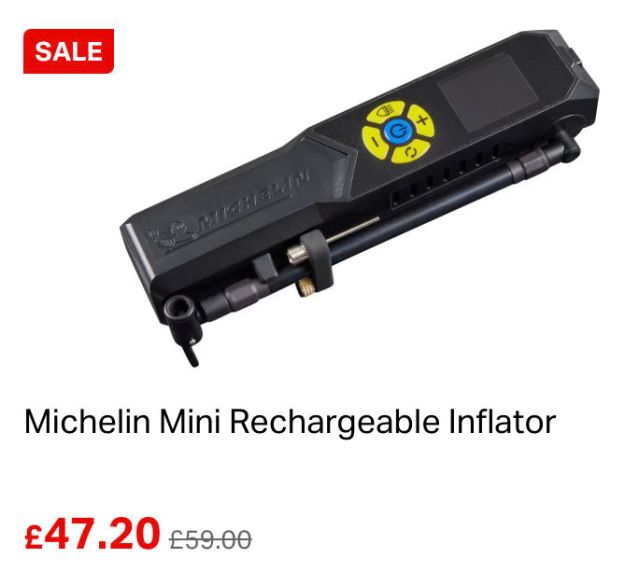
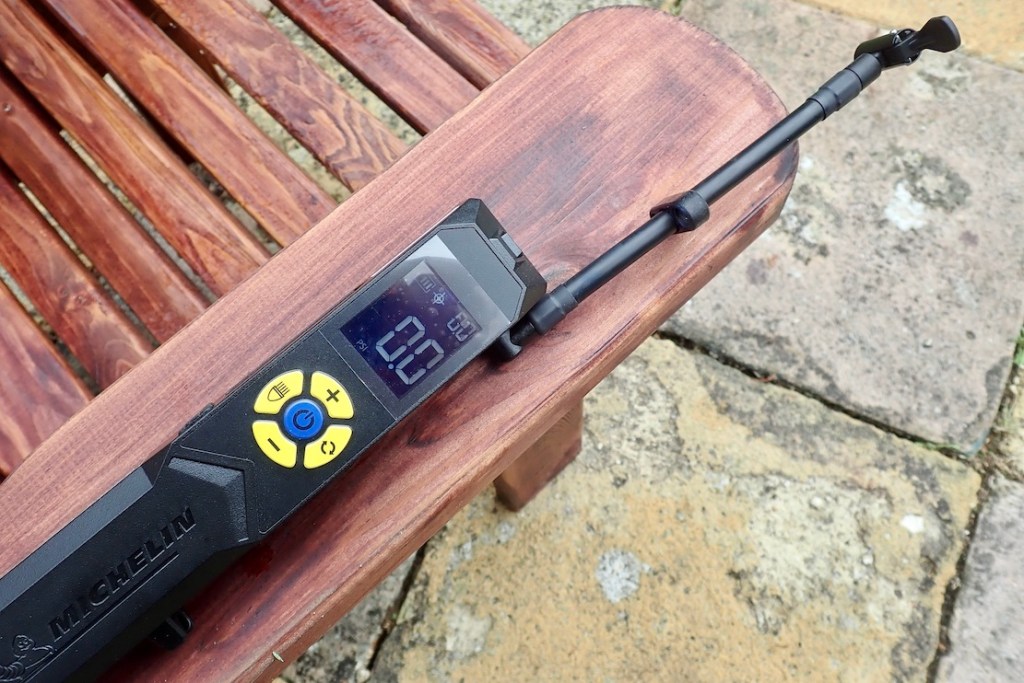
IN A LINE Handy Mich-branded tyre inflator with Presta adaptor, clear LED display and a light.
WHERE TESTED At home and on the road in Morocco.
COST & WEIGHT £47 discounted at Halfords. 450g verified.
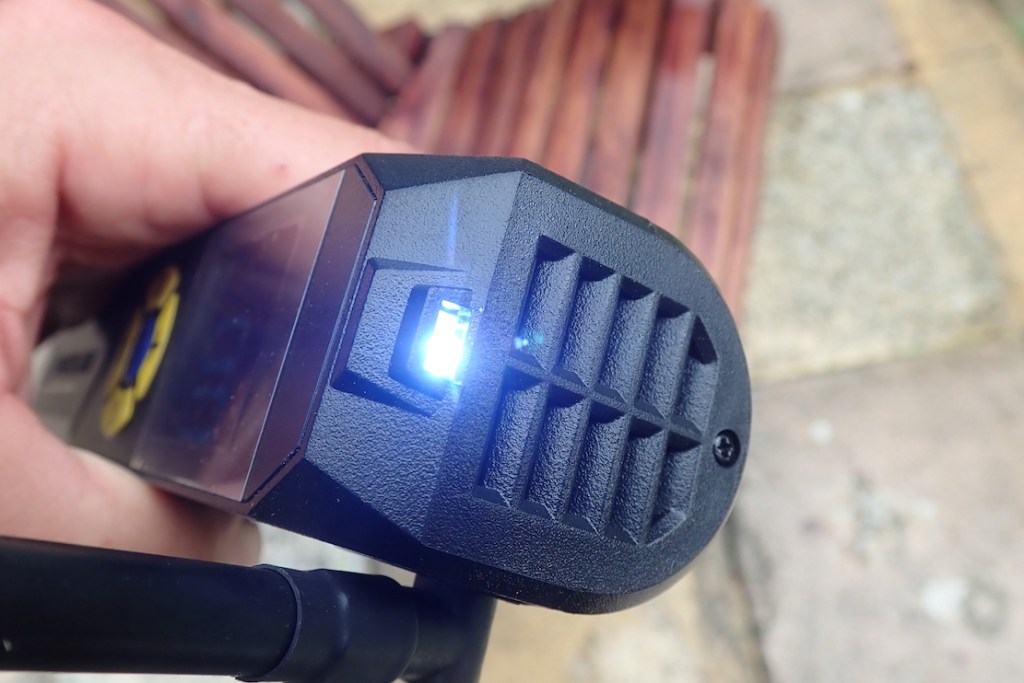
WHAT THEY SAY Compact design fits in the glove box. Designed for topping up tyre pressures. Digital gauge is accurate to +/- 1 PSI up to 50 PSI. Switchable between PSI, BAR & KPA. Cordless, lightweight and portable, the Michelin Mini Rechargeable Inflator is remarkably easy to use. With four programmable pre-set pressure settings the cordless inflator is ready to inflate bicycle, motorbike and car tyres as well as a sports balls and other small leisure accessories. It’s [sic] integrated lithium battery is rechargeable in aprox. 3hrs. Built-in high intensity LED light at the top, enables for use in emergency or low light situations.
OK price at Halfords
Clear, simple display and function buttons
Dead easy to use
Fairly quick fill for it’s size
Can’t turn on accidentally once hose is folded back in place
Presta pushbike adaptor included
Works as a tyre gauge too
Vibrates a bit
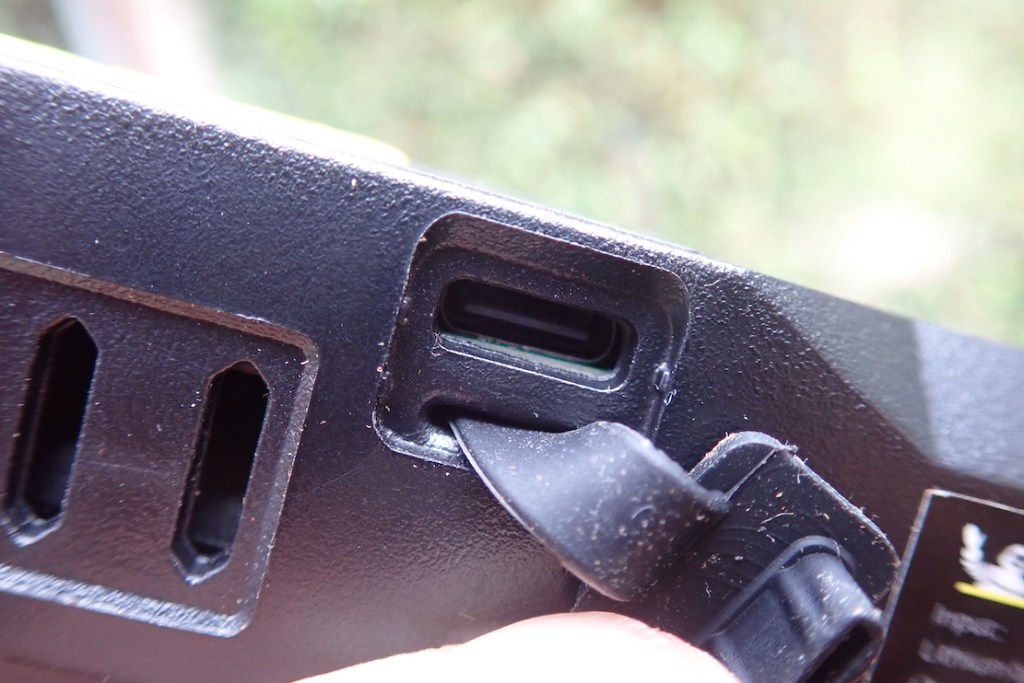
The lever-down valve clamp is hard to detach quickly without losing air
None of the presets can be stored after changing (I did RTFM)
Play up occasionally but always works in the end
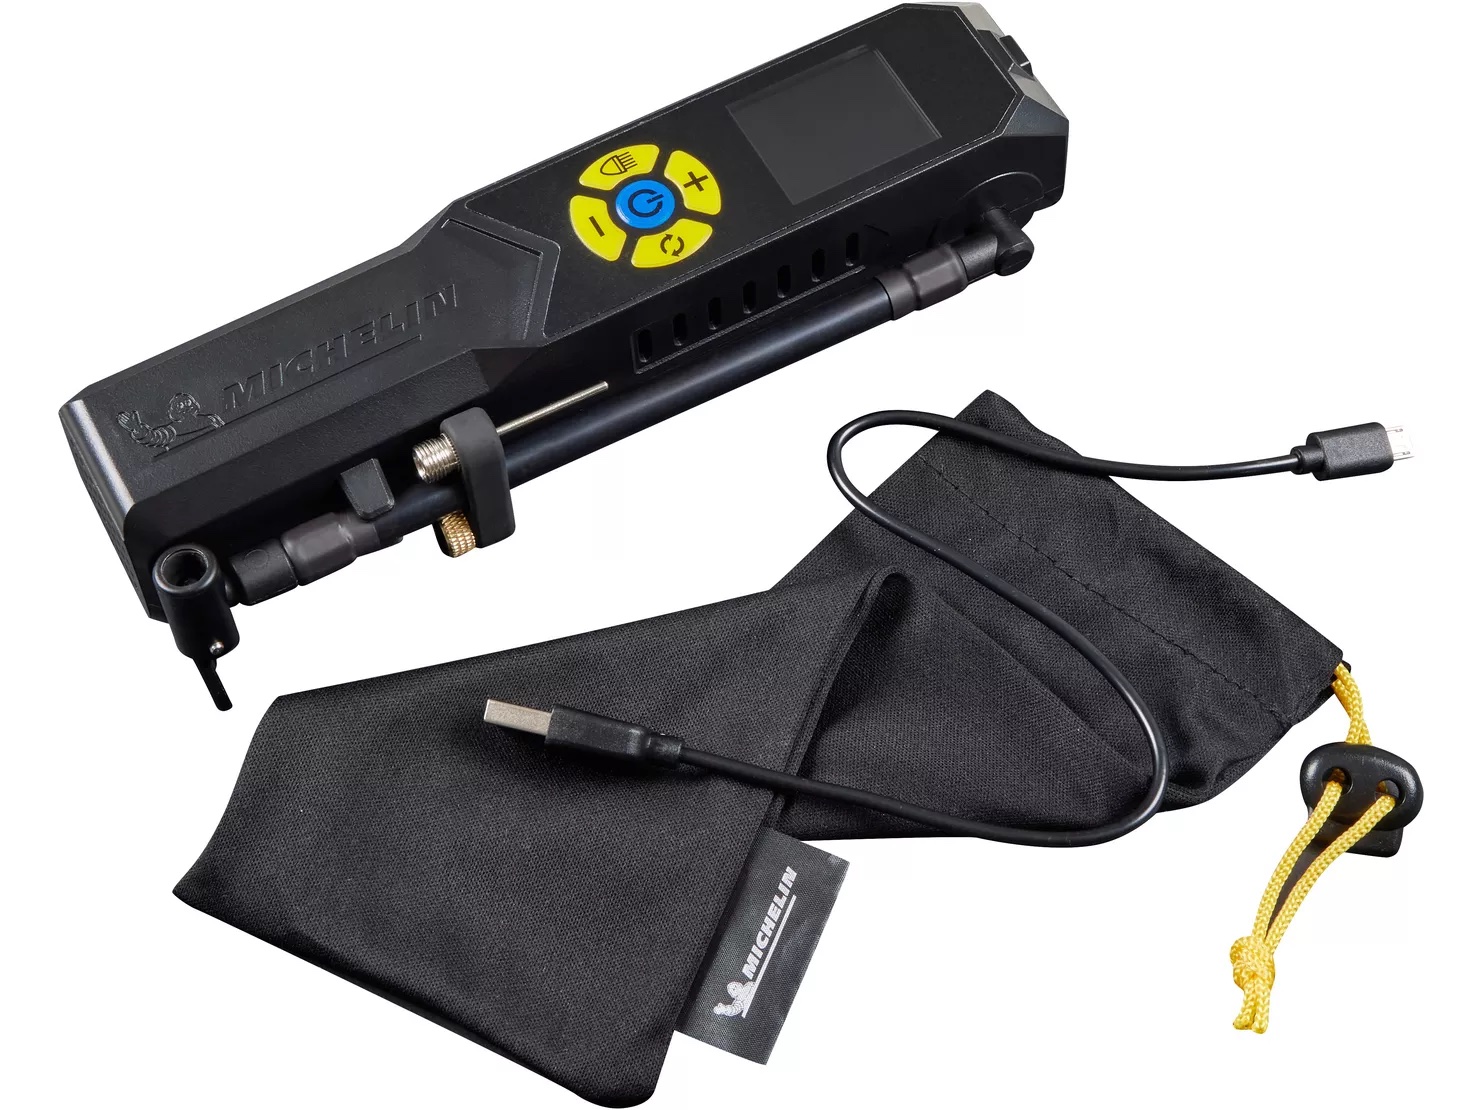
REVIEW My £20 ebay cheapie died after two years, longer than expected. And the bulk and faff of my ancient, 12-volt wired Cycle Pump remains off putting. Once you go wireless it’s hard to go back. Bring on the day when all electrical household items are cable-free! I like to think the 20% saving at Halfords on the Michelin Mini Rechargeable Inflator covered the premium for Michelin branding. The handy pump is about 8 inches or 20cm long, and comes with a tiny LED ‘phone’ light, and adapter nozzles for pushbike Presta valves and a football clipped to the swing-out hose with a fold-lever tyre valve connector. Plus there’s a flimsy bag.
Clear displayLED lightType C USBUnfold hose to wake the display
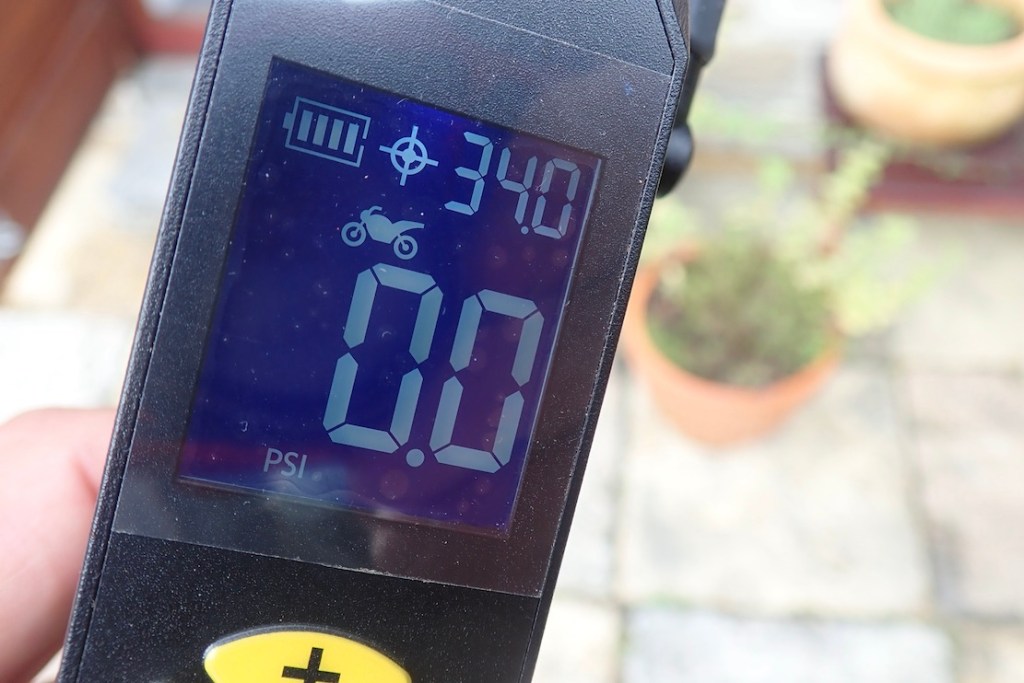
Jabbing the blue button won’t work. You wake it up by swinging out the hose at which point the LED lights up and the thing is live. Only then does the blue button set it off. You can scroll through four fixed-psi presets (bike 45, moto 34, car 32, football 8psi). It says adjustable which is true but that doesn’t mean ‘storable’ afaict. There’s a fifth, empty one to set as you like. But that isn’t stored either. I did read the leaflet and tried a few times. This all reminds me of the TPMS glitches (see below). Or maybe it’s as it was supposed to be. But honestly, you don’t really need presets. Just clip on, hit the blue button and watch the numbers rise to the pressure you want. Then hit the blue button again and it stops.
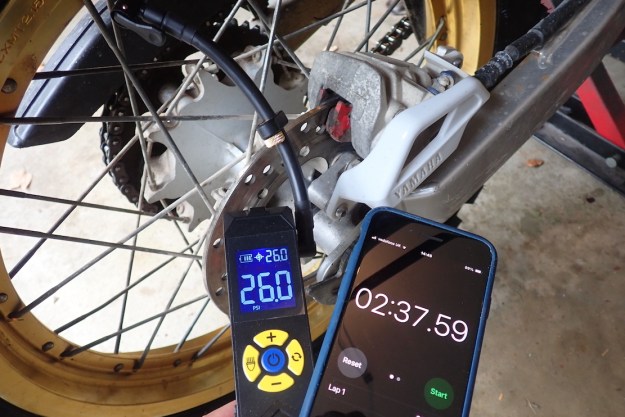
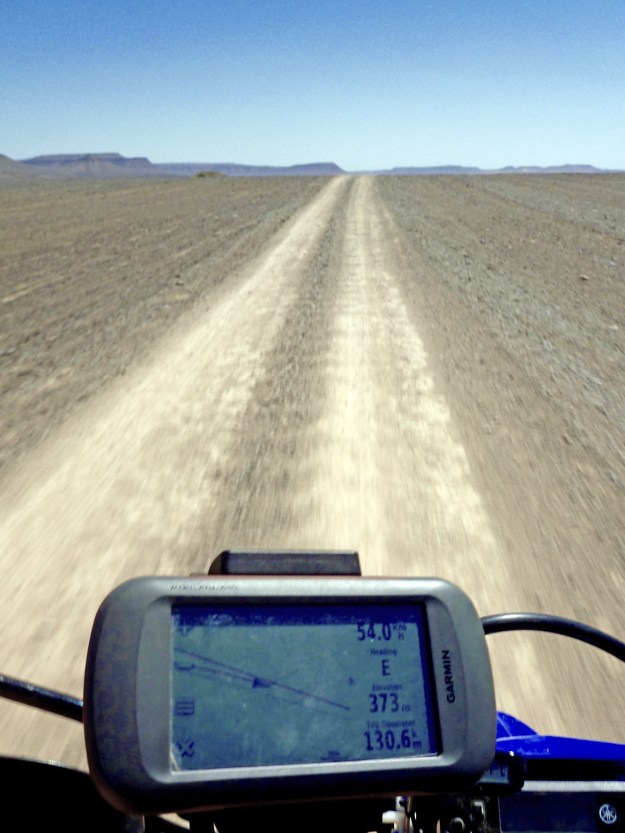
Zero to 26psi in 2:38
Fully charged out of the box, I inflated the new rear Michelin Wild tyre on my Serow from empty to 26 psi in 2:38s. The gadget vibrated a bit but didn’t get too hot. The battery dropped to ¾, but recovered back to full four bars in a few minutes. In Morocco my Serow’s stick tubeless rear leaked on most days – as some do. The Mkch pumped up up, though some days it didn’t light up and I was reminded of the flakey Michelin branded TPMS I tried a few years ago. But maybe it was a knack I needed to learn. I’ve never been a fan of these fold-down clamps on any inflator and this one was a tight fit on my valves which made quick removal without losing air tricky. Maybe it’ll loosen up or I’ll get used to it. but so far so good for the Mich pump.
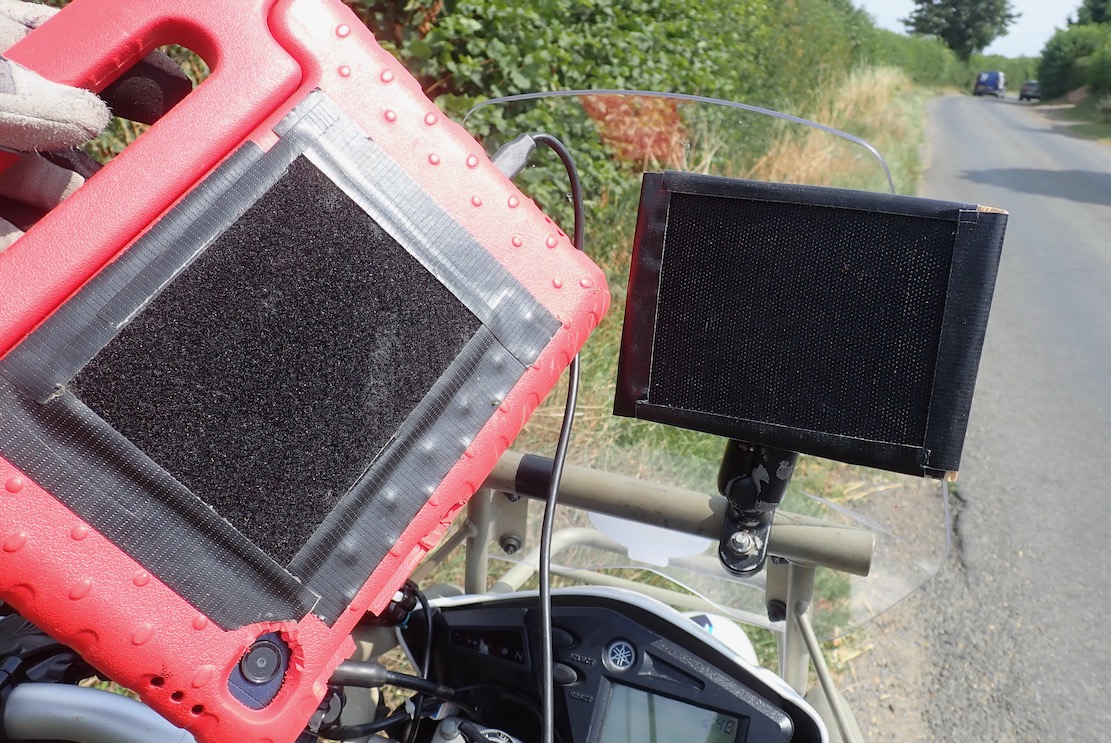
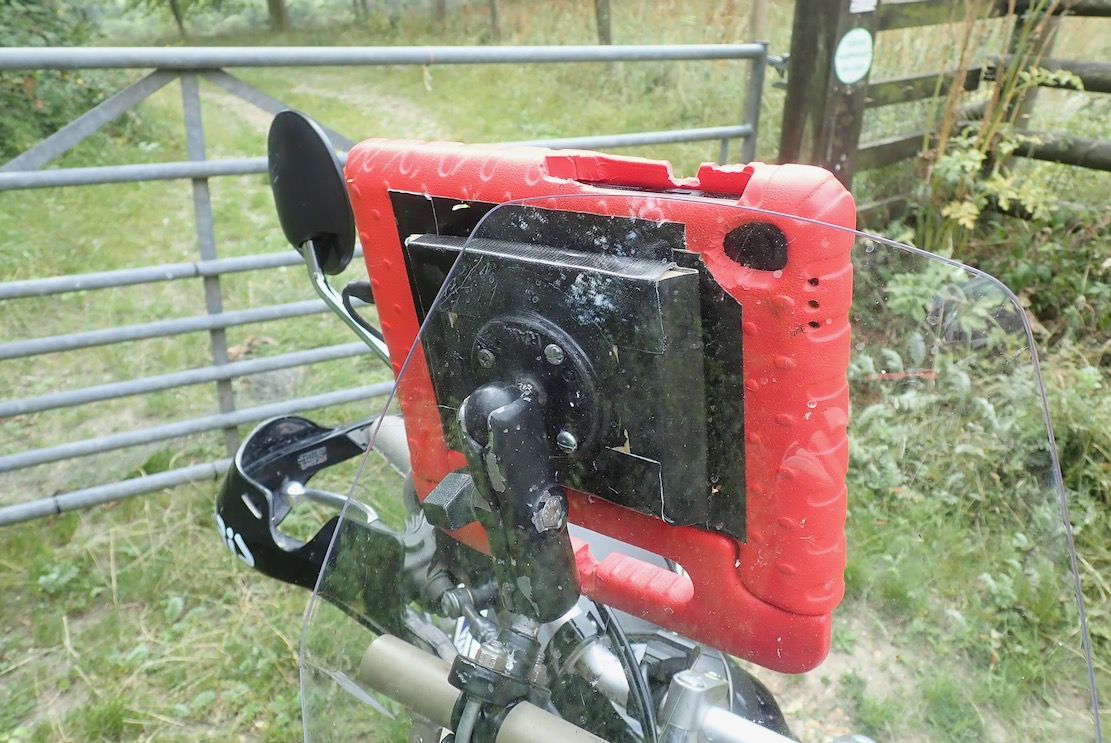
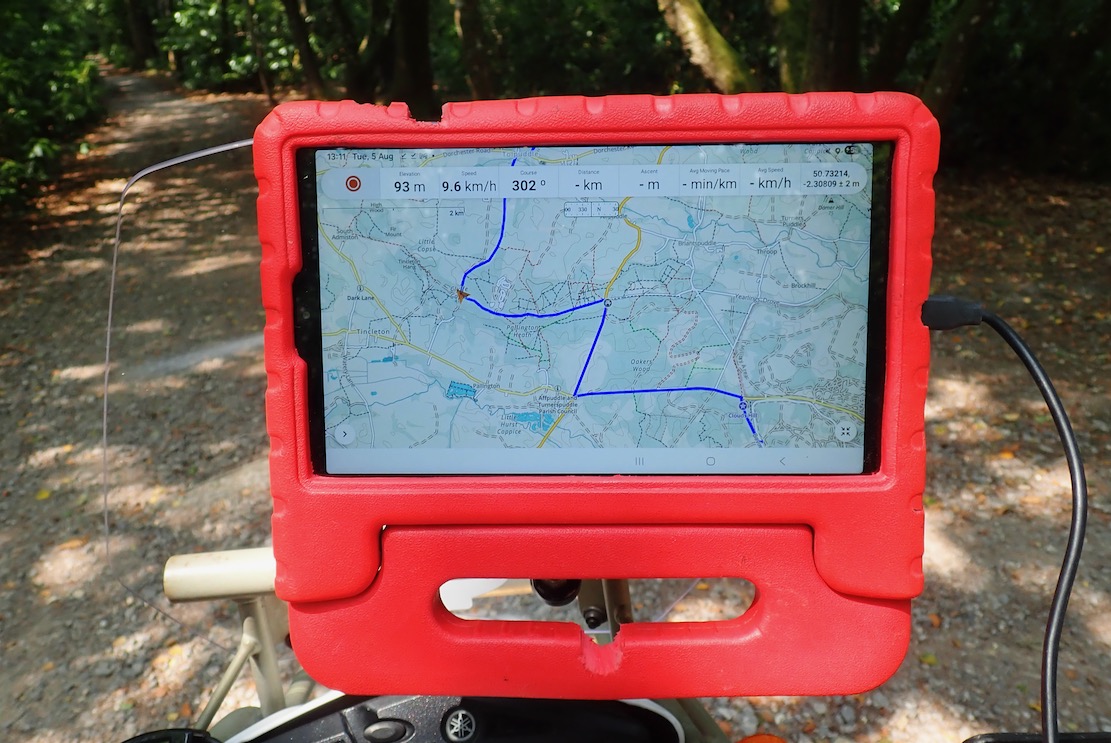
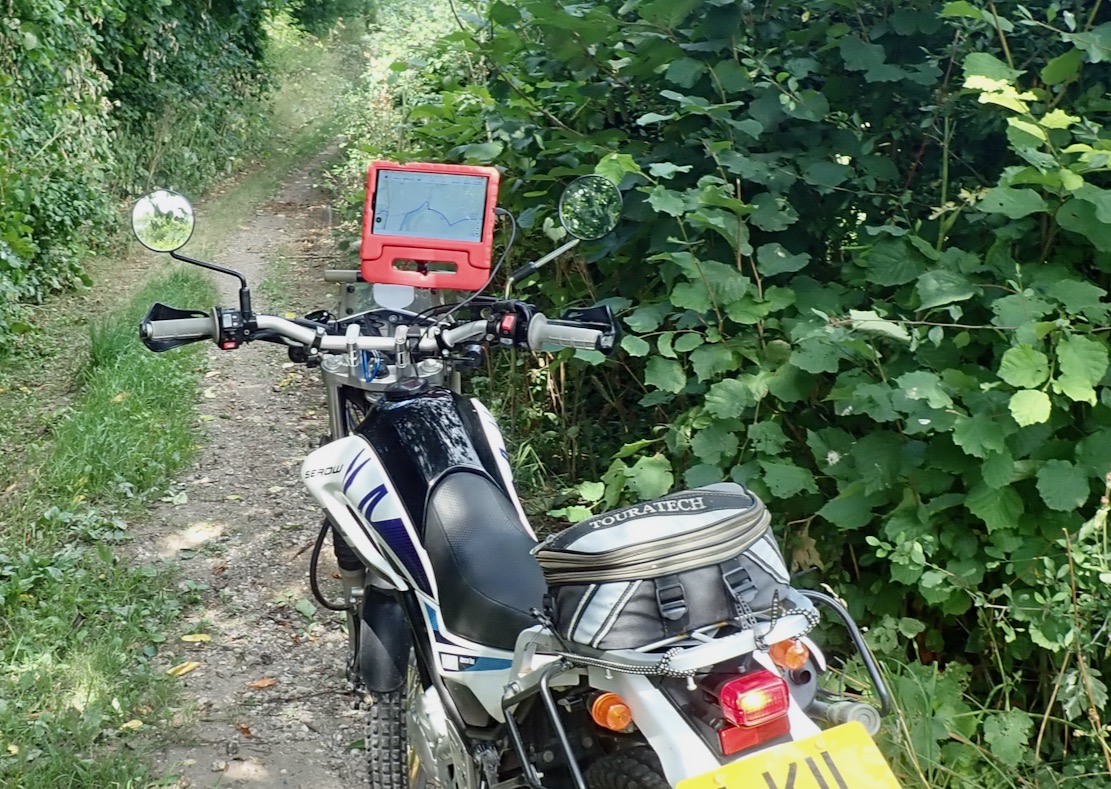
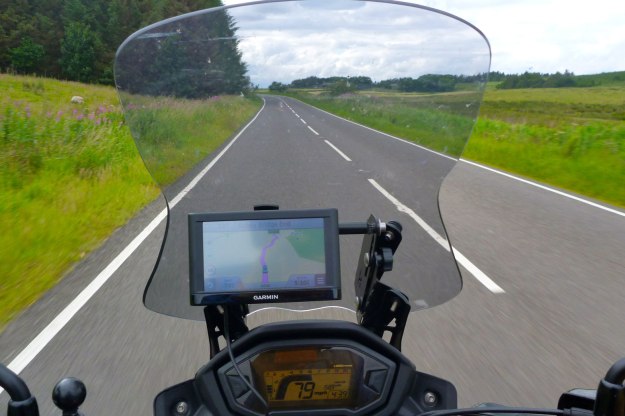
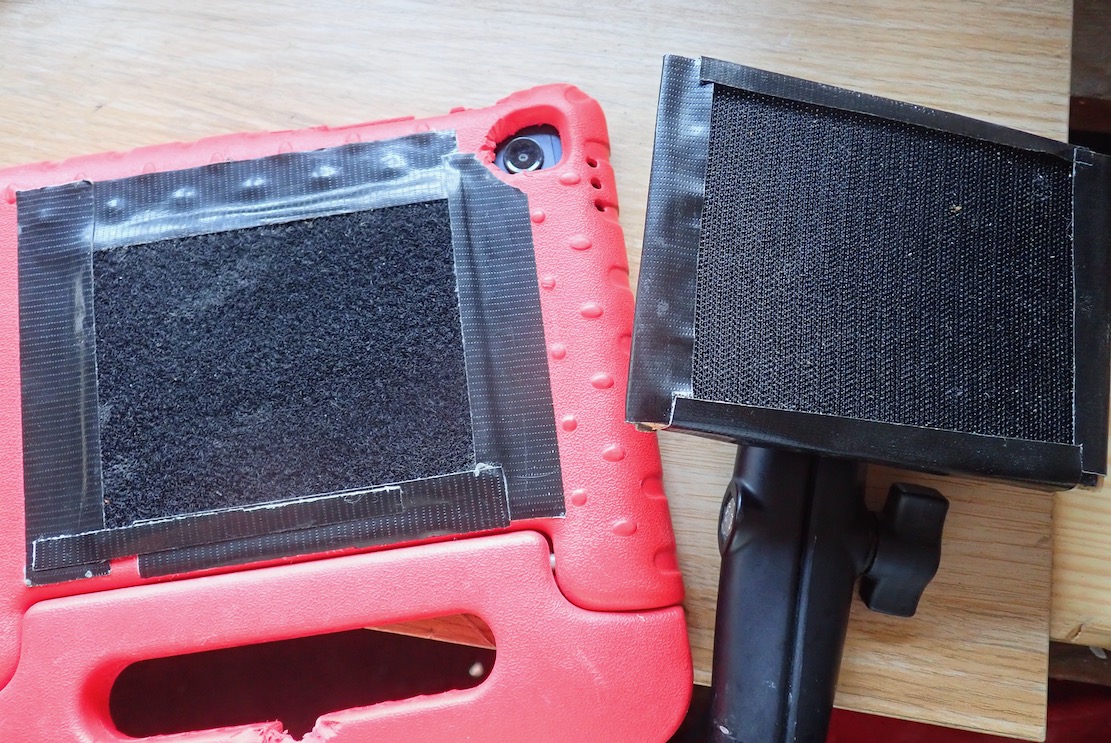
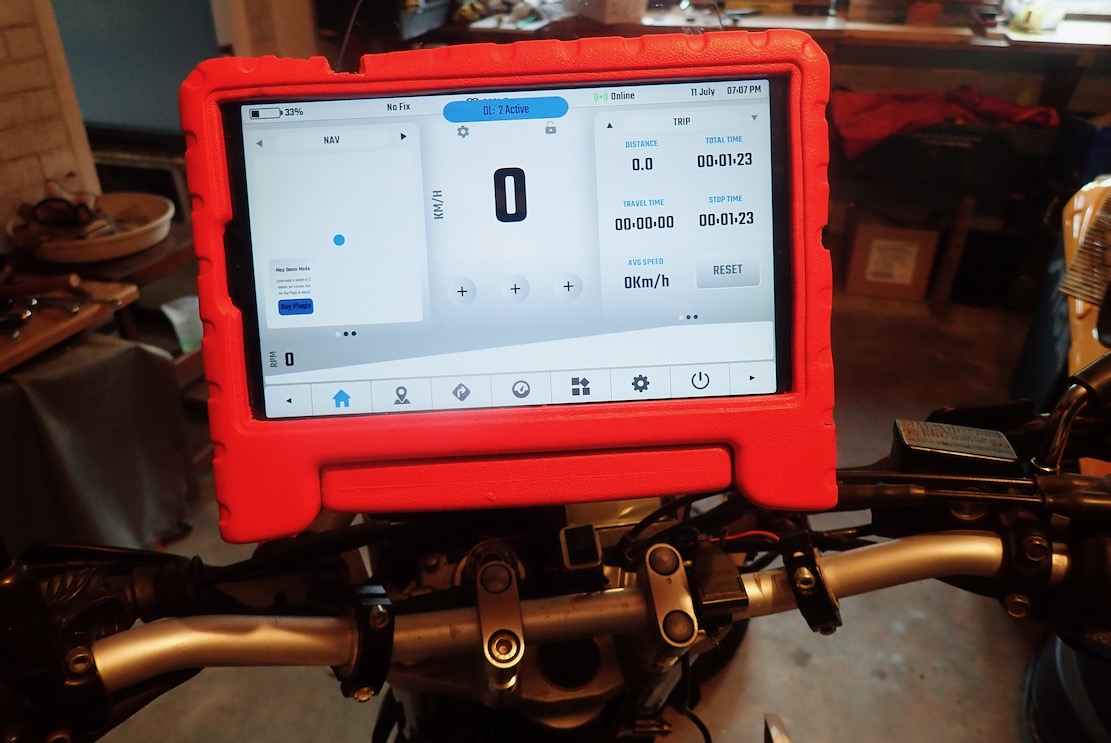
Garmin’s dominance in satnavs has surely peaked now that offline nav is yet another task we can do on our phones. I’ve been moaning about my flakey Garmin Montana 680 for years: screen too small and murky, occasional freezing, slow loading, and newer Garmins way too pricey for what they are. But along with travel biking, the rugged Montana remains usable for green laning, walks, MTBing and even paddling, while shrugging off the shaking, occasional dropping and salt water. It won’t overheat in the sun and batteries last all day, but trying an app on an inexpensive device I already own and use is a low risk experiment. Recently I bodged a way of attaching my £85 Samsung A9 tablet in its child-proof case to RAM handlebar hardware using velcro, plywood and sticky-backed plastic. The A9 has loads of screen space – a bit too much, even; a 7-incher would do. A trail ride round the local lanes on the Serow and MTB proved my fittings held up, though weather and time might see to all that.
That done gave me a chance to try GaiaGPS (~£60 a year) which I know a little from Morocco, plus Ordnance Survey (£35) and DMD2 (£19) which I don’t. This isn’t really a like-for-like comparison. The OS is pitched at non-vehicular, UK-only recreation, GaiaGPS and DMD2 maps cover the world; the former again more for hikers but with overlandy adds-ons, the latter is made by and for motards. But you can use switch from app to app on your device.
Ian Haslop
DMD do make their own DMD-T865Xrugged tablet (right) for 850 quid. A mate is already on his second one. Then again, I’m on my third A9 in as many years; the motherboard or something packs up doing nothing more rugged than sitting on the bedside table.
Based on the crowd-sourced or volunteer contributed Open Street Mapping database (‘the free wiki world map’), in the UK, neither Gaia or DMD2 accurately differentiate between the few legal byways and the zillions of footpaths.
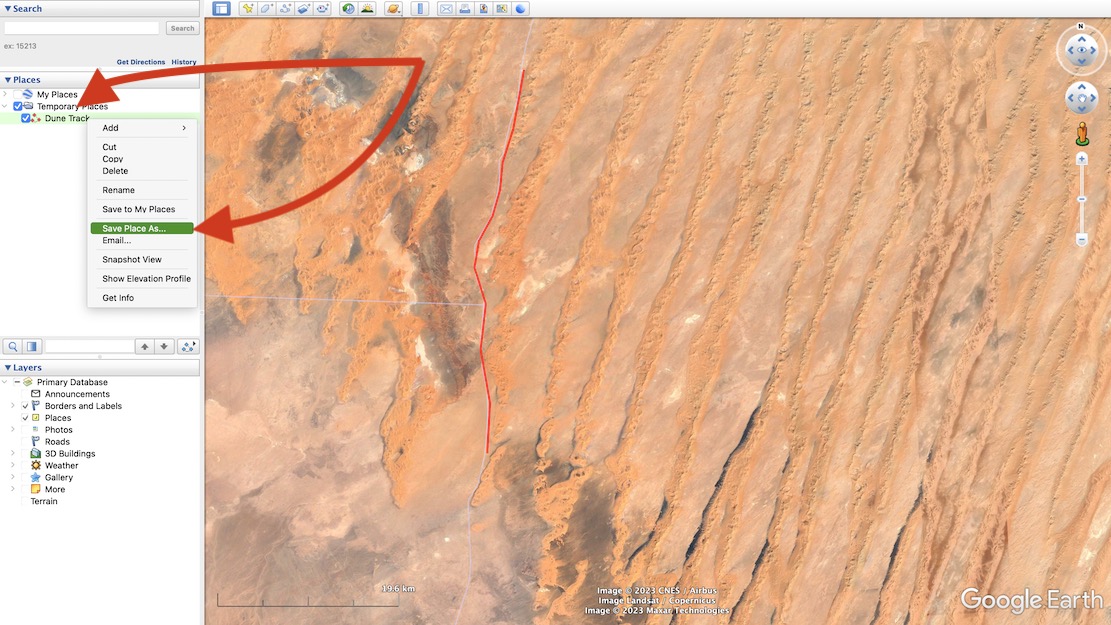
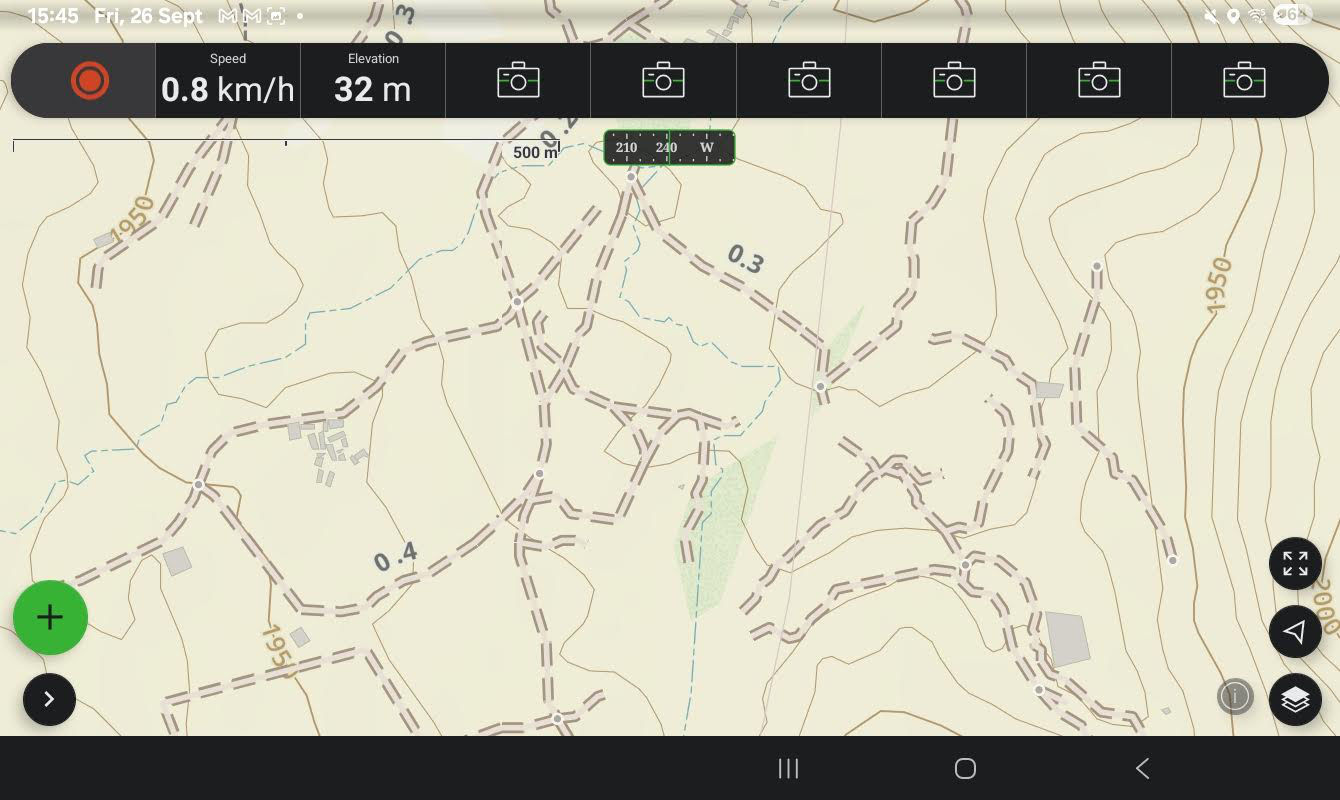
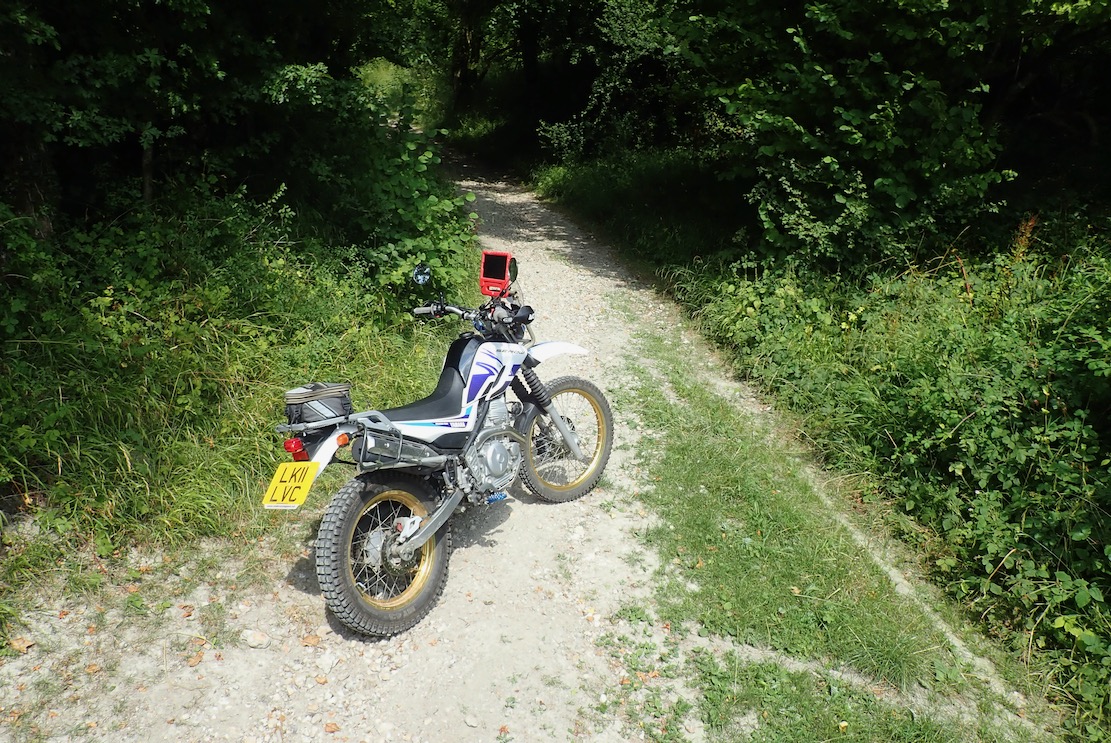
That said, with an imported and verified green lane gpx tracklog, you’re probably following a legal trail, so how the background map looks is less important. Meanwhile in southern Morocco and similar places, whether a track is actually passable on your machine is more important than rights of way – and that can change from season to season. Even in Morocco I nearly always ride new routes with tracklogs traced off sat imagery in advance (above left), sometimes even the night before. As you’ll read, the trails that appear on OSM-derived maps out there are too inconsistent and unreliable.
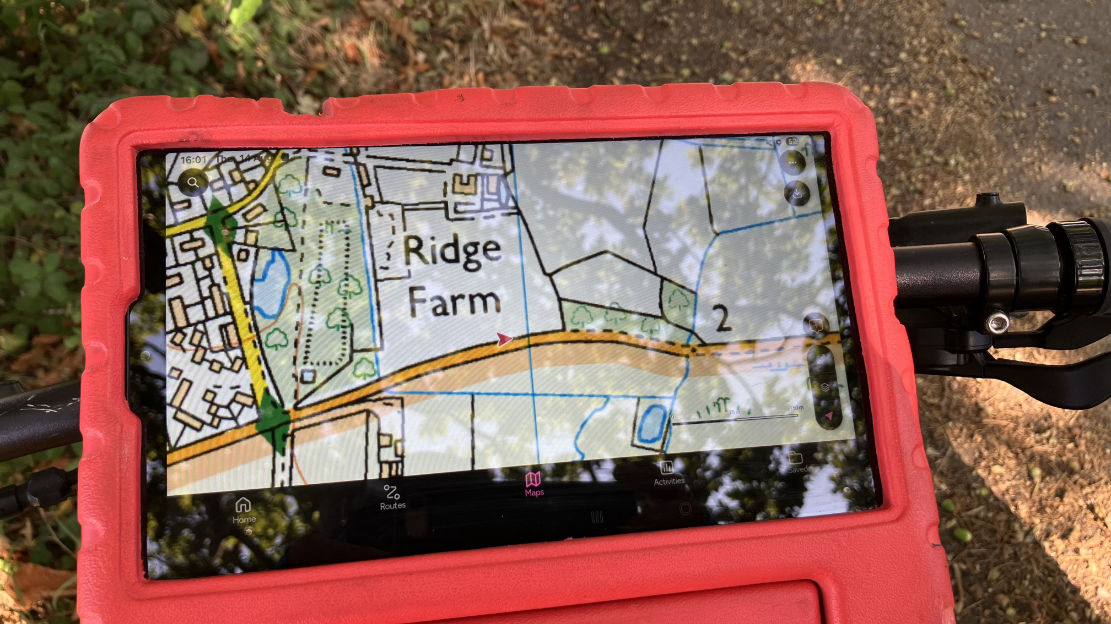
Ordnance Survey (£35 a year) For UK green laning Ordnance Survey mapping is a no brainer, even if you didn’t grow up using OS paper maps and can still read them like a copy of the Beano. Thirty five quid a year is a great deal if you do a lot of UK outdoorsing in addition to motorbiking, I’ve found myself referring to it nearly daily, either planning MTB rides from home, or when out and about to check directions with the A9 or the Mrs’ phone (it will run on multiple desktops and devices). One reason I stick with my Montana is that it came with a ropey old copy of OS 50k UK mapping (new, an ‘all UK maps’ miniSD from OS costs 300+ quid). On an OS I know what most things mean at a glance, and in the UK Rights of Way (RoW) are important when it comes to touchy Byways and similar off-road trails. Tap Map and the OS app transitions from the big-picture/motoring 250k map to the well known 50k and 25k sheets, The image on my Samsung (below) is crystal clear, although the red location/direction arrow is fixed at a tiny size (usually in the middle, of course). If you forget your RoW hierarchy, the OS legend tab is easily accessed offline, and downloading a map for offline use is also dead easy, though it’s limited to about 45km wide or ~300mb.
Importing a gpx file is also intuitive and once loaded, you can view an elevation profile in a side bar (like on Garmin BaseCamp and Google Earth), plus do a 3D fly-through over aerial imagery (internet needed). I couldn’t work out how to do this over a less gimmicky OS map, not aerial – I think it’s not possible. Another thing OS won’t do is show more than one of your imported routes at a time. Nor will it do A to B road directions like a sat nav; it’s a recreational mapping app. But using the ‘road cycling’ option under Activities will snap to roads and so could work for motos, though it might be scenic backroads rather than ‘shortest’ or ‘fastest’, like a satnav. One thing I often use on my Garmin is tapping the screen to instantly get the straight line distance to a nearby point from my location. On the OS app you have to go to Create Route, then select a non trail Activity like `Paddle’ or ‘Other’ which won’t snap to a path or roadway. This ‘snap to path’ (or byway) feature can be hard to control off road, though I’ve learned small hops work. Set on MTB (roads/tracks), it routed me into an army tank training area, though it did try and keep me out of a nearby firing range – and to be fair the map was plastered with ‘Danger Area’ labels and irl there would be similar signs and fences. Recording your own route, saving it and sharing/exporting is also intuitive. Because the mapping is so familiar to most Brits, for UK use it’s easy to get your head round the OS app, and unlike DMD it knows when to draw a line with ‘just-because-we-can’ added features which can just go too far. But other Open Street Map based apps will have endless POIs, and more functionality, like directions. You can of course switch to other apps on your device to find nearest fuel, for example.
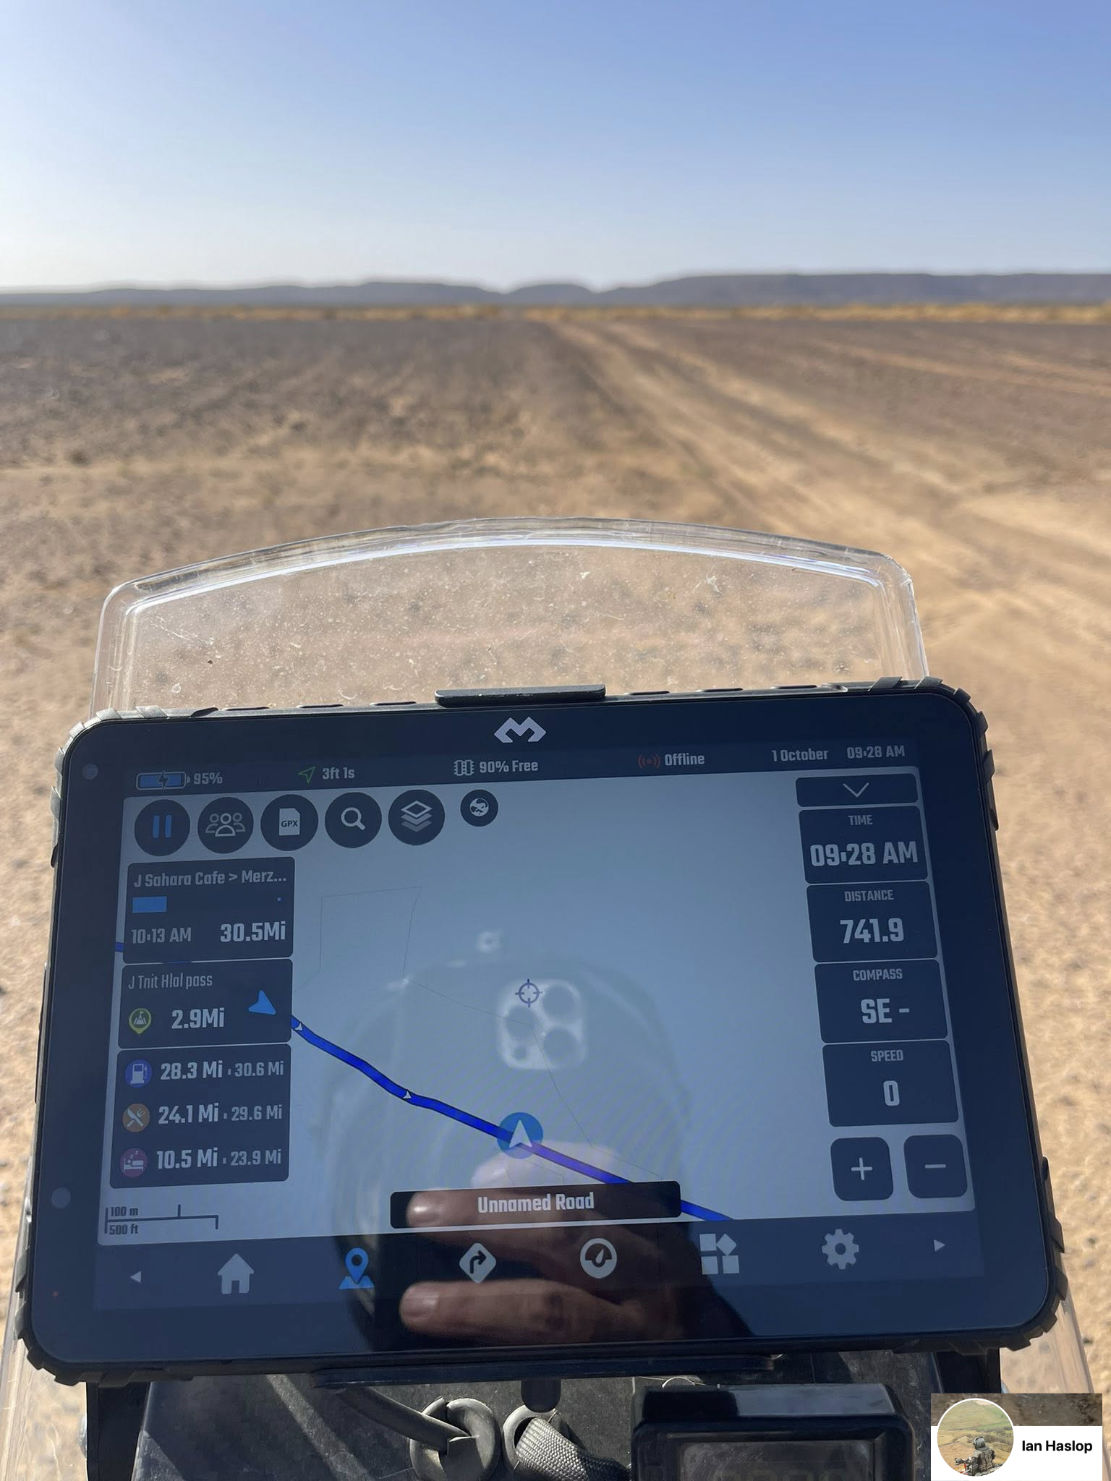
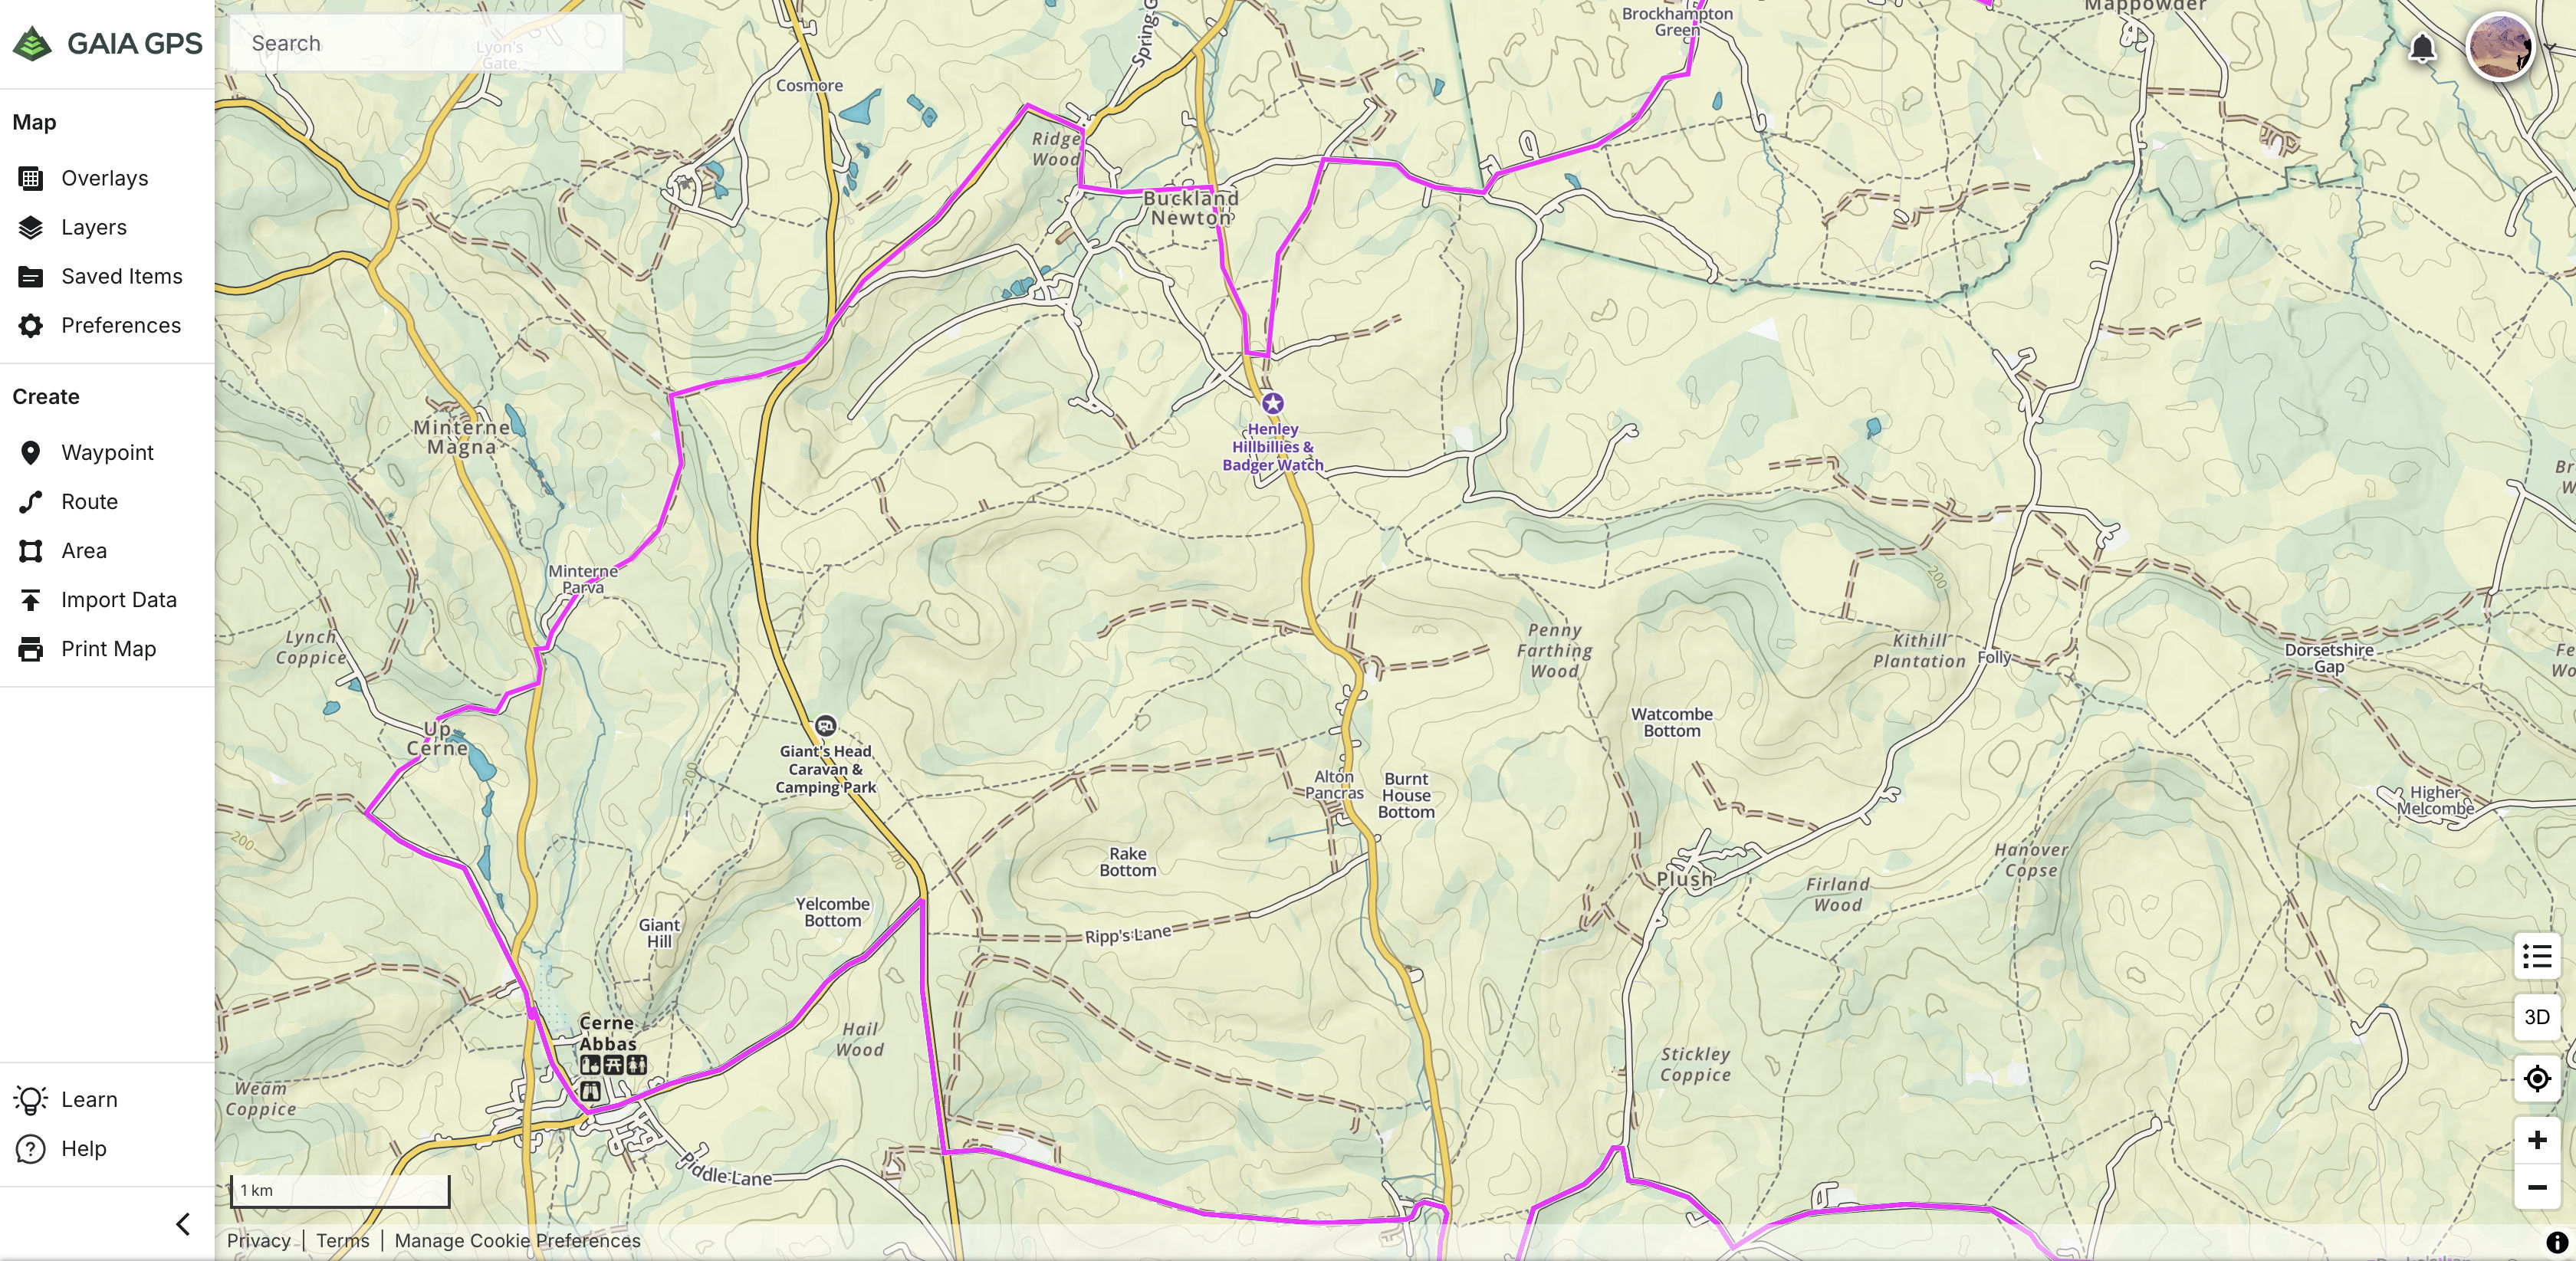
GaiaGPS ($60 p/a subscription) Produced (or owned) by Outdoor magazine in the US, normally I’d not look twice at Gaia, assuming, like other US entities, they don’t ‘get’ mapping in my parts of the world. But their Morocco Topo map is preternaturally better than many other also OSM based maps, showing loads of real trails with outstanding legibility. Someone there gets how to design a map. And there are loads more in the layers.
Gaia: nice enough but unlike OS, you can’t tell the BOATs from the trees.
While offering routing options for every scenario under the sun (‘ice fishing’, ‘turkey hunting’, ‘streaking’ and ‘white water’), the app interface is clearly pitched towards hikers who can easily read the screen on the move with device in hand. On a moto (or anything similar at speed) the info across the top (speed, distance, etc) is just too small to be easily read and can’t be enlarged. Even the Montana is better at this.
Top info data designed for phones in walker’s hand; barely readable on a moving moto
But it sure is nice to have all that space to foresee the twists and turns of a loaded gpx trail, and with good brightness. Wearing a dark main visor on the HJC took the edge off this; next time I’ll fit the clear visor and use less good but in-built tinted visor. When I’d done enough green lane exploring I decided to try out the routing feature to get me home. It didn’t seem to work, even when set for ‘buffalo rustling’. I worked out later you need to tap the map exactly on a road for it to calculate a route. There’s probably a very lengthy list of other features on GaiaGPS, but me I’m just navigating trails from A to B, not trying to calculate my average elevation while ice fishing before the sun sets. All I know is that the Morocco map is one of the best out there.
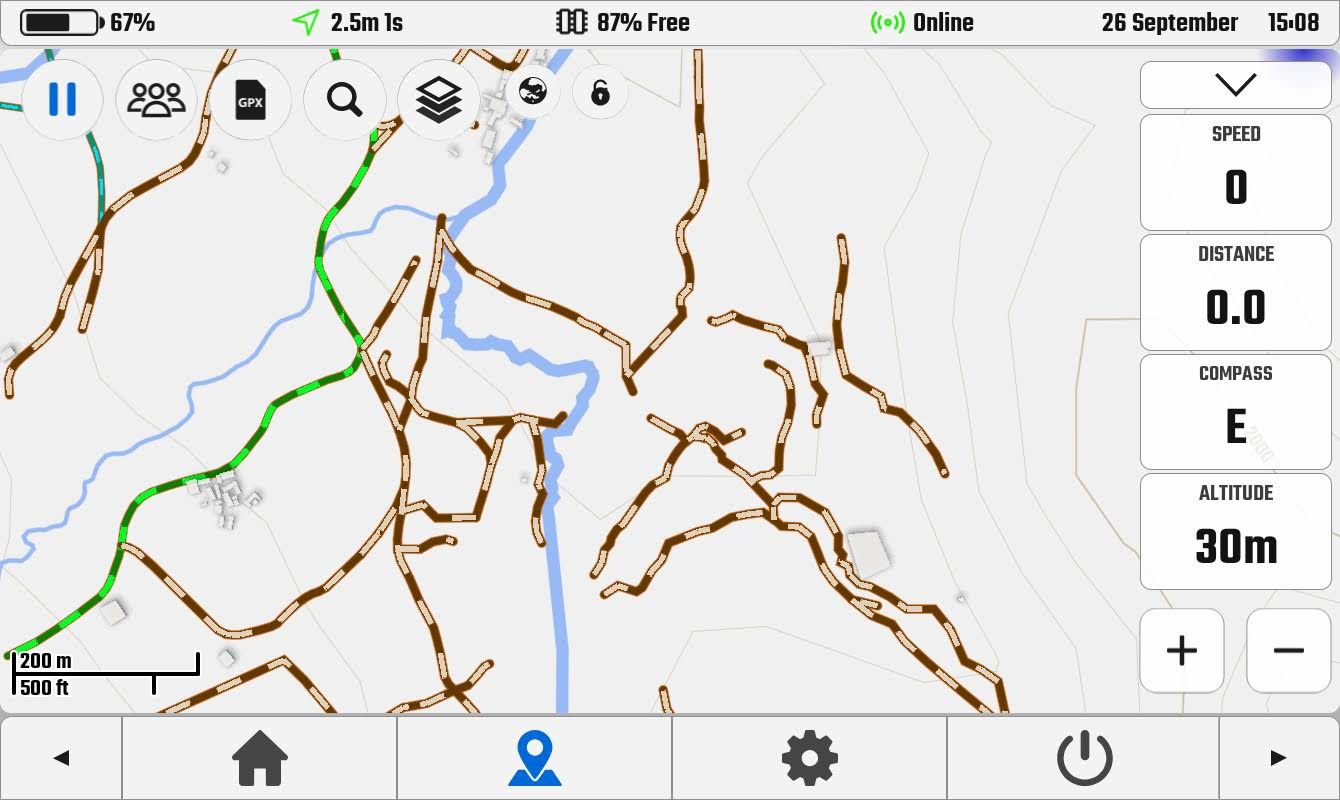
DMD (£19 p/a map subscription) Made by motorbikers and loved by motorbikers. How would DMD2 stack up for UK green laning? £19 is quite cheap but this is only to open the maps and route yourself – good enough for most. There’s a Roadbook plug in to save on lunchboxes and rolls of paper, and an OBD plug which opens up the whole world of bike telemetry – TPMS, coolant temp, mpg – a lot of stuff that’s probably on your dash menu, assuming you’re not riding an air-cooled dinosaur. You download maps by the country. I did UK and Morocco, some parts which I know well, and did a test. It looks like DMD have simply loaded everything off the OSM base map with little filtering. In Morocco it’s evident from the many disconnected scraps of track added by pedantic contributors misinterpreting aerial imagery or the meaning of useful contributions. What use is 450m of ‘track’ on a remote hillside going from nowhere to nowhere? Actually, I see Gaia (below right) is the same, but makes them far less conspicuous – the key to legible cartography – while often managing to get the real, useful or main tracks right. This extraneous clutter is something that’s unique to little-scrutinised Morocco on OSM. In Europe, such nonsense would never go unchallenged, as the UK map below shows.
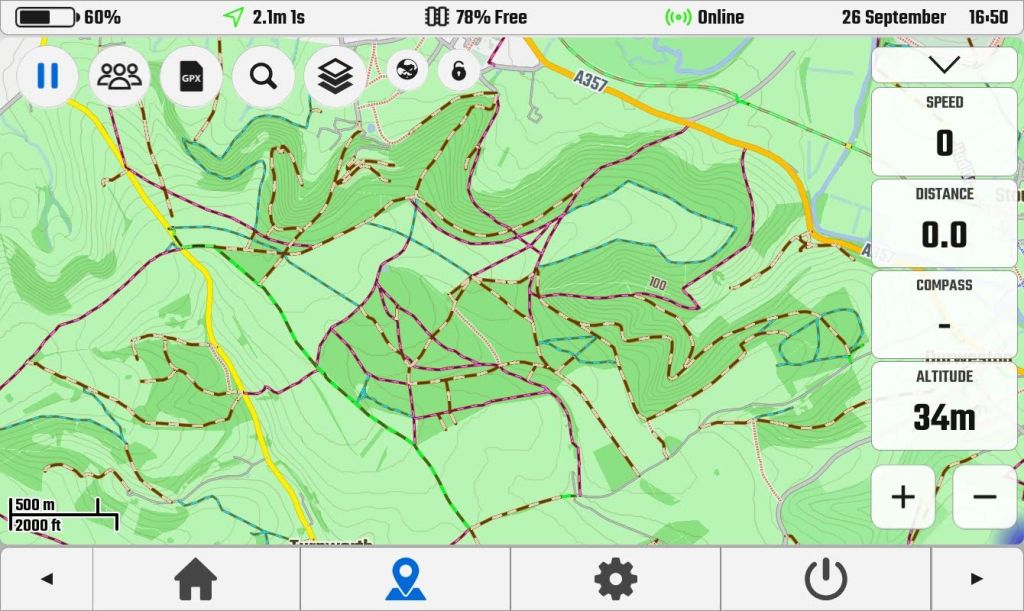
The comparative screenshot in the UK below looks a bit skimpy compared to the Gaia and OS versions above, but two zooms in shows a lot more track detail. I do like the ‘globe’ icon which toggles when online, most usefully satellite view as well as ‘OS Maps’ in the UK (not real OS maps, as above, who protect their copyright like the crown jewels), plus wind, rain and temperature (aka: ‘weather’).
DMD2 UK map. Not so legible
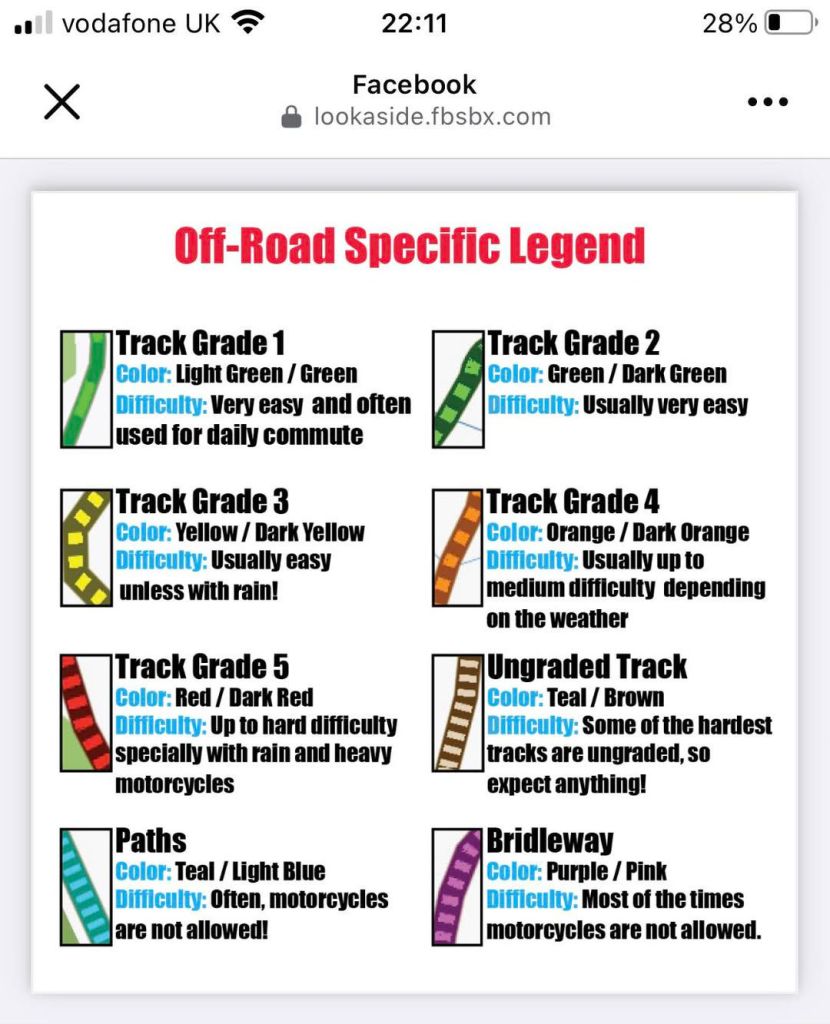
Even then, I find DMD2 look cluttered compared to the Gaia and in the UK would obviously use OS, Amazingly, there is no key or legend built into the app to work out what the multi-coloured tracks mean. Searching online gives this page, and a DMD Facebook user condensed it into the image below left.
Condensed DMD2 legendMasses of brown tracks; none moto legal
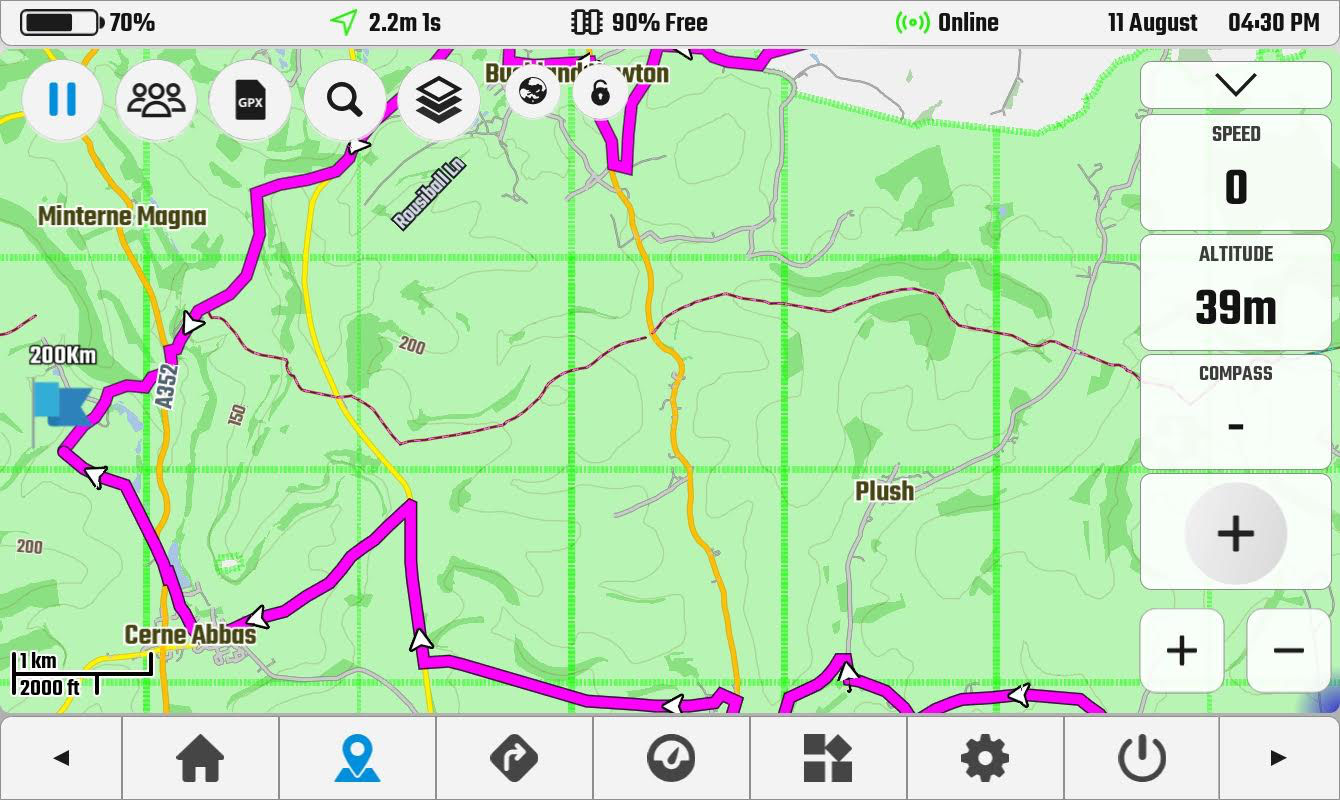
It seems difficulty – always subjective, weather and moto dependant – is prioritised over rights of way, but my UK DMD2 map certainly doesn’t relate to what I know locally. Green and blue are footpaths, purple is supposedly a bridleway, but rarely corresponds with OS data. Meanwhile, there are masses of brown tracks (as in southern Morocco). Of brown tracks DMD says: …it should be unpaved but no further information is present. Difficulty: Some of the hardest tracks are ungraded, so expect anything!‘ Afai can see, there’s no designation for a legal UK Green Lane/Byway. I know the few around here and they’re all brown or don’t exist. So without a verified gpx to follow, DMD2 would be unusable for off roading on UK Byways, but in Morocco (for example) a brown track ought to be a real track. Just make sure it is connected to other roads or trails.
I was going to try to get to grips with DMD2 and Gaia on my tablet this autumn, but in the end just used my long proven Montana loaded with a couple of good maps. It’s fun to experiment but in the end, why complicate things. I’ll stick with Montana for Morocco and a tablet running OS for UK trails.
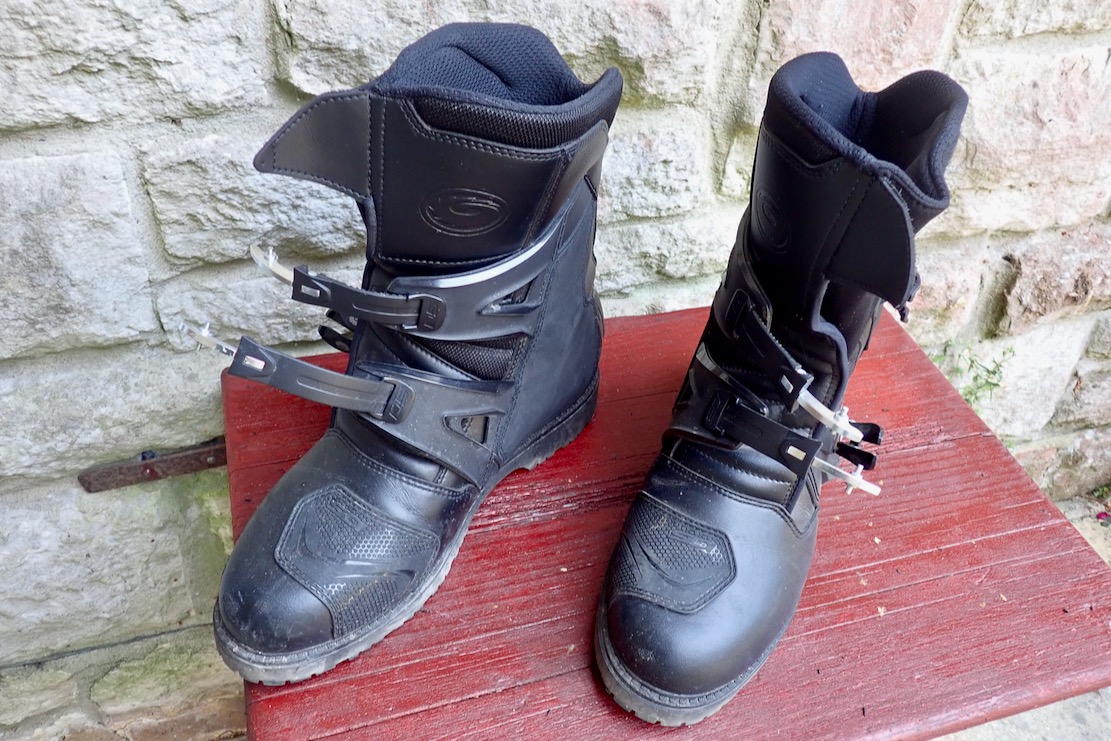
IN A LINE Quality, heavy duty off-roading Mids with Gore-tex. Tall on the shin but narrow across the foot.
WHERE TESTED For the moment, just local lanes.
COST & WEIGHT £280 rrp (from £210). Mine used for £86. Weight: 1100g per boot.
Used bargain!
Very solid build
Stiff instep for standing on pegs
Grippy, Vibram-like sole
Mil green version looks best
Gore-tex membrane
Comes with detailed manual in 13 languages
Mine in boring black but price was right
Right now heavy, stiff and clumpy, but may ease up
On the narrow side
Like all Mids, the top edge can chaff on the shin
What They Say A shorter, more practical version of Adventure 2 Gore. While the non-slip rubber outsole provides optimum grip and total control in all situations and terrain, the micro-adjustable buckle system ensures total comfort. Versatile and untiring, the special Gore fabric is a bonus for the best possible exploration, even in rain and muddy conditions. • Full grain microfibre and suede construction • Waterproof Gore-Tex breathable membrane • Non-slip rubber sole • Hook and loop strap and buckle closure system • Inner gaiter • Plastic support on ankle area • Back reflective inserts for night-time riding • Nylon inner sole with removable arch support
REVIEW After seven years my TCX Baja Mids were as comfy as old slippers but wearing out. One buckle clamp was bodged from something else, then recently in Morocco an unnoticed flying stone poked a hole in the toe like it was cardboard. No longer listed by TCX, remnants crop up from £190.
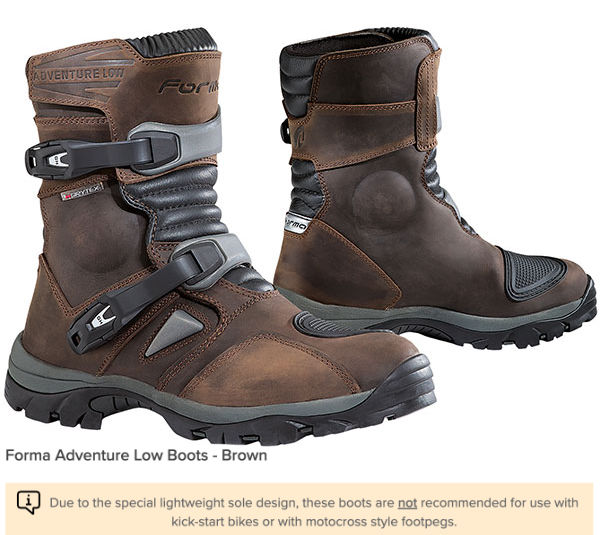
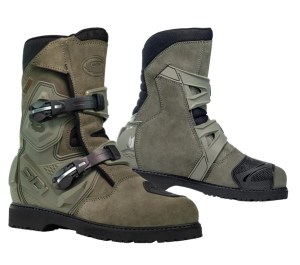
Forma Adventure Low – too soft
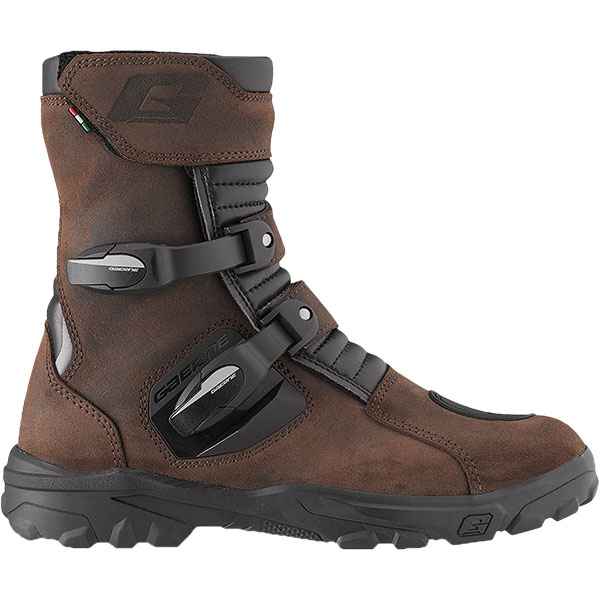
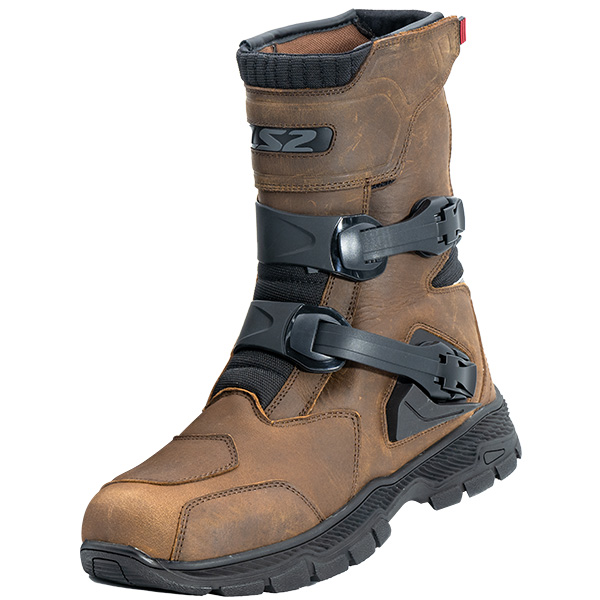
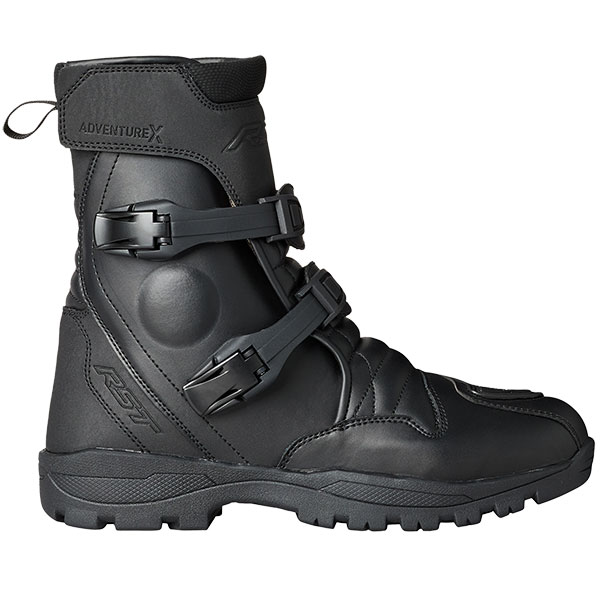
For my next pair of Mids I definitely wanted a less mushy instep for standing up foot-ache free. And a treaded sole would be better too; I’m forever slipping around when clambering on the roadside to shoot a quick pic. Similarly good looking Forma Adventure Lows (left; rrp £214) caught my eye until I clocked the unusual warning on SBS about the soft instep. The current trend for wider pegs helps spread the load of course, but if they’re advising this upfront, the Formas were no longer contenders. There’s an ‘Adventure look’ with boots that doesn’t correspond with actual all-terrain adventuring – a parallel to the entire ‘style before function’ Adventure Motorcycling Phenomenon some might say! My old Bajas may have been in this category, and so might similar, two-clamp Gaerne G-Dunes, cheaper LS2 Adventures and the even cheaper RST Adventure-X (below; left to right).
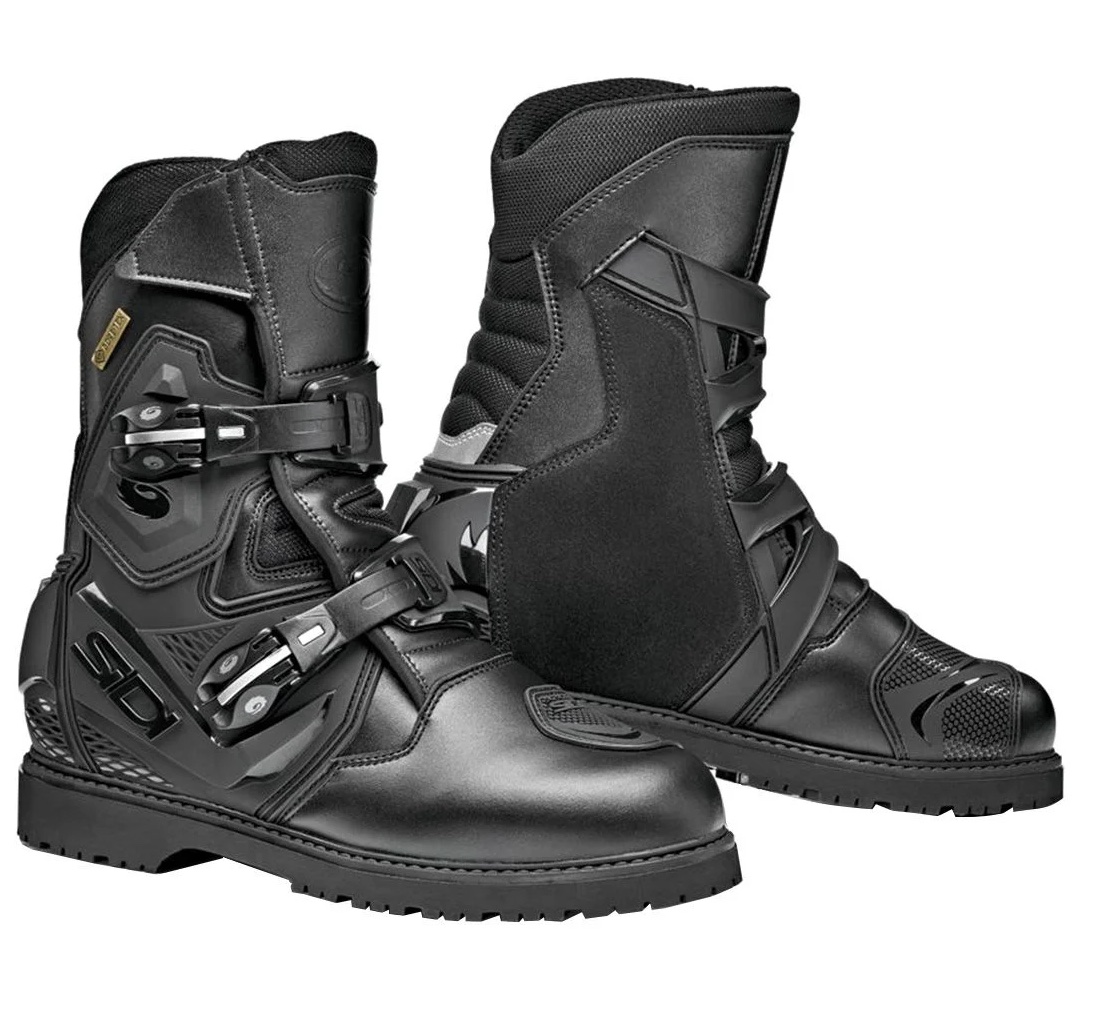
They all have the appearance of MX boots – rugged clamps and ankle protection – but underneath aren’t really up for it. This shop product video review seems to confirm this lamentable trend while claiming these Sidis are a cut above.
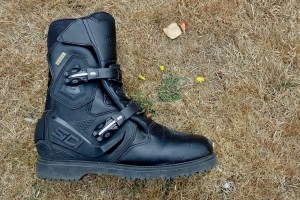
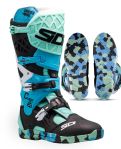
I thought I’d treat myself to some Sidis who, like Alpinestars, have had a solid rep in off-road moto footwear as long as I’ve been riding. Or should I say, some turned up in my size dead cheap ;-). They certainly look like they could give and take a good kicking, have a Vibram-style sole and, in ‘military green’ (left) looked way more interesting than ‘tobacco’ or boring black.
I’d have sized up a green pair from SBS, then waited for a sale or used, but as said, my size in black and used once was ending soon on eBay for just £86. Boring black it would have to be, but at least they’re better than the ‘messy coral’ Crossair X for just £630 (right).
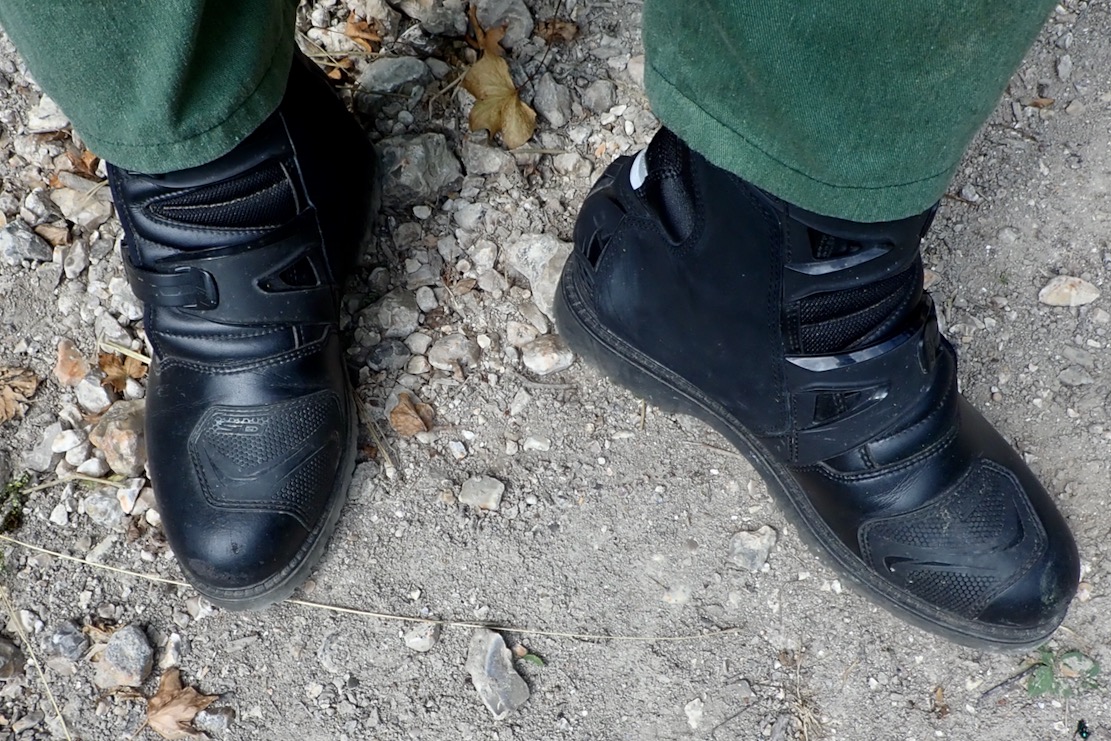
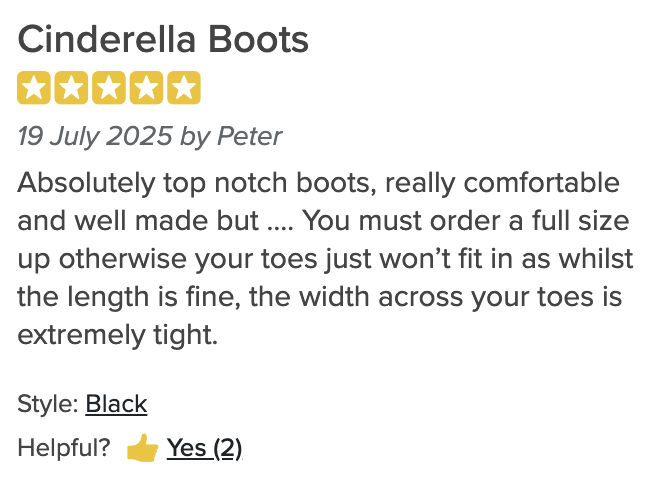
Narrow
Sidi Mid Adventure 2s Out of the box the 11s (46) looked solid but unnervingly narrow. Once on my feet they felt the same, initially pressing on my small toe, even with thin socks. I didn’t get the chance to read before buying but many reviews and customer reviews on SBS (left) testify to this. But had I gone up a size to 47s they’d be way too long. I’ve had width issues forever with hiking boots, but with the Sidis the pressure goes away after a while, and it’s not like I’m heading up the Pennine Way with a full pack for a fortnight. If they’d been that bad I’d have put them straight back on eBay and might even have made a few quid.
Note that the video above compares the Mids with the full-height version with an ankle hinge for full articulation. The Mids don’t have this but being tall for Mids, lose out on that ankle movement when walking or sliding into a corner, extended inside skimming over the dirt. The simpler, one piece body will probably do me, plus there are bellows above the heel for a bit of give.
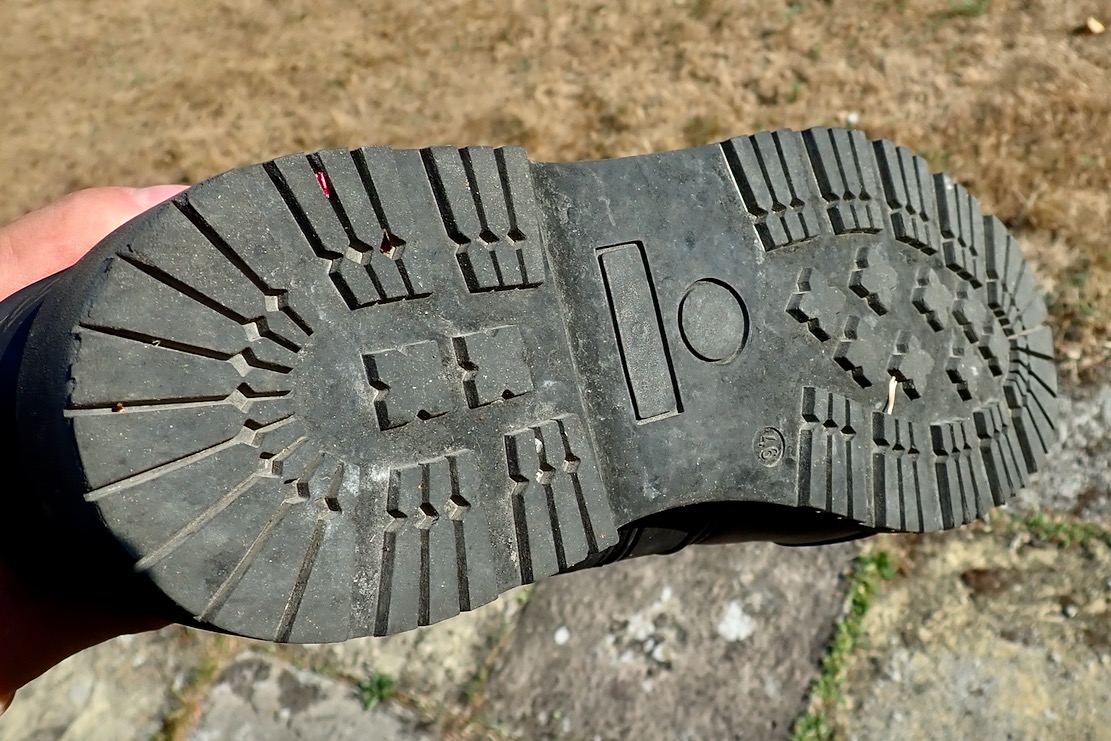
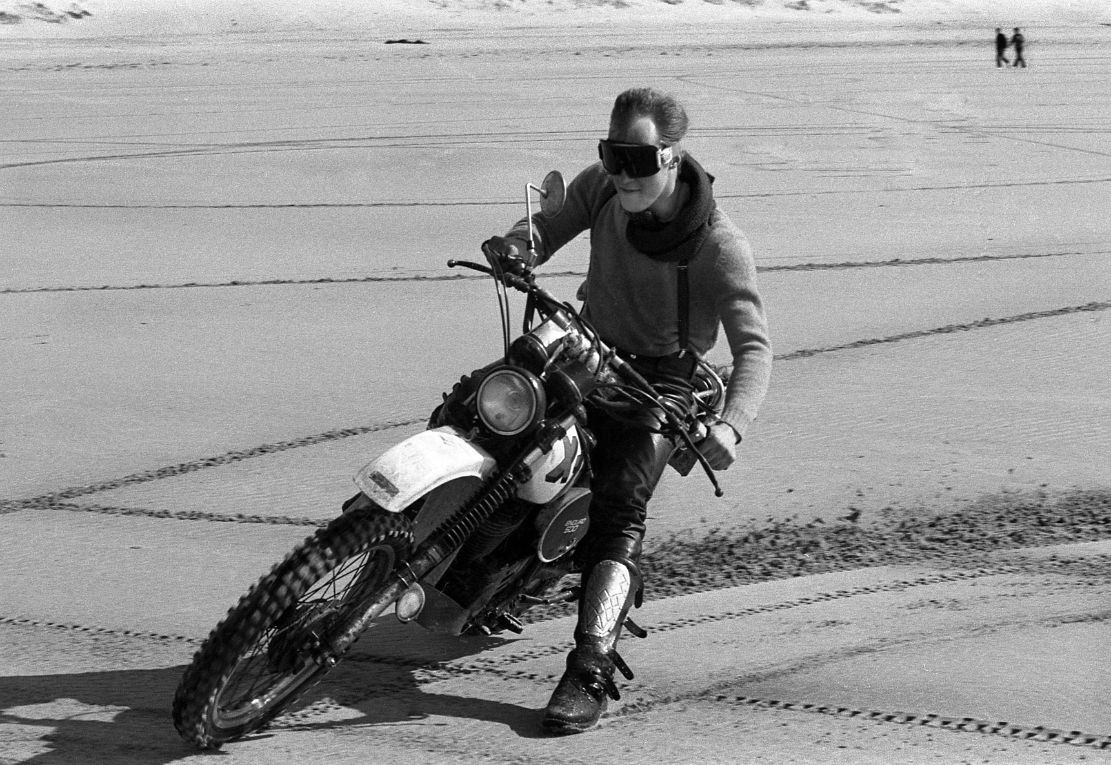
Green laning locally on the Serow, the Sidis proved they had what the Formas, my Bajas and maybe the other softies all lacked: a rock-hard MX instep offering pain-free standing support on the narrowest, spiked footpeg. And the lugged ‘Vibram’ sole (left) will add grip when paddling or scrambling about off the bike. My smooth-soled Bajas were a pain in this regard, though a real dirt racer’s boot would have a smooth sole for crossed-up broadsides, like I was practising below (1970s Alpinestars Super Vics).
The Sidi’s straps clamp down securely with a bumper protecting the lower one, and ought not fall off like the Bajas. With the unusually tall height (300mm in my 46s), they could be run ITB (tucked in), and ought to keep the feet dry in downpours and through fords. The Bajas were too short for reliable ITB; these taller Sidis ought to hold the tucked in trousers. Plus you get an actual Gore-tex membrane for as long as it lasts, not some no-name ‘SplashBack™’ version, though the vid review above notes the membrane ends about halfway between the top edge and the upper buckle.
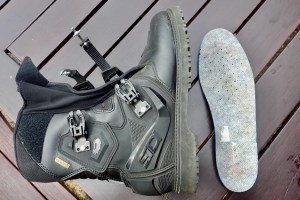
Inside you get the usual cheap, thin removable insole (left). I’might put in one of the better ones I’ve lying around, or if you need more volume you could ditch it; it’s not like to need the all-day walking support. One thing with Mid height boots like this is that the top of the boot can chaff on your shin – my Bajas were like this too. It’s one reason to go ITB or wear knee-height socks.
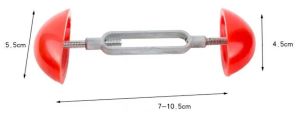
Weighing 1100g each (only 80g more than my Bajas), they don’t feel anywhere near as comfy right now, but will hopefully respond to breaking in. To speed that process up, I bought some boot spreaders (left). We’ll see how effective they are, but once that’s done the Sidis look like they’ll take whatever terrain and weather’s thrown at them. More to come.
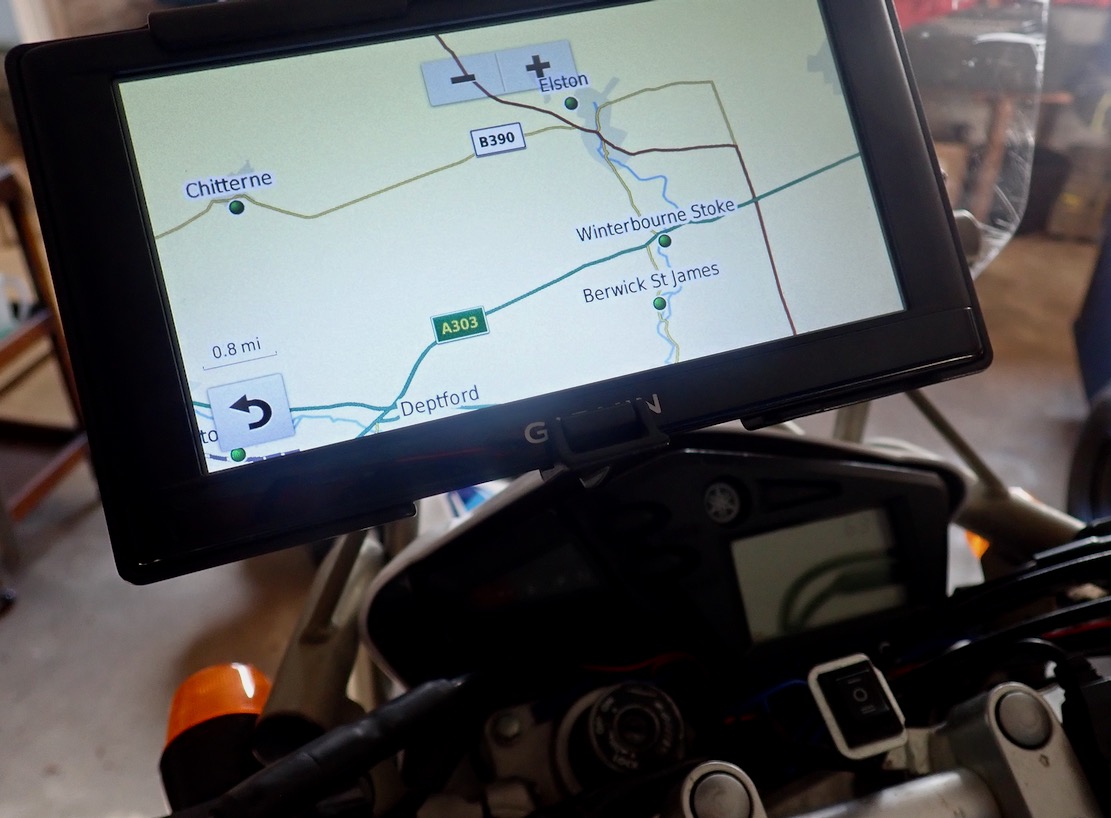
My well-used Montana 680 (above) is playing up more than usual. Like most of my Garmins it’s always been flakey, crashing, freezing, or dying outright (I’ve got through a couple). But now it’s routing illogically. It happened in Morocco on the Himalayans in April, putting us in a right tangle trying to get out of Marrakech. I should have pre-visualised the exit route on a map the night before; as we know, second guessing a GPS’s routing is part of the game. A quick Morocco map switch – such a great feature which set Montanas apart back in 2011 – fixed that. I assumed the OSM map had some flaw with main roads wrongly classified as mule tracks, flipping us up some diversion then coming back to the main road. Then the other day riding my new Serow back from Wiltshire via backroads, it was routing me all over and even onto tracks fluttering with red flags and low flying tank shells.
Cheapo Nuvi car satnav. Better than a Garmin handheld on the road.
Back home I reset the Montana, updated the software, installed the latest UK OSM, changed my underwear, moved/deleted maps off the internal storage and took out/put in the mini SD card. And I’m always disabling unused maps to free up whatever needs freeing up. This routing anomaly might have sorted itself out but even then, compared to a tablet or phone, the 4-inchMontana screen is small, murky and my eyes less good, made worse by using full dark visor these days.
Handheld Garmin dark, Nuvi (right) bright (2012, USA)
So once again I find myself looking for an as-functional alternative: a satnav that routes reliably when not in North Africa, but that switches maps and records tracks and waypoints with ease when out there, has an all-day battery for UK walks/MTB exploring (with the benchmark OS map), but doesn’t cost 700 quid like the Garmin 710i/Tread or a full DMD/Thork set up. I don’t need to listen to music, answer calls, run dash cams, talk to other riders, integrate Group Rides, receive fun road suggestions, log my lean angle and tyre pressures, or get traffic and weather notifications. These clever do-it-all-and-more app tablets are impressive like a phone, but right now I’ll just settle for nav.
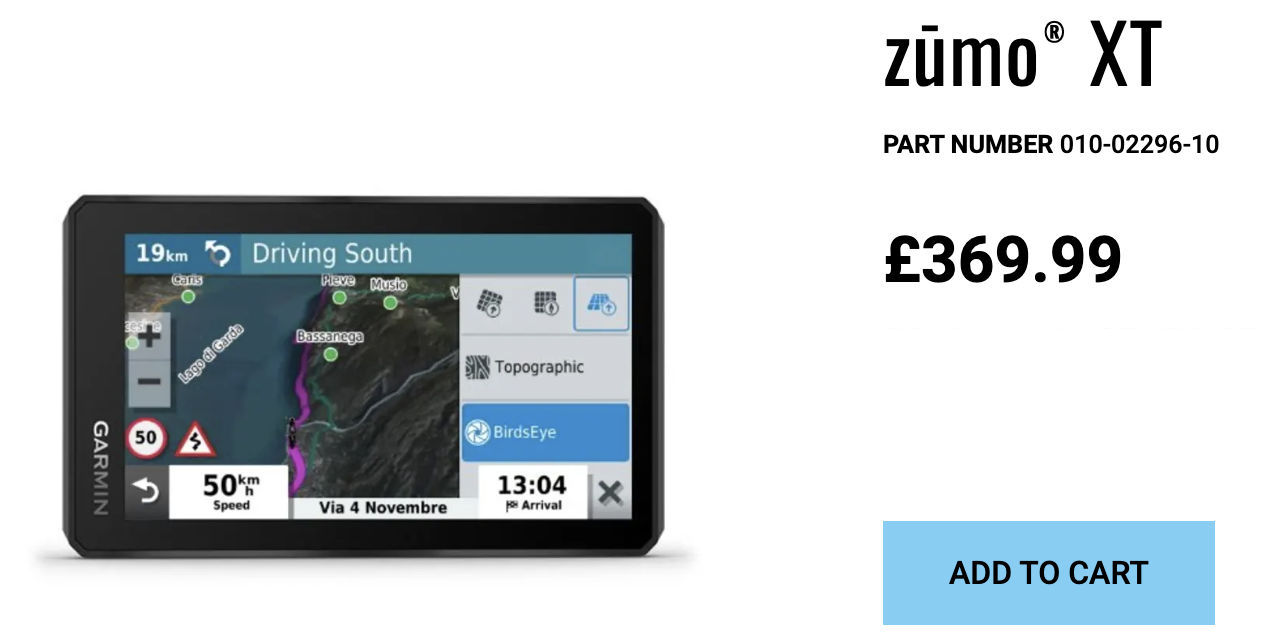
Garmin Zumo XT
What they say The rugged zūmo XT motorcycle sat nav is built for adventure. Its ultrabright 5.5-inch display is glove-friendly, rain-resistant and shows you the adventurous way — on and off the beaten path.
Zumo? Schmumo! £50 Nuvi + ZipLoc
Superseded late last year by the XT2 (from £530), the 2021 Zumo XT came out in 2021 and goes discounted to £304 at SportsBikeShop with 77% 5-star reviews on amazon. I intended to try and see if it would do the things I needed, then either keep it or send it back. Way back, I was lairy of Zumos when I realised they were nothing more than a Nuvi car satnav in a rugged package with moto routing gimmicks and a jacked-up price. I’m sure the XT has moved on from that era, but being cheap myself, for around £50 used on ebay I took to using used Nuvis (now called Drive), as for plain road nav the map display is far superior to any Garmin handheld, while still keeping a Montana for recording trails. A Nuvi required a plastic bag for rain, but even then one drop off it’s flimsy car mount, drop of rain, or even just pocket dampness saw it off.
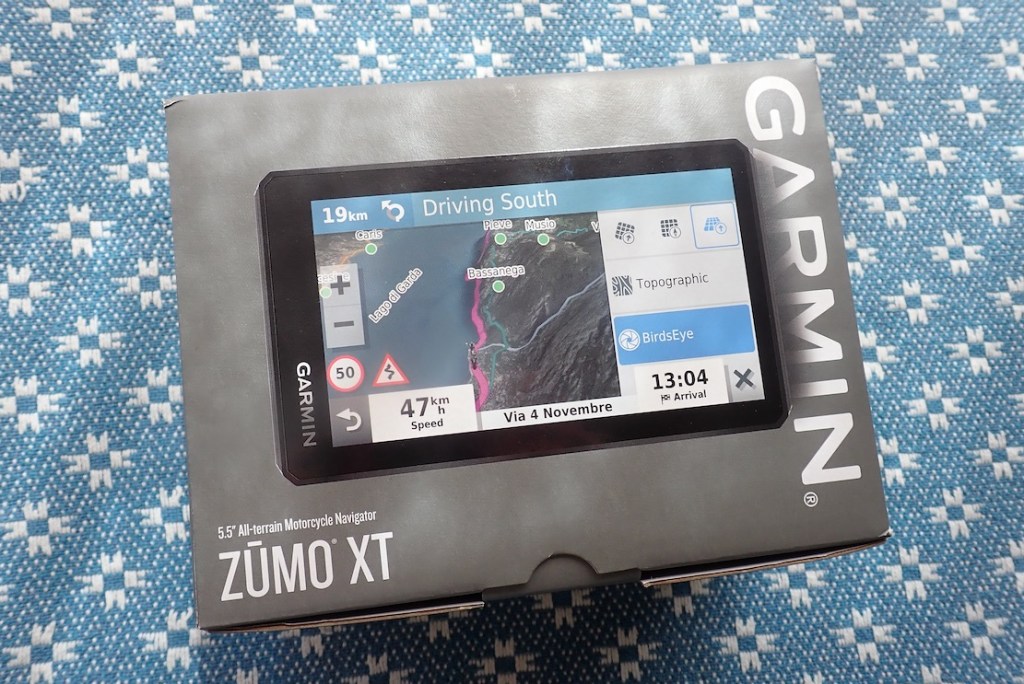
In the box You get a lot with the Zumo XT: proper RAM ball mounts (nice), suction mounts with the old Garmin ball plus a cig plug lead for car use, long 12-v power cable and solid looking clip mount plus the charging/data cable. The unit is rated IPX7 which is rain resistant, with thick rubber caps to protect the miniSD and USB ports, though I read that rain drops can set off the sensitive touch screen. The XT2 has a way of disabling this. Likje a Montana, you can run an XT off the battery, via a USB cable or off the charging mount hard wired to the bike. This clip-off mount feels quite solid and may do for off road use, though generally clamping around the whole body (like Montana) is more secure. The unit was dead out of the box so I plugged it into a power bank via its ancient USB mini A slot and started looking around. All very Nuvi like but a nicer lay out. There’s a lot of added crap on there too, but isn’t there with everything these days? Basic set up was dead easy (compared to a Montana after a reset). Then came the moment of truth: slotting in my Montana’s miniSD loaded with my .img custom maps. “Alert! Alert!:Maps are corrupt and cannot be used. Go to http://www.garmin.com/express to download [AKA: buy] the latest maps. Alert“ I did manage to get one UK map to load, but not the more useful OS 50k mapping (I was told OS 50k wouldn’t work on an XT, even newer ones). And a Moroccan one appeared at some point, all before I learned to store the maps in a folder called ‘Maps’ on the mini SD card (not ‘Garmin’ folder as before). So there was potential there but crucially, I could not see how to switch from one map to the other – so easily done on the Montana. Often in Morocco one of my maps will show more or better detail of what’s ahead. Switching between multiple maps is important. I suppose I could have ploughed on for a few more hours trying to unravel it all via the Zumo forum. But it reminded me of the bad of ~Garmin years of try to get custom maps to show up, plus I wasn’t convinced I’d not come up against some other game-ending anomaly. So with no great surprise I declare the Zumo XT a great passive satnav. For 300 quid it’ll spare you mobile but does not answer my nav needs. Recording a track and saving a waypoint looked pretty easy, and the screen was a bright as. Unlike a like a Montana, it was getting pretty hot in the hand charging off the powerbank, but once separated, it did look like the battery had a few hours in it, unlike any Nuvi. You’d hope wifi import/export/updates will be seamless. – didn’t try but I hope it’s not like baffling camera wifi. Right now I have a RAM cradle for the car’s Nuvi for UK road nav (below left), and will stick with the Montana whose routing might be magically fixed.
NuviVelcroChildproof tablet + DMD
Next, I might sharpen the crampons and try to ascend the DMD2 learning curve using my 9″ Samsung tablet (above right) before considering something normal sized. I’ll even have a chance to try out my recently bodged velcro & RAM set up. Intended more for cars, it might do pootling about on the Serow to see if DMD2 with a rugged 6-inch tablet is worth the plunge. I have not arrived at my destination.
In a line: Well featured, fully armoured, all-season shell for cooler or faster rides
Price: £549
Size andWeight: XL; 2520g or 1440g without armour (verified)
What they say: The Gravel Jacket is a CE AA certified, highly durable, lightweight, waterproof, breathable adventure touring jacket. It combines everything Adventure Spec has learned about extreme off road and trail riding into the lightest adventure touring package. The Gravel Jacket is designed to be partnered with the Gravel Pant. It is constructed from a three-layer waterproof fabric that features a blend of Cordura Nylon 6-6 for high abrasion resistance, and PU film for extreme water resistance and breathability. Additional protective panels and removable level 2 armour protects back, shoulder and elbow impact zones. The Gravel Jacket and Pant is designed to keep you comfortable and safe while adventure riding on road, gravel and trails.
I had a close look for review purposes, took some photos, then returned it.
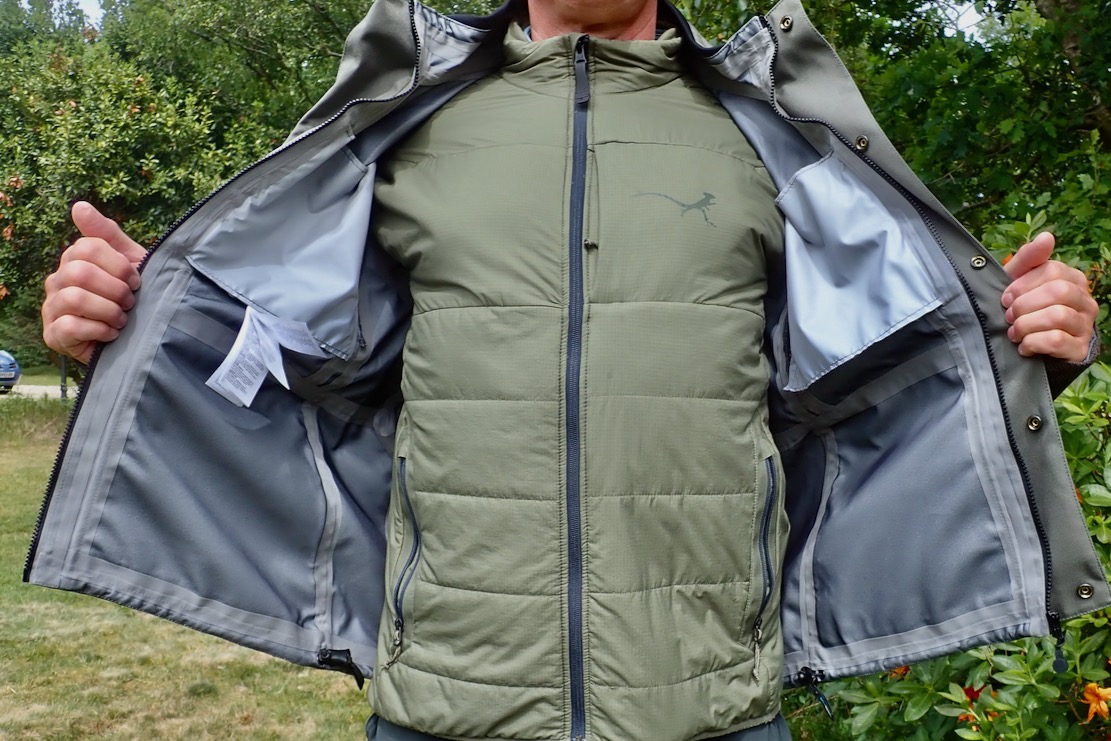
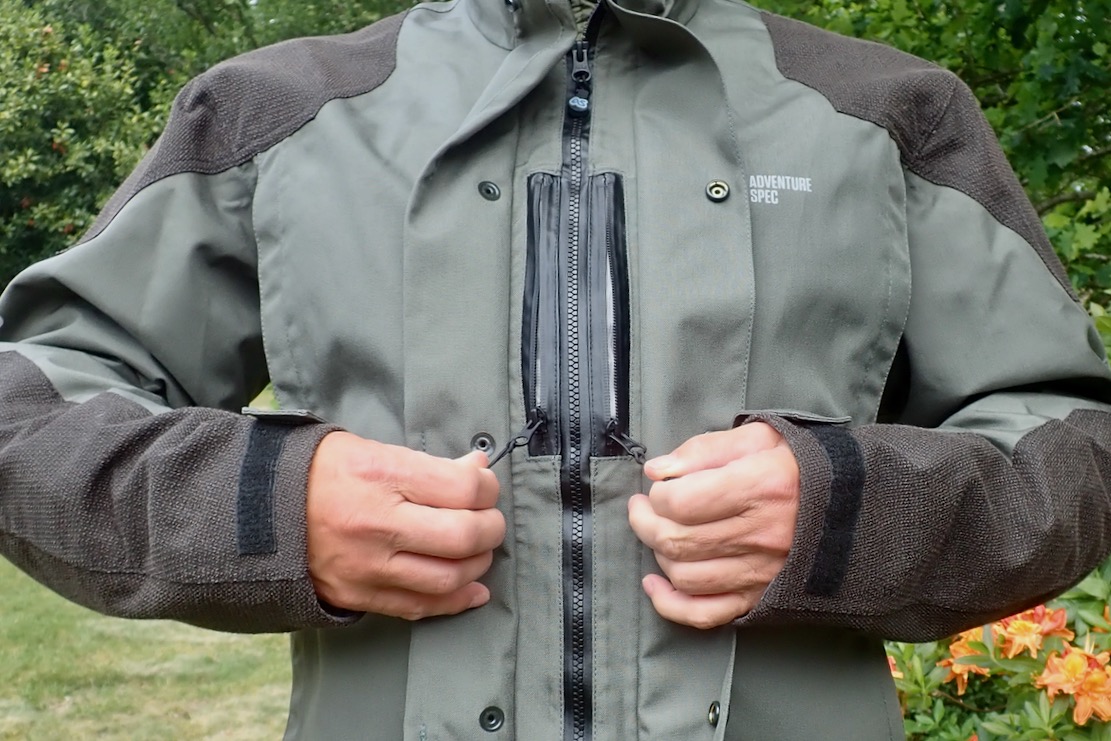
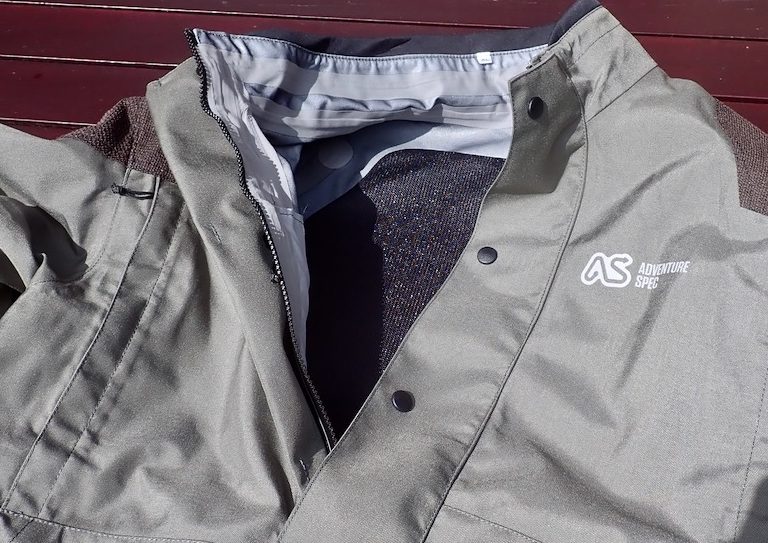
Front one-way zip is double storm flapped with an added ‘gutter’ fold on the inner flap to slow down water ingress
Quick Look Adv Spec’s Gravel Jacket came out in late 2024 with matching Gravel pants. Up till now most of AS’s apparel has been gear for more active enduro or trail bike riders who value minimal clobber and may be layering up and down throughout the day. At £549 The Gravel is their top of the range CE AA, all-season jacket pitched at touring riders on bigger Adv bikes which are suited to long road miles and easy gravel trails. Using non-proprietary armour and PU membrane help keep the price down, while ticking many other boxes.
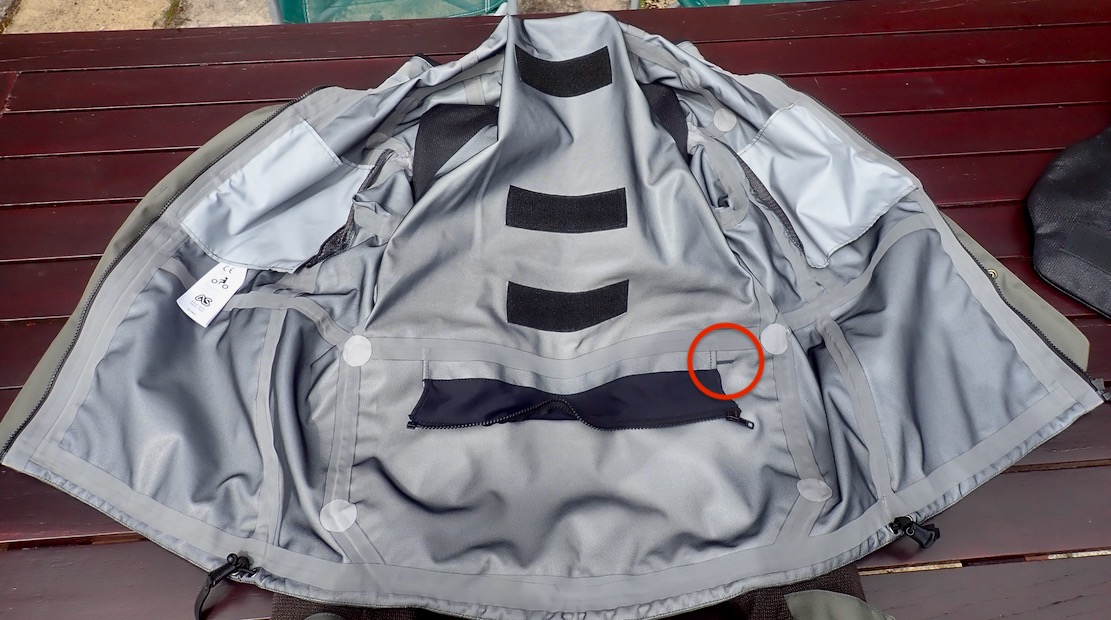
The wicking lining is bonded to the shell fabric, not a separate, loose mesh, which shows taped seams sealing the stitched panels. Ringed: a slot in the back pocket for a hydrator hose.
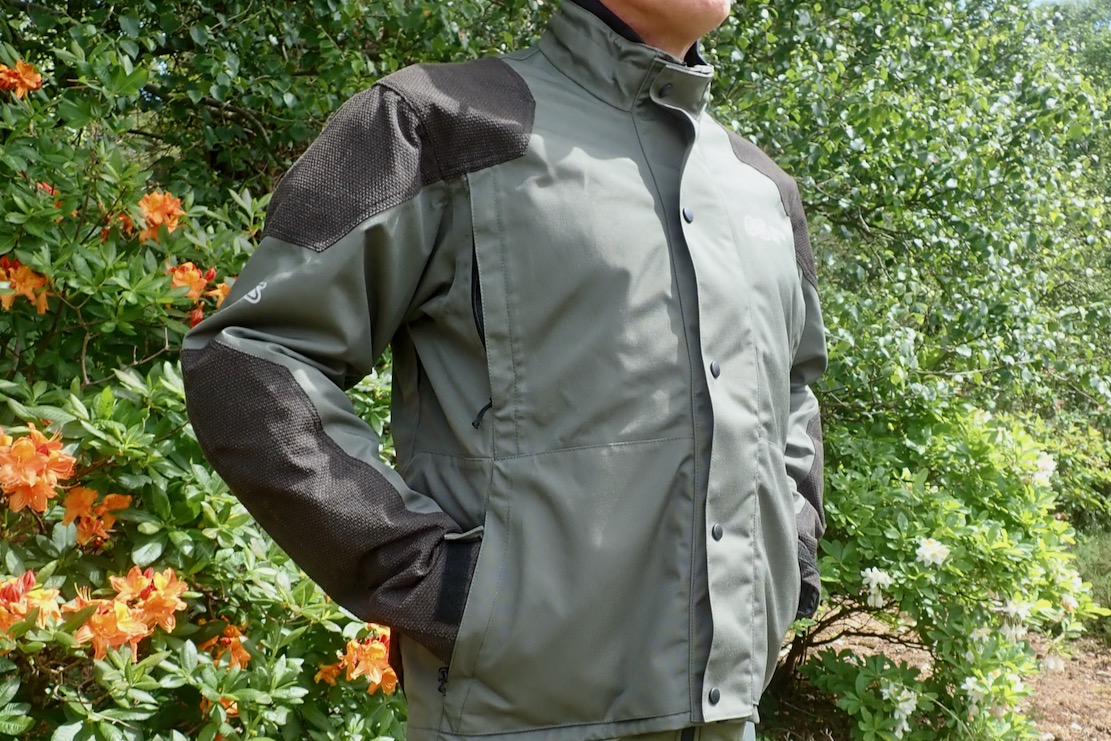
Out of the box the Gravel feels hefty with all the armour in place, and once on, the fabric is pretty chunky and stiff too – at least while new and compared to what I’ve been wearing lately. (Fyi: I am 6ft 1in/186cm, 210lbs/95kg.)
The 500D, grey nylon body fabric is an abrasion resistant, 3-layer bonded laminate, sandwiching a no-name membrane. That’s the best way to do it, compared separate zip-in liners found on cheaper gear which I like to think have had their day. Oddly, the contrasting woven, 240D kevlar reinforced polyester abrasion panels are also 3-layer. You’d think any simple, tough abrasion-resisting patch would do, and in fact according to the AS table, this 240D is less abrasion resistant than the plain old 500D shell fabric (which is how Aerostitch do their impact-area patches), but helps add a textured look to the jacket. This additional layering will improve water resistance but reduce breathability. It also means these impact-prone areas get no less than seven layers of protection if you include the armour pads underneath. You’re elbows, back and and shoulders will be well protected from impacts.
80-minute, feature-length video? Hard to think the salient facts could not also be packed into a snappy, Mosko-style <5 minute version.
Size wise, new and stiff out of the box the XL Gravel initially felt a bit tight on me. But once the back protector was removed it felt much more comfortable, even wearing my Mosko electric puffa over a denim shirt – a typical riding set up for cooler temps. Sleeves are long, so is the back while the front is short. More dims below.
Adjustability includes two cinch pull tabs along the hem sides – it took a close look to work out how to operate them – plus velcro cuffs and another cinch at the back of the neoprene-edged, unlined collar.
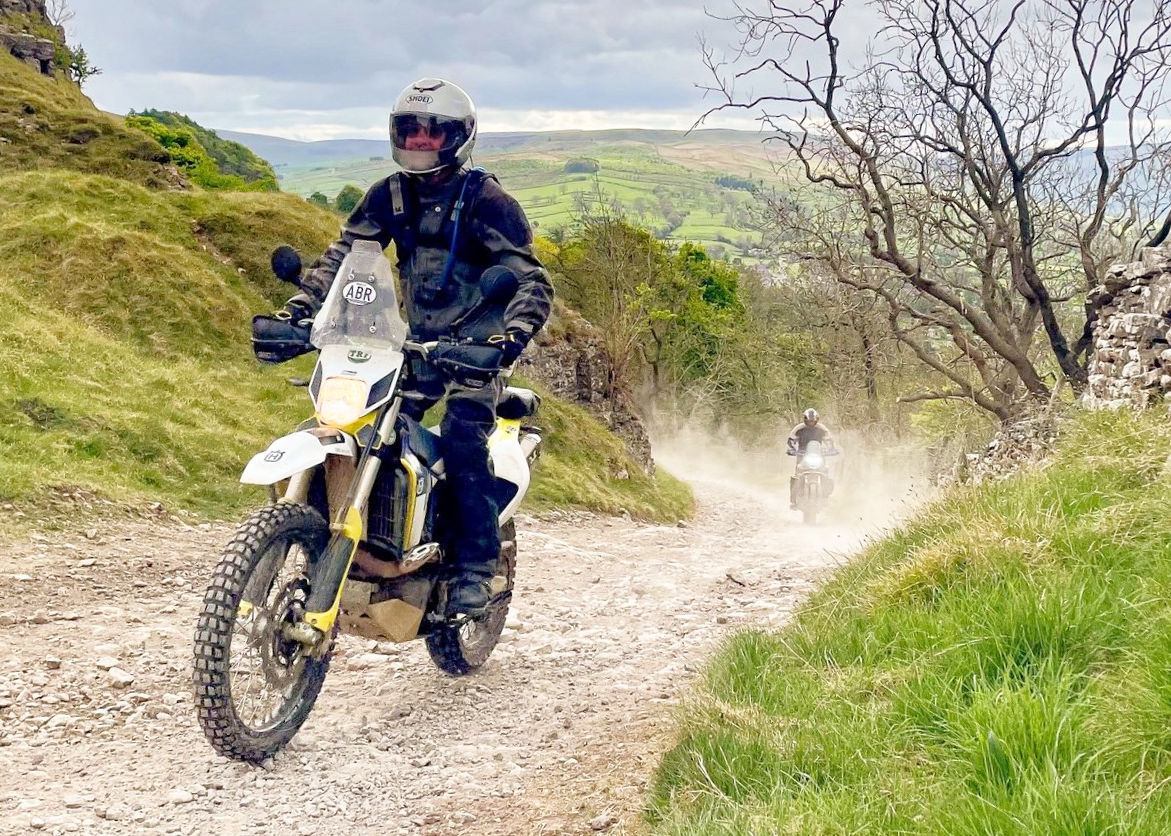
Dave K on the gravel
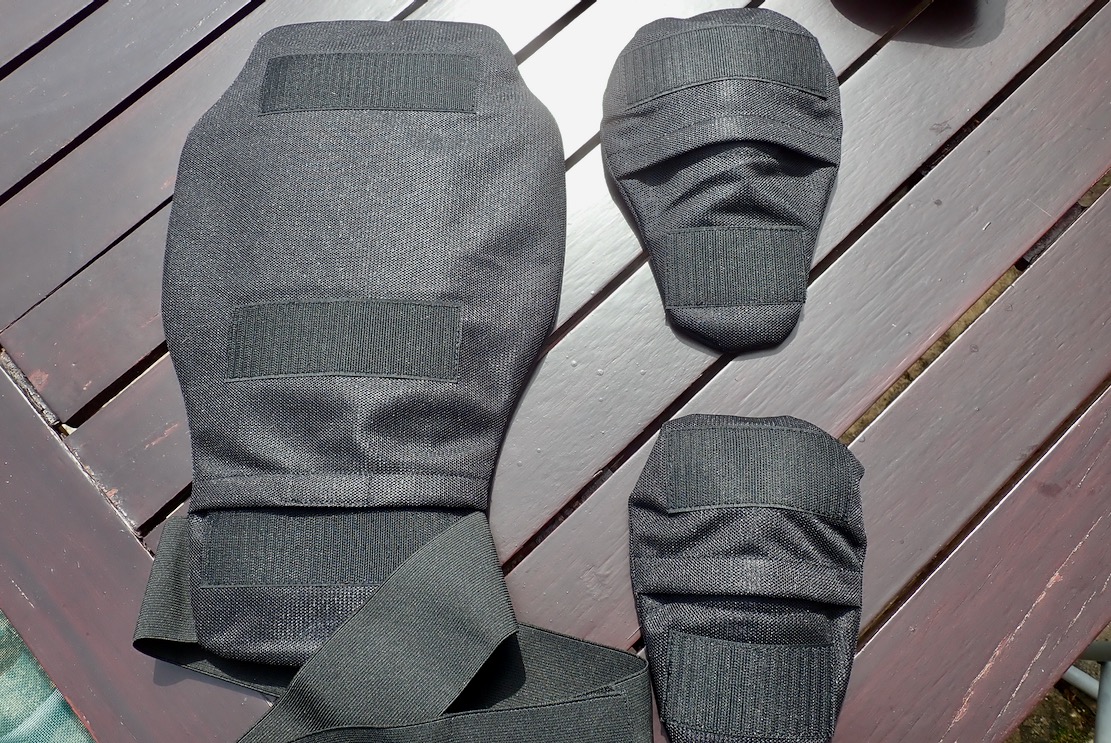
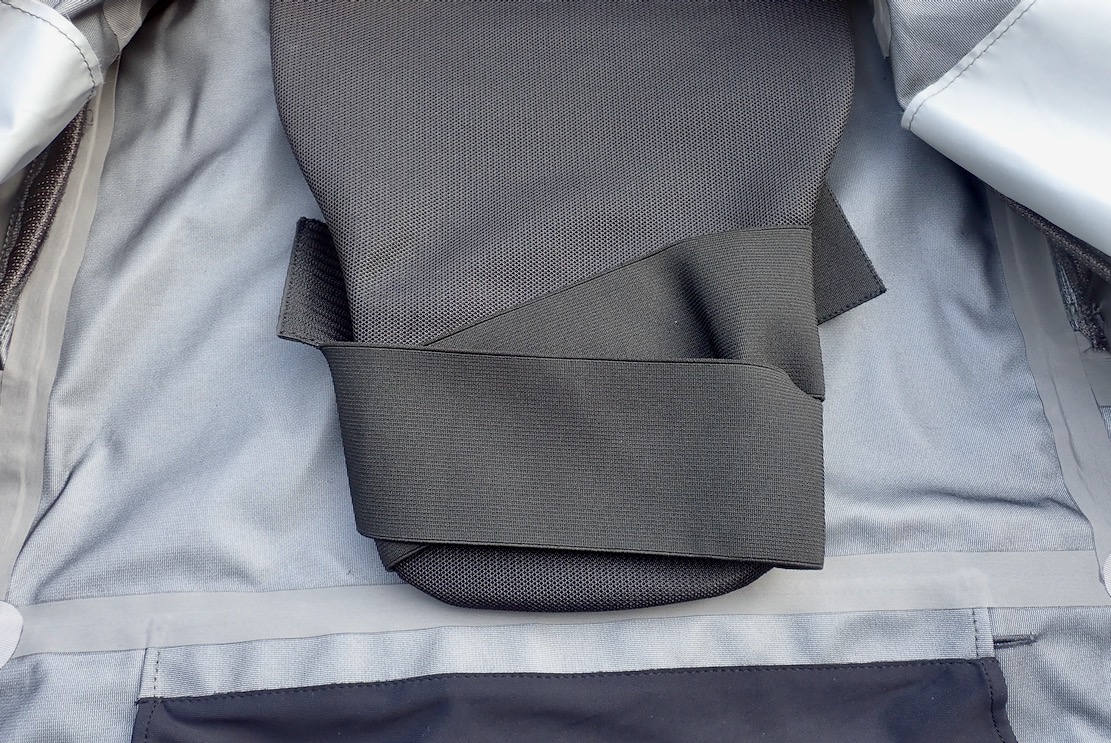
Armour Underneath and inside, five pieces of A-Spec-branded armour sit in pockets velcro’d to the shell’s interior. I wonder if an included back protector is mandatory to secure a CE AA rating. While good insurance for high-speed crashes, as said, I found the Gravel much more comfortable without the back plate (as I do with most jackets). On the scales this back pad weighed 565g, or over 20% of the jacket’s overall weight.
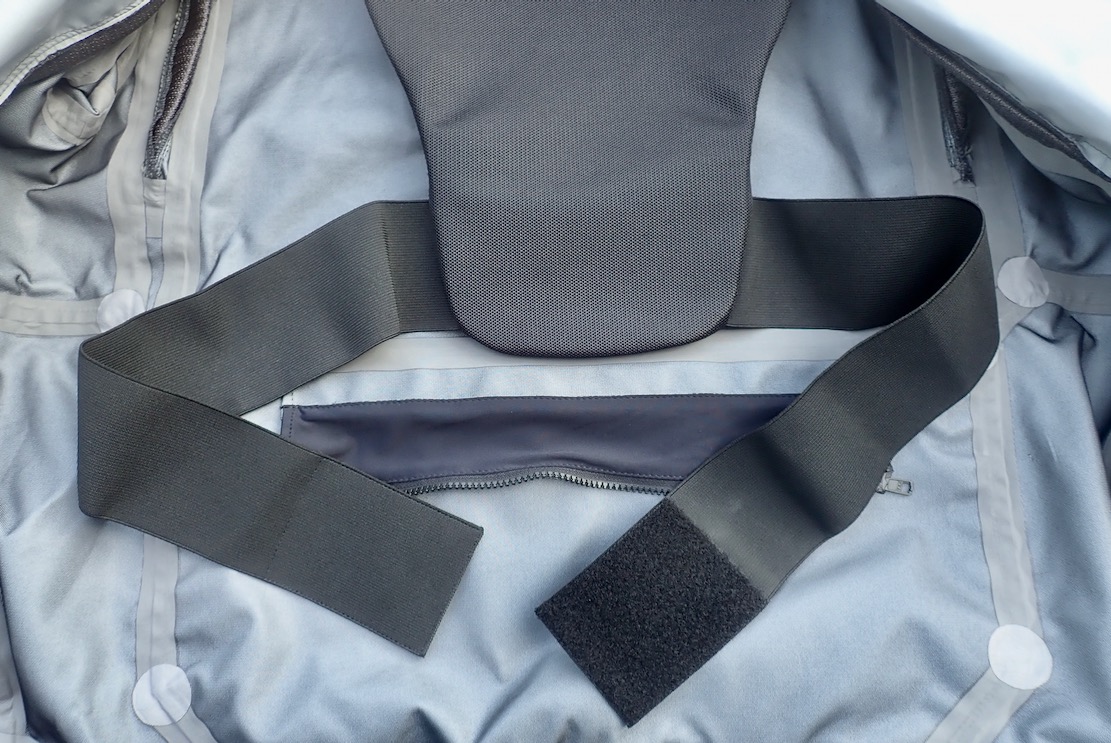
An elastic waist strap is sewn to the nylon sleeve housing the back pad (above left; below). They call it a ‘kidney belt’ but that’s something else: a stiff girdle-like band which MX racers use to support the lumbar region and keep their organs in place. All this stretchy band does is pull in the base of the back protector which may help keep out draughts. That could be even more effective with a couple of belt loops on the sides of the inner shell to pull everything in. When not used, the belt dangles down, or you can tuck it out of the way behind the back armour (below right). You’ll also notice a half-zip to join up to Gravel pants for the same draught eliminating effect.
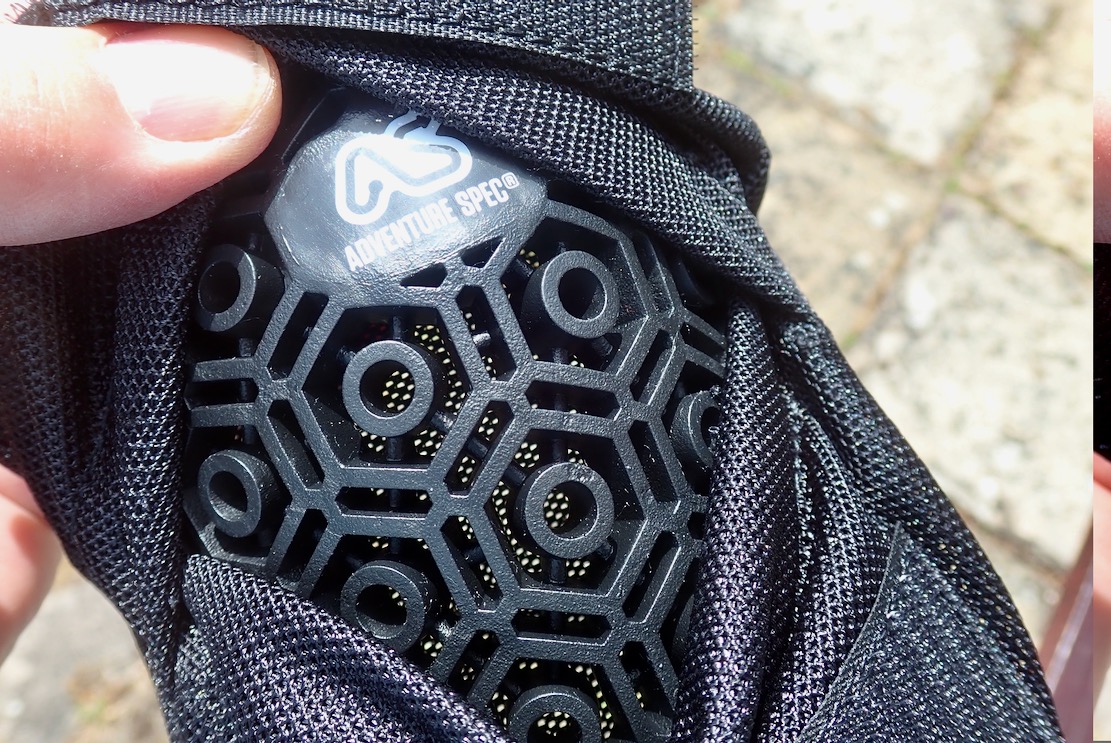
On the arms, the two pairs of shoulder and elbow armour came in at 514g. I’d be happy to leave those in place, but by comparison the more pliable and slimmer D3O on my new Klim weigh 380g and could be easily swapped into the Gravel’s armour sleeves.
The whole elbow/shoulder armour thing must be another CE requirement, but it won’t stop over-the-bars broken collar bones. Some jackets I’ve had included a bicep cinch strap to pull in baggy arms out of the mirror line, while also keeping otherwise loose elbow armour in place. If you’re serious about armour, remove everything from the Gravel to save over a kilo, and wear something like A-Spec’s padded SuperShirt. It’s yet more clobber, but will probably be way more comfortable and effective.
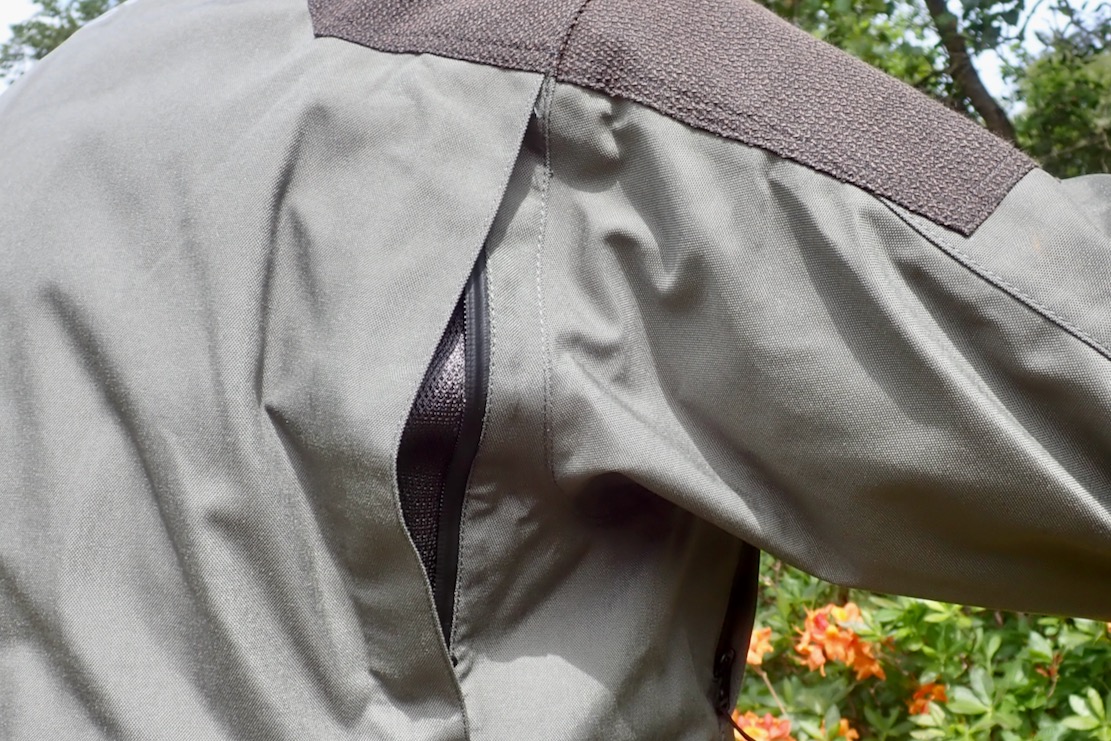
Short, mesh-backed arm vents
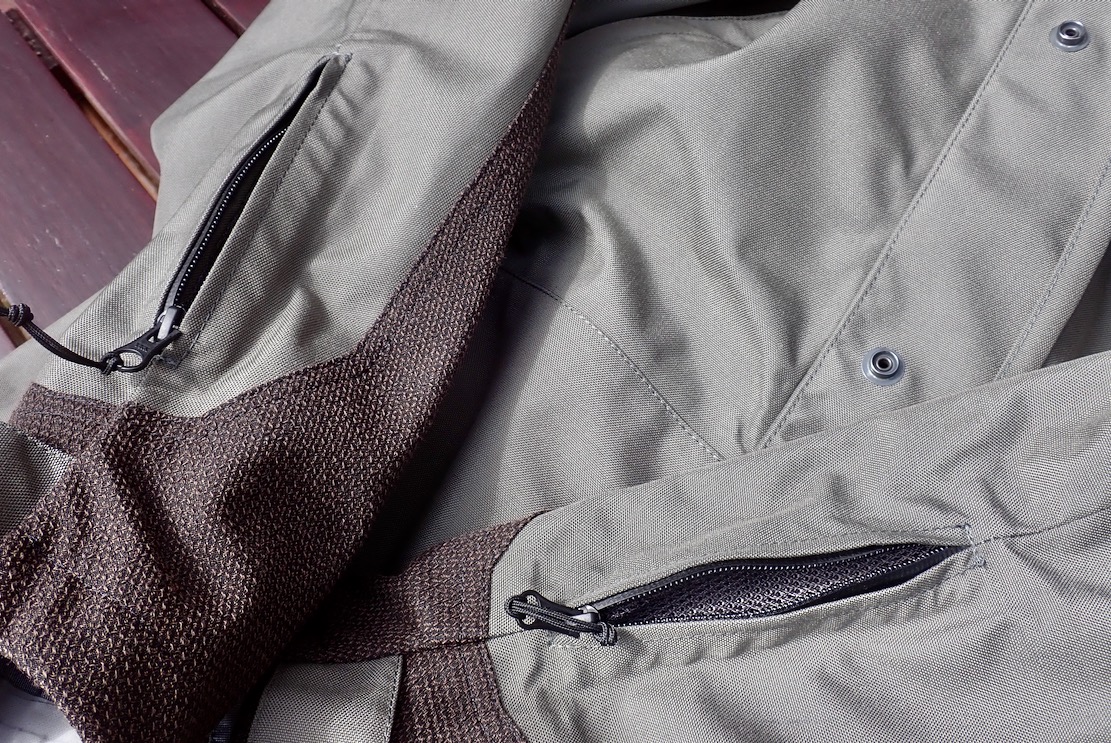
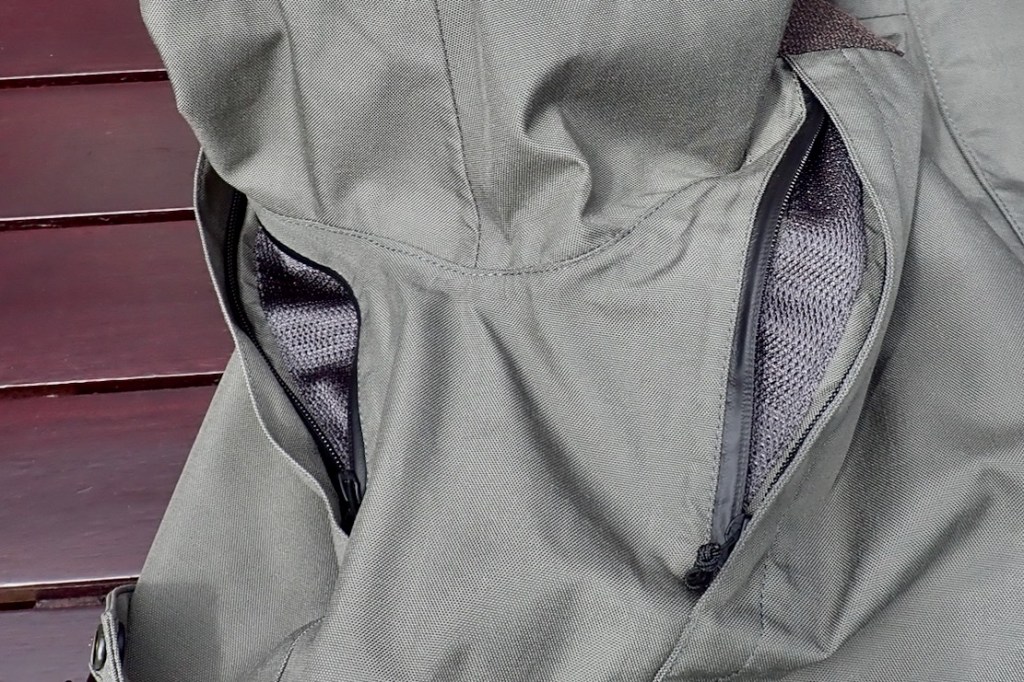
Venting air flow looks a bit constricted on the Gravel, but then I’ve not actually tried it. On the forearms you have a couple of short, mesh-backed zip vents (above) which it’s hard to see being very effective. There’s another set on the upper sides of the chest with exhaust vents on the shoulder behind (below left and right).
Apertures are on the small side and will be better than nothing, but as on other jackets, the trend for mesh backing means they can’t open fully to get a flow on. For more venting you might as easily open out the cuffs and unzip the one-way front zip, then do some of the poppers back up. Or, do as Dave did in the Comments, and cut open the mesh to maximise the flow.
Pockets add up to a couple at the hem (below left), and another pair outside on the chest but behind the poppered storm flap (below right) which means you don’t need to open the main zip to access them. Water-resistant zippers up here mean that a passport, wallet and phone ought to be well protected from downpours, but condensation in a pocket may add humidity.
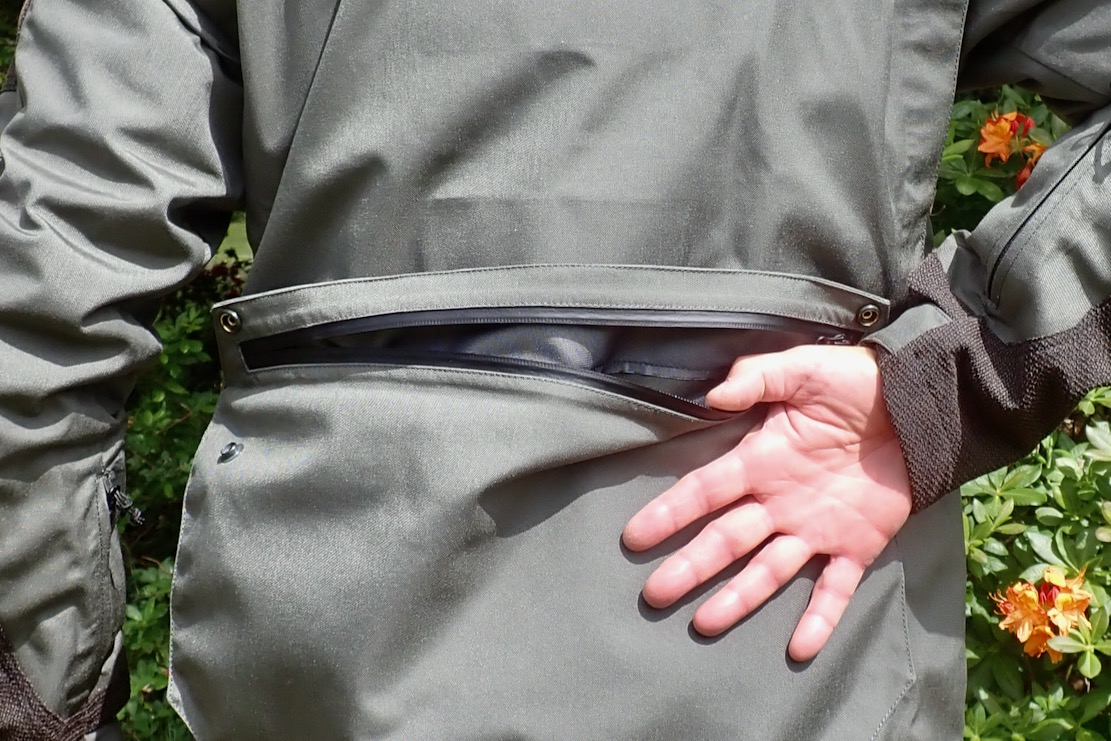
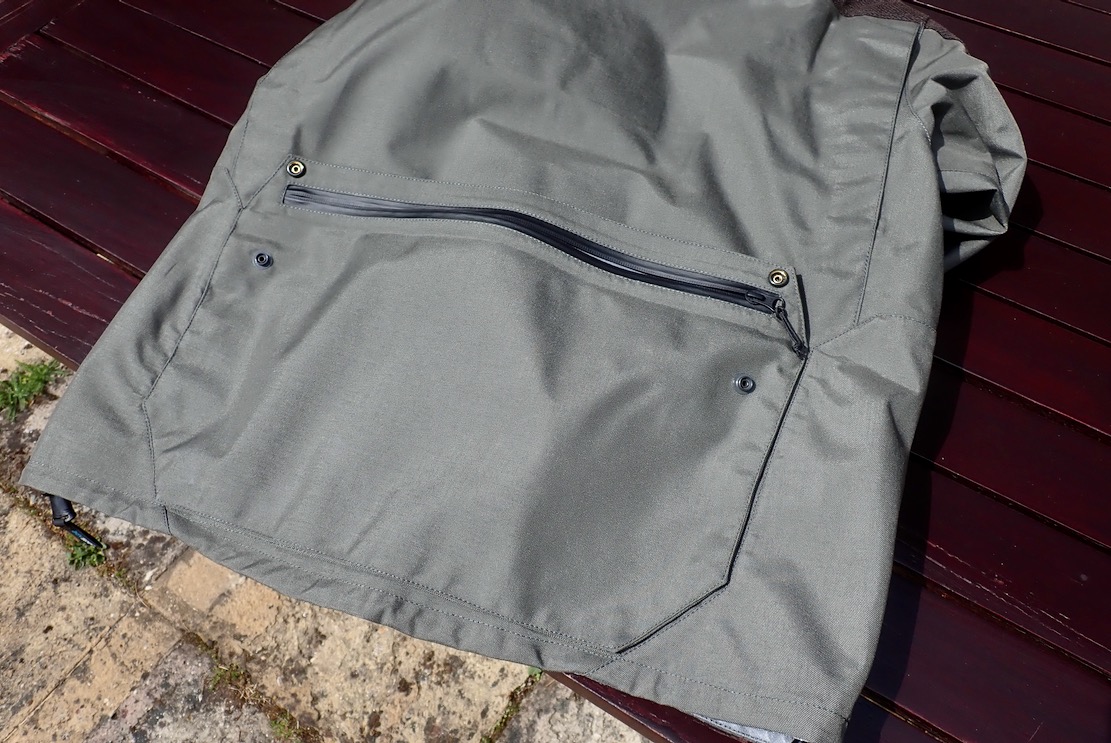
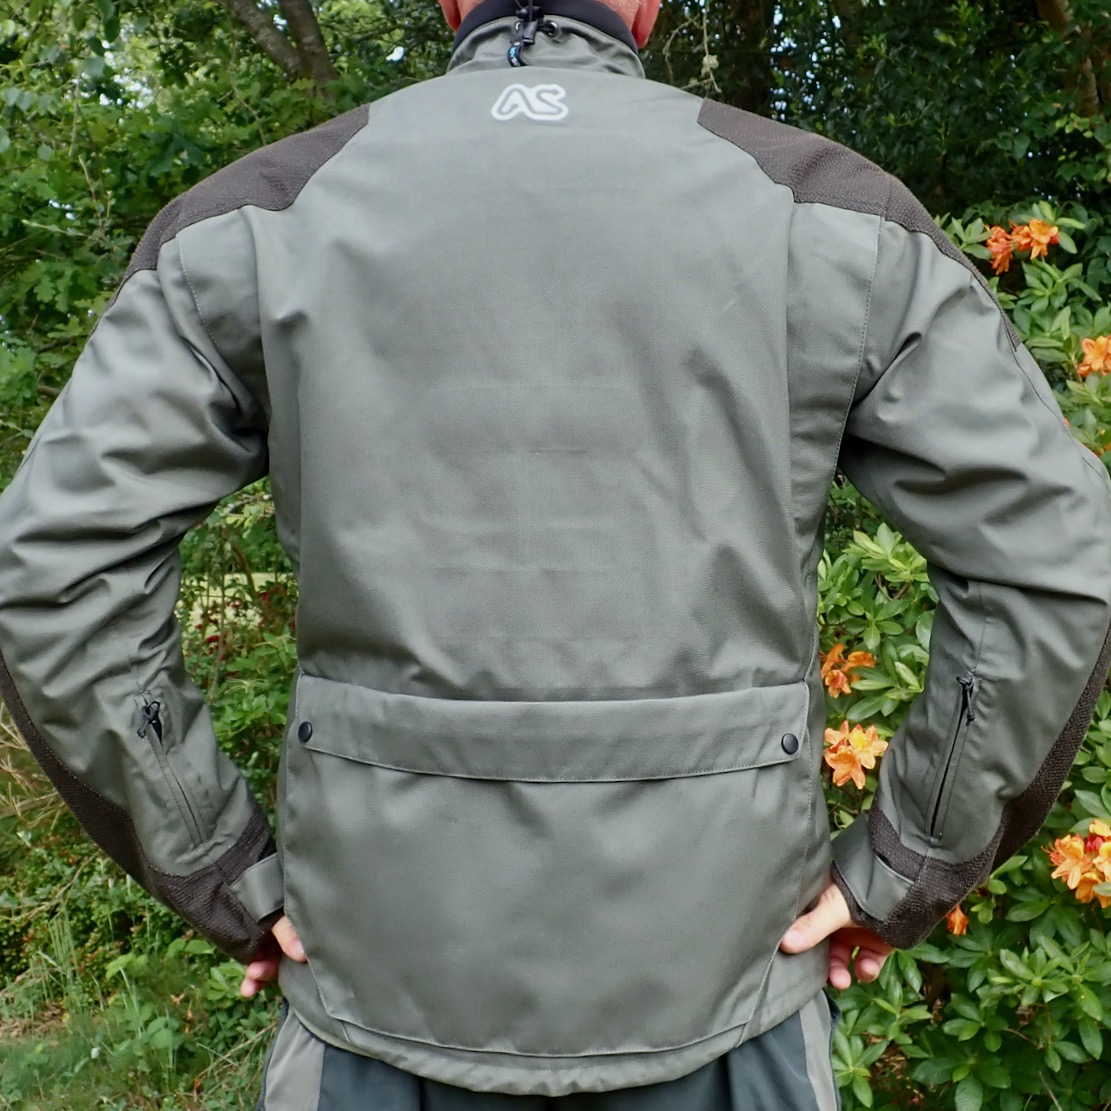
On the back is a huge ‘game pocket’ with studs over another water resistant zip. I find pockets like this a handy place to stash essential but rarely needed items which you never want to be parted from. It’s a long time since I’ve been as supple as Olga Korbut, but I was able to open both poppers and slide the zip while wearing the jacket. They don’t mention it, but inside the game pocket is a buttonhole slot to feed out a long hydrator hose. It would have to come out around the neck – close enough to your mouth – but means you can dispense with wearing a hydrator daypack, another clobber ‘win’!
For comparison I tried on my new Klim Traverse GTX (to be reviewed). It felt flimsy by comparison – or you could say it felt a whole lot lighter and less clobber-like, while still being Gore-Tex waterproof and armoured at the arms.
As I found with Mosko’s similar Basilisk, the Gravel Jacket would be too heavy for the sort of easy trail biking I do in Morocco. Road touring on a big Adv you’ve already surrendered off-road agility for all-conquering road manners, and something like the Gravel Jacket, or even the full outfit, will add to your feeling of invulnerability. Thanks to Adventure Spec for sending out the Gravel for a quick look.