Tubeless Conversion Index Page
Yamaha XT660Z page
Twelve years after doing the Tenere, in 2020 I had another go at DIY on an Africa Twin and like to think I did a better job


Knowing a whole lot less about this game at the time, I took the DIY option for my Tenere in 2008: sealing the well of the rim with a marine-grade 3M adhesive called ‘5200’ (below). It looks similar to the stuff you put around a bath edge, but costs £15 a tube from boat shops and presumably will last a whole lot longer in rough conditions.

My rims were in fairly good shape, being only 700 miles old, and once the near-new Tourances were removed (tried everything except the sidestand trick, but had to go to a bike shop in the end) I dried out any moisture with a hairdryer, cleaned them with lighter fluid and smeared the sealant all along the well.
The 5200 sealant I used was FC: ‘Fast Cure’ so set in a few hours. I used half the 300 mil for both rims. Unfortunately, the 5200 tube doesn’t fit a B&Q sealant gun, so I found it easiest to just cut the tube open and paste it on with a knife. I tried to leave no air gaps, small holes, or get any on the actual rim edges where the tyre bead sits (should have masked them with tape). Once dry I refitted the rim tape (left) for added protection.
Years later it was interesting to see Cyb’s version of doing the same thing on his spoked bikes. Rather than slapping 5200 all over the well, he individually applied two coats of thinner, runnier sealant to each spoke nipple, and then topped them off with a thicker sealant. As he says, it means individual leaks can then be more easily located and dealt with. If I was doing this again, I’d follow his example.

Tubeless valves
Matey at my local tyre shop flogged me some tubeless car valves, but after hanging off the rim trying to pull them through I realised the holes on some tubeless rims, car or bike, must be a bigger 15mm diametre? A tubed rim hole for a Schrader inner tube valve stem is about 8-9mm. I started drilling but before I’d gone too far I got on the web and yes, there are two sizes as well as screw-in, two-part tubeless valves from about a fiver (above left). My local tyre shop had an angled pair which screwed in with a lock nut from the inside around two rubber seals.

I had a pair of new tubeless Conti TKC80s and they levered onto the rims with a pleasing lack of drama. This was much eased by the fact that you don’t have to worry about pinching that darned tube anymore and instead are able to concentrate on scratching the heck out of your nice black rims. I did make some rim savers out of garden hose (left) but found they got in the way and could have ended up in the tyre (did that with a lever once in the desert. Took me ages to work out where it had got to!).

Mounting the tyres
This I knew would be the tricky bit. With no inner tube to push the tyre out onto the rim, it could take time and knack before the air pressure made the bead catch and seal on the lip and so pop it onto the rim.
It helped that I’d taught myself to do this on my old Land Cruiser’s 16″ rims, learning bead-sealing techniques such as clamping down the tyre with a tie-down, resting the tyre on another rim (or anything round like an old-style metal dustbin) to get the lower bead to sit and seal on the rim under the tyre’s weight while putting a soapy inflated 16″ bicycle tube around the top to help make a seal (it worked).

There was even the ‘Icelandic Eruption’ trick (left); squirting gasoline into the tyre via the valve body (valve core removed) and lighting it in the hope that the small explosion inside would blast the tyre out onto the rim’s edges – it’s said to be commonly used in Iceland by off-roaders running huge tyres at low psi. What also helped at the time was having a decent 2.5 cfm Viair compressor attached to my pickup. Car or bike, a decent pump on the overland is an important accessory.

To cut a long story short it all took most of a day. At one point I looked for answers and ideas on the web. Tex on youtube made it look effortless with a sports bike tyre and a hand pump, but for me even going ‘Icelandic’ didn’t work, or I didn’t have the guts to use enough fuel; the tie-down clamp (right) helped, soap and water didn’t do much, running a bit of soft hose around the edge of the tyre to try and seal the escaping air (like the bicycle tube trick did so well on the Toyota) didn’t work either.
In the end it was just a matter of jiggling and technique: clamping the metal clamp of the tie-down right over the part of the tyre that was not mounted (so forcing the gap onto the rim), as well as manhandling the tyre, sitting on it, pushing and kicking it to get the lipless front tyre on. If you don’t have a chunky tie-down on the road, any rope or tape twisted tight with a stick will do to crush the tyre on.
Emboldened by this small victory after half-a-day’s pissing about, I eventually got the back one on too. The knack here may have been turning the car engine on to give my Viair compressor that extra bit of poke to ram in the air in faster than it could escape out the sides. Important: remove the valve core to get the air in faster. Once the tyre bead is seated on a rim it won’t come off, even at zero psi.
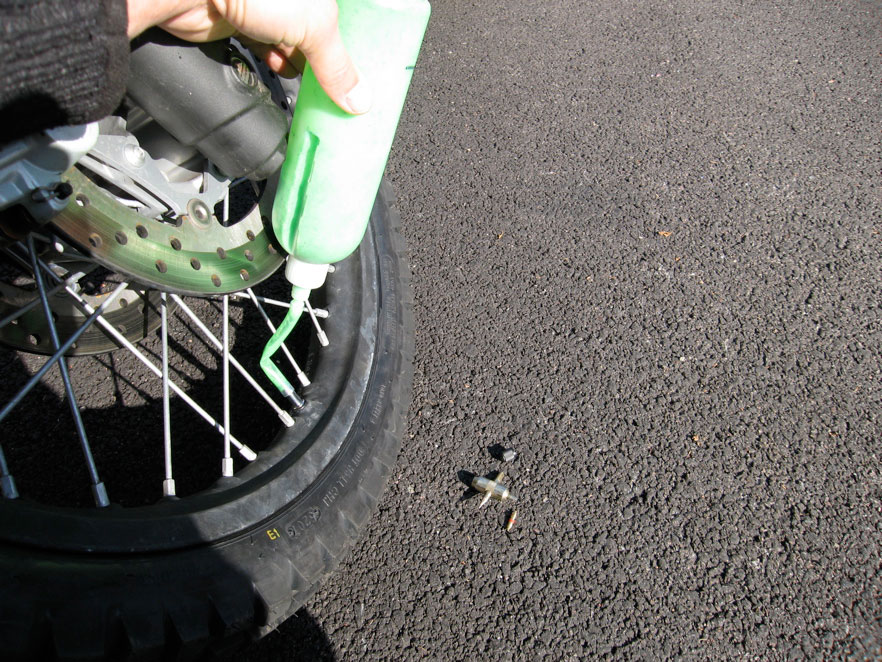
Once the bead ‘catches’ you’re on your way and you’ll hear the long-awaited creak of a tubeless tyre easing over the rim’s lip with that satisfying pop. Now screw the valve core back in and pump back up to normal pressure. I also added half a bottle of Slime (left) as a safety measure. Doesn’t always work, as I found on my desert car, but still a good idea.
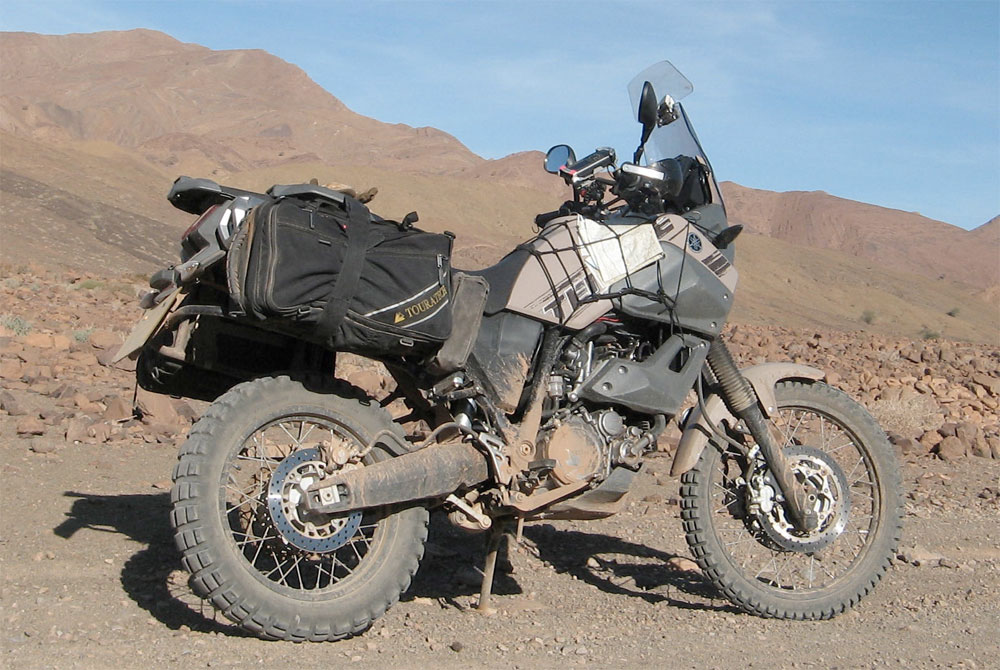
With no air loss over a few days, I went to Morocco as planned.
Summary after 4000 miles in Morocco
For what they are TKCs are great road tyres, you forget they’re knobbly and on the dirt they manage fine, even at the road pressures I used. I’d use them again except that I don’t like to use the same stuff twice; it’s good for the book. I also forgot I was running on experimental tubeless and should have been monitoring the pressures more frequently (this was before TPMS). Winding around off-piste on the way down to Erg Chebbi I did think, heck these shallow-knobbed, road-psi tyres are gripping unusually well in the sands! Turns out the back was down a bit but the front was way down – 10 psi. Amazingly I didn’t notice on the road.

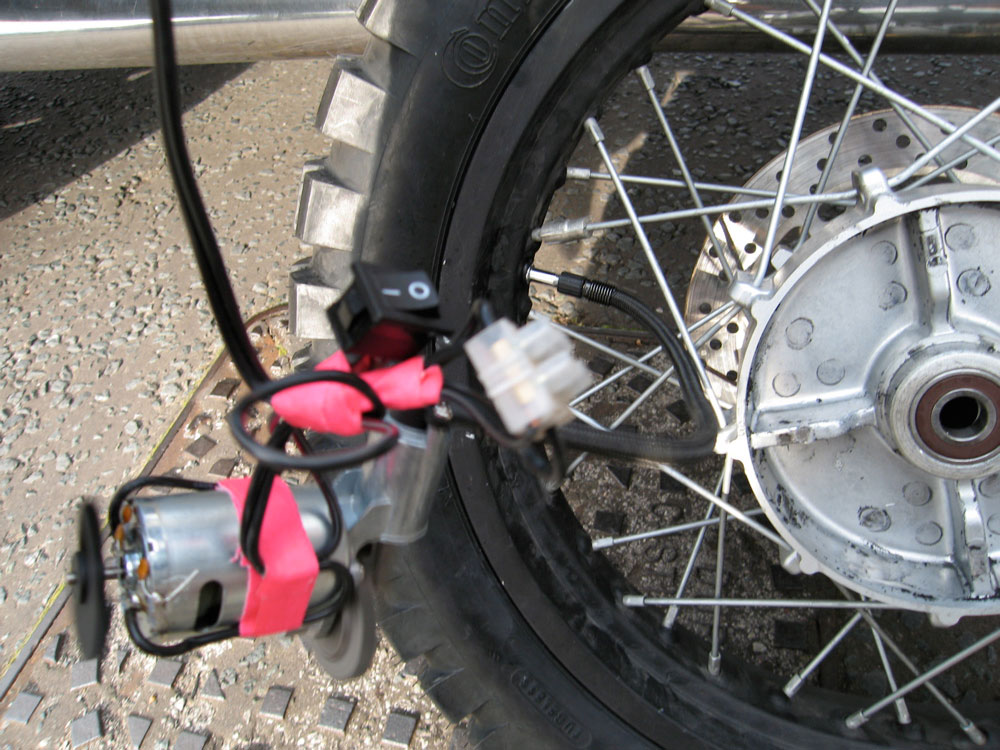
On pumping up (the stripped-out £9 compressor pictured right worked fine) I also noticed a tell-tale spurt on the front tyre where the Slime fluid had leaked out the sides (left) as presumably, I hit washed-out creek edges on the Col Belkassim track the day before. The rim wasn’t damaged so this suggested that even on moderate impacts (or possibly too-low tyre pressures) the lack of the ‘safety lip’ (see graphic top of the page) was allowing the tyre to collapse into the well or somehow lose its grip on the rim and so lose pressure; handily this was exposed by the Slime stains.

Whatever the cause, it was time to scoot over a couple of hundred miles to Bikershome in Ouarzazate, put the tyre on the operating table and then probably slot in a tube. Unfortunately, my urge to tick off a few tracks on the way went too far and I found myself up the gnarly Tizi n Ouli Ousir) with numerous problems including a flat front. I’d just ridden over some barely rideable rocks following a day of rocky tracks, and in all the excitement hadn’t kept up with the front tyre’s slow leakage (TPMS would have solved this). I imagine the under-inflated tyre transferred the sharp shocks to the rim while banging over the rocks; it, in turn, got dinged enough to lose pressure. Luckily there was one bar on the mobile if I stood on the right spot and Peter from Bikershome came to the rescue that night.

Back at Ozt, I’d have liked to have tested the wheel underwater to see exactly where it was leaking, from the rim/tyre edge or out of the spokes, but the dinged rim would have flawed that experiment. I peeled off the 5200 mastic with unnerving ease. Tellingly, there was some very slight Slime seepage under the glue in places. I tightened up some spokes and Peter flattened the ding with a mallet, cleaned it up and slotted in a tube. I also discovered the vital 14mm Allen key I had to buy especially to remove the front wheel (it seems not to be included in the OE Yam toolkit) had fallen out of its resting place. Most of my trips have these ‘moments’ but deary me, it was not my day!
So, what have I learned? Well, on the dirt a thin-walled front tubeless tyre can have tough time, taking the brunt of the impacts. I don’t ride hard, especially when alone, but on a long trip, there’ll always be times when you take a hard hit – rock, pothole, whatever – that you don’t react to quickly enough. I now think a safety lip on the front is important up to the point where a front rim gets dented. Then, unless you can bash it back you’re stuffed and will need a tube. After this episode, I continued and watched the tyre pressures more closely and kept them at near road tyre pressures. Moroccan tracks are mostly rocky anyway.
As has been mentioned on the old HU discussion thread, for some reason tubeless 21-inchers have a bad reputation with holding their air. Could it be the relatively narrow tyre profile of a 21-incher in relation to its height (for the same average tyre carcass thickness) allow it to ‘cave in’ under hits where a wider front – typically a 19-er – will take a hit ‘flat’ and maintain the seal? Also, 21s rarely have the safety lip found on the back
Would the Tubliss liner mentioned above have faired better? One imagines yes, and that along with keeping tabs on tyre pressures (TPMS!!), my 5200 sealing was possibly not good enough. A Tubliss liner was the next thing I tried in 2012, then for the last time in 2019.

I’ve been there, in the bush and out of tubes and patches. This is why tubeless is a good idea and it’s a shame that in Morocco I didn’t get the chance to establish where the leak was on the front, sides or spokes, but at the time I had a job on.
The back tyre held up fine, kept its pressure following early loses, and has 5mm left after 4200 miles (left) so it looks like it would have lasted up to 6000 miles. Not bad for a TKC. The front had plenty of tread left.
