Note: I rushed this job below and had a manageable slow leak from the 17, a meltdown on the 19 front arriving in hot Marrakech (fitted a tube), but the 21 I left at home has held its air fine for months. In Marrakech the mechanic re-sealed the rear in between my trips, cleaning then applying a continuous band of Puraflex. He’s doing the same to my 19 front. Summary: technique works if you take your time – days of curing – and do it right.
Note: I rushed this job
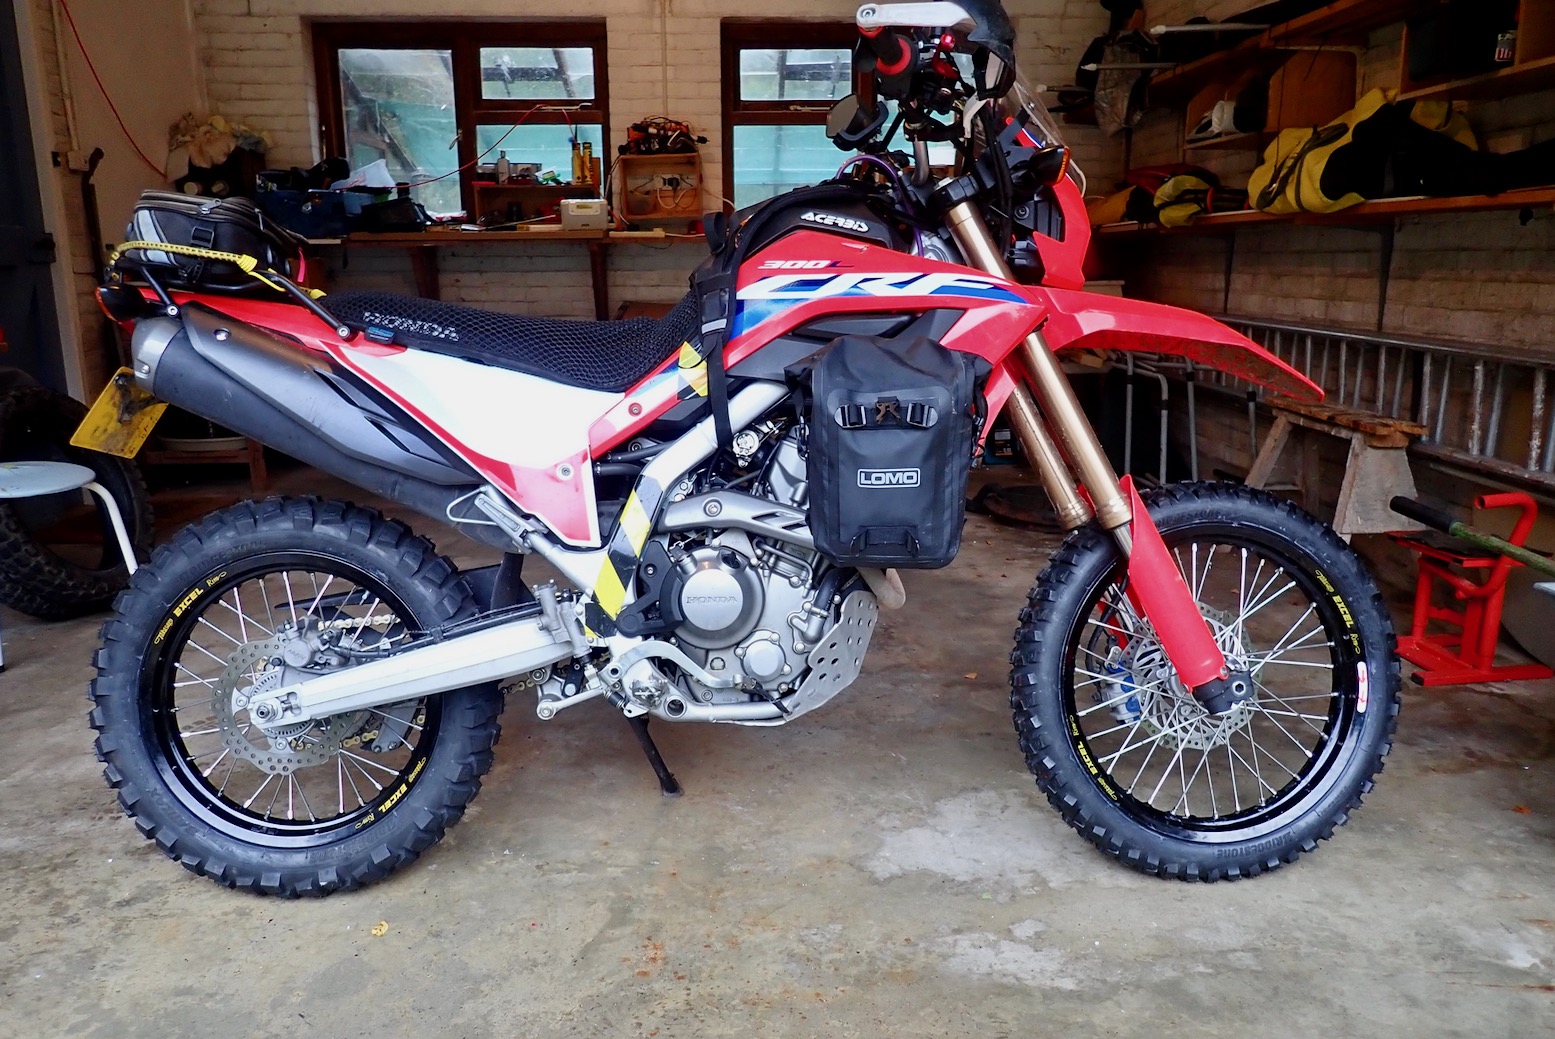
Rims are smaller but the 300L is no lower and rests the same on the side stand
It took so long to get my three new tubeless wheels made I’d forgotten quite why I did it. Oh, yes, the clear desirability of tubelessness, plus some experimentation with wheel sizes, notably a 19-er front which is 38mm less tall, 7mm wider and the same weight as the stock tubed wheel. Wheel builders seem to have long lead times, rims are not in stock, custom spokes need to be made and holiday needs to be taken. Once everything was in place and my slot came up, the actual job took a couple of days.
Waiting for that reassuring pop.
The Fly & Ride transporter was leaving for Malaga next week so I had to get cracking. Ideally I’ve have had a month or more to sort any sealing issues and get a feel for the new sizes. The 19-inch wheel arrived so I got stuck in but rushed it. I didn’t wait a day for the glue to cure, then fatally used slippery 303 UV Protectant to help mount the very stiff AX41. Works great on tubed wheels but I suspected it was a bad idea for MYO tubeless. Once mounted, when I spotted 303 bubbling out of a spoke thread I knew the game was up.
What a mess. Return to Go.
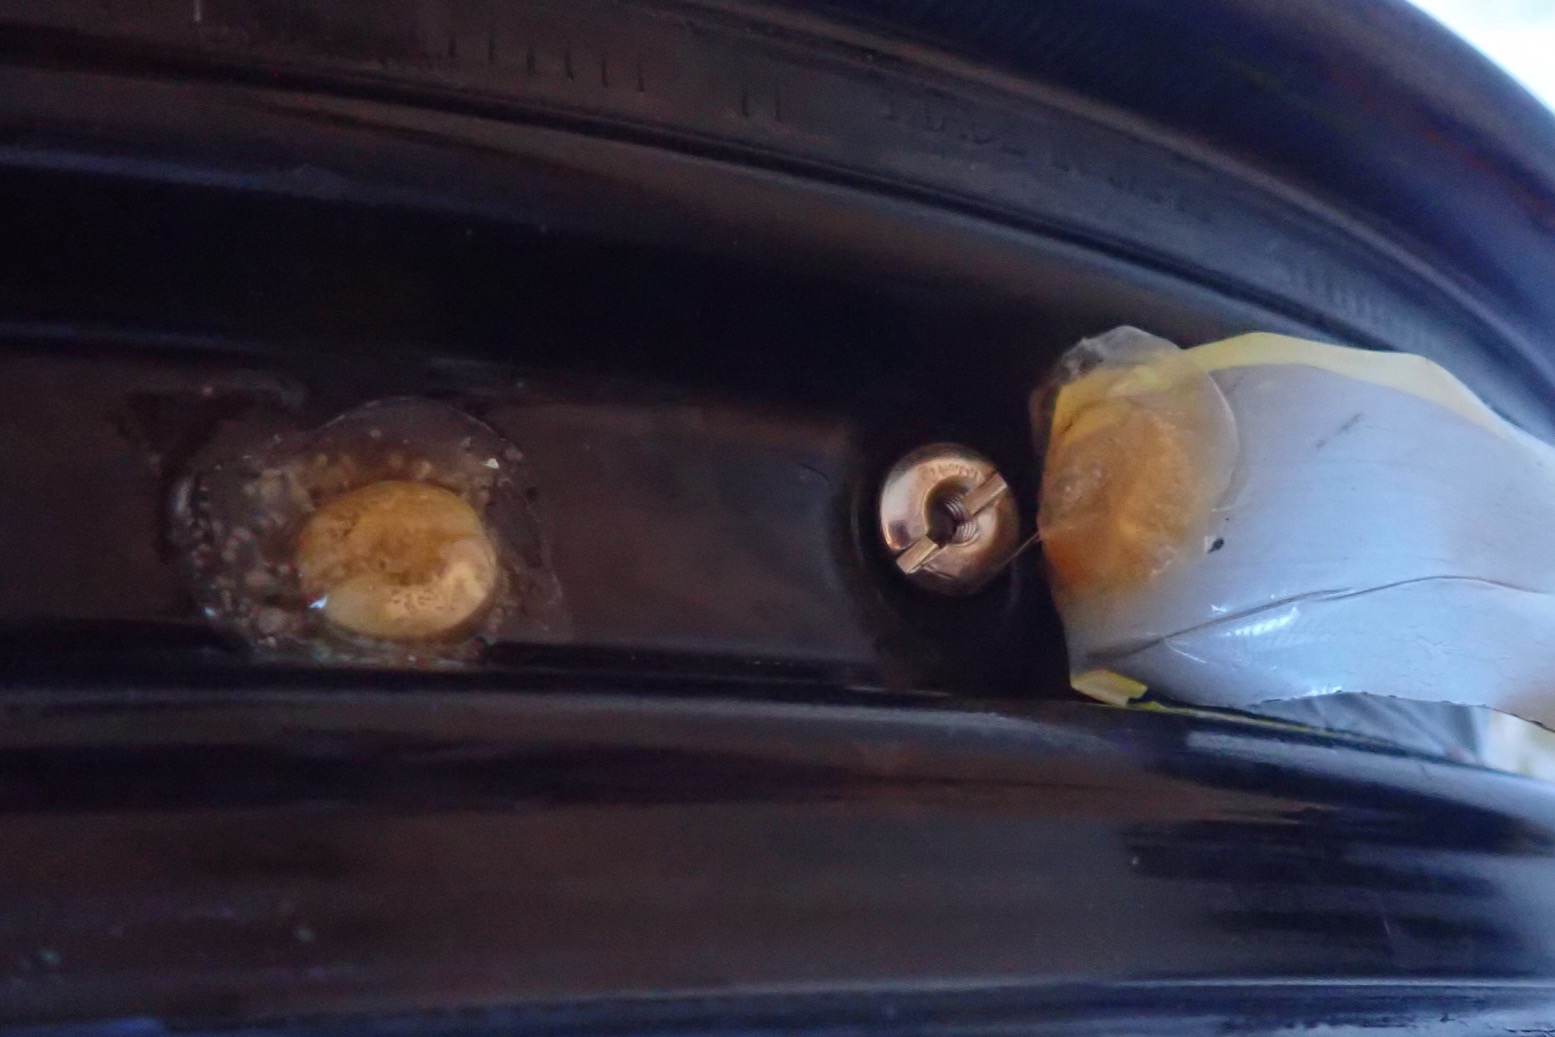
With the tyre off, my glue blobs had gone soft (left, from 303 contact?) and peeled off like soggy plasters. To be fair, one problem with this used 19-inch rim was that the pre-existent spoke holes (from a KTM?) had to be reamed and re-angled to fit the Honda hub. It made for bigger gaps so I tried to seal the outside of the nipples with Stormsure where water might run in, but should have done a better job all round. This is the gamble of marrying pre-drilled rims with non-matching hubs. Angle-wise, there can’t be that much in it, but in this case it was enough to misalign the pull of the spokes. Some wheel builders like CWC keep drilling patterns or templates to precisely drill a rim to match a given hub. This used Excel rim saved me £150 which I easily paid back with re-drilling and custom spokes. Oh well, the perils of experimentation.
Next day I needed to get my ducks in a row. Typically for me, I wasn’t repeating the proven system from the Africa Twin, but trying a new idea suggested by a mate. I spent a couple of hours in Poole sourcing components and by the time I got back, the other two wheels had arrived. After cleaning the 303 off yesterday’s mess, I started over.
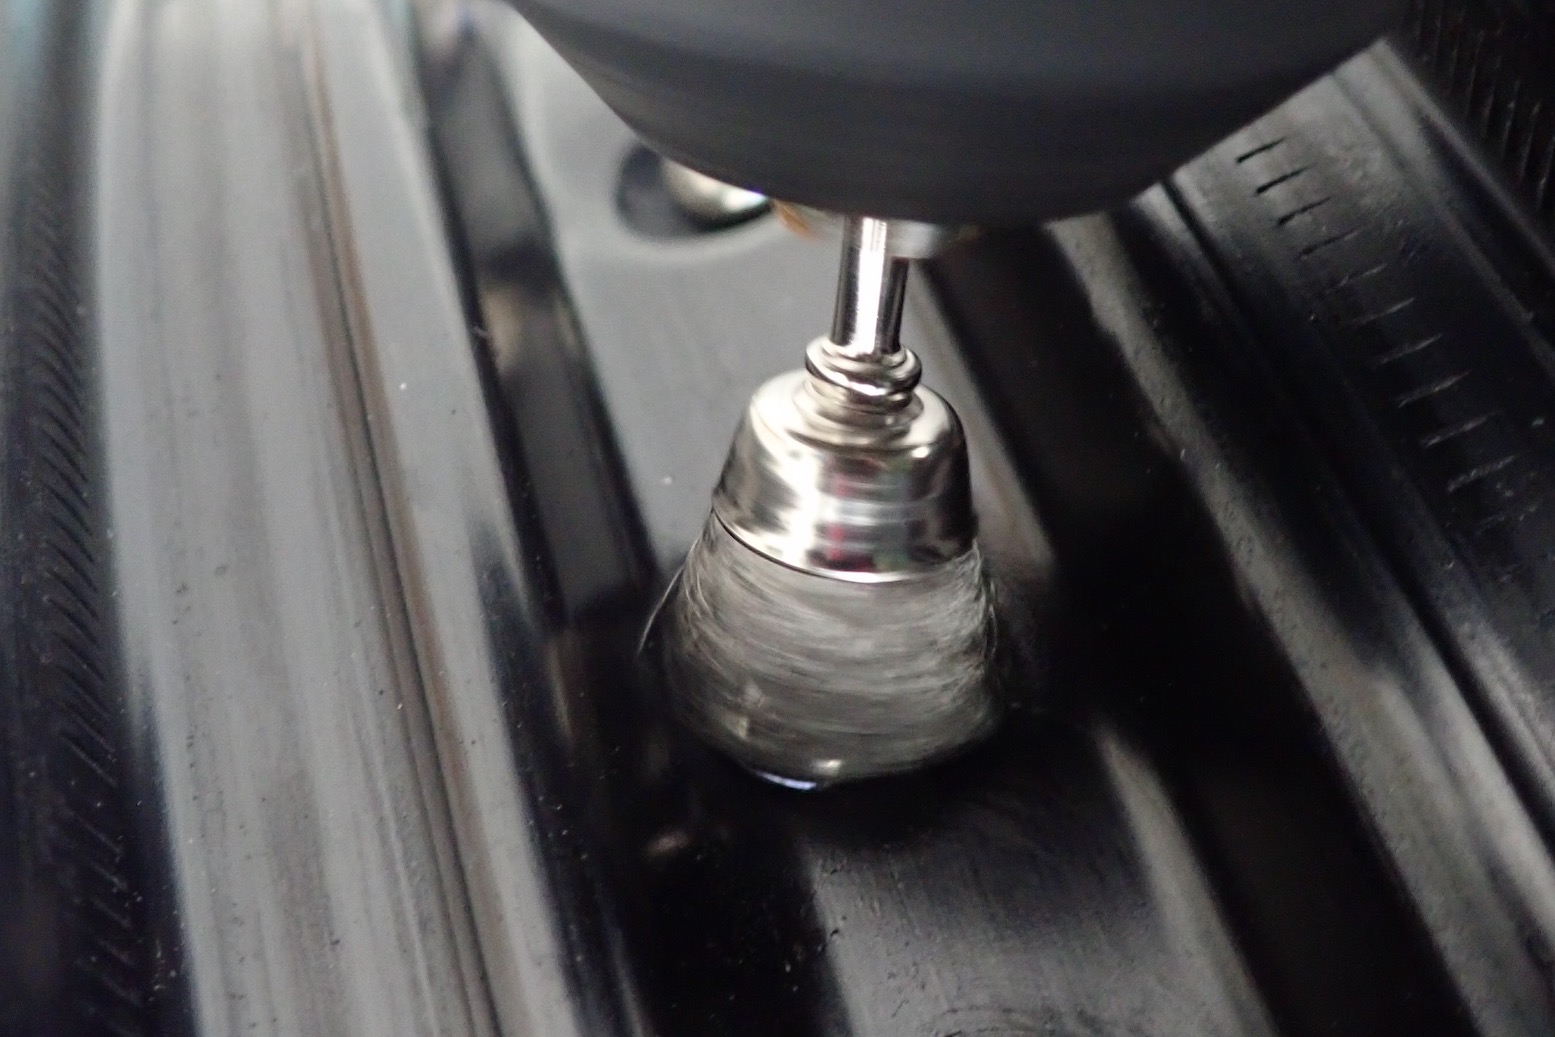
Wire brush each spoke nipple. Didn’t really do much as rims were in good shape but worth a go. Mini drill brushes on ebay.Rinse& DryRough up the rim’s black painted well with sandpaper then wipe it down with gas-o-lene.Mask off the bead and lip with tape (did this a bit late).Drip runny Superglue around the edges and into the thread hole of each nipple. Should pre-penetrate the cavities.
Spray the rims’ well with etching primer. Halfords were out so I paid £21 down the road. All for 60 secs of spraying ;-/ I presume the idea is the sealant sticks better to the primer than the glossy black rim.
Once dry, apply a blob of Puraflex 40 to each nipple. That’s 104 blobs for 3 wheels but still < half an £8 tube, fyi. Individual blobs as opposed to a continuous band like here are better for isolating leaks, as will soon be shown. But a continuous band ought to mean a guaranteed and complete seal. Decisions, decisions.Let the Puraflex cure overnight, light a few candles and hope for the best.
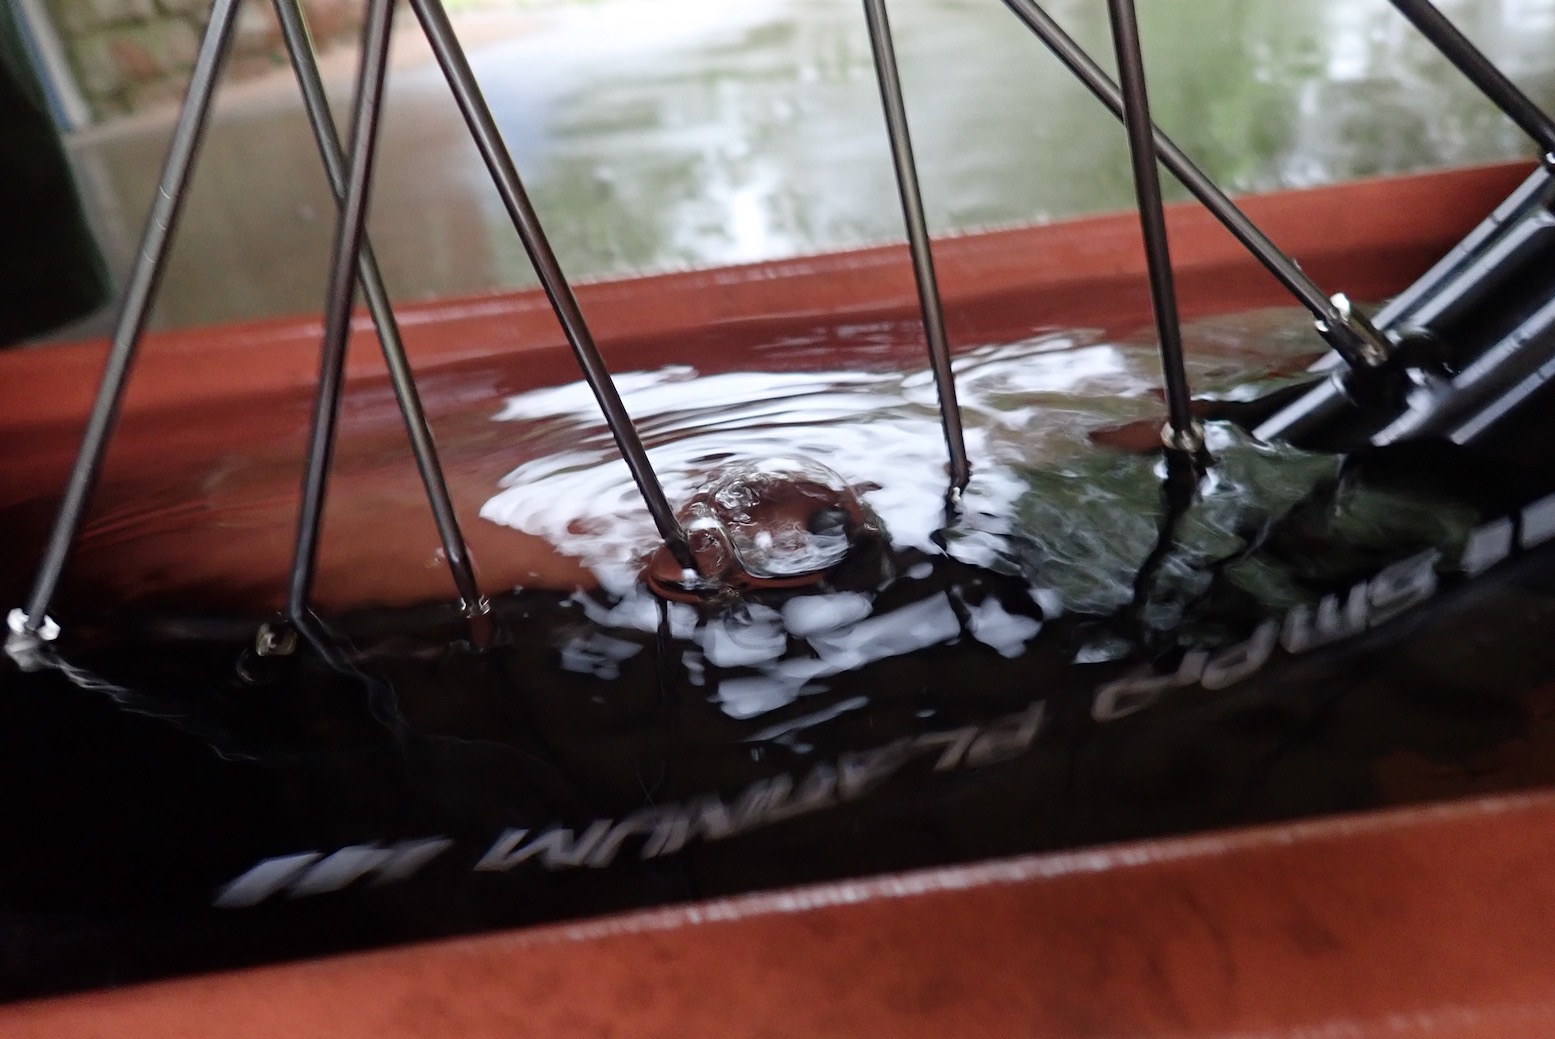
Next day I felt fairly confident I’d sealed all three wheels but had some heavy tyre wrangling to do. Sod it I thought, why not support the local economy and let my LBS mount the tyres. They’ll have a tyre machine and a compressor with enough poke to shove the tubeless tyres onto the bead before they know what’s happening. With 30 quid well spent, the tyres came out the shop rock hard. But would they stay that way? No, the two fronts were losing air. Casting aside seal damage during mounting, what were the chances of 104 blobs and 3 valves all being perfectly sealed? Only about 98% it seems. I turned the leaking wheels slowly through a trough of water and isolated a leaking spoke on each. I marked the spokes and whipped off the tyres, much easier now they’d been pre-flexed at the shop.
Bubbles of unhappiness
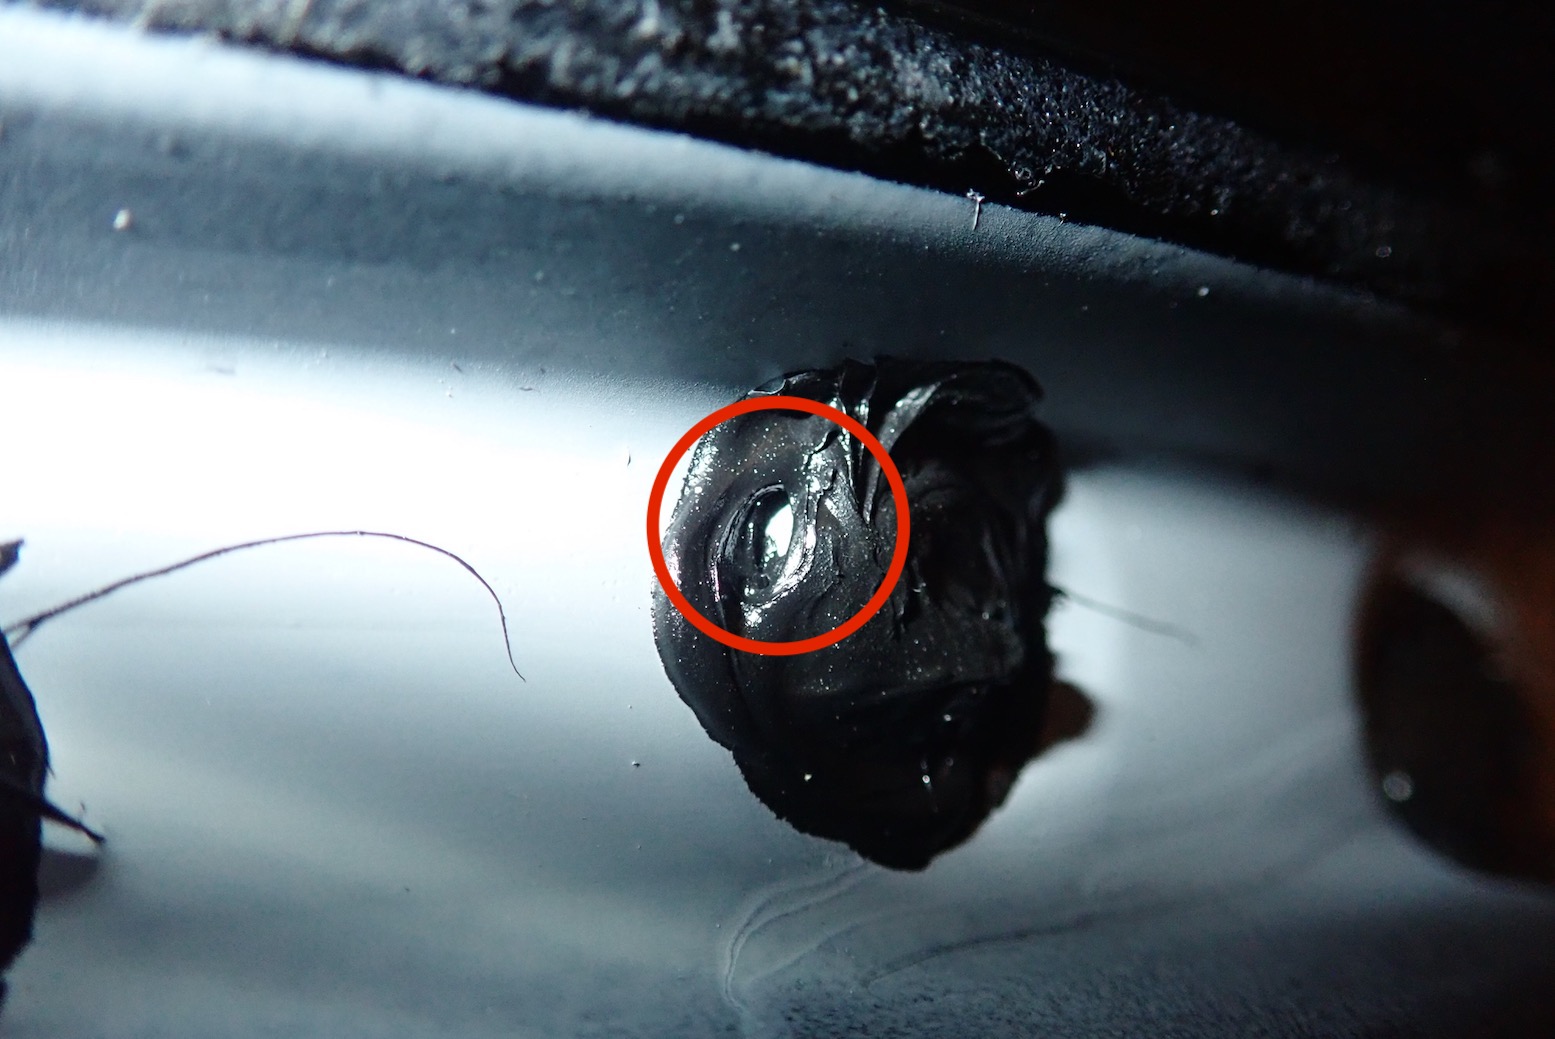
Seal gap
On the 19er I spotted a millimeter wide hole in the Puraflex (left) which the dab of Superglue underneath had also not sealed. I’ve not used Puraflex before – it’s not like a bathroom sealant and is PU, not silicon, based. Not sure what that means – the stuff was good and hard but had shrunk a bit as it dried. Perhaps the hole had opened up on curing, or perhaps I should have inspected each blob with a magnifying glass or given them all a pre-emptive second swipe of Puraflex once dried – that would take another day to dry. On the 21 incher I couldn’t see the hole under the corresponding spoke’s blob which underlines the idea of a second coat or even a continuous band. So I second-coated all the blobs and left it for another night. Weeks later the 21 (left at home) had lost just a couple of pounds so I’ll take that as a win.
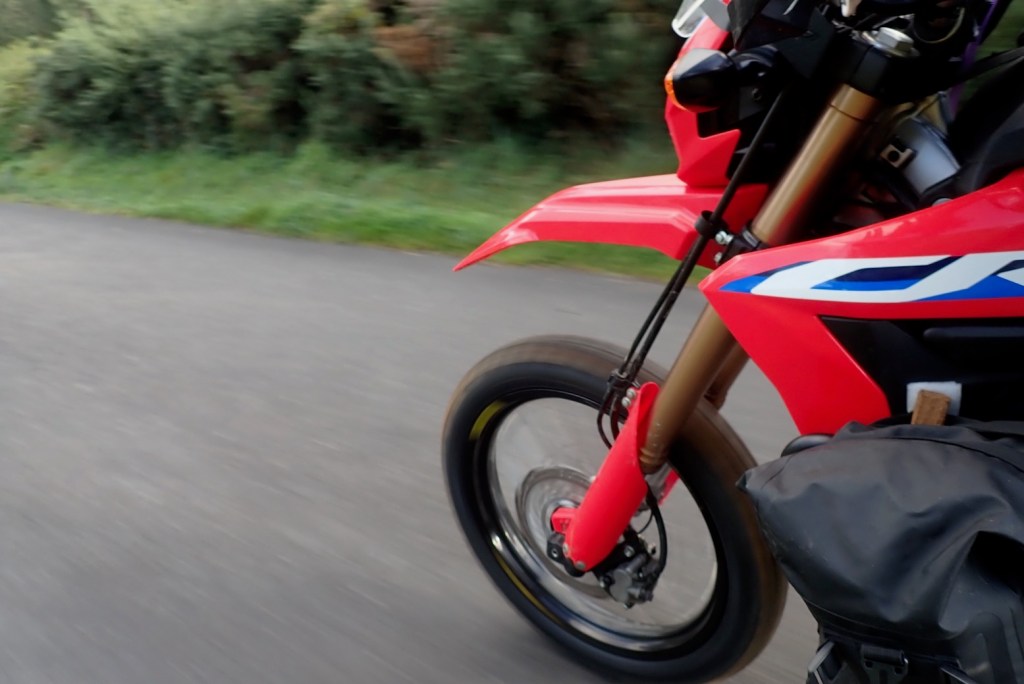
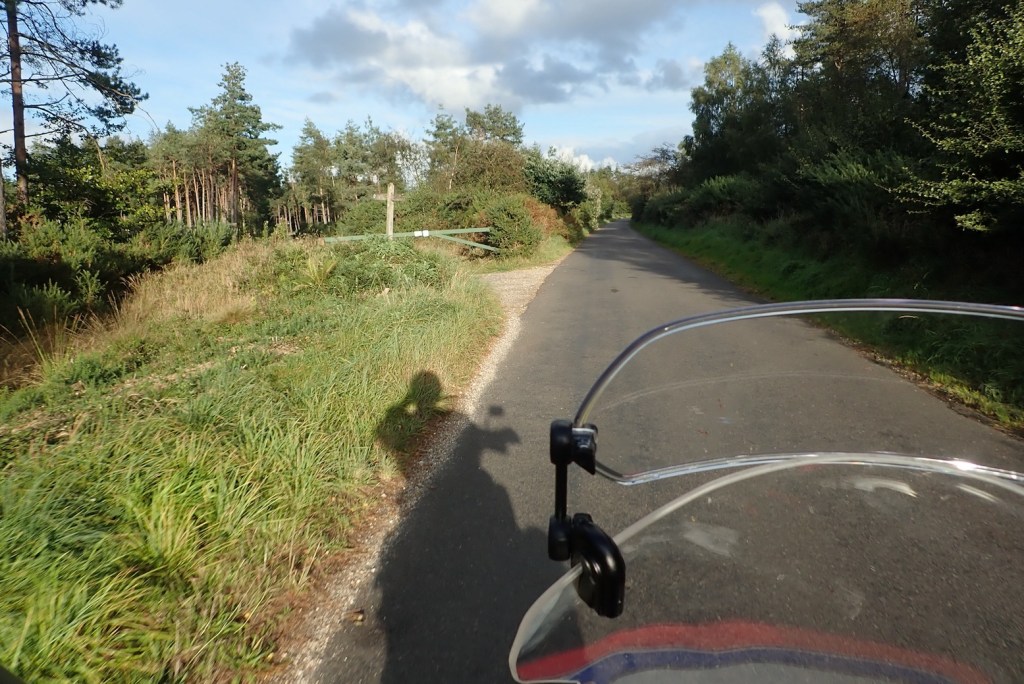
N-n-n-nineteenDorset pines
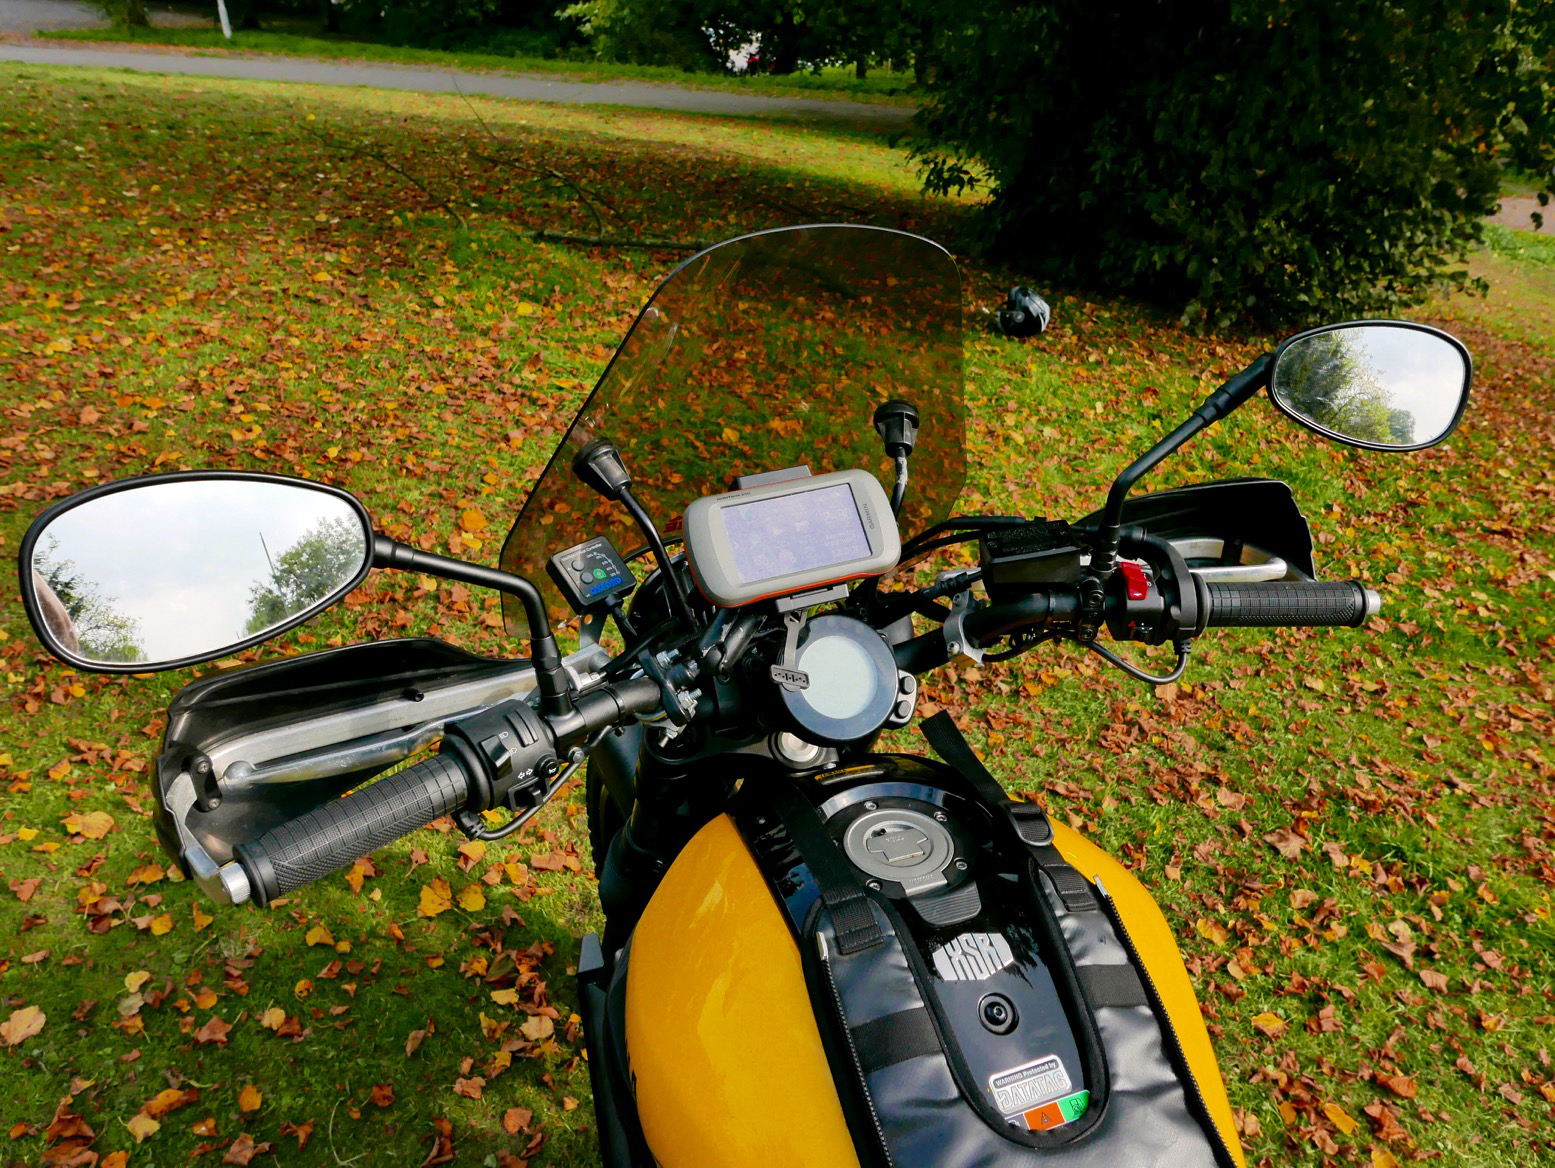
All bolted on and first thing I noticed was the bike leant the same on the side stand, so clearly was no lower. Not that bothered as it’s one less thing to meddle with and the narrow saddle means my feet touch down OK. I guess the AX41s have high sidewalls; good for off-road and rim protection. I went for a lovely evening ride. On the road the fresh tyres didn’t exhibit any anomalies, nor did the handling feel much different. I think it might take a more spirited ride through some bends to highlight any improvements in the steering. In Morocco I know just the spot, several in fact. The 19 is only 7mm wider than the 21, while the back 17-incher is the same as the stock IRC.
CRF300L 2023
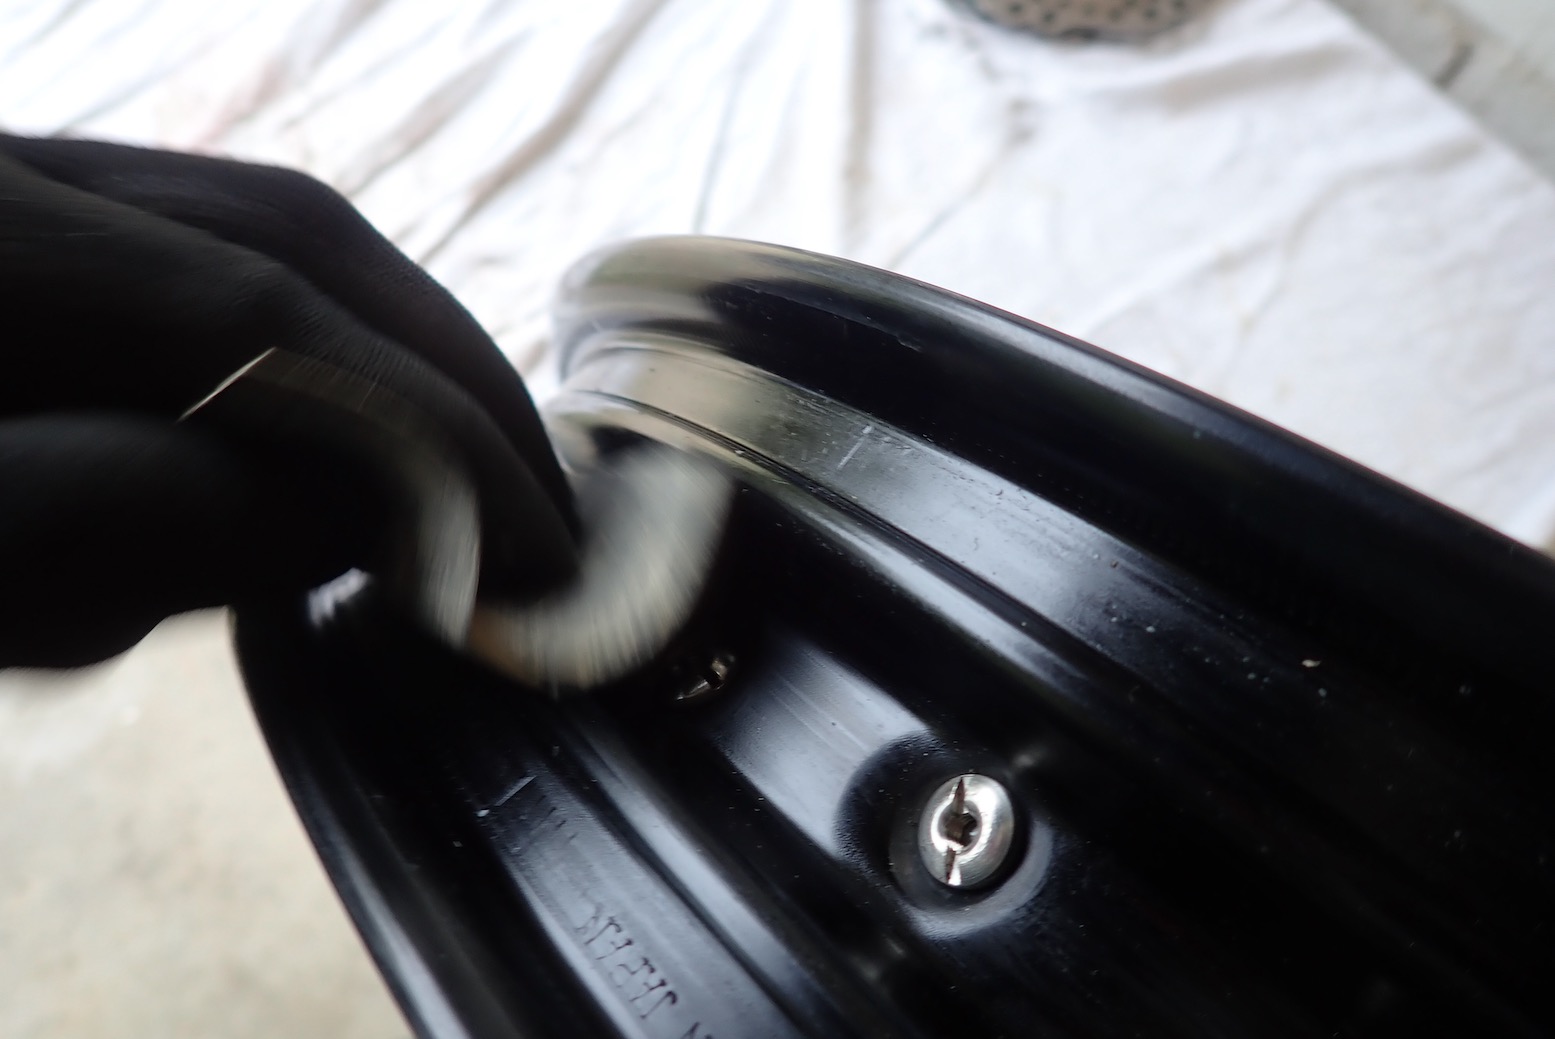
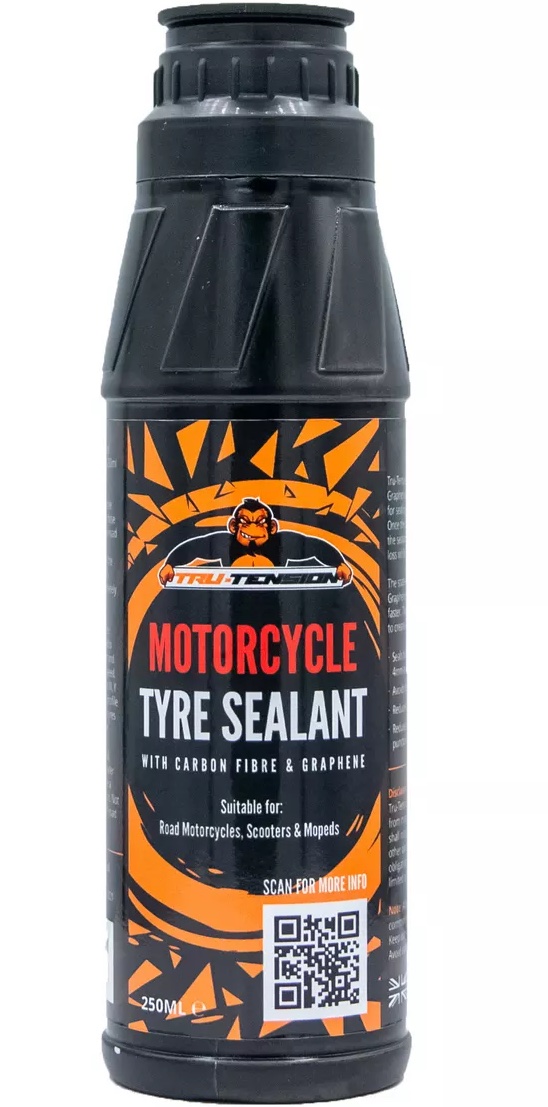
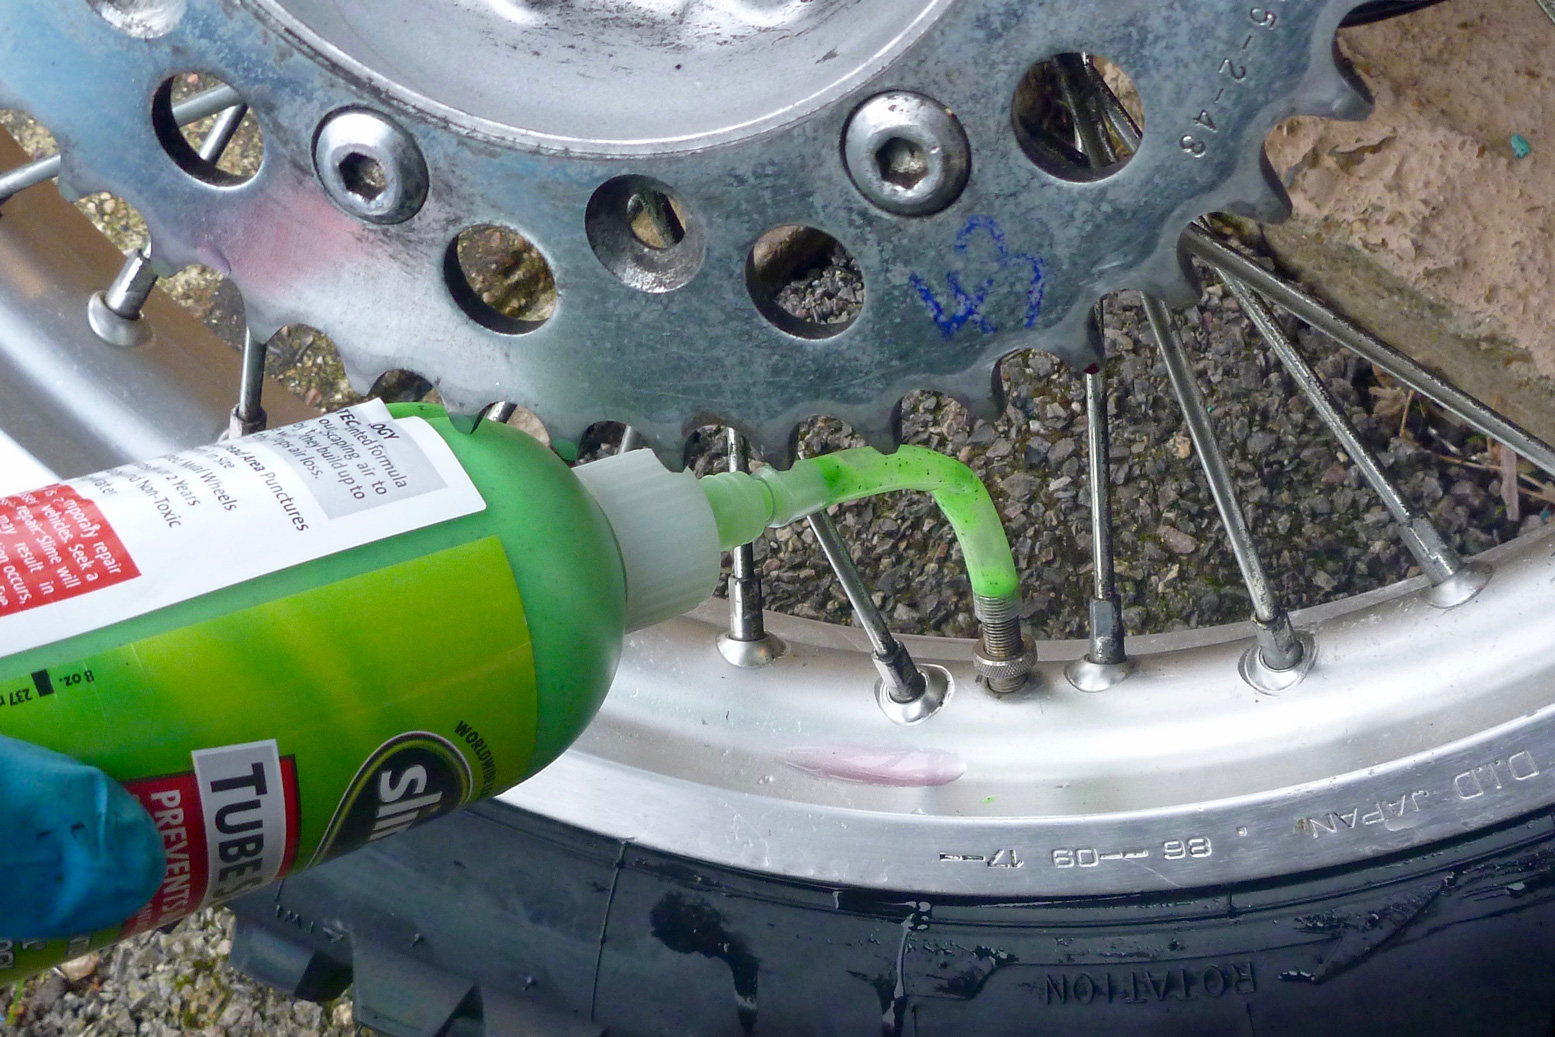
In Halfords I’d bought some Slime for later, but also carefully applied a shot of similar Tru-Tension tyre sealant (left) in the front wheel, squeezing it up into the valve set at 12 o’clock so it would dribble down along the rim’s well. This stuff contains ‘carbon fibre and graphene’ which are such cutting edge compounds I fell for it. Slime or similar have helped permanently seal other imperfect MYO TL jobbies, even though it shouldn’t be necessary if the job has been done well. I rode back to London and then on to Fly & Ride near Gatwick. Whatever fuel I picked up in Poole, the CRF (now with 2200 miles on the clock) belted along like it was on methanol, holding an indicated 70 much of the time. But both tyres were still losing a bit of overnight air so I may have to spend a day in Morocco sorting it all out. I’ve packed Puraflex, some more Slime and a pair of tubes and levers.
Robbo, a fellow MYO TL experimenter does wonder whether Slime etc can soften rim sealants. These goops work under pressure but also centrifugally, getting flung out onto the inside of the tyre where punctures occur, but away from the hand-sealed rim well where, in my case, it’s as needed. Much as Sixties psychedelic guru Tim Leary proposed that enlightenment and self-awareness must eventually be sought without the aid of drugs, so MYO TL should endeavour to seal without Slime. Tune in. Glue Up. Ride out.
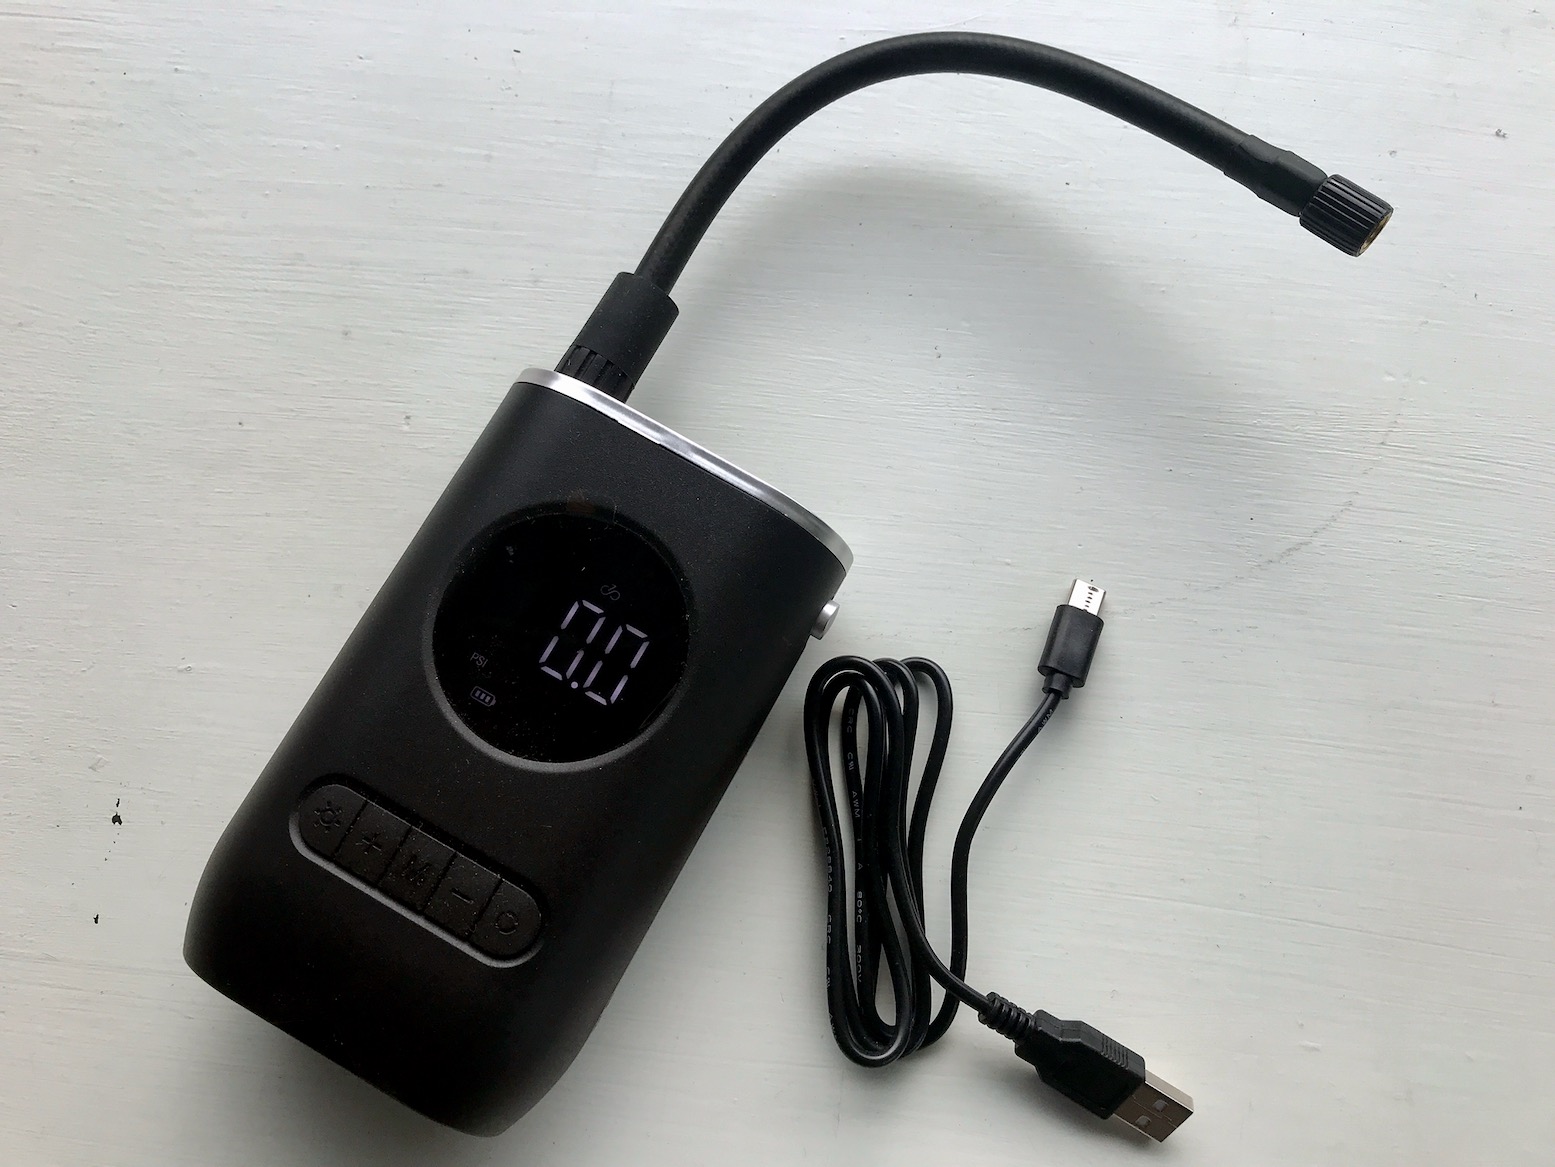
Best Rest Cycle PumpRechargeable lithium batt pump. £20
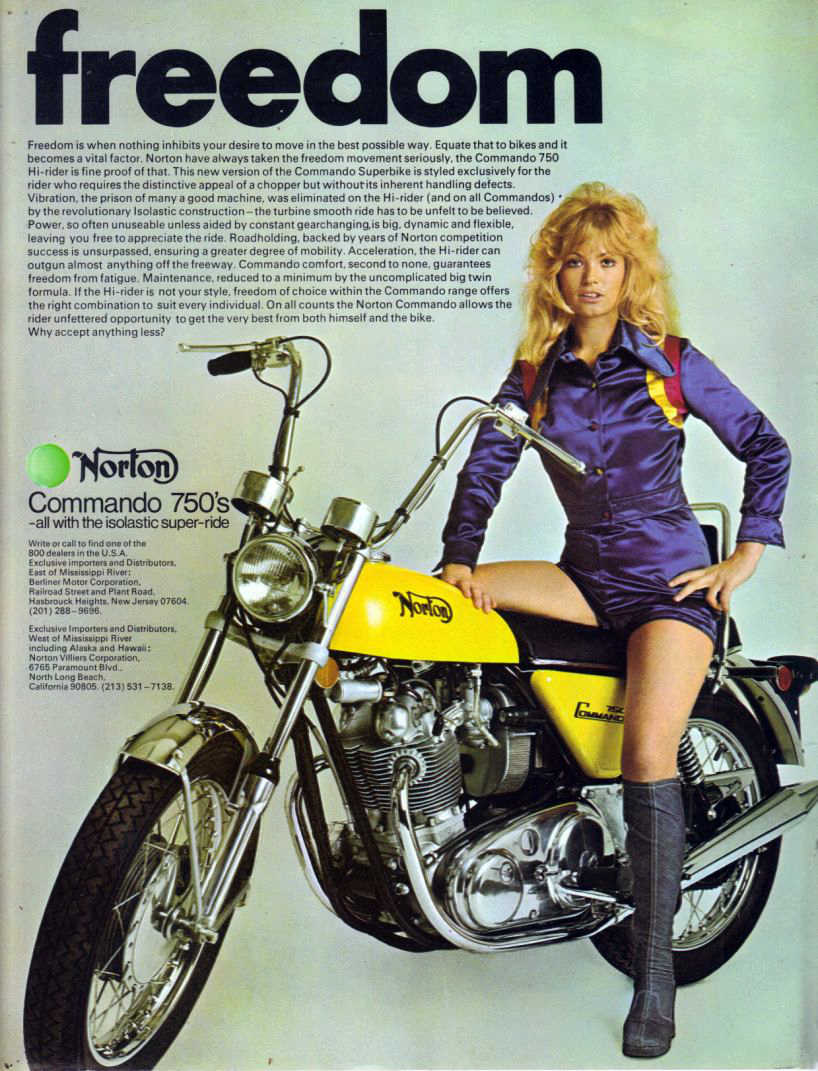
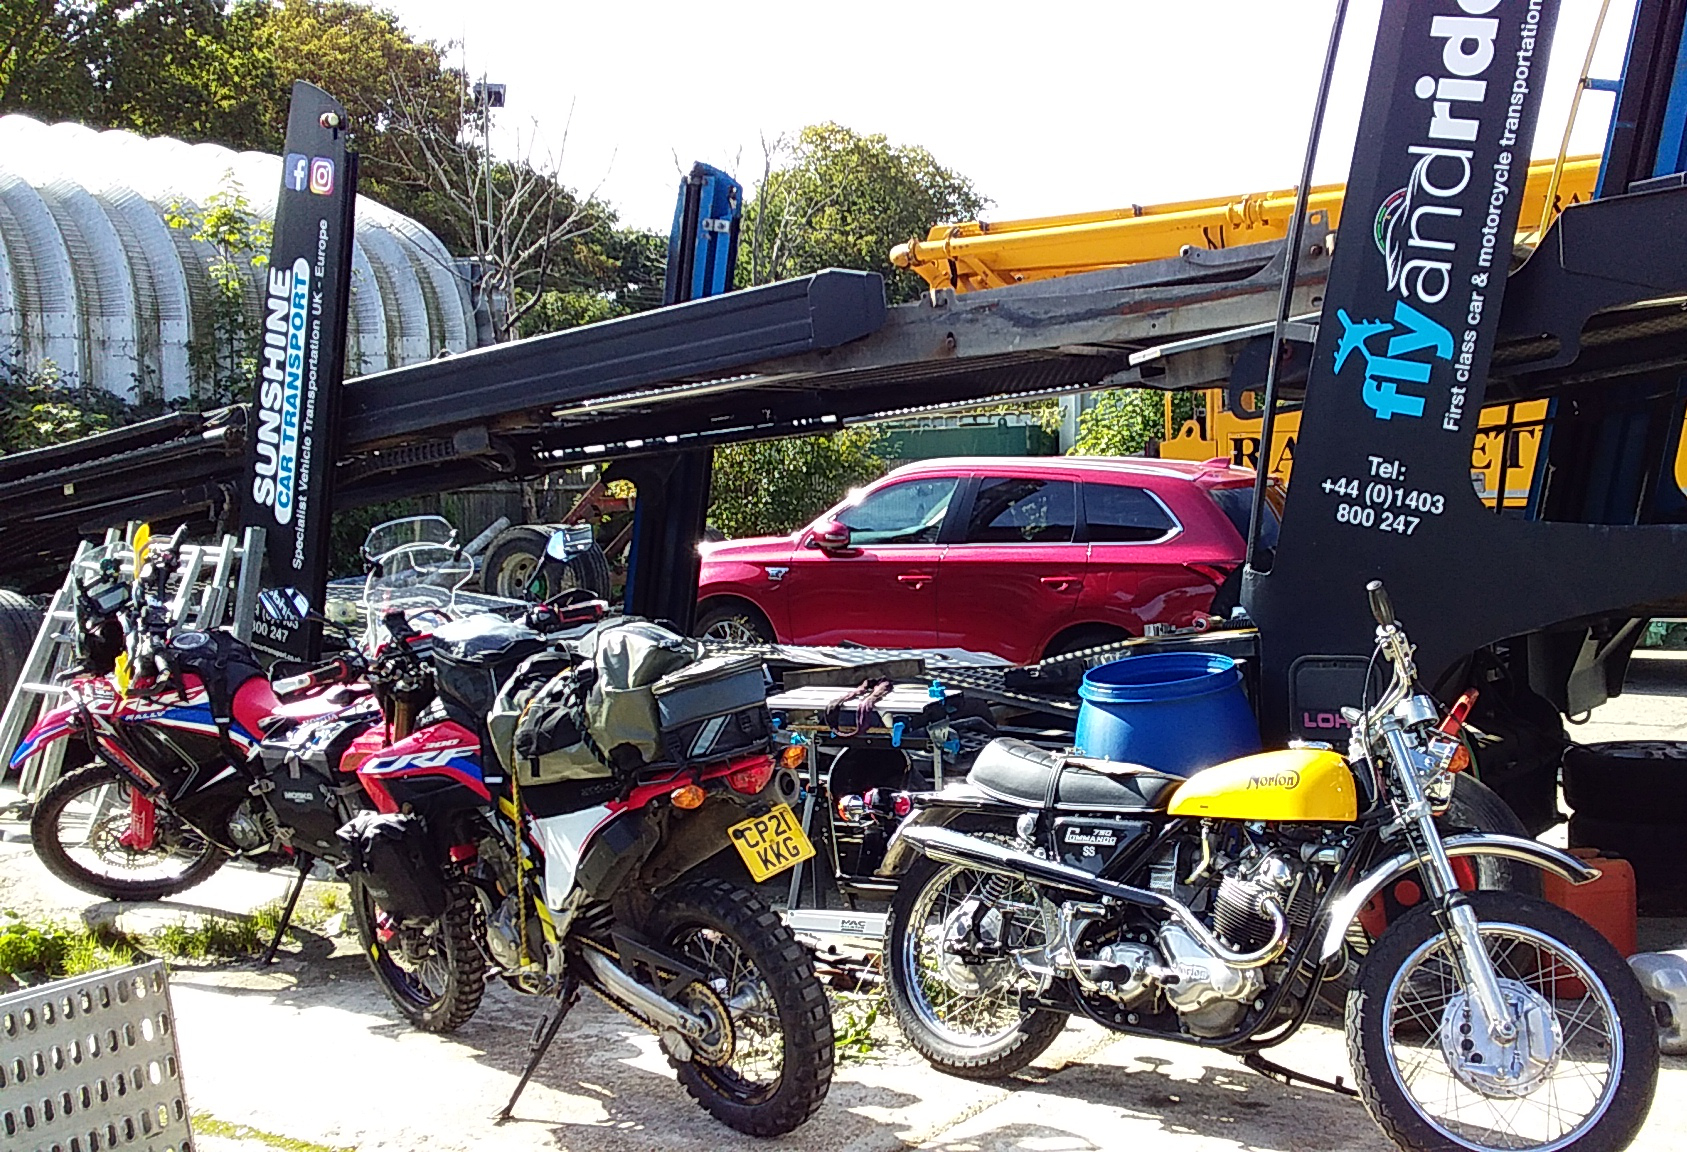
Robbo showed me a niffy USB rechargeable 4000MAH tyre pump (above right) which topped my overnight tyres up quickly. I have my aged 12-volt Cycle Pump packed on the bike, but if I’ll be topping up regularly until they’re fixed, the 20-quid hand pump off ebay will be easy to whip out and use each morning. Let’s make rumpy pumpies while the lithium lasts. I left my 300 in Fly & Ride’s yard alongside a cool ’72 750SS Commando. The period image on the left exists solely to highlight Norton’s questionable use of an apostrophe. It turned out the nicely set up 300 Rally also parked up belonged to another Robbo who was on my tour a year ago and by now is halfway to Dakar, or however far suits him.
So, a bit annoying to be flying out to Malaga next week to imperfect wheels, but what trip ever kicks off without some T’s uncrossed and I’s undotted? At least I have the means to fix it.
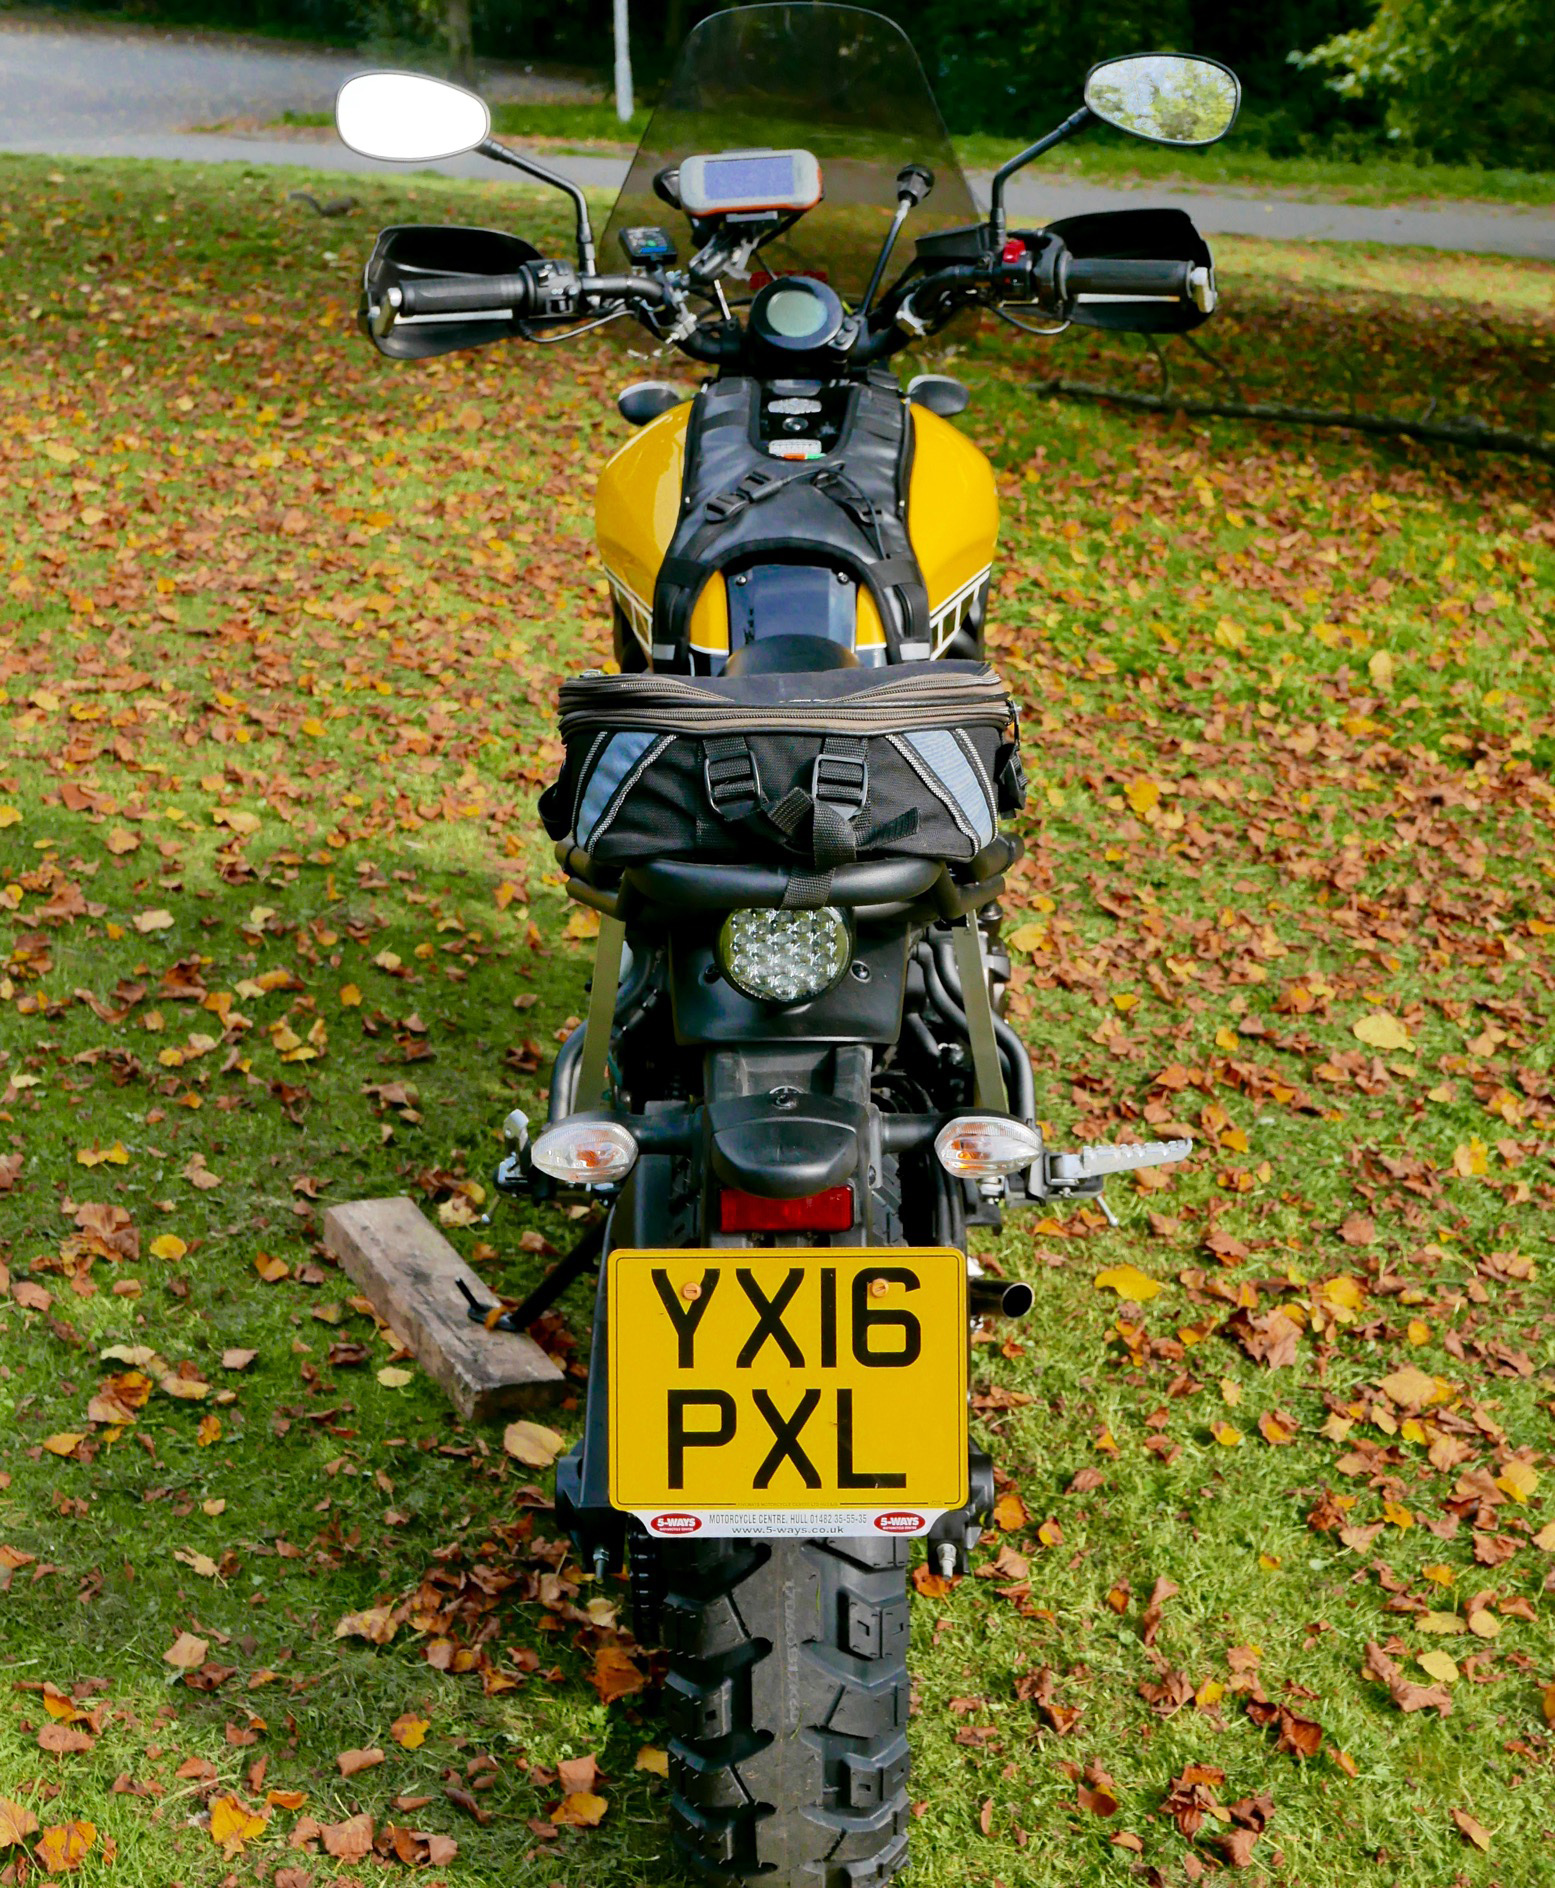
My XScrambleR sets off in a month for Morocco and, bar some luggage, is ready to go. Don’t think I’ve ever had a bike ready so far in advance.
Using some left-over or unused components, I fitted a Tuturo Chain oiler which I still think is the simplest and most effective way of getting this messy but necessary job done. It is, of course, especially handy on bikes without a centre stand where hand oiling the chain is a particular faff.
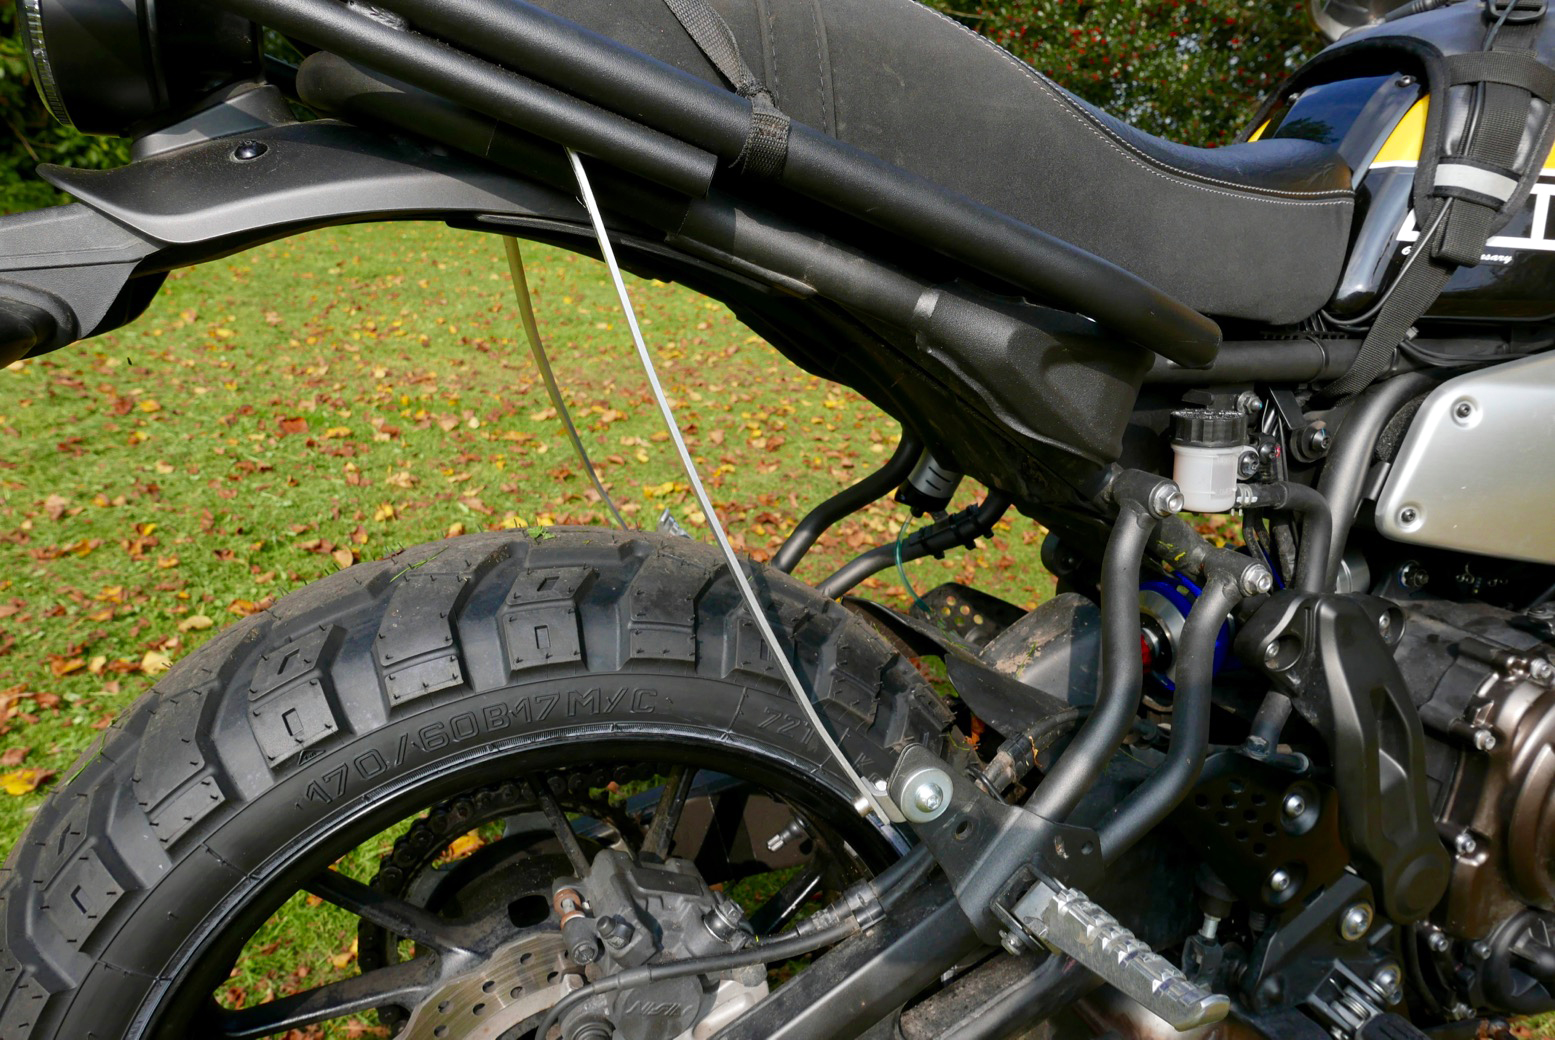
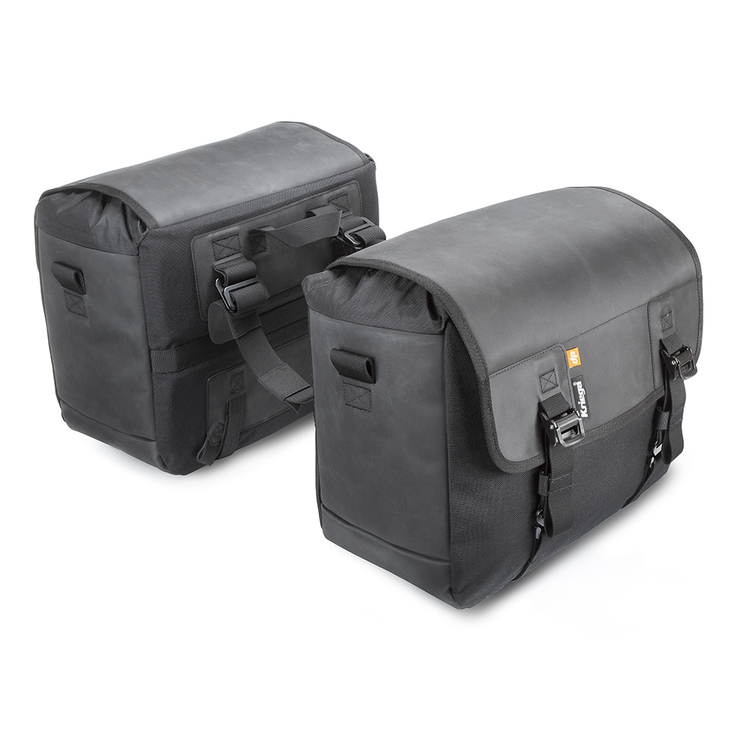
For luggage I’m going to use some simple Kriega Duo 36 Throwovers again, as I did last year on the KLX in Baja. The great thing with the XSR’s underpipe is that it’s right out of the way of luggage but bags still need something to stop them swinging into the wheel and chain. In the spirit of the Chouinard RURP, I’ve come up with RURTS (Realised Ultimate Reality Throwover Stay) an ultra-minimal side rack. The weight is taken over the saddle; the slim stays help locate the bags. If their reality ultimately turns out to be too realised, another stay from pillion pegs to the rear flashers will fix that. I’m sure they sell broomsticks in Morocco.
Once the holes were drilled the RURTS were another 10-minute roadside job, but lacking anywhere better than the kerb to work, I weakened and got my LBS to do the rest of the heavy jobs.
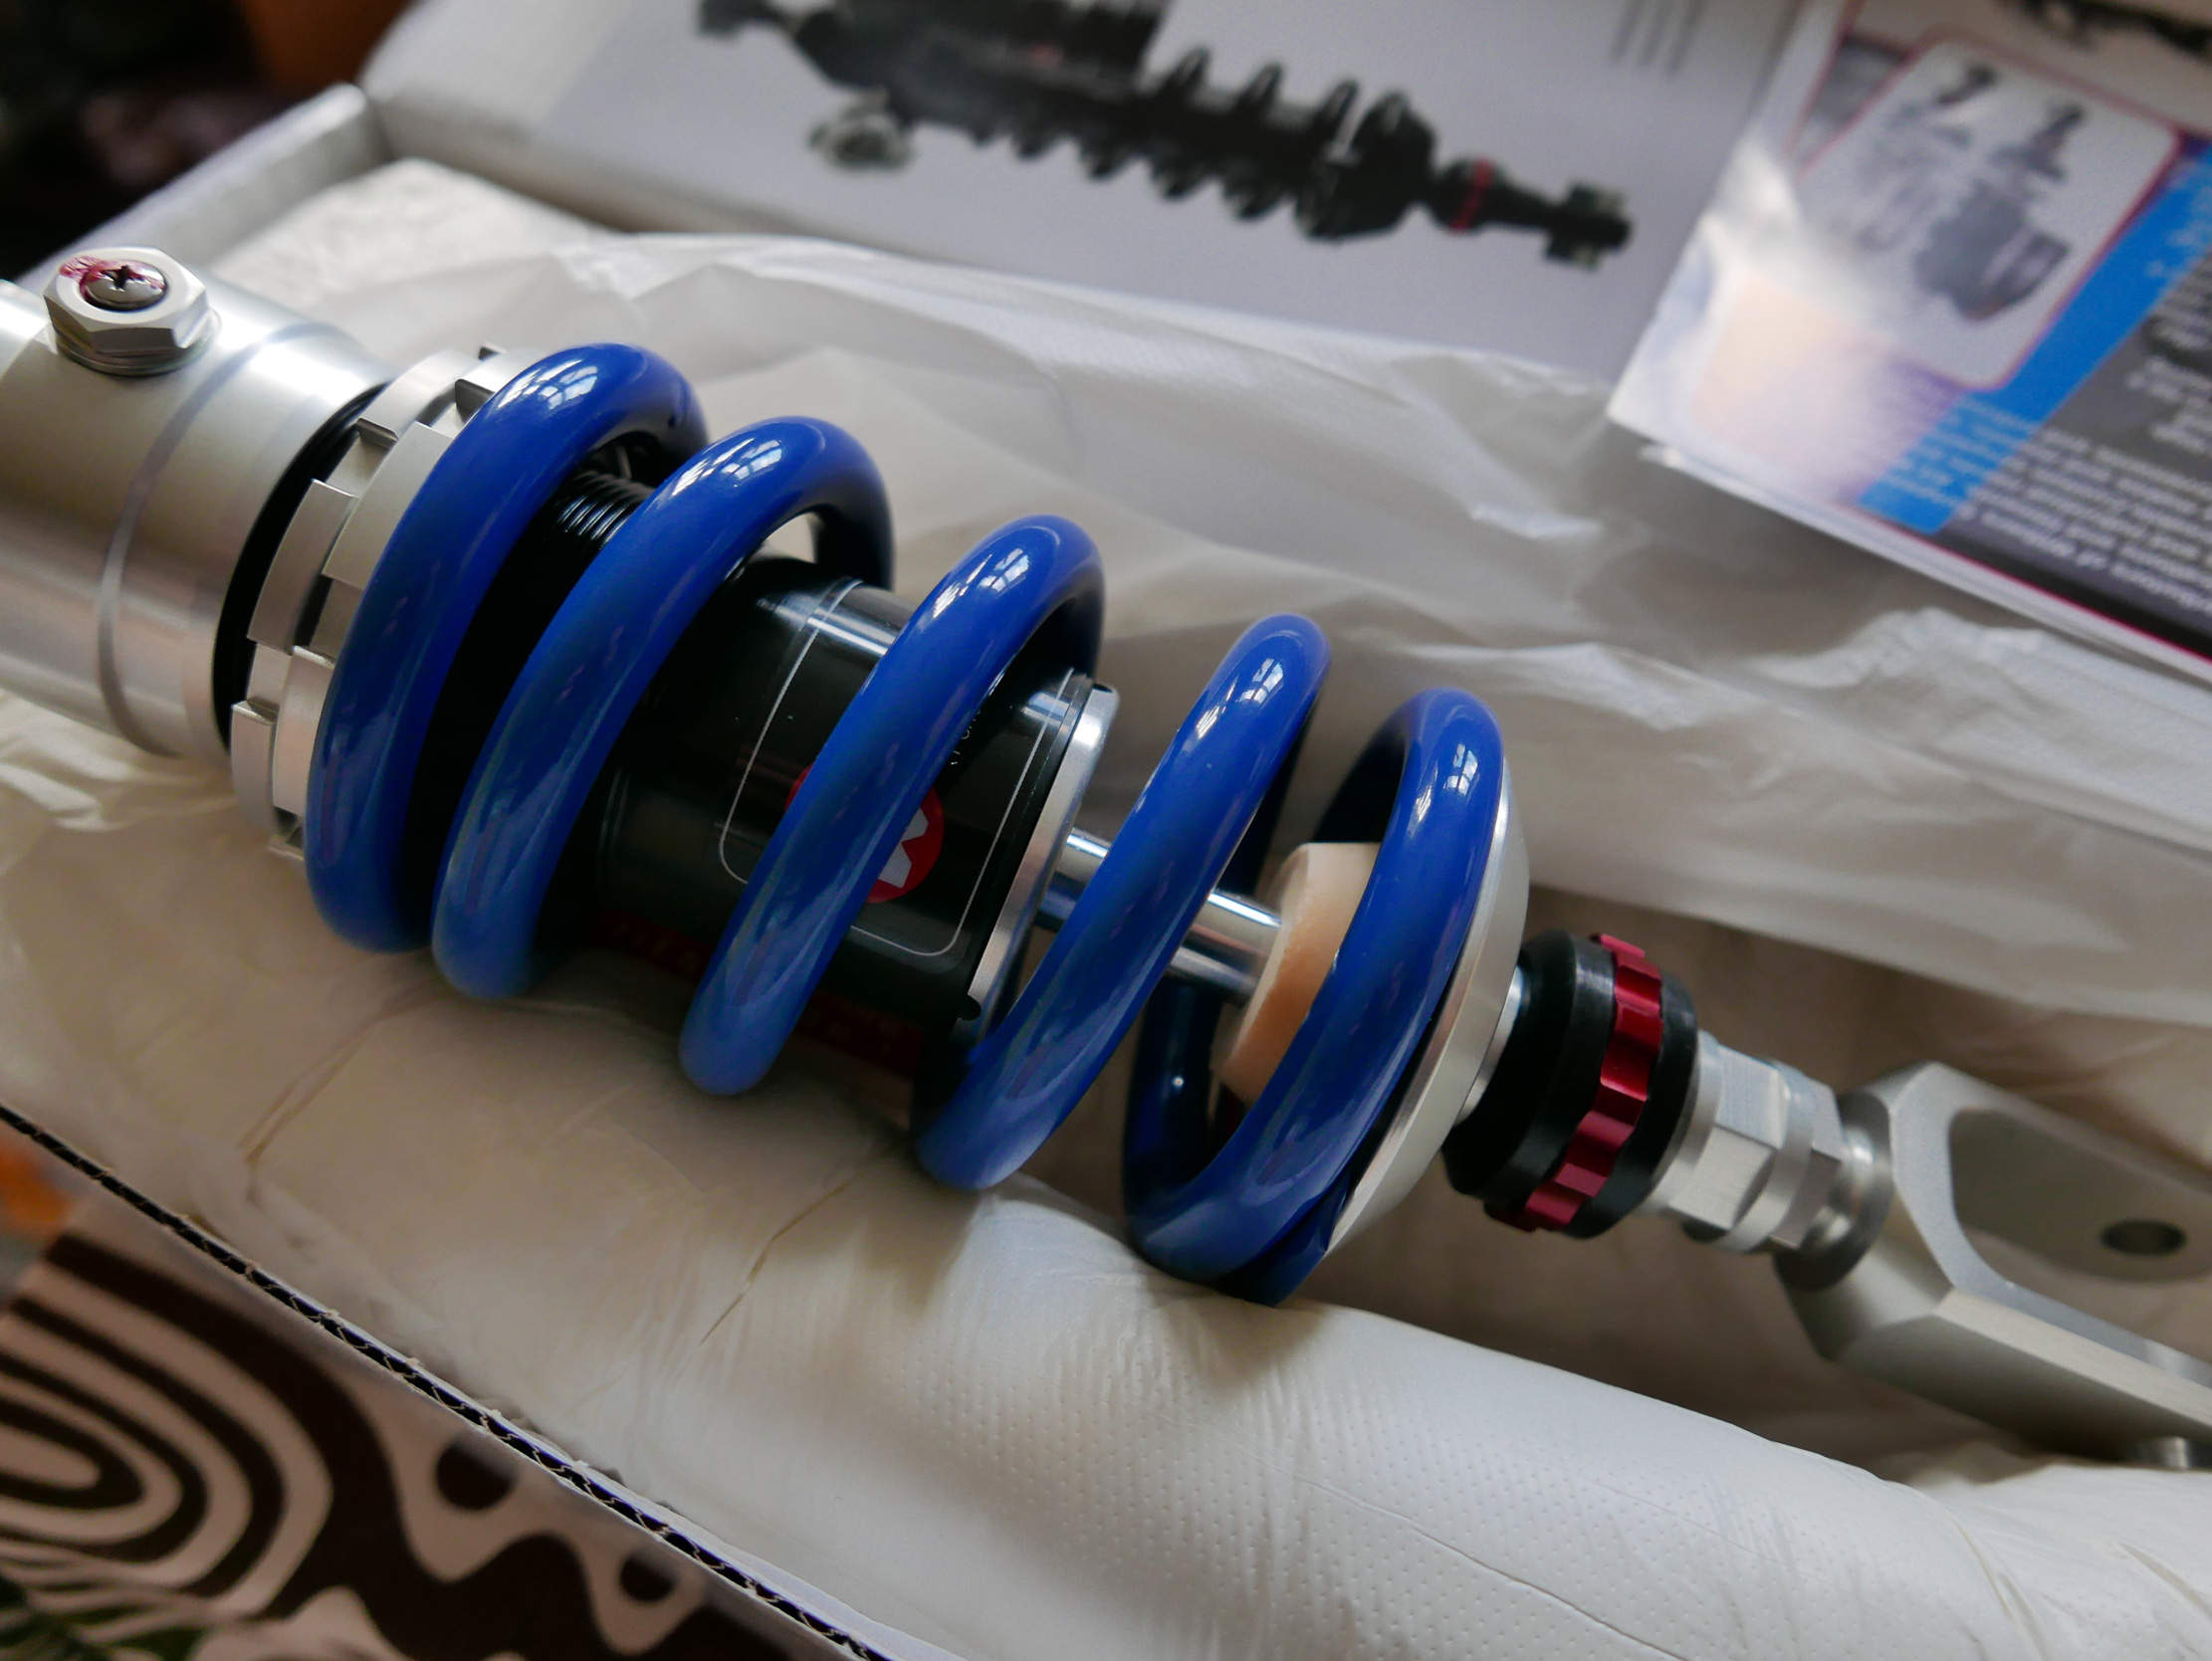
Shock The new wheel on the front has raised the bike 30mm, and the fork preloaders may help it stay that way. I was looking for a way to achieve a bit less than that on the back – partly with a taller tyre and partly with a longer shock. The OE shock is basic; it’s fine for very normal riding but only has preload rings. They are found used on ebay in their zillions. I preloaded it on the first run, but found it lacked any rebound damping to control it.
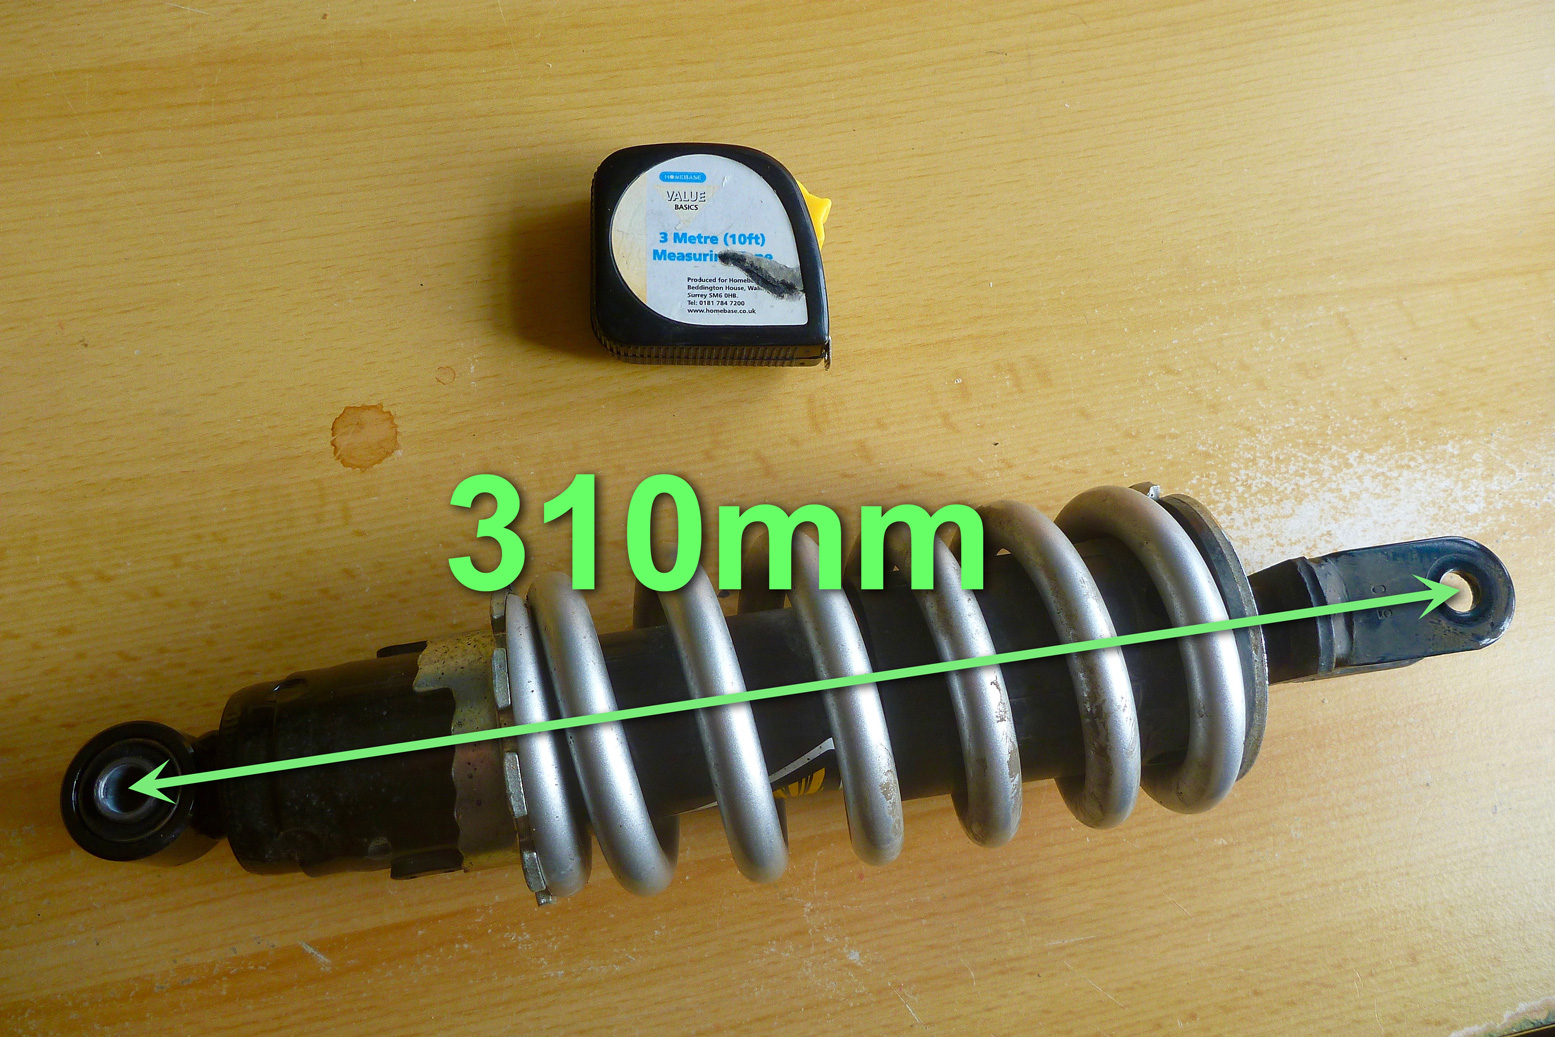
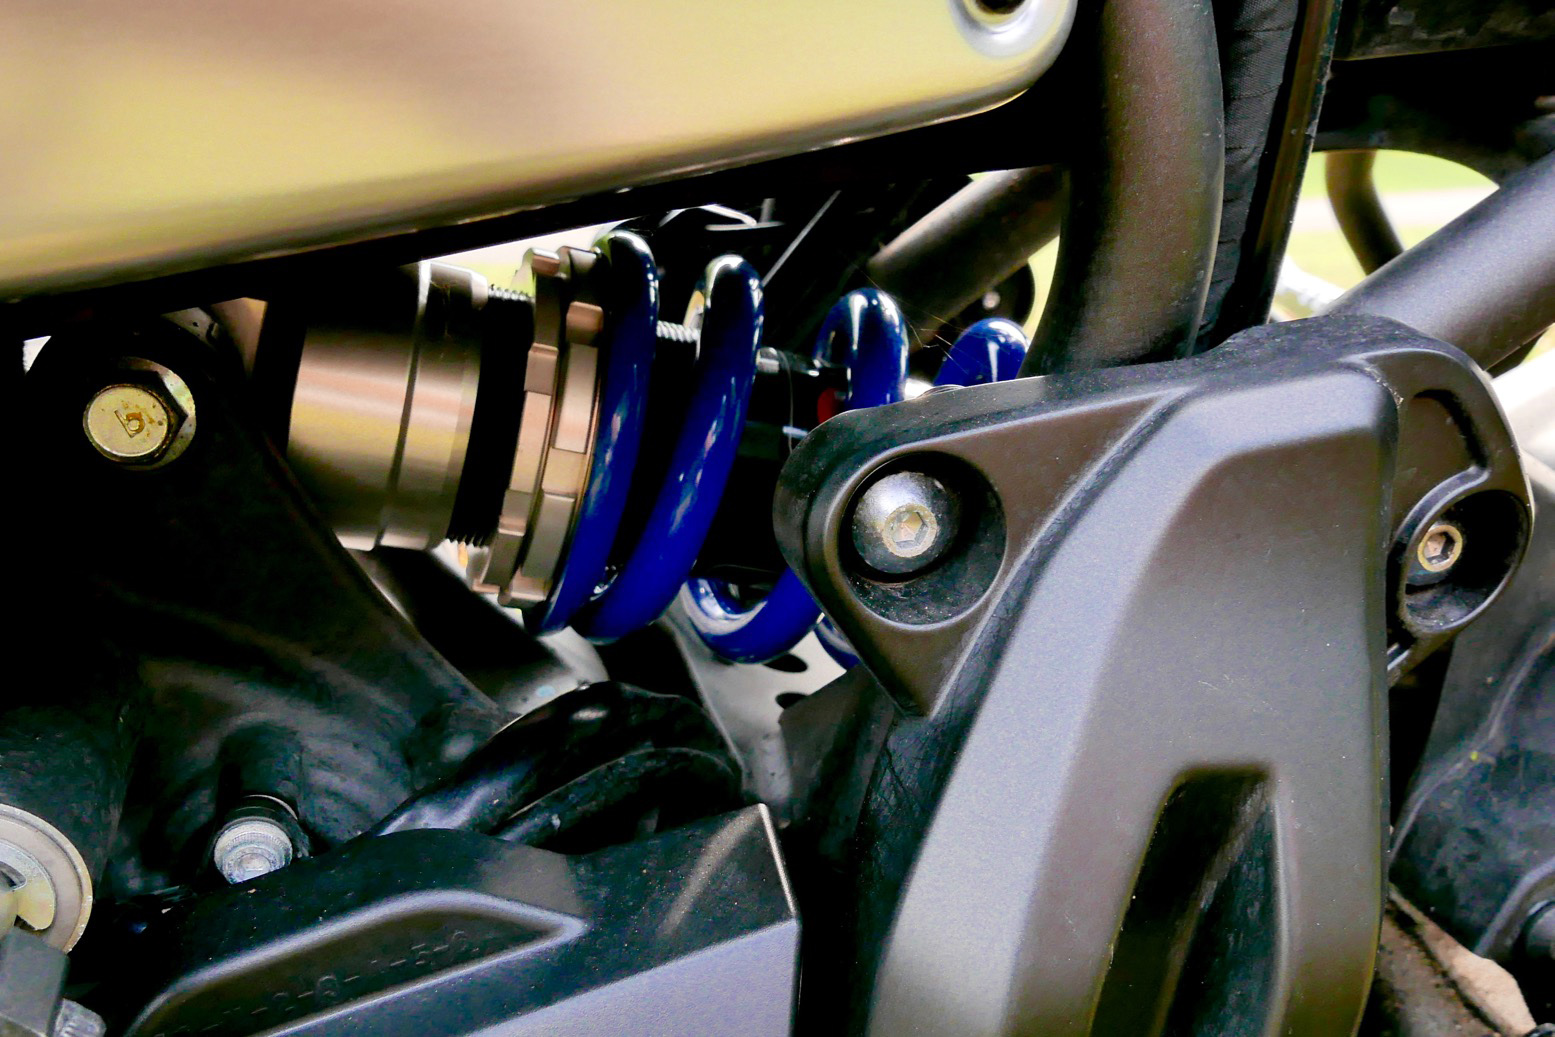
The OE shock is 310mm long. I was looking for a shock with rebound damping that started at that length but had extendability. Looking at the usual suspects, only the Wilbers640 Blueline could be specified with that feature for a reasonable £512. All it is is a chunky thread and nut at the bottom of theshock below the red rebound knob, and which can be unscrewed (lengthened) to a pre-set point then locked out. Rocket science it is not, but you need to remember that 10mm on the near-horizontal shock adds up to more in actual seat height. Pythagoras will know exactly how much, but when my Wilbers arrived I maxed it out and sent it to the shop.
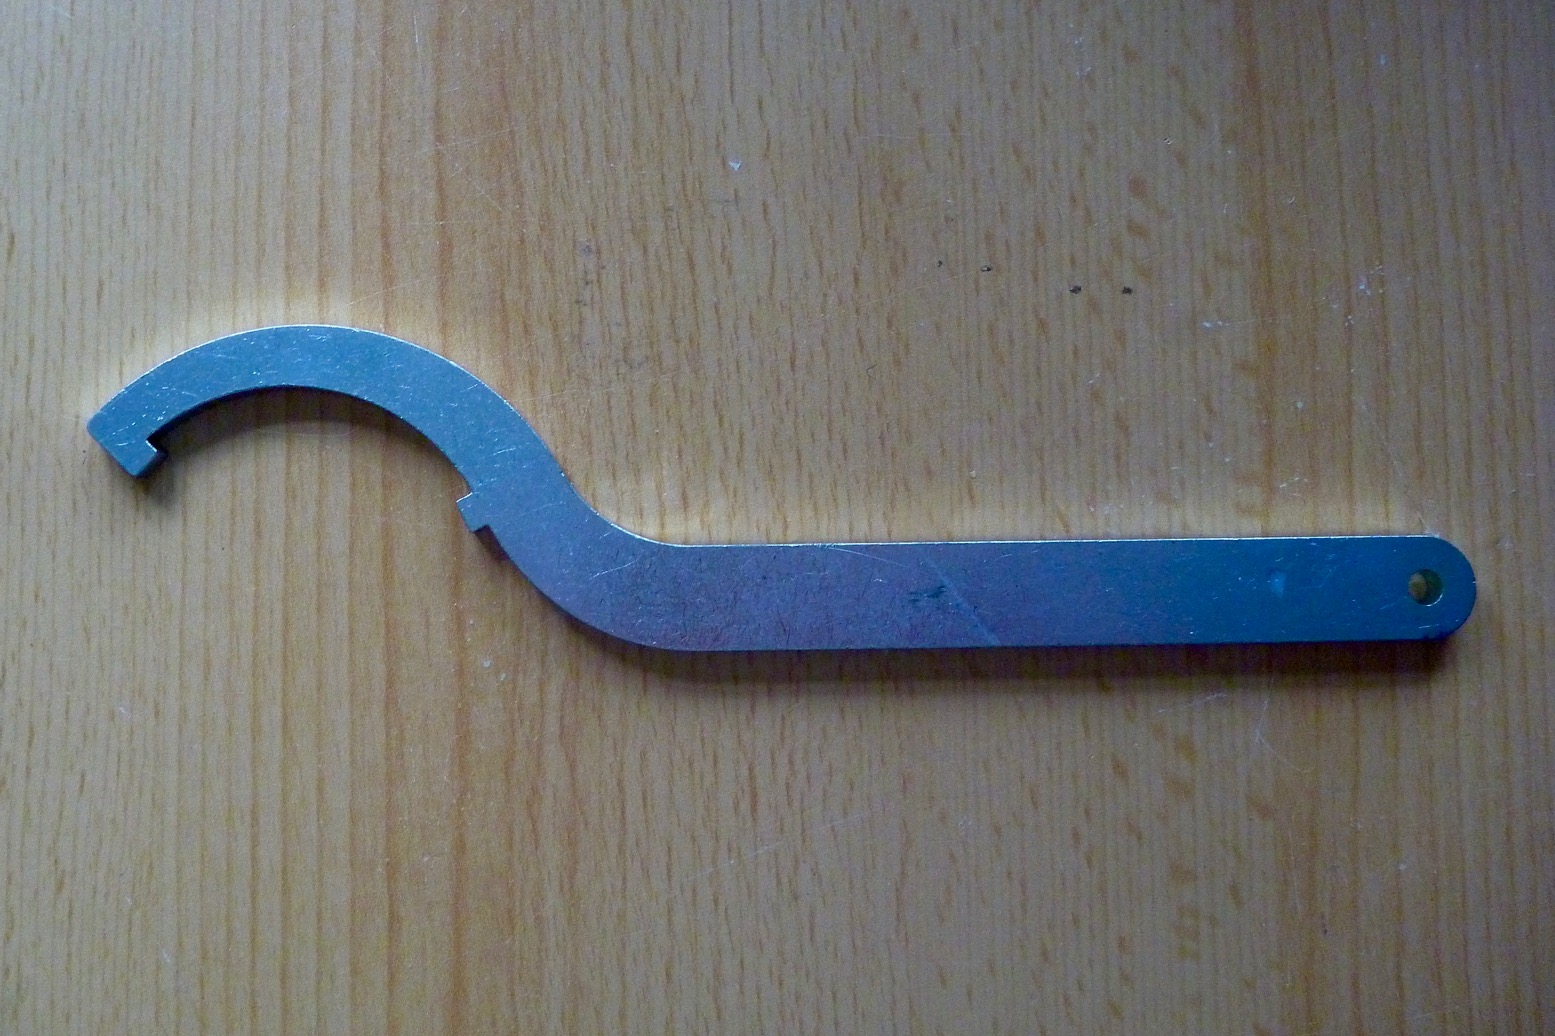
Doing it this way makes the shock/bike more sellable later, as it can be wound back down to the standard 310mm XSR height. In fact this whole XSR build, including front wheel swap, is fully reversible. No one need every know. For once in my suspension history, I’m going to endeavour to set the static sag before I leave. It’s a bit tricky alone, but there are instructions on how to do it all over the web. I dare say it will need some tweaking on the road as it beds in, and I’ll sure miss the Hydraulic Preload Adjuster of my previous Hyperpros, but there we are. As it is, C-spanners keep Elastoplast in business and come free with the shock.
Tyres I could have tried something new from my do-it-all category, like a Mefo Super Explorer, but only Heidenau K60 Scouts came in a range of sizes which sort of included the XSR; a still ridiculously fat 170/60 17 72T was delivered for £97 from Germany, and a 100/90H-19 Catspaw (not Scout) from the UK for £61. Looking at it now, the rear looks a bit lower profile than I’d prefer, but there was no 170/80 in 17.
The nearest K60 was 150/70 17, but as I was dropping from OE 180 width, 150 (over an inch slimmer) looked too much of a change for the rim size. Best of all, these retain the tubelessness (which reminds me, need to get some Slime in).
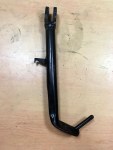
Actually, I think I need to address that stunted sidestand now the bike sits at least an inch higher. I could drill a hole through the foot and bolt on a block of wood or HPDE. How shit would that look? Good news is used MT-07 stands go on ebay from 20 quid. Weldy-mate Jon might be persuaded to hypnotise it and make it grow an inch, and while it’s out slap on an 5mm sandplate underneath; it will look like it was made that way and ought to have the strength to take a lifted wheel if I have tyre troubles.
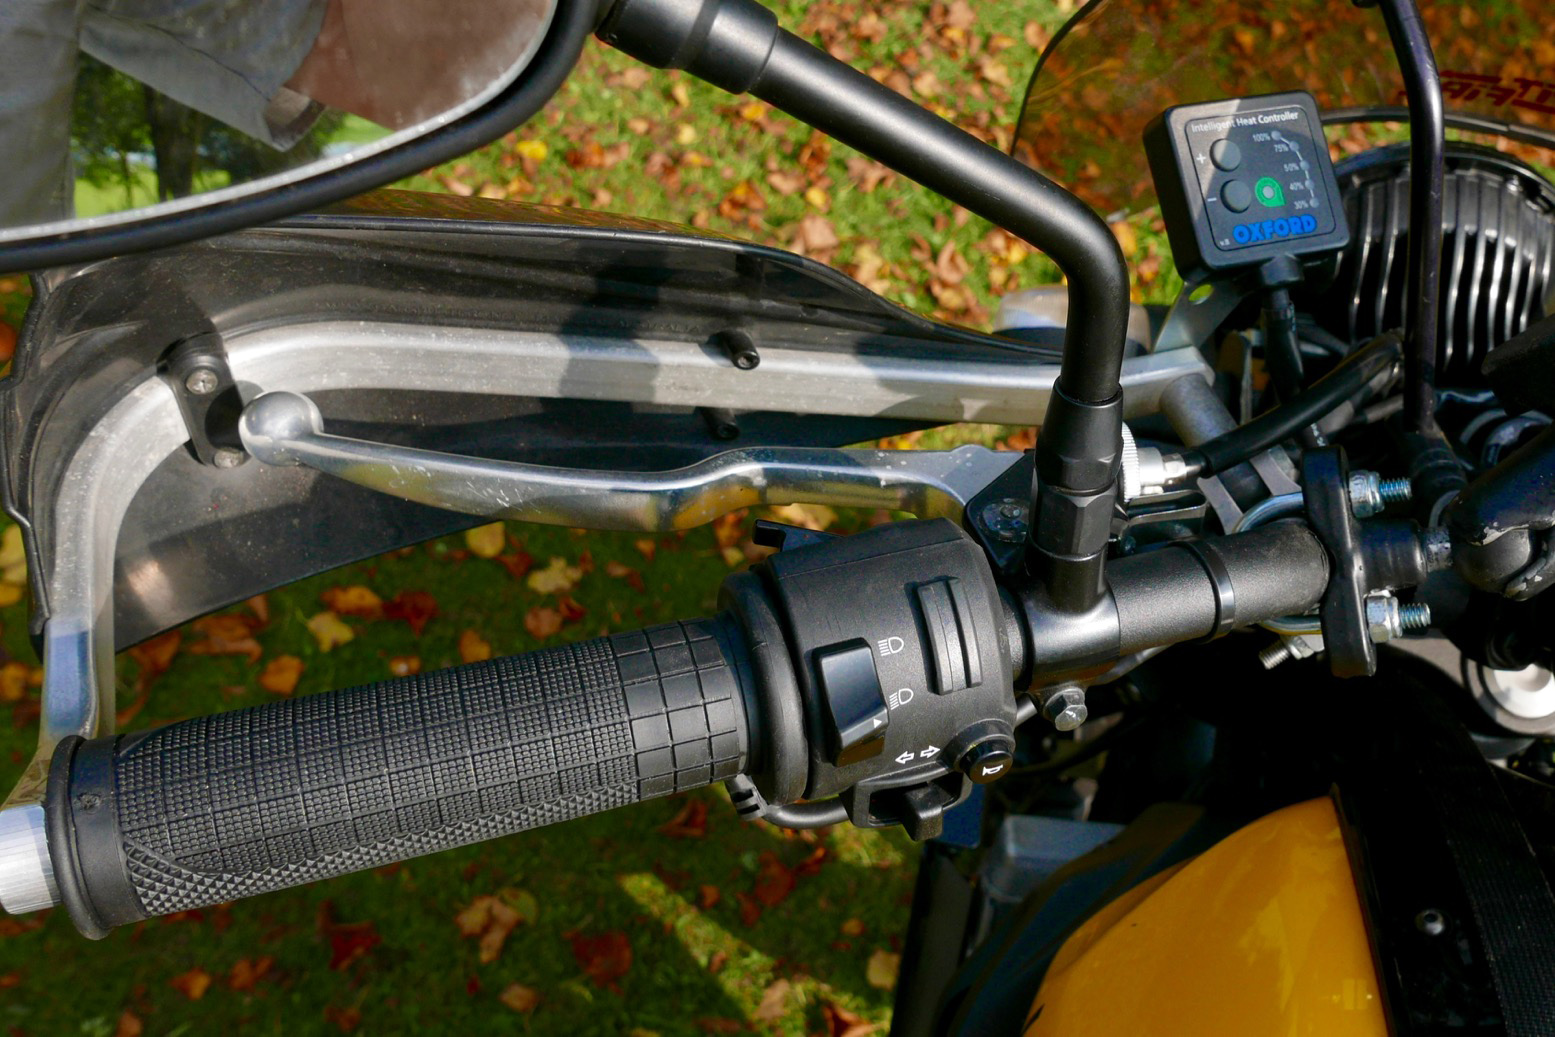
Other than that, my LBS fitted some Oxford Hot Grips for me (£50 ebay). This is the first time I’ve actually bought a set; usually they’ve come with the bikes I’ve bought. and for UK commuters are a no-brainer. Along with my screen, my Barks and my Powerlet jacket, I simply cannot wait for the December ride back across Spain.
Like the CRF250L itself, I use longer rides to try out new stuff, new ways of doing things or whatever else catches my imagination. Below is the equipment roll call from the 2013 Honda ride around Southwest USA. What worked, what didn’t and why. The prices given in £ or $ are what I paid for the gear or what it cost. Some items like Kriega, Magadans, Trailtech and Aero stuff has been supplied to me over the years in exchange for adverts in the book.
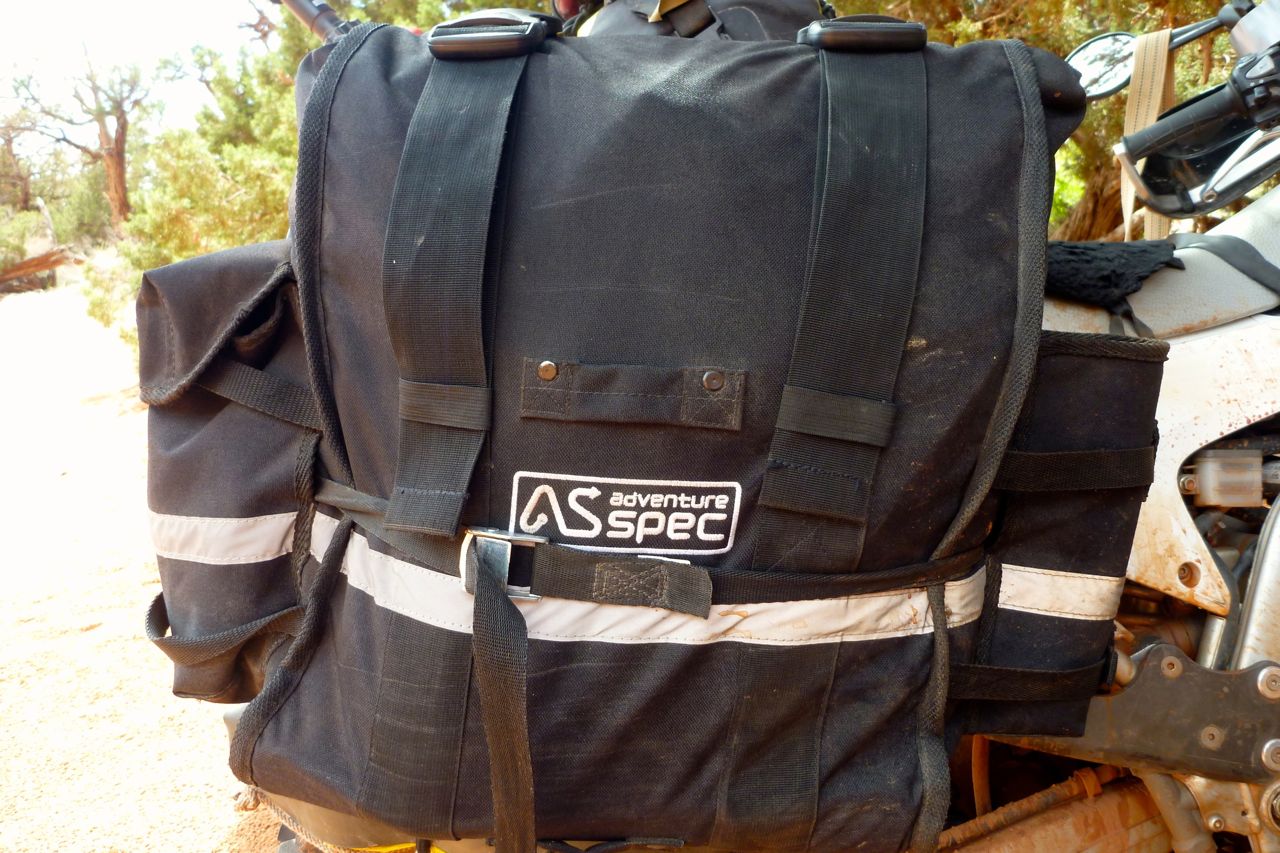
Adventure Spec Magadan bags – £330 No complains about my Magbags; the best soft bag out there for my sort of riding. Simple and functional, great capacity, big external pockets and tough fabric. It didn’t rain enough on this trip to test them, but it lashed down on previous UK rides with no leakage, even through the fabric outer, let alone the thick PVC liners. Requires a rack but that’s the way it should be for heavy loads in soft bags. More on the Mags here. Verdict: regret giving these away with the CRF.
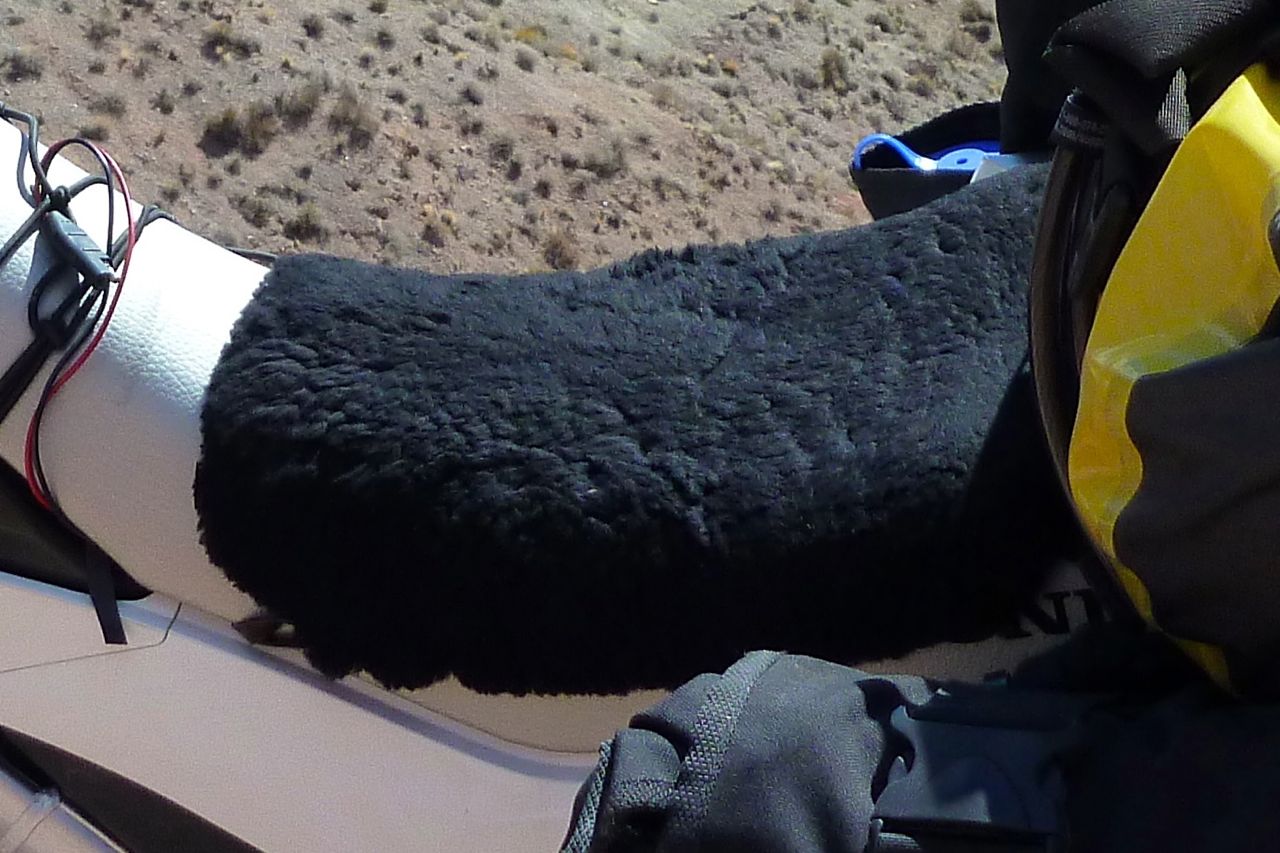
Aerostich wool seat pad – $67 I used this last year in Morocco on a BMW 650 twin which has a seat straight out of Enhanced Interrogation; sadly the Aeropad couldn’t save it – three inches of Moroccan mattress foam did. On the Honda the wool pad may have taken the edge off, giving another hour’s comfort but I actually found frequent dismounts were as effective to posterior durability. Another interesting thing: mostly I rode in my leather jeans but one hot day I wore thinner (slipperier?) synthetic 5-11 Tactical trousers (great gear btw, much tougher than ‘outdoor rec’ stuff). Result: sore arse arrived very soon. I also found the wool would pack down and lose its loft after a few long days, but could be easily washed and ruffled up. And after a night in the rain a vigorous rub dispersed most of the moisture. Verdict: seemingly minimal improvement but can’t do any harm.
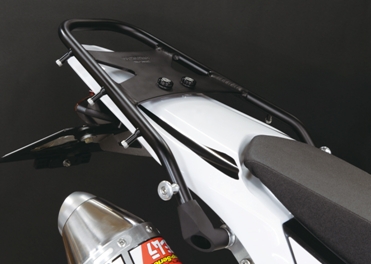
Alpha Three tail rack – on bike Never heard of Alpha Three – could be Japanese rather than Chinese? – but this ‘Type A’ item was a neat little rack with downward pointing prongs incorporating hexhead bolts to securely attach stuff, should you wish. A tendency has developed towards racks cut out of flat metal sheets, either thick alloy or thin galvanized steel. Reason: cheaper manufacturing costs not necessarily reflected in the retail price as they’re the latest ‘thing’. Smaller ‘plate racks’ the size of the Alpha might be fine but some of the wider ones as tested in Overland Journal (Fall 2012) have nasty thin edges that I wouldn’t want to meet while tumbling down a slope, even though I’m all for wide ‘sheep racks’ in principle. Conventional tube racks are easier to use and grip, when needed. There are a few more CRF-L rack options listed here. Verdict: a slick and well-featured tail rack.
Barkbuster Storm handguards – $130 Always liked the Aussie-made BBs and even though cheaper versions are available I splashed out at more tolerable US prices US prices on some Barks with the biggest Storm handguards to keep for later. Cheapies often don’t fit so well; the key I believe is the articulated joint (available separately) at the inboard mounting end. Cheaper versions off ebay have no joint – less easy to position optimally. I like to think the Storm handguards kept my hands warmer and drier and so deferred the need for heavy gloves – I always prefer thin unlined gloves. The only time I fell off the Barks did their job, although one drawback with all lever guards is you can’t hang stuff, including a helmet, so easily off the bar ends. I’ve fitted bungy hooks on previous bikes. Verdict: worth paying out and keeping for the next bike.
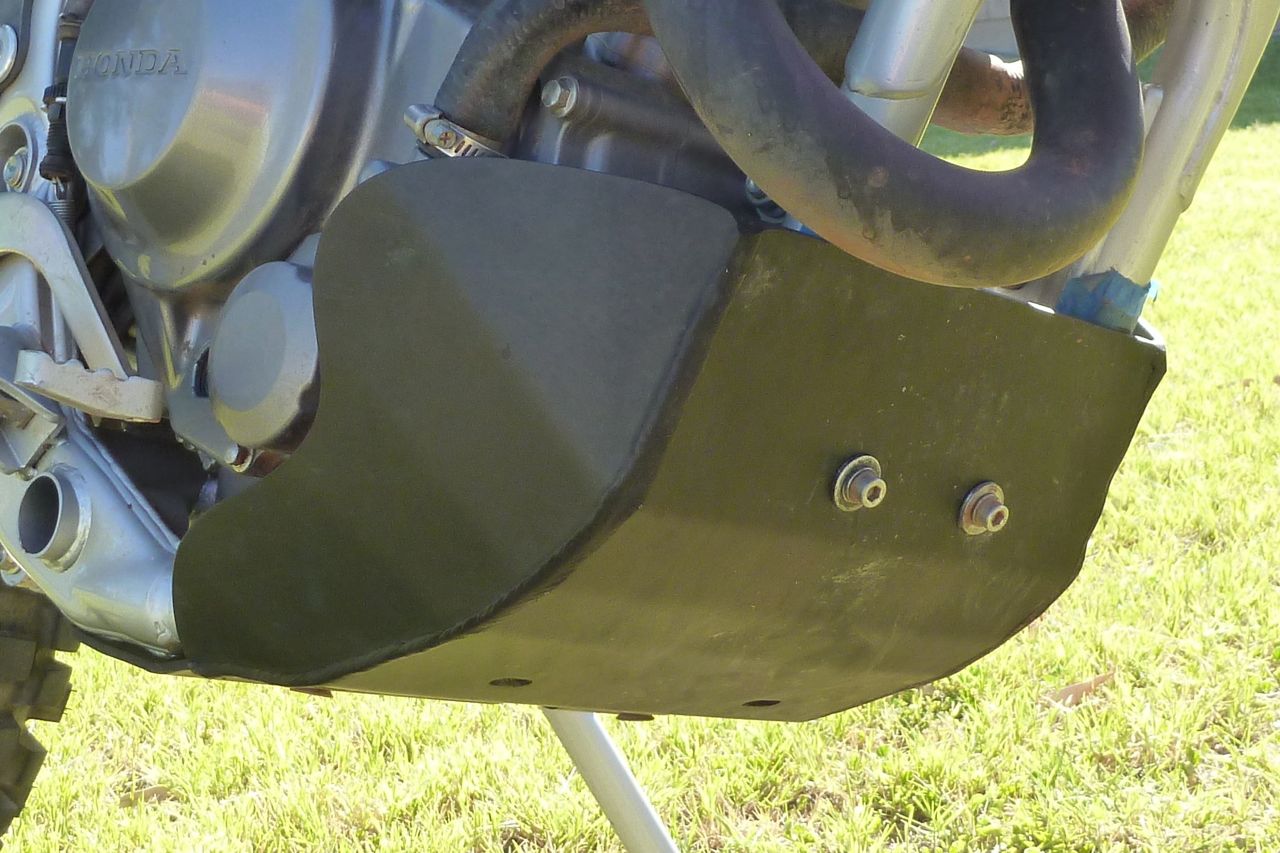
Bashplate – came on bike I omitted to note what brand it was – Ricochet is a name that bounces around the forums. Engine protection is a no brainer of course, even if I only dinged it once on the gnarly Lockhart Basin track. The fit was fine – no exposed bolts on the underside and a hole to enable drain plug access without removal. But clamped directly to the frame rails I found the resonance intrusive. I reduced that by refitting the plate with some strips of closed cell foam (karrimat) on the frame rails. Like others, I also think a bit more width to either side would improve protection of the filter housing and bottom hose. Verdict: As usual, the OE plastic plate is a joke. Essential for off highway riding.
Bell Mag 9 helmet – $70 Probably discontinued by now but great lid for the money. Full review here.
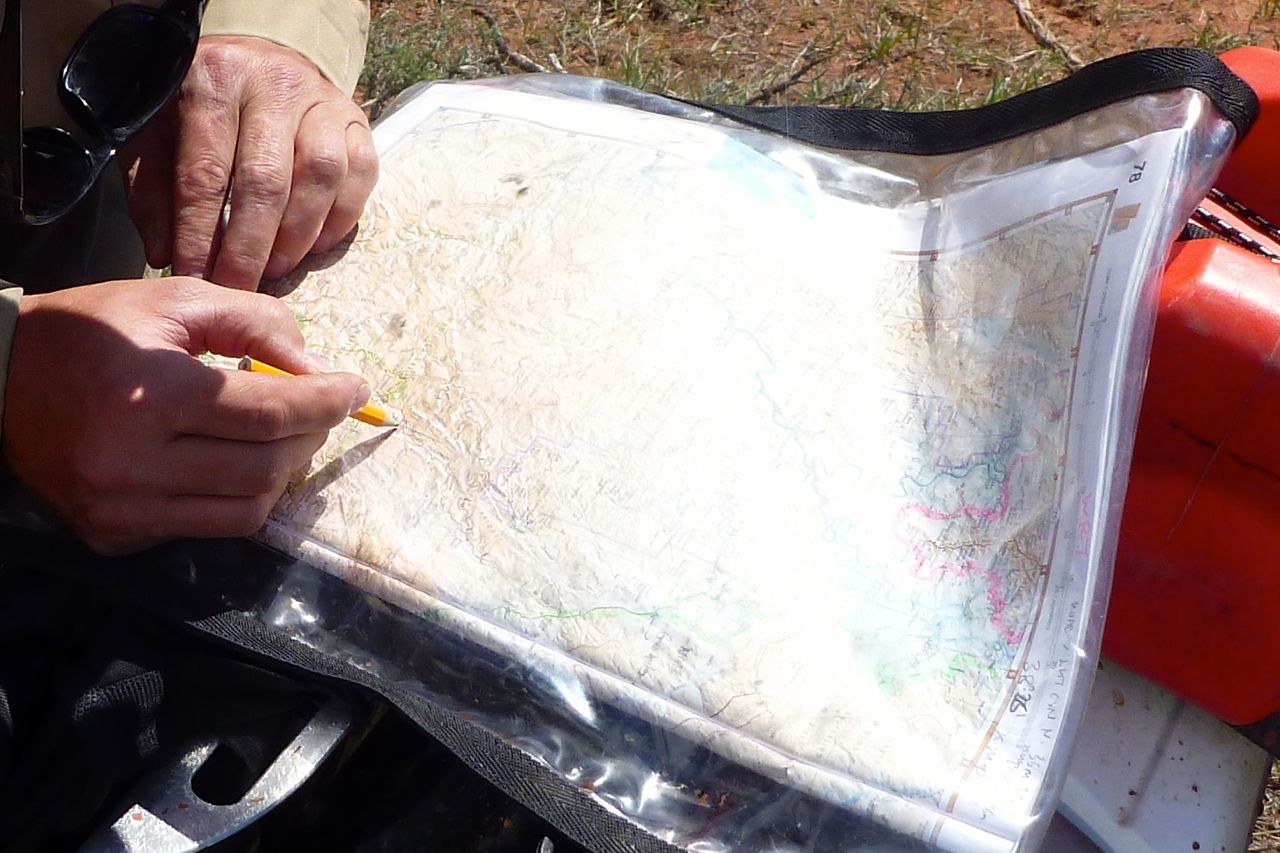
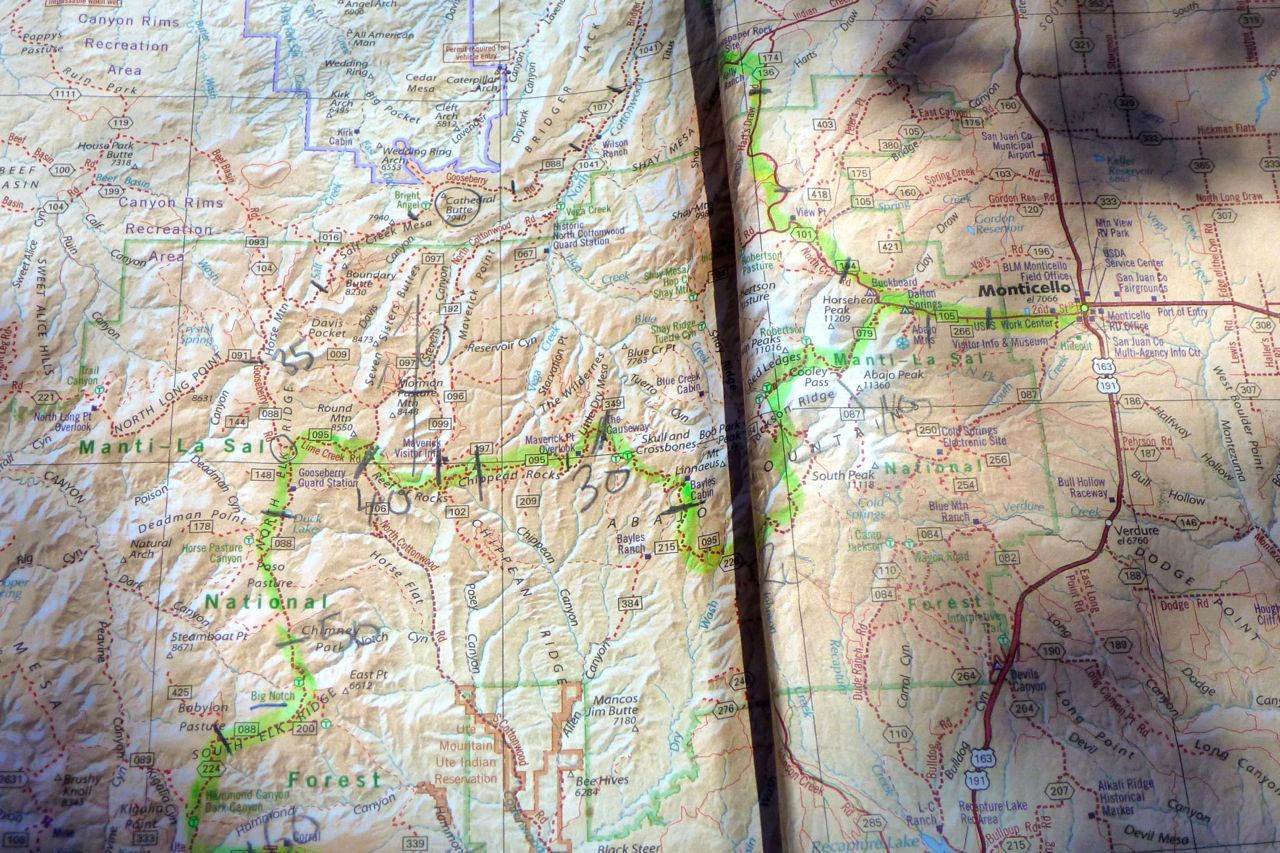
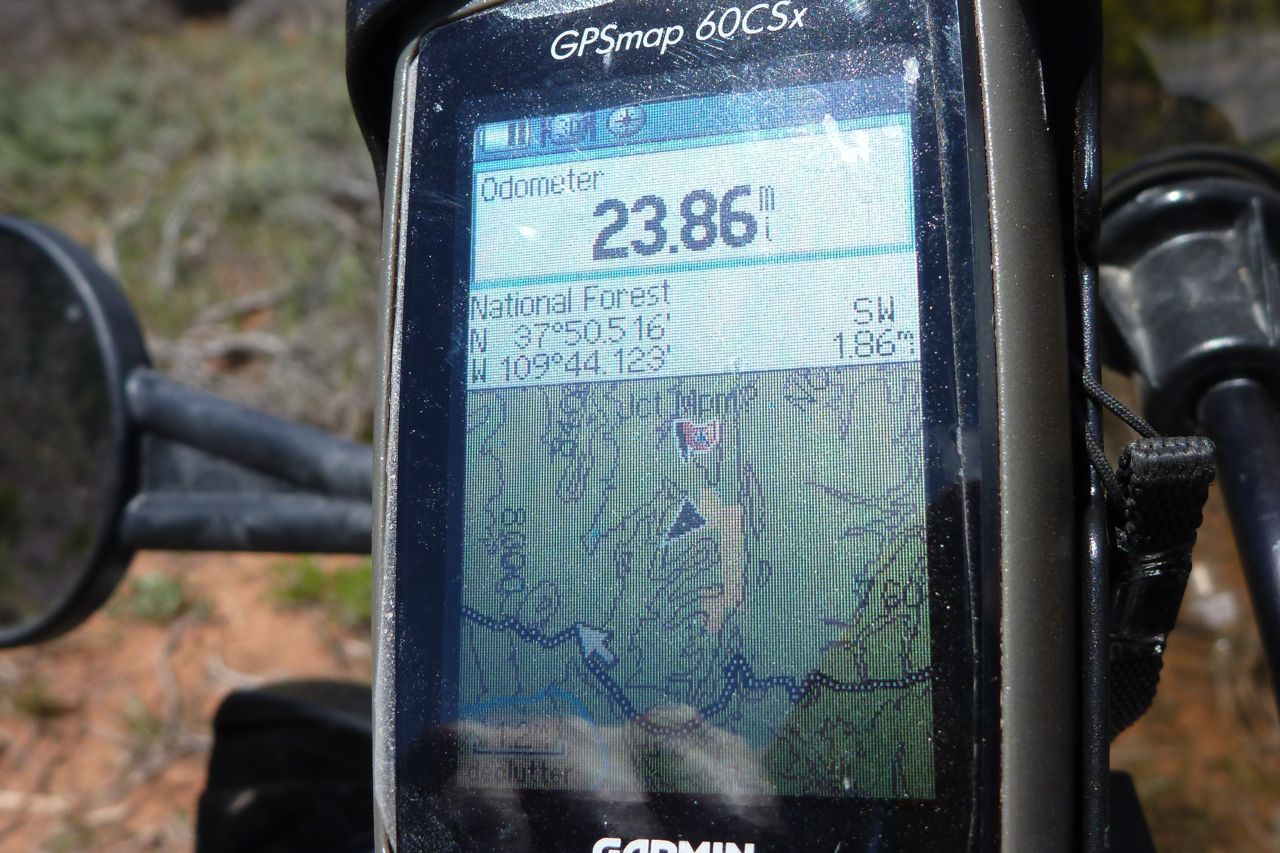
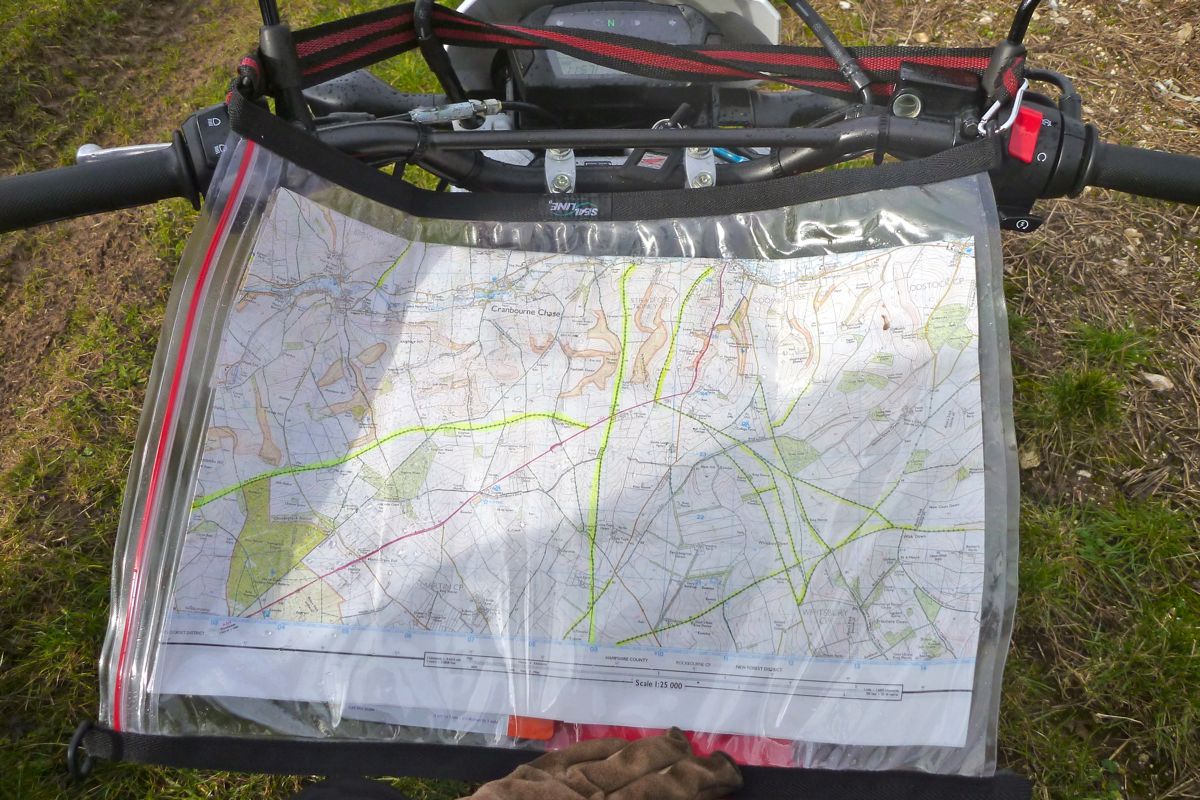
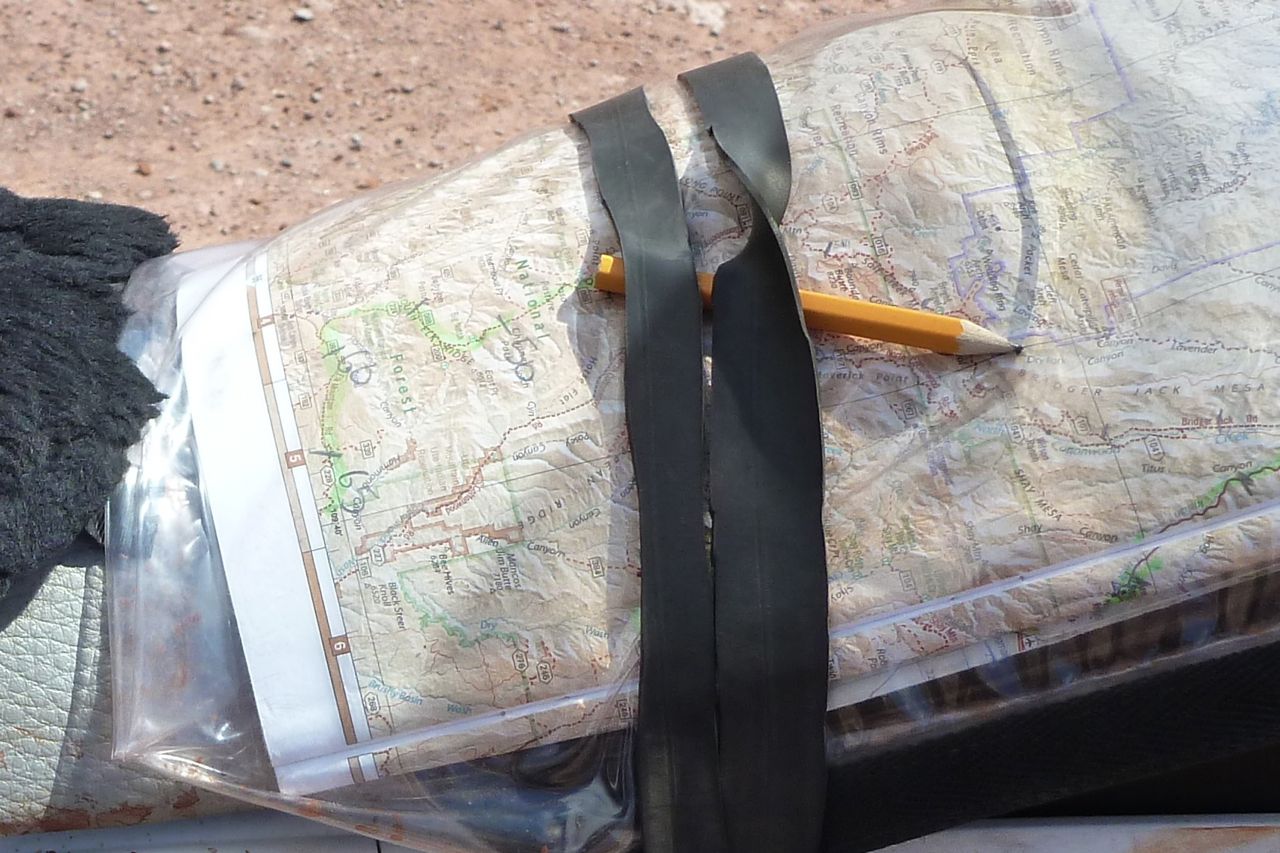
Benchmark atlases – $15 I’ve been using these for years in the US and on this trip they came into their own for riding off pavement across Nevada and Utah. Yes they’re big to carry on a bike and may well be available as a tablet app, but give me a paper map any day for getting the big picture. I barely use the additional guidebook-like recreational info you get in a Benchmark but it’s good to know it’s there. As with all paper maps, dirt road accuracy got a bit mushy at times, and here I found the US-sourced Garmin satnav filled in the gaps. And then when the satnav was wanting, just like a proper map I could read a long-lat easily off my Garmin 62 against the Benchmark’s incremental long-lat grid (above) to find exactly where I was. Verdict: I’ve tried Delormes but Benchmarks are to the US what OS maps are to the UK.
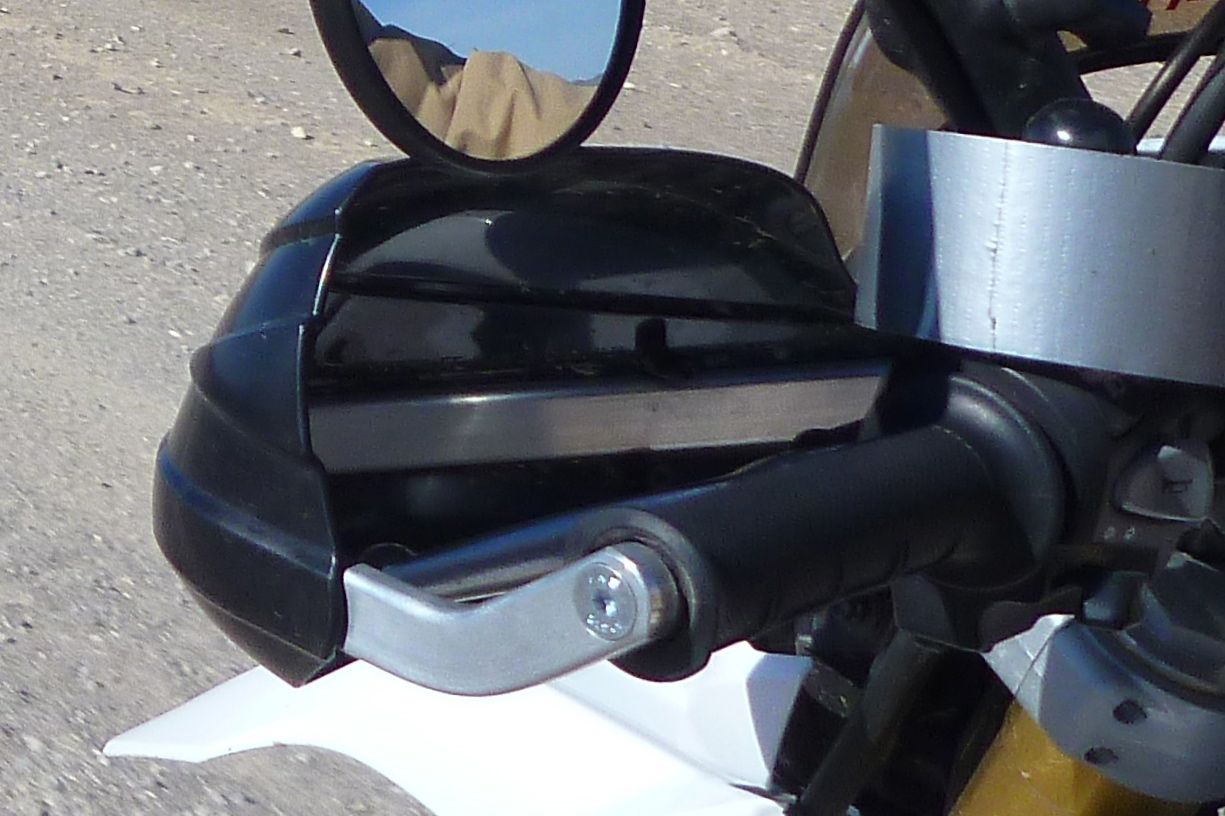
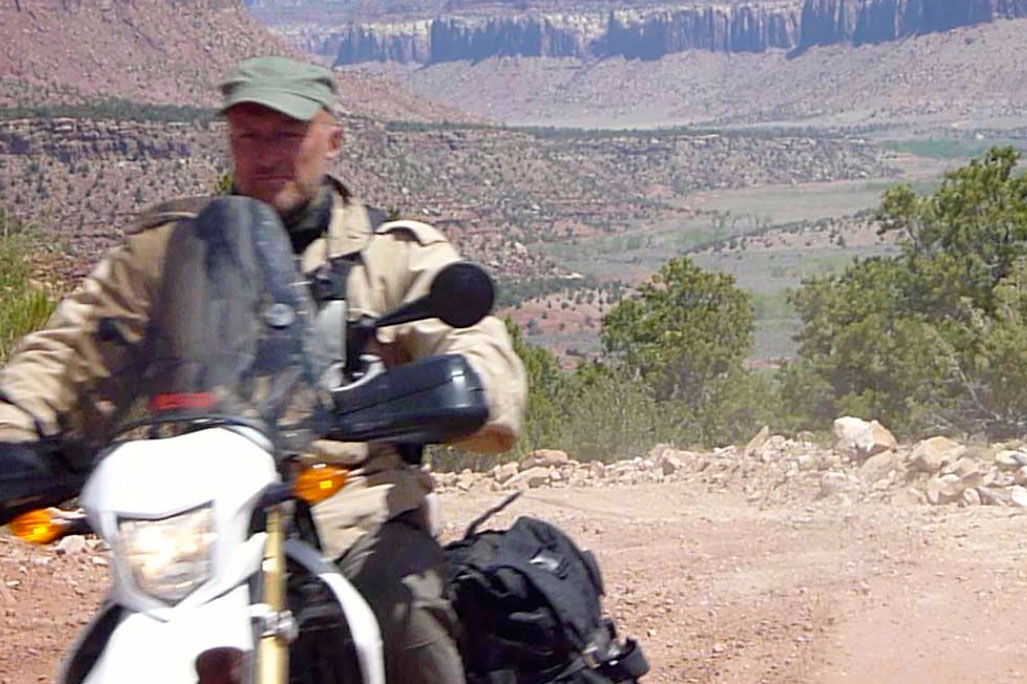
Double Take mirrors – $100 pair! A mate had these in Morocco last year and I admit I fell for the hype – or wanted to see if they lived up to it. At over $100 a pair (iirc) the RAM ball-mounted DT mirrors provided infinite positioning and crash-proof toughness. I took one and left the OE Honda mirror on the nearside (on the right side in the picture, left) but soon wished I’d either kept both Hondas or ran them the other way round. For seeing what’s behind you the OE Honda was a better mirror – bigger (wider), clearer and immune to vibration or movement. That was until my single, low-speed fall on the right side when the Honda glass shattered in the otherwise undamaged plastic housing. Honda dealers at the time only sold the whole mirror assembly which had to be ordered. Perhaps they’re suited to more aggressive off-roading where falls are more frequent, but where you probably want mirrors to get to your riding location. Here a Double Take or the like soon pays for itself, although I found at road speeds it blurred too much to be reliable and moved around on the dirt or in strong headwinds, no matter how hard I clamped it. And with that nifty mirror-base RAM mounts they are rather nickable; RAM’s theft-proof clamp is not the slickest design. Verdict: built for crashing, but on the Honda less good for seeing.
EJK fuel controller – on bike I’ve had 4×4 turbo-diesel engines ‘chipped’ through I never knew exactly what was being done – it seemed to be one unprogrammable map and the sort of performance chasing meddling that doesn’t interest me that much. For petrol engines EJK’s fuel controller is a bit more sophisticated: an ‘electronic jet kit’ enabling you to increase fuel delivery (richen the mixture) as you experiment with performance enhancement. Short version: at $200 a useful bit of kit to experiment with or optimise the mixture; long version here. Verdict: another good reason to bid adios to carbs.
FMF Q4 pipe + Megabomb header – on bike (sold for $350) The bike came with this set up the suitably calibrated EJK (above) and holes in the airbox, but one day’s dirt riding convinced me the Q was not at all Quiet and would have driven me nuts on the long road. Even at double the weight I was happy to refit the weighty OE cat silencer and flogged the FMF set up. Verdict: way too noisy and can’t say I noticed any significant power loss once removed.
Garmin GPS 60CSx – £160 used I used the bulkier GPSMap 72 for years to log tracks for my off-roading guidebooks until it started playing up. I was happy to replace it with the more compact and popular 60 series using the similarly intuitive interface. This one had Utah topo maps on it and took the UTBDR tracklog without any undue gnashing of teeth. And a RAM cradle mount performed securely without vibration issues. Verdict: CSx not made any more but still preferable to touch screen Montana/Oregons.
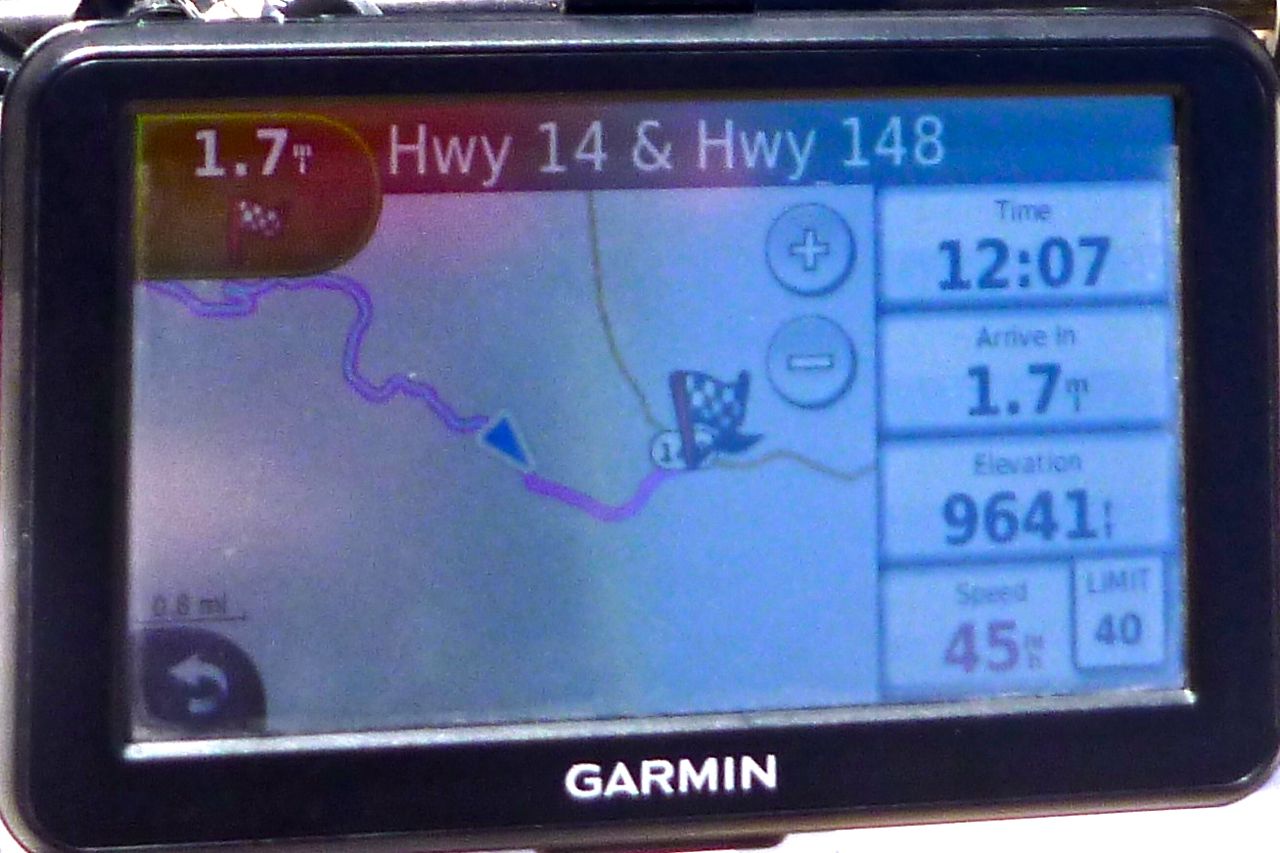
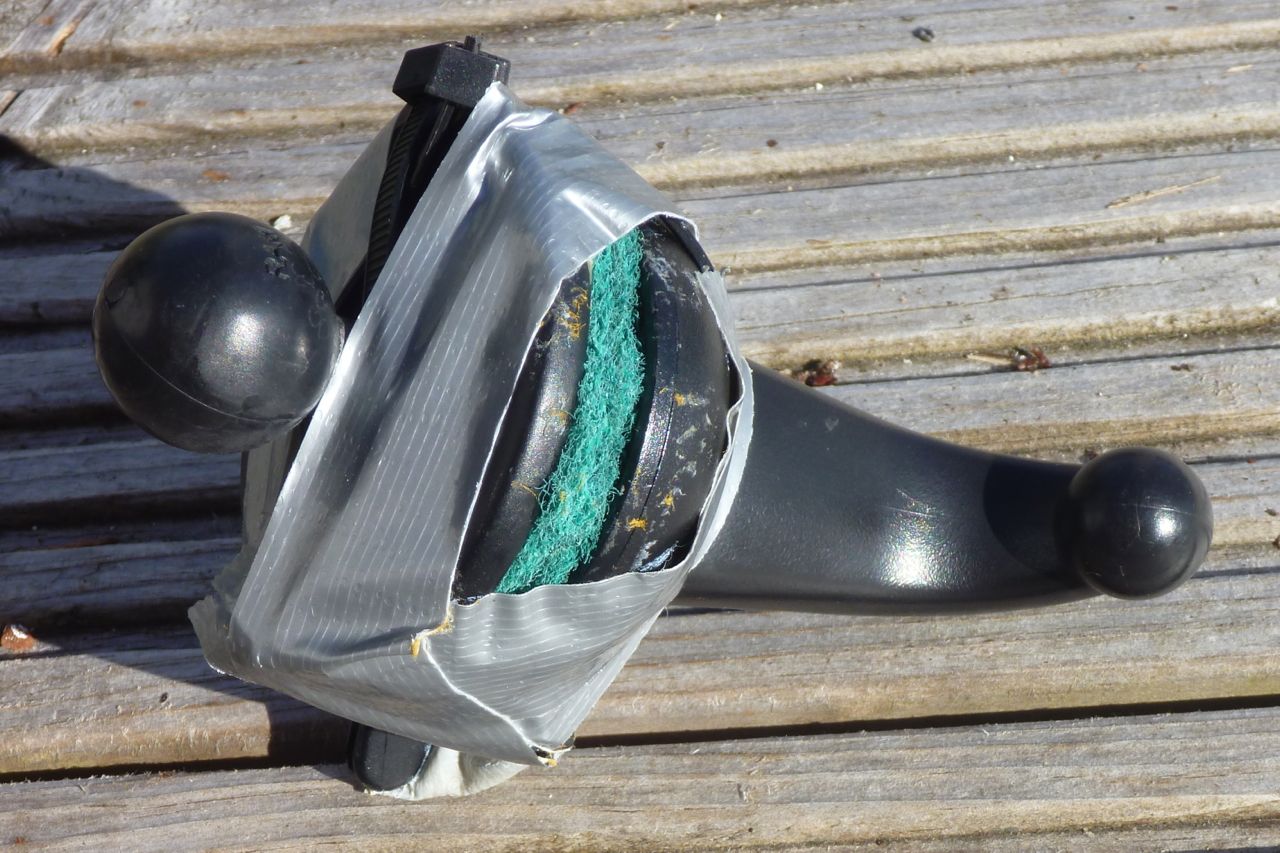
Garmin Nuvi LM50 – $80 used I hoped that a US-sourced Nuvi would have maps which featured the countless miles of unsealed roads in the western US, and so it did. When the Benchmark atlases got a bit vague the Nuvi led me out of the mountains, providing it was set up right and you took the suggested directions with a pinch of salt. Don’t know if it was my basic unit but I found that the full range of tracks around me would only display once a ‘Go to’ was set (a memory saving feature perhaps?). It meant I couldn’t scroll/zoom out to see the possibilities around me without a ‘go to’. Also, I was too lazy to address what I knew would be problem with vibration. Last year using a similar unit in Morocco I was smart enough to lay it on foam on the tank, this time with a cobbled together Garmin/RAM set up the vibration at higher revs caused it to cut out. I’ve since modified my home-made mount to incorporate a foam sandwich (above left) that may work better with future moto Nuvi-ing. Used Nuvis are cheap and easy to find on ebay; Garmin’s moto-focussed waterproof Zumo is not. You can buy waterproof pouches for a Nuvi to fit your bike. Verdict: as long as it has worthwhile mapping, a used Nuvi is a good value nav aid.
Old iPad $200 vs Macbook Air $600 I soon found that trying to update this website on the road from an iPad was frustrating, even with an accessory keyboard; WordPress have not got to the bottom of it. Luckily craigslist Phoenix had several used Macbook Airs within arm’s each. What a relief to get back to Mac’s laptop platform at about the same size and barely twice the weight of an iPad. Verdict: a tablet to read but a laptop to write and edit. Nearly six years, many trips and a couple of dents later, I’m writing this in New Zealand on the same well-used airbook. What a brilliant machine!
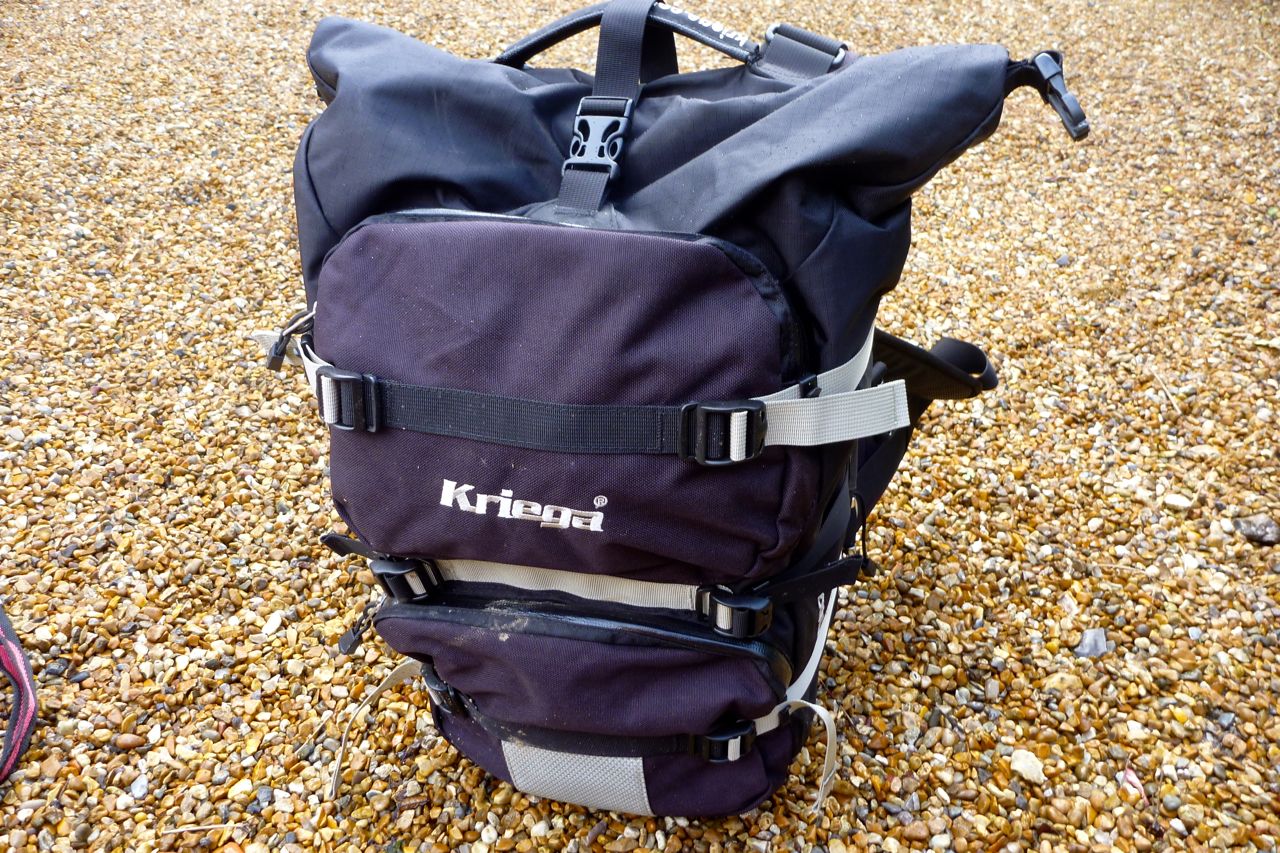
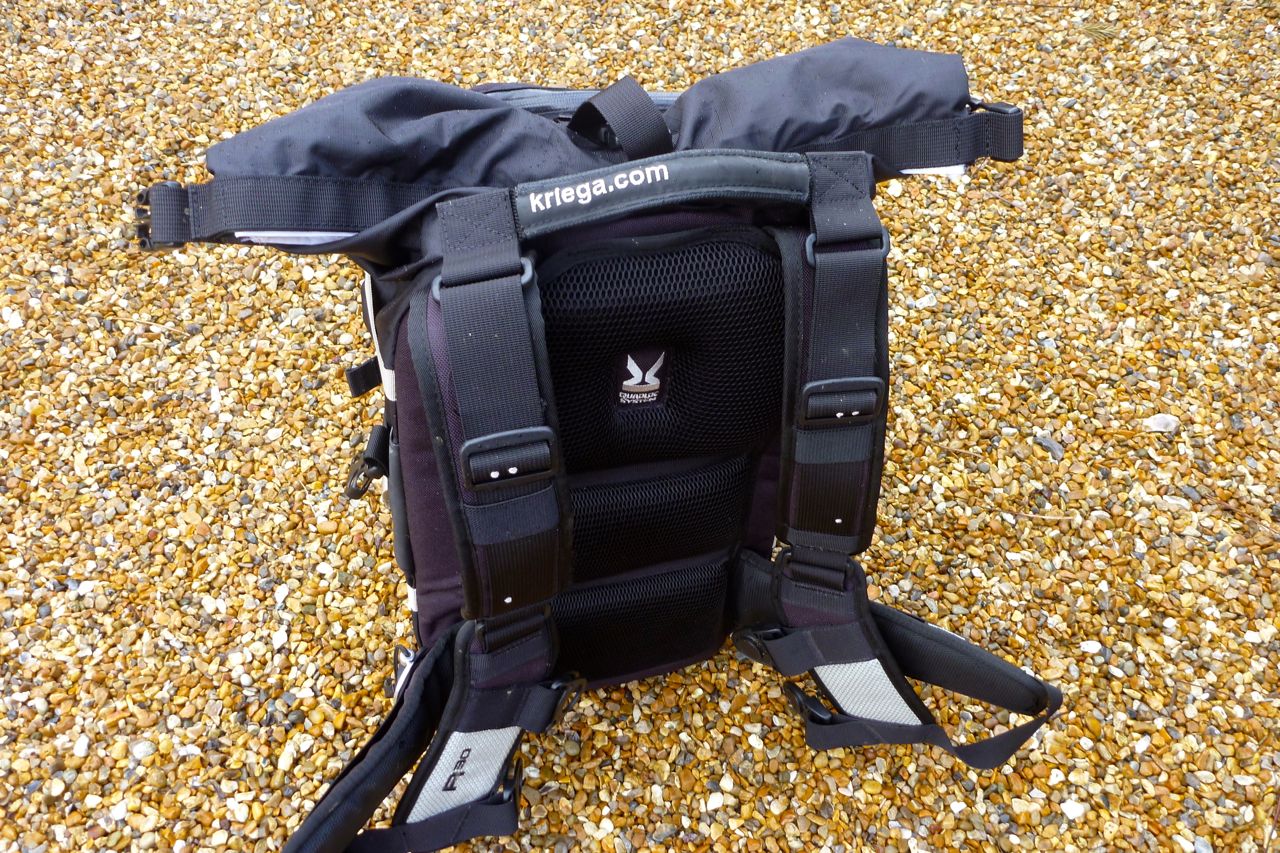
Kriega R30 backpack – £135 I’m not so keen on tank bags but can’t fit all my essentials in my jacket so a backpack like the R30 takes the laptop and other valuables, sandwiches and quick access day items. Too heavy a backpack accelerates backside pain but the R30 rested on the Watershed when seated so took the weight off my shoulders. Like a lot of Kriega stuff there’s some very clever but over-complex strap adjustment system that I never investigated; for me it fitted well enough out of the box. It includes a double clip joining the shoulder straps across the chest which along with the grippy mesh on the back helps keep it in place. On the back are cinch-down straps to stop a loose bag flapping. But when unclipped the chest clip arrangement doesn’t hang naturally off the shoulders when walking and who wants to walk around clipped in as if you’re ready to make a parachute jump. On the move I can’t say I ever noticed it which is the point and the capacity is expandable enough for all my needs; if not camping you could probably get a superlight touring load all in there.
Best thing about it was a simple, zip-free roll-top closure which, unlike around-the-top zips, won’t matter too much if you forget to do it up – opened zips see stuff fall out. The small outside pockets do feature water-resistant zips which are a bit stiff to use, but then zips do need cleaning from time to time. The R30 has a velcroed-in, removable waterproof liner which I hear is up to the job and easy to replace once it isn’t. Or just use your own dry bags. The chunky top handle is another good feature, the reflectives are probably useful and the quality of construction is what you’ve come to expect rom Kriega. Verdict: expensive for a backpack but actually designed for biking not hiking.
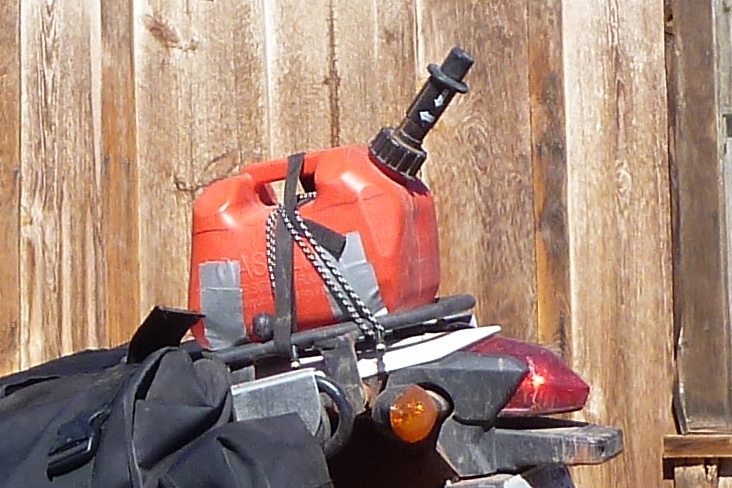
Liquid Containment 5L fuel bag – £60 I figured this was a compact way to inexpensively increase fuel range and rated fuel bags as such in the book: rolled up out of the way when not needed; handy when they are. That may be true for the odd occasion when you need extra fuel, but I found a fuel bag was less well suited to near daily use on a motorcycle. The rot set in when the o-ring cap seal fell out and blew away unnoticed at a fill up in Vegas – didn’t notice that until that evening when everything reeked of 85 octane. A day or two later I picked up a replacement o-ring for a backstreet garage, but had gone off the bag by then. The other pain on a bike is securing a wobbly bag of fuel reliably, securely and without faffing. Sure, the tough plastic LQ has holes on every corner but at a fuel stop you have to release the bag, prop it up, fill it up, cap it and then secure the load to the bike. If I had stuck with it I’d have found a good method, but these sorts of repetitive tasks need to be foolproof for the day you rush it and make a mistake. Like scores before me, I found a red plastic $10 one-gallon can strapped to the tail rack better for near daily use. To fill up simply undo the cap, like an auxiliary fuel tank; to decant into the bike tank undo the straps, pour in and refit. A bigger tank in a worthwhile size was not available for the CRF-L at the time. Note; the fuel bag I used was not the same as the 7L item which Zen sell in the UK. Theirs is an older, bigger and superior model with an integrated pouring spout inside the cap and a handle. Verdict: in practise not so convenient for regular use.
Maxxis IT Desert tyre – $110 Amazingly the CRF-L’s OE rear IRC tyre was finished in 3000 miles – a record for me, and on a 18-horse 250, too! I found the meaty-knobbed Maxxis (like an MT21 or D606) was easy to fit with short levers and some WD40 lube, didn’t play up on the highway (bike not heavy or powerful enough to stress and flex the knobs) while on the dry and rocky dirt I rode at road pressures it did the business and I’m sure would have outlasted the IRC. Verdict: performed as well as better known brands; a pair goes for <£100 on ebay.
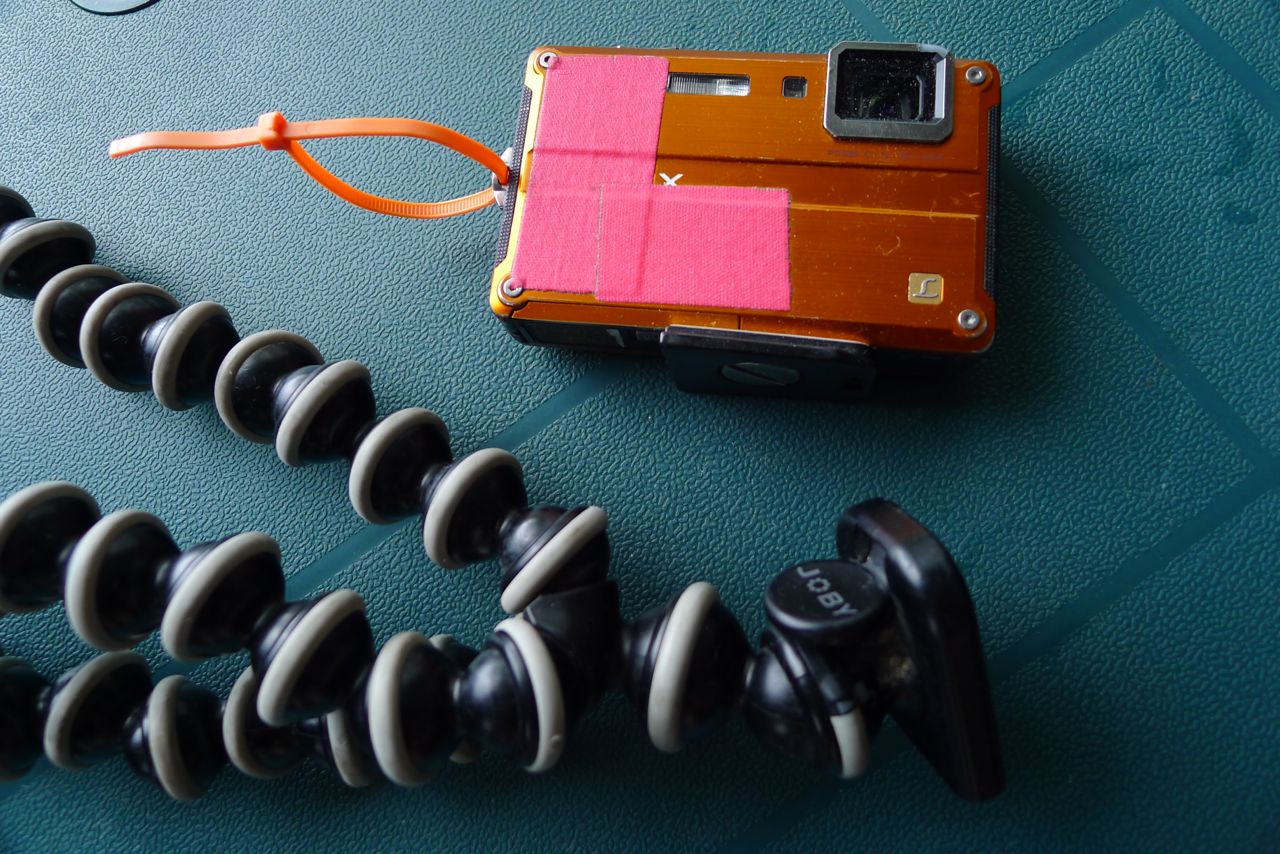
Panasonic Lumix FT2 – from £60 used I’ve had this camera for a couple of years now and use it almost every day. When it was playing up recently I looked around but newer models in the FT range all had compromises (smaller battery, less megapixels, unnecessary gimmicks like GPS, expensive) as did other brands. So I got another old FT2 off ebay for £60 but which time my original camera had fixed itself. What I like about Lumixes is they commonly feature wide-angle lenses (28mm or less) over excessive zooms. An FT2 camera is also shockproof and waterproof to a few metres so rain or sand won’t bother it and it’s robust enough to survive ‘carefree’ treatment. Yes, the enclosed lens is tiny and the zoom is limited, but slipped into my jacket’s chest pocket and hung around my neck on a cord, it’s easy to use while riding. And just occasionally the auto exposure captures the scene as well as any DSLR. At other times – especially on full optical zoom, the quality drops off; better to shoot wide at max resolution and crop later (I always disable digital zoom). With landscapes, a trick I use with these types of cameras all the time is half press the shutter and expose off the sky, then lower the camera, compose and click. The resultant ‘tricking’ into under exposure often gives a richer result (or one that can be more easily edited). I didn’t film on this trip, but have done a lot elsewhere and the results are up to youtubing. I even sold my annoying GoPro a while back and am now happy to use the FT2 for movie making. The tougher, DSLR-sized Gorillapod also works well as a steady tripod or clamp. Verdict: until it wears out or breaks up, can’t think of a better P&S camera.
Riding gear On this trip to save weight I bought a lid once in the US (see Bell), wore my heavy leather trousers and old Altberg boots on the plane and brought my Aerostich Kanetsu electric vest to make up for my regular ‘M65’ desert jacket; no armour, Gore-tex, mesh or reflectives – just light, quick drying and with enough big pockets to make up for not being a Darien. In the event of heavy rain I had my old Rukka one-piece suit, but never needed it. For gloves I has my similarly ancient unlined Aerostich Deerskins (sadly MIA) and a pair of Armr Moto WXP8 gloves for cold days. Apart from the Rukka, all got used all or some of the time. Temperature-wise this trip was quite extreme but I felt protected enough to be comfortable, while never feeling over-laden with clobber, as you can do with moto gear. Verdict: for the local conditions, the best set up I’ve ridden in.
SealLine XL map case – £15 I normally use this for sea kayaking or packrafting, the zip-lock seal keeps maps and other bits dry and the big size gives you the all-important big picture without the need to open up and refold a map too often as the crashing surf closes in. In the Southwest the map case took a folded back Benchmark with room to spare and stopped the pages flapping in the wind. I found a neat way of holding the maps case down was stretching a thin loop on inner tube from one side of the engine to the other (right). Note: they also make roll-top map cases, not as reliably waterproof as the zip lock version. Verdict: moto or boto, great bit of kit.
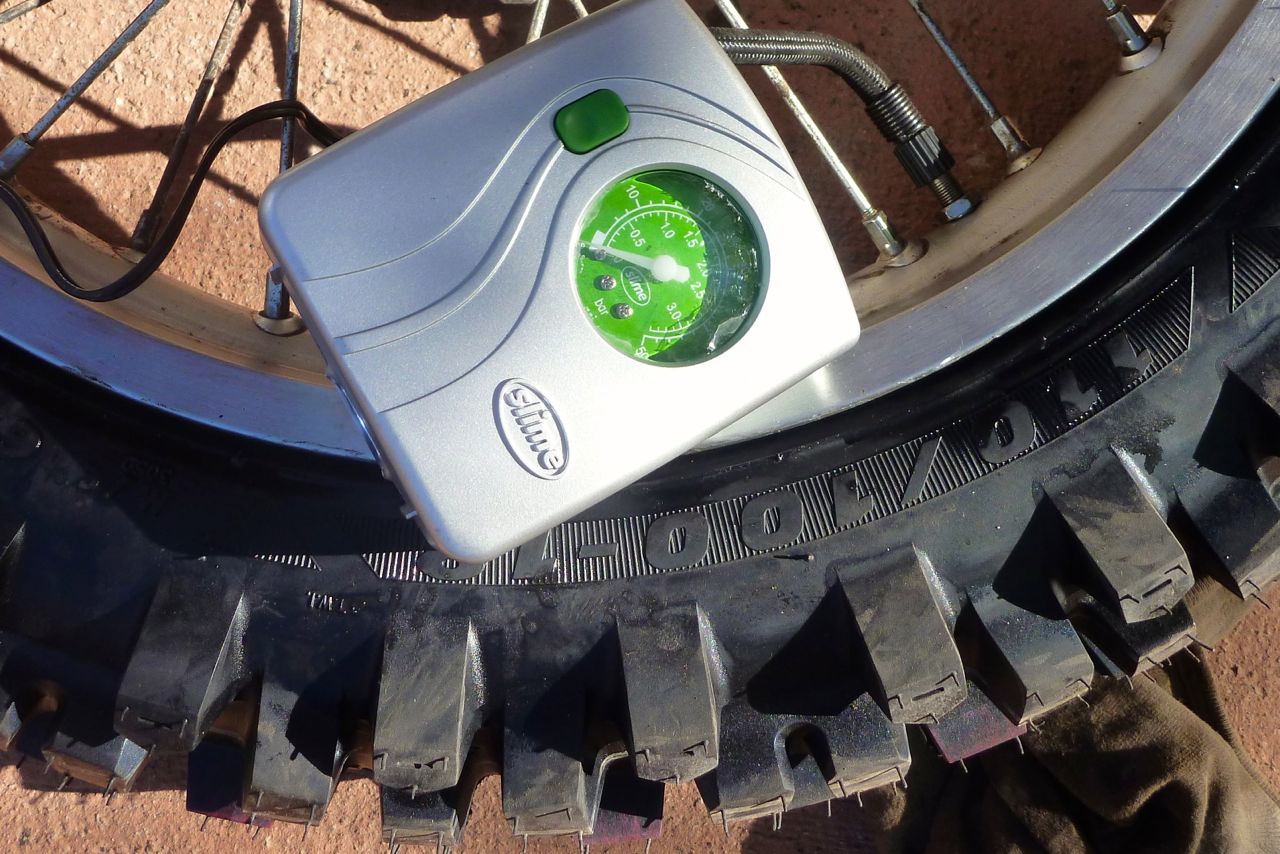
Slime anti-puncture fluid and compressor (both $10) Can’t say the luridly green Slime fluid stopped any punctures on my ride, but for ten bucks it was worth the squirt. Also on the shelf in Walmart was a Slime-branded 12-volt compressor (right) also for a tenner and with a pressure gauge too and the ever useful flashing light. More compact and lighter than my Cycle Pump, I actually used the Slimepump a few times and it performed fine. Verdict: well worth $20 for peace of mind.
Slipstreamer Spitfire windshield – $70 Just what was wanted for the CRF; a small, inexpensive, one-size-fits-most screen to keep the wind and rain off. Mounting is a bit rudimentary but adds up to a quick, tool-free way of temporarily removing the screen while leaving the bar mounts in place, something I was slow to catch on to for dirt day rides when the screen was not needed. With only two mounting rods (no triangulation) high-speed runs into headwinds or rough tracks caused the screen to inch back – this could have been fixed by anchoring the base of the screen to the headlamp cowling. It seemed hard to get a tight fit on the screw down screen mount lugs too, but meddling with spacers or rubber shims would fix this. Verdict: Great value, simple fitting and effective.
Trail Tech Vapor digital guage – $90 A great gadget for a travel bike like the CRF-: with limited instrumentation. Click the link for full review.
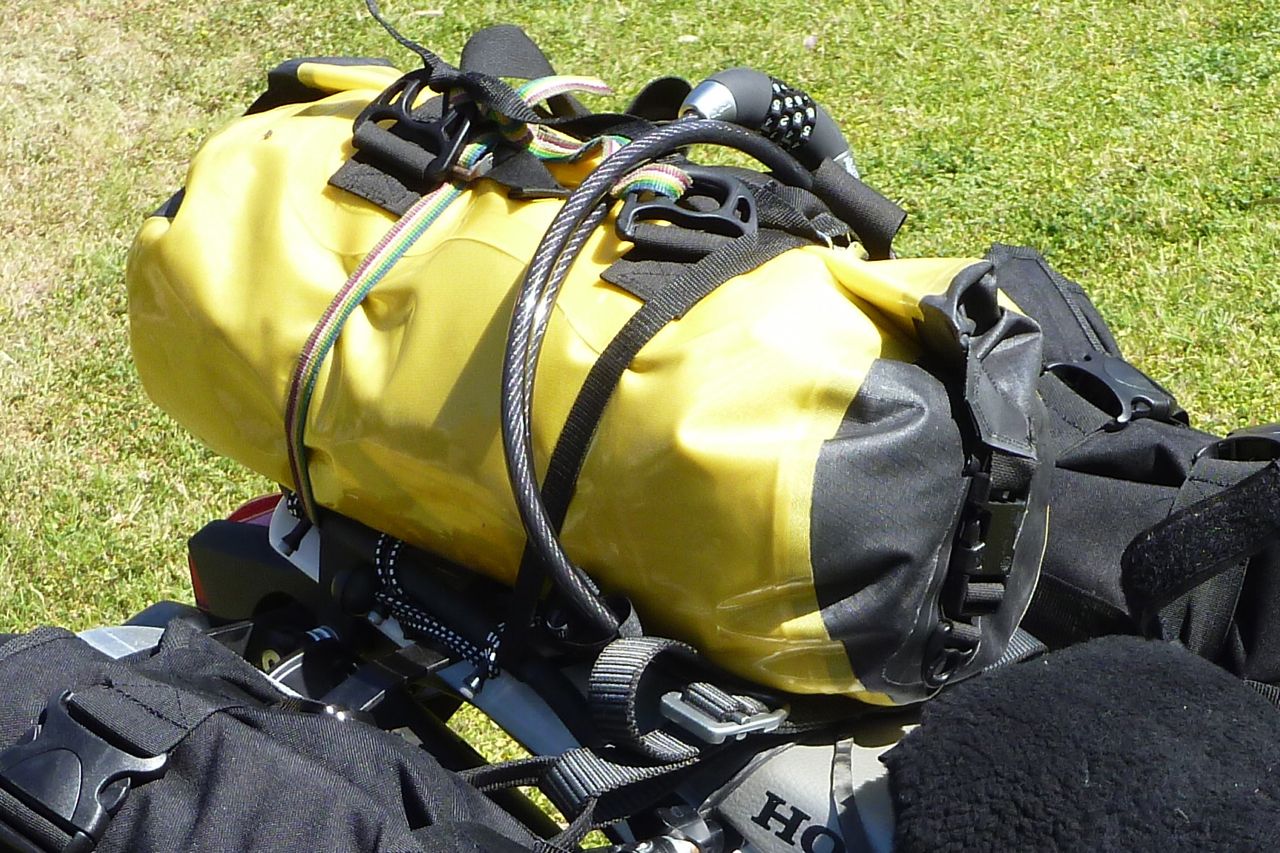
Watershed Chattooga dry bag – £65 Another kayaking item that works well on bikes. Watershed dry bags use a tough fabric, but unlike your average roll-top bag, they feature a chunky ziplock-like seal that makes the bag immersion proof. At about 20 litres the Chattooga model is compact but big enough to take my infrequently used tent, sleeping bag, sleeping mat and a spare pair of gloves. It didn’t happen on this trip but it’s good to know in heavy rain you need not worry at all about your camping gear getting wet until you take it out. For smooth closure the zip seal can use a bit of WD or 303 once in a while. Verdict: Watershed when it absolutely positively has to be kept dry.
Tubliss Generation 2 is now widely available in 18, 19 and 21-inch sizes for WM3 (2.15”) or slimmer rims. I fitted one to the front of my Himalayan
My Suzuki GS-R ran 19-inch SM Pros and the plan was always to have them running tubeless, hopefully doing a more successful job than I did on my Tenere’s wheels a couple of years earlier. On that bike the sealed-up rear never missed a beat, but the 21-inch front leaked off-road and as I failed to monitor it, it got soft enough to ding a rim on a gnarly Moroccan climb and with that lose all pressure.
Back then I wanted to try Tubliss but they weren’t sold in Tenere sizes in the UK. I picked some up in the US for around £55 each. The vid below explains it all very loudly. Man that guy can talk!
I was expecting a hard time fitting them in my Heidenau K60s – it’s a stiff tyre and you’d imagine the bulk or shape of the red plastic core and rim-lock might make tyre mounting even harder. When a sunny afternoon came by, I left the 4000-mile old K60 out against a wall to warm up a bit and then followed the clear instructions carefully. Off with the old Cheng Shin without too much difficulty, clean off the duct tape/rim tape residue and the drill an 11mm hole a few spokes up from the regular valve hole. I then talc’ed the inside of the red liner to slide better against its mini tube, lined up the rim lock clamp/tyre inflation valve and the nearby core inflator valve with the two holes in the rim (pic above; the instructions stress this is critical) and then mounted the core onto the rim.
How it works Tubliss works by using a small but extra thick bicycle-sized inner tube at very high pressure to expand the red casing onto the tyre’s bead, sealing it against the rim (see image below). By doing so it isolates the tyre’s main air chamber from the spoke nipples where air would otherwise slowly leak out.
This can be an odd concept to get your head around; a high-pressure mini-tube is still used to press and seal the tyre bead against the rim, but the tyre chamber itself is effectively tubeless. An additional hole for a rim lock is required so as to pin down the red casing and completely eliminate tyre slip and valve lean at low pressures (as happens with regular tubes at low psi). Because the thick Tubliss mini tube isn’t anywhere near the flexing tyre carcass and is inside the red casing, it would take an exceedingly long and sharp spike to puncture it. Plus everything remains cooler; the benefit of all tubeless tyres. You can still tune spokes, something not be so easily done with other spoke nipple-sealing methods. The rim lock uses a ‘hollow bolt’ which is also a valve to inflate the tyre chamber to a regular pressure. The original valve hole is used to inflate the red casing tube to 100 psi.
The core went onto the rim easily. Just follow normal bike tyre mounting techniques: make sure the red core is right down in the well of the rim as you lever the other end on. Usually I use diluted washing-up liquid but that tends to dry up quickly. This time I used more slimy 303 Protectorant; it’s the same as Armor All that Tubliss recommend. Use lots so it’s lubed forever inside. The core slipped on with no levers. WD40 will do, if stuck.
Next came the tyre. This was going to be hard, or so I thought. I double checked I had the direction arrow in the right orientation, then pushed the wheel down into the tyre using the folded metal plate which Tubliss supply, rim-lock down. Following the instructions closely (and having changed a few tyres in my time), the plate did genuinely help the core-fitted wheel slide into the tyre with less effort than normal. And if you kept pushing down as they advise, with a bit of multi-armed Vishnu-ing I got the wheel inside the tyre walls.
The rest – levering the tyre bead back onto the rim – was like regular tyre mounting: minimal lever force where possible combined with maximum lube, while always making sure the tyre bead opposite the levers is being kicked and crammed into the tyre’s well (central dip) so as to free up vital slack when levering to reduce the effort which is when mistakes are made and tubes get pinched. Like they say on the leaflet, lube is the key to this. In the end the last bit of tyre went on without the final lever. This used Heidi was not so hard to mount after all. The same-sized new K60 for the back was a bit more effort shoving inside the wheel, even with the Tubliss plate, but with slack and lube, it got there.
With all this done the next step was to see if the system held air once everything’s pumped up. There’s no reason to think the mini tube got pinched, protected as it is inside the red plastic core. The key is the red liner sealing against the bead of the tyre to keep the tyre at the right pressure. You need to put 100 psi into the mini tube to make sure it seals: You want to check your average mini compressor will have the power to do that, but because the volume is tiny it may be easier than you think – it’s not like pumping up a full sized moto tyre to 100 psi.
Testing, testing
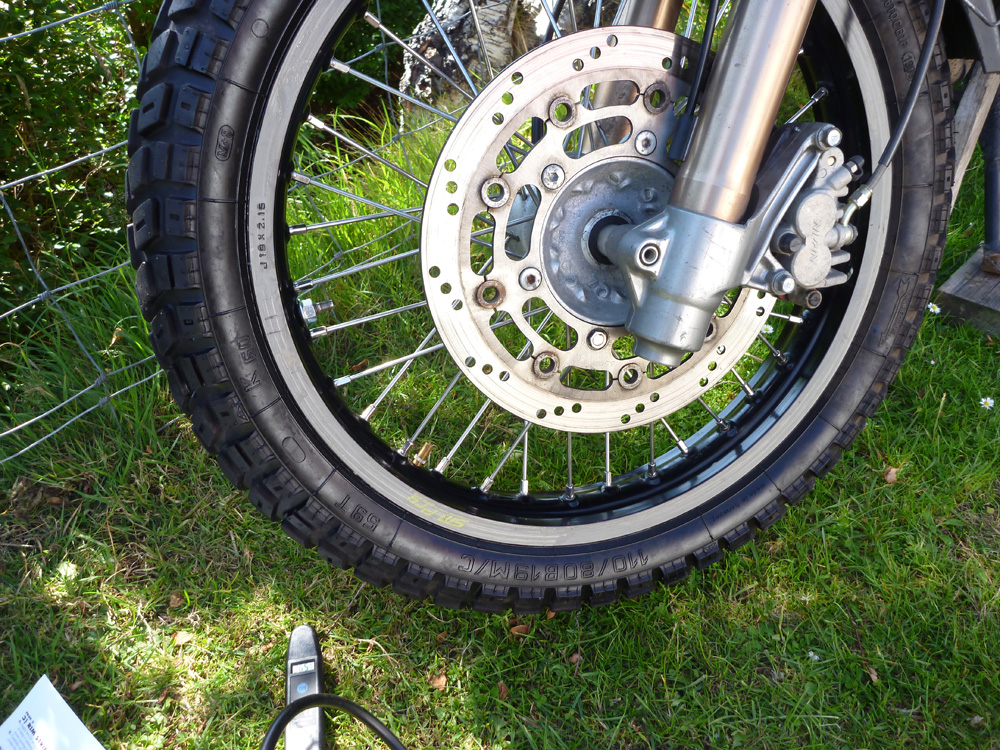
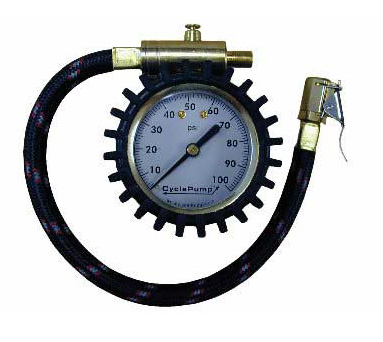
You may read complaints that fitting Tubliss doesn’t work first time round or doesn’t work at all – the tyre goes down – but so far overnight both tyres have held their pressure. Checking the tyre and core pressures after 10 days, I found both cores down by about 10%. I think that’s acceptable and can’t be sure everything was at the right or equal pressures to start with so I topped it all up to 100 psi and 33 for the tyres and will check again in a while. Tubliss do say to check pressures before each ride. Unfortunately, checking the high pressure cores blew the brains out of my digital tyre gauge (right) and those metal sliding rod types only go up to 50 psi. I have a bulky Cycle Pump gauge (left) that’s sat around for years and whose moment may have come. As mentioned, a mini-compressor able to deliver 100 psi without fatal results will be needed. Not sure my Cycle Pump (below) or anything like it can manage – we’ll see on the Himalayan. Anyway, there are always roadside garages.
Should you have a flat on the road it’s only the tyre chamber that loses pressure, not the small sealing tube of course. Once quickly plugged (left), the tyre can be reinflated with a regular bike compressor to normal road pressures.
Initially Tubliss didn’t claim to be suited to road riding let alone overlanding, but that seems to be changing as the system has proved itself. What is important is making sure the tyre sealing tube is kept at around 100psi. That may take more frequent checking than you’re used to, at least until you get a feel for the rate of loss, if any. On the road and out in the world a reliable mini-compressor is a vital tool.
A mate with Tubliss in his TTR has had no probs, including air freighting it around the world. He’s reminded me that, as the video above mentions, injecting sealant like Slime/Oko/Ultraseal (right) is a good idea and over time helps seal the tyre right up. I did the same to the Tenere when I sealed those wheels (right) and if nothing else it helped highlight leaks oozing out of the front.


 How it works