Tag Archives: Barkbuster Storm handguards review

Enfield Himalayan: desert ready

Himalayan Index Page
himlabels.jpg
s1nzmangro
himheadly

While I was busy dodging the winter under the shady mangroves of the Coromandel peninsula, Simon-with-a-workshop quietly worked on my Himalayan, like a gnome chipping away in a pink rock-salt mine. The long list included:

Bolt-ons

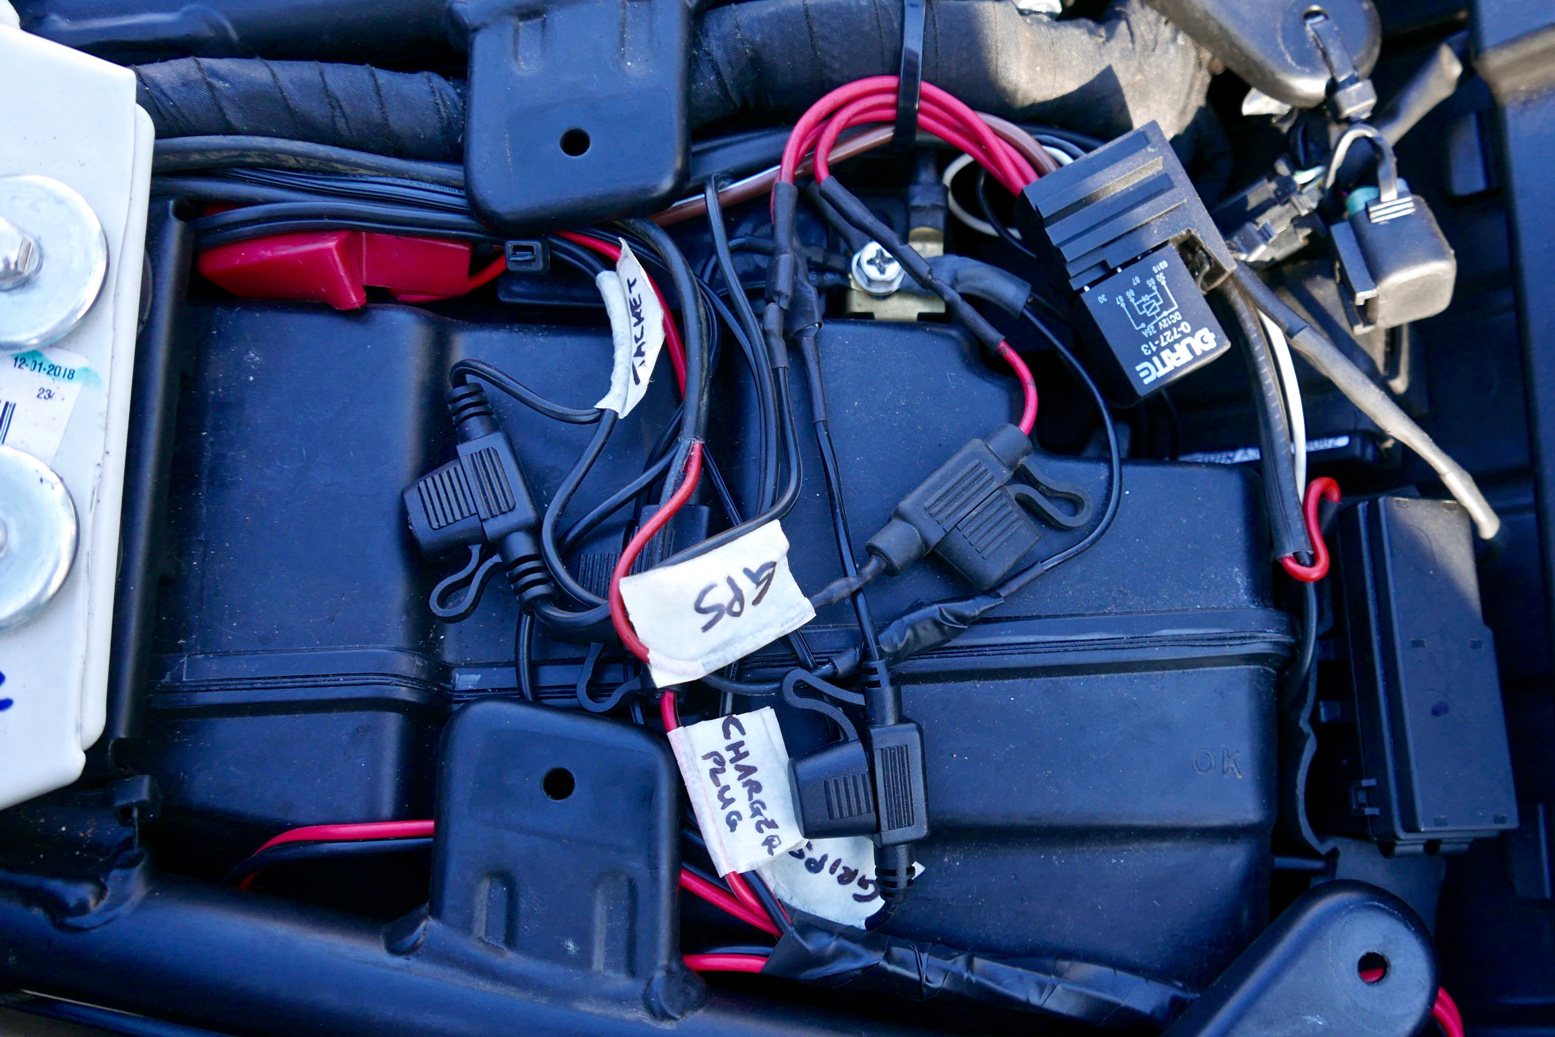
Move the Oxford heated grips control module to an accessible position and rewire it to the ignition, not the battery, as the original owner had done.

him-ox.jpg
himleads

Fitting ancillary leads off the battery for my heated jacket and Cycle Pump/battery optimiser.

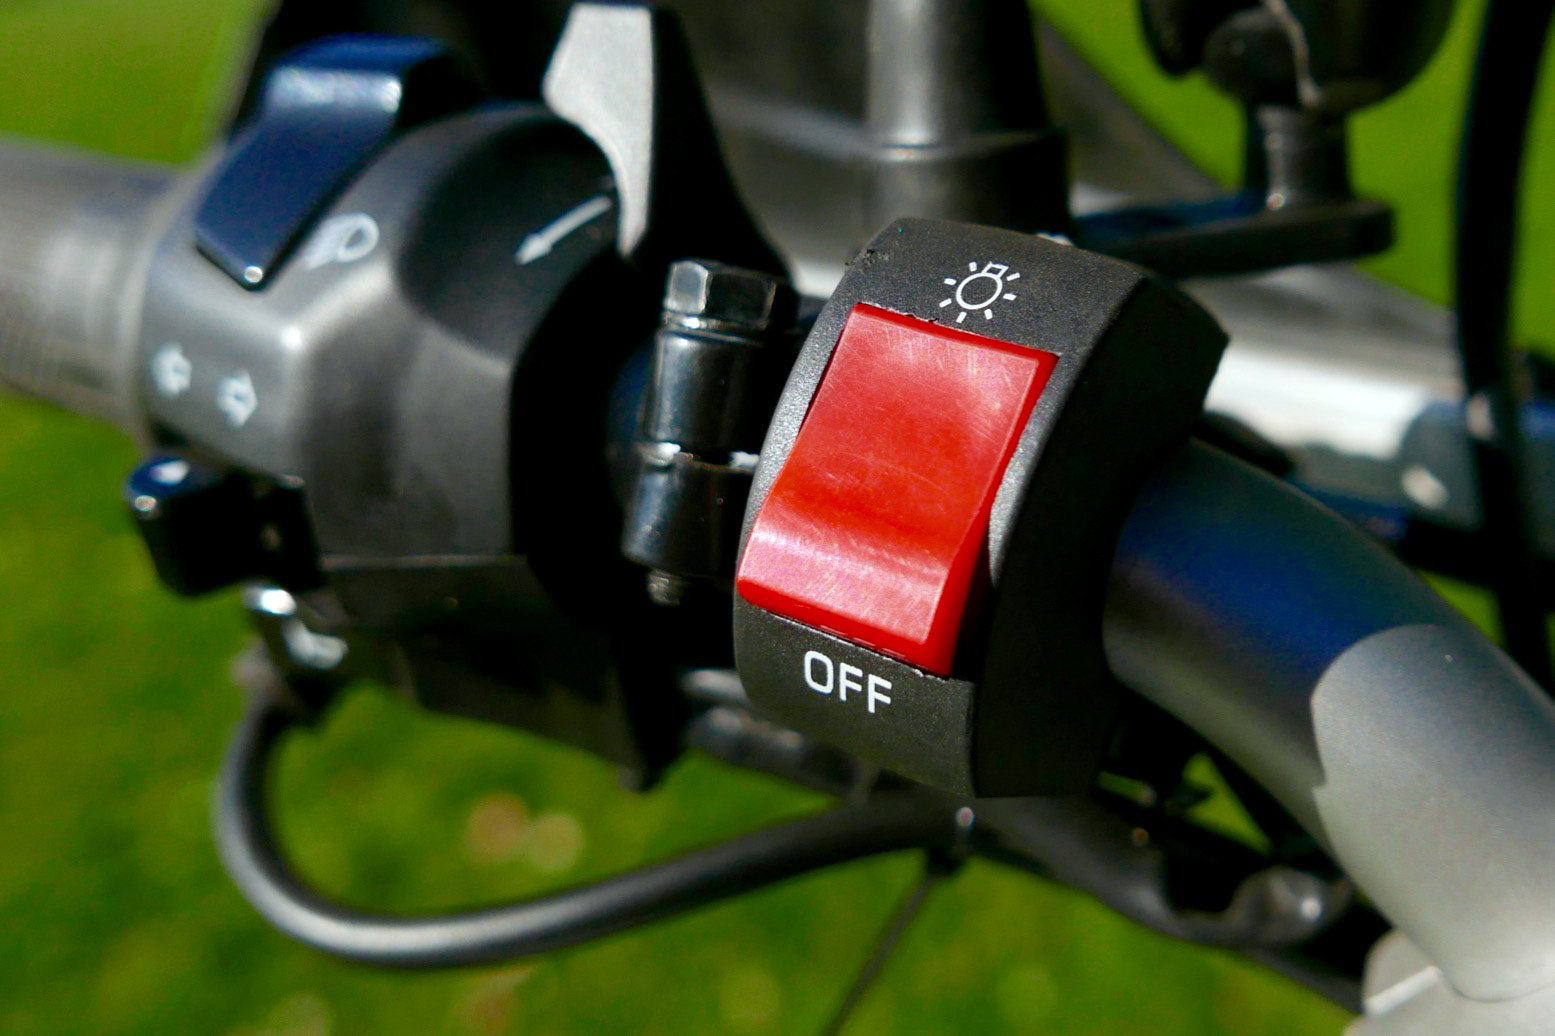
Fitting a switch to kill all lights. Handy for battery saving as well as leaving the highway unnoticed for stealthy wild camping.

himlightout

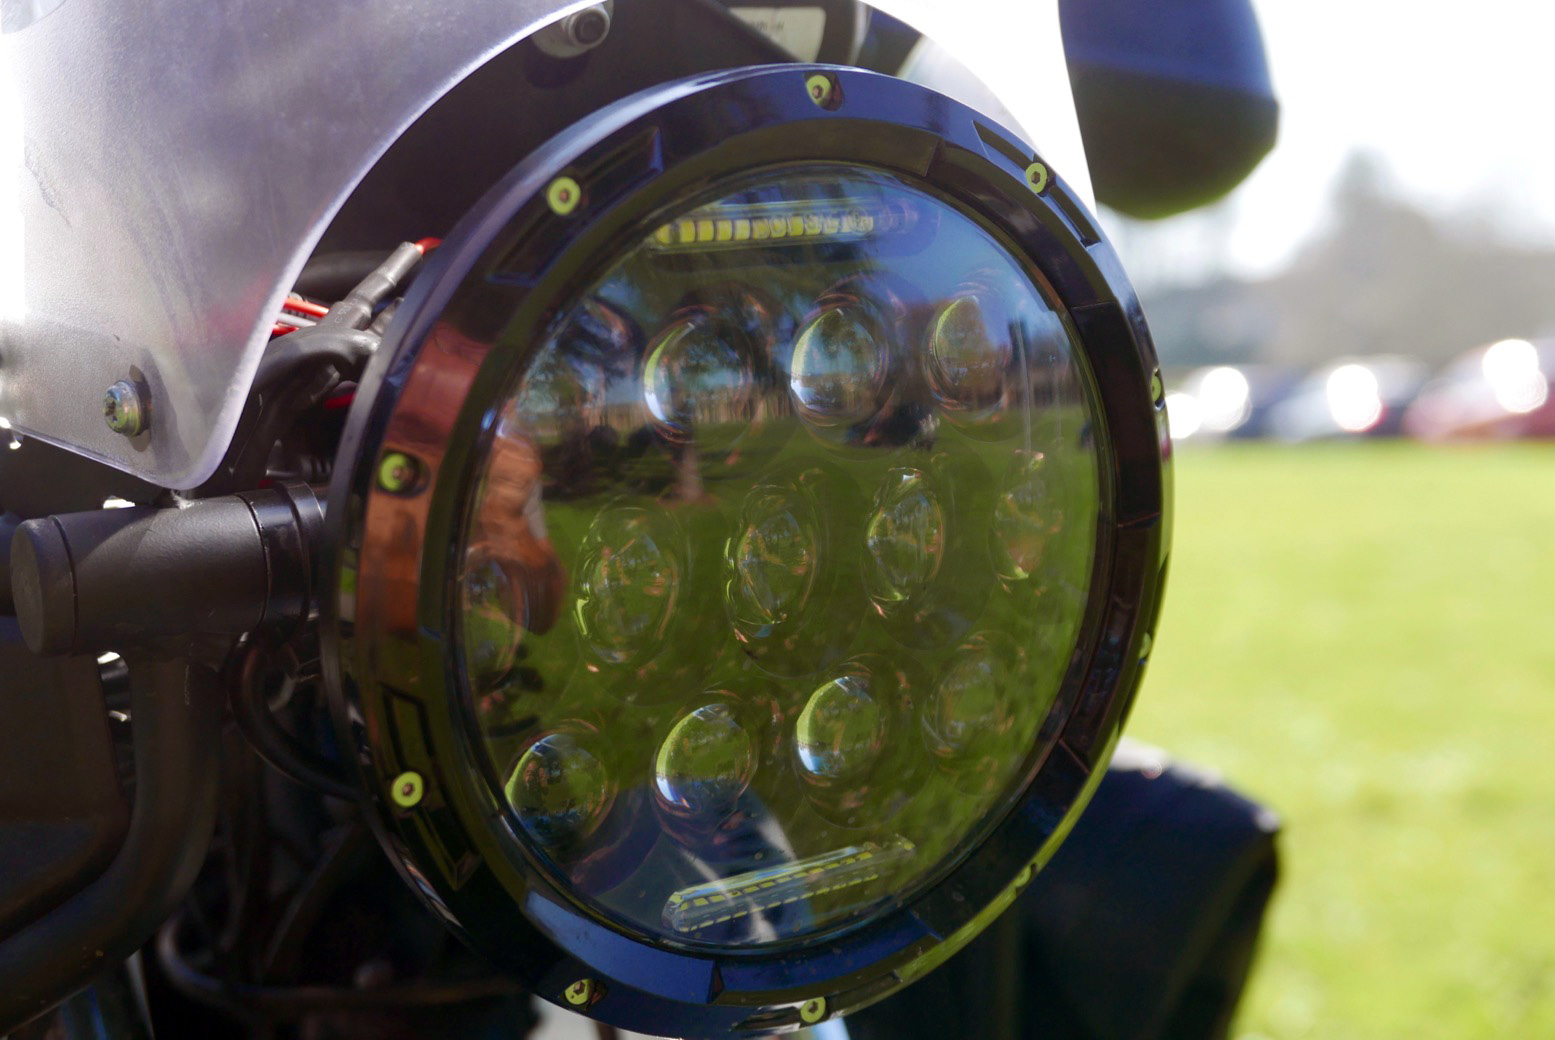
Refitting the cheap LED headlamp which came with the bike. It’s the same one I put on my XScrambleR. Never rode that bike in the full dark but although it saves watts (or is it amps?), I suspect the LED lamp looks better than it shines.

himLED
him-temp

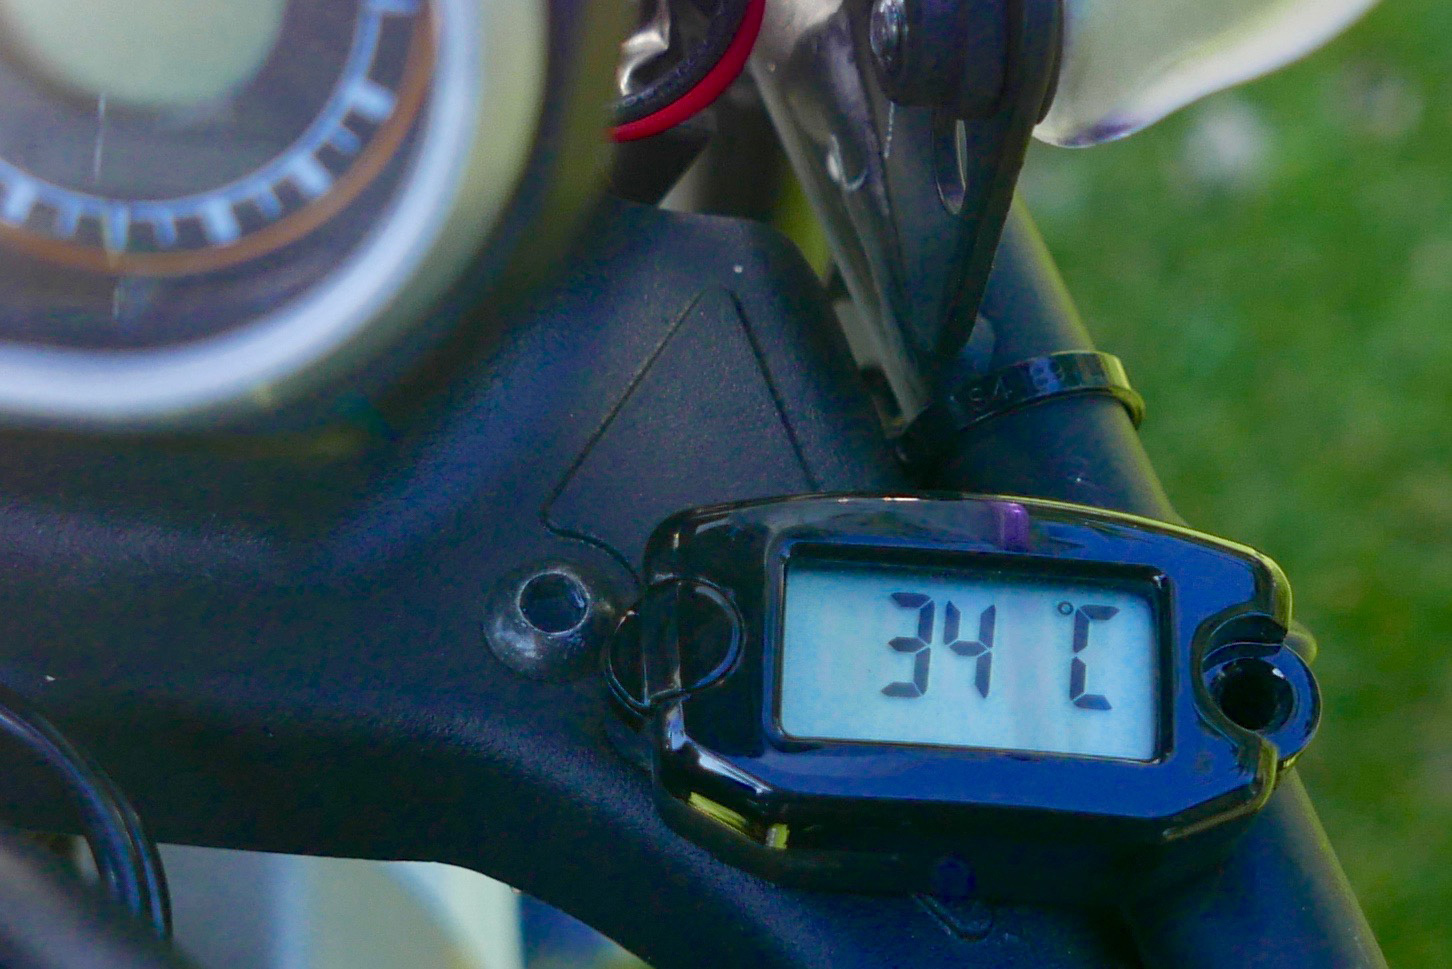
To monitor engine temperature a Trail Tech engine temperature sensor is more useful, accurate and quicker responding than relying on the stock ambient air temp sensor. At a cold start it will show ambient anyway, same as the stock in the dash, but once running, reading off the spark plug, the TTech soon shoots up. Even with the oil cooler and the ‘under piston oil sprays’ we read about, the low-tuned, air-cooled motor’s reading reaches a staggering 240°C at 65mph on the motorway, dropping to around 175°C in town. The spark plug is of course just about at the hottest point of an engine so basically it’s quite normal. ‘They all do that – sir‘.
Under the seat the Himalayan’s ambient air temperature sensor got relocated anyway to a position less affected by the motor’s downwind heat flow so it gives a truer ambient reading once on the move. It’s a common mod.

himfuse.jpg

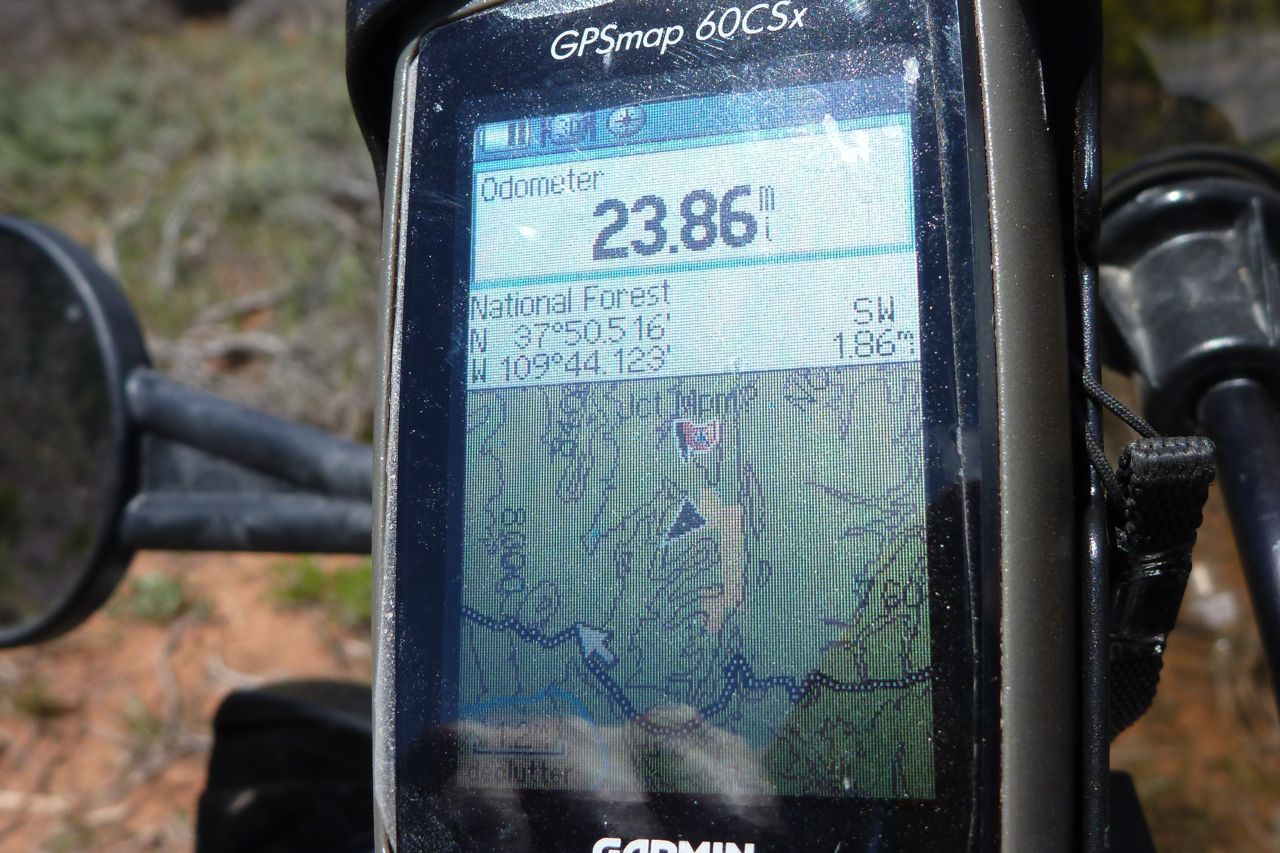
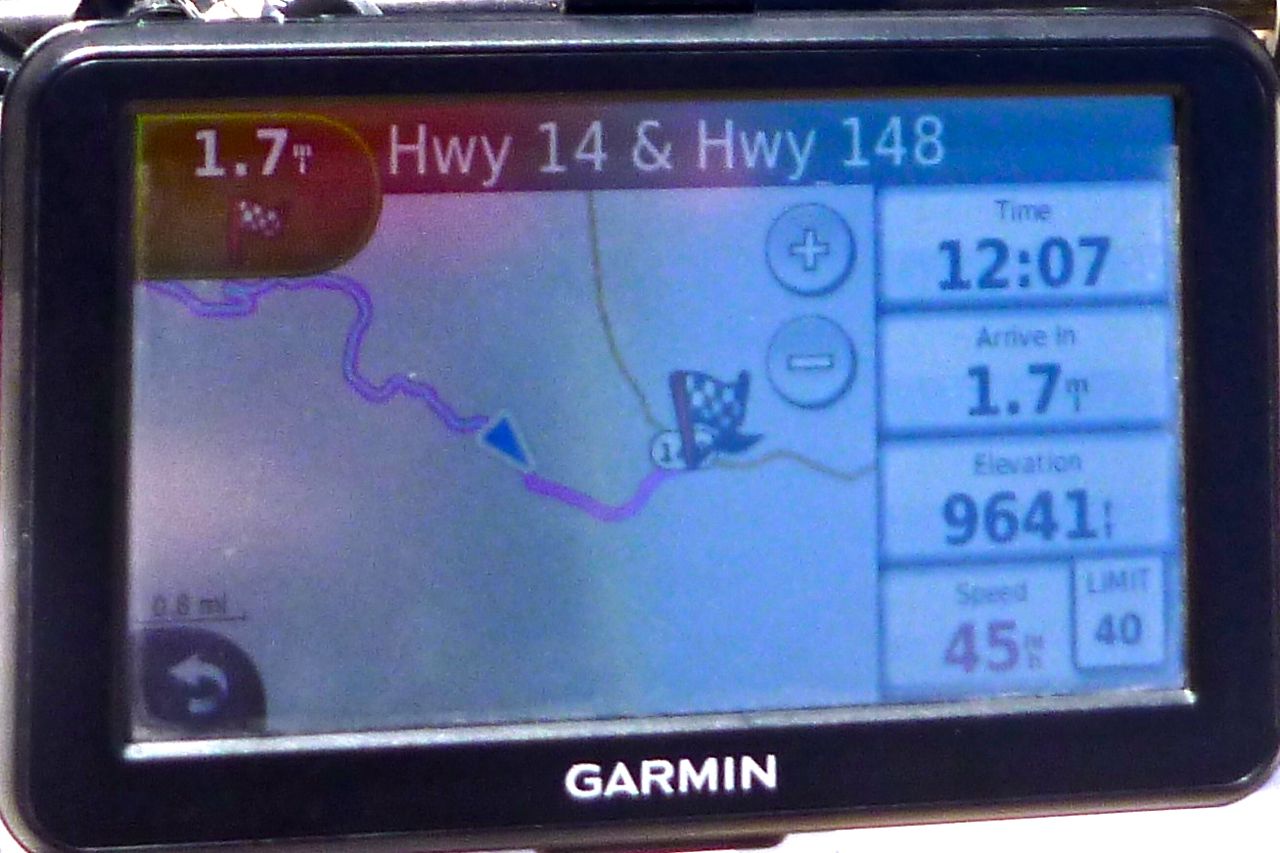
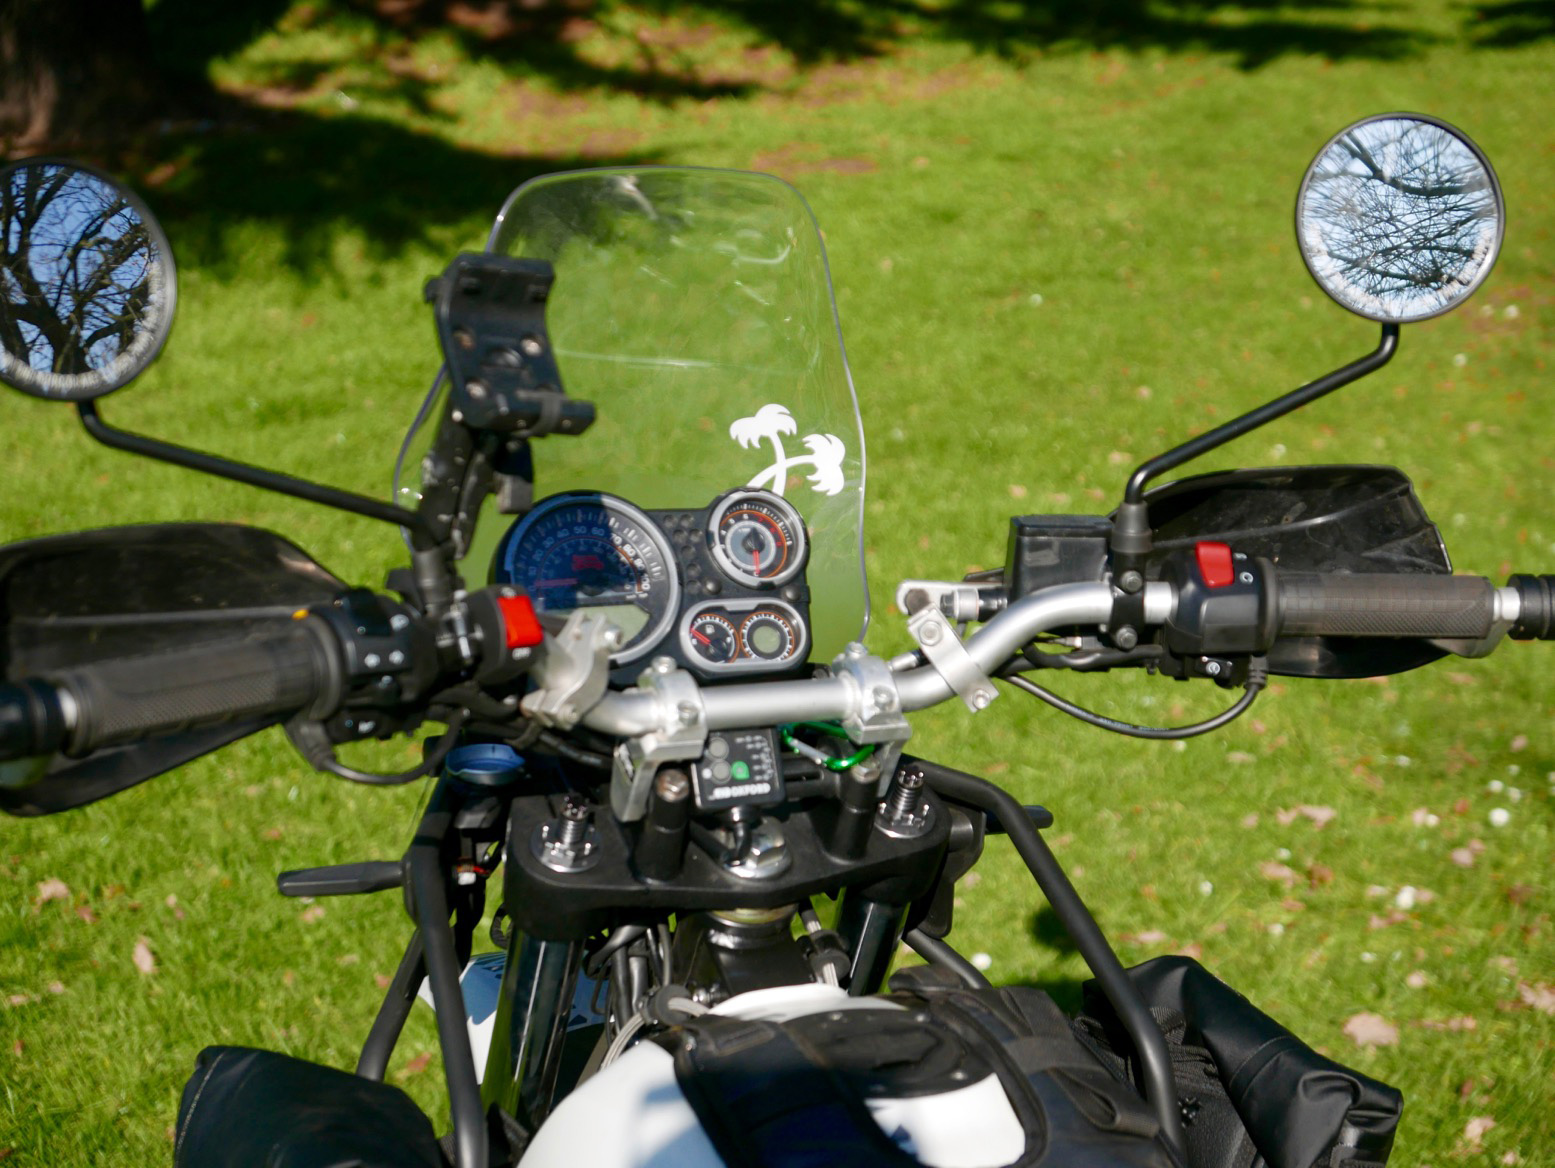
Garmin Montana cradle fitted to left mirror stalk with RAM mounts and hardwired to the ignition. I thought they’d not fit for want of cable slack, but I was wrong and the adjustable Rox Risers have raised the stock bars a healthy 50mm. It required releasing a clip off the braided ABS brake line under the tank somewhere, and the barely needed cold start cable was also on the limit. With the raised seat it’s now easy to stand up and to not stoop once I’m up there. Halleluia.

himkok
barkbt06
recycle

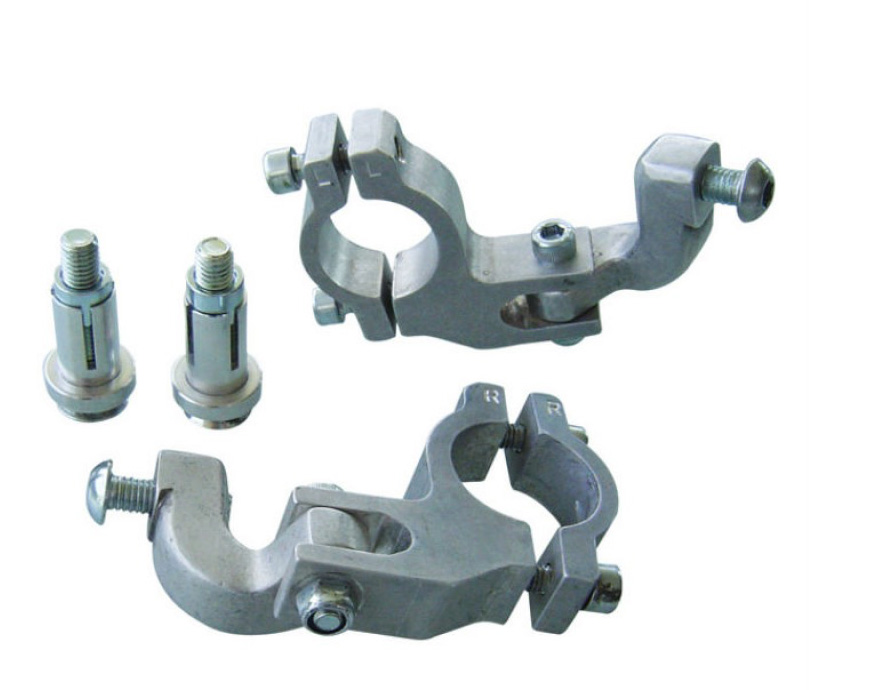
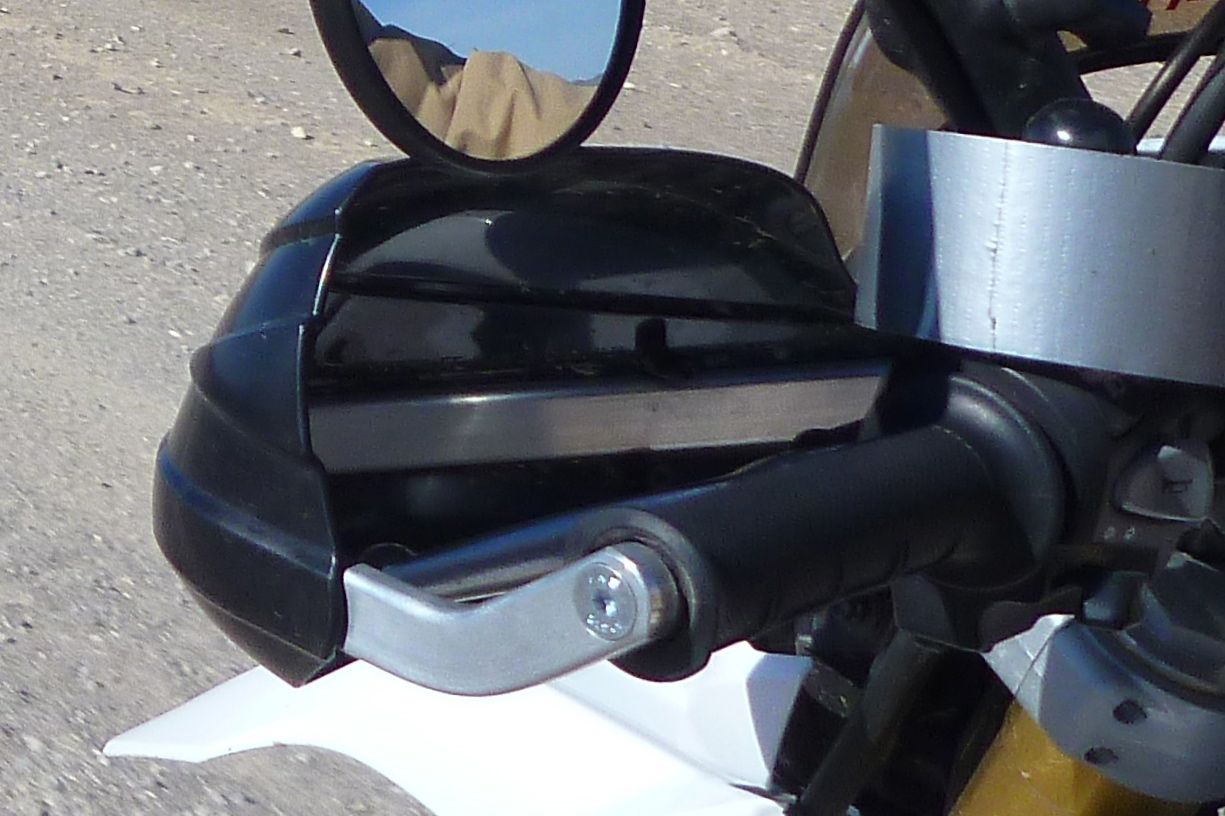
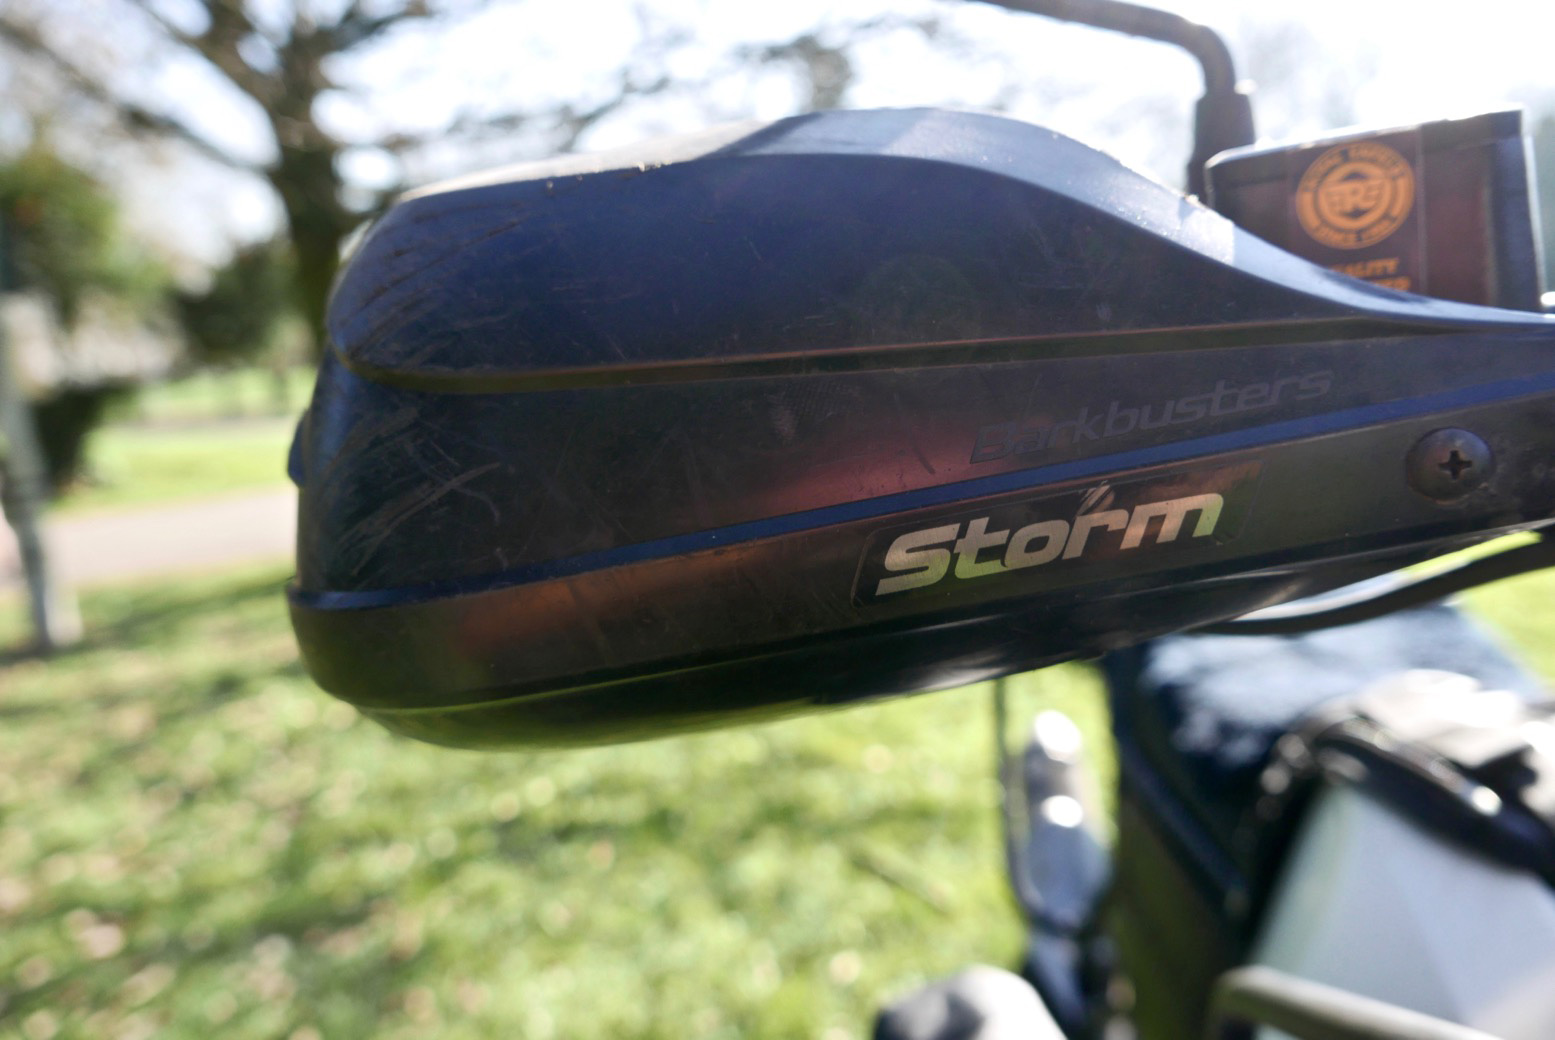
My ancient Barkbuster Storms are now on their 7th outing since fitting to my XT660Z back in 2008. I should win some sort of recycling award. Simon had to make some simple mounts as for some reason, the curvy BTC 06 adaptors (right) which were recommended didn’t fit. Could be that a decade on, newer Barks have changed shape.
The Barks require the slightly adjustable stock screen to be set fully forward, but riding back I can’t say the turbulence was any better or worse than in the original position. I think that at the speeds the REH can achieve, it’s all a bit academic. And as it is I’m sat on a motorbike out in the open air. There will be turbulence.

himbarker
himbarkmount
himcoil

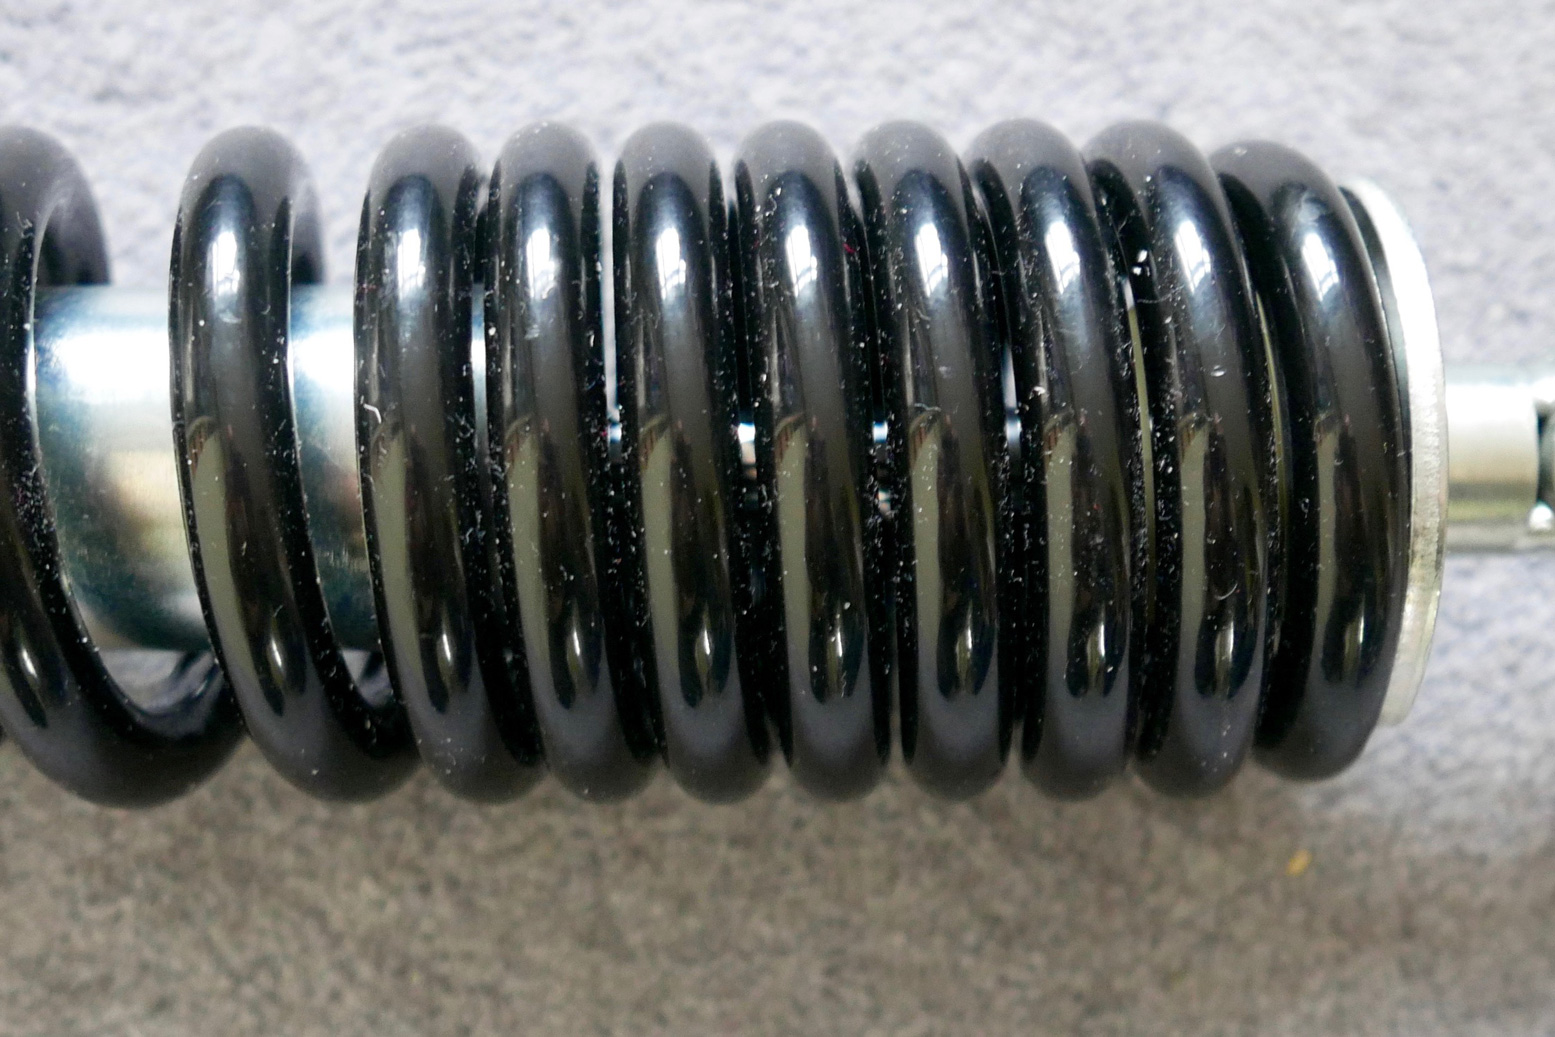
Like so many bikes I’ve owned lately, I assumed the stock shock would be a budget keep-the-fender-off-the-wheel job, so I pre-emptively ordered the Thai-made YSS which took a few weeks. Some reports claim the stocker is too harsh, others say too soft, others just right. On the road it didn’t feel too bad – perhaps the usual mix of over-sprung and under-damped. It weighs over 4.8kg and half appears to be coil-bound, but in fact there’s a couple of mm gap in the coils (left) which adds some progressiveness.
It would have been good to evaluate it properly, but the shiny red YSS is sat there like a cream cake on  cushion. Getting it fitted, I asked my LBS to check the linkage grease. Who knows if they did. I may also rivet on a flap to stop it getting plastered with crud spun off the back wheel.
The YSS is about a third lighter at 3.3kg, costs £290, is length adjustable by 10mm, has 35-click rebound damping and will work with an HPA which probably costs half as much as the shock. Out of the box rebound came at 20/35 clicks and with 12 threads exposed below the spring preload collar. Looks like a good place to start. On the short ride back from the LBS I did detect a little more compliance with small irregularities. Otherwise it felt the same. With most suspension upgrades, I’ve found you can’t tell much difference until road surfaces deteriorate or the speeds increase.

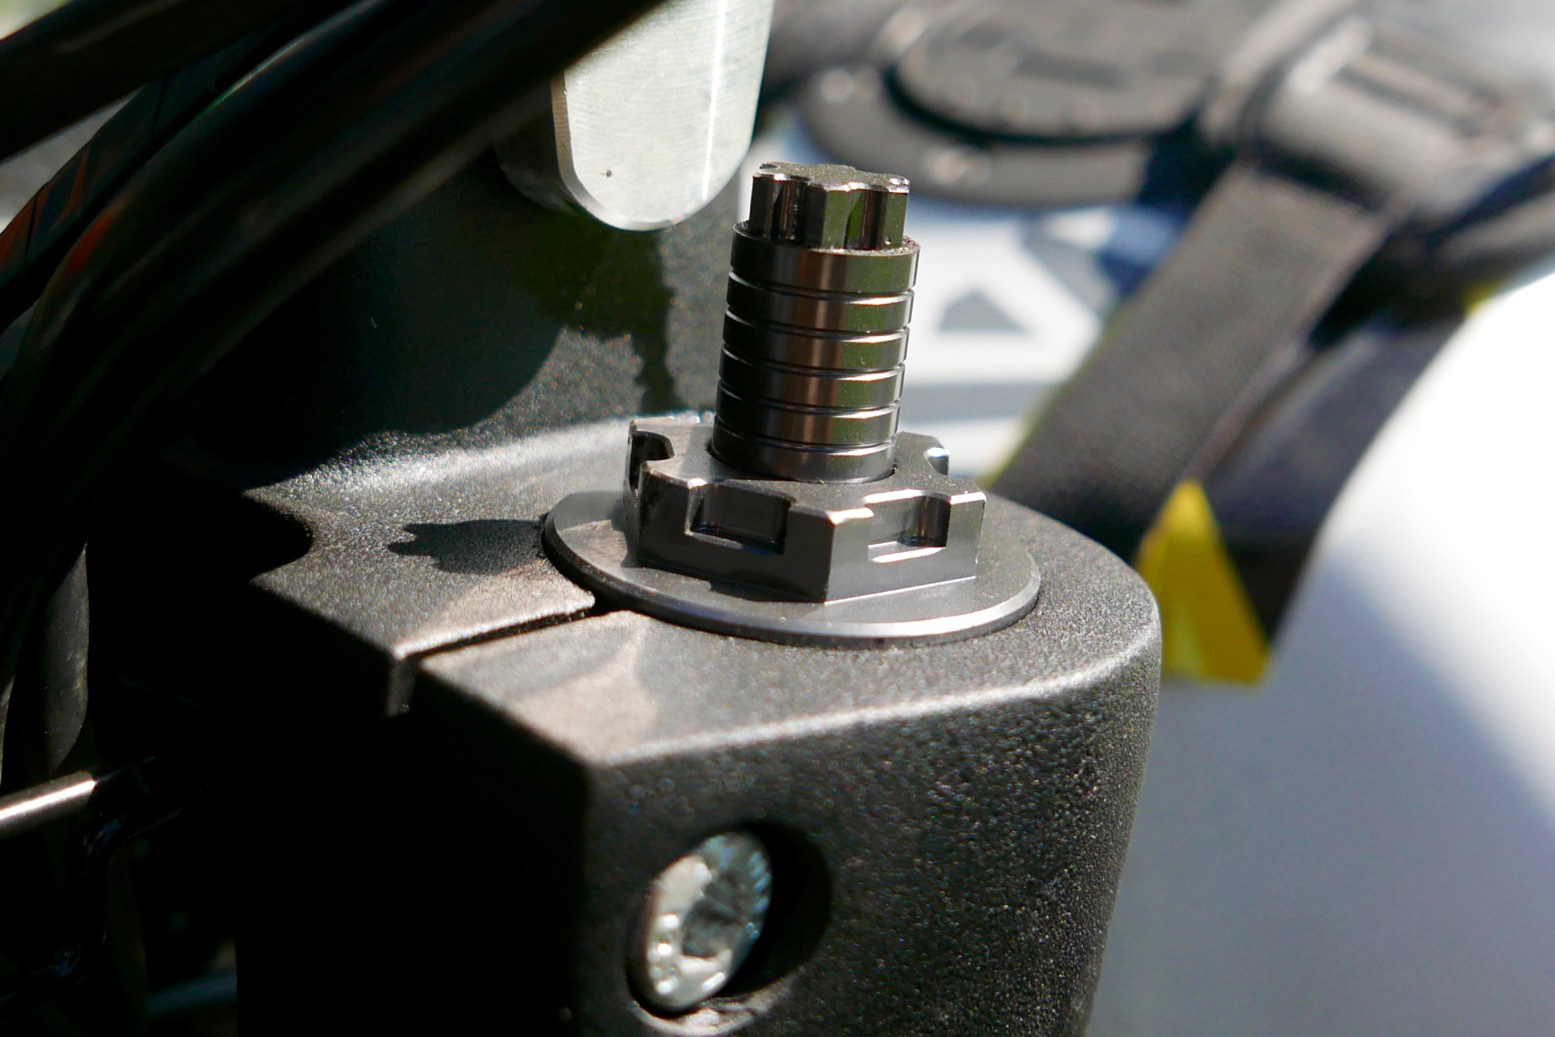
YSS fitting advice: The preload collar at the top of the YSS is now quite hard to access – removing the airbox lid on the LHS may help, as will a shorter, right-sized hex key, as opposed to the rod supplied. There is a tiny hex screw on the collar which locks it to the threads (hex key supplied). Either risk leaving it loose (collar may unwind), or make sure when fitting the shock that it’s in a position where you can get to and loosen it from the LHS – about ‘7 or 8 o’clock’ if 12 = forward. You will then probably need to wind or unwind the collar a full 360° to get the screw back in a lockable position.

himyss.jpg

A tenner’s worth of Chinese fork preloaders were also fitted on the front but are currently set at zero. The stock spacer inside the top of the fork needed to be shortened.

him-prelod

The steering head bearings got regreased. Along with swing-arm linkages, it’s a common precautionary requirement, and not just on inexpensive Indian bikes. My BMW XCountry’s head races were shot at just 6k.

him-steer.jpg
him-msgseatpad

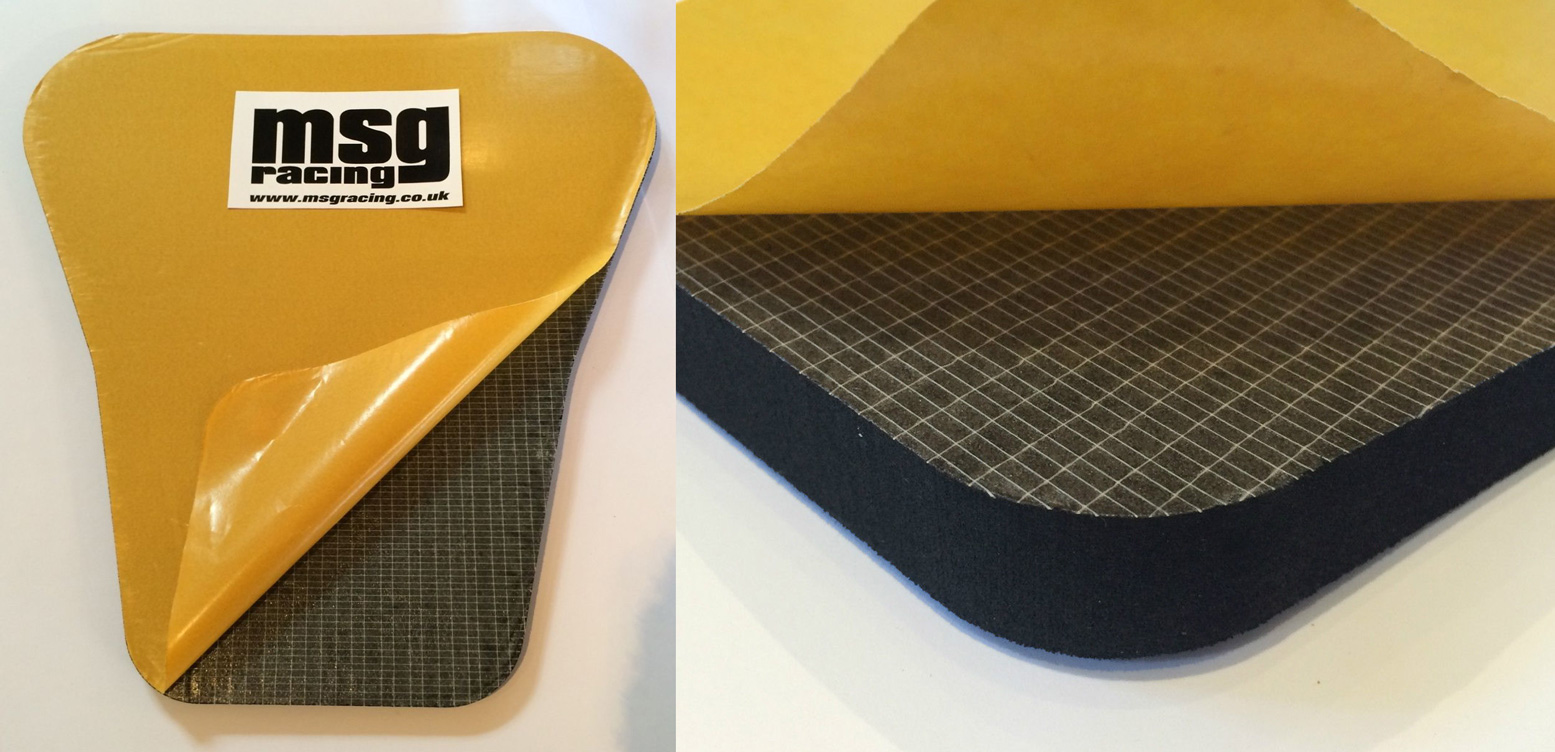
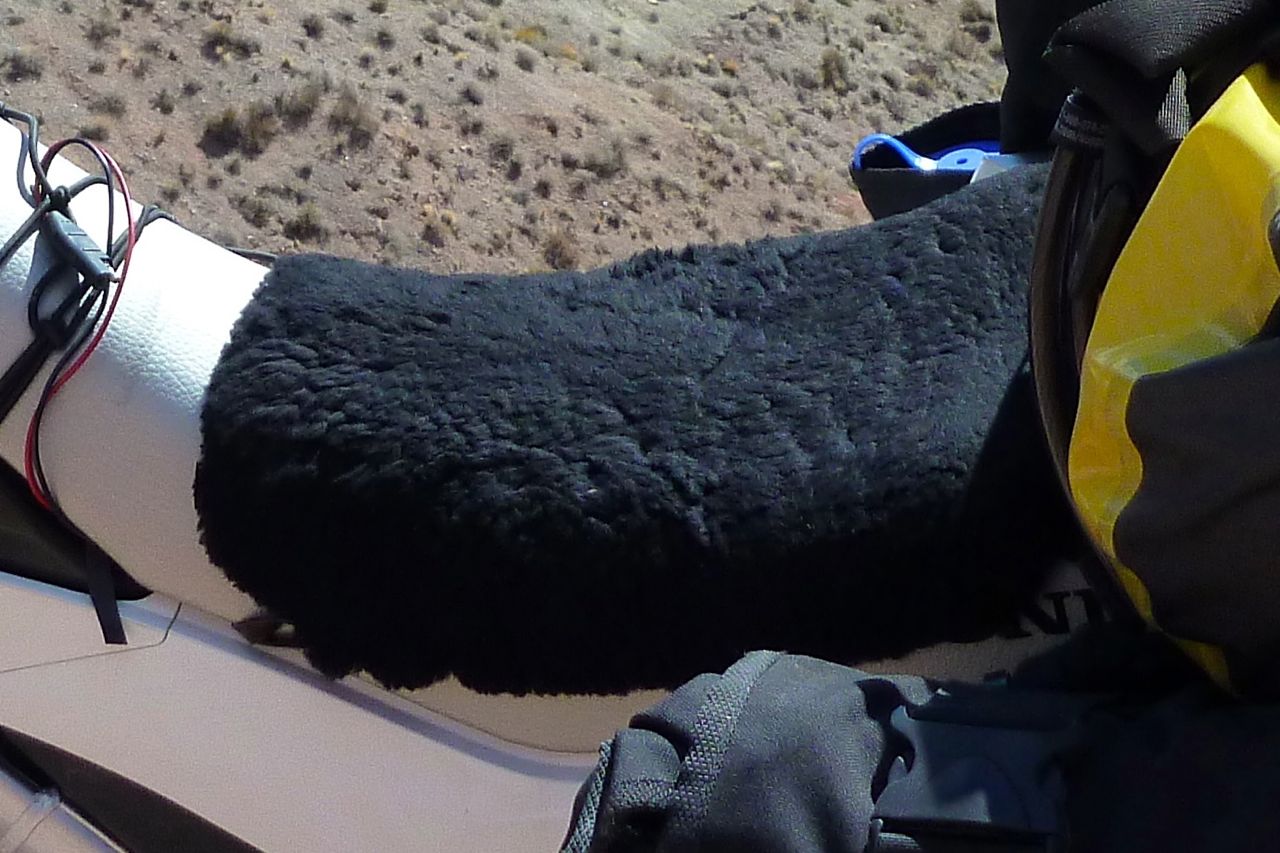
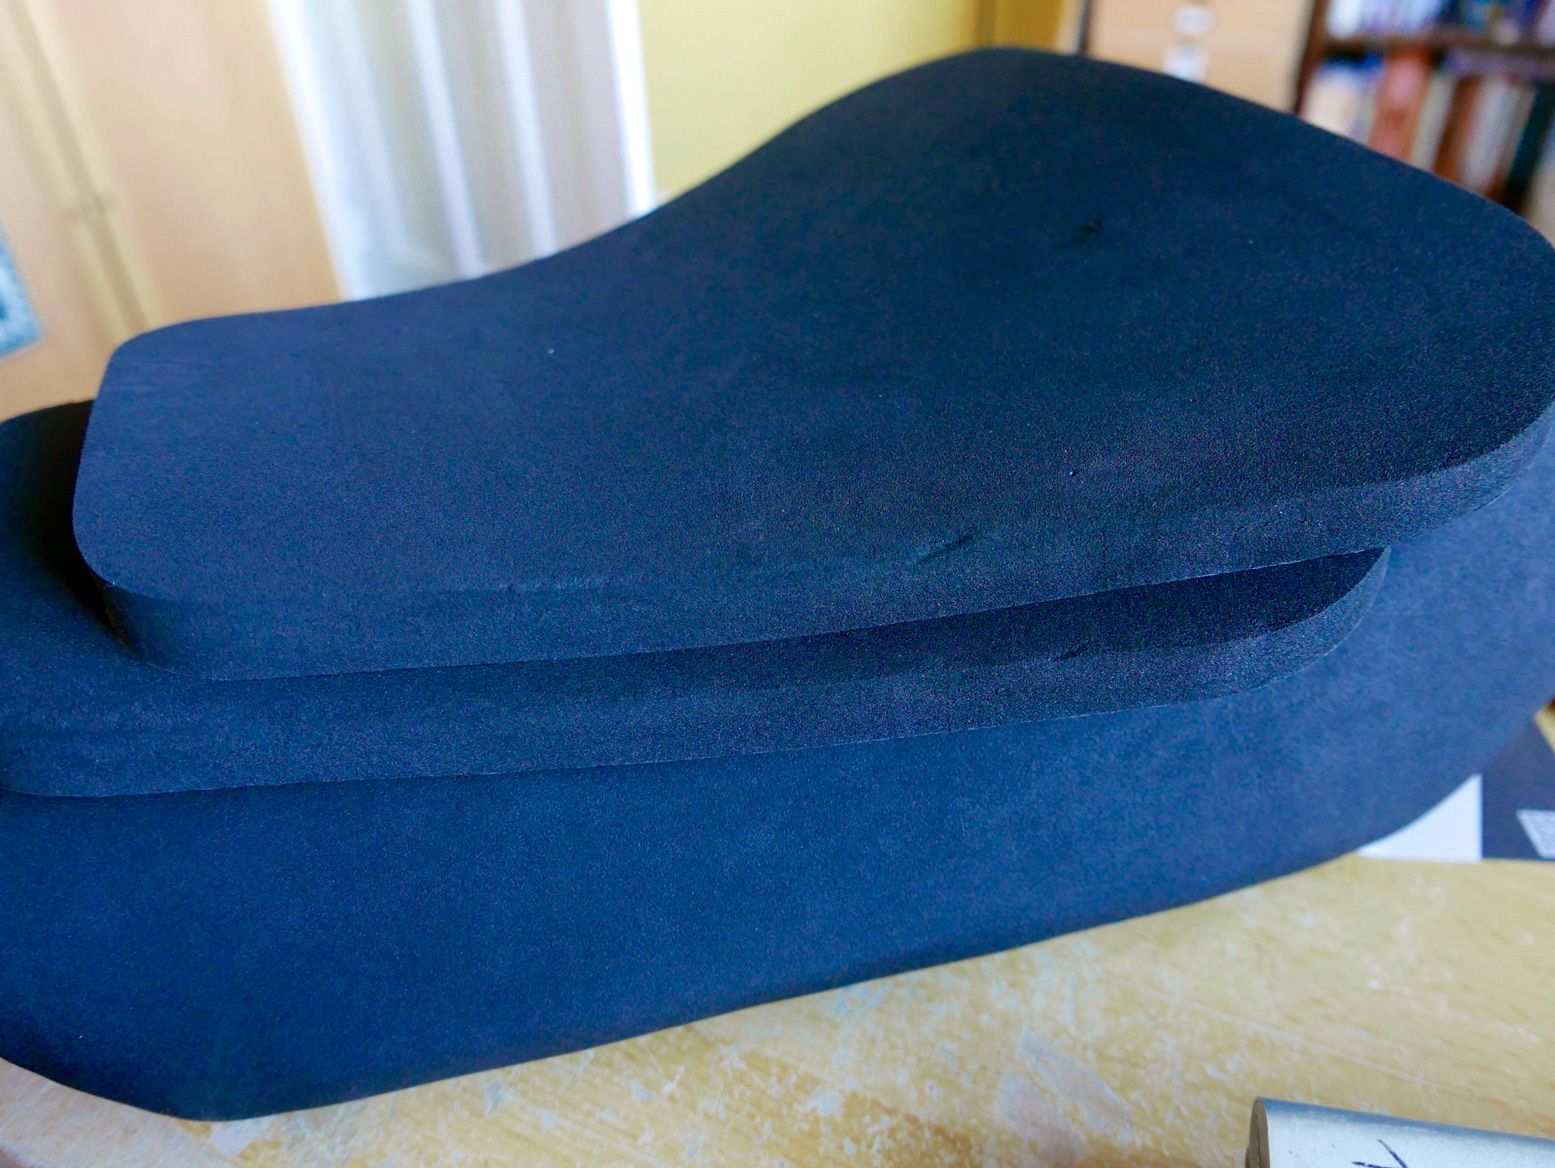
My initial seat foam bodge proved to be poor, mostly because the foam I used had the springiness of Philadelphia cheese. A fellow Himaliste recommended some pre-cut stick-on foam seat pads on ebay (left; £15 each). At 20mm I bought two and rode home with them shoved under the Aero lambswool pad.

himseatpads.jpg
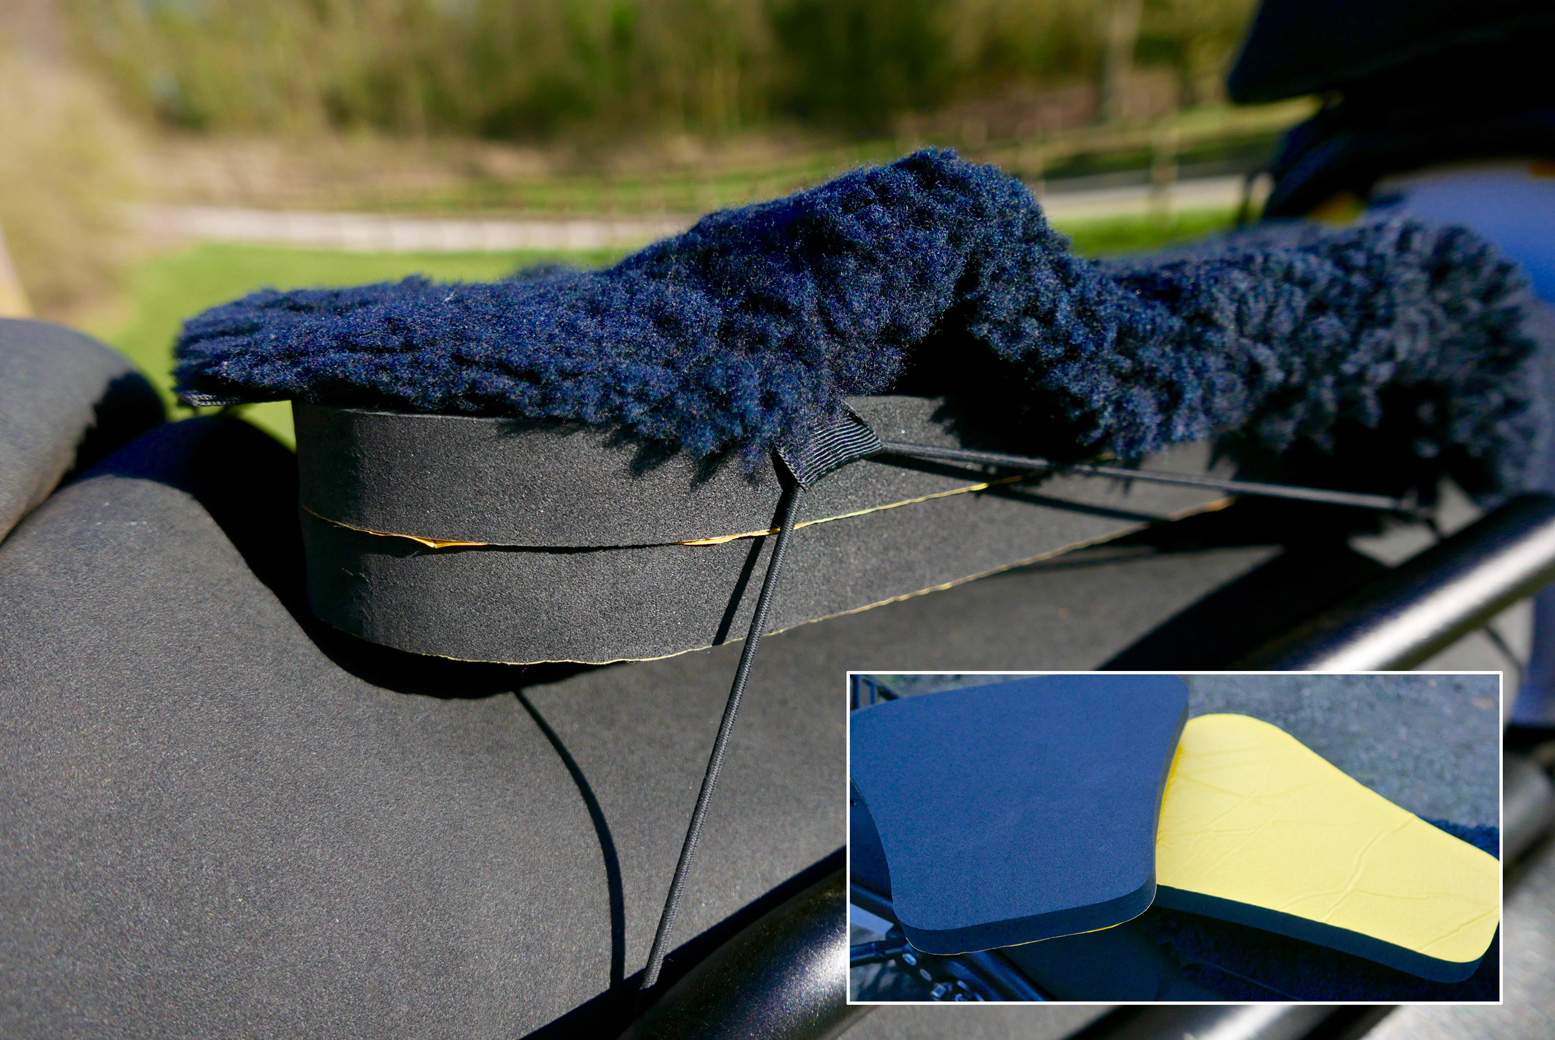
With the yellow backing still on, it all slithered around a bit and after only 120 miles the butt was sore, but I can definitely see the potential in raising the seat height. And I do wonder if the old lambswool pad makes things worse.
Cool Covers sent me one of their durable aerated mesh seat covers to try. Like wool, the idea is that air circulation reduces heat and improves comfort, but with bike saddles, one man’s fur-lined throne is another man’s agony. Luckily, the Cool Cover just stretched over the two racing pads now glued to each other and the stock seat. The back edge of the top pad was crudely trimmed to level it off. In the picture below the seat looks like it’s sloping forward – not good – but it’s actually the taut cover over an air gap. The foam below is more level than it looks.

himcoolseat.jpg

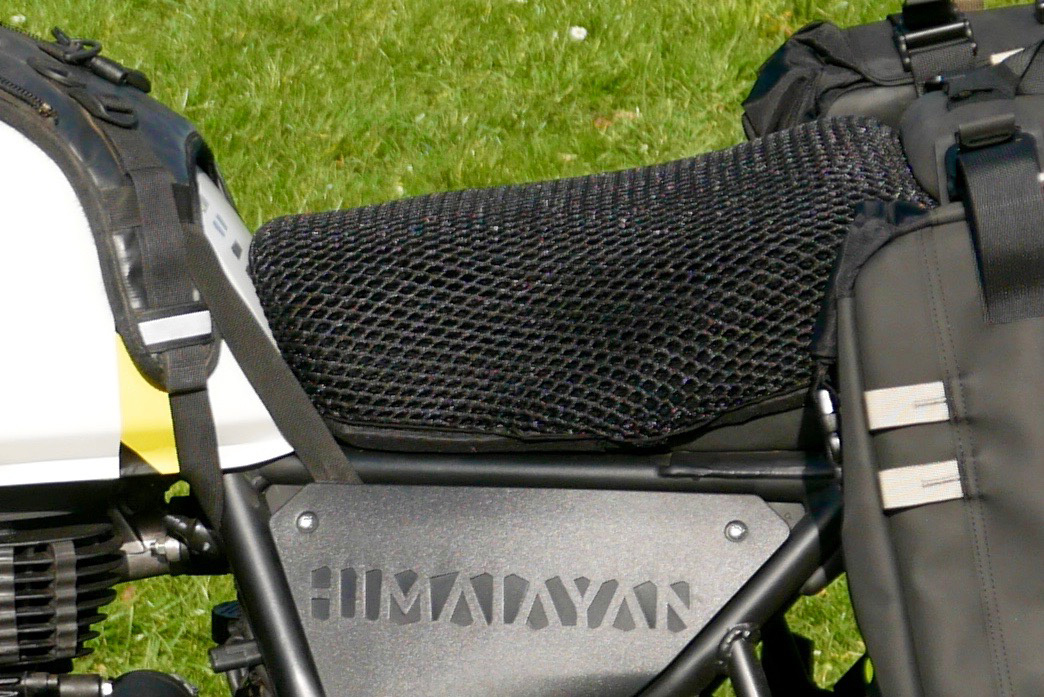
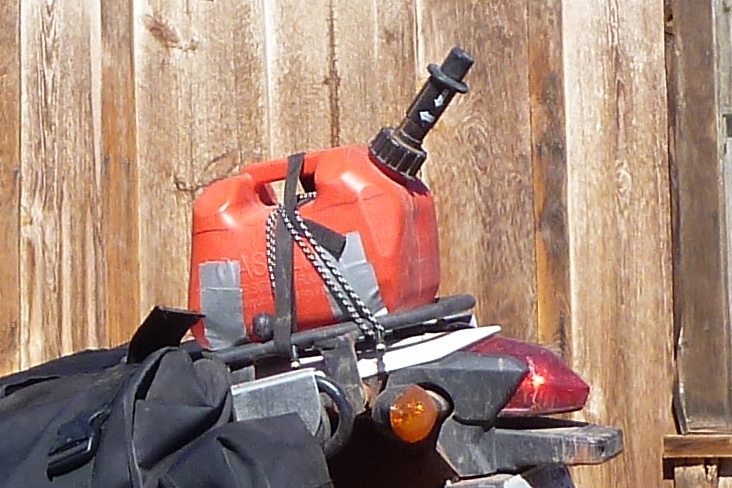
Let’s hope it makes a difference but bike saddles are usually more miss than hit. Seat foam apart, the combination of seating position, bars, footrests and the presence of a screen all have an influence, but it’s also down to tank range – in other words how long you sit riding uninterrupted. My CRF250L should have been the usual agony, but because I could only do 120 miles before reaching for the fuel can, the 5 minutes it took to do that rejuvenated the cheeks. One of the worst saddles ever was the BMW F650GS, probably because it easily did 200 miles between fill ups. One of the best was my GS500R Overlander. I never worked out why.

himslabs
himcoolcov

Wheels and Tubeless Tyres

wmwheelrims
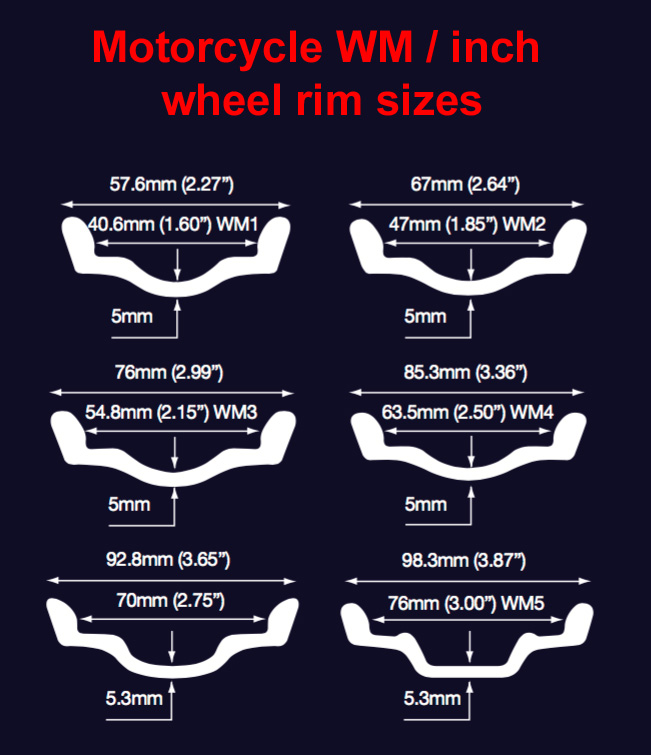
Note: being a maddeningly illogical Imperial British standard, the ‘WM’ wheel rim width designation you commonly see (in the UK at least) doesn’t correlate with actual rim width in inches. But it is close – see table right. They say ‘MT’ is a modern, fully logical (but little seen) equivalent, where the MTxx number refers to the actual rim width in actual inches.
As confusingly, rim width in inches does not correlate with notional tyre width where, 
for example, a 120 section width (120mm; 4.7”) is converted to inches. But it is close-ish.
Stock REH rims are WM1 (MT1.85) on the front and WM3 (MT2.15 – need to check) on the back with a 120/90 17 tyre.

himtublieTo enable easy puncture repairs I wanted reliable tubeless wheels which meant sealing the spoked rims. Along the way I was happy to ditch the steel rims in the hope of saving unsprung weight which I keep going on about. A mate had given me some ageing 18 and 21 Tubliss. The back was a bit too old to risk; a BNIB front got fitted and Slimed with the new Michelin (left).
On the back, for the sake of simplicity I wanted an Excel 18-er with a new Tubliss (Tubliss don’t do 17 size). Then I was told max width for an 18-er Tubliss is 2.15” rim, like the stock, I think. The Anakee Wilds were recommended for a 2.5-inch rim. We’re talking a notional discrepancy of a third-of-an-inch here, but let’s try to do it by the book for once. Shame as an 18-er would have saved a couple of kilos in tyre and rim and greatly opened out the range of off-road tyres. But another problem is tubeless tyres (which do differ significantly from tube type) are rare in 18-inch size. Seventeen TL tyres are much more common.

CWCAirtight

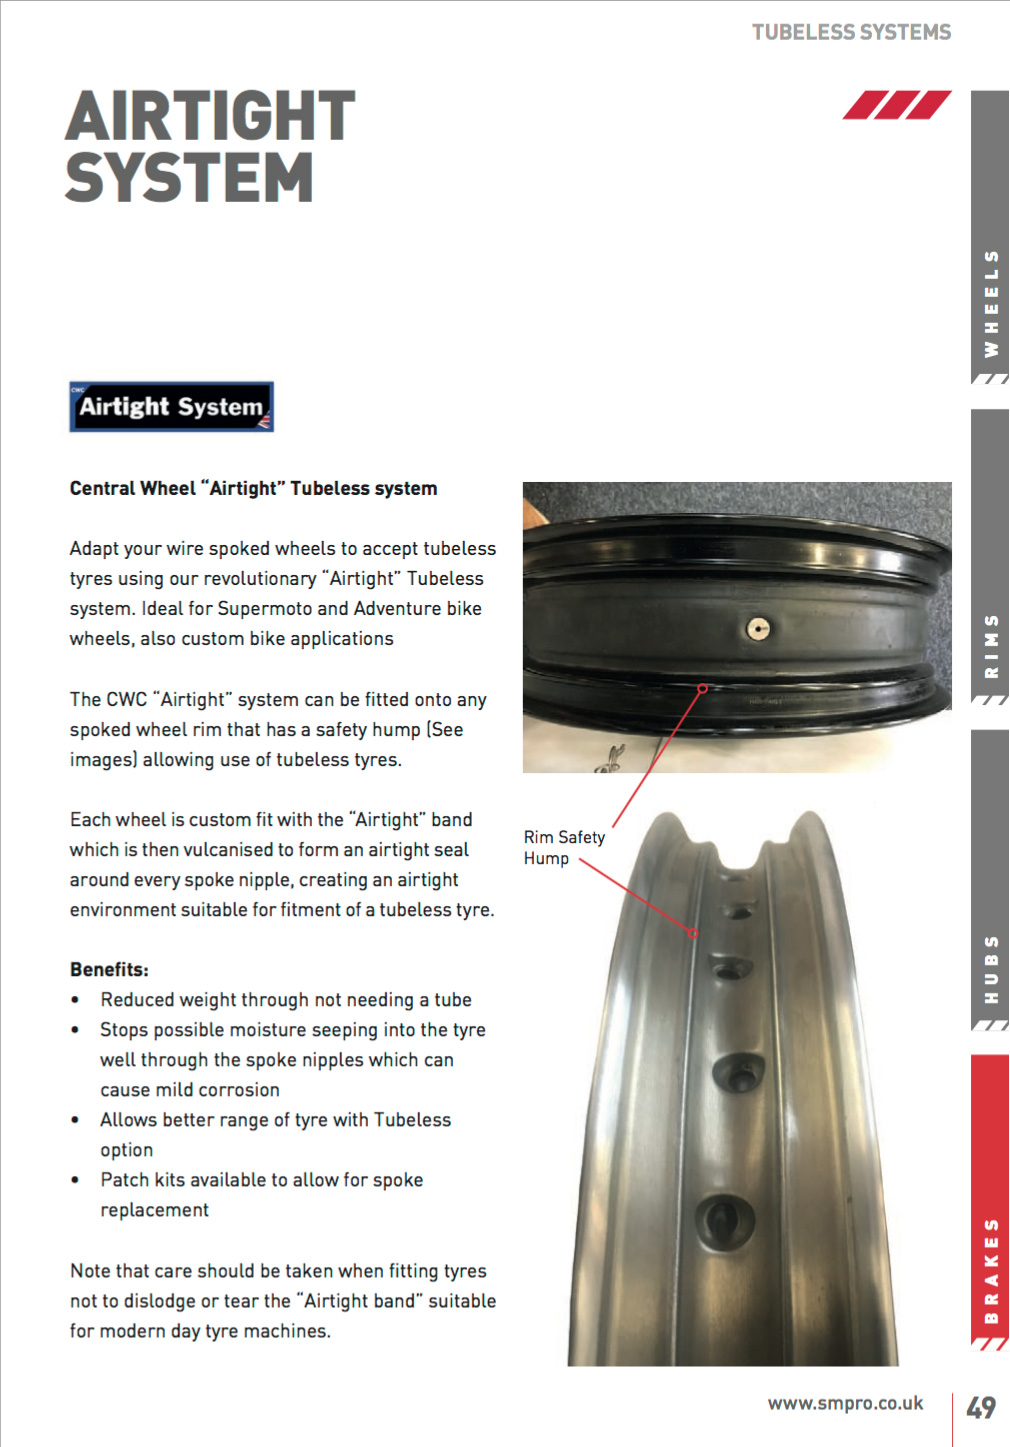
It wasn’t on their website but CWC’s brochure mentions an Airtight™ vulcanised spoke-sealing band (left). It’s similar to the Italian BARTubeless polymer sealing I had on the Rally Raid CB500X of a couple of years back (and which CWC also offer).
I’m always keen to try something new for my Ongoing Tubeless Saga, but not so fast, chum! CWC can only Airtight a 3-inch (WM5) or wider rim. Next problem: there were no 18-inch Excel rims in that width, so it was back to a 17-inch rim in WM5 to fit an Anakee Wild. Confused? So was I but we got there in the end.

MichelinAnakeeWild

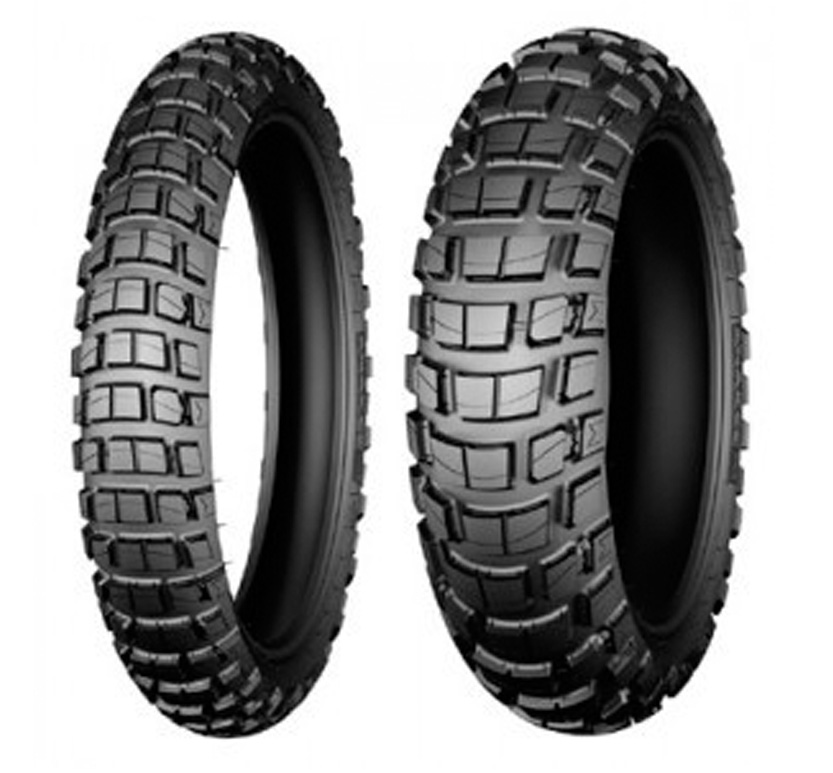
Tyres were always planned to be Michelin Anakee Wilds, one of the few do-it-all travel bike tyres I’ve not yet tried. On hearing about my plans Michelin kindly supplied them for free, along with a couple of back-up tubes which I hope I won’t need. Rear is a 130/80-17 M/C 65R TL. The front gets the larger 90/90-21 M/C 54R TL to balance the lift on the back. And it all comes with lashings of Slime.
Simon did some weighing before Sliming (add about 250g per wheel):

Stock front wheel with Pirelli MT60 90/90 + tube 13kg
Front wheel with 90/90 Anakee Wild + Tubliss 14kg
(Stock steel front rim 3.77kgsource)

Stock rear wheel with MT60 120/90 17 + tube 15kg
Airtight  Excel + Anakee Wild 130/80 17 TL 14kg

Stock steel rear WM3 rim 2.15 x 17 3.84kg (source)
Excel WM5 17 rim + Airtight band 3.5kg (acc. to CWC)

Michelin Anakee Wild 130/80 17  7.5kgPirelli MT60 120/90 17 + tube 6kg

tltwit

So, a kilo gained on the front due to Tubliss and heavier Wild tyre; a kilo lost on the back despite the wider Excel being barely lighter than the steel stocker. I wonder if there’s an error somewhere, considering the new Michelin is 1.5kg heavier than the stock MT60 and tube.
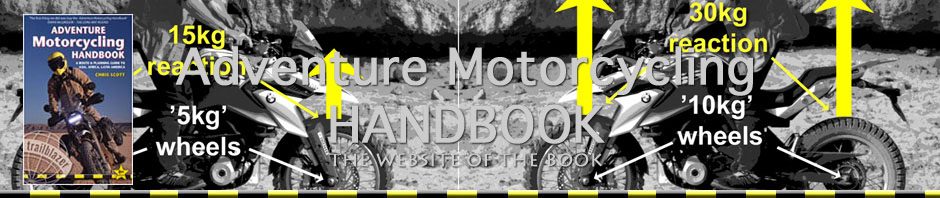
The whole ‘alloy is light’ thing can be a bit of a myth until you get to the exotic stuff. Look at MTB frames or an old, two-ton Range Rover or handlebars (right). But, although it’s been decades since I’ve had wheel problems, I’m pretty sure the CWC-built Excel will be stronger than the steel stocker.

xsrbar


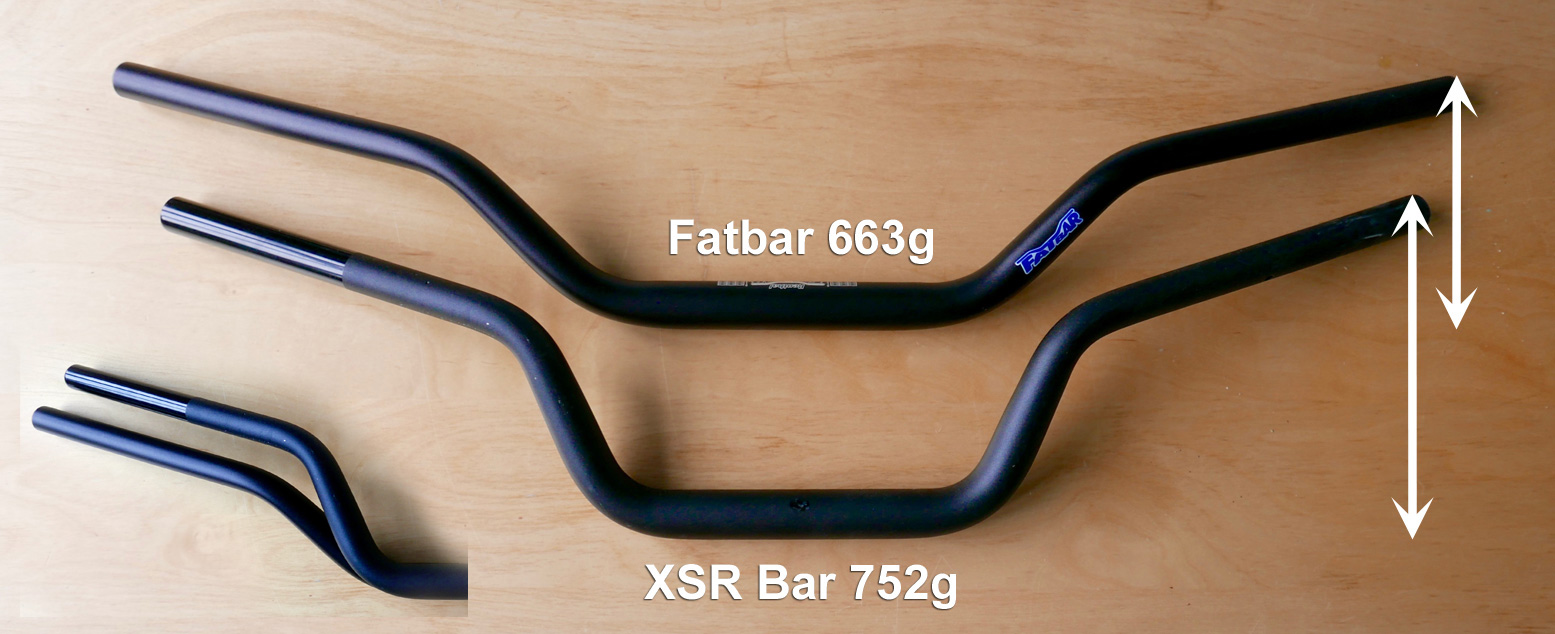
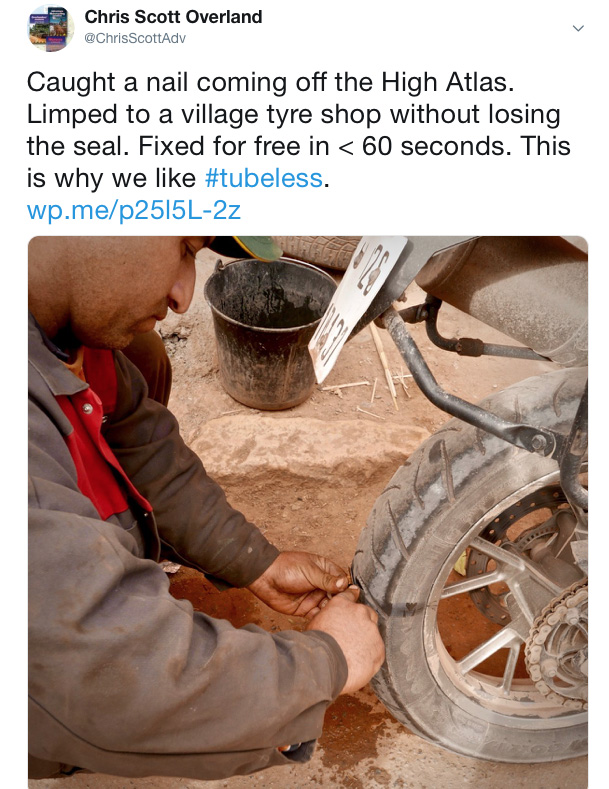
At 7.5kg, the TL Anakee on the back is hefty. I rationalise that the added mass is down to the tougher tubeless carcass. If it’s anything like the punctured Anakee or Tourance I rode on last November, it’ll be stiff enough to cautiously ride airless while staying on the rim until I reach a village tyre menders (right). Here are some more dims regarding 18 or 17-inch Anakee Wild tyres:

Anakee Wild 120/80-18 M/C 62S TT Max sectional width 131mm, max diameter 663mm, weight 5kg,
Recommended rim width 2.75”

Anakee Wild 130/80-17 M/C 65R TL
Max sectional width 142mm, max diameter 654mm, weight 7.5kg (verified by SV), Recommended rim width 3.0”

Both will easily fit the width of the Himalayan’s swing arm, but at the front (back) of the swing arm, clearance gets down to less than an inch with the taller 18. A bit of chain wear and you’re good to go. On the front the mudguard now looks fairly close to the new Wild, so for mud clearance I’ll lift it a bit as mentioned below.
Riding back 120 miles, the fresh Anakees rode a lot more securely than some also-new K60s I’ve ridden with other bikes. No weirdness in bends and no vibration or noise (a common complaint) that I could tell.

him-excel

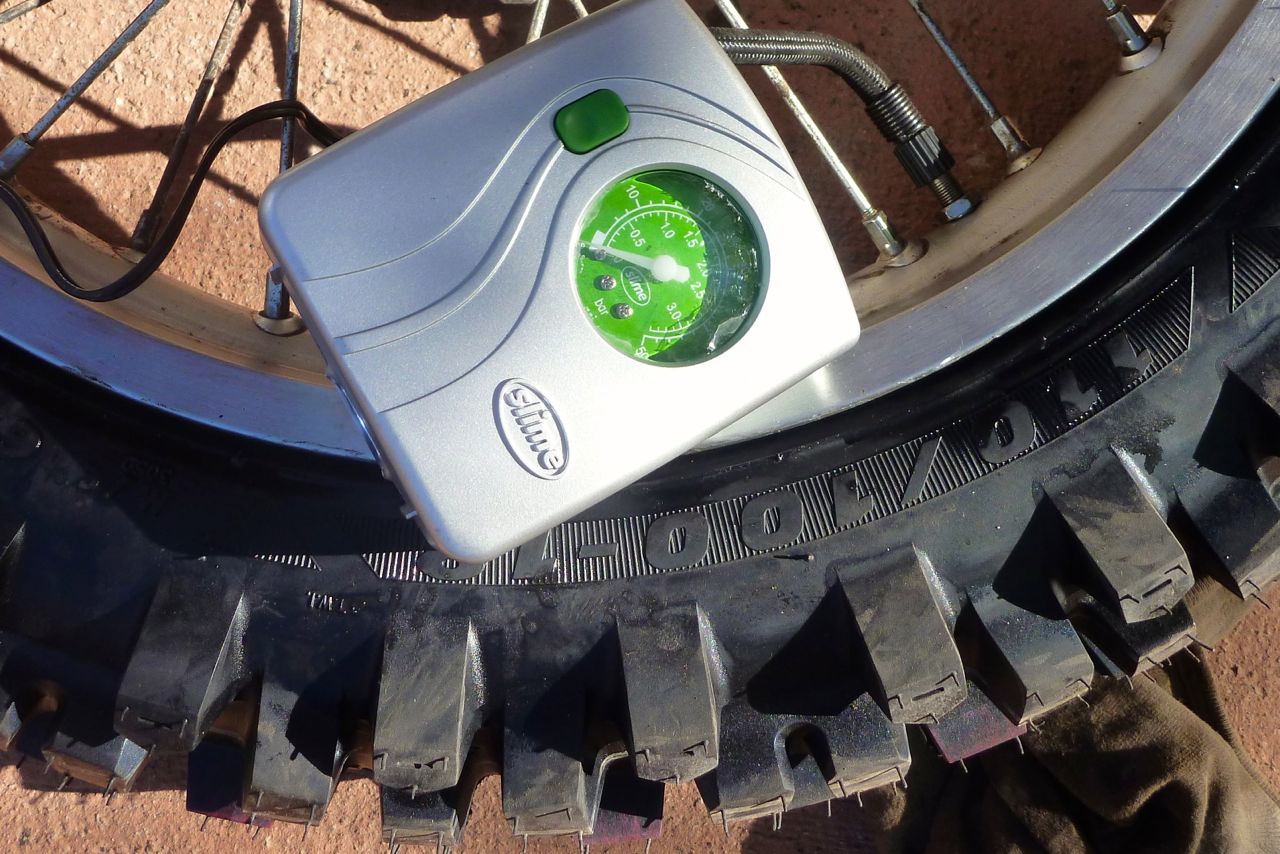
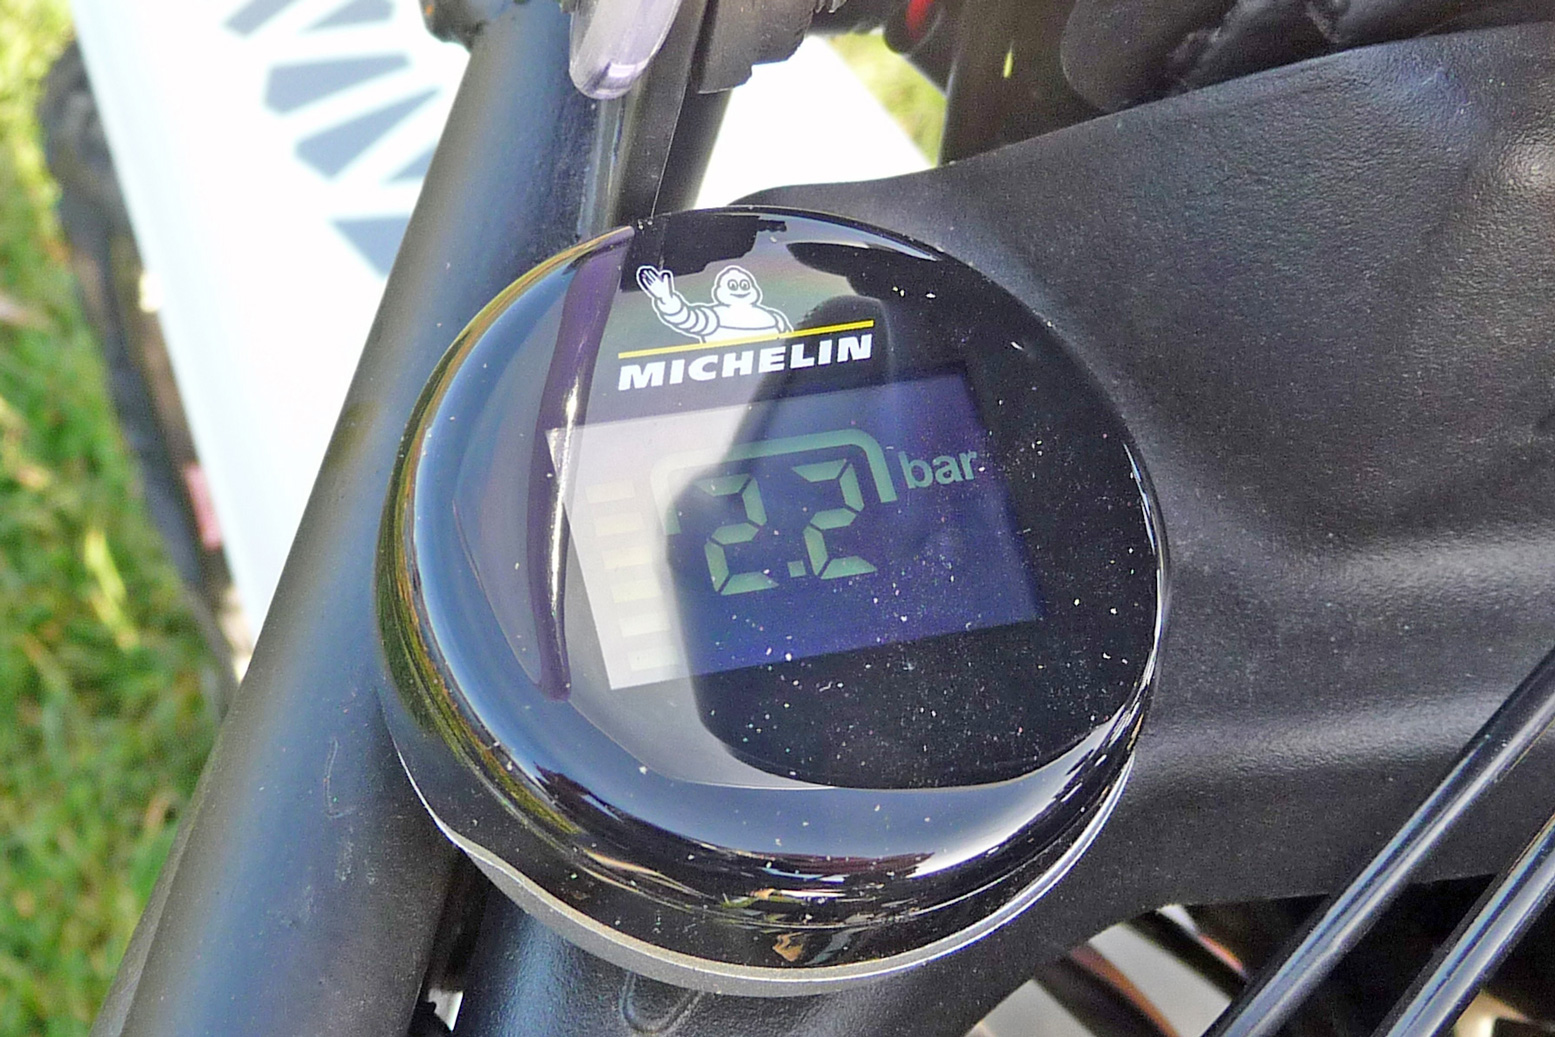
Michelin have just brought out a new TPMS and sent me one to try out. It will be particularly welcome for keeping tabs on my untried tubeless set up. The unit is USB rechargeable and sits magnetically in a stuck-on dish. So it’s easy to remove or nick, and might fall out on rough ground without an extra method of adhesion.
The read-out (psi or bar) flips every few seconds between front (as shown below) and rear. It’s interesting to note how pressure climbs by up to 20% as the tyre warms up.

himtpms

Fabrications and load carrying

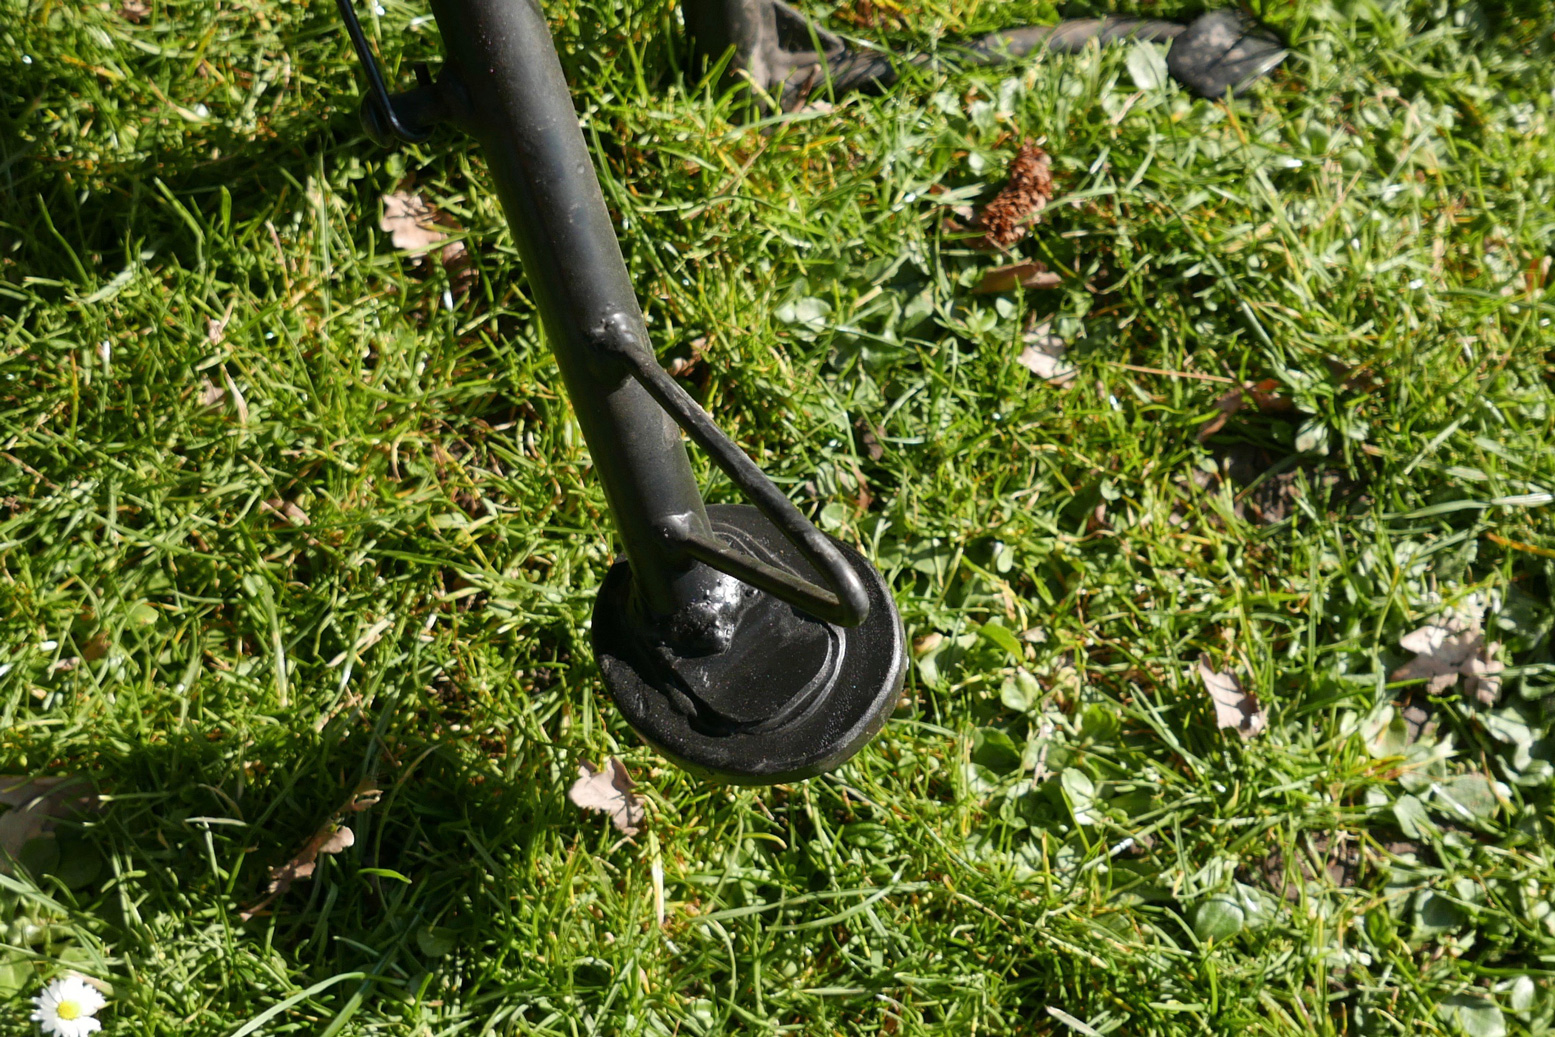
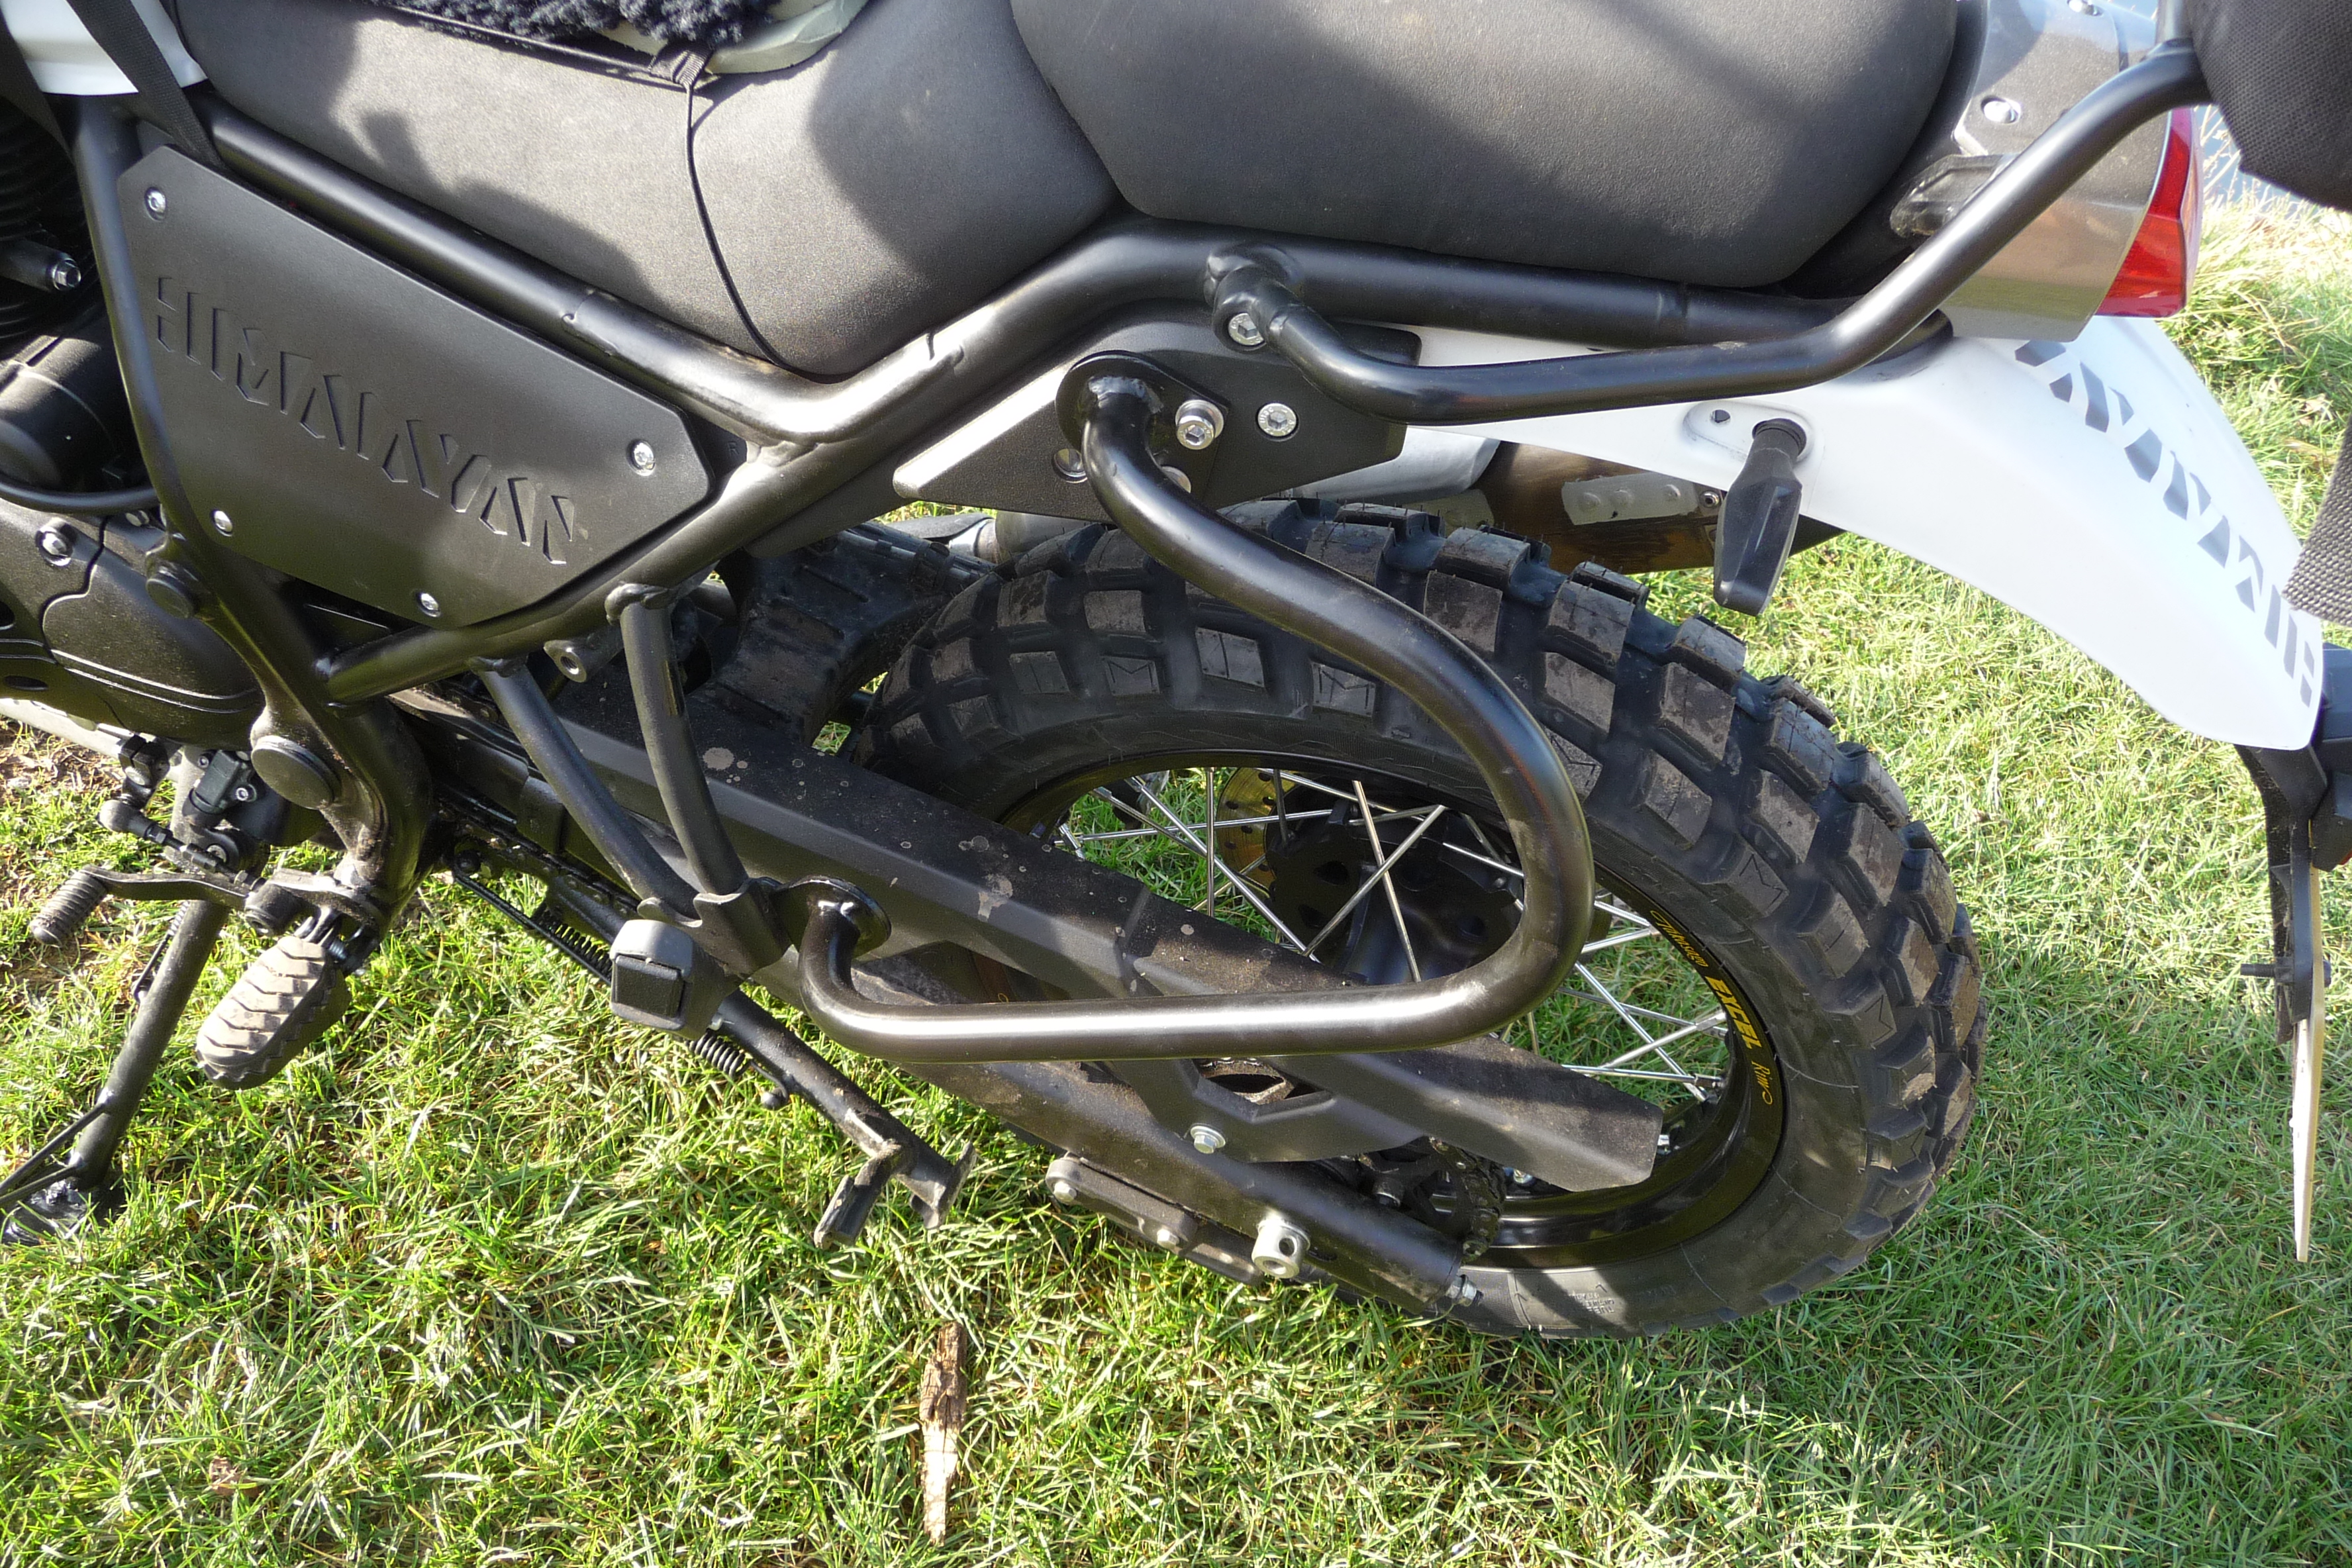
Apart from some custom Bark mounts, all the Him needed made was a sand foot plate welded on the end of the sidestand.

him-stand
himreack

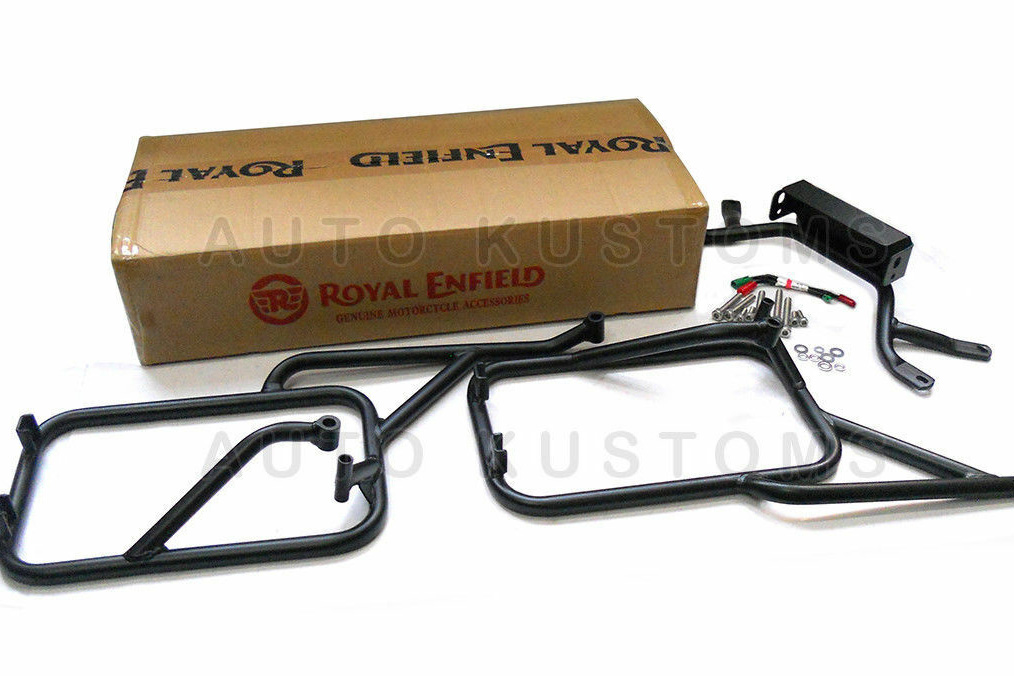
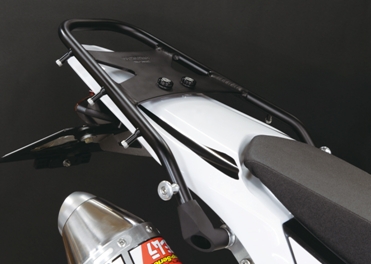
And Simon managed to hand bend and bolt on a pair of very nice unbraced C-racks (as I’ve decided to call them). I’d originally bought the RE pannier rack from India for only £77 (right), but while cheap, the thing weighed over 5kg. You don’t need all that metal unless you’re running alloy cabinets.
Inset in the circle below, Simon pointed out a weak spot where the lower C-rack bolts to the pillion mount which is welded rather bolted to the subframe. But the unbraced rack has some give, plus the soft bags will also absorb impacts, so hopefully it will take quite a crash to break the mount. It actually wouldn’t be hard to brace from the upper curve of the C-rack to a point on the stock tail rack, just above the indicator.

P1010930.JPG
krigos22
ROVAFLEX

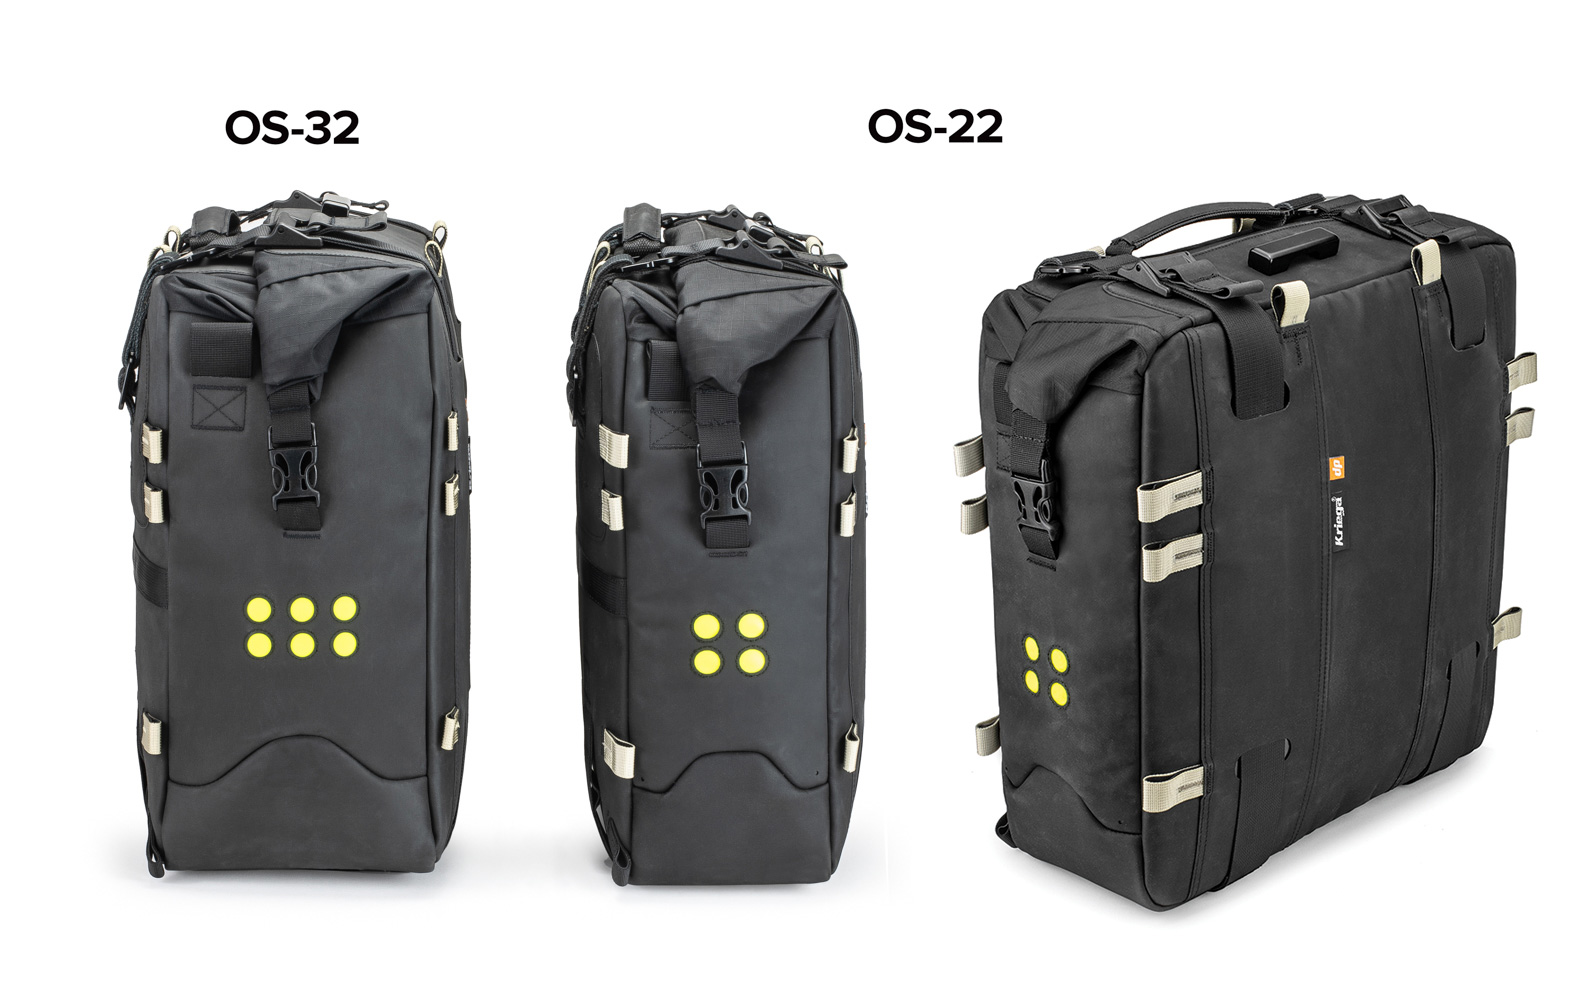
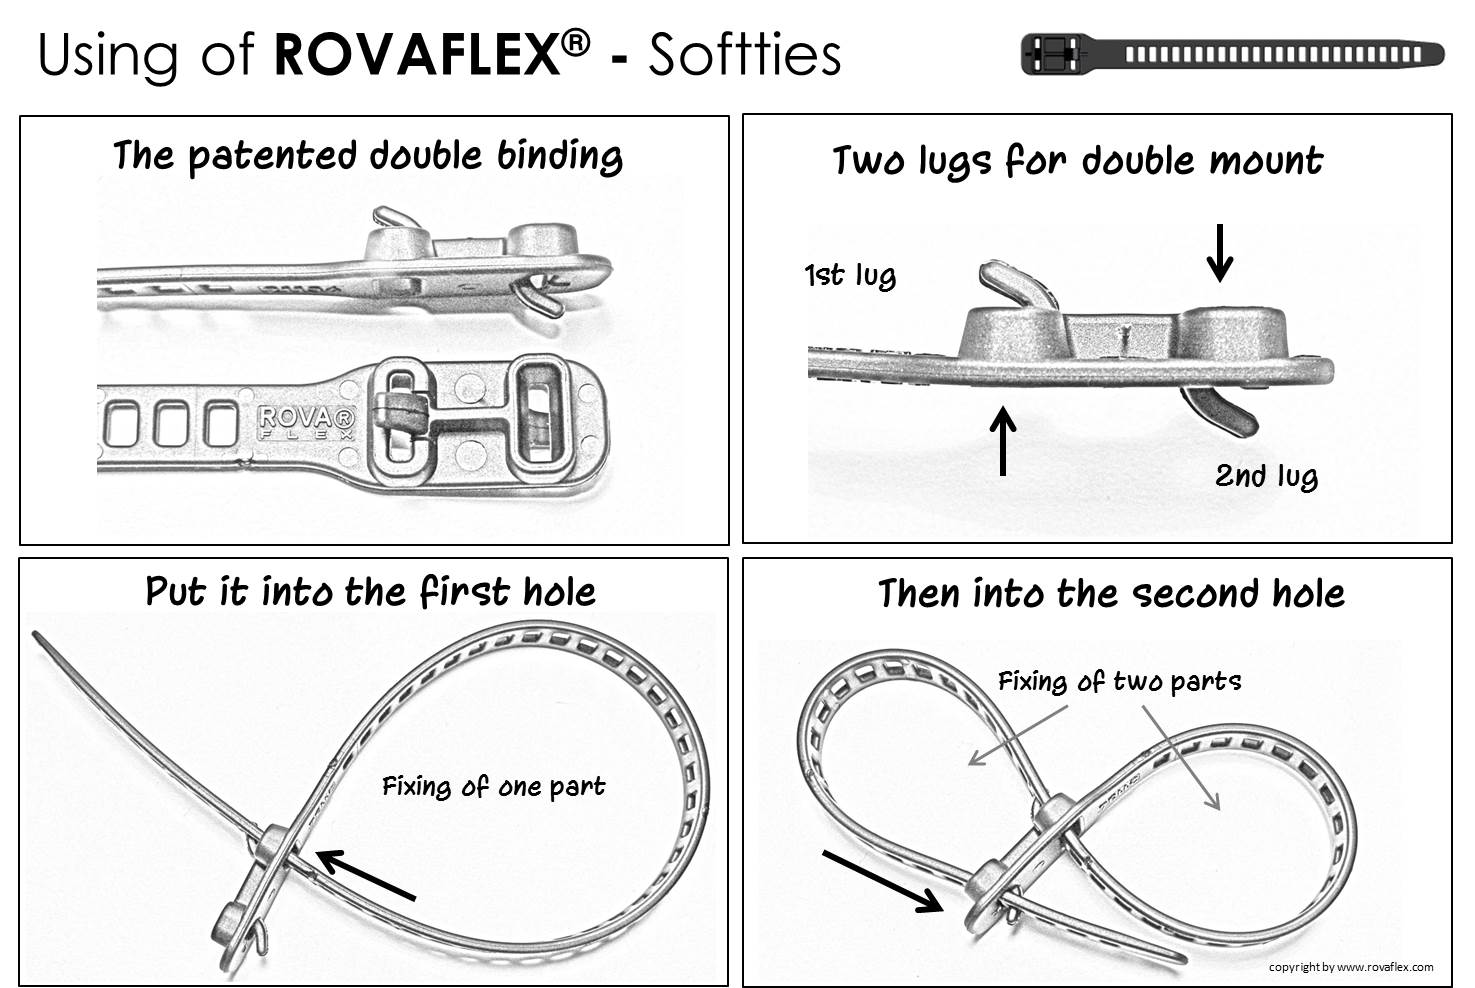
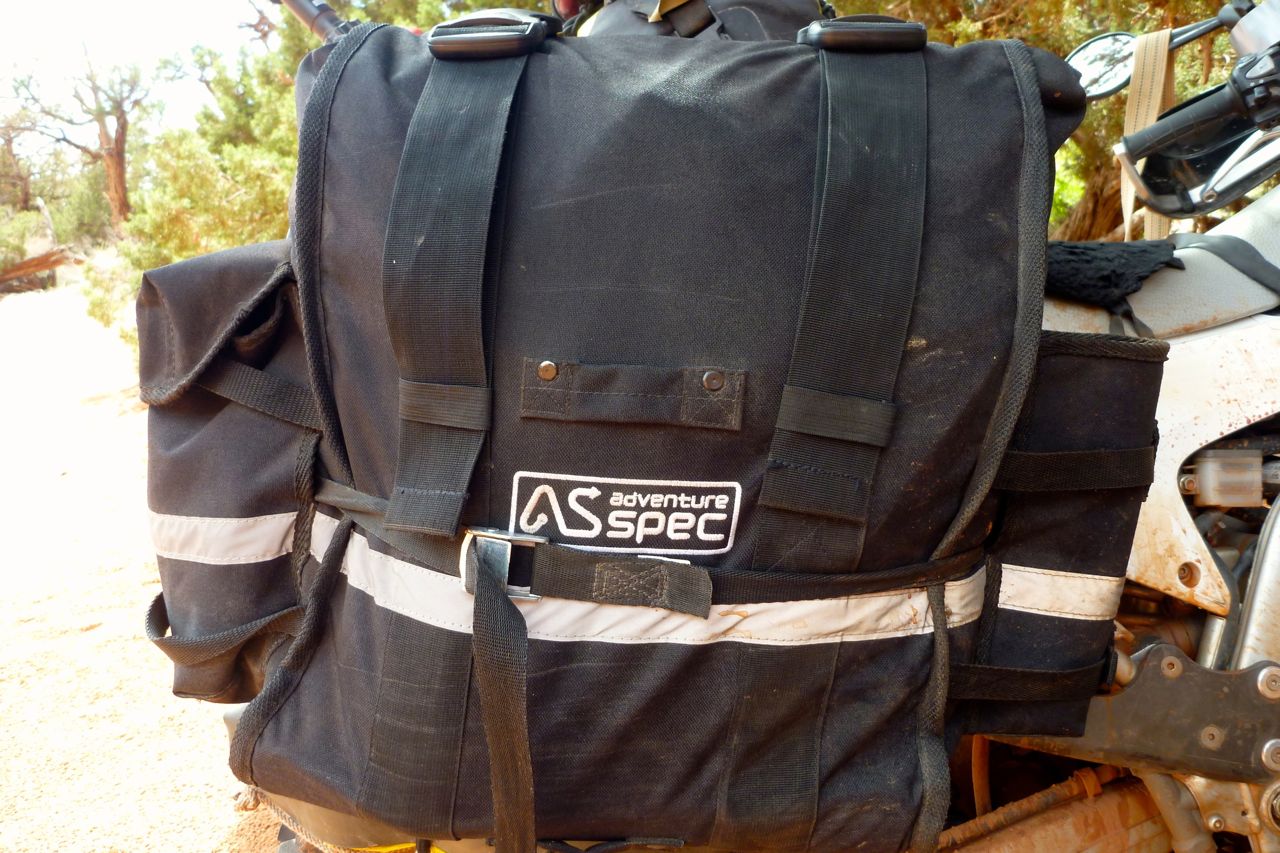
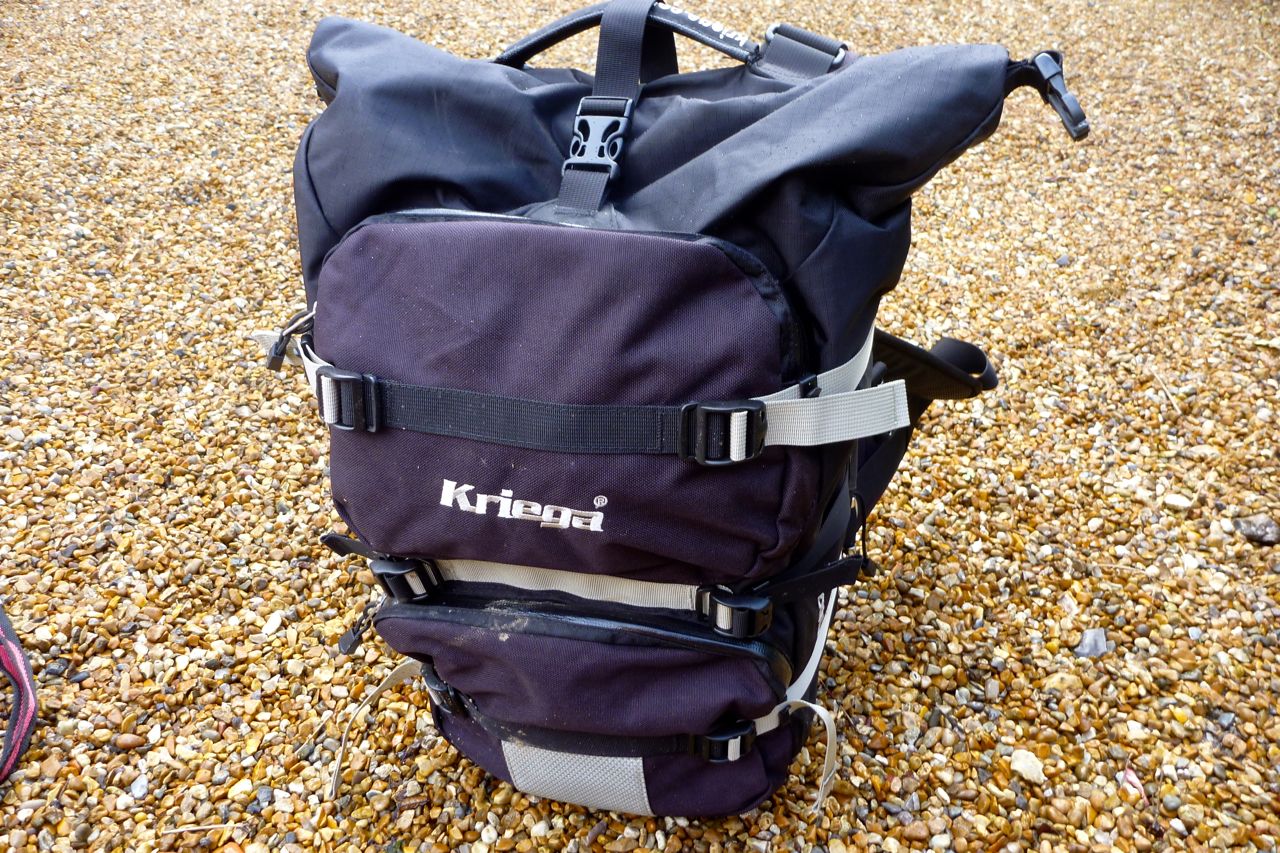
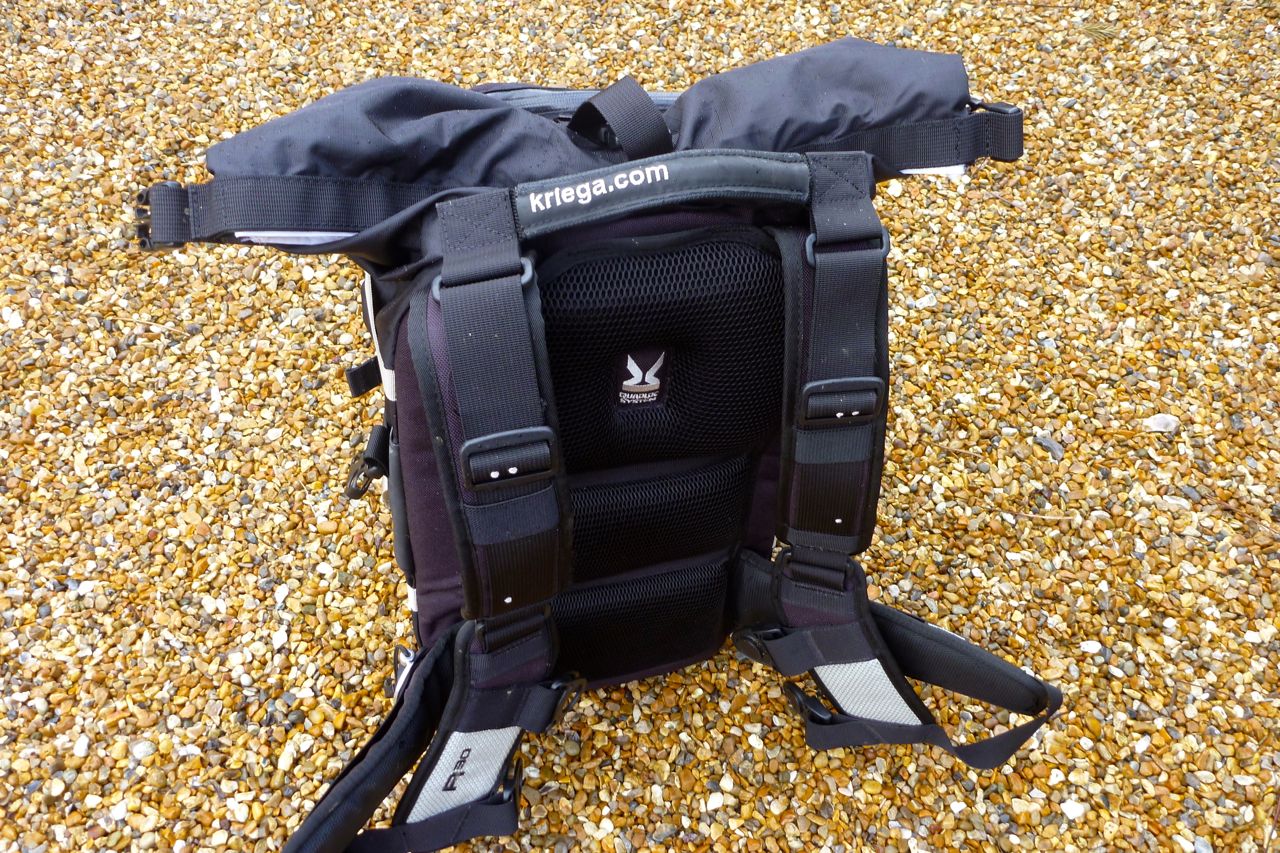
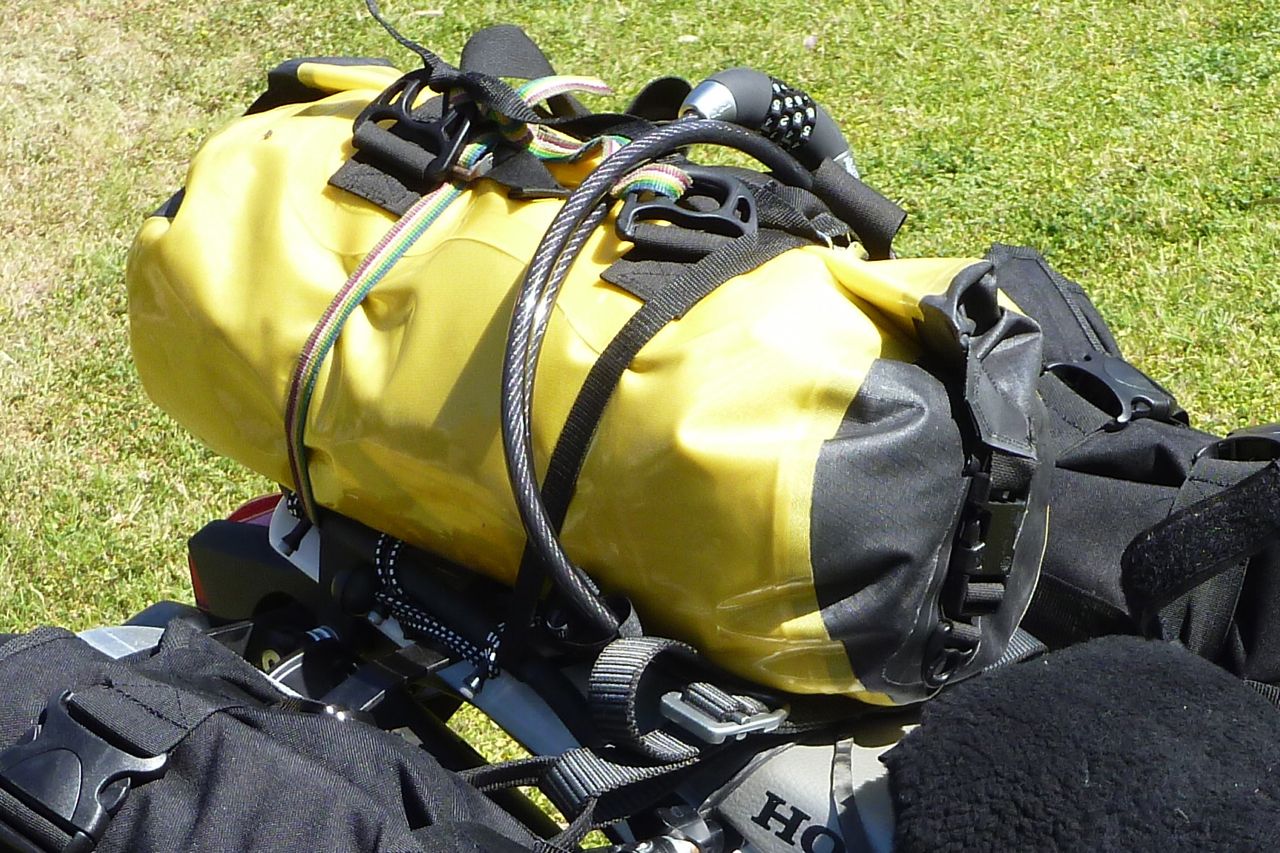
I forget that I’m an unsung Kriega Ambassador; they’ve just sent me a set of their new OS22 throwovers (below) to try out. I was a big fan of the OS32 on my WR250R a couple of years back. The OS22s feel very rugged and weight in at 2.5kg each. This time, to save weight I’ll fit them as throwovers without the platform, and use the tabs on the back to secure it to the C-rack with brilliant q/d RovaFlex cable ties (right).

kriega10drypack
himlomo

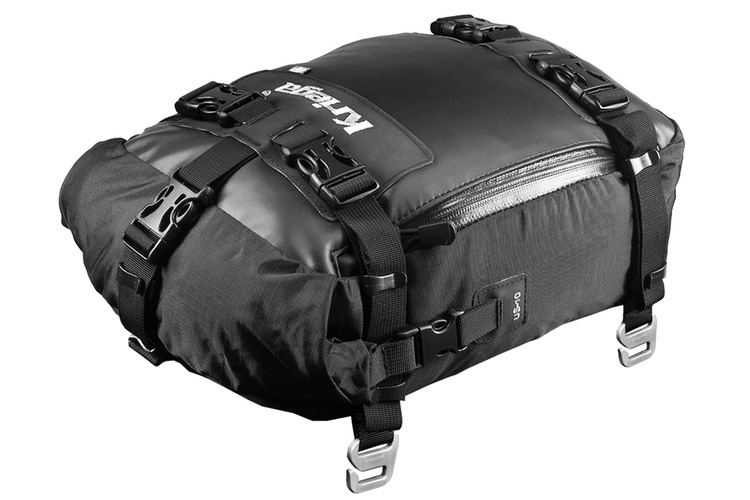
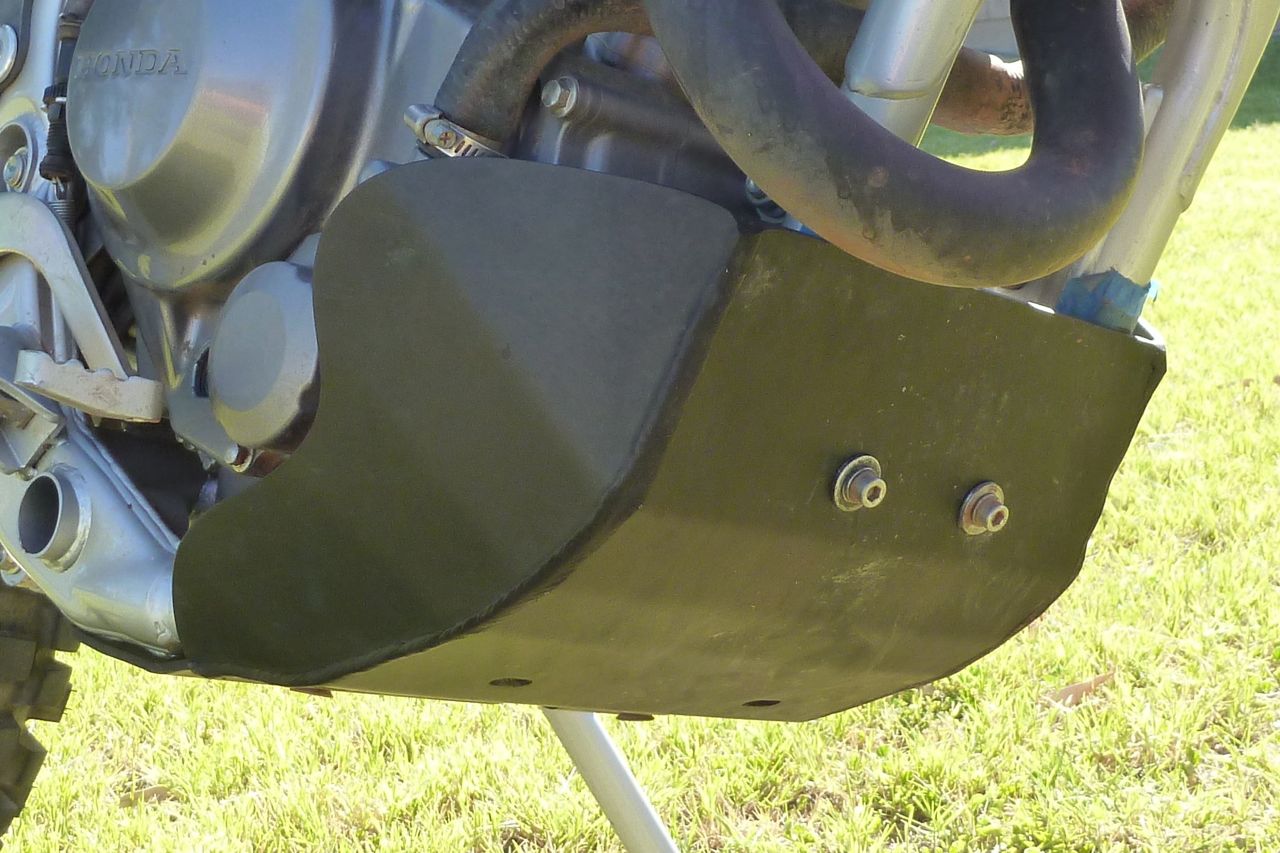
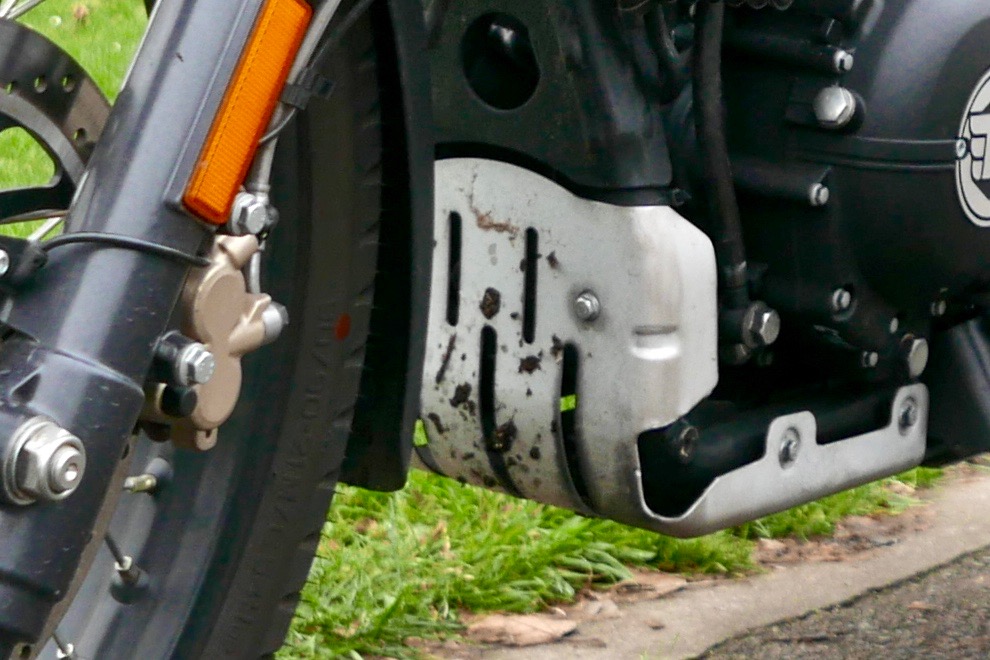
They’re the same size but 40mm slimmer than the 32s which looks quite a lot, but the slack will be taken up on the front by the 6-litre Lomo Crash Bags (left). Hopefully I can get away without my 30-L Ortlieb Travel Zip which can make getting on an off a chore. I have a 10L Kriega Drypack (right) knocking about if I need more capacity.No six-megaton bashplate you say? On the tracks I ride these days they’re more useful at keeping flying gravel from damaging the engine paint. When it gets that gnarly, I’m down to walking pace, ready to deploy outriggers. The new tyres and firmer shock have raised the clearance a bit so the tinny, stock bashplate (below) will do fine for the moment.

himbashh.jpg

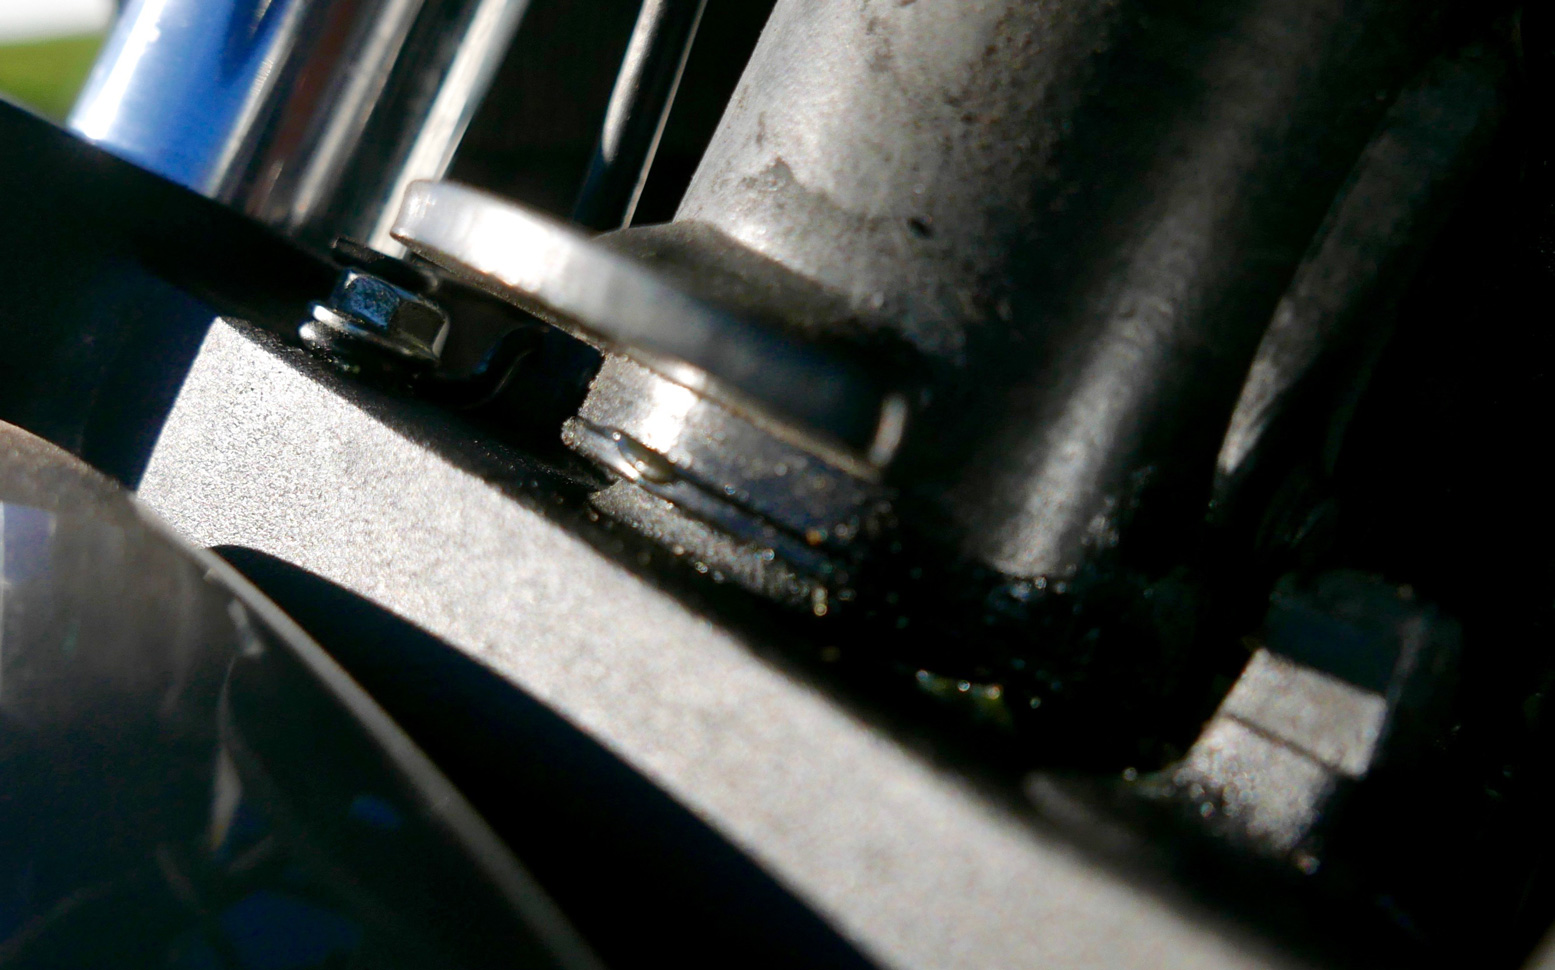
Lifting the front mudguard is a good idea now that the fatter 90/90 Anakee Wild is closer to the plastic. One time on the Tenere in Morocco I rode onto recently rained on clay which jammed the front wheel solid. A right faff to clear with Moroccan farm workers milling around saying ‘Oi, you’re front wheel’s jammed, mate!’.

himudraise

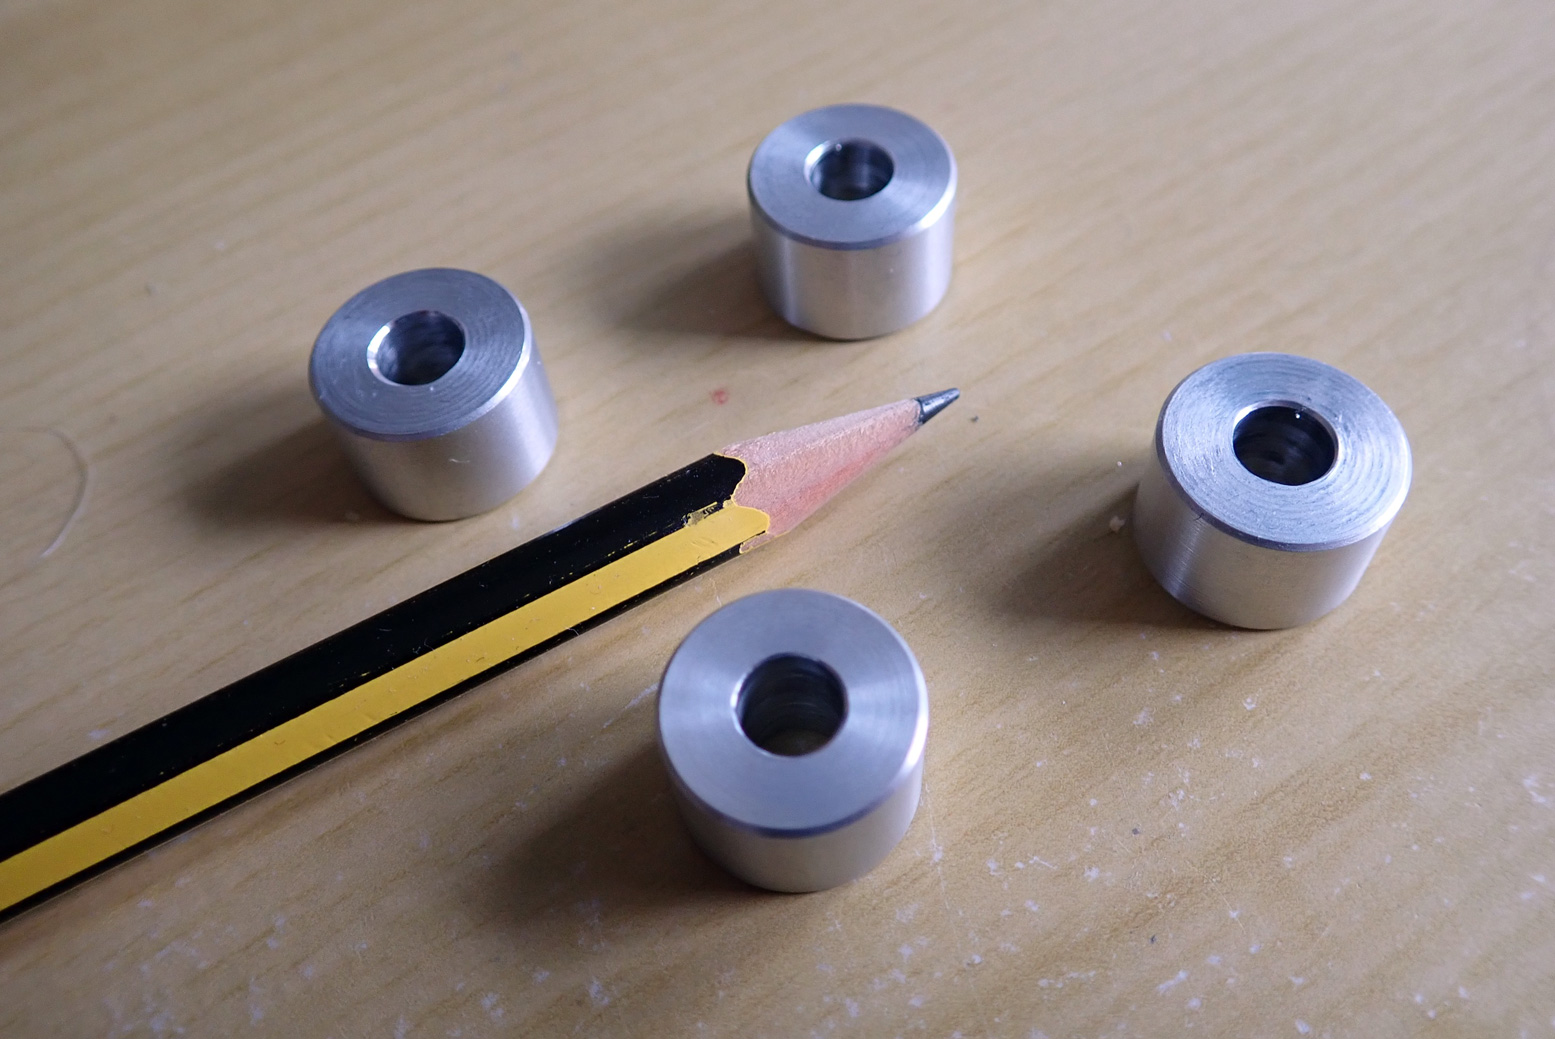
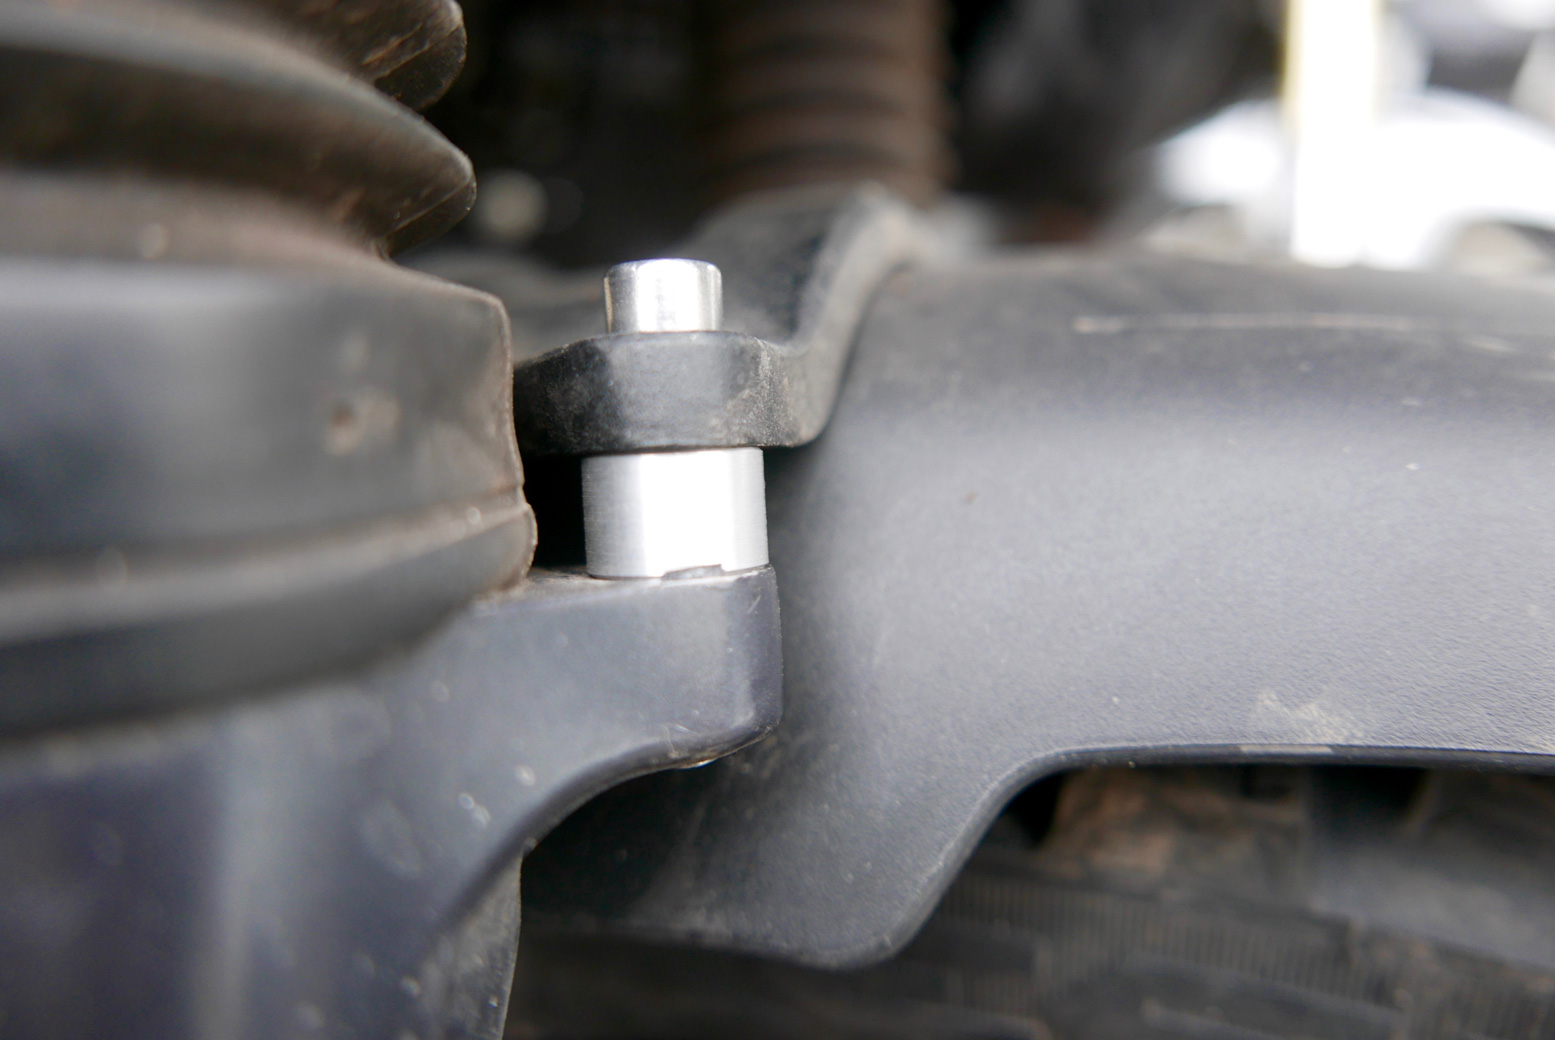
On the Him it’s easily done with slightly longer fork brace bolts (below) and some M6 spacers raising around 10mm, before the mudguard hits the downtube on full compression. It’s worth remembering these spacers (search ebay: ’15mm ø aluminum bushes M6 hole’; right) want to keep a broad contact between the brace and fork mounts as there’s some leverage stress here.

himlift

So there it is. Just about all done in one fell swoop, as they say in Simon’s neighbourhood. Riding back to London, initially the Him felt a bit odd as modified bikes always do. The jacked up shock and new Michelins have given the bike an altered stance, but despite the sliding seat pads I soon settled back in to it.
It’s not fast, but somehow that’s not frustrating and I’ve yet to put my finger on exactly why. Am I still in the honeymoon period of enjoying the novelty and kidding myself it’s better than it is, as so many owners claim with their bikes? Or with the Himalayan, have Royal Enfield stumbled on some magical combination of looks, gearing, power delivery and value for money which, for the moment ay least, still makes this bike such an enjoyable ride?
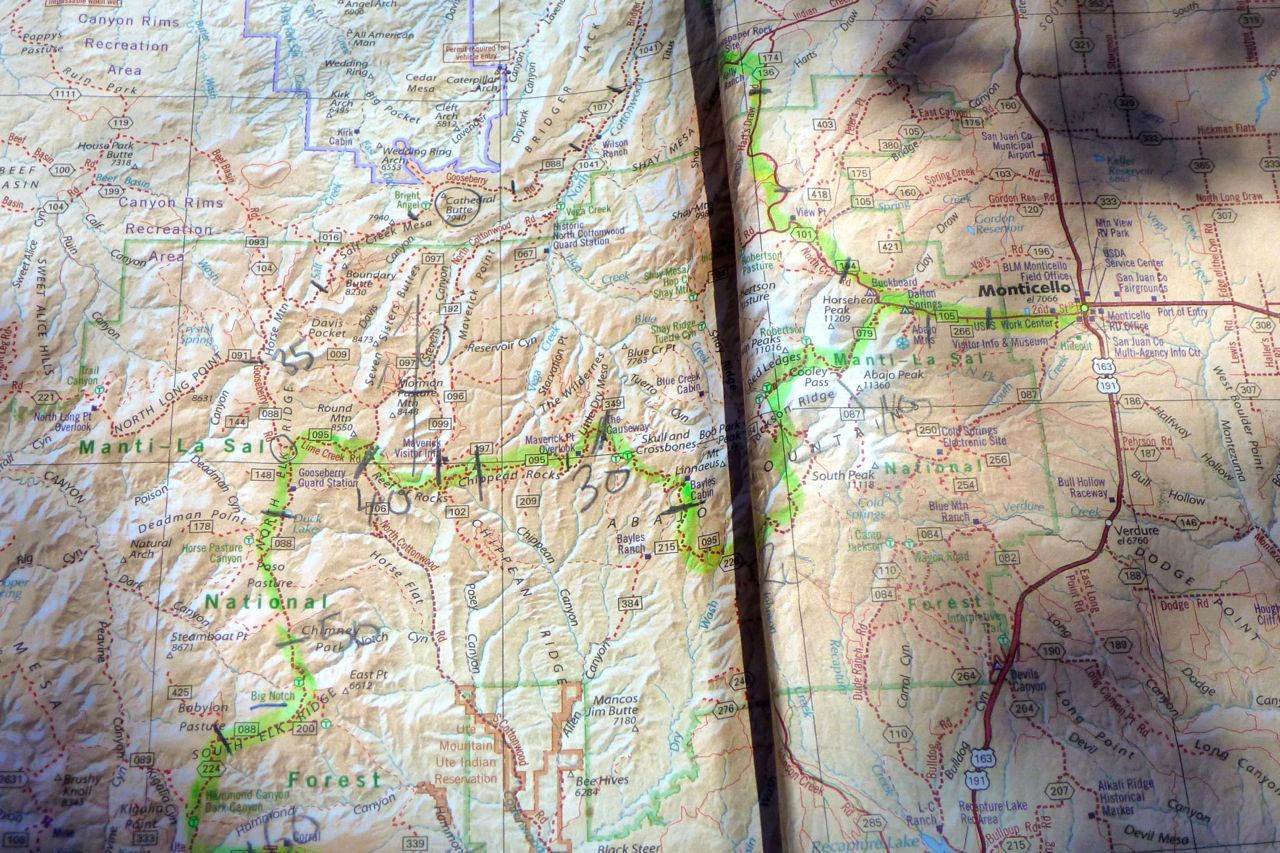
It’s getting trucked to southern Spain shortly – a liaison stage to Morocco which I’ve done enough times already. We’ll see how I feel once the shine has worn off after a month on the trails and backroads of southern Morocco.

Himalayan Index Page
himbo

CRF250L Southwest USA – Gear Review

monu03

Like the CRF250L itself, I use longer rides to try out new stuff, new ways of doing things or whatever else catches my imagination.
Below is the equipment roll call from the 2013 Honda ride around Southwest USA. What worked, what didn’t and why. The prices given in £ or $ are what I paid for the gear or what it cost. Some items like Kriega, Magadans, 
Trailtech and Aero stuff has been supplied to me over the years in exchange for adverts in the book.

clap

Adventure Spec Magadan bags – £330
No complains about my Magbags; the best soft bag out there for my sort of riding. Simple and functional, great capacity, big external pockets and tough fabric. It didn’t rain enough on this trip to test them, but it lashed down on previous UK rides with no leakage, even through the fabric outer, let alone the thick PVC liners. Requires a rack but that’s the way it should be for heavy loads in soft bags. More on the Mags here.
Verdict: regret giving these away with the CRF.

crgr-pad

Aerostich wool seat pad – $67
I used this last year in Morocco on a BMW 650 twin which has a seat straight out of Enhanced Interrogation; sadly the Aeropad couldn’t save it – three inches of Moroccan mattress foam did. On the Honda the wool pad may have taken the edge off, giving another hour’s comfort but I actually found frequent dismounts were as effective to posterior durability. Another interesting thing: mostly I rode in my leather jeans but one hot day I wore thinner (slipperier?) synthetic 5-11 Tactical trousers (great gear btw, much tougher than ‘outdoor rec’ stuff). Result: sore arse arrived very soon.
I also found the wool would pack down and lose its loft after a few long days, but could be easily washed and ruffled up. And after a night in the rain a vigorous rub dispersed most of the moisture.
Verdict: seemingly minimal improvement but can’t do any harm.

AlphaA

Alpha Three tail rack – on bike
Never heard of Alpha Three – could be Japanese rather than Chinese? – but this ‘Type A’ item was a neat little rack with  downward pointing prongs incorporating hexhead bolts to securely attach stuff, should you wish.
A tendency has developed towards racks cut out of flat metal sheets, either thick alloy or thin galvanized steel. Reason: cheaper manufacturing costs not necessarily reflected in the retail price as they’re the latest ‘thing’. Smaller ‘plate racks’ the size of the Alpha might be fine but some of the wider ones as tested in Overland Journal (Fall 2012) have nasty thin edges that I wouldn’t want to meet while tumbling down a slope, even though I’m all for wide ‘sheep racks’ in principle. Conventional tube racks are easier to use and grip, when needed. There are a few more CRF-L rack options listed here.
Verdict: a slick and well-featured tail rack.

crgr-bark

Barkbuster Storm handguards – $130
Always liked the Aussie-made BBs and even though cheaper versions are available I splashed out at more tolerable US prices US prices on some Barks with the biggest Storm handguards to keep for later. Cheapies often don’t fit so well; the key I believe is the articulated joint (available separately) at the inboard mounting end. Cheaper versions off ebay have no joint – less easy to position optimally. I like to think the Storm handguards kept my hands warmer and drier and so deferred the need for heavy gloves – I always prefer thin unlined gloves. The only time I fell off the Barks did their job, although one drawback with all lever guards is you can’t hang stuff, including a helmet, so easily off the bar ends. I’ve fitted bungy hooks on previous bikes.
Verdict: worth paying out and keeping for the next bike.

crgr-bash

Bashplate – came on bike
I omitted to note what brand it was – Ricochet is a name that bounces around the forums. Engine protection is a no brainer of course, even if I only dinged it once on the gnarly Lockhart Basin track. The fit was fine – no exposed bolts on the underside and a hole to enable drain plug access without removal. But clamped directly to the frame rails I found the resonance intrusive. I reduced that by refitting the plate with some strips of closed cell foam (karrimat) on the frame rails. Like others, I also think a bit more width to either side would improve protection of the filter housing and bottom hose.
Verdict: As usual, the OE plastic plate is a joke. Essential for off highway riding.

Bell Mag 9 helmet – $70
Probably discontinued by now but great lid for the money. Full review here.

crgr-watrbench
crgr-bencher

Benchmark atlases – $15 
I’ve been using these for years in the US and on this trip they came into their own for riding off pavement across Nevada and Utah. Yes they’re big to carry on a bike and may well be available as a tablet app, but give me a paper map any day for getting the big picture. I barely use the additional guidebook-like recreational info you get in a Benchmark but it’s good to know it’s there.
As with all paper maps, dirt road accuracy got a bit mushy at times, and here I found the US-sourced Garmin satnav filled in the gaps. And then when the satnav was wanting, just like a proper map I could read a long-lat easily off my Garmin 62 against the Benchmark’s incremental long-lat grid (above) to find exactly where I was.
Verdict: I’ve tried Delormes but Benchmarks are to the US what OS maps are to the UK.

crgr-mirror

Double Take mirrors – $100 pair!
A mate had these in Morocco last year and I admit I fell for the hype – or wanted to see if they lived up to it. At over $100 a pair (iirc) the RAM ball-mounted DT mirrors provided infinite positioning and crash-proof toughness. I took one and left the OE Honda mirror on the nearside (on the right side in the picture, left) but soon wished I’d either kept both Hondas or ran them the other way round. For seeing what’s behind you the OE Honda was a better mirror – bigger (wider), clearer and immune to vibration or movement. That was until my single, low-speed fall on the right side when the Honda glass shattered in the otherwise undamaged plastic housing. Honda dealers at the time only sold the whole mirror assembly which had to be ordered.
Perhaps they’re suited to more aggressive off-roading where falls are more frequent, but where you probably want mirrors to get to your riding location. Here a Double Take or the like soon pays for itself, although I found at road speeds it blurred too much to be reliable and moved around on the dirt or in strong headwinds, no matter how hard I clamped it. And with that nifty mirror-base RAM mounts they are rather nickable; RAM’s theft-proof clamp is not the slickest design.
Verdict: built for crashing, but on the Honda less good for seeing.

cf-ejkred45

EJK fuel controller – on bike
I’ve had 4×4 turbo-diesel engines ‘chipped’ through I never knew exactly what was being done – it seemed to be one  unprogrammable map and the sort of performance chasing meddling that doesn’t  interest me that much.
For petrol engines EJK’s fuel controller is a bit more sophisticated: an ‘electronic jet kit’ enabling you to increase fuel delivery (richen the mixture) as you experiment with performance enhancement. Short version: at $200 a useful bit of kit to experiment with or optimise the mixture; long version here.
Verdict: another good reason to bid adios to carbs.

crgr-pipes

FMF Q4 pipe + Megabomb header – on bike (sold for $350)
The bike came with this set up the suitably calibrated EJK (above) and holes in the airbox, but one day’s dirt riding convinced me the Q was not at all Quiet and would have driven me nuts on the long road. Even at double the weight I was happy to refit the weighty OE cat silencer and flogged the FMF set up.
Verdict: way too noisy and can’t say I noticed any significant power loss once removed.

morpas09

Garmin GPS 60CSx – £160 used
I used the bulkier GPSMap 72 for years to log tracks for my off-roading guidebooks until it started playing up. I was happy to replace it with the more compact and popular 60 series using the similarly intuitive interface. This one had Utah topo maps on it and took the UTBDR tracklog without any undue gnashing of teeth. And  a RAM cradle mount performed securely without vibration issues.
Verdict: CSx not made any more but still preferable to touch screen Montana/Oregons.

crgr-nuvi
crgr-mount

Garmin Nuvi LM50  – $80 used
I hoped that a US-sourced Nuvi would have maps which featured the countless miles of unsealed roads in the western US, and so it did. When the Benchmark atlases got a bit vague the Nuvi led me out of the mountains, providing it was set up right and you took the suggested directions with a pinch of salt. Don’t know if it was my basic unit but I found that the full range of tracks around me would only display once a ‘Go to’ was set (a memory saving feature perhaps?). It meant I couldn’t scroll/zoom out to see the possibilities around me without a ‘go to’.
Also, I was too lazy to address what I knew would be problem with vibration. Last year using a similar unit in Morocco I was smart enough to lay it on foam on the tank, this time with a cobbled together Garmin/RAM set up the vibration at higher revs caused it to cut out. I’ve since modified my home-made mount to incorporate a foam sandwich (above left) that may work better with future moto Nuvi-ing. Used Nuvis are cheap and easy to find on ebay; Garmin’s moto-focussed waterproof Zumo is not. You can buy waterproof pouches for a Nuvi to fit your bike.
Verdict: as long as it has worthwhile mapping, a used Nuvi is a good value nav aid.

crgr-mac

Old iPad $200 vs Macbook Air $600
I soon found that trying to update this website on the road from an iPad was frustrating, even with an accessory keyboard; WordPress have not got to the bottom of it. Luckily craigslist Phoenix had several used Macbook Airs within arm’s each. What a relief to get back to Mac’s laptop platform at about the same size and barely twice the weight of an iPad.
Verdict: a tablet to read but a laptop to write and edit. Nearly six years, many trips and a couple of dents later, I’m writing this in New Zealand on the same well-used airbook. What a brilliant machine!

crgr-kriega

Kriega R30 backpack – £135
I’m not so keen on tank bags but can’t fit all my essentials in my jacket so a backpack like the R30 takes the laptop and other valuables, sandwiches and quick access day items. Too heavy a backpack accelerates backside pain but the R30 rested on the Watershed when seated so took the weight off my shoulders.
Like a lot of Kriega stuff there’s some very clever but over-complex strap adjustment system that I never investigated; for me it fitted well enough out of the box. It includes a double clip joining the shoulder straps across the chest which along with the grippy mesh on the back helps keep it in place. On the back are cinch-down straps to stop a loose bag flapping. But when unclipped the chest clip arrangement doesn’t hang naturally off the shoulders when walking and who wants to walk around clipped in as if you’re ready to make a parachute jump. On the move I can’t say I ever noticed it which is the point and the capacity is expandable enough for all my needs; if not camping you could probably get a superlight touring load all in there.

crgr-kribak

Best thing about it was a simple, zip-free roll-top closure which, unlike around-the-top zips, won’t matter too much if you forget to do it up – opened zips see stuff fall out. The small outside pockets do feature water-resistant zips which are a bit stiff to use, but then zips do need cleaning from time to time.
The R30 has a velcroed-in, removable waterproof liner which I hear is up to the job and easy to replace once it isn’t. Or just use your own dry bags. The chunky top handle is another good feature, the reflectives are probably useful and the quality of construction is what you’ve come to expect rom Kriega.
Verdict: expensive for a backpack but actually designed for biking not hiking.

crgr-liquid
crgr-can

Liquid Containment 5L fuel bag – £60
I figured this was a compact way to inexpensively increase fuel range and rated fuel bags as such in the book: rolled up out of the way when not needed; handy when they are.
That may be true for the odd occasion when you need extra fuel, but I found a fuel bag was less well suited to near daily use on a motorcycle. The rot set in when the o-ring cap seal fell out and blew away unnoticed at a fill up in Vegas – didn’t notice that until that evening when everything reeked of 85 octane. A day or two later I picked up a replacement o-ring for a backstreet garage, but had gone off the bag by then.
The other pain on a bike is securing a wobbly bag of fuel reliably, securely and without faffing. Sure, the tough plastic LQ has holes on every corner but at a fuel stop you have to release the bag, prop it up, fill it up, cap it and then secure the load to the bike. If I had stuck with it I’d have found a good method, but these sorts of repetitive tasks need to be foolproof for the day you rush it and make a mistake.
Like scores before me, I found a red plastic $10 one-gallon can strapped  to the tail rack  better for near daily use. To fill up simply undo the cap, like an auxiliary fuel tank; to decant into the bike tank undo the straps, pour in and refit. A bigger tank in a worthwhile size was not available for the CRF-L at the time. Note; the fuel bag I used was not the same as the 7L item which Zen sell in the UK. Theirs is an older, bigger and superior model with an integrated pouring spout inside the cap and a handle.
Verdict: in practise not so convenient for regular use.

crgr-maxxis

Maxxis IT Desert tyre – $110 
Amazingly the CRF-L’s OE rear IRC tyre was finished in 3000 miles – a record for me, and on a 18-horse 250, too! I found the meaty-knobbed Maxxis (like an MT21 or D606) was easy to fit with short levers and some WD40 lube, didn’t play up on the highway (bike not heavy or powerful enough to stress and flex the knobs) while on the dry and rocky dirt I rode at road pressures it did the business and I’m sure would have outlasted the IRC.
Verdict: performed as well as better known brands; a pair goes for <£100 on ebay.

crgr-cam

Panasonic Lumix FT2  – from £60 used
I’ve had this camera for a couple of years now and use it almost every day. When it was playing up recently I looked around but newer models in the FT range all had compromises (smaller battery, less megapixels, unnecessary gimmicks like GPS, expensive) as did other brands. So I got another old FT2 off ebay for £60 but which time my original camera had fixed itself.
What I like about Lumixes is they commonly feature wide-angle lenses (28mm or less)  over excessive zooms. An FT2 camera is also shockproof and waterproof to a few metres so rain or sand won’t bother it and it’s robust enough to survive ‘carefree’ treatment. Yes, the enclosed lens is tiny and the zoom is limited, but slipped into my jacket’s chest pocket and hung around my neck on a cord, it’s easy to use while riding. And just occasionally the auto exposure captures the scene as well as any DSLR. At other times – especially on full optical zoom, the quality drops off; better to shoot wide at max resolution and crop later (I always disable digital zoom).
With landscapes, a trick I use with these types of cameras all the time is half press the shutter and expose off the sky, then lower the camera, compose and click. The resultant ‘tricking’ into under exposure often gives a richer result (or one that can be more easily edited). I didn’t film on this trip, but have done a lot elsewhere and the results are up to youtubing. I even sold my annoying GoPro a while back and am now happy to use the FT2 for movie making. The tougher, DSLR-sized Gorillapod also works well as a steady tripod or clamp.
Verdict: until it wears out or breaks up, can’t think of a better P&S camera.

crgr-wear

Riding gear
On this trip to save weight I bought a lid once in the US (see Bell), wore my heavy leather trousers and old Altberg boots on the plane and brought my Aerostich Kanetsu electric vest to make up for my regular ‘M65’ desert jacket; no armour, Gore-tex, mesh or reflectives – just light, quick drying and with enough big pockets to make up for not being a Darien.
In the event of heavy rain I had my old Rukka one-piece suit, but never needed it. For gloves I has my similarly ancient unlined Aerostich Deerskins (sadly MIA) and a pair of Armr Moto WXP8 gloves for cold days. Apart from  the Rukka, all got used all or some of the time. Temperature-wise this trip was quite extreme but I felt protected enough to be comfortable, while never feeling over-laden with clobber, as you can do with moto gear.
Verdict: for the local conditions, the best set up I’ve ridden in.

crgr-bench

SealLine XL map case – £15
I normally use this for sea kayaking or packrafting, the zip-lock seal keeps maps and other bits dry and the big size gives you the all-important big picture without the need to open up and refold a map too often as the crashing surf closes in. In the Southwest the map case took a folded back Benchmark with room to spare and stopped the pages flapping in the wind. I found a neat way of holding the maps case down was stretching a thin loop on inner tube from one side of the engine to the other (right). Note: they also make roll-top map cases, not as reliably waterproof as the zip lock version.
Verdict: moto or boto, great bit of kit.

crgr-slimer

Slime anti-puncture fluid and compressor (both $10)
Can’t say the luridly green Slime fluid stopped any punctures on my ride, but for ten bucks it was worth the squirt. Also on the shelf in Walmart was a Slime-branded 12-volt compressor (right) also for a tenner and with a pressure gauge too and the ever useful flashing light. More compact and lighter than my Cycle Pump, I actually used the Slimepump a few times and it performed fine.
Verdict: well worth $20 for peace of mind.

crgr-screen

Slipstreamer Spitfire windshield – $70 
Just what was wanted for the CRF; a small, inexpensive, one-size-fits-most screen to keep the wind and rain off. Mounting is a bit rudimentary but adds up to a quick, tool-free way of temporarily removing the screen while leaving the bar mounts in place, something I was slow to catch on to for dirt day rides when the screen was not needed.
With only two mounting rods (no triangulation) high-speed runs into headwinds or rough tracks caused the screen to inch back – this could have been fixed by anchoring the base of the screen to the headlamp cowling. It seemed hard to get a tight fit on the screw down screen mount lugs too, but meddling with spacers or rubber shims would fix this.
Verdict: Great value, simple fitting and effective.

trailtech

Trail Tech Vapor digital guage – $90
A great gadget for a travel bike like the CRF-: with limited instrumentation. Click the link for full review.

crgr-water

Watershed Chattooga dry bag – £65
Another kayaking item that works well on bikes. Watershed dry bags use a tough fabric, but unlike your average roll-top bag, they feature a chunky ziplock-like seal that makes the bag immersion proof.
At about 20 litres the Chattooga model is compact but big enough to take my infrequently used tent, sleeping bag, sleeping mat and a spare pair of gloves. It didn’t happen on this trip but it’s good to know in heavy rain you need not worry at all about your camping gear getting wet until you take it out. For smooth closure the zip seal can use a bit of WD or 303 once in a while.
Verdict: Watershed when it absolutely positively has to be kept dry.