See also:
Himalayan 450 preview
Himalayan 450 in the Himalayas
Himalayan 411, 4000 mile review
A Week in the High Atlas
Renting a moto in Marrakech

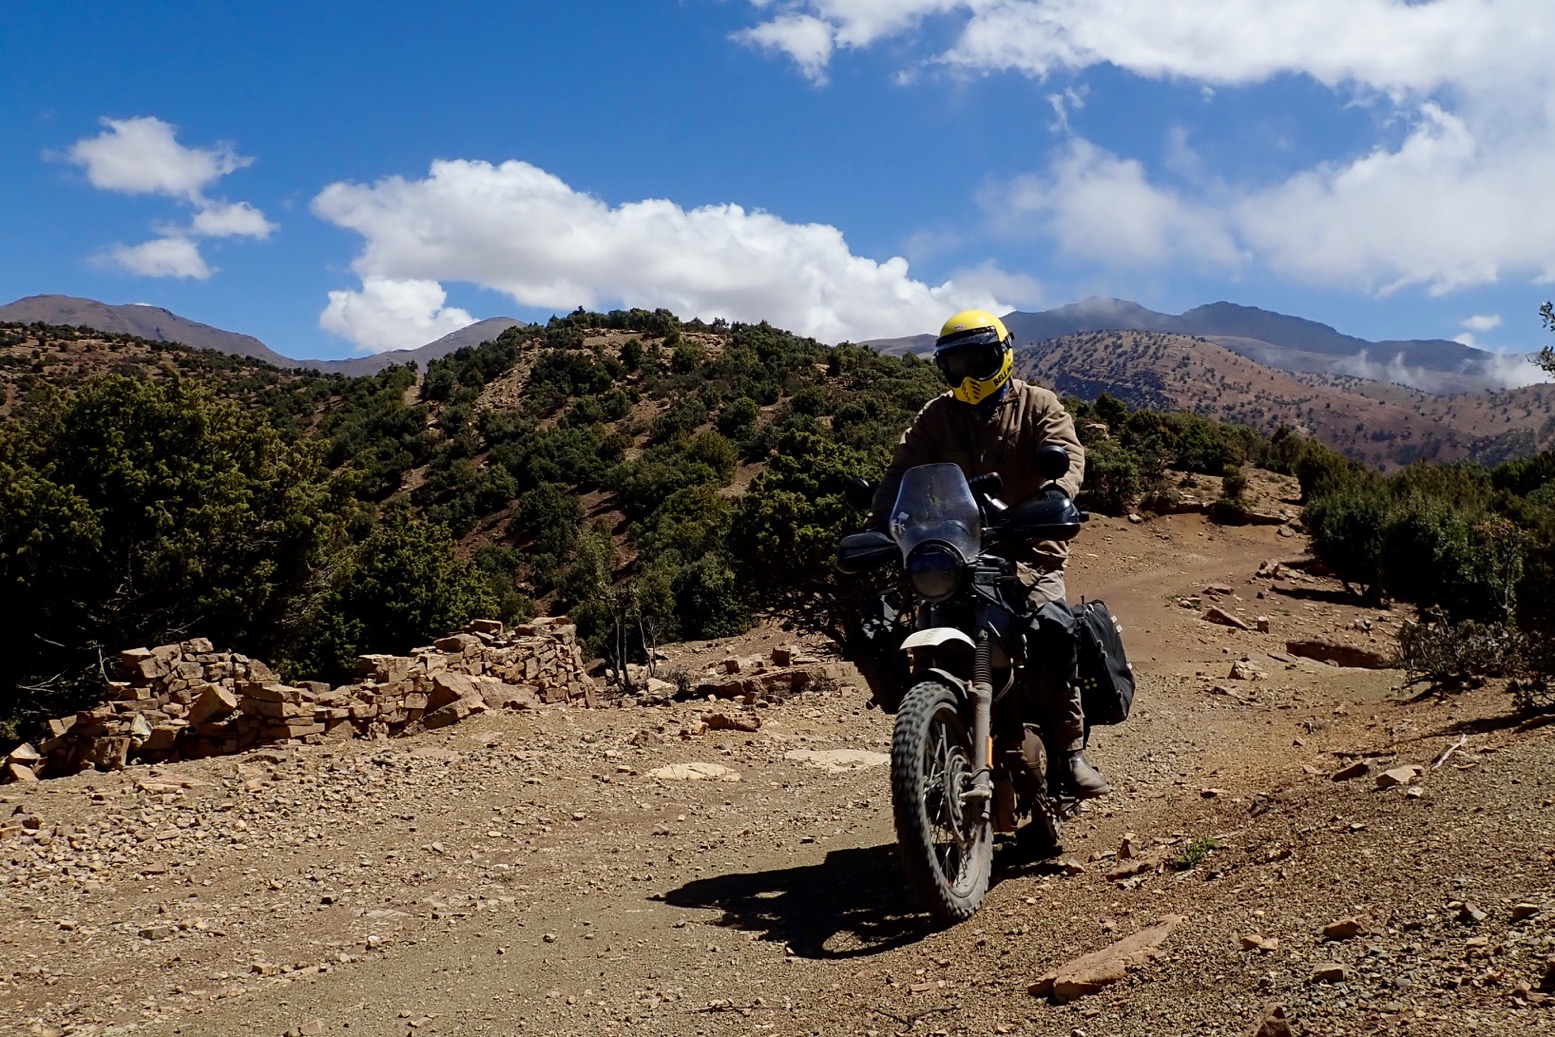
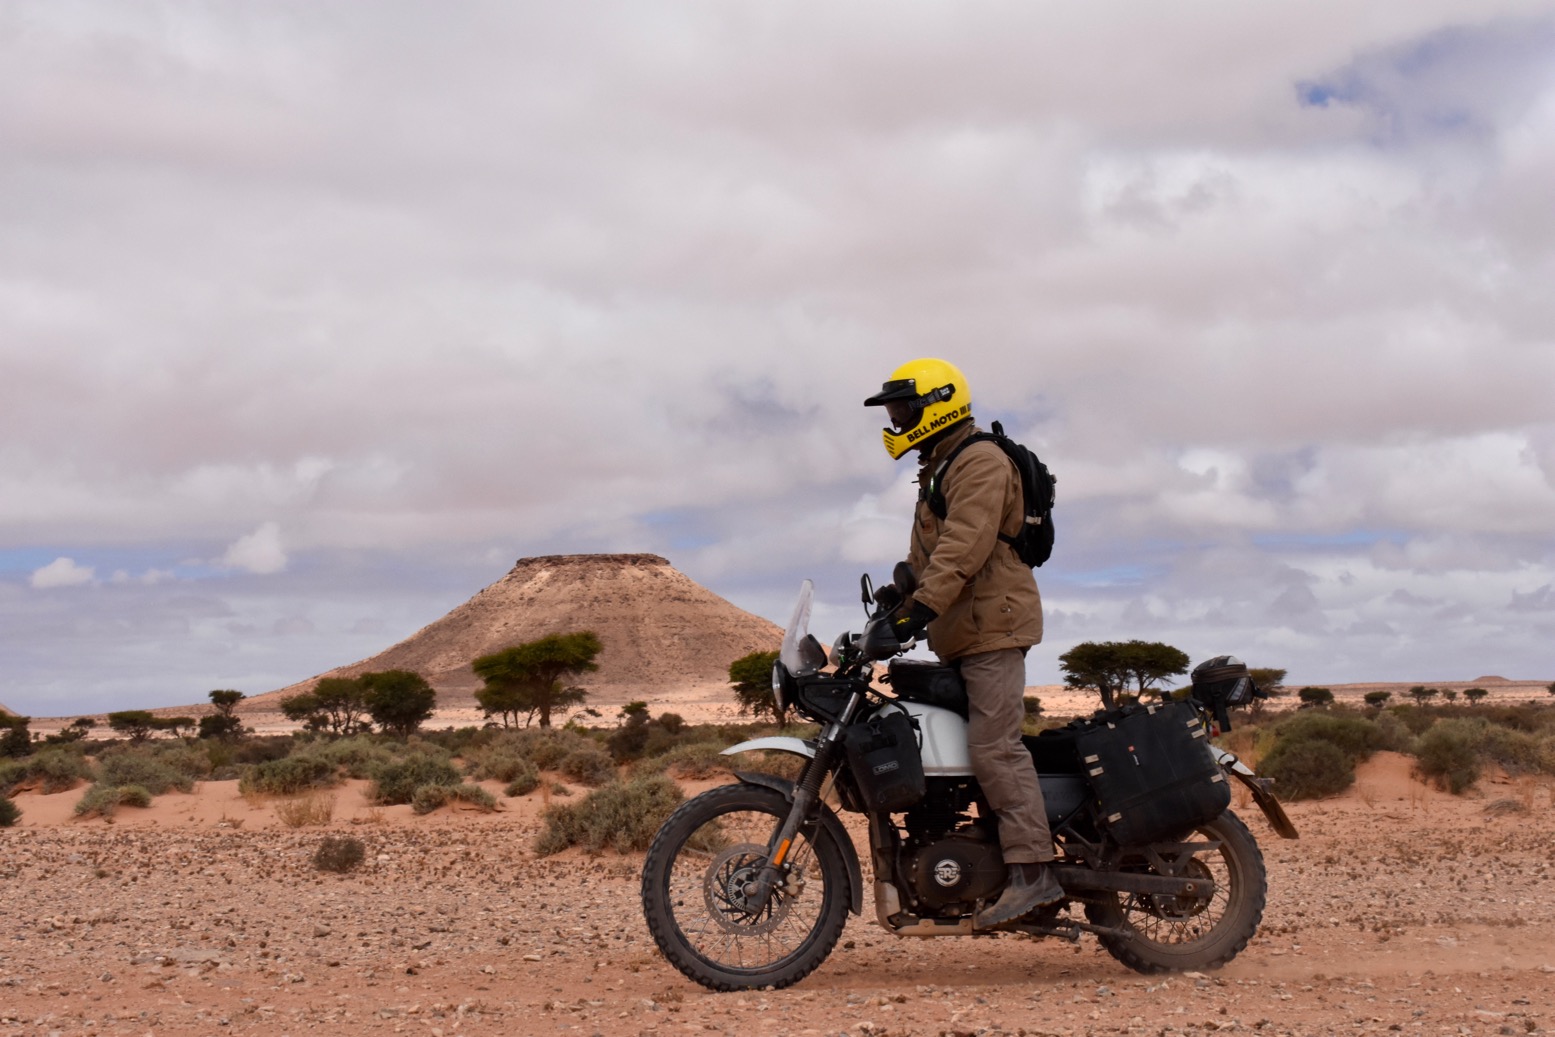
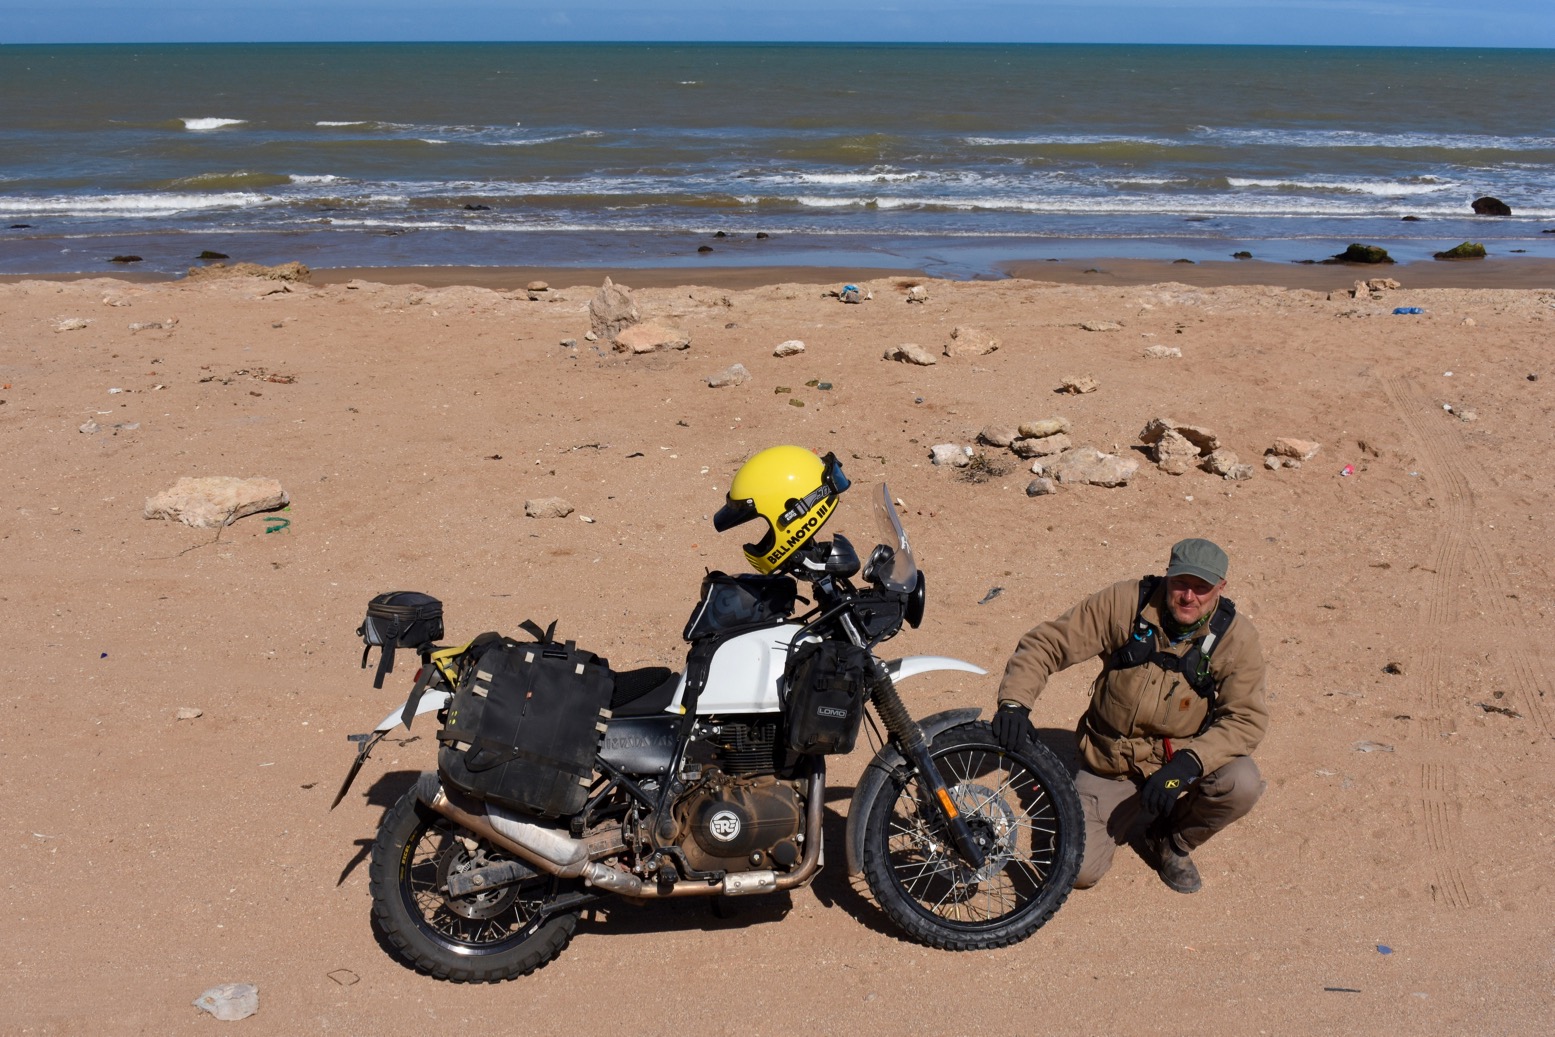
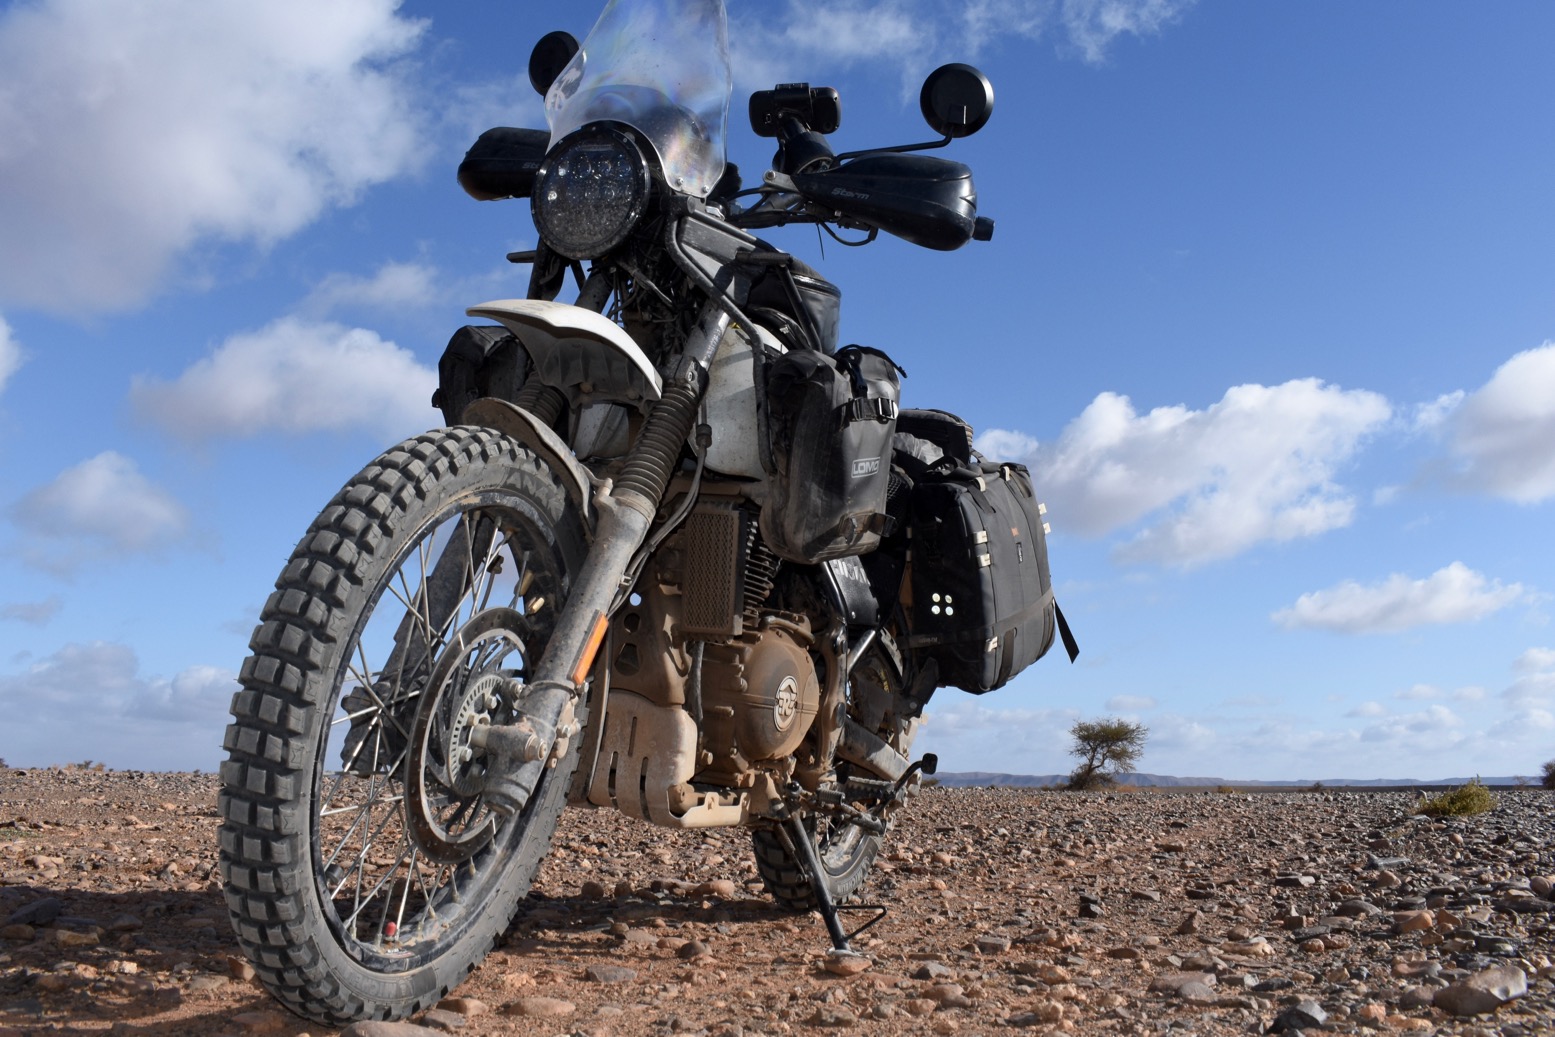
After selling my Honda 300L, summer 2024 I was all set to buy Enfield’s new Himalayan 450, but in tubeless it cost well over £6k; 10% more than the more unusual CFMoto 450MT. so I went Chinese and didn’t regret it. I sold the MT after 8 months/7000 miles and, still Himi-curious, just got back from eight days in the Moroccan Atlas with a mate on a pair of Himalayan rentals, covering 2900km.
My MT was a bit juicy for a 450cc, plus I knew at first sight its size would limit solo off-road exploration, even with the low seat height. Luckily, I did loads of that the previous winter on the 300L for my new Morocco 4 guidebook from which I span off the Trans Morocco Trail. I missed my 300’s go-anywhere ability, even if crossing Spain was a slog. Could a Him 450 pull off both? We were here to find out. I was in Morocco with Jon. We last rode together in 2003 on Desert Riders out as far as the northern Tenere’s Lost Tree.

In a line: Economical, but heavy for what it is, we both agreed the Him was better off-road than on, but wasn’t great at either.

• Carries its mass low which results in good tracking and stability
• Low seat height, and can go lower still
• The economy of my 300, giving up 600km range
• Stock, the minimally adjustable suspension is pretty good
• Optional tubeless wheels (ours weren’t)
• Feels better made– and fixed many of the 411’s shortcomings
• No low-speed fuelling issues!
• Stock CEAT road tyres have at least 18,000km in them (which is annoying)
• Almost don’t need bar risers
• Centre stand – some added weight is worth having
• Tail rack and tank bars; ditto
• Shock preload easy to access (but I didn’t)

• Tanked up, it’s heavy and feels it on the trail
• Saddle soon gets uncomfortable
• Needs softer grips
• ‘Screen’ does nothing useful other than offer mounting points for something effective
• Display selection is a bit tiresome, and always resets
• Should an engine crash bar bend that easily?

Review
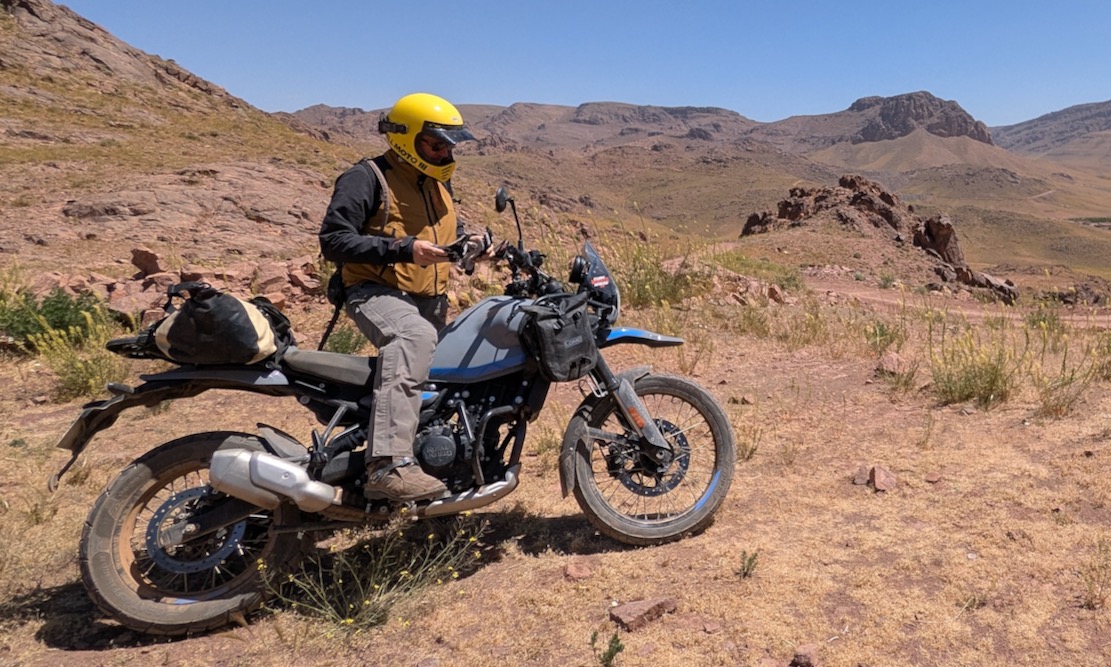
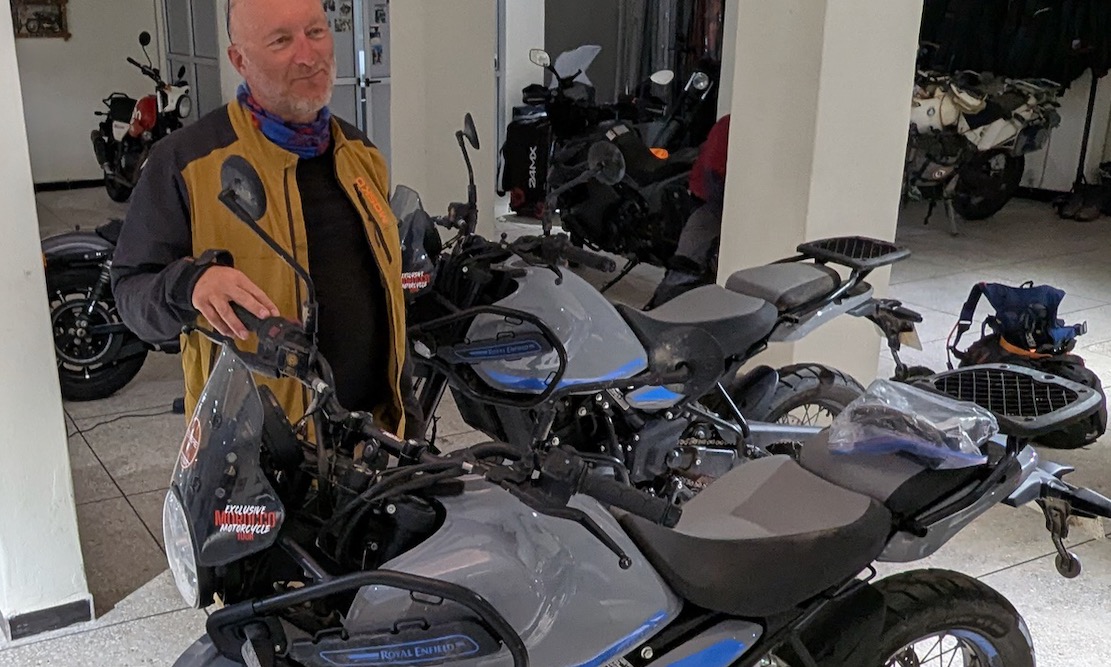
There are a couple of places renting Him 450s in Marrakech now. Ours had around 15,000km and cost €65/day with worn-out stock CEAT tyres (despite me requesting good tyres in advance). So far, so Moroccan. But both bikes looked in great nick and my bike had engine crash bars. And I have to confess: what I thought was an ugly bike in late 2023 now looks pretty good, even with the naff graphics.
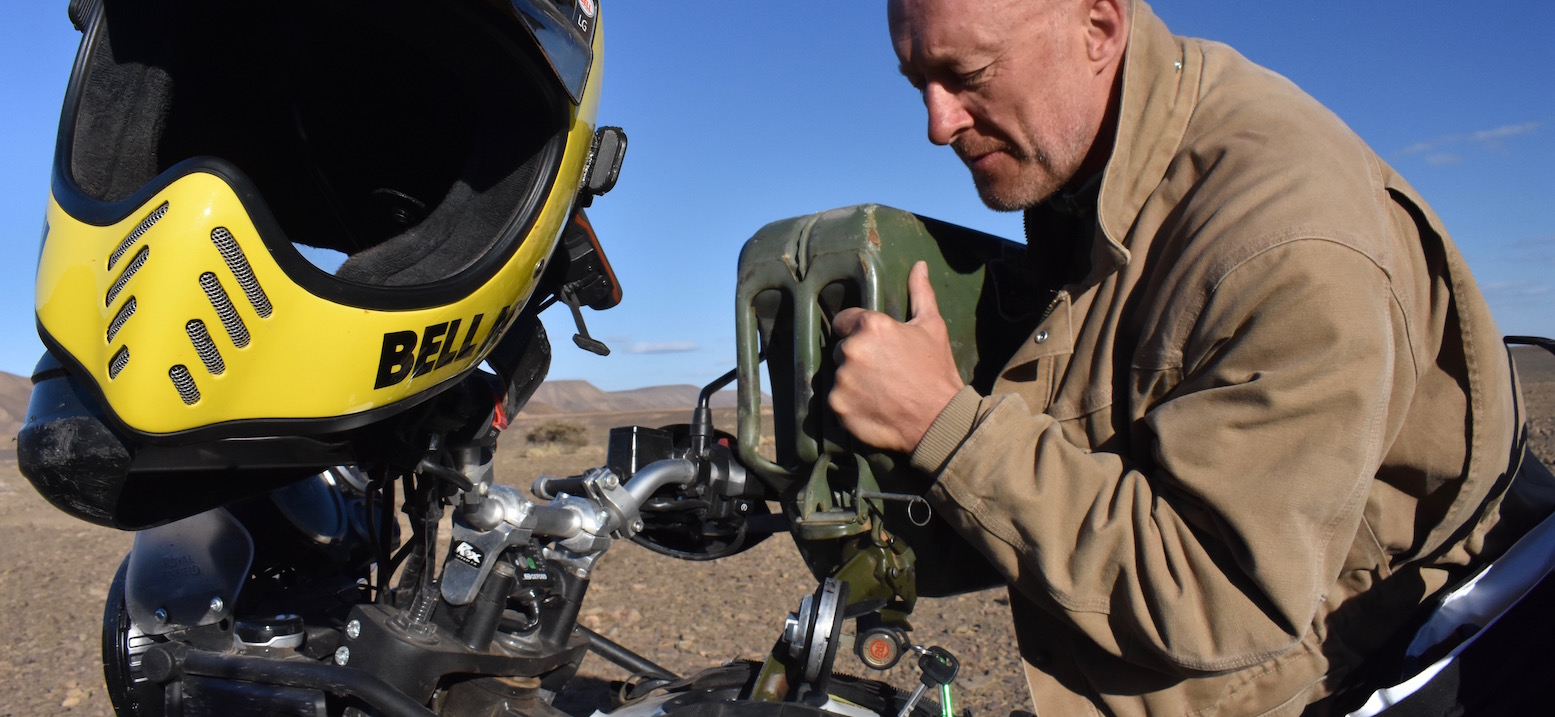
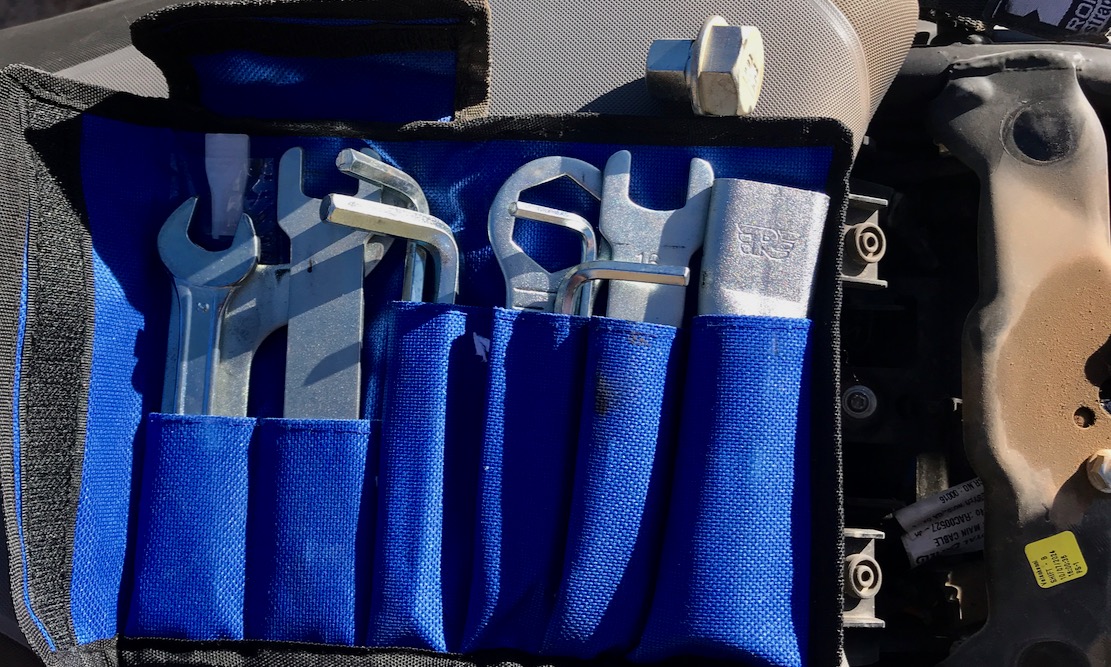
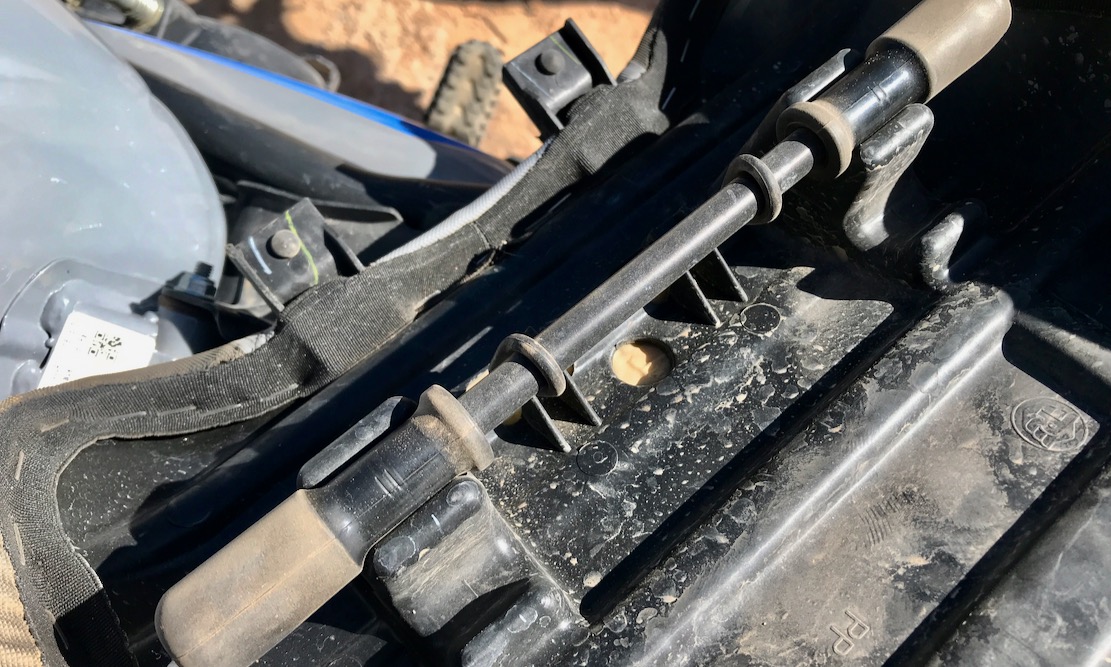
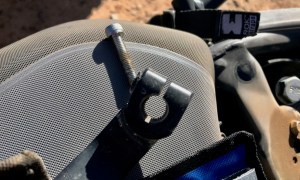
I checked for a toolkit and was amazed to find something resembling a 1970s BMW or MZ. Everything’s there (below left), including an adaptor nut to remove the front wheel with the rear wheel wrench. What a shame the rental shop didn’t think it through and import tubeless models; I’d have happily paid more. We borrowed a rear tube, expecting to need it. With the seats off, I also noticed the height adjustment pegs on the front saddle (below right). I left mine on high which is still pretty low.
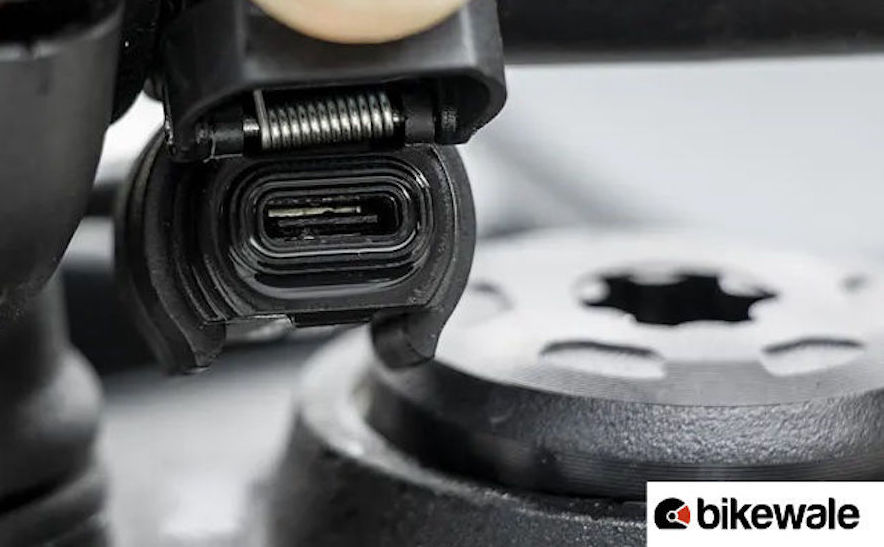
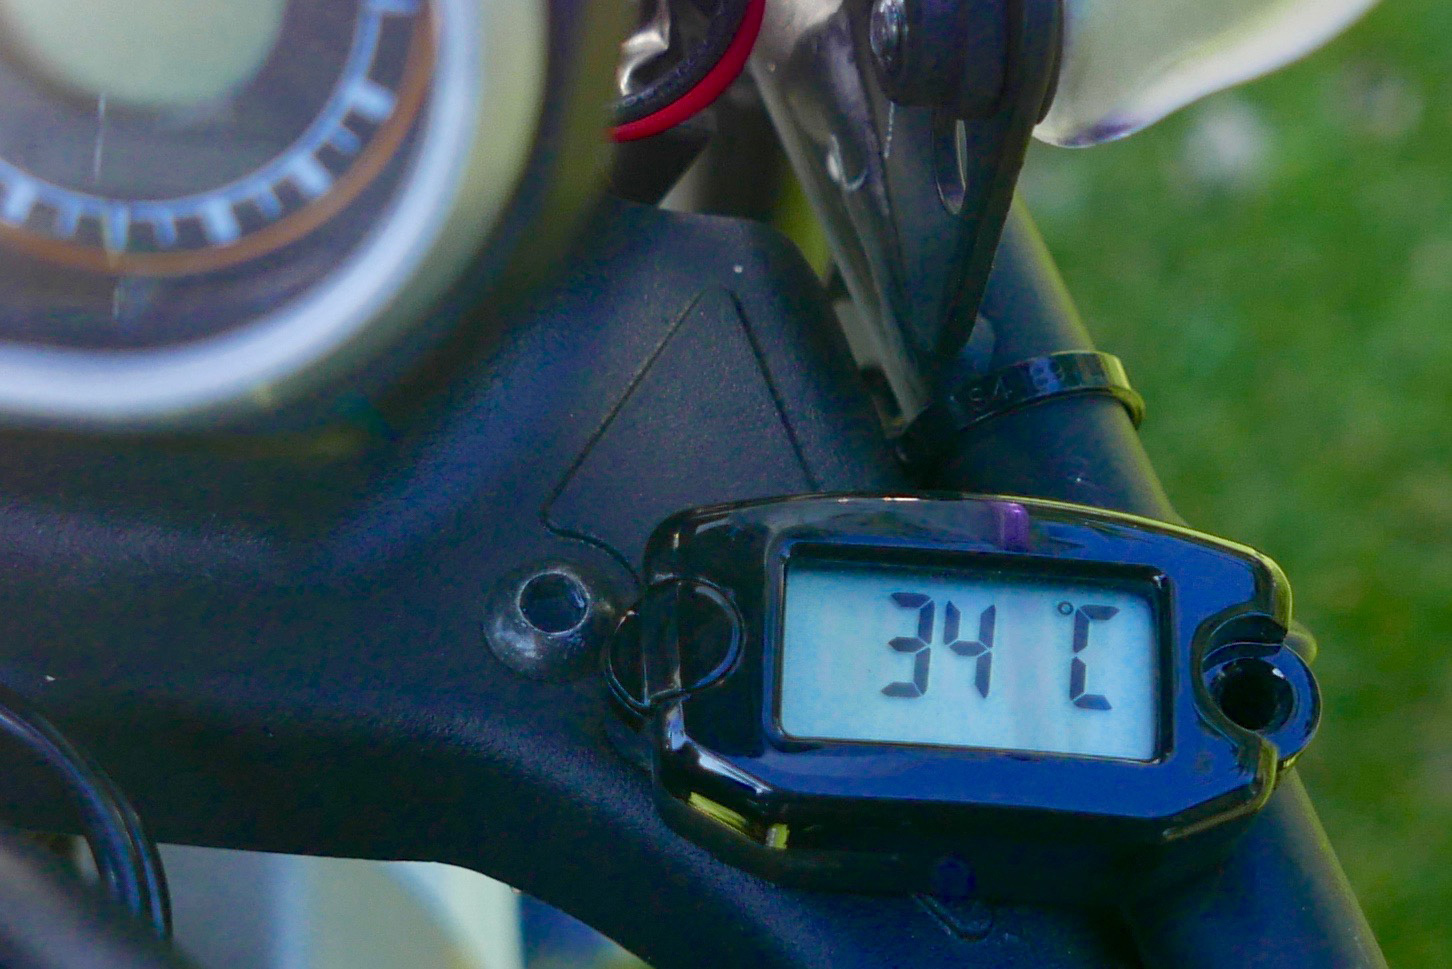
One annoyance was the USB-C charging port under the handlebar mounts. I was hoping for a regular USB2/3. I suppose I might have tried to buy an adaptor in Marrakech, but luckily my Garmin runs for up to two days on a battery, so I made do.
Sorry, but I didn’t waste my time trying to make the display’s Tripper mapping app work, even had my phone been Android, as it uses inadequate (for Morocco) Google Maps and can’t run offline.
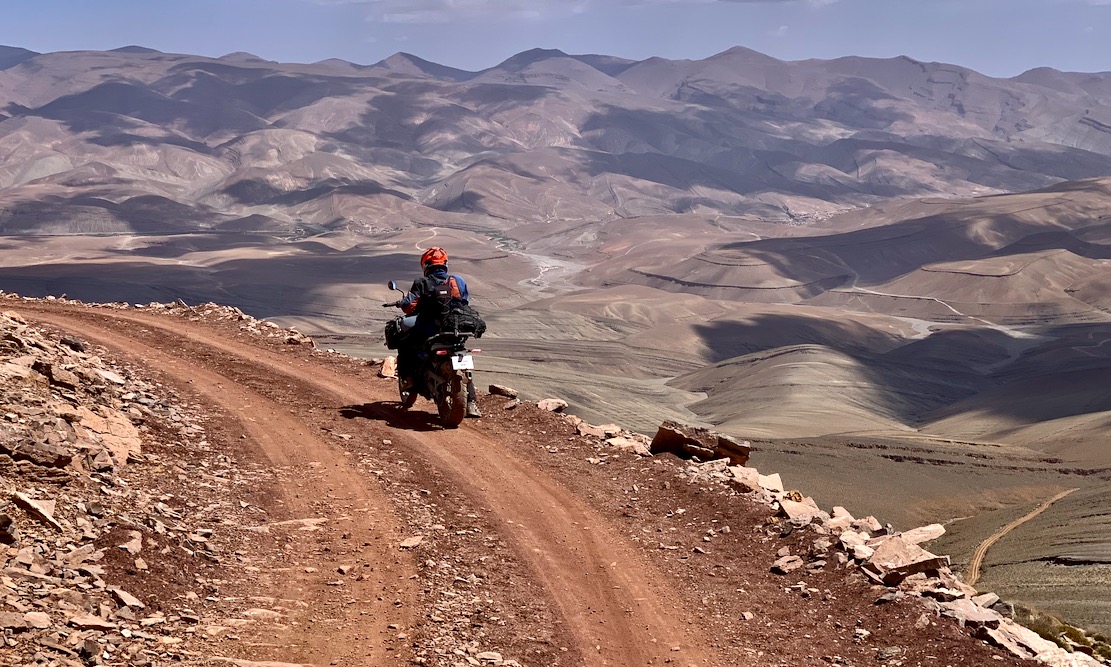
Lifting the bike off the side stand and turning the bars, with tank ¾ full, the front end felt incredibly heavy, and even getting it onto the centre stand took quite a heave. It was a sign of things to come. We were on our way to Anergui, about 300km to the east, tucked in a remote High Atlas valley.
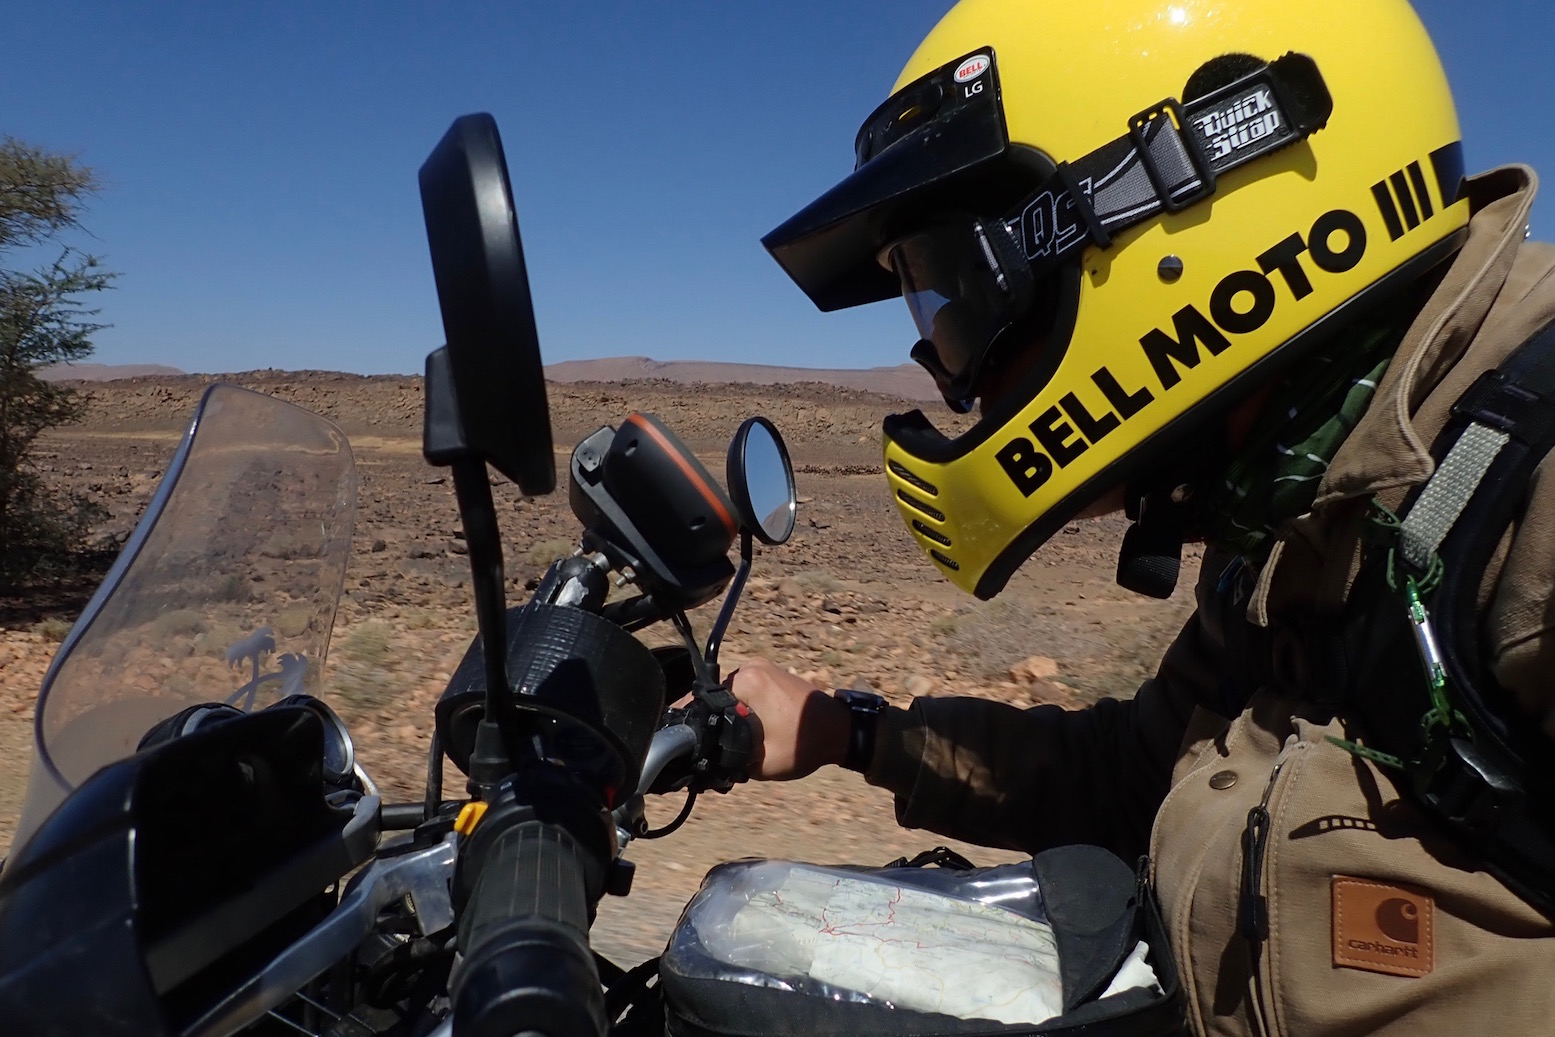
On the road the Him’s brakes were fine; the rear perhaps over leveraged, but ABS sees to that. The dash was clear enough, but doesn’t save settings afaict, and unlike Jon, I didn’t bother getting to grips with it. My gear change was nothing special, the clutch a bit heavy and the screen little more than a console G-string.
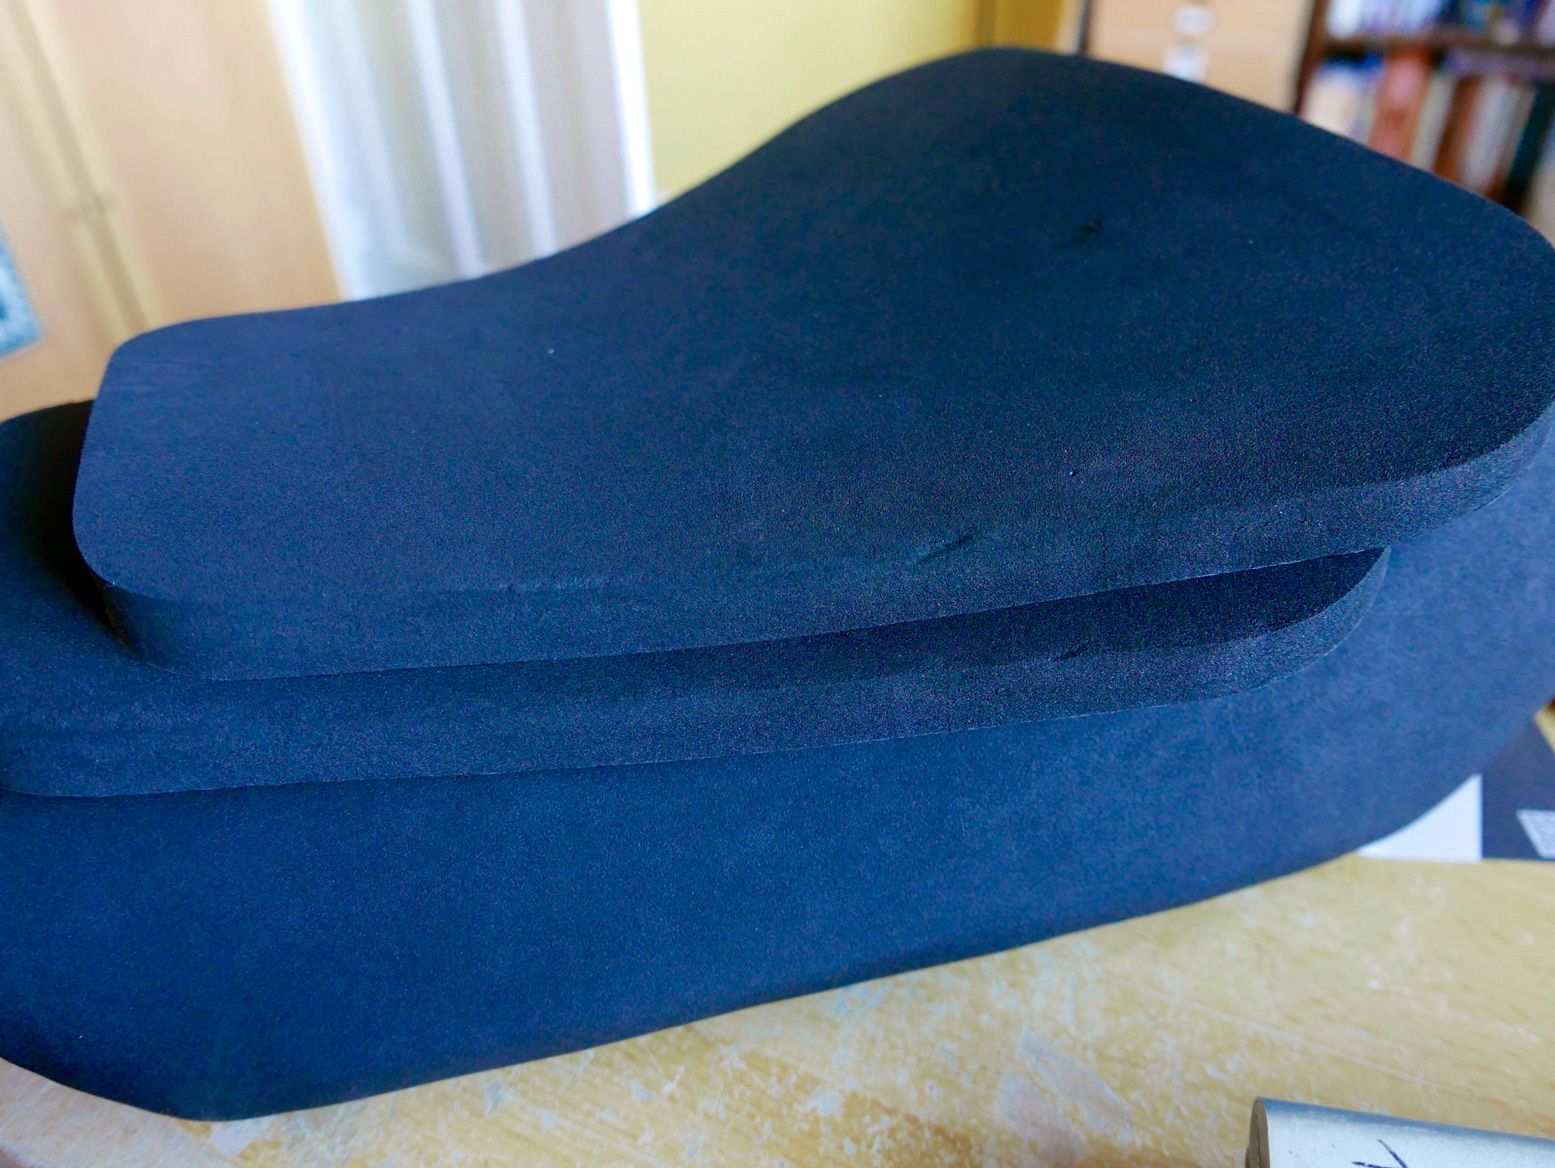
Jon and I were initially underwhelmed: the power-to-weigh ratio didn’t add up. We realised later we were on Eco mode which reduces power in the bottom four gears, though we were rolling along mostly in the upper two. And does 40-hp actually need softer power modes, or was it just a ‘because we can’ gimmick? On top of that, while looking wide and feeling soft, the saddle got painful after less than two hours and would remain so. Had 15,000 rental kms done the foam in? It didn’t feel like it, and had been the same on my 411 which I adapted with neoprene slabs and a Cool Cover. Shoulda brought my Skivvies.
This was the only part of our ride on fast, straightish roads. Perhaps the vibration might have eased up, but with no screen and my wind catching Bell lid, I didn’t have the urge to push on beyond 100kph and hold it there. Jon was the same.
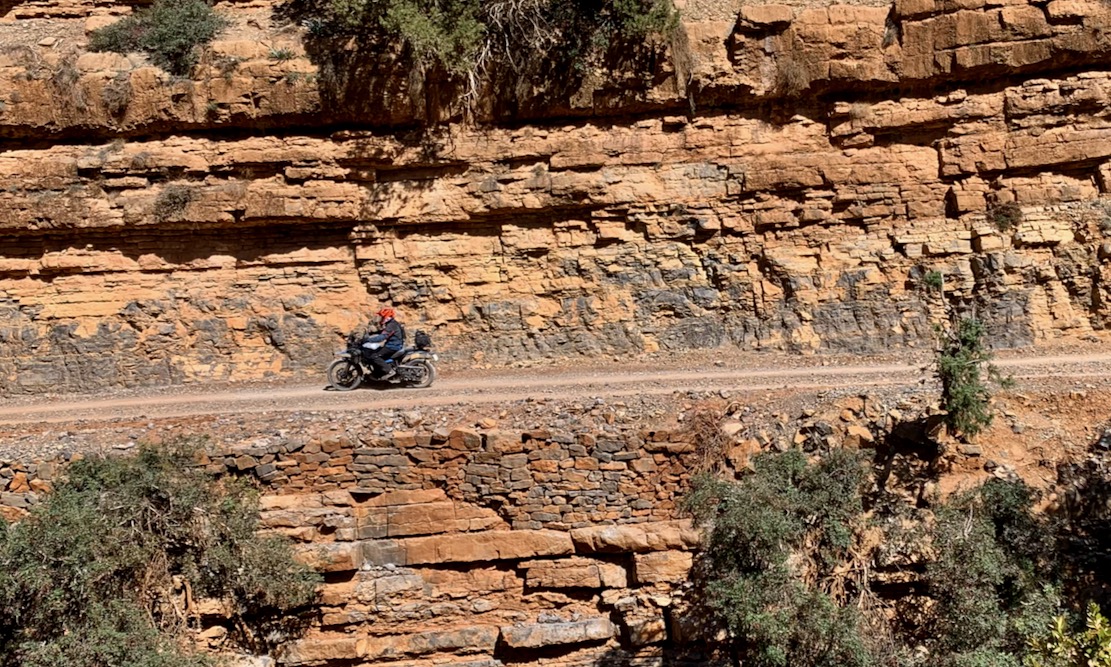
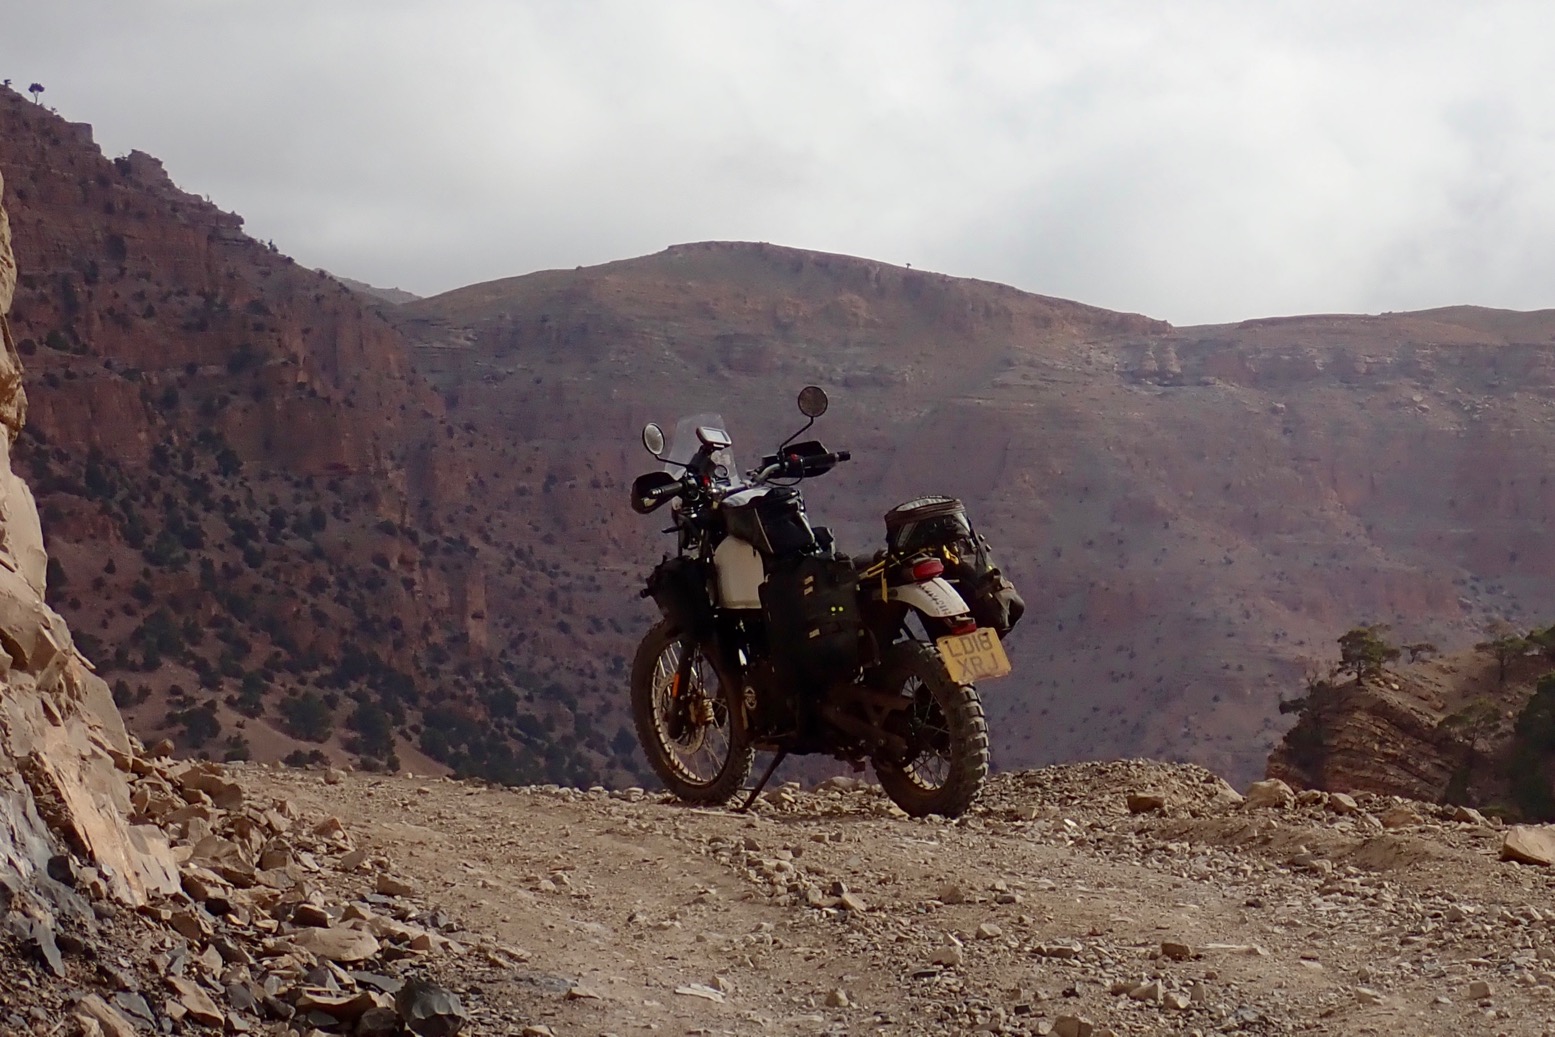
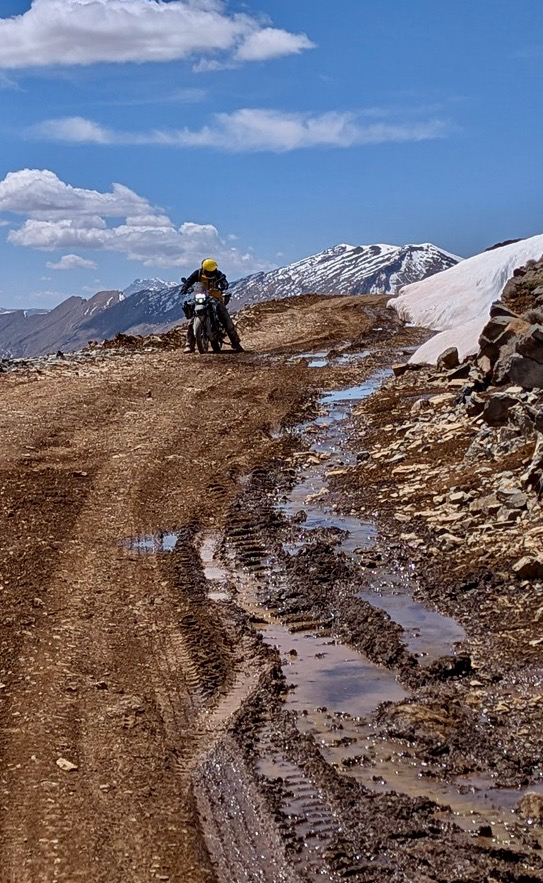
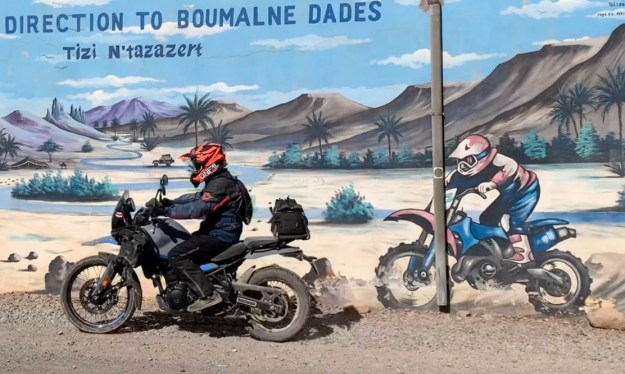
The last 40km into Anergui follows the precipitous Assif Melloul gorge (above; video below) with some big drops into the river you’d not want to attempt. Getting weary, I did overcook it a couple of times – perhaps the ABS led me astray.
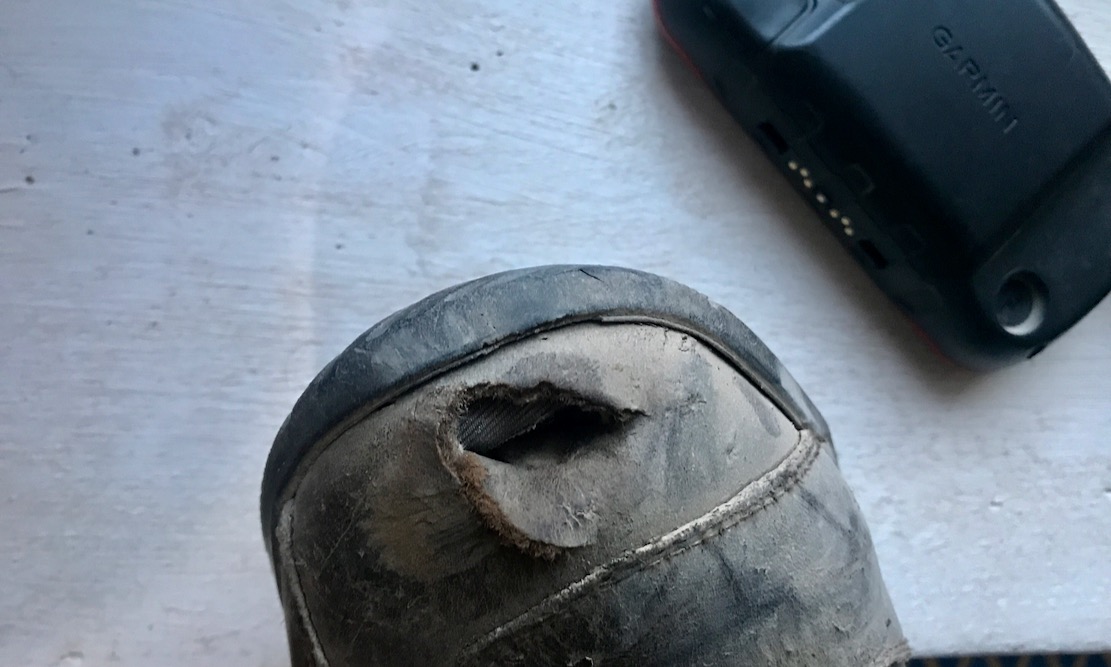
I even managed to poke a hole in the toe of my ageing TCX boots (left) without anything clouting the bike, far less spotting a sharp rock. I know the pegs are low, and sliding forward on the saddle points feet downwards, but this was a first for me. The wide gearing felt fine providing you kept it above 3000rpm. First was a tad tall as usual ~6-7kph @ tickover? – but clutch slipping and grunt pulled it round steep switchbacks.
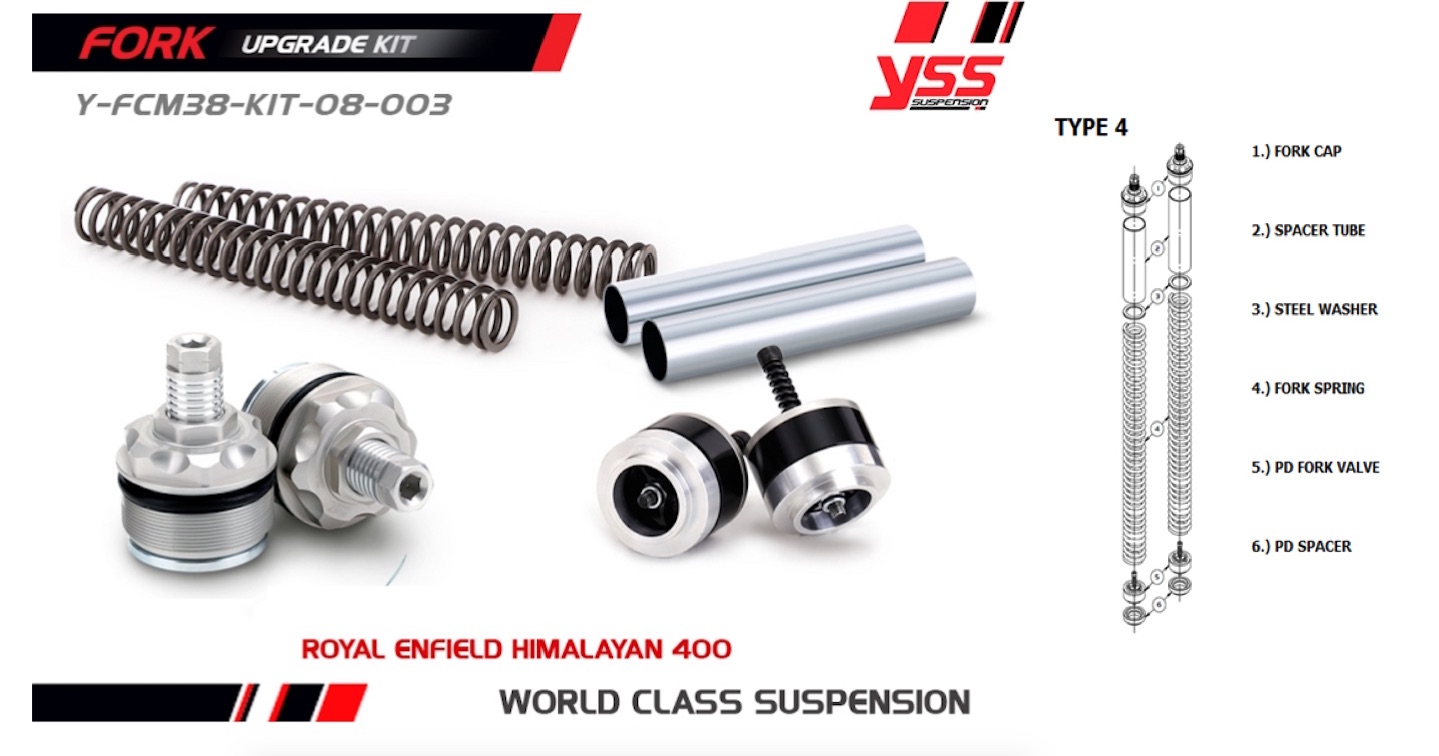
On arriving in Anergui we both decided the Him was better off-road than on, but it wasn’t great at either. The weight – 200 kilos with the 17-litre tank brimmed – is set low and combined with the low seat height made the Him stick to tracks like glue, but it still took a fair amount of effort to ride. The barely adjustable suspension felt good, especially the cartridge? forks. I could’ve backed off the rear rings a bit to reduce chattering, but neither end bottomed out during our ride. Nor did the bash plate scrape. We checked the tyre pressures, and dropped them from 36 to 30psi.
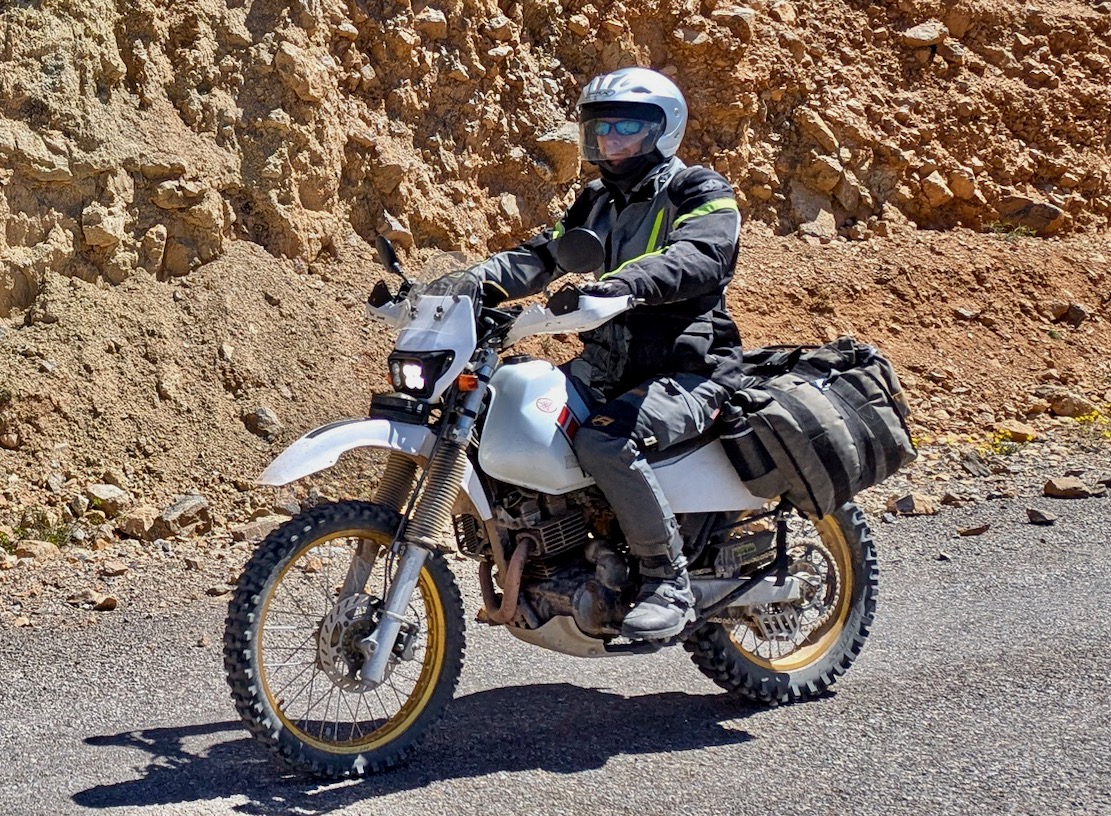
At the Anergui auberge we met up with Simon on his nicely set-up, over-bored TTR315 (left), as well as a couple of Germans on an AT and a 901 who’d both just discovered the TMT. They’d got here via TMT Stage N which had just become accessible again after months, but not without a few fall-overs. By November 2025 Stage N was rideable again. Until the next big storm.
I rarely visit Morocco this late in the season, but was staggered by the size of tourist bikes used out here. Maybe they weren’t all piste bashing, but as it is, regular mountain roads are often missing the surface or capped with dried mudslides, so a giant Adv trounces a giant tourer.
Old Man Norden said he was on his Last Bike Adventure, recognising he was becoming a bit of a liability. ‘Get a lighter bike!’ and give yourself another decade, we all thought. Feeling the same loss of ability, that’s what I’ve done.

On Day Two a rattle became evident under load. It had probably done it out of the shop but now unplugged, I could hear it. Jon’s bike was fine and his gear change was better too: I traced the latter down to a loose lever. It took a thread-stripping amount of cranking to close up the gap with a bit of added soap.
Over the next day or two we prodded various bits to try and pin down the noise: cush drive looser than Jon’s; tightened my chain (centre stand – yay!); loose rad or crash bars? Nope. Eventually I placed the rattle under the tank and, as it didn’t get worse or affect anything, I left it. Probably like the previous customer and the next one.
Both Jon and I were amazed how well the rubbish tyres tracked on dry trails, providing we backed in appropriately. In that way the low CoG is a benefit; light bikes can feel skittish. But my new thin gloves didn’t agree with the Him’s hard plastic grips combined with the need to manhandle the 450. Weeks later I still have calluses on my palms. Along with the seat, this discomfort may have jaded our impressions of the Enfield.
Economy
Having covered nearly 400km since filling up, in the Ait Boumengueze valley and with 50km range showing on the read-out, we took on a couple of litres. By the time we topped right up at the Kelaa servo next morning, I recorded 26.6kpl / 75mpg with a lot of steep and slow trails. That was already better than my MT ever managed.
The next fill up after crossing Jebel Saghro off-road and recrossing back to Dades came in at 34.5 kpl or 96mpg. These match the impressive 450 figures I’d seen bandied about and add up to a potential 600km range. I read that Acerbis have produced a 24-litre tank for the Him. Why bother? The final fill-up back in Kelaa after crossing and recrossing the High Atlas was around 86mpg / 30.5kpl which was the average. This frugality was partly what had attracted me to the new Him. And unlike my CF Moto, the low-rpm fuelling was spot on, while briefly over 3000 metres – nearly 10,000′ – the loss of power was barely noticeable at the sorts of speeds we were able to ride at.
Arriving in Imilchil the next night after long road ride recrossing Saghro and the High Atlas, it sure felt nice not to have been pummelled. Is it the weight of the bike, or my advancing years? Probably the latter, as others manage fine.
My impressions waxed and waned, but in the end settled on wane. Not helped by the discomfort, the Him wasn’t fulfilling all my expectations and Jon, who rides a 690SM, was even less impressed. Even with inner tubes, I was rather hoping the Him could become my fly-in rental hack to save me running a bike in the UK, but without improving the comfort, it’s not for me – the bane of WYRIWYG rentals.
Were I to own one, I’d fix the saddle, change the grips, fit an actual screen and change the shock and tyres. That’s pretty much a regular list you’d do to any bike – unless it’s a CFMoto 450MT, of course!
Still, all this grumbling didn’t stop Jon and me having a brilliant last couple of days in the High Atlas. We recce’d a new start to Stage N out of Imilchil that dodges a sometimes troublesome gully, then winged it off the map to discover a fabulous 50-km off-road crossing of the High Atlas back to the Dades valley, peaking at over 3000m. You really need to set the bike on full-power mode in this sort of terrain; the day or so we wasted in Eco we’ll never get back.
I was expecting the Him to be my sort of bike – more Trail than Adv which is the way my riding prefs are going – with better economy than the 450MT but still with enough grunt to chug around steep switchbacks. I also expected the lack of frontal bulk to make it less cushy on the road while giving an impression of greater agility on the piste. But for me, along with the discomfort, the weight just kills any benefits. The former could be fixed but the latter is largely there to stay and only increases once the bike gets outfitted for travel.
Looking back at my 411 review, they’ve fixed many of the flaws and even made the 450 more economical and a lot faster on the road. Yet, perhaps because I improved my 411, as we do with all our own bikes, I think I got on with my old Him better than this rental.
It was great to have tried the Him 450 on the sort or terrain I like to ride. My replacement is waiting for me on a farm up north and is a bike I’m quite excited about. What could it be?


 • Valves need checking every 3000 miles – not practical