My current 300L came with Acerbis handguards so I’ve decided to recycle my trusty old Aussie-made Barkbuster Storms (see ebayuk). Looking back, I realise what a great life of adventure they’ve enjoyed! Proper handguards based around a metal frame clamped to the handlebar are a no brainer. A simple fall over can snap a lever or mount. That’s never happened to me since I’ve been busting the bark.
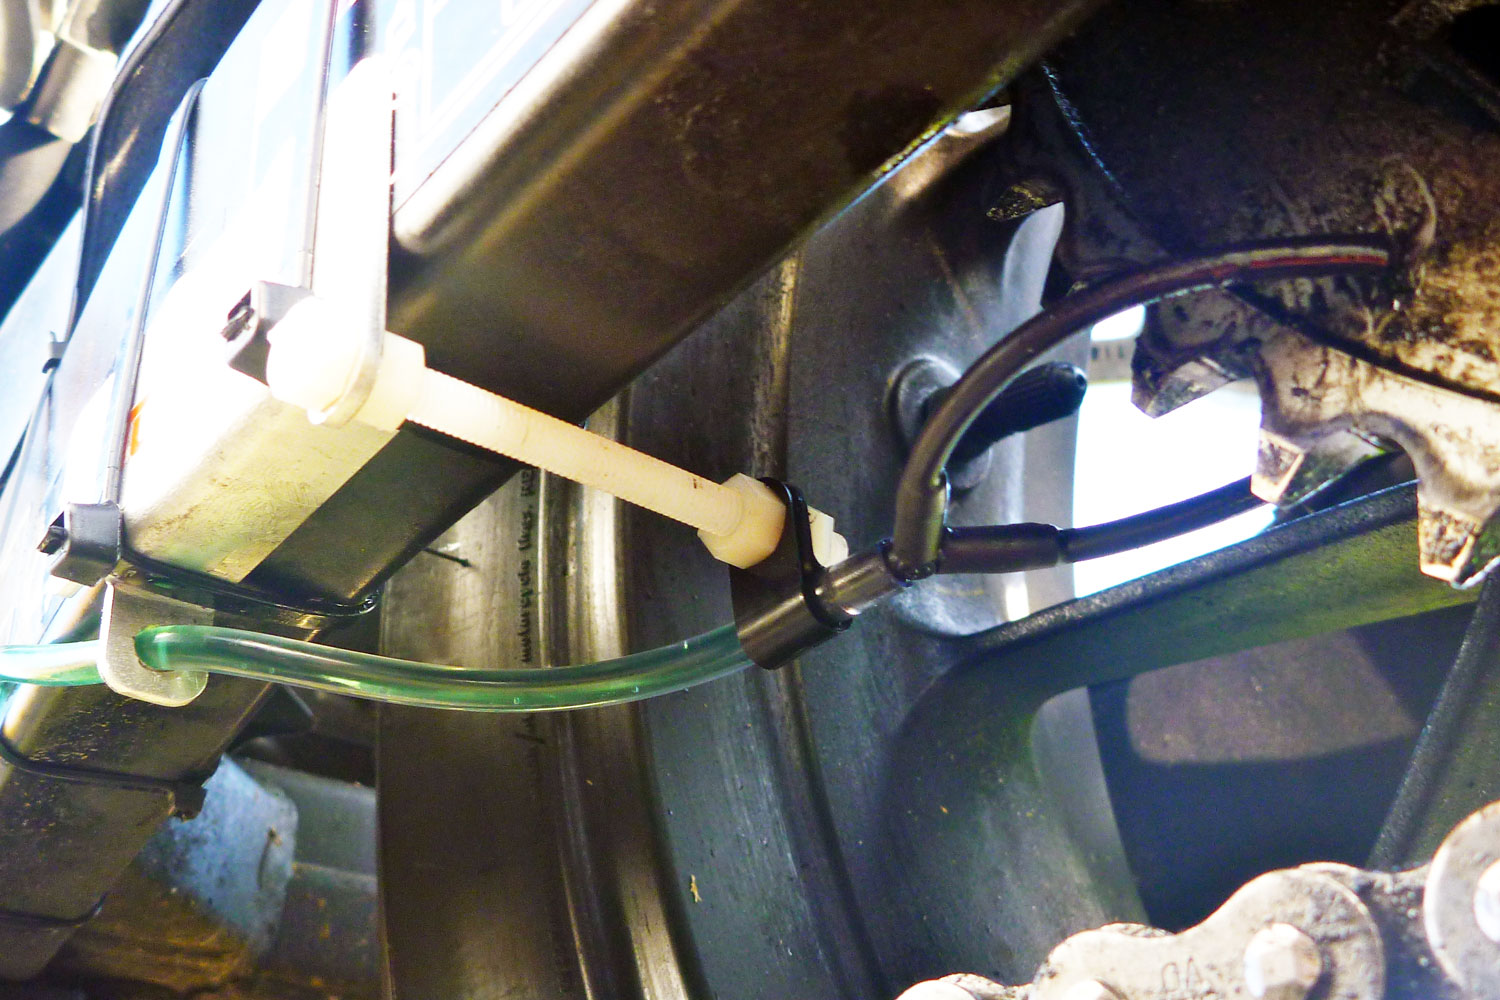
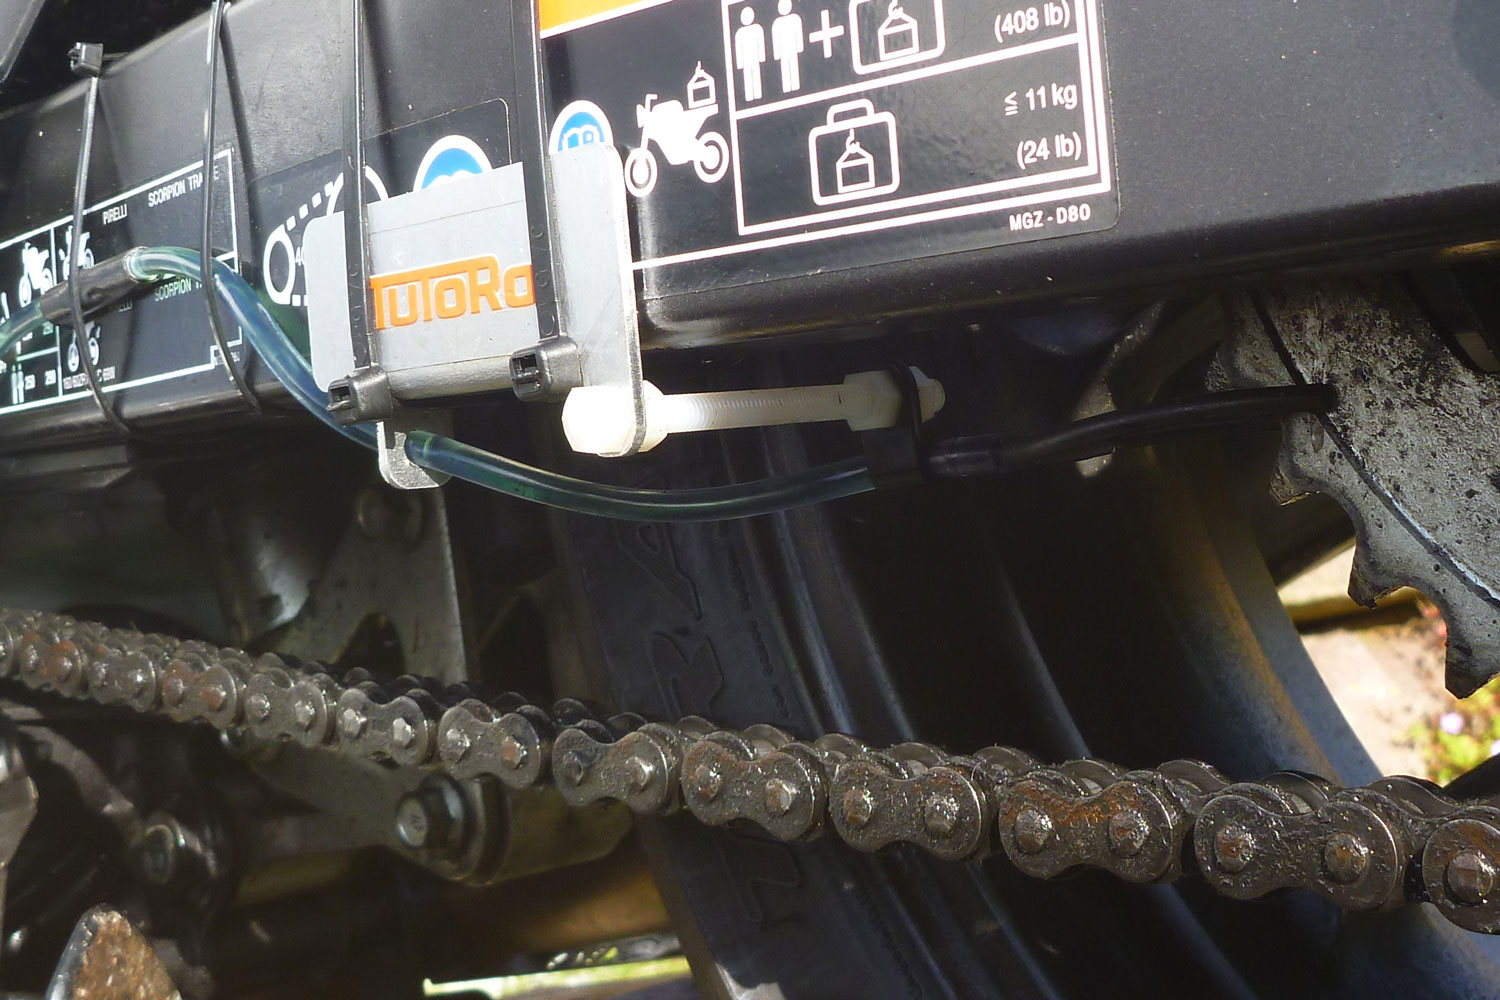
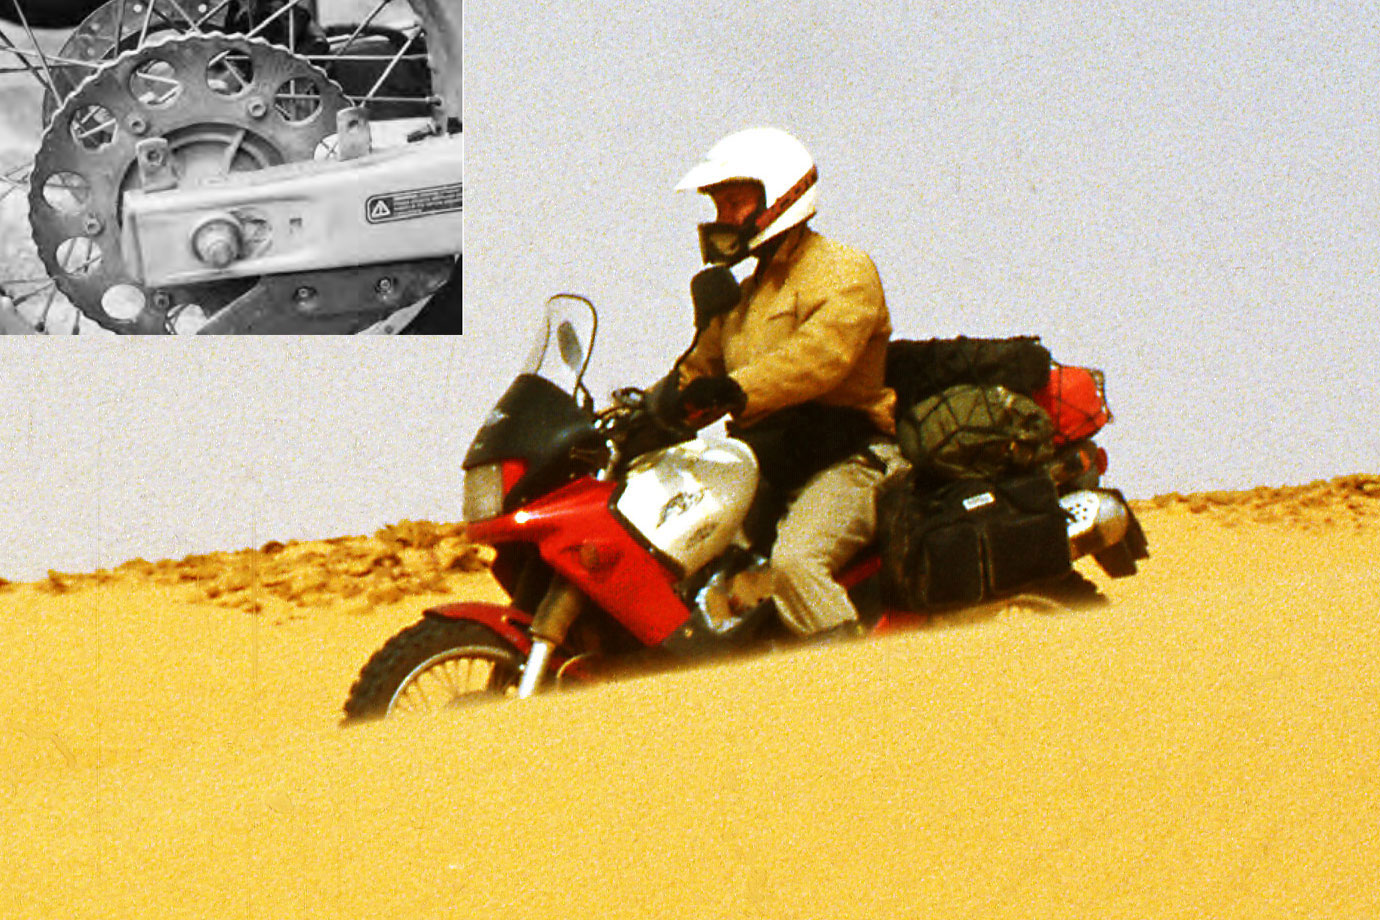
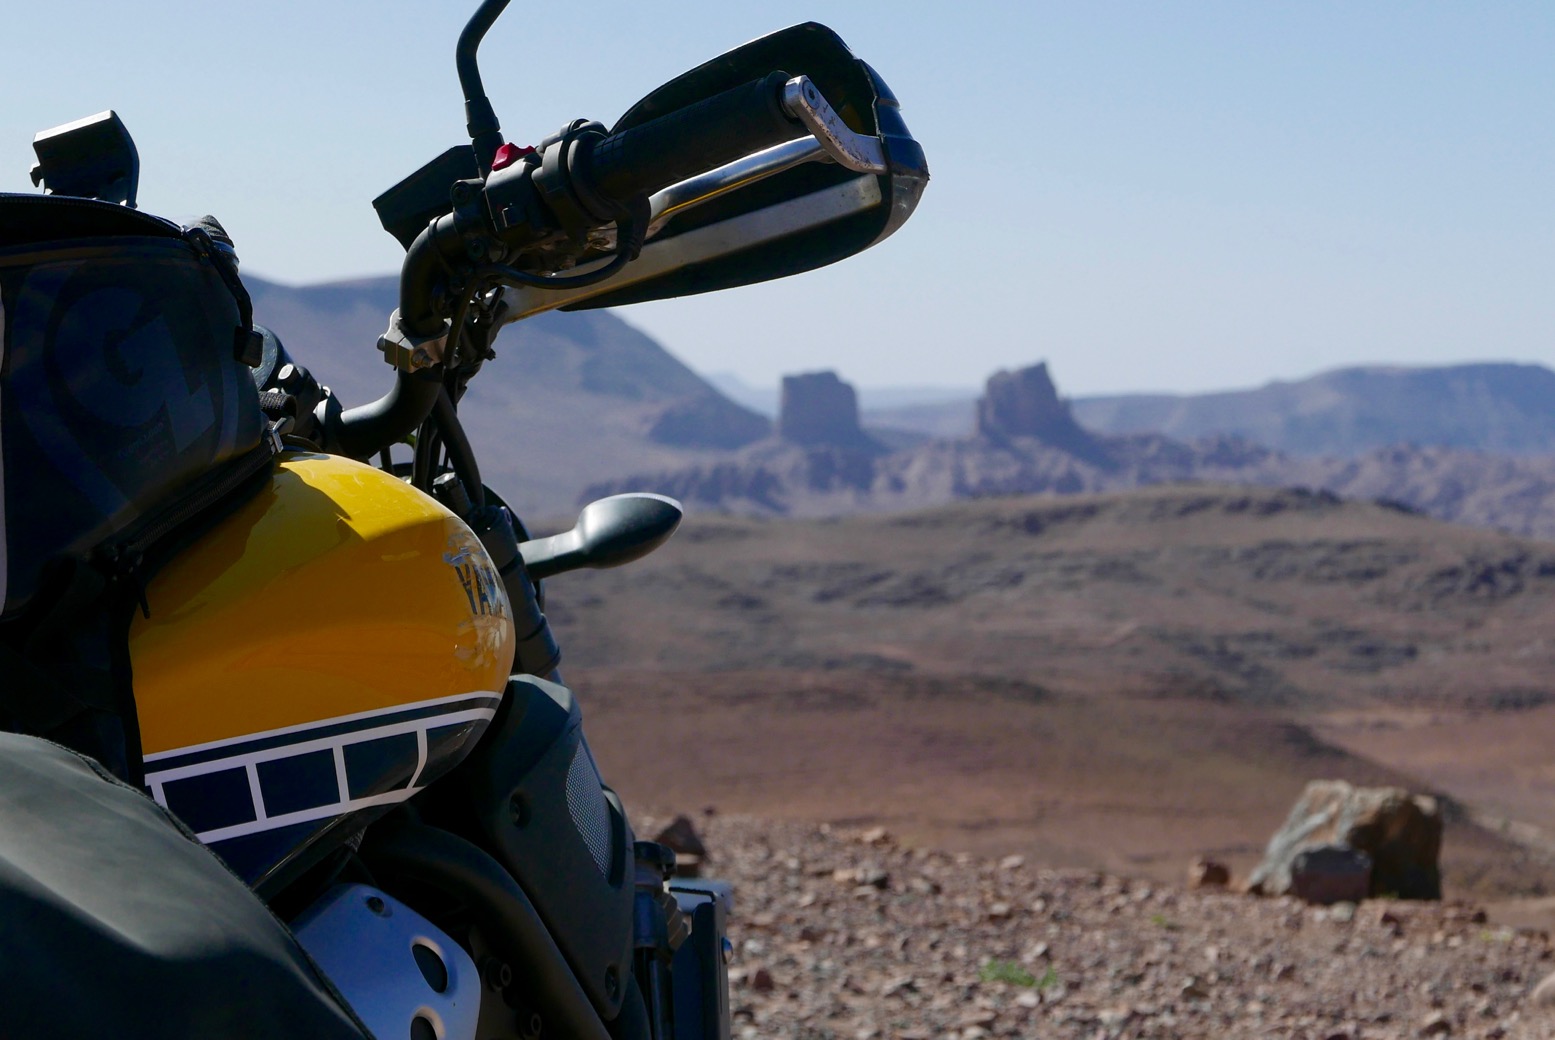
I bought my set in 2008 for my near-new Yamaha XT660Z to research the first edition of my Morocco Overland guidebook. Turned out I needed them too when I look a piste too far up Jebel Saro (right). The 660Z was also the first bike with which I experimented with DIY tubeless tyre spoked rim sealing. I’ve got better at it since. And the XT was my first bike with efi. What a miracle that proved to on a big single; smooth running at low rpm and over 80mpg possible. Where possible, I’d never go back to a carb bike.
Yamaha XT660Z – barked!
Next bike was another near-new CRF250L I bought in Arizona. Over the years right up to my current 300L, I’ve profited from new owners’ selling on bikes with barely four figures on the clock and at a massive depreciation. 
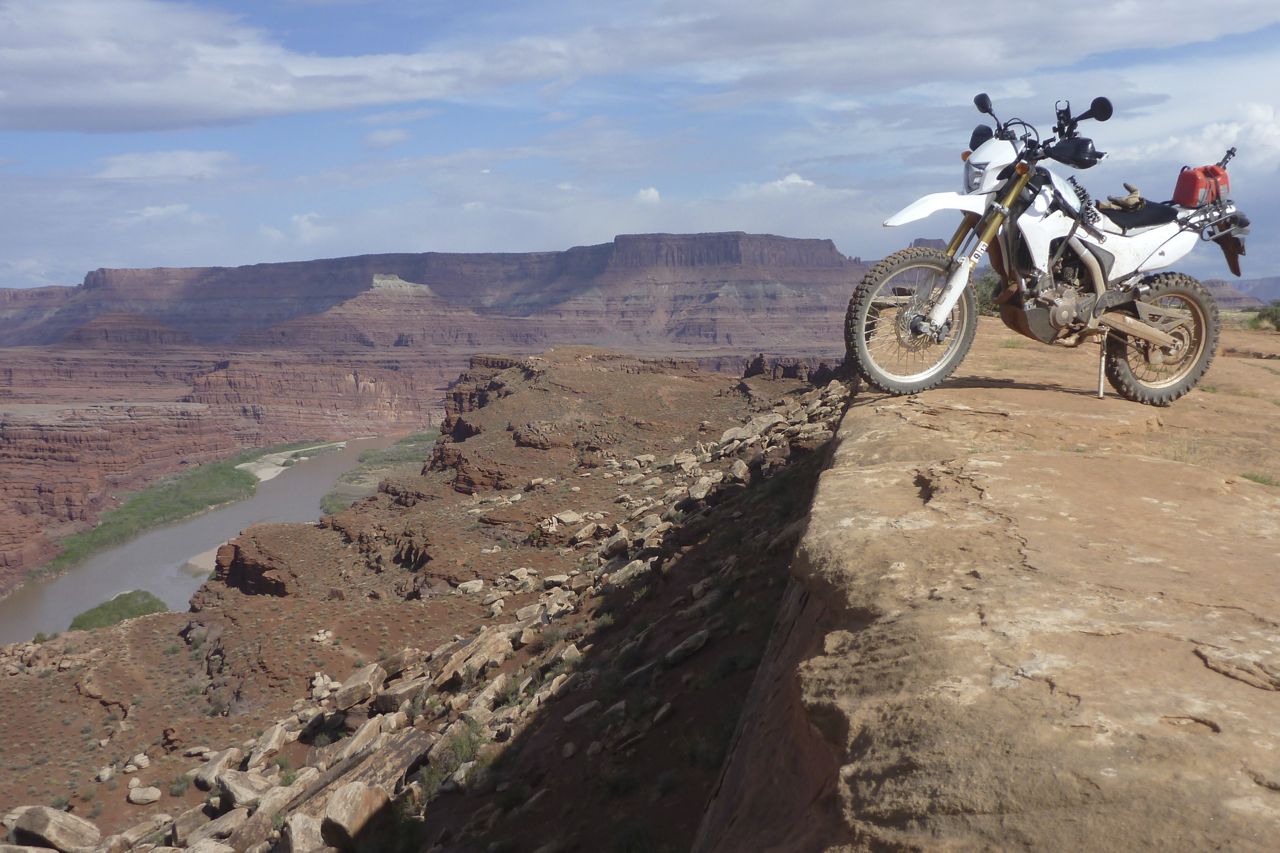
The L led me on a fabulous 3200-mile clockwise lap of Southwest USA through northern California, across Nevada, into amazing Utah and back down into AZ via the ‘do-it-before-you-die’ White Rim Trail. Road and/or trail, SWUSA like being in your own road movie, a trip every rider needs to tick off.
CRF250L barking on the White Rim
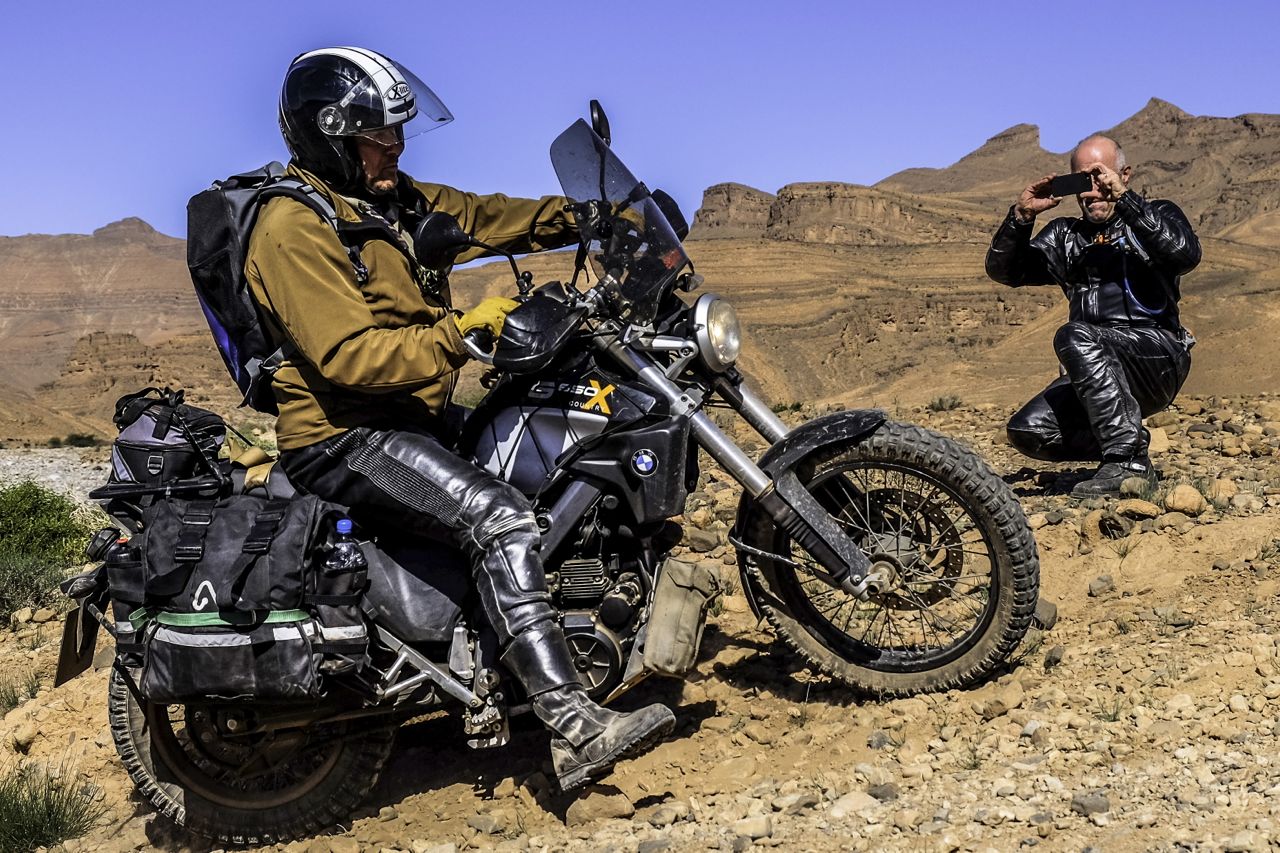
The BMW XCountry was one of my periodic breaks from reliably reliable Jap machines. I used it in Morocco on my first Fly & Ride tours which have also got a lot better since. It’s a shame BMW ditched these X bikes. This one had a grand’s worth of Hyperpro suspension – on the road you’d not notice much but off road riding was believing. The X-tank too was an ingenious idea since picked up by Camel tank and an easily replicated DIY job.
Taking a dab on the BMW XCountry. Photo David W
Soon after they came out I got myself another near-new, low miler; a Honda CB500X. I barked that up along with adding prototype kit from Rally Raid who also saw potential in the twin and went on to produce a popular line of 500X-ccessories. For years my 500X page was the most viewed on this website. I used the X in Morocco on tours and for researching my Morocco 2 book.
CB500X RR barking up in the High Atlas
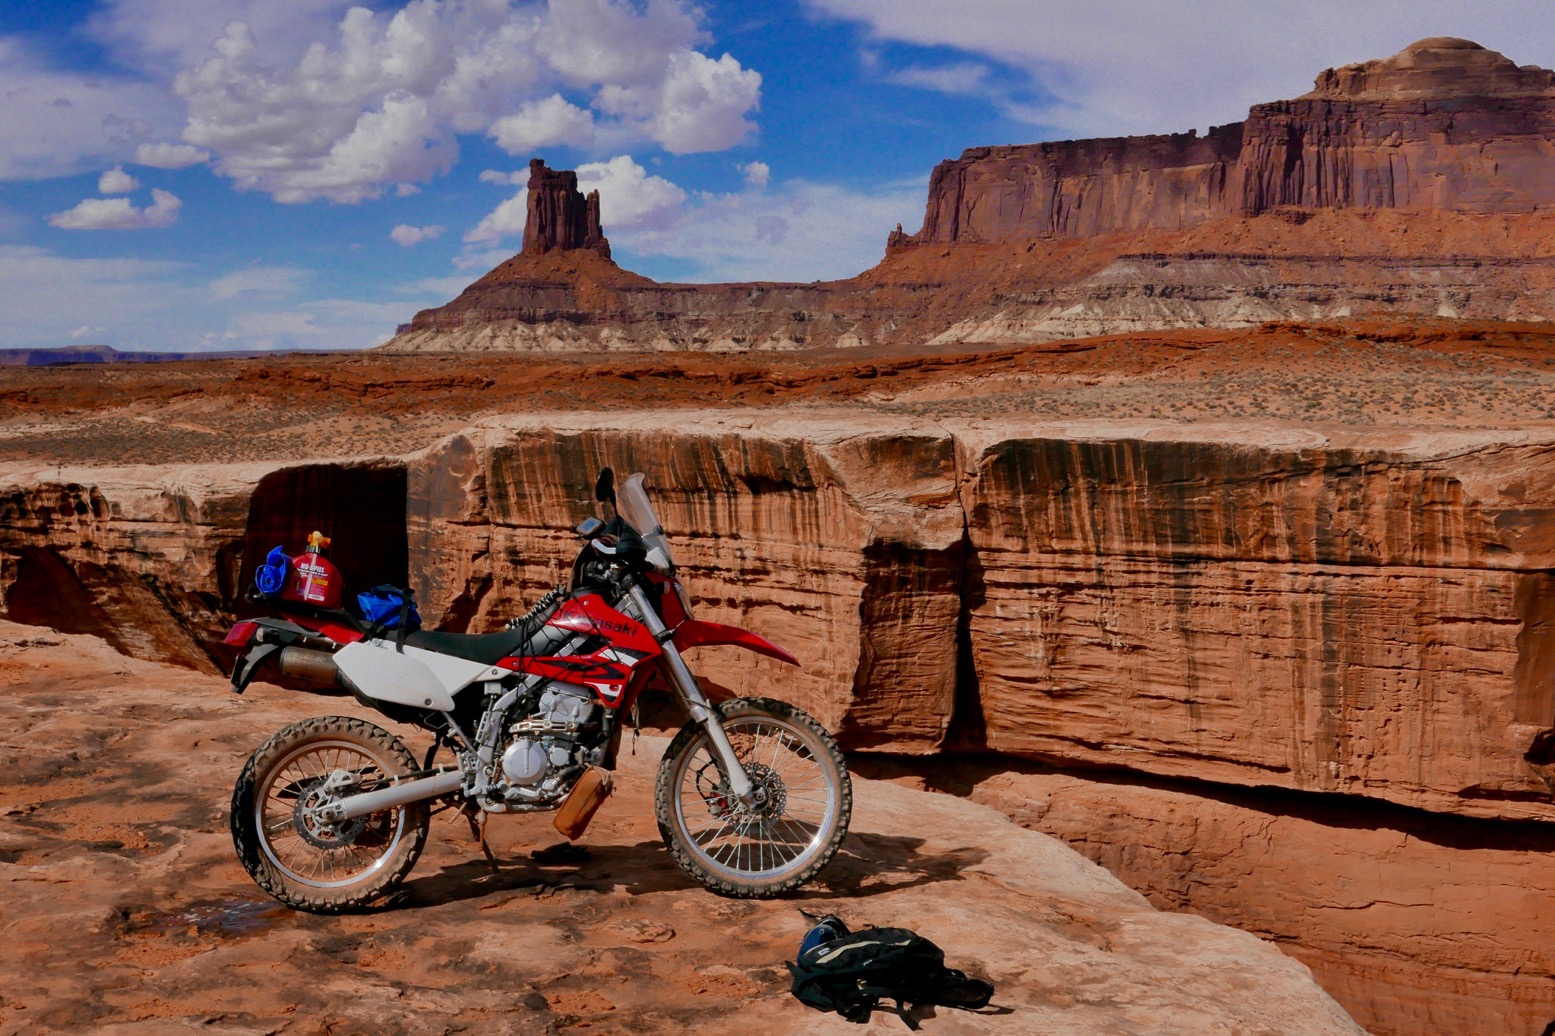
I went back to Arizona and this time got a KLX250 – basically like a CRF250L but for some reason never as fashionable and with better suspension out of the box. Unlike Europe, it was a carb model that ran horribly on low octane back-country fuel. I ticked off another memorable tour of the American Southwest, including a dream visit down to Baja and Mike’s Sky Ranch with Al Jesse of bevel luggage fame. Below, barking along on the amazing WRT in Utah again: ‘the best 100 miles of dirt you’ll ever ride‘ as I wrote in Bike magazine.
White Rim Trail again – Heaven’s Dirt
On that KLX ride I met a chap on a WR250R near Death Valley. I never fully realised that Yamaha’s WR250R was actually a well-spec’d but expensive trail bike, not a dirt racer like the near-identical looking 250F or 250X which put out 40hp or more and so need regular maintenance. Yamaha imported the R for a few years into the UK but they proved an overpriced dud and by 2016 when I was looking, good ones were hard to find. So I bought one off Hyperpro in Holland just before Brexit confounded the whole import process, did it up and and set off for Morocco, the Dig Tree and edition 3 of the guidebook.
WR-ing about
A 135-kilo WR-R makes the same power if not a bit more than my current 300L, but it’s located up in the stratosphere beyond 10,000rpm. As a result the bike didn’t work on well the road and left me with a back ache for months after. As a result I decided to suspend my search for the 250 unicorn. Back home I bought a smashed up XSR700 with the creamy CP2 lump. I repaired it, jacked it up a bit and added the usual protection, including my trusty busteros, now on their 7th outing. I still wish Yamaha would make a more serious 19/17 scrambler using their brilliant CP2 motor.
Barks and volcanoes
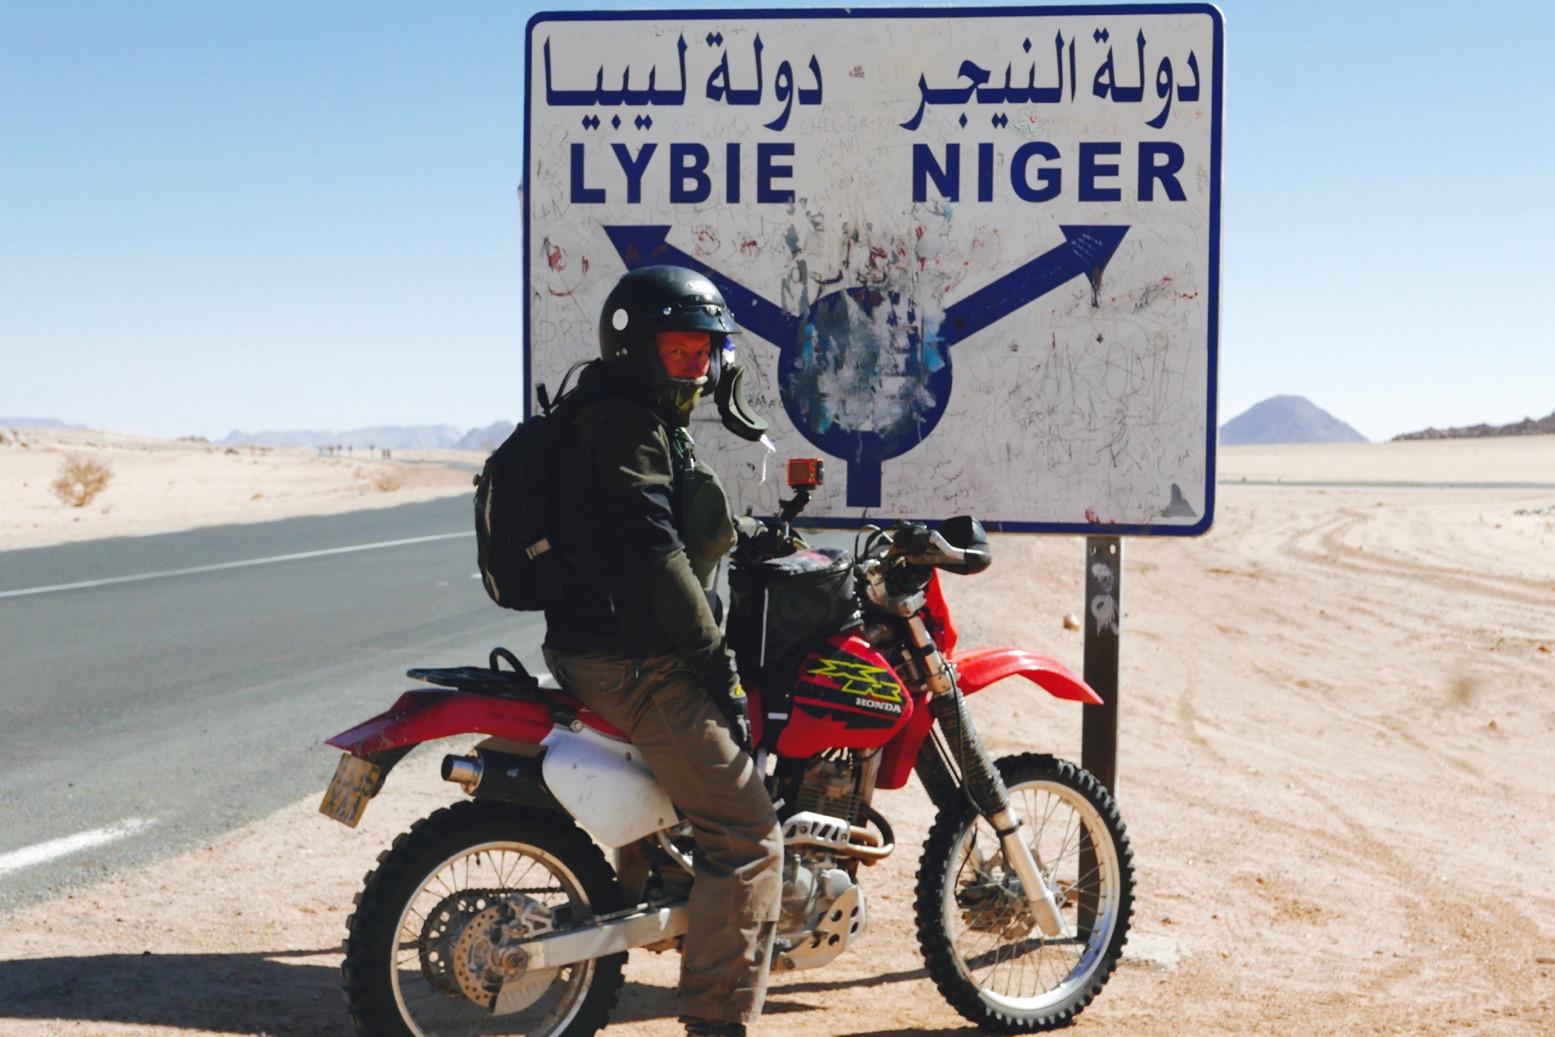
Next, I got some pals together on a supported tour to Algeria where I rode a lot in the 1980s. The tour finally gave me an excuse to buy an XR400, the all-time classic trail bike from the mid-1990s which was always too skimpy of subframe to make a serious travel bike. Sadly mine turned out to be skimpy of piston rings too and began guzzling oil, but was a joy to ride in the sands of the Grand Sud. The old Barks were needed, navigating through the tussocky oueds.
Barking at the border
The Himalayan came out and following teething problems it looked like it was worth a punt; a low saddled trail donkey that was perfect in Morocco, if not so much the getting there. We tried to reach the fabled Dig Tree again, but tyre problems saw to that. Still, at least my mate got a nice cover shot of the Bark-clad Him for the current edition of AMH.
For barking out loud!
Fermed
Barks on the continental shelf.
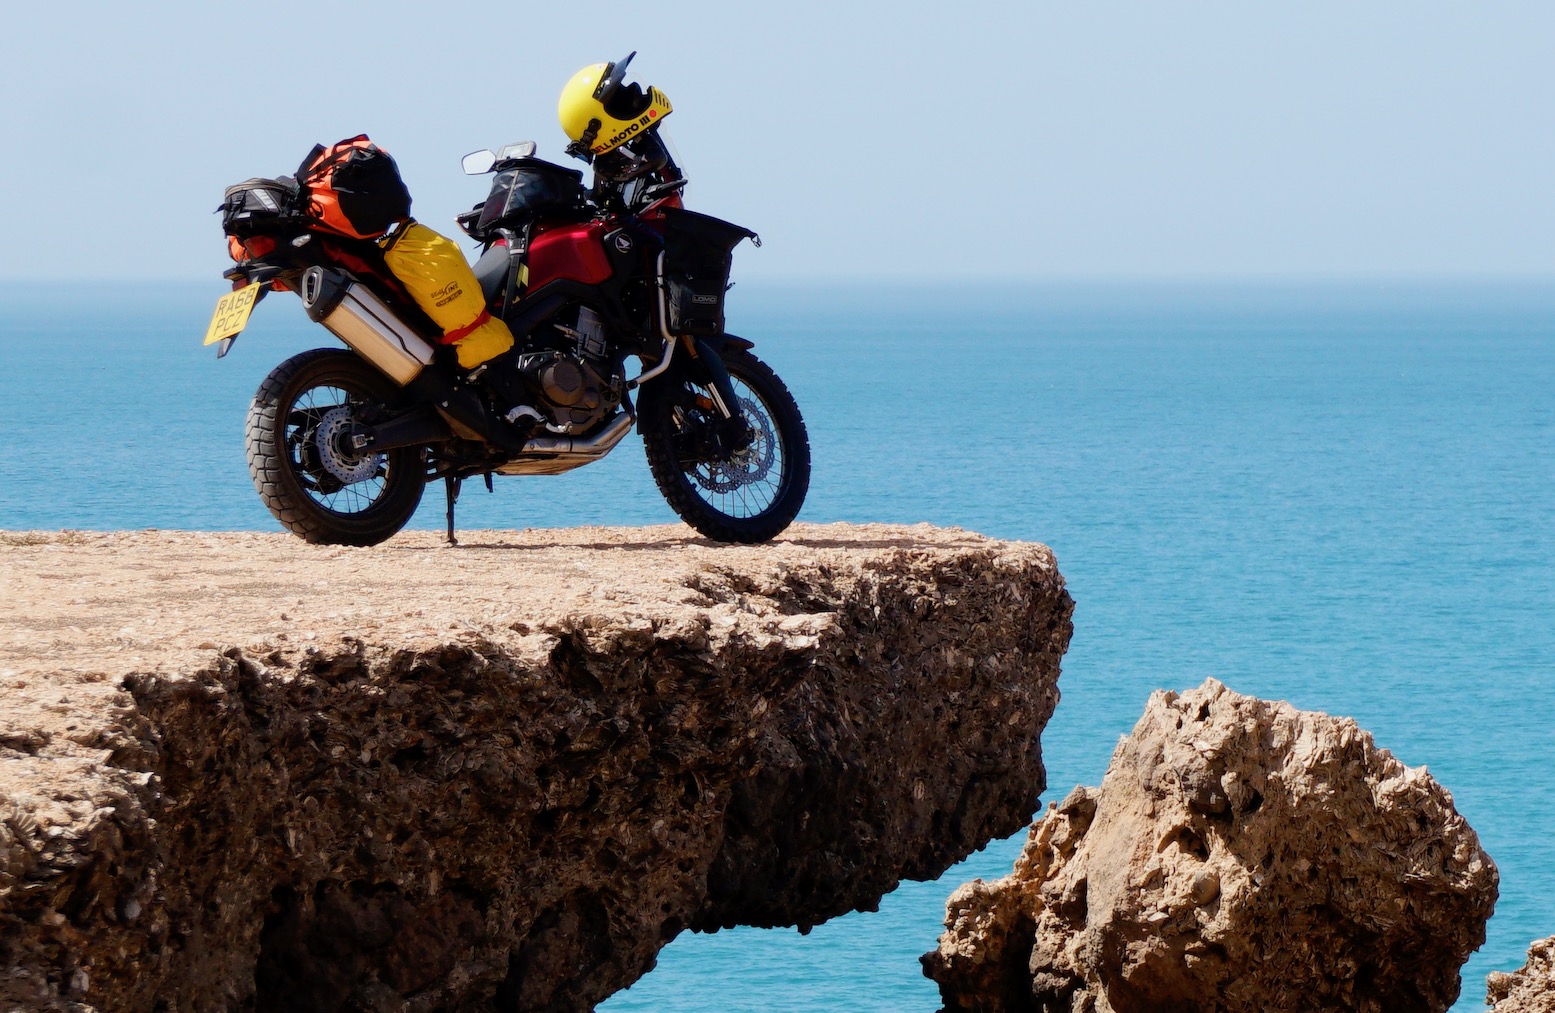
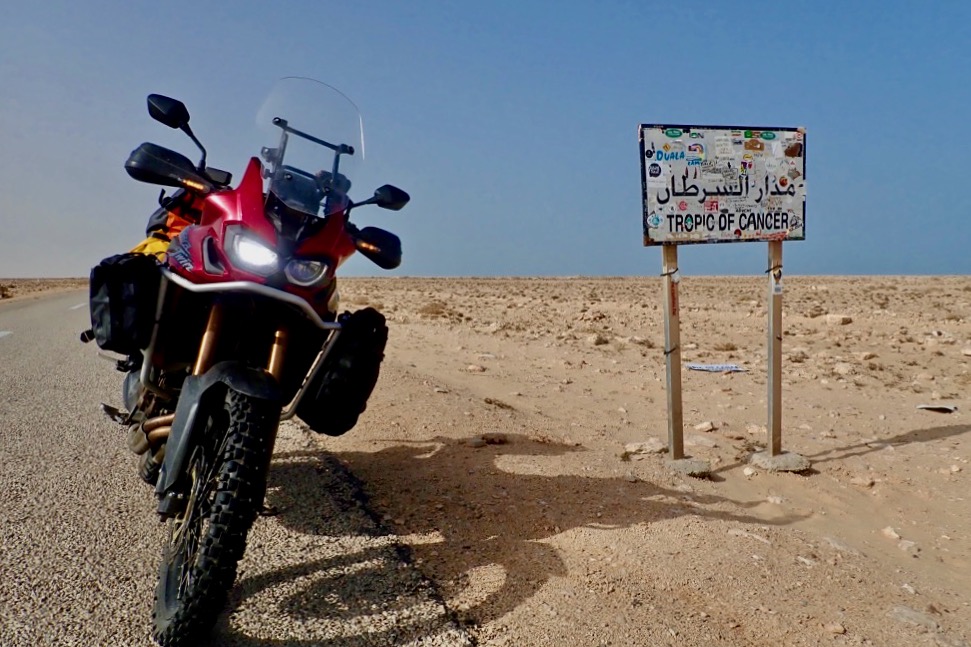
For the kind of riding I like to do I’m not a fan of giant ‘adv’ bikes but many are, so I thought I’d take the popular Africa Twin down to Mauritania in search of manageable pistes. 
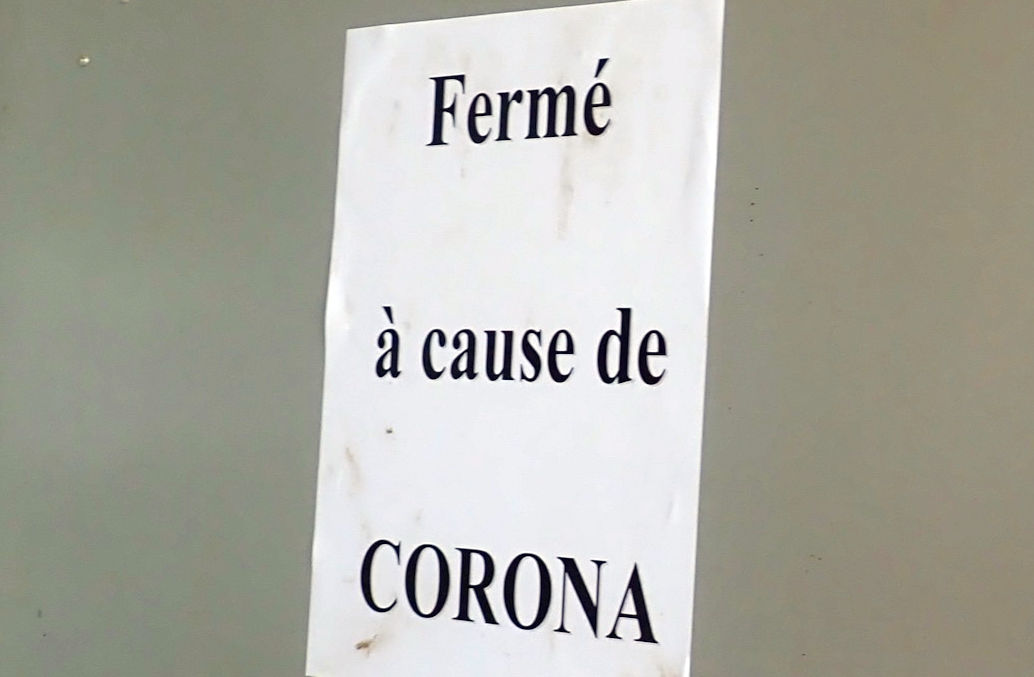
‘Hotel Sahara’ I called that trip, and the outbreak of Covid 19 put an early end to it, close to the Mauritanian border. I raced back north before Morocco locked down, but punctured the engine and had to dump the bike and fly out on the last plane. Corona went on longer than we guessed, and it took me a year and a half to recover the AT from Morocco.
AT at the Tropic of Corona
Back in London the Barks were removed for next time just before they pinched my AT. Now I feel they’ve paid for themselves many times over so it’s time to let them go. There’s easily another 15 years of protection left in them. Who ya gonna call? Bark Busters!
Golden Tyre GT201 rear; Heidi K60 front, both with BARTubless
All over for this year’s one-weekers in the Moroccan High and Anti Atlas. Now sitting in a Marrakech hotel room signing off AMH7 before it heads to the printers. Surprisingly we had our first actual break down: a XR250 blew a counter sprocket seal just ten minutes from the rental place in Marrakech. Now the stand is replaced and suspension is getting dialled in the Rally Raid CB500X didn’t miss a beat and was recording up to 85mpg at XR-speeds, but could sure use a jet wash. The rain in Spain (that falls mainly on the plain) will probably see to that.
Was ready and equipped to go to Mauritania, but sounds like the border with Morocco has gone rogue, making it an expensive proposition for what would have been a limited look-around on my own. I’m sure it’ll all be there next time.
Perfect weather this time in Morocco – not a cloud in the sky. First one warm, next one a bit chillier in the High Atlas. Planning new routes for next year and heading off to the High Atlas tomorrow to dig up something with the same fly-in; gas, food & lodging format as Anti Atlas. Plus maybe a Western Sahara for early 2017. This will be desert camping with 4WD support. More news shortly – for the moment click this or the image below to scan the full slide show on the other site.
Rally Raid Level 3 kit plus BARTubeless sealed rims on Heidenau K60 / Golden Tyre GT201 tyres. RR rack and backplate, Palmer Products screen, Barkbuster Storms, Tutoro oiler. Weight about 220kg (485lbs) plus 25 transit/10kg piste payload. Me, 105kg in gear
It hasn’t rained much yet, but as expected the all-road tyres: Heidenau K60 and similar Golden Tyre GT201 on the back – are flawless for what they are. Crossed Spain at low 30s psi, now running high 20s road and track and not one scare so far. Obviously they don’t have the edge bite of a proper knobbly, but for my sort of riding on dry, stony tracks, that’s academic on a heavy CB500X. A back TKC on an F800 that did just 900km with us looked like it was half gone by the end.
To date the BARtubeless wheels have lost no air except each time I check them, and the stainless HD spokes haven’t budged. Some front spokes have a minute half-mil creak in them, the rears are as solid as an alloy rim. This is after some mountain tracks that left one XR with a fully loosened set of front spokes. Whoever makes these wheels knows their spokes from their elbow.
With me at 6′ 1″ plus riding boots, the Honda handlebars are too low for standing up for anything longer than an impact-absorbing jolt. Partly this is because they have to be set back so the Barkbusters can clear the dash on full lock (left – look long enough and it makes sense). Having to sit down changes the way you ride on the dirt, and not in a good way. Perhaps refitting the OE bar ends might set the Barks further out to clear the dash. Iirc, John M said that V-Strom Bark clamps have the sort of bend that suits the X. Removing the Storms would be a shame but I may try that as I have some spare RR adjustable levers should I snap a Honda lever. Back home my stronger alloy fatbars are waiting on RR clamps, but they’re actually lower than the OEs so will need quite a stack of risers. It reminds me of the problems you can have when converting a road-oriented bike into a trail bike, as I found with my TDM earlier in the year. Dedicated trail bikes have a higher headstock in relation to the footrests, something not very convincingly shown in the gif, left, with a 660Z behind a TDM.
To get it right for my height may need at least two more inches of bar height if I’m to keep the hand guards. (Note in the picture right, my hands are above the bars in a comfortable stance and I’m only wearing thin-soled slippers). As that may need longer cables, reorganising the hand guards will be less hassle.
As they come from RR, the forks are miles better than the OE arrangement, but after a couple of thousand miles of road and trail they don’t quite evoke the plushness of the simple, Hyperpro-sprung XCountry I used over the same terrain last year. The BMW forks didn’t have any adjustment but were set up (with a new back-end and me present) at HP HQ. Maybe that’s got a lot to do with it.
Part of the negative impression has been down to the unnerving creaks from the cockpit as the bike hammered over the rocks and which gets mistakenly conflated with the fork action. A quick check over after the tour revealed that the two bolts supporting the whole fairing on the headstock (left) had come loose… again. It’s a good thing RR supply M8 nylocs for the job. Keep a eye on these bolts, off-roading CB-X people. Fyi, other than that there was nothing the Honda needed other than wiping the sand-caked chain with some used engine oil. I also noticed one gaiter looked like it had ‘vacuumed in’ as if there was no breather hole and the pumping action had sucked it against the forks. This would cause stiction, and I recall Bas at HP telling me that eliminating stiction (drag) contributes greatly to smooth fork action. When I snipped the zip tie prior to cutting the whole thing off the tension was released. Looks like it was merely mounted with a small twist. Now it’s zip-tied back up and might help improve the fork action.
The CB-X RR forks have preload adjustment and air bleeders (nothing to bleed so far) so, as I’ve progressively jacked up the back-end, the forks were well overdue for some preloading too. What looks like a 17mm lock nut is hard to get to with a socket as the bleeder gets in the bleeding way, but my trusty Knipex adjustables (which also make a great spoke wrench, right) managed to get in there. I turned the hex adjuster in seven faces (just over one turn). The forks still felt soft but we’ll see how it rides on the next tour. Now I know how, I can give it more turns down the track.
The Palmer Products adjustable screen mount was of course great for the two-day 115kph transit of Spain and northern Morocco. But the first afternoon on the piste proved that the added kilo of weight and forward displacement of the mounting hardware supporting a tall Honda screen would probably break something if left for too long (that ride is what probably loosened the cockpit bolts). As it was, the other guy with a similar arrangement on his F800 had some screen screws fall out. Another reason to remove it is the screen position feels rather unnerving close when briefly standing up on the piste. I know of a guy who was killed by his screen in a freak over-the-bars accident, and even if it didn’t guillotine me, I’d rip the whole thing off if I went flying the same way. The screen unscrews from the frame in five minutes and will go back on in ten for the ride home. Riding around warm and dry Morocco in short spells up to 100kph is OK without a screen.
The Daytona heated grips were great on a foggy night and morning in north Spain, and doubtless will be even more useful on the colder ride back. Compared to Oxford grips I’ve had on other bikes recently, the adjustment is crude: off, very high (for short-term warming up, they say); and warm, which seems to equate with the medium setting on Oxfords. I don’t suppose they’ll be much cop if temps reach down to freezing point, but that’s the time for lined gloves.
Running down through Spain it was clear the Tractive shock was loosening up from the way the headlight lit up road signs miles ahead. After a few days on the piste it needed urgent preloading. One of the more rallyesque riders in my group advised I first tried the easy option: a few clicks in on the low- and high-speed compression damping on the remote reservoir. That put me on 15 of 22 for low-speed, 11/18 high-speed, and 18/24 on the rebound damping at the base of the shock, but that didn’t do enough (click totals may vary from official Tractive sources; it’s what I felt). John M warned me the spring preload would be a faff, but it’s actually not so bad: two big allens to remove the LHS footrest hanger and the preload collar or ring is there between some frame tubes. Mine was about halfway down the threads. There’s no usual lock ring requiring a C-spanner, instead there are about 8 peg-locating holes in the collar which I realise are for a hydraulic remote preload adjuster (left) which would eliminate all this aggro. But Tom G at Tractive explained they don’t suit the shorter and more constricted CB-X RR shock. That’s a shame as I’d buy one in a shot. The shock comes with a multi-bit tool, but with the supplied 6-mm peg fitted, you can’t make enough collar-turn to line up the next hole before fouling a frame tube. After a bit of trial end error I found a short 5-6mm allen key levered with a ring spanner worked best. That gives you enough space to turn the collar from one hole to the next. The preload ring is held in position with a single tiny hex-head locking screw. But as there’s only one it means the presumably essential locking requires you to bring that screw back into the narrow 20-30° working aperture between the frame tubes. Doing this I managed 1.5 turns on the collar bringing the lock screw back in position. Next morning this was initially better but the shock was still occasionally bottoming out harshly on the rocks and even bottomed out gently over a fast concrete ford at 90kph. I know they say bottoming out proves all the suspension movement is being used, but this felt too soft for the hefty mass of a CB500X with me on it.
I’ve never really got into suspension, having run what I brung for years until seeing the light with the Hyperpro XCountry. I still don’t fully comprehend the exact relationship between compression damping (high- or low-speed) and preload. I’m sure the answer is just a Google away, but assume adequate preload with sag must come first. That’s hard to do alone while cranking away on an allen key with a ring spanner. Two nights later I put another turn on the preload ring (2.5 from delivered). At this point on a cool morning it initially felt like it needed more rebound damping, but by now most of the piste was over and the forks were in greater need of attention. I’ll do some more experimenting on the next lap, but do wonder if the remote reservoir’s position alongside the cylinder and behind the radiator might negate their purpose in getting cooled away from the pumping hot shock. I touched the reservoir which was only warm; the mounting bracket maybe 40-50°C. When the bike’s thudding down a steep pass, working the suspension hard at little more than walking pace and the fan running, whatever’s in the reservoir will get quite hot. The shock action does seem to soften through the day and the temps here are only in the mid-20s.
The longer RR sidestand needs to be redesigned or beefed up. As a prop for a bike it works, but side stands can suffer upward impacts similar to bash plates, need to perch a bike on one wheel when doing wheel or chain work and may need to press down to break a tyre bead.
I came off the boat in Santander thinking the bike was leaning on the stand a bit more than normal. Turns out the lashing down – or maybe the crashing of the ferry on the overnight swell – had bent the stand so the foot was 2-3 inches further forward (left). This greater lean now puts more stress on it, and when retracted it stuck out.
Closer inspection showed the bend was not on the Honda frame tab but just below the stand’s pivot (above). The RR stand is made of flattened, not round tube, and the alignment of the flat face is right into the bending force. Checking my earlier pictures, it looks like the OE stand shares the same flattened profile (i.e.: not round tube), so it must simply be down to greater leverage on the new stand due to the added length. Once I knew the problem I decided not to bend it back and took great care not to stress the stand when getting on and off. But two days into the tour it folded on me anyway (left). Kicking it back out of the way, I was surprised how thin the tube’s walls were, though I can’t say I’ve ever dissected a motorcycle side stand closely. Luckily there was time to text John and get him to send a reinforced stand with one of the next group flying in. I figured this was a better solution than getting a bush mechanic to repair or make up a new stand, as the actual angle of the stand from the pivot is quite critical. Now I see a picture of John’s chunky reinforcement (left), I think it may not go far enough past the point where mine fractured. I may get a fin of 2-3mm sheet spot-welded to the other flat face at the top of the stand, against the force of the bend. Overall I think an equilaterally stiff round tube with a thicker wall will be a better long-term solution to the greater forces put on the RR stand, as well as a wider foot for soft terrain. When a side stand is all you have, it needs to be bombproof, but my experience is all part of the testing procedure.
The big footrests are a revelation, offering great grip plus a broad platform on which to stand, were I able to do that for long. Even with full MX boots some riders found the normal-sized pegs on the XRs a pain to stand on for long. There’s no noticeable loss in comfort from the rubber-capped OE pegs, and the RR pegs are a tad lower and further back too (see above). I find the heel of my right boot touches the can’s heat shield when stood upright.
The RRskid plate / crash bar has lately been used as a surrogate prop in place of the side stand, and while it’s taken a few flying hits, I don’t recall bottoming out on anything big. It’s doing its vital job unobtrusively.
The RR rack hasn’t really been put to the test either, carrying light dry bags lashed to the side, with inner tubes and a fuel bag lashed on the inside spaces. As mentioned elsewhere, I miss an old-school tube rack’s tubes for something to grab on to.
Most of the off-road riding has been on stony or rocky tracks typical of Morocco, with very occasional soft sand or loose shingle in the oueds, and the odd fast gravel road. On these gravel roads the CB-X can go as fast as you like, the tame power delivery adding up to reliable traction on the hard, all-road tyres. The suspension is never taxed and appropriate use of the brakes for the conditions scrubs off the speed, with the added back up of ABS in case of a stray mule. On the rough trails, particularly on the inclines, the CB-X is a bit of a tank, as is any bike this heavy. Such tracks (usually the abandoned and unmaintained middle sections between remote villages accessed from one end or the other) are not enjoyable on anything bigger than an XR250. The bike crashes along with the cockpit creaking as you try to minimise impacts while steering, braking and balancing. But these tracks very often lead you to the most spectacular places. One route (MA7 in the Morocco book, left and bottom of page) we reversed over the Jebel Timouka I wouldn’t want to repeat on the CB-X with six bikes in tow, but I’d sure like to ride it again.
The great thing is the engine’s soft power adds up to velcro-like traction rather than more photogenic, knob-ripping torque, which means you get no more tired than you need. Climbing a rubbly switchback feet up but sat down at walking pace, you’re not fighting the thud of a big single (or Boxer twin come to that) which needs to be damped with a slipping clutch, all of which makes the bike easy to ride. I find the six-speed gearing ideal for all this: low enough on gnarly pistes and with a top end 75-mph cruise. For once no need to meddle with the sprockets. Most of the XRs had harmless low-speed falls, the F800 a few more. Apart from my bike falling over when the stand broke, I’ve not yet come close and I hope it stays that way. On a bike this heavy, falling or hammering the suspension until something breaks is to be avoided at all costs, even if it means I’m slowest in the group. The number one priority is preserving the bike to get me round the circuit and back home.
My fuel consumption’s varied greatly: Spain to Marrakech (sustained 115kph cruising where possible) returned 66.5; 63.5; 60; 57; 60; 61.5mpg UK. That’s between 20.2 and 23.2kpl (other conversions here or right). Once on tour speeds rarely exceeded 90kph so that rose to 80.5; 87 and 78.5mpg (27.8 to 30.8kpl) which was better than some of the XRs, and usually a little better than the F800 which was a handful to ride smoothly at slow speed.
I plan to change the oil and may need a new air filter back home. The Tutoro chain oiler doesn’t work so well on the piste: the oily sprocket picks up all the sand and grit but the lube goes nowhere. I turned it off; it’s back to hand oiling with a toothbrush.
The seat is hanging in there but I don’t think the Aerostich wool pad will help disguise the pulverised foam from too much sitting down. Whatever, it’s got to be better than an F650/800 seat. Eric used an ‘XL bubble wrap’ Air Hawk 2. Without it, even with a Wunderlich seat, he can’t go much over a 100kms.
There’s still experimentation to be done with the CB-X’s suspension and bar position, but as it is it’s hard to imagine doing what I’m doing on a standard CB500.Add the necessary proper engine and lever protection, and carrying ability and you have an all-road travel bike ready to go. Read a broader conclusion here after 5000 miles.
The cupboard was bare, the fridge was an icy cavern bereft of succulent goodies, and the sun was shining. It was high time for a shopping run to Ullapool. And, finding myself between chapters on the new AMH, it was also high time to saddle up the CB-X for a ride along the lochs and glens to try out some new gear.
Adventure Spec supply me with free or reduced cost gear in return for advertising in AMH
In need of a decent coat for a winter getting to and from the desert, Adventure Spec recently sent me a Powerlet Rapidfire heated jacket and Klim’s Overland jacket. AS had already sent me a Latitude to look at a couple of months back. But considering the investment in such a key item of gear, I found the Latitude either a little small in L, or way too big in XL. And in other ways it didn’t quite compare with an Aerostich Darien Light which I still consider a benchmark in travelling jackets.
Wearing the Powerlet liner (about the bulk of a fleece), the Overland in Large felt tight across the chest and shoulders and yet, according to the chart on the right, I’m (42″ chest, 6’1″, 95kg) at the lower end of their Large range. The Overland was snug on me dressed in full gear – but still useable.
What Klim say If you’re taking your first steps into Adventure and Adventure Touring, the all new Overland series from KLIM® is a tremendous value [sic].
My first impressions Good value, solidly built three-season shell that’s well-designed, has some tidy features and an understated look. Warmer than you think too, but could use more- or just bigger pockets in and out. And beware: Klim sizing comes up small.
Klim Overland – a quick look • The Overland costs £379 with tax from AS and is listed as $429 + tax in the US or another $50 for the huge 3XL size • My Large weighs 2.04kg, less 330g without back armour pad • It has four pockets: two hand pockets the hem with vertical entry water-resistant zips, a smaller vertical chest pocket and a similarly small one on the mesh inside (right) • There are water-resistant zipped armpit vents down the sides that you might just undo on the move, and two corresponding long vertical back vents (right) • The front two-way zip lies under a velcro flap with a stud at each end, and the soft, Tricot-lined collar can be cinched for a snug seal. There are also cinch cords on each side of the hem, velcro arm tabs below the elbow and velcro at the wrists • The jacket has ventilated D30 E5 EVO XT armour on elbows, shoulders with a slightly less highly rated slab of non T5 D30 across the back (right) • Eight discreet 3M Scotchlite reflective flashes front and back • The cut is boxy and most of the arms and shoulders are over-layered with coarser and darker abrasion-resistant panels of 840D weight Cordura. The light grey body is made of much less stiff regular nylon fabric of about half that weight. The mesh lining is polyester and the membrane is Gore-Tex tw0-layer Performance Shell which is ‘Guaranteed to keep you dry ®’ and the jacket has a lifetime warranty too.
Review A few years ago when Klim first came to the UK, I remember looking at a Badlands or something at the Ace Cafe Adventure Day and thinking: £800 for a jacket – really? Of course Rukka had come to price themselves up there too, incorporating what I considered fussy, over-complicated ‘technical’ designs that seems to be a way of justifying high prices on a lot of stuff these days. But 800 quid for a garment made in Southeast Asia?
Maybe ‘start high – bring in the cheaper stuff later’ is a recognised marketing strategy. That’s how it looks to me with Klim in the UK and now we have more normally priced jackets like the Traverse, and the second take on the Traverse which is known as the Overland.
As I say in the book, setting off on a long trip you’ll be wearing your jacket just about all the time for weeks or months. It’s got to work well, feel right and be up to the task as it’ll become your second skin. One thing that categorises Klim as a serious contender is they only make rugged waterproof shells and eschew what is to me the cheap measure of a zip-out membrane. If you want a serious Gore-tex type jacket, get one where it’s laminated to the outer shell. Yes, it costs more.
I set off for what turned out to be a 180-mile ride on an October day with temps peaking at 13° and strong winds forecast. Underneath I was wearing the Powerlet, a thick shirt and a vest, and leather trousers plus thin unlined gloves. I planned to fire up the Powerlet when the chill got to me. As it turned out – perhaps because I was stopping a lot – that never happened. The Overland kept me warm all day right up to sunset which was impressive. It means you can wear less clobber underneath but I suppose may get hot working hard off road in a warmer climate. For that reason I chose the grey version rather than the black. It really can make a difference.
Doing it up I noticed that with the Powerlet’s high wire-laden collar and a shirt collar too, there wasn’t really room for my thin neck buff I usually wear. The front collar stud was a two hand squeeze to do up and the collar felt tight at the front while loose at the back where the cinch is. In other words the collar fitting was too upright or – like many humans in this digital, screen-staring era – my neck and head stick forward like a round-spined Australopithecus. Trying it again now it definitely presses on my Adam’s apple, but not unbearably so. Normally I prefer loose clothing and the Overland is a ‘snug’ fit round the neck and in the arms and across the shoulders with arms pulled backed which is probably more flattering, cosier and aerodynamic.
Riding along I thought I felt a chill under the arms through the vent zips, but not enough to plug in the heated jacket. And anyway this could be attributable to my bike / screen /posture / speed. Later on I didn’t even notice it.
At one point I left the bike perched on a sunlit hillside track and walked on to recce the route. In a black jacket I’d have cooked like a Findus boil-in the-bag cod in parsley sauce, but the Overland was surprisingly cool. By the time I got back to the bike I did have a bit of a glow on, but rode back the few miles to the main road unzipped and flapping by which time normal operating temps had resumed.
An hour and lots of lipsmacking pics later I pulled in at a cafe near Poolewe and instinctively went to slot my gloves into a pocket to came up against the Overland’s main flaw: too small pockets. I suppose I could have stuffed then into one of the lower pockets but what I’d like a decent, map-sized chest pocket or some meshy drop pockets low down inside (they could actually be easily tacked on to the mesh. What do other riders do? – cart around a tank bag or backpack – or slip them in a topbox I suppose. A jacket called Overland needs overlandable storage. For the return run I also removed the back armour to free up some room. It made the jacket lighter and more flexible, but I can’t say it felt significantly more roomy. For that the shoulder pads need to come out but I’ll keep those for the moment.
Riding back with the sun now dipping behind the hills, I expected to resort to the Powerlet, but riding up to 80mph the Klim still hung in there. The wind was up now too, pushing me around on the single track roads and at one point coming over a pass I distinctly felt the wind catch the back vent flaps and pull me around in the seat.
So – preliminary findings on the Klim Overland adventure touring jacket. Warmer than you’d think, under pocketed but the plain looks that are growing on me. Great armour and adjustability too. Resistance to pelting rain and ventability to be established. I always wonder if the latter might compromise the former.
Previously… on the AM Website… I fitted a rack and chain oiler to the CB-X. But my chain oiler by the rad (right) wasn’t such a good idea according to Tutoro – too hot for the oil and too hot for the reservoir. At one point I thought somewhere inside the fairing or on the fork would work. I noted some dirtsome travelling KTMs put their oilers up front for the same reason: out of the way of flying rocks. But on the more cluttered CB-X the fairing makes access and topping up too awkward. Can’t be having that.
I had another look and decided inside the fold of the Rally Raid pannier rack was as good as it would get on the back. Easy access for flow adjustment and topping up, and anyway it will be the feed nozzle that will get knocked about before the reservoir. The kit with the Tuturo Auto Pro comes with a range of brackets (right) to help you fit it in the best space available.
While in the area I also took a chance to beef up the support for the twin-feed nozzle by adding a spring-coiled section of hose and supporting the sacrificial white nylon bolt with a bit of hard-to-see rubber between it and the swingarm, then zip-tied together (left). Like I say, one flying stone and it’s all gone – better ideas may evolve.
I fitted a JT x-ring chain. At only 2600 miles I wasn’t convinced the OE chain – branded a ‘DID’ no less – would last the distance (see the previous post).
It gave me a chance to use a Motion Pro chain breaker (left) to separate the linkless OE chain – a solid, compact and easy to use bit of kit. I can’t recall the last time I actually did this – usually I just sell the bike. I also had a Motion Pro chain press (right) but decided to go with the spring link despite dire warnings from JT. If it was that deadly they wouldn’t include it in the kit. Adventure Spec sells the Motion Pro chain tools.
Speaking of broken chains, it was good to see that there was a semblance of a case saver tucked in around the front sprocket (right), though if that hefty JT gold-plate lets go I don’t think there’ll be much to hold it back.
Also, re-adjusting the new chain gave me a chance to use the nifty RRP axle wrench (left) which, it must be said, fits in the hand very nicely and spins round 360° behind the pipe without snagging. Well worth a tenner. Why oh why can’t we have snail cam chain adjusters back? I’d happily pay the extra £3.76 on the price of a bike. There are no usefully visible alignment marks worth noting on the Honda.
With the new x-ring and chain oiler I’m hopeful I’ll get a good 15,000 miles worth of chain life, even with some desert biking thrown in.
This lack of grab rails with the new RRP pannier rack was driving me nuts. With plate rather than tube there’s nothing solid to grab on to when you want to move or pick up the bike. As it looks like getting a sheep rack made for the back isn’t going to happen, I decided on a quick, easy, free and light solution: a thick bit of belt (right).
Even before the new chain was dry they came in handy hauling the bike back up to vertical. And if they break I can make another from a passing postman’s satchel or whatever’s lying around. As for the sheep rack; if it’s that important to get a bit of useful width on the back I can screw a bread board to the RRP tail rack. More next time on the AM Website.