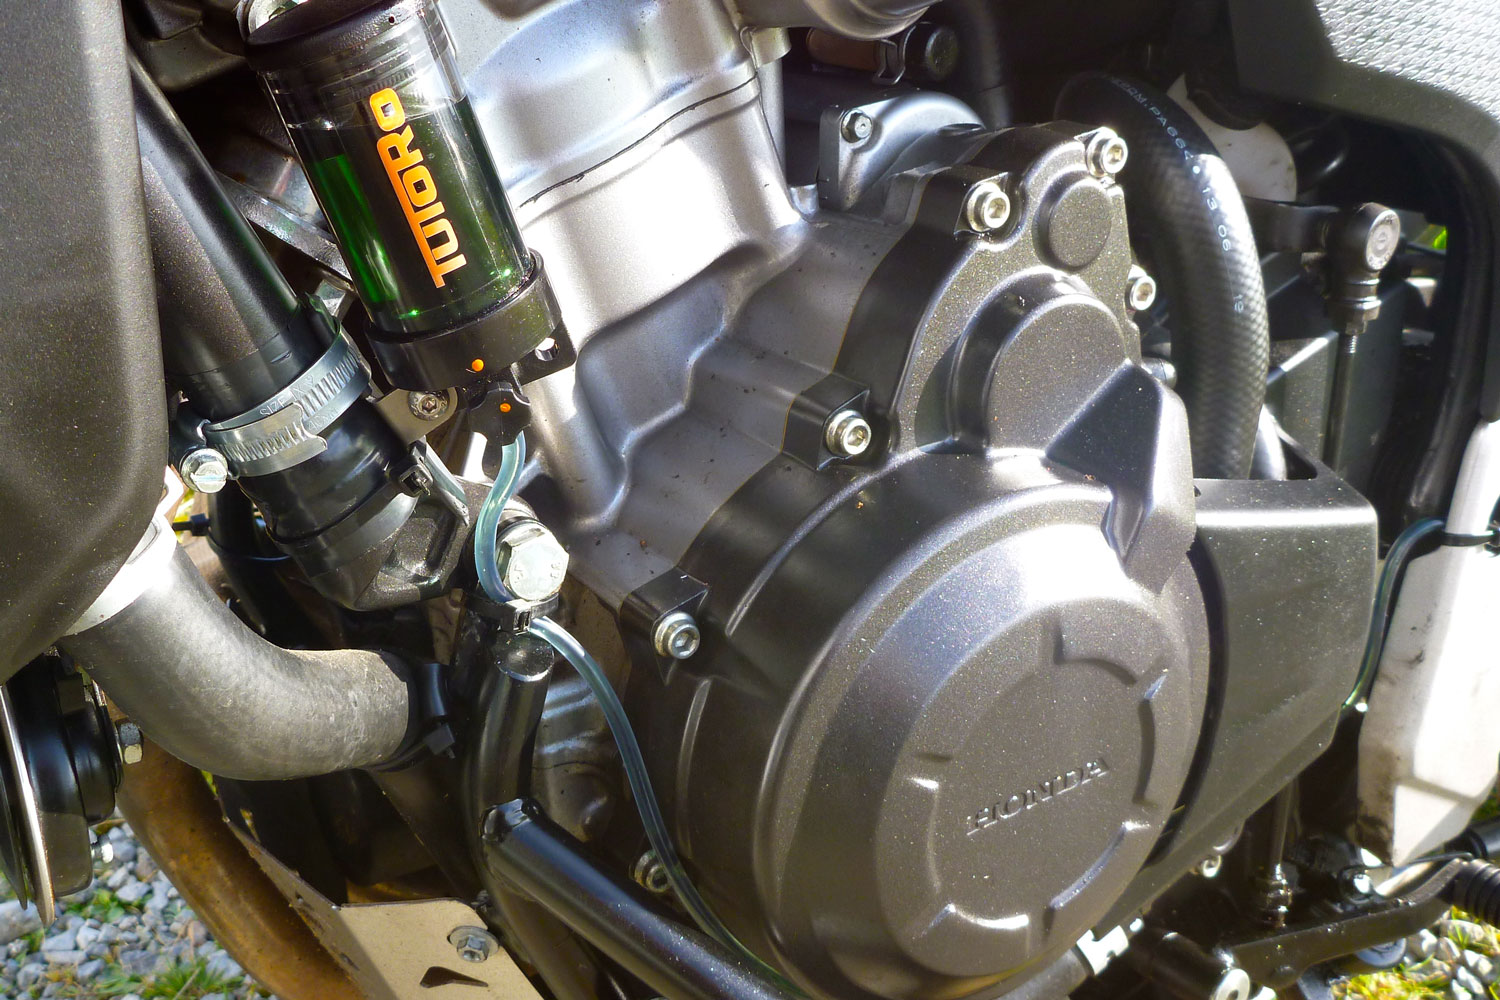
On the CB-X there wasn’t an obvious place around the back to mount a new model Auto Pro 1 Tutoro chain oiler. I saw a couple of people on the forum perched theirs on the pillion footpeg mount, but with off-roading and stone flying on the agenda, I can’t see mine lasting too long back there, even with the reservoir rock guard that comes with the latest model.
The next best place I could find was on a front downtube behind the radiator. Who knows, the warmth might make the oil runnier and better penetrating – or maybe just more splashy. The delivery tube needed an extra 6 inches which I had from an old Tuturo kit.
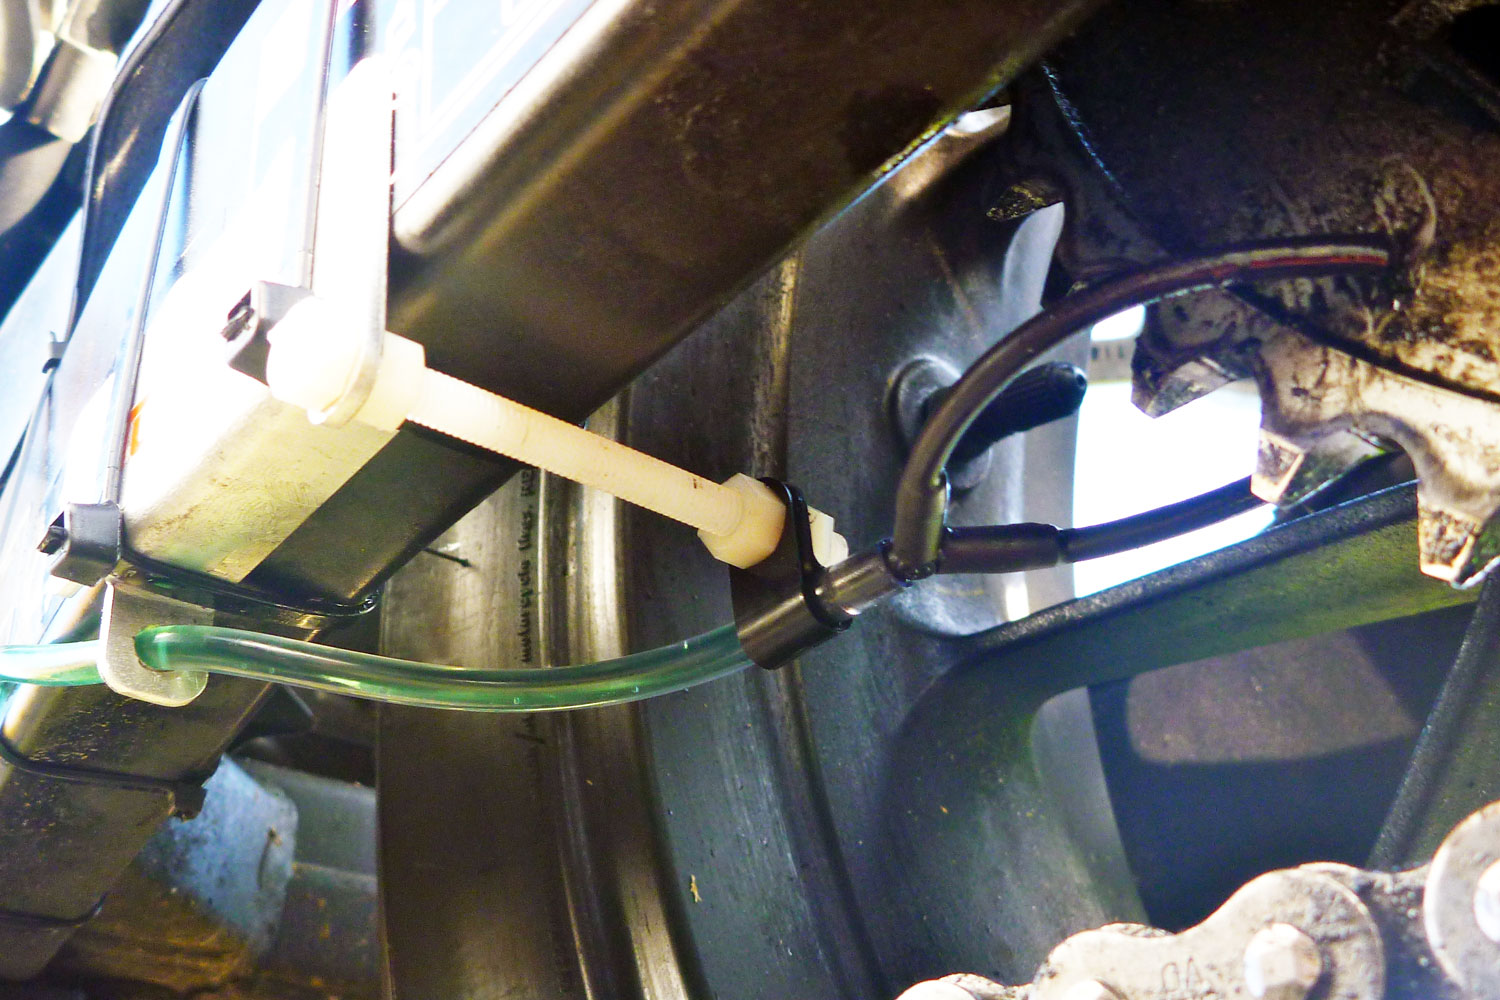
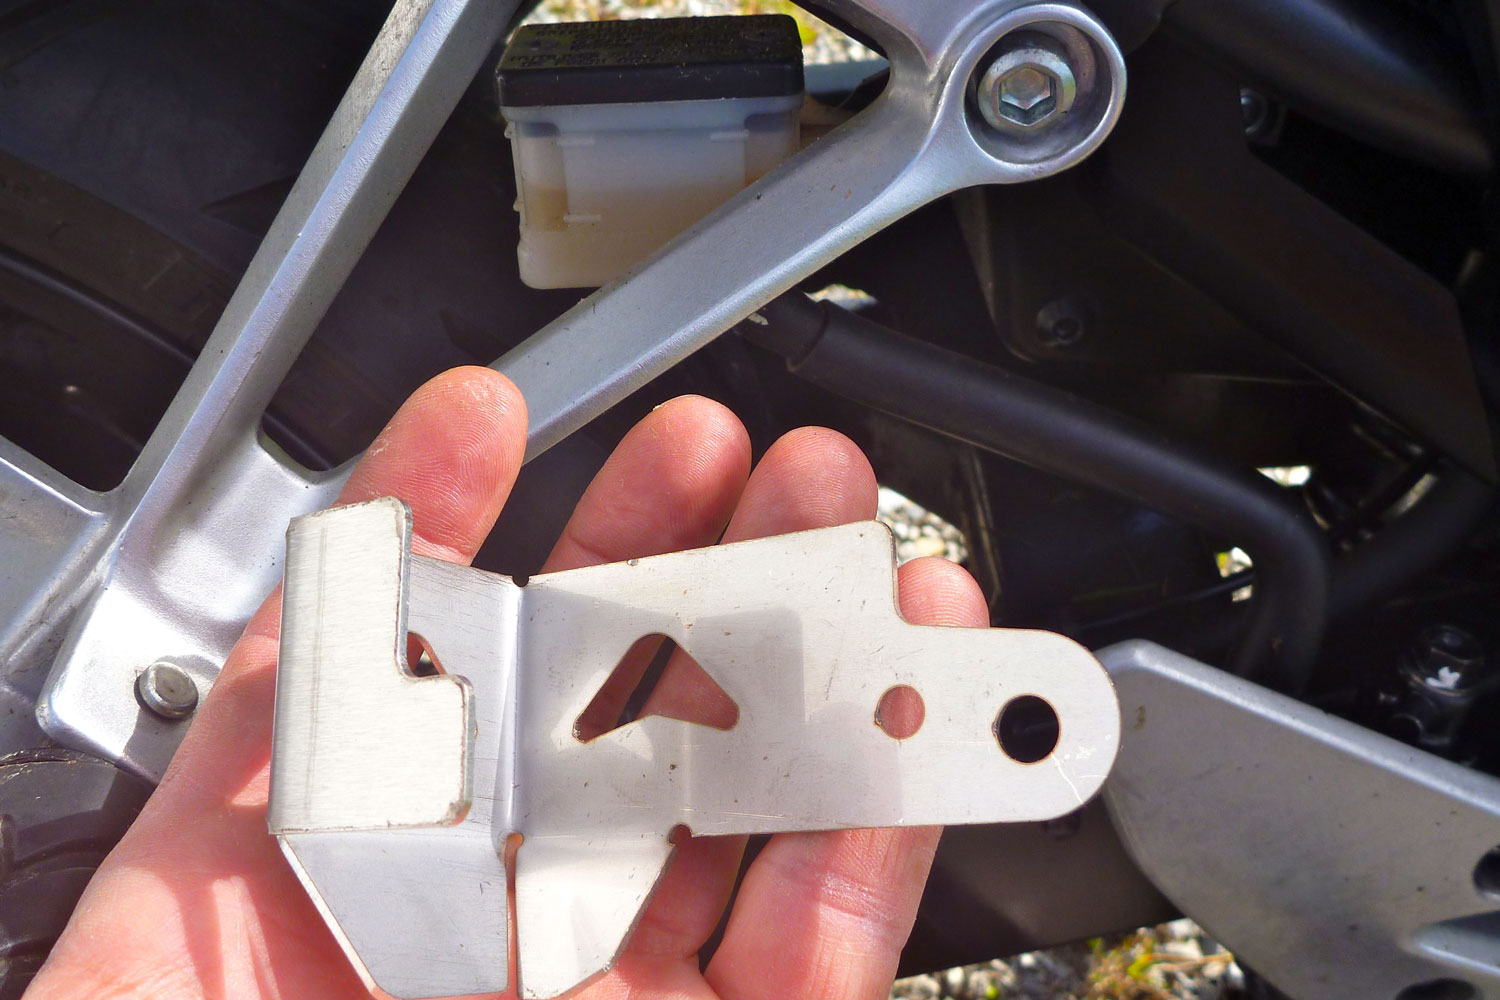
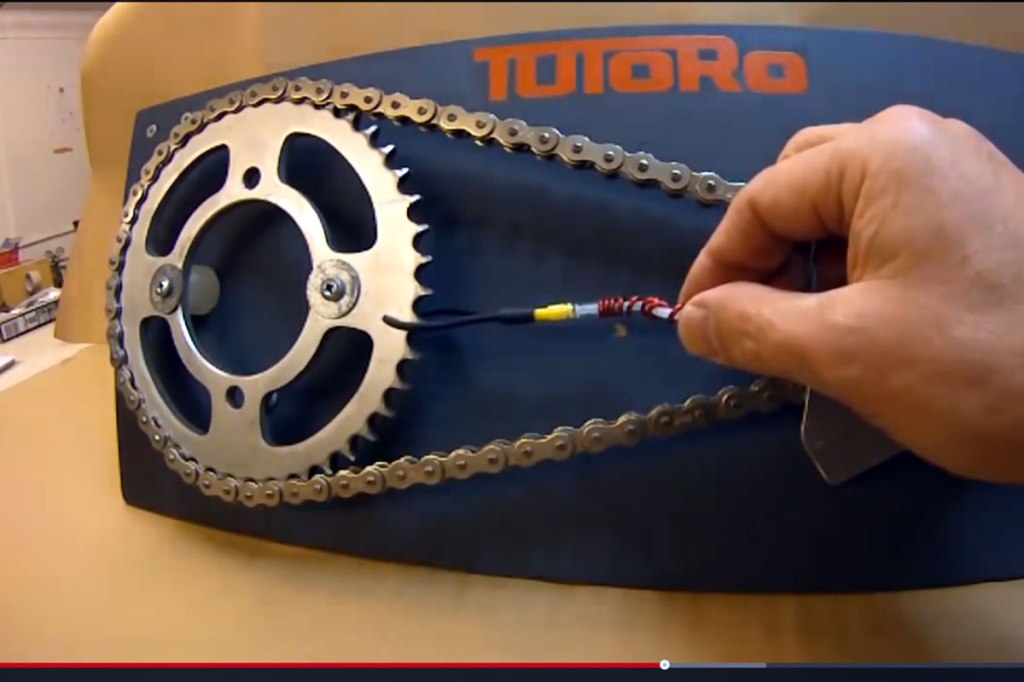
They have a new nozzle swingarm mount too: a plate and nylon bolt (right) you zip tie on to better secure the twin nozzle in front of the sprocket, instead of positioning it with a coil of bent wire. I think I’ll add some more support to the nylon bolt at the inside of the swingarm to stop it getting snapped off. As it is, I can see it all getting swept off by off-road debris. At least with the bendy coil you can bend it back. I may add that too.
I’m a bit concerned about the state of my chain. At only 3000 miles there’s rust on the outer plates which probably means rust on the inside too which will ruin the o-rings soon enough. Neither I nor I doubt the previous owners neglected it that much, so it must have been a cheap batch, like those that found their way onto some F-series BMW twins a few years back.
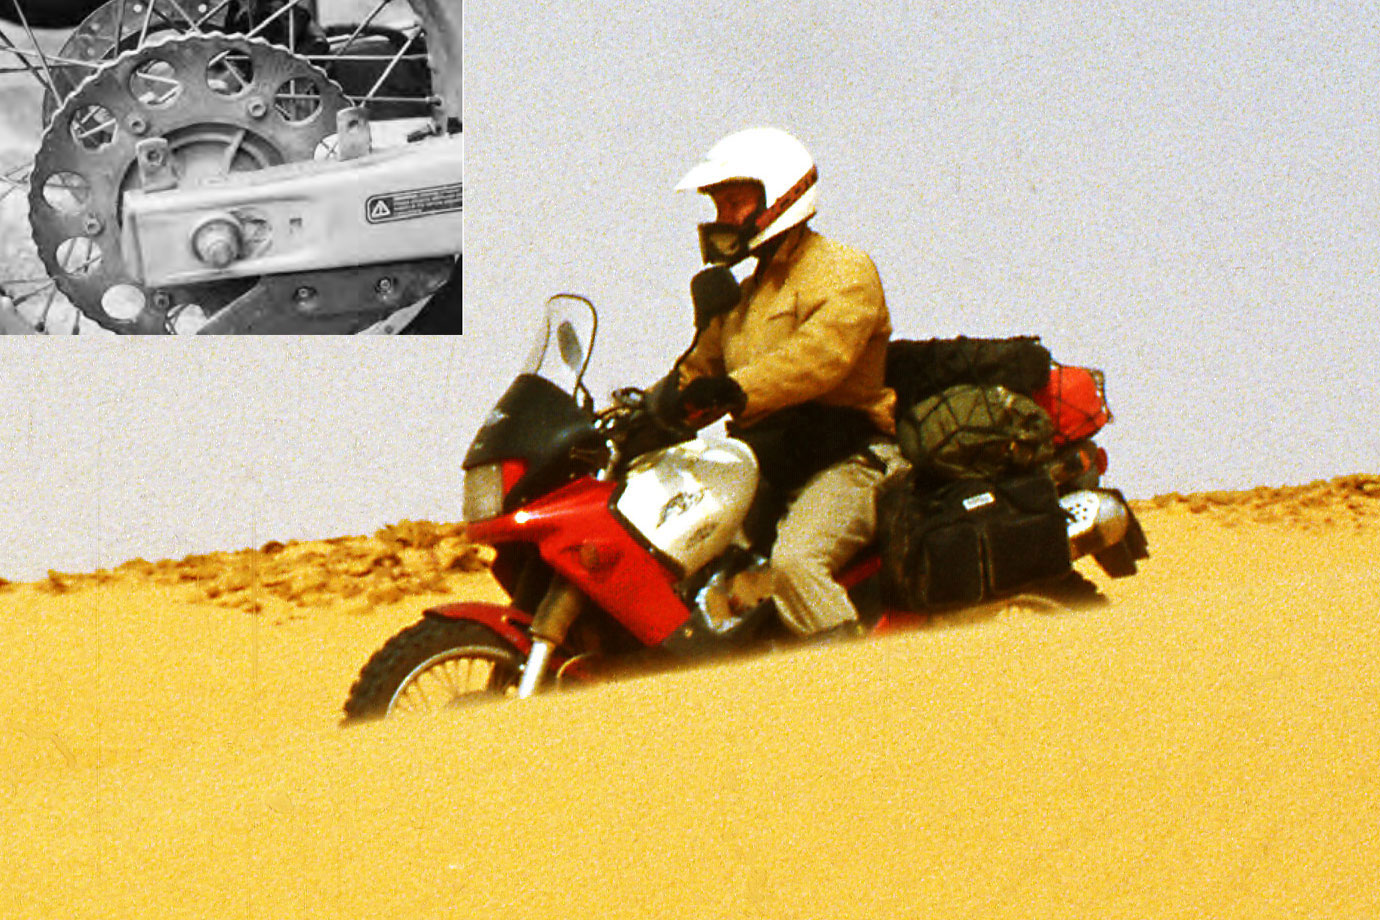
Even though it’s far from worn out, I think I’ll have to take a leaf out of my own book and fit new. The upcoming trip to Western Sahara and back will rack up at least 7000 miles, and even with the new oiler, in the sands I doubt my dud OE chain will make it to 10k.
I made that mistake on a Funduro ride to Libya once (left). Lots of sand on that trip and the no-name chain was slipping by Tunisia on the way back and despite my best efforts, the back sprocket was totally shot by Maidstone. I had to hire a van the last 25 miles home. On other Sahara trips o-ring DIDs have lasted fine.
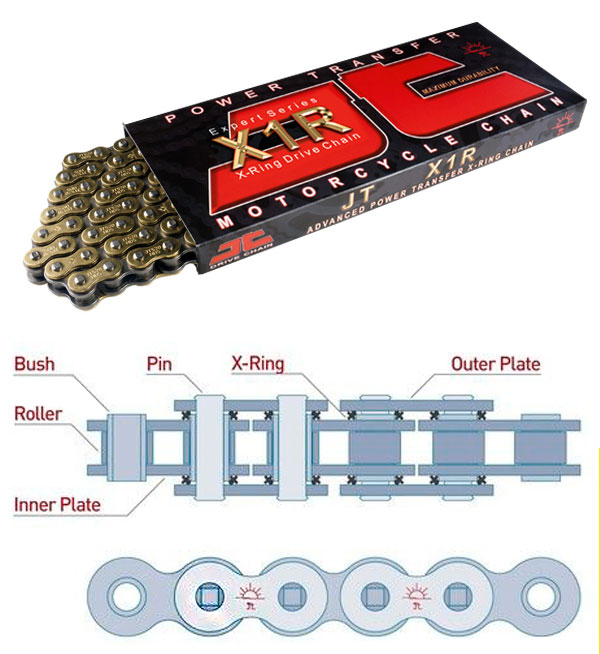
Again the forum has mixed reports on chain life, even with very regular maintenance. A quality chain wants to get on there quick before the sprockets wear. Normally that would be a DID gold x-ring, but I couldn’t find an X on ebay so let’s take a chance on a JT X1R version for £53. It’s good to try new stuff anyway, and I’m sure it will last the run in the desert sands, now the Tutoro is lubing it.
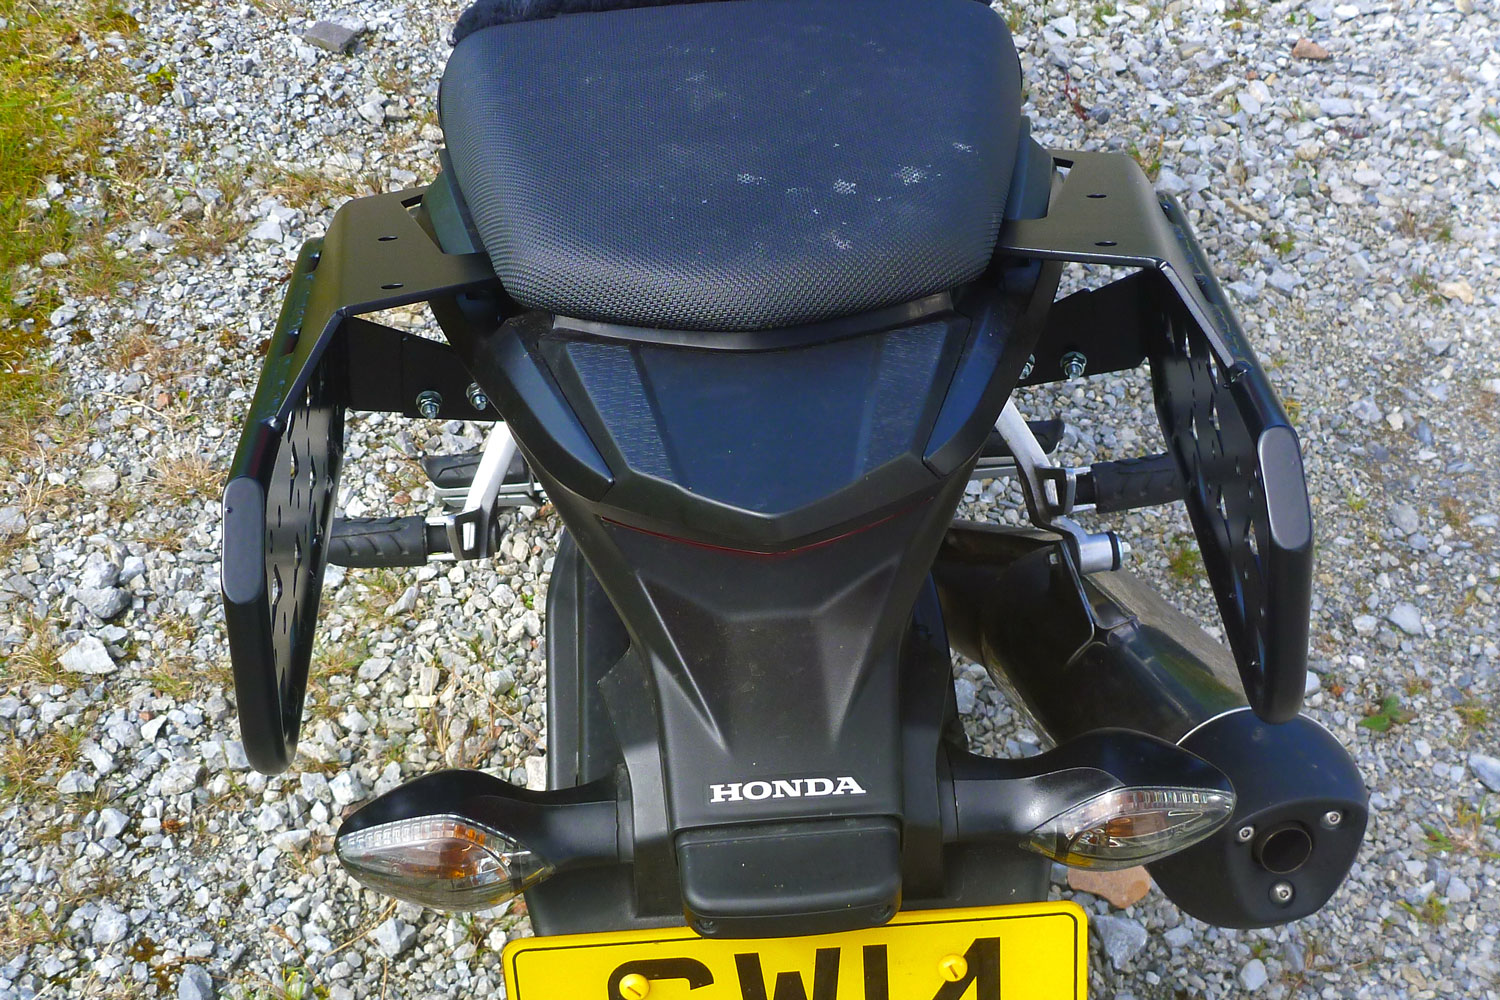
Rally Raid’s pannier rack arrived, along with a few extras. At £230 delivered, it was a good deal more expensive than a regular Hepco pannier rack (right) which seems to be the only one that’s a general purpose rack, and not specified for a certain type of luggage. As it is, it’s way too far back like so many of these racks, though with throwovers that doesn’t matter too much.
The RRP side rack weights 4.7kg in steel and seems based on their KTM690 rack, a bike whose plastic fuel tank is the rear subframe and so needs a bit of extra support. Being more heavily built than your H&B, the RRP CB-X rack does away with the rear cross brace and is said to be made to fit the Giant Loop Siskiyou throwovers.
The rack replaces the 1.8kg pair of grabrails and uses their six mounts on the chunky subframe, so that’s actually less than 3 kilos added overall. The third mount is a bracket that goes behind the pillion peg mounts and the whole lot was easy to fit and lined up precisely.
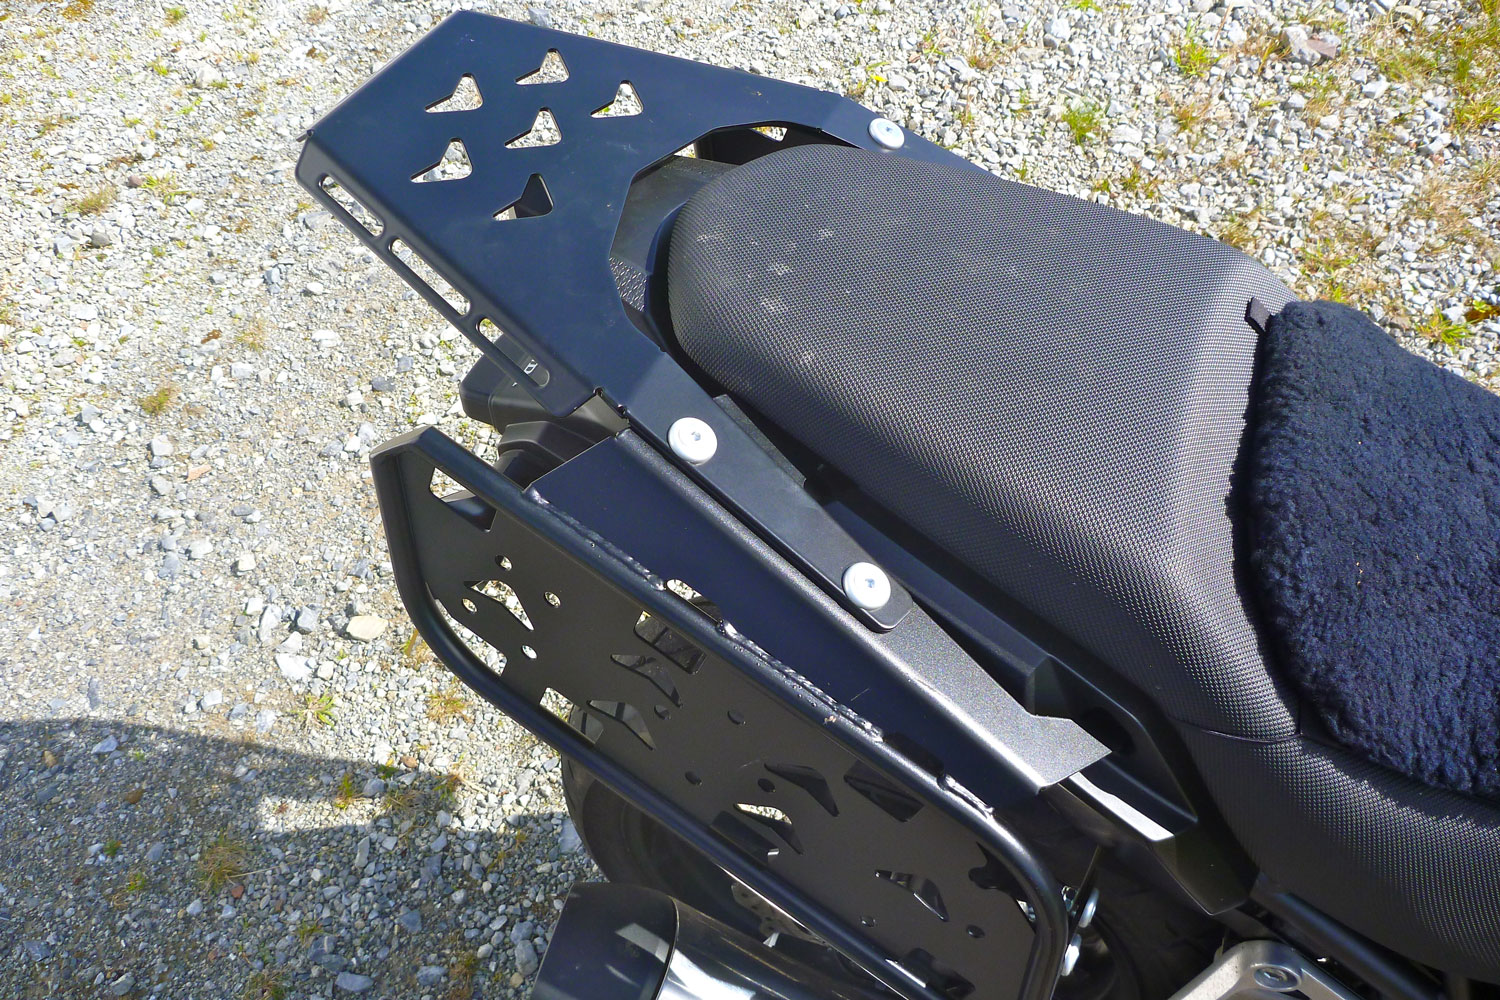
I did wonder if the short side height might not support my tall Magadans so well. As it is on the right the upswept silencer will get in the way whatever set up you use. Sticking out equally on both sides, there’s heaps of room to stash stuff behind (left) or fit one of those tool tubes. Though I’d rather have a slim rack, I can see those spaces becoming handy.
RRP also sent me their 1.8kg tail rack to look at, though I’m not a fan of these CNC ‘plate racks’. I fitted it anyway to see how it looks, as it mounts on the side racks very easily.
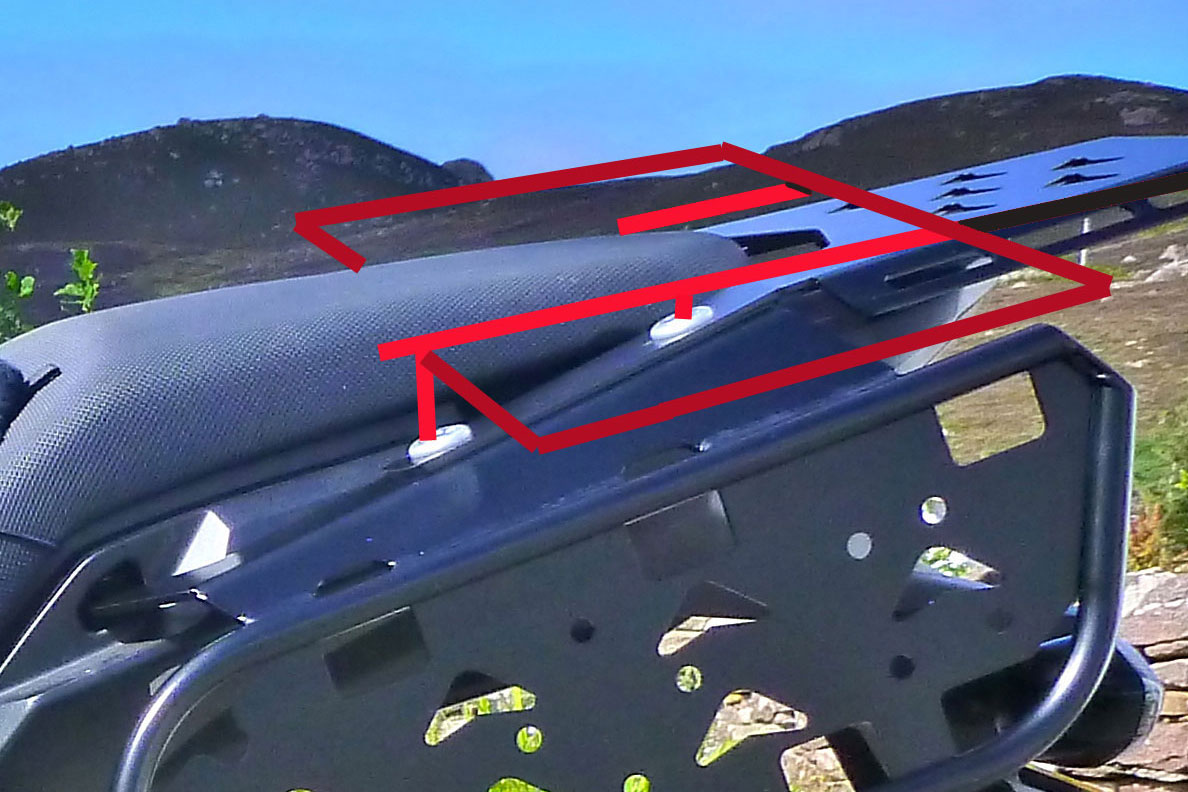
I prefer traditional tube racks and the reason becomes clear once the grab rails are removed: there’s nothing to grab on to! Not so much for a pillion but when picking up or manoeuvering or back-end dragging the bike into the cow shed where it currently lives. It’s really quite frustrating. For a while I thought I might bolt on grab loops to the tail rack mounts, but have decided to try and get an X-rack style sheep rack made (right).
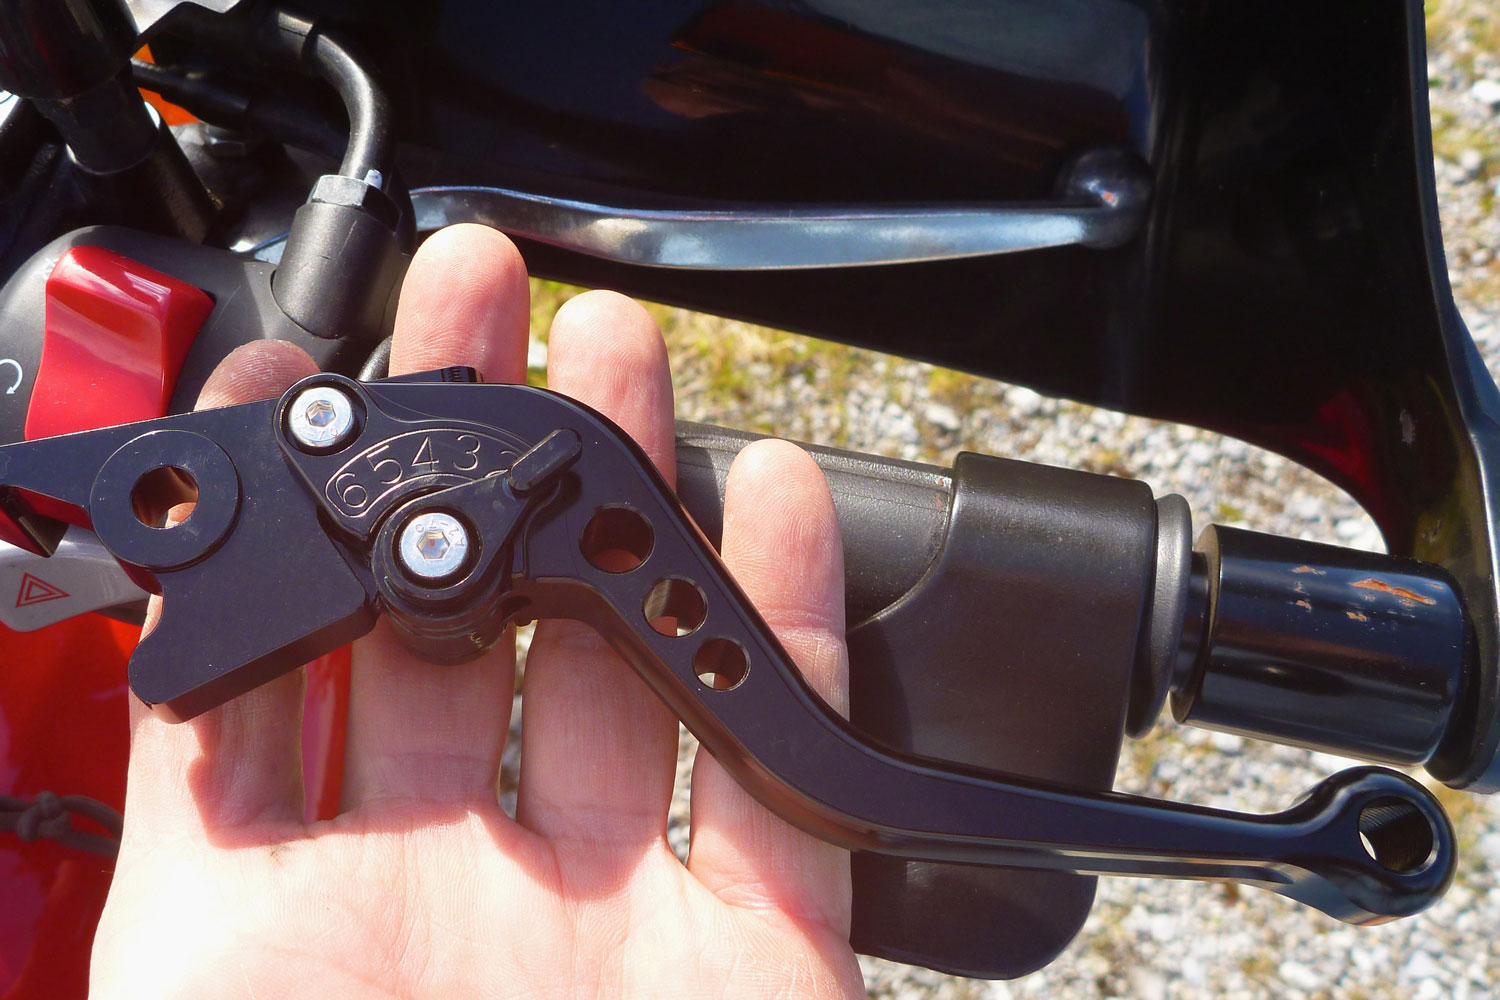
Other RRP goodies included a nifty rear brake reservoir guard (left). Now I look at it, it’s quite exposed, just as the oiler would have been back there. And a nifty pair of adjustable shorty levers. I’ll get round to them when the new front end arrives.
Although I haven’t scoured the internet to establish every possible alternative, to me the Tutoro auto luber is all you need to get the job done at a reasonable priceand without unnecessary complications. But because nozzles get knocked off and lost off-road, in 2023 I have reverted to simply brushing the chain with good (Tutoro) oil, as shown below left (2008)
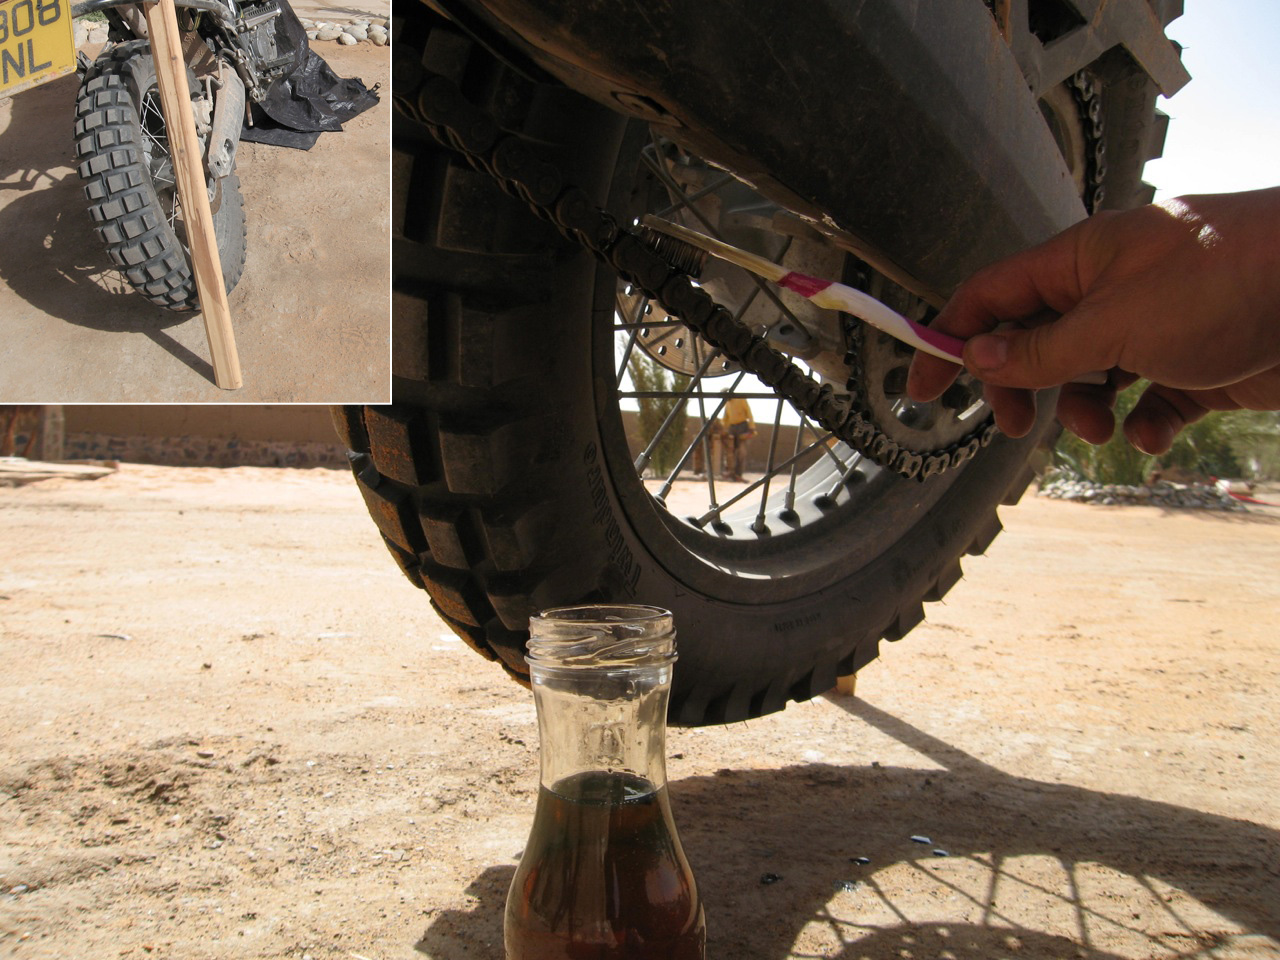
Brush on – but now I use proper chain lube oil.
It’s not sprocket science Even if your bike has a centre stand, some sort of automatic chain oiler is the best way to keep you chain lightly lubed all the time if you do a lot or riding. On the long road a bulky aerosol will eventually run out and while brushing on manually (left), is as good if not better, it’s a faff to do regularly. Sealed-ring chains are amazingly durable, but that range can easily be doubled if they’re coated in a near-constant film of oil, and cleaned once in a while.
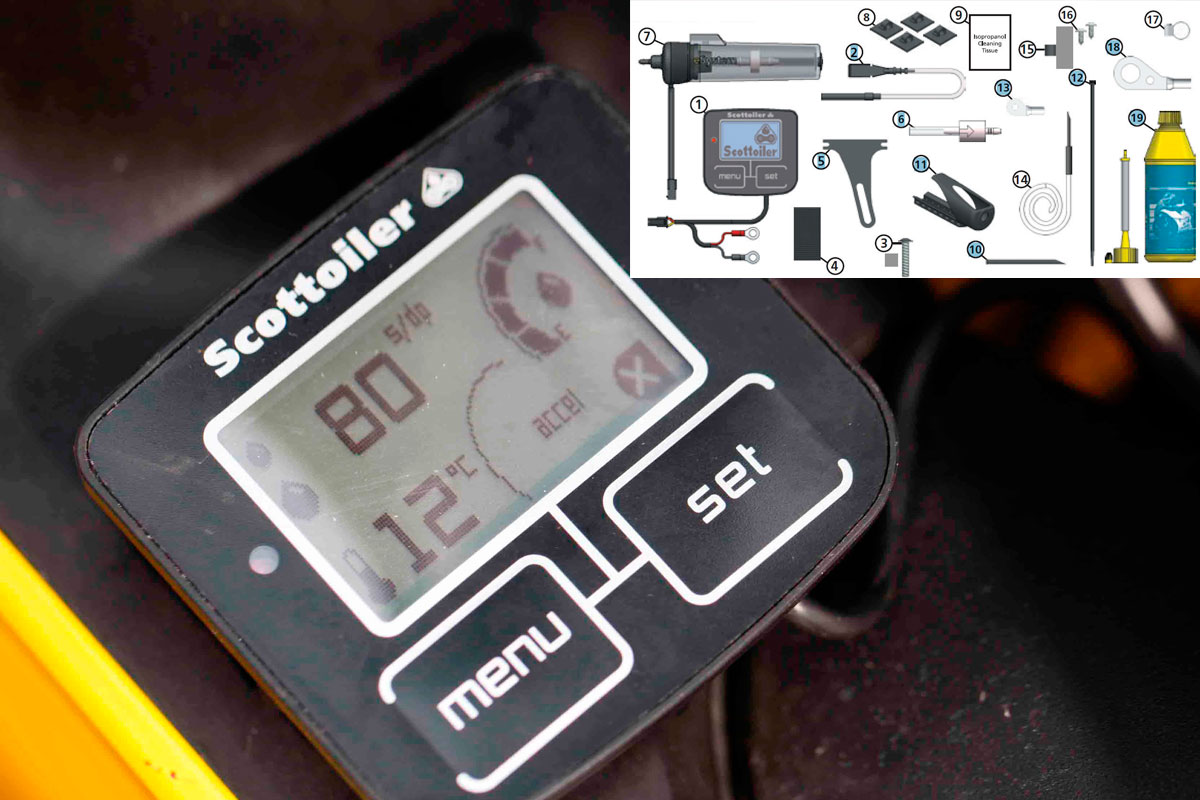
Scottoilers have been around since I started biking – or so it feels – but I never bought into their idea of plumbing the unit into the carb vacuum, or these days, using electronics. Why complicate things, it’s just an oil dripper? Do you really need a £240 piece of kit including a digital read-out on ambient temps and G-force (left), when you can make your own crude manual oiler with a squeezy bottle and a tube? Fit-and-forget automation is great of course, but I prefer an autonomous set up which, should it pack up up the Khyber, will be independent of other bike systems. It’s one less thing to eliminate when fault finding.
At Hyperpro one time I saw an 650Xcountry with the Dutch Osco system. It’s a stand-alone unit but turned out to be a manual, ‘actuate-the-plunger-once-in-a-while’ operation (see instructions below right) . Way too much faffing to remember at the end of a long ride. At less than 20 quid, the Loobman is another manually actuated dispenser of chain oil which, for that price, is probably less hassle than making your own. But the word seems to be that Loobs don’t survive rugged riding and there’s the problem with all manual oilers: remembering to use them regularly or forgetting they’re on and losing all the oil/making a mess.
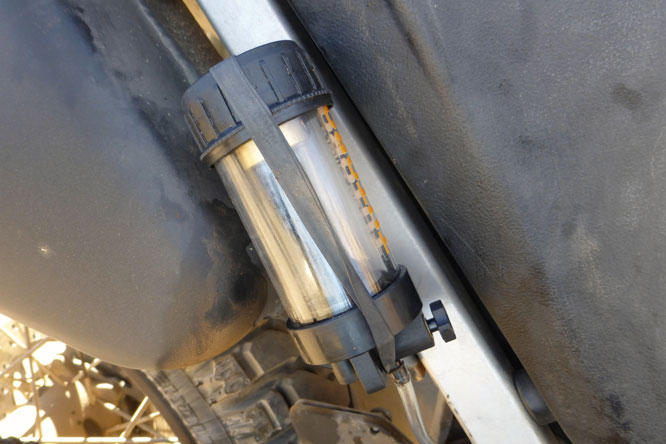
A bit of research led me to Tutoro oilers who’ve come up with the best solution to motion-actuated and adjustable chain oiling at a reasonable price, as well as offering manual drippers costing little more than a Loobman. The auto Tutoro (left) uses a finely balanced weight which moves up and down a stem, reacting to the movement of the bike and pumping or releasing oil as it goes. It might well resemble the ‘triple-axis accelerometer’ that Scott mention on their e-oilers, but without all the electronics. The Tutoro uses the free kinetic energy of your moving bike. Set the reservoir’s drip dial (reachable on the move) at whatever level is needed to oil the chain. If it starts raining maybe turn the wick up. Heading for the desert sands? Shut off the drip valve. Other than that, you don’t have to remember to do anything: when the bike’s at rest the plunger weight blocks flow – no drips. Once on the move again the bike’s motion and road irregularities will set it off. Simple and ingenious.
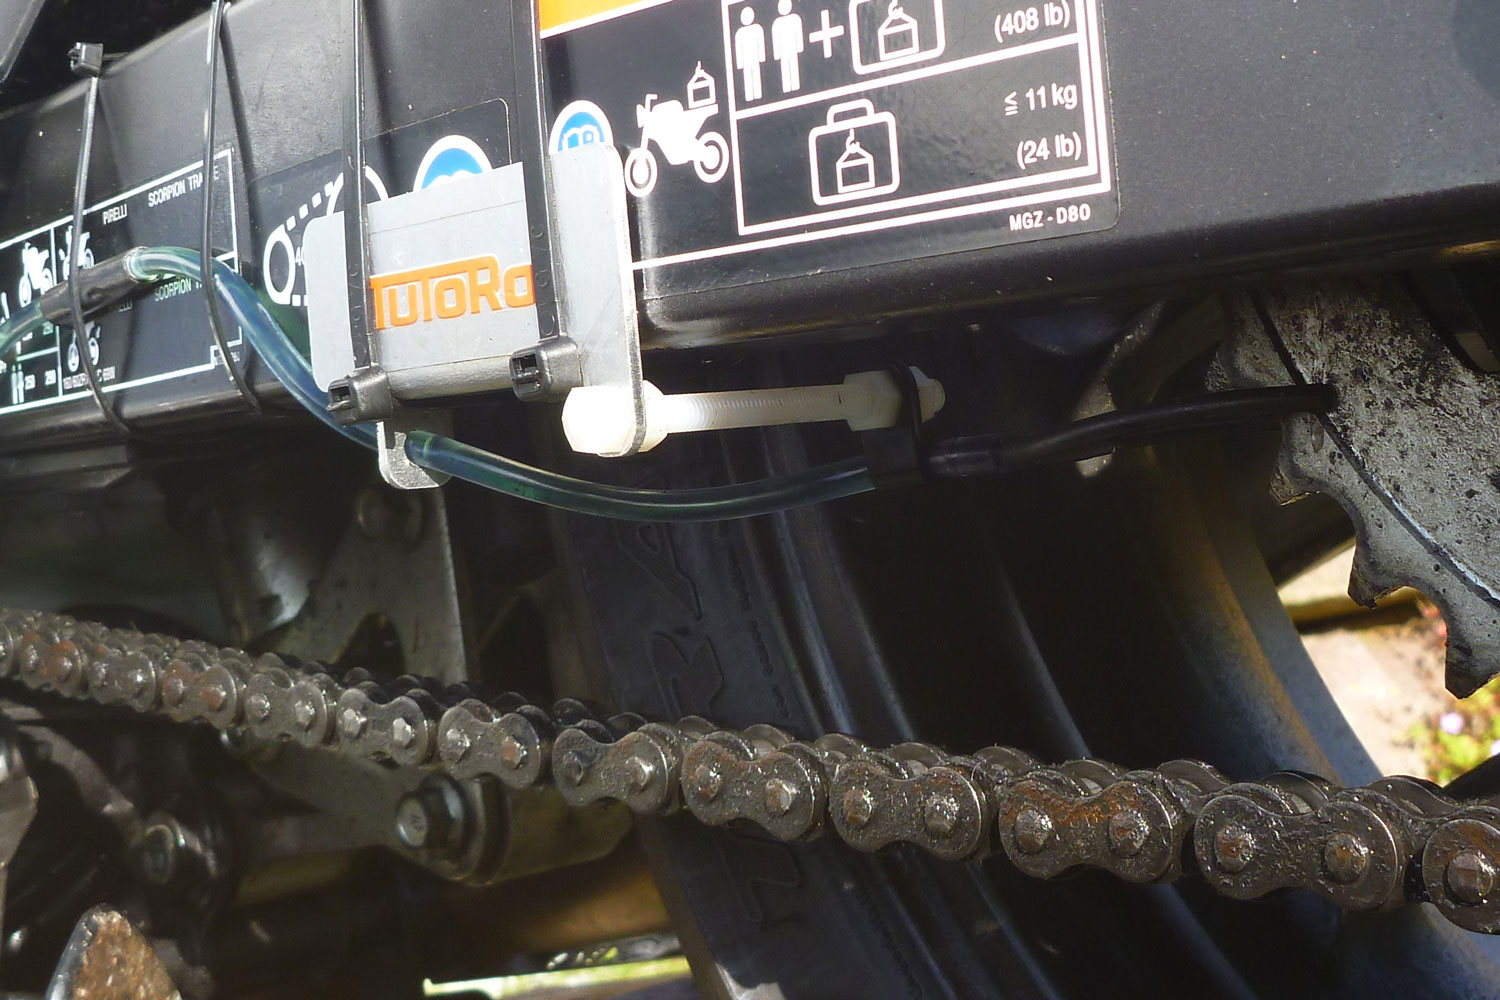
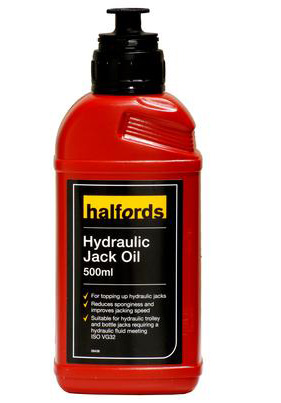
The Auto Delux edition I was sent came with a 100mm x 45mm reservoir (above left), delivery hose, a variety of reservoir mounting brackets, a forked nozzle, zip ties and cable guides, the helix flexible tube, a small top up can and 500 mil of Tuturo oil. And this is not just any oil, this is a lushly blended, thick and sticky blue goo, just like you get from the best spray cans. They now offer two weights of oil, depending on ambient temperatures in your locality. And if you run out, Tutoro specifically advise mineral hydraulic oil (example right). I bet you’ll find that cheap anywhere where there are cars or machines. Other stuff like ATF, EP gearbox oil, or any oil with additives may degrade the unit’s plastic and acrylic parts (but are all fine for the chain, as is waste motor oil).
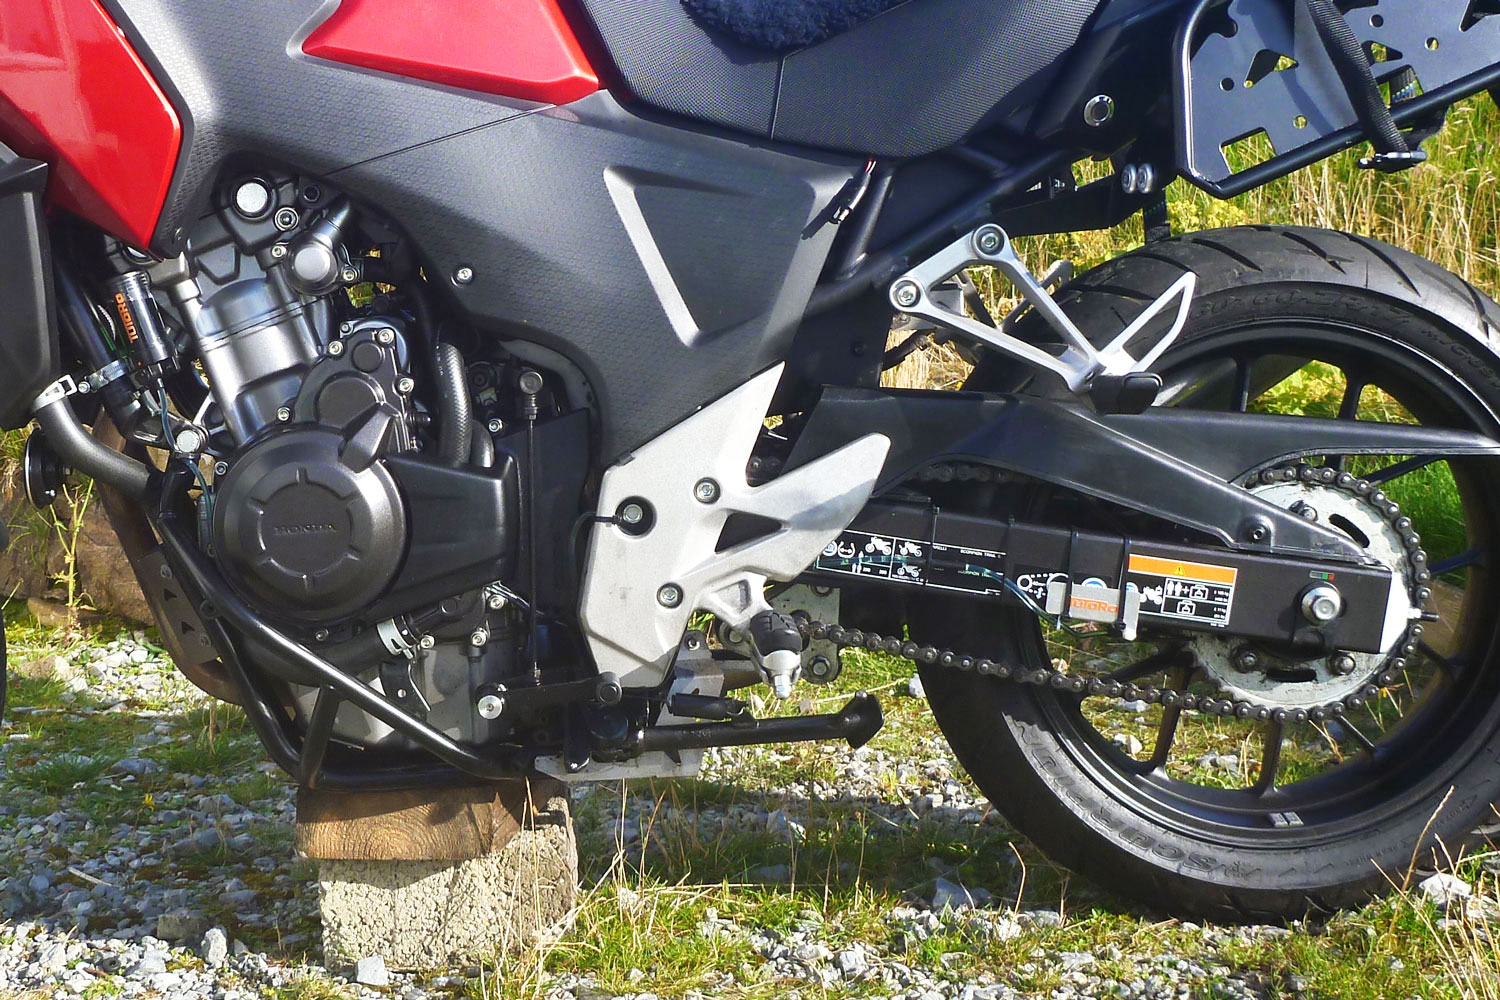
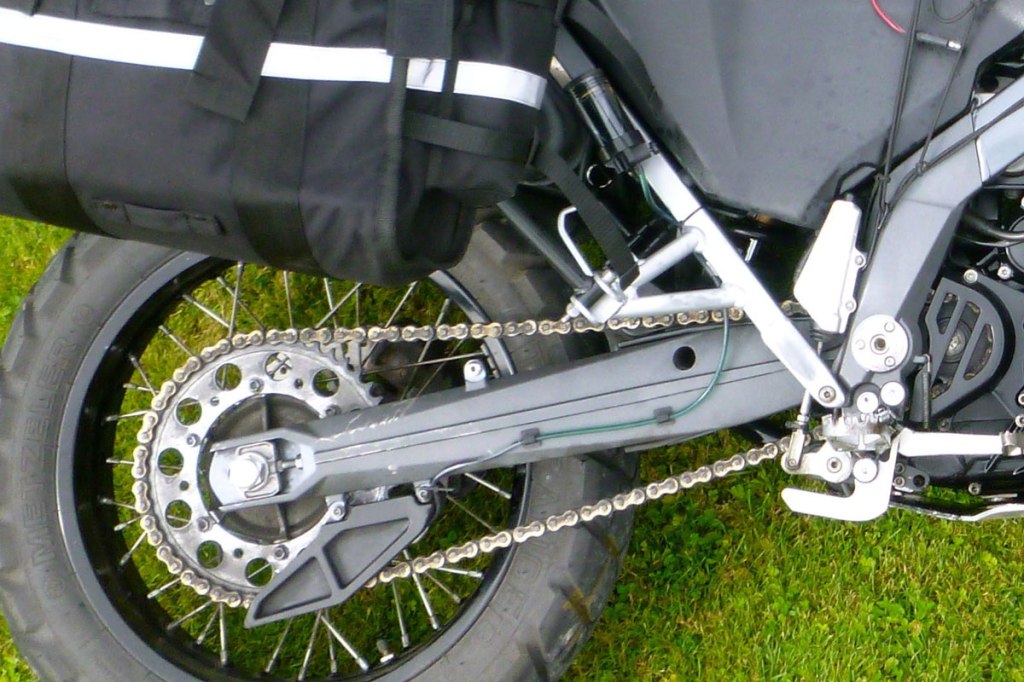
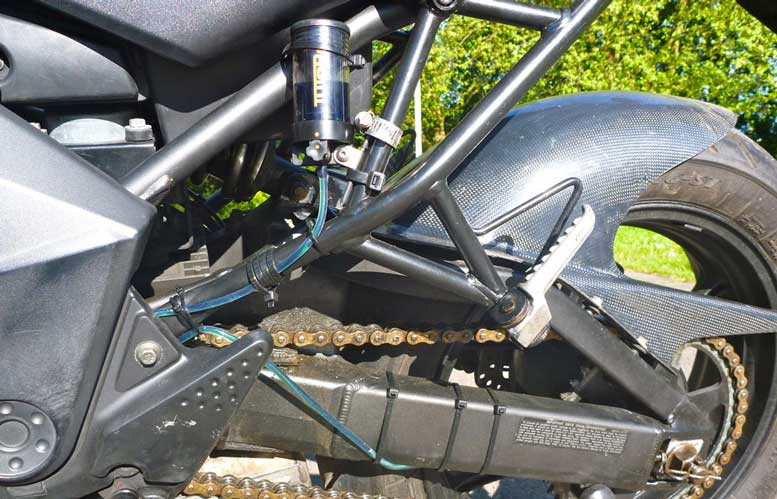
Fitting the oiler I fitted mine on the pavement in a bit of a rush, while at a Touratech travel event. On my GS650X there was a way of routing the hose neatly in and out of holes in the swing arm, but that looked a bit tricky to pull off in my situation. With just the zip ties, the reservoir was easily fitted to a bolt on the subframe down tube: out of the way but easy to reach and about 20° off vertical which is probably outside recommended operational limits, but worked OK for me. Vertical is best, even taking into account your typical 11-12° sidestand lean. The hose ran along the outside of the swingarm using stick-on hose clips (below). I thought they would be vulnerable off road (a slab of gorilla tape over the hose may help), but months of riding later, including Morocco and back and everything remained intact.
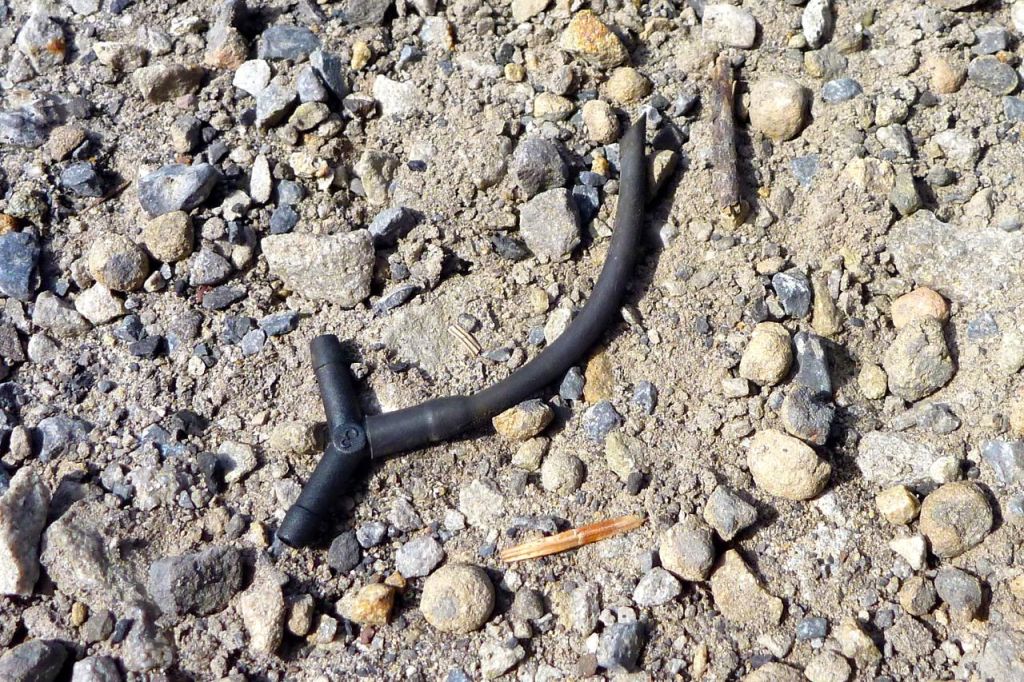
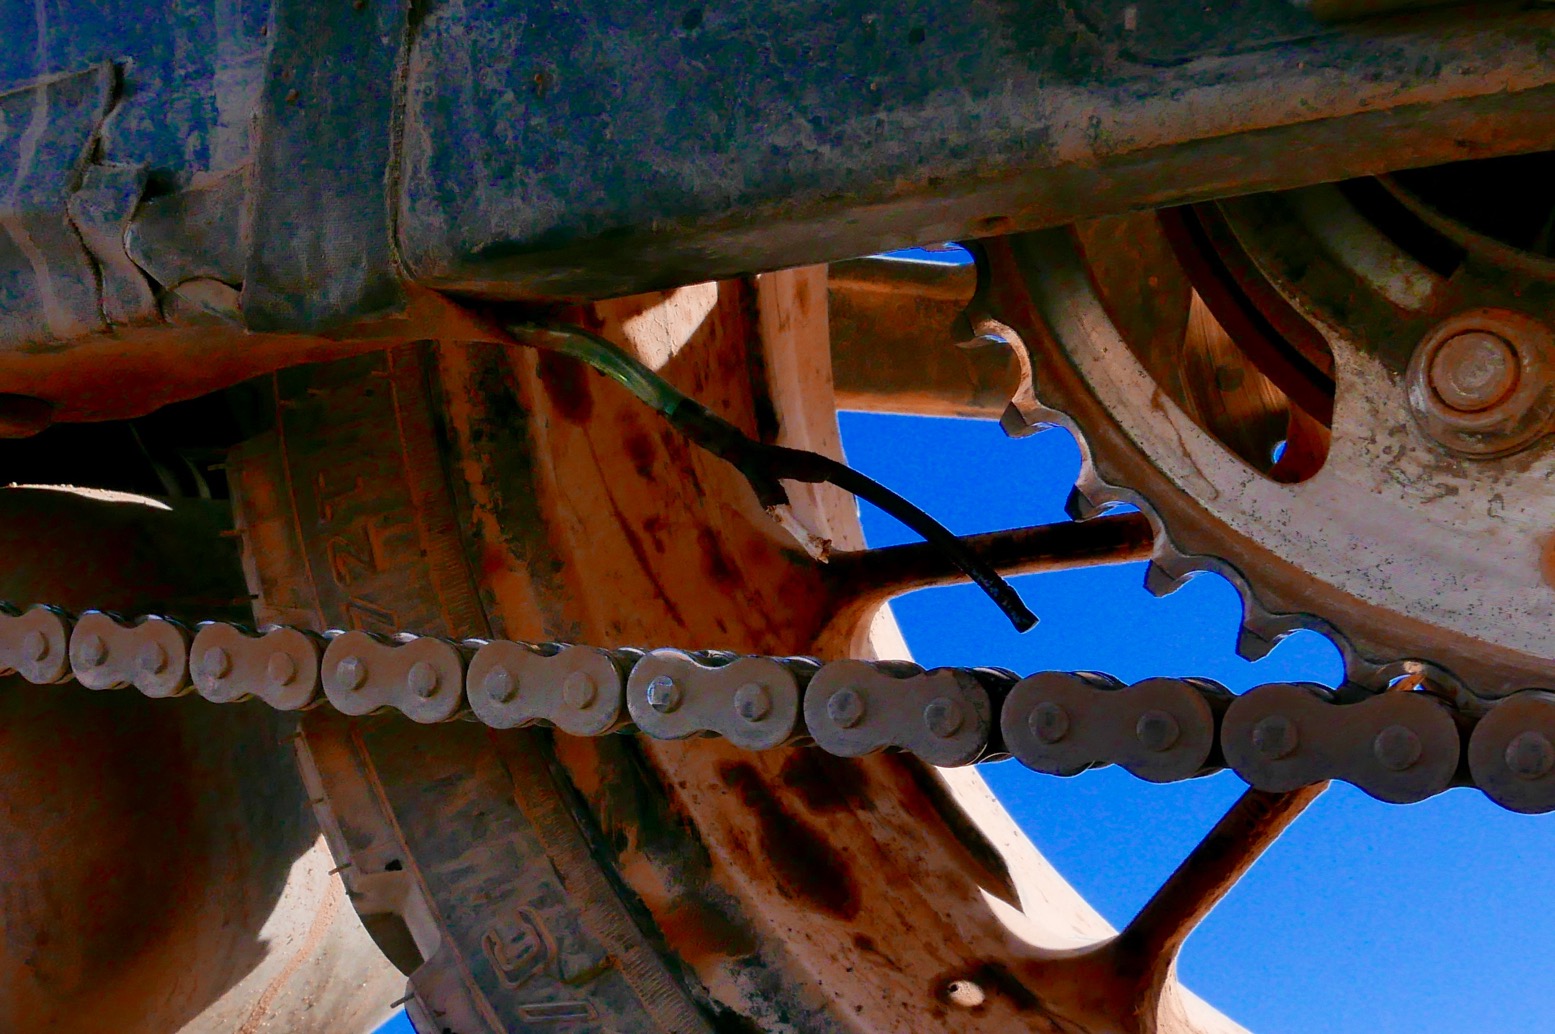
On the road Some Tuturos come with a rubber forked nozzle which I thought was to get the drips close to the o-rings on either side of the chain. I guessed wrong. Due to unavoidable chainslap, my nozzle got damaged almost straight away (right). Had I seen this later video, I’d have seen the forked nozzle is supposed to ‘bite’ either side of the sprocket at ‘3 o’clock’ (left) and well out of the way of the slapping chain. From here the oil gets thrown out onto the chain. No matter; it’s only a bit of hose dripping oil. Zip-tied to the chain guard, I repositioned my single hose feed at the back of the lower chain run, just as it goes onto the sprocket (the place they tell you to spray a chain). Tutoro say a single feed is as effective but a bit more wasteful at lubing the chain than forked, and there’s nothing to get damaged or pulled off.
Setting the feed dial positioned at the bottom of the reservoir took some experimenting, or it’s quite possible that again, I didn’t rtfm. I didn’t bother priming the unit and just left the valve wide open to let it happen on the road. From Touratech I set off north for a early morning ride through mid-Wales and forgot all about the oiler until fuelling up in north Wales. Here I noticed the reservoir was empty, oil was all over the back wheel and the chain glistened like an eel that had just stepped out of a steaming shower. With enough lube on the chain to last a few days, I shut it off then forgot all about it again as I rode up to northwest Scotland and then rode back home to London via the Outer Hebrides. Over the weeks and months, I’ve settled on about one turn out from fully closed; perhaps a bit more in chilly conditions.
Lately I came across Motobriiz (right; $92) which similarly uses motion-actuated automation: this time wind pressure off an intake tube pushing oil out of a reservoir down another tube and into a felt pad tucked under the chain on the slider. There are no moving parts at all. In the US one time I was offered a kit by a distributor, but wasn’t convinced the way they do it was that much better than Tutoro. The best thing is that, like some Scottoilers, the reservoir mounts on its side and out of the way and under the seat (but also where it’s easily forgotten about). Less good is the oil-soaked felt pad you glue to the chain slider needs regular replacement. Plus I have to say I’m not fully sold on the wind idea – won’t riding fast into a headwind prematurely empty the tank? I prefer the Tutoro’s adjustable valve. All the ideas gadgets on this page are better than no oiling and less faff that manual application, but for me Tutoro’s simplicity combined with mechanical fit-and-forget ‘autonomous motion-actuation’ works best. And compared to the other products mentioned above, I think they’re a bargain.
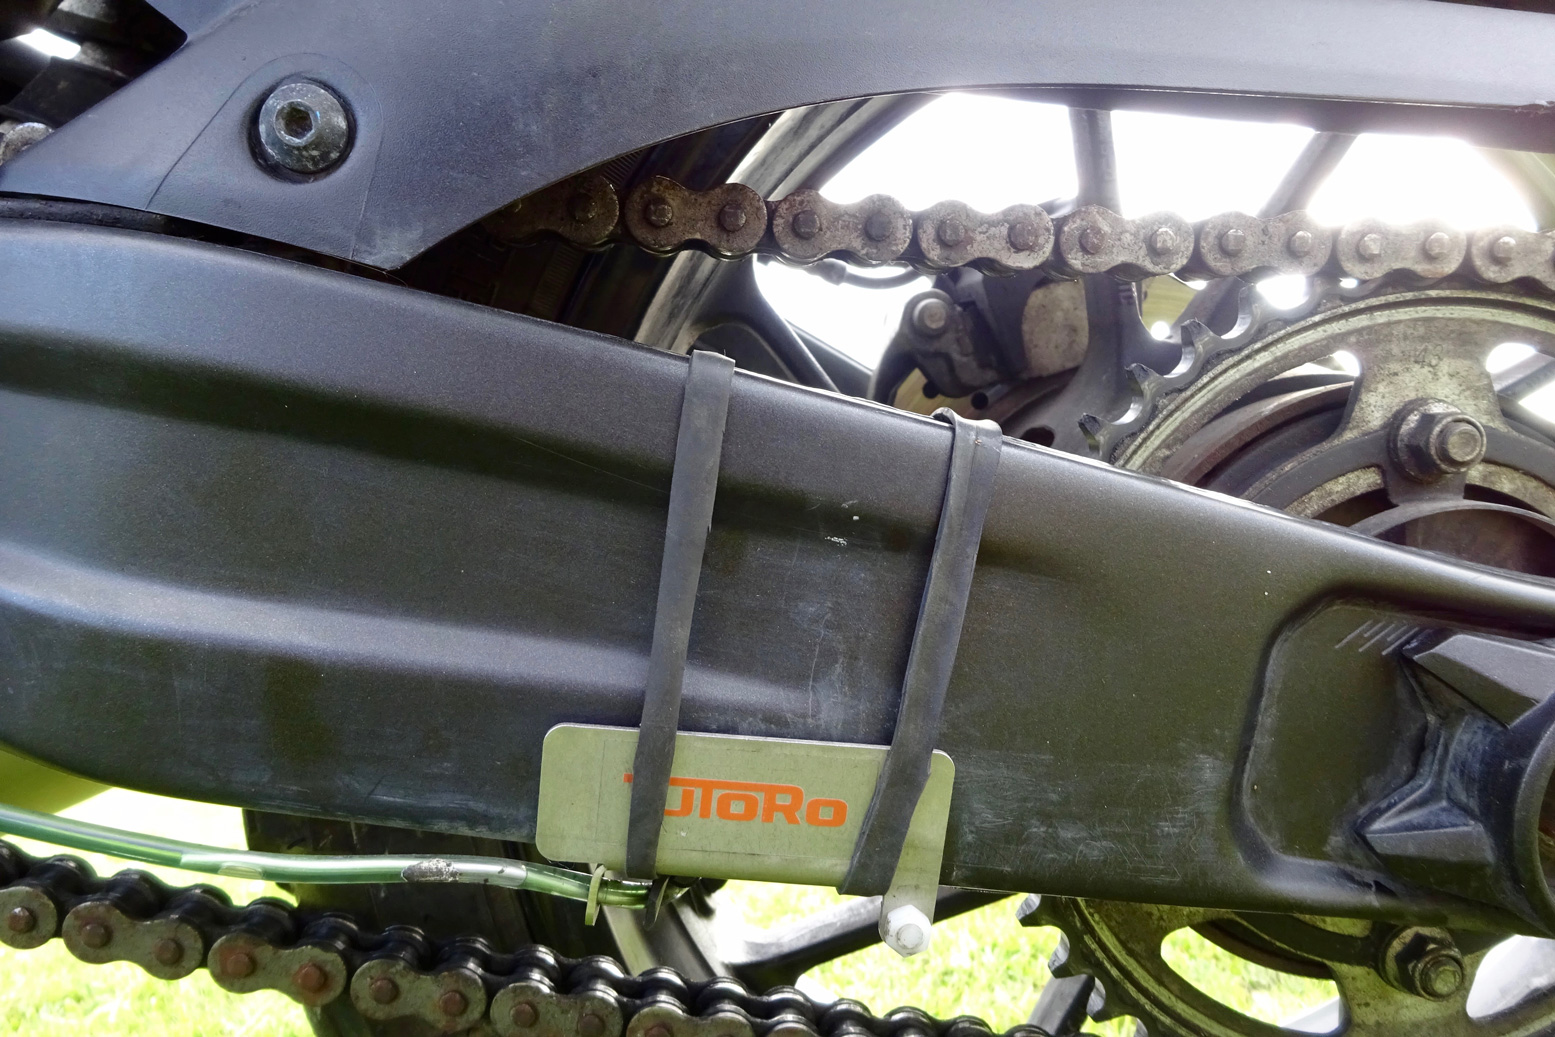
Update after Morocco with XSR The benefits of a chain oiler are greatest on a long trip covering big mileages. A bulky aerosol won’t last and you don’t have to prop up your bike and get on your knees every morning to give the chain a squirt. I topped up my Tutoro and left for Morocco with a 200ml bottle of oil. All went well until I had to give someone a lift off a mountain pass one evening when things turned a bit epic. Because there were no pillion footrests on my Xbike, her feet flailed around and knocked the reservoir about, losing its cap and contents. A flush out with petrol and an oil bottle cap with a bit of inner tube worked for the rest of the trip. That’s what I mean about simple, in-the-field repairability. I came back with Morocco with the reservoir half full. I adjusted the BMW chain twice in the 10,000 miles I had the bike (8000 miles with the oiler). The chain looked like is has 1000s of miles left in it. Pictured left is the same type of unit fitted with a little more know-how to my Kawasaki Versys. I then took the unit off that bike and put it on the CB500X (above left) and fitted what bits I had lying around to my XSR700 Scrambler.
I should have remembered that the anchor plate or helix they offer are both useful devices to keep the forked nozzle in position, biting the sprocket at ‘7 o’clock’, especially on rough roads and tracks. Tbh, I expected a stone to knock off my nozzle much sooner than it did.
Instead, the hammering regularly twisted the nozzle arms out of position on their forked mount attached to the delivery hose, and by the end of my third lap one nozzle arm was MiA. I plugged it up with a twig and pointed the remaining ‘single feed’ nozzle arm onto the chain (below). If the forked nozzle was a single piece, this would not be a problem. I’ve since ordered the anchor plate which I used on my CB500X RR and fitted it in with a strip of inner tube (the supplied zip ties didn’t stay in place on my tapering swingarm). That’s about all there is to say on the subject.