Tag Archives: tubeless conversion

Project CRF300L: old tubes and dirt bike rims

Project 300L Index Page
See also: Tubeless conversions

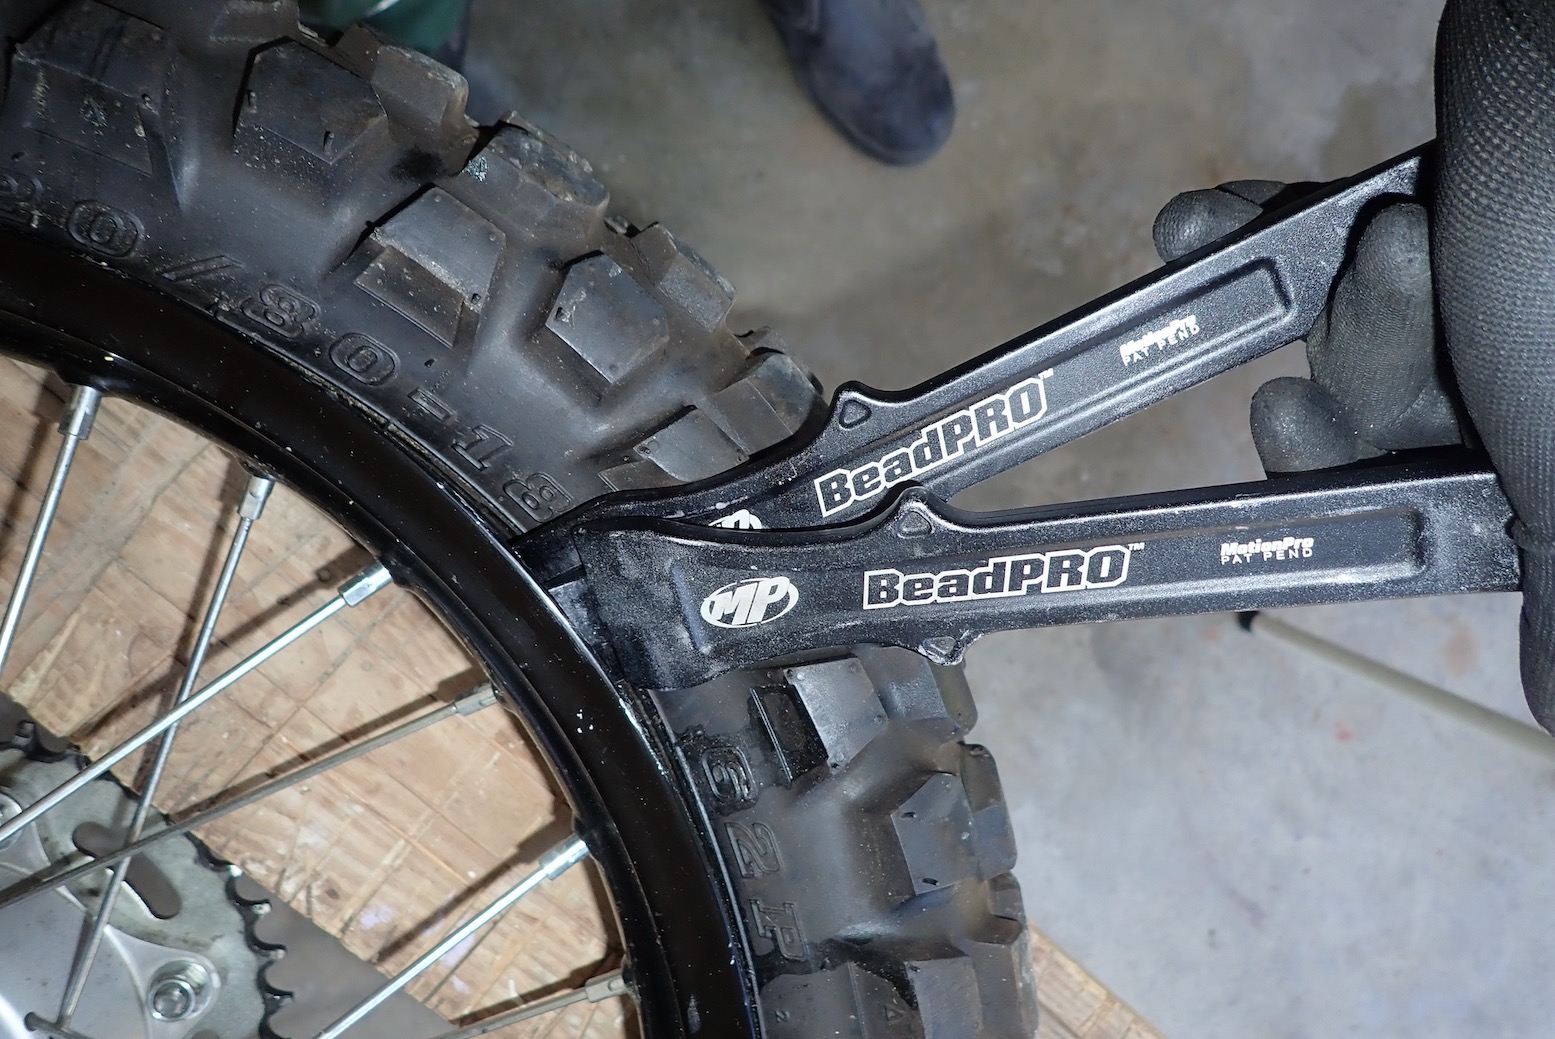
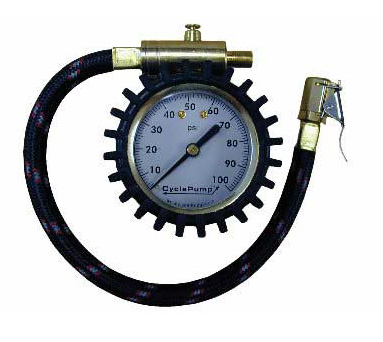
After less than 20 miles I’ve already got myself a rear flat, luckily at home. At some point I was going to remove the stock IRCs, seal the rear rim for tubeless tyres and fit some proper tyres for the ride to Morocco. May as well do that job now. While I’m here, allow me to give my usual shout-out for Motion Pro Bead Breakers, an alternative to standing on or otherwise levering the tyre bead to achieve the same result.

I spun the wheel on my exciting new stand you just read about but couldn’t see any nails or similar. I did wonder if I pinched the tube a couple of weeks back, but if I did, it only gave out now.
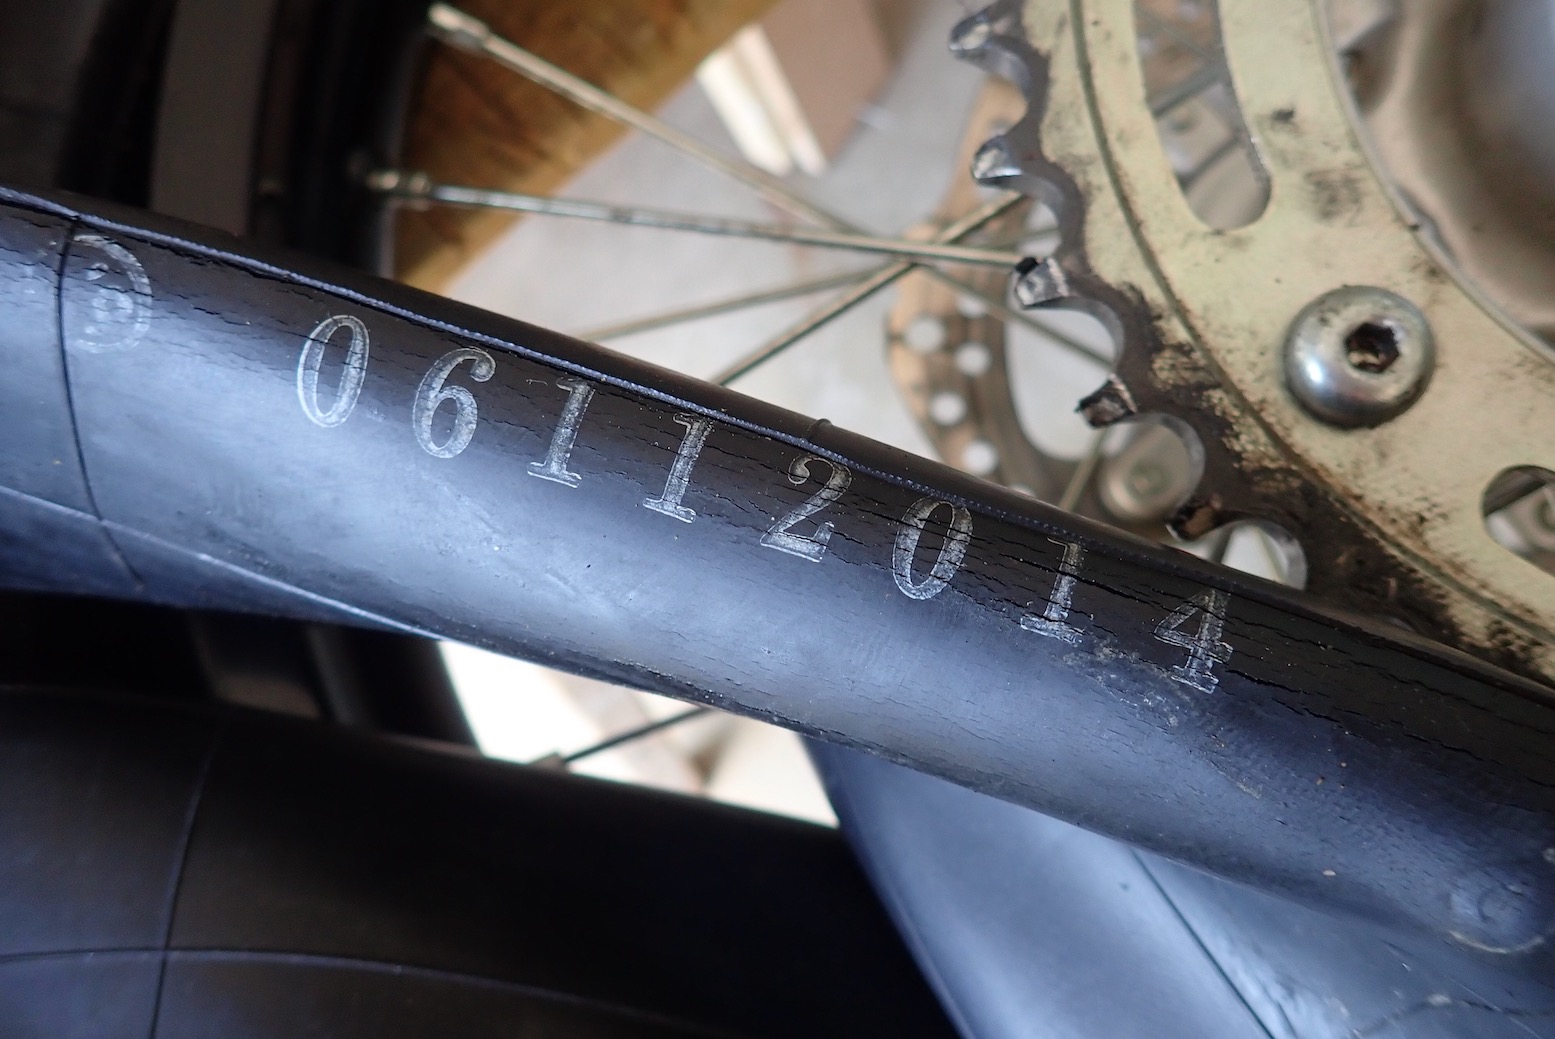
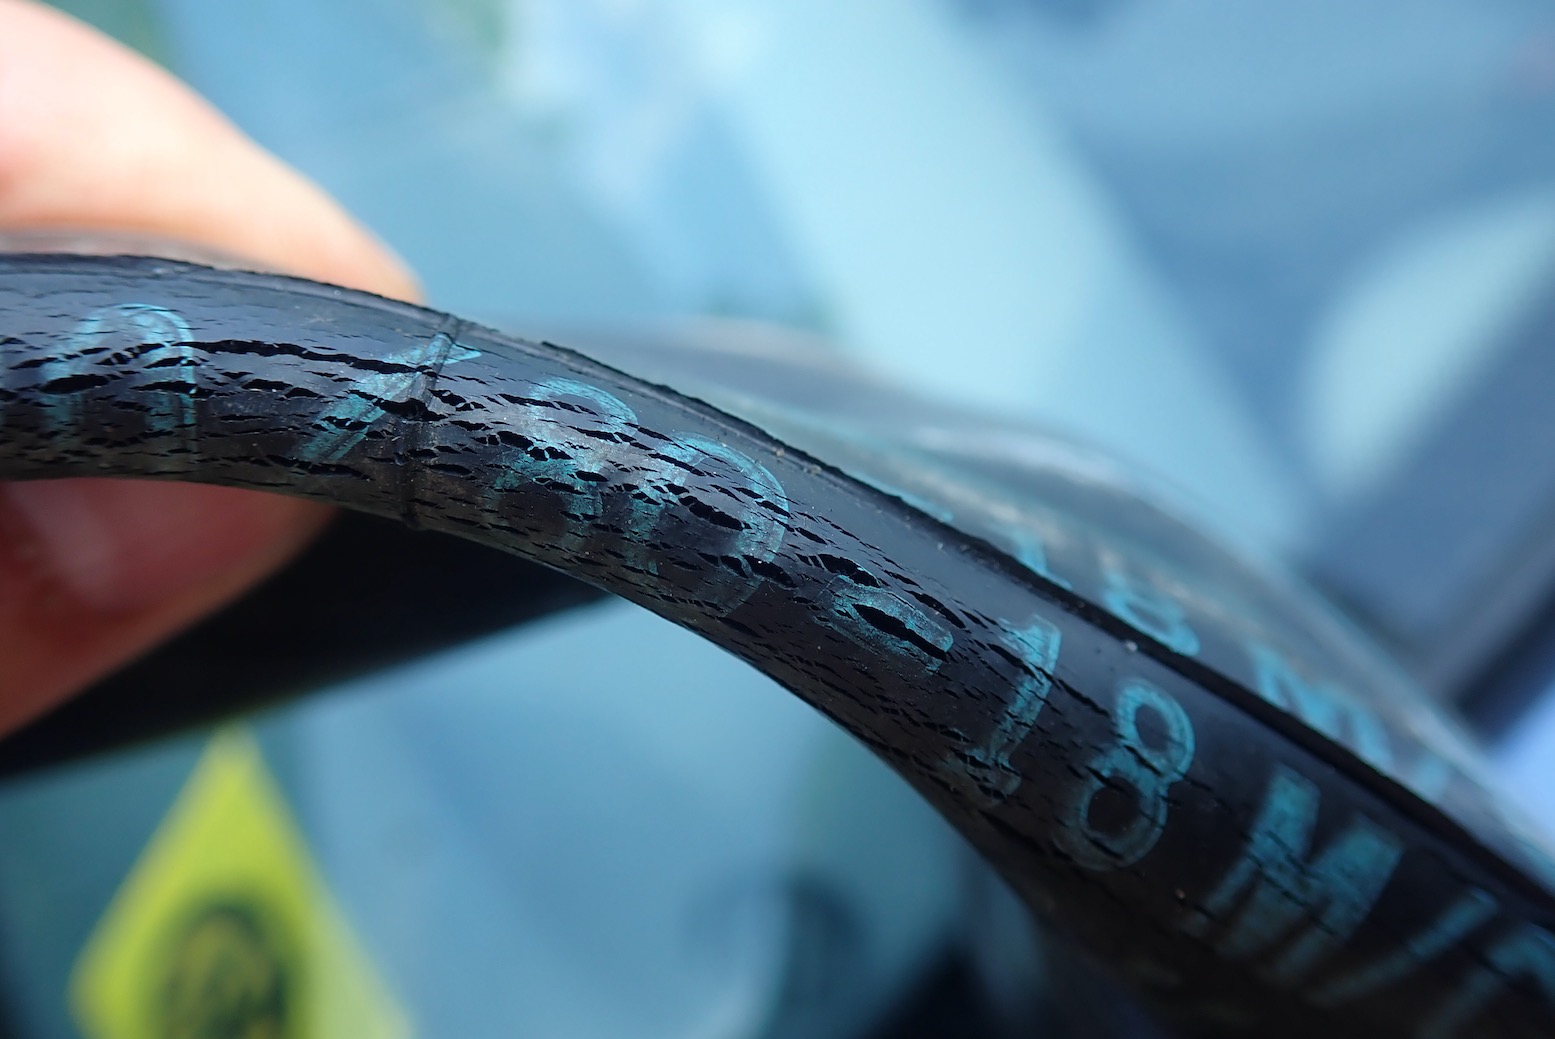
Pulling the tube out I was shocked to see a huge gouged hole like a mouse had got in there. Maybe I did it just now removing the tyre, but can’t say it was a struggle. Who knows, but I also noticed how the folded rubber tube cracked like it was ancient. Then I clocked a date stamp from November 2014. Yikes, nearly 9 years old! Well I suppose I should be impressed that a: Michelin date-stamp their tubes (can’t say I’ve ever noticed this feature before) and, b: that this tube lasted nearly nine years without a repair (assuming it had any use in that time)! Obviously the tube isn’t worth repairing. Good thing I noticed now. I just picked up some old Mich tubes from 2017 and they are nowhere near that far gone (nor do they have that date stamp). Could it even be a fake Mich tube?

Cracked rubber; not a good look.
No MT stamp
No lip so unsuited to DIY tubeless sealing ;-(

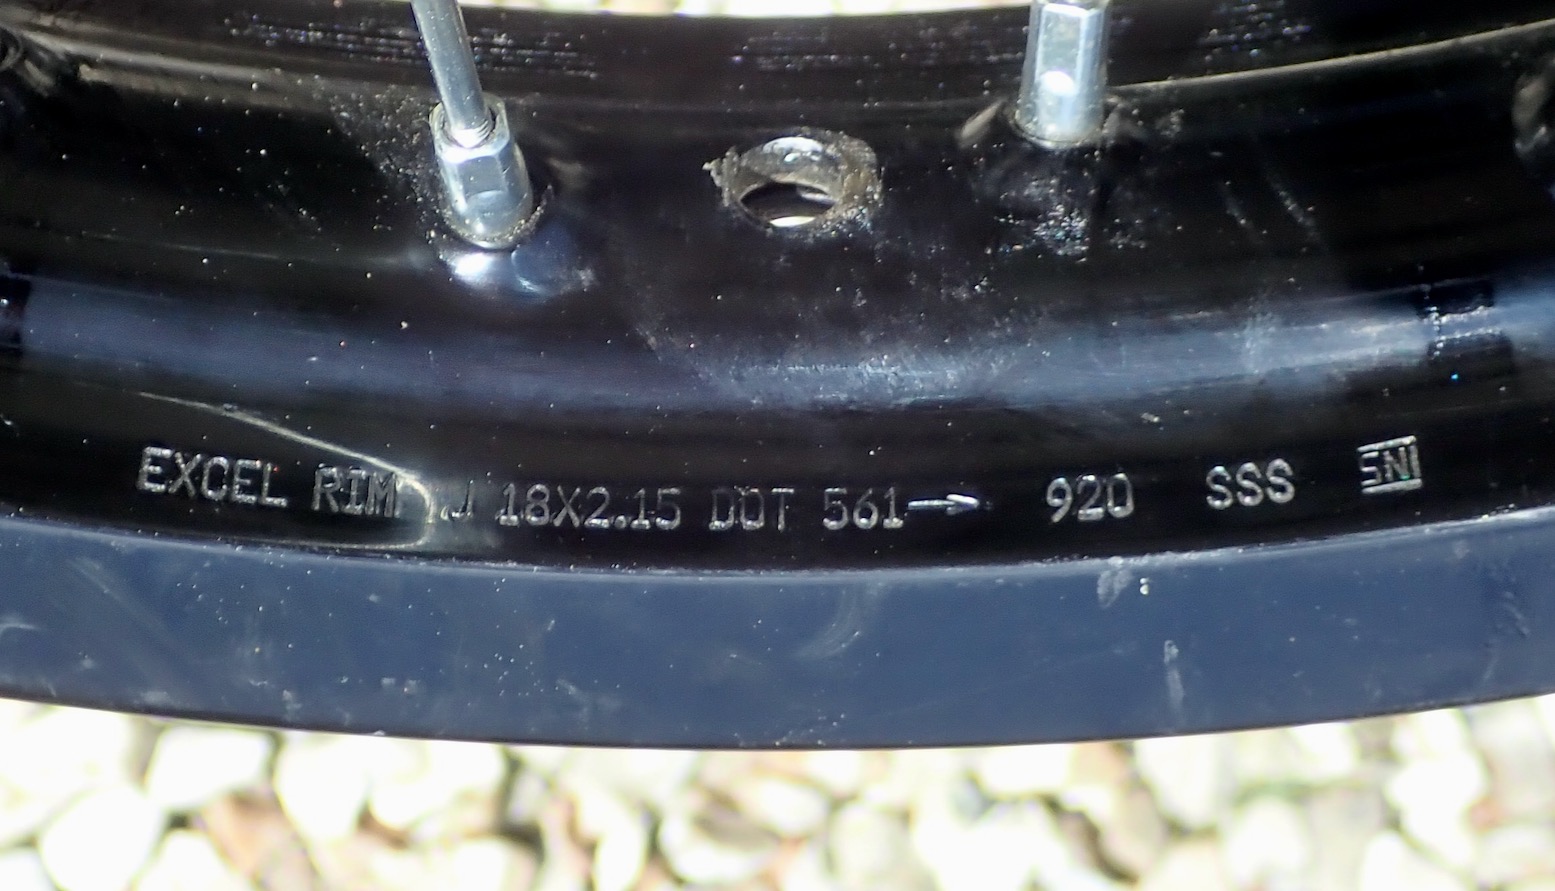
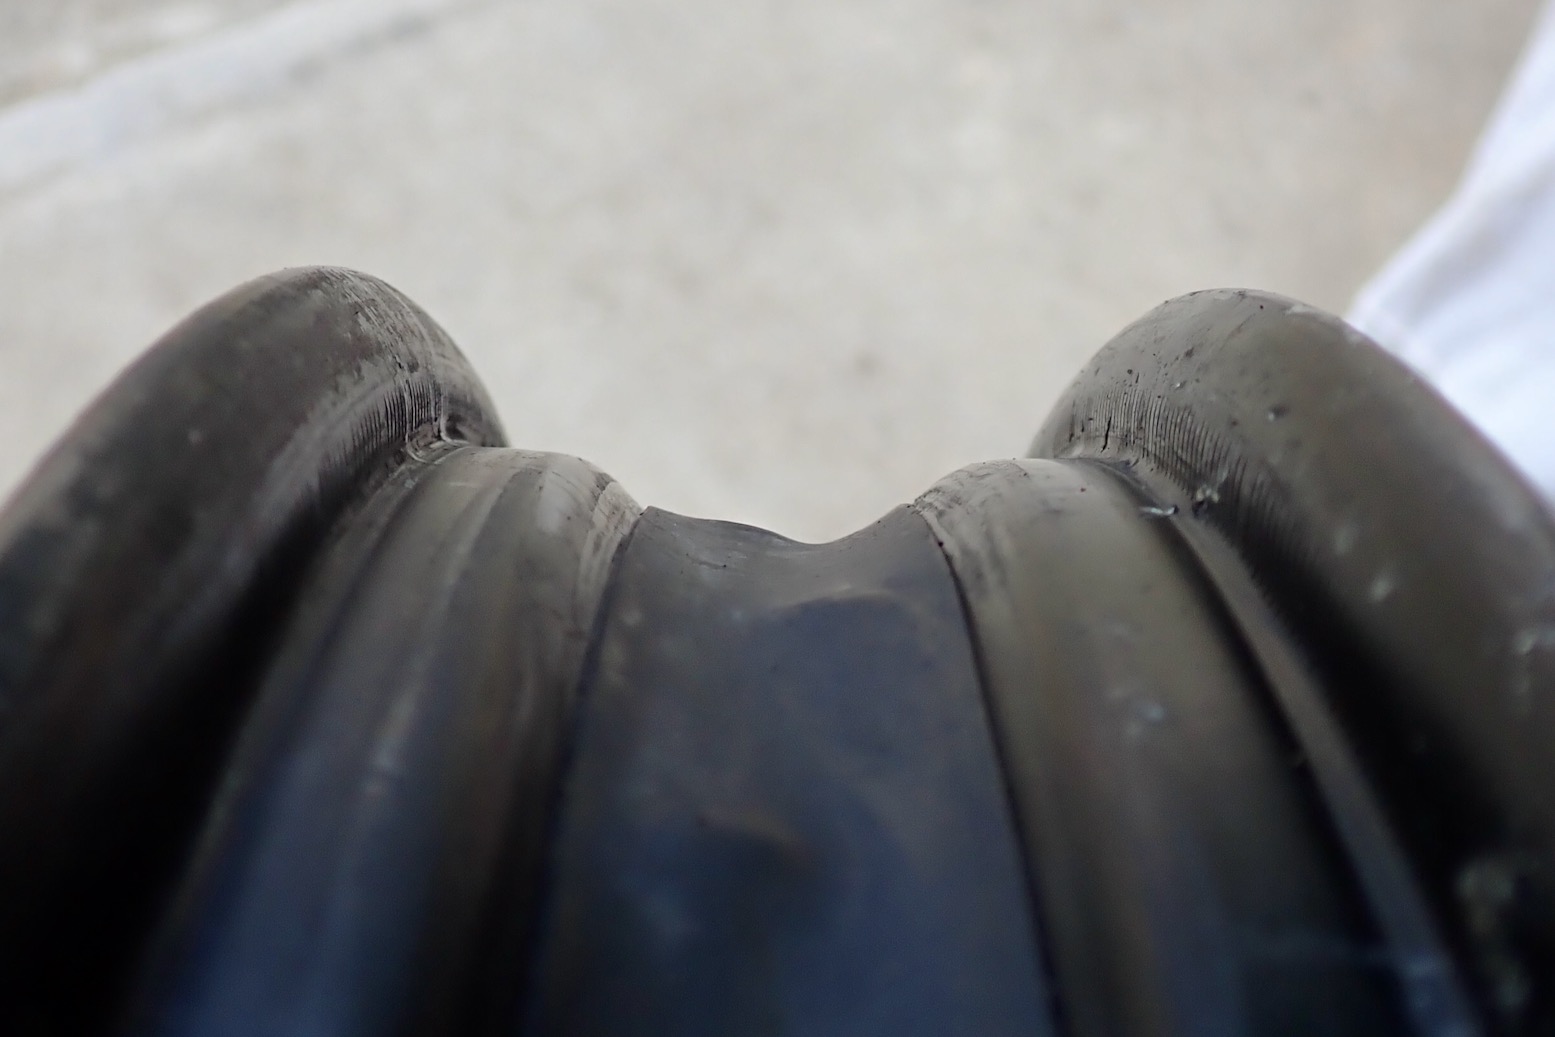
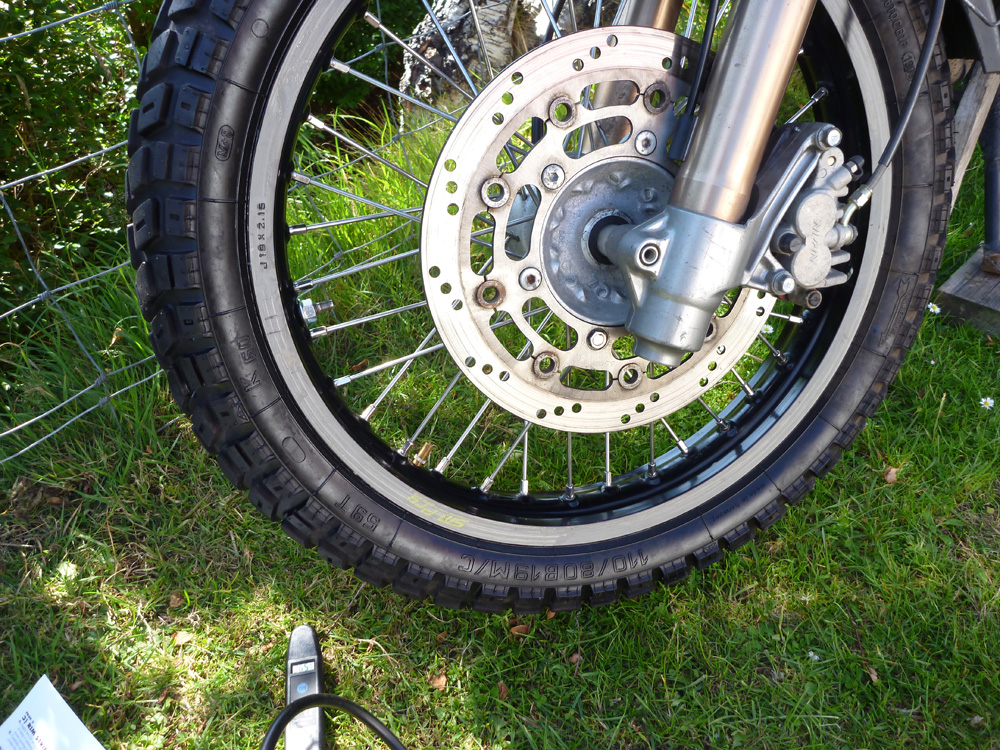
When it comes to sealing the rear rim, I was also bummed to see the stock Excel J 18 2.5 rim has no safety lip, in which case I can forget about doing a TL conversion. That’s odd as, like I’ve mentioned over the years, I recall actually grinding the safety lip off a rear DID rim on my tubed XT600 way back in 1985 to make desert tube repairs easier. I assumed such safety rims had become defaults on all spoke/tube rim as they help a tyre stay on the rim when it loses pressure.

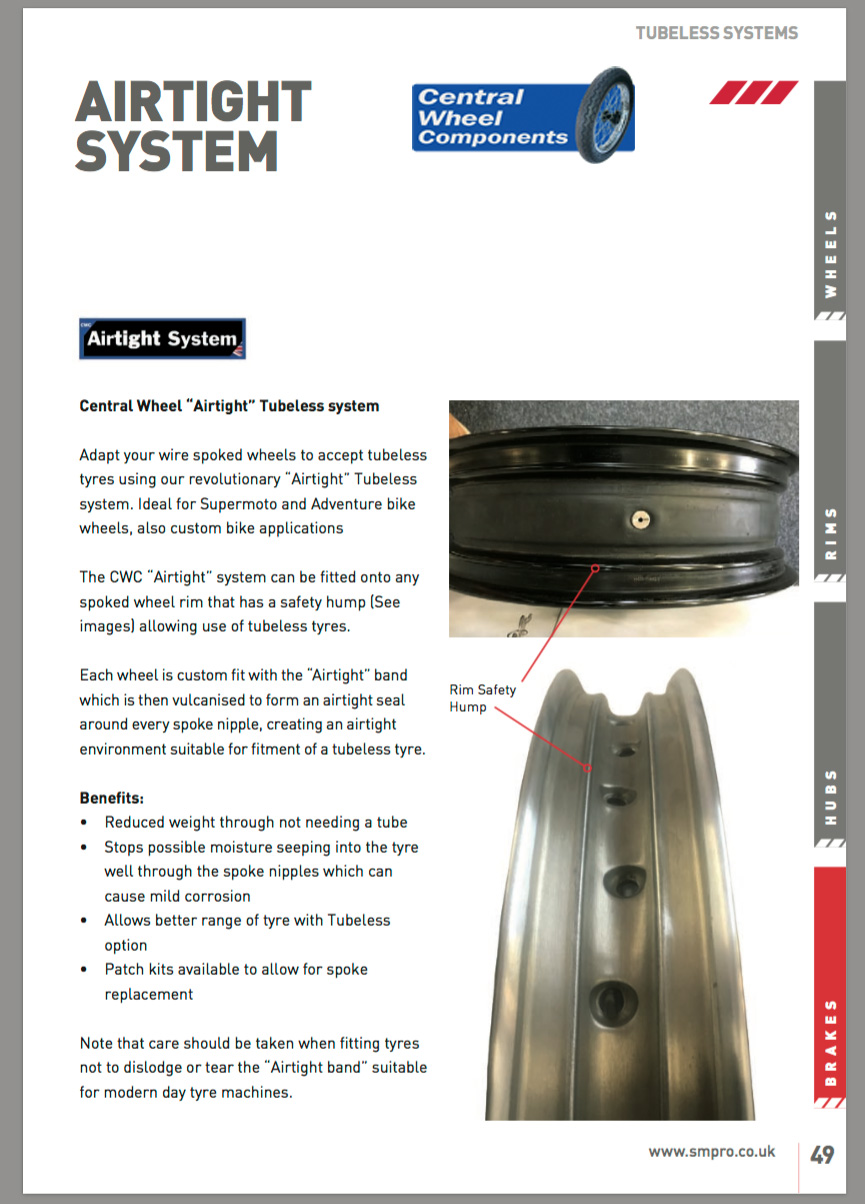
This means I’ll have to lace a new lipped MT rim onto the hub to get TL – a couple of weeks and a couple of hundred quid. And while I’m at it I may as well get professional CWC Airtight sealing (left; as on my Himalayan) instead of my labour intensive DIY efforts, as on the Africa Twin. Or I could just live with inner tubes. On a travel bike (as opposed to a weekend trail bike) not sure I can go back to all that potential aggro and added toolage.

I also noticed there’s no cush drive on the 300L. It makes me think this is a dirt bike rim from Honda’s MX bikes. A part number check would reveal all – maybe later or you can do it for me.
Cush drives add weight and expense and absorb a little power, but reduce drivetrain lash to the transmission including the chain.

The thing is, at 28hp and however few torques, a 300L hasn’t got enough grunt to strain the components that much, so I can live with no cush. Apparently my old XR650L was the same but I never even noticed. A mate who’s currently importing one has, and dug up various rubber-insert sprockets (left) to reduce the lash from the much torquier 650 thumper. And in fact the 250L I had years ago didn’t have cush.

So net result of today’s puncture:

  • it pays to verify you inner tube’s age (if you can) as well as old tyres (all have date indexes). Or just get new tubes.
  • If I want a tubeless rear I’m going to have to get a new wheel built up on an MT rim, in which case I may as well have a proper sealing job done like CWC Airtight™.
  • OMG there is no cush drive ;-0
  • Is it time to consider mousses? A light slow bike like a 300L is suited to them, but afaik they come rated at no more than 15psi which to me is on the low side for road riding, even at only 60mph.

Fitting Tubliss liners (GS500R; Himalayan)

Updated 2020
Tubeless Conversion Index Page
GS500R Index Page Himalayan Index Page

Tubliss Generation 2 is now widely available in 18, 19 and 21-inch sizes for WM3 (2.15”) or slimmer rims. I fitted one to the front of my Himalayan

himtublie

My Suzuki GS-R ran 19-inch SM Pros and the plan was always to have them running tubeless, hopefully doing a more successful job than I did on my Tenere’s wheels a couple of years earlier. On that bike the sealed-up rear never missed a beat, but the 21-inch front leaked off-road and as I failed to monitor it, it got soft enough to ding a rim on a gnarly Moroccan climb and with that lose all pressure.
Back then I wanted to try Tubliss but they weren’t sold in Tenere sizes in the UK. I picked some up in the US for around £55 each. The vid below explains it all very loudly. Man that guy can talk!

I was expecting a hard time fitting them in my Heidenau K60s – it’s a stiff tyre and you’d imagine the bulk or shape of the red plastic core and rim-lock might make tyre mounting even harder. When a sunny afternoon came by, I left the 4000-mile old K60 out against a wall to warm up a bit and then followed the clear instructions carefully. Off with the old Cheng Shin without too much difficulty, clean off the duct tape/rim tape residue and the drill an 11mm hole a few spokes up from the regular valve hole. I then talc’ed the inside of the red liner to slide better against its mini tube, lined up the rim lock clamp/tyre inflation valve and the nearby core inflator valve with the two holes in the rim (pic above; the instructions stress this is critical) and then mounted the core onto the rim.

tubli-dual-airHow it works
Tubliss works by using a small but extra thick bicycle-sized inner tube at very high pressure to expand the red casing onto the tyre’s bead, sealing it against the rim (see image below). By doing so it isolates the tyre’s main air chamber from the spoke nipples where air would otherwise slowly leak out.
This can be an odd concept to get your head around; a high-pressure mini-tube is still used to press and seal the tyre bead against the rim, but the tyre chamber itself is effectively tubeless. An additional hole for a rim lock is required so as to pin down the red
casing and completely eliminate tyre slip and valve lean at low pressures (as happens with regular tubes at low psi). Because the thick Tubliss mini tube isn’t anywhere near the flexing tyre carcass and is inside the red casing, it would take an exceedingly long and sharp spike to puncture it. Plus everything remains cooler; the benefit of all tubeless tyres. You can still tune spokes, something not be so easily done with other spoke nipple-sealing methods. The rim lock uses a ‘hollow bolt’ which is also a valve to inflate the tyre chamber to a regular pressure. The original valve hole is used to inflate the red casing tube to 100 psi.

tubly

The core went onto the rim easily. Just follow normal bike tyre mounting techniques: make sure the red core is right down in the well of the rim as you lever the other end on.
Usually I use diluted washing-up liquid but that tends to dry up quickly. This time I used more slimy 303 Protectorant; it’s the same as Armor All that Tubliss recommend. Use lots so it’s lubed forever inside. The core slipped on with no levers. WD40 will do, if stuck.

Next came the tyre. This was going to be hard, or so I thought. I double checked I had the direction arrow in the right orientation, then pushed the wheel down into the tyre using the folded metal plate which Tubliss supply, rim-lock down. Following the instructions closely (and having changed a few tyres in my time), the plate did genuinely help the core-fitted wheel slide into the tyre with less effort than normal. And if you kept pushing down as they advise, with a bit of multi-armed Vishnu-ing I got the wheel inside the tyre walls.

The rest – levering the tyre bead back onto the rim – was like regular tyre mounting: minimal lever force where possible combined with maximum lube, while always making sure the tyre bead opposite the levers is being kicked and crammed into the tyre’s well (central dip) so as to free up vital slack when levering to reduce the effort which is when mistakes are made and tubes get pinched.
Like they say on the leaflet, lube is the key to this. In the end the last bit of tyre went on without the final lever. This used Heidi was not so hard to mount after all. The same-sized new K60 for the back was a bit more effort shoving inside the wheel, even with the Tubliss plate, but with slack and lube, it got there.

tbs-front

With all this done the next step was to see if the system held air once everything’s pumped up. There’s no reason to think the mini tube got pinched, protected as it is inside the red plastic core. The key is the red liner sealing against the bead of the tyre to keep the tyre at the right pressure. You need to put 100 psi into the mini tube to make sure it seals: You want to check your average mini compressor will have the power to do that, but because the volume is tiny it may be easier than you think – it’s not like pumping up a full sized moto tyre to 100 psi.

bestguage

Testing, testing
You may read complaints that fitting Tubliss doesn’t work first time round or doesn’t work at all – the tyre goes down – but so far overnight both tyres have held their pressure. Checking the tyre and core pressures after 10 days, I found both cores down by about 10%. I think that’s acceptable and can’t be sure everything was at the right or equal pressures to start with so I topped it all up to 100 psi and 33 for the tyres and will check again in a while. Tubliss do say to check pressures before each ride. Unfortunately, checking the high pressure cores blew the brains out of my digital tyre gauge (right) and those metal sliding rod types only go up to 50 psi. I have a bulky Cycle Pump gauge (left) that’s sat around for years and whose moment may have come. As mentioned, a mini-compressor able to deliver 100 psi without fatal results will be needed. Not sure my Cycle Pump (below) or anything like it can manage – we’ll see on the Himalayan. Anyway, there are always roadside garages.

tltwit

Should you have a flat on the road it’s only the tyre chamber that loses pressure, not the small sealing tube of course. Once quickly plugged (left), the tyre can be reinflated with a regular bike compressor to normal road pressures.
Initially Tubliss didn’t claim to be suited to road riding let alone overlanding, but that seems to be changing as the system has proved itself. What is important is making sure the tyre sealing tube is kept at around 100psi. That may take more frequent checking than you’re used to, at least until you get a feel for the rate of loss, if any. On the road and out in the world a reliable mini-compressor is a vital tool.

cyclepump
tubeless-slimer

A mate with Tubliss in his TTR has had no probs, including air freighting it around the world. He’s reminded me that, as the video above mentions, injecting sealant like Slime/Oko/Ultraseal (right) is a good idea and over time helps seal the tyre right up. I did the same to the Tenere when I sealed those wheels (right) and if nothing else it helped highlight leaks oozing out of the front.

More impressions to come with the Himalayan.

gsr-gsr