The GS-R has now shed it’s used road tyres and taken on a pair of 110/80 B 19Heidenau K60, the tyres that impressed me on the Morocco ride I took in March on the 650GS. At the same time I fitted Tubliss liners. I’m not completely set on these until they’ve proved they’ll hold air reliably – that will take a few days.
At the same time I inspected the front sprocket against a new one and found them near identical so will leave the current chain – age unknown – on the bike, even with the new back sprocket. In my experience o-ring chains last ages but then go quickly as the seals begin to fail. If I can catch the chain just before that, I might get more miles out of the sprox.
I also fitted a pair of taller, wider ‘flat track‘ handlebars, the sort of bars American street scramblers ran in the 60s and 70s, and the same price as a set of bar risers. What a great pair of bars, just as I knew they would be. The even looked good just lying on the floor.
Fitting was of course far from simple. Oh no. One crosshead on the LHS switch cluster turned into plastic at the sight of a screwdriver, cables needed re-routing rond the back of the triple clamp, but luckily the switch cluster wires – potentially the most complicated to modify – had plenty of slack tucked inside the headlamp. Anyway, much pissing about, dropped nuts, shorts cuts costing hours, but I got some bars, high and wide. Took the GS out for a lap and it feels so much more comfortable and confidence inspiring – just like a trail bike in fact. The front Heidi is worn in and normal, but I’m not keen about having to nurse an edgy back tyre while the new K60 on the back wears in. Without the weight, speed, power and breaking of the F650, it will take hundreds of miles, but I must say, so far it feels quite normal. Perhaps it was the bigger ‘Catspaw’ type K60 for bigger bikes that for a while felt odd on the BMW.
Anyway, here’s a cool film. Dave Aldana talking but shot in the UK of all places.
Tubliss Generation 2 is now widely available in 18, 19 and 21-inch sizes for WM3 (2.15”) or slimmer rims. I fitted one to the front of my Himalayan
My Suzuki GS-R ran 19-inch SM Pros and the plan was always to have them running tubeless, hopefully doing a more successful job than I did on my Tenere’s wheels a couple of years earlier. On that bike the sealed-up rear never missed a beat, but the 21-inch front leaked off-road and as I failed to monitor it, it got soft enough to ding a rim on a gnarly Moroccan climb and with that lose all pressure.
Back then I wanted to try Tubliss but they weren’t sold in Tenere sizes in the UK. I picked some up in the US for around £55 each. The vid below explains it all very loudly. Man that guy can talk!
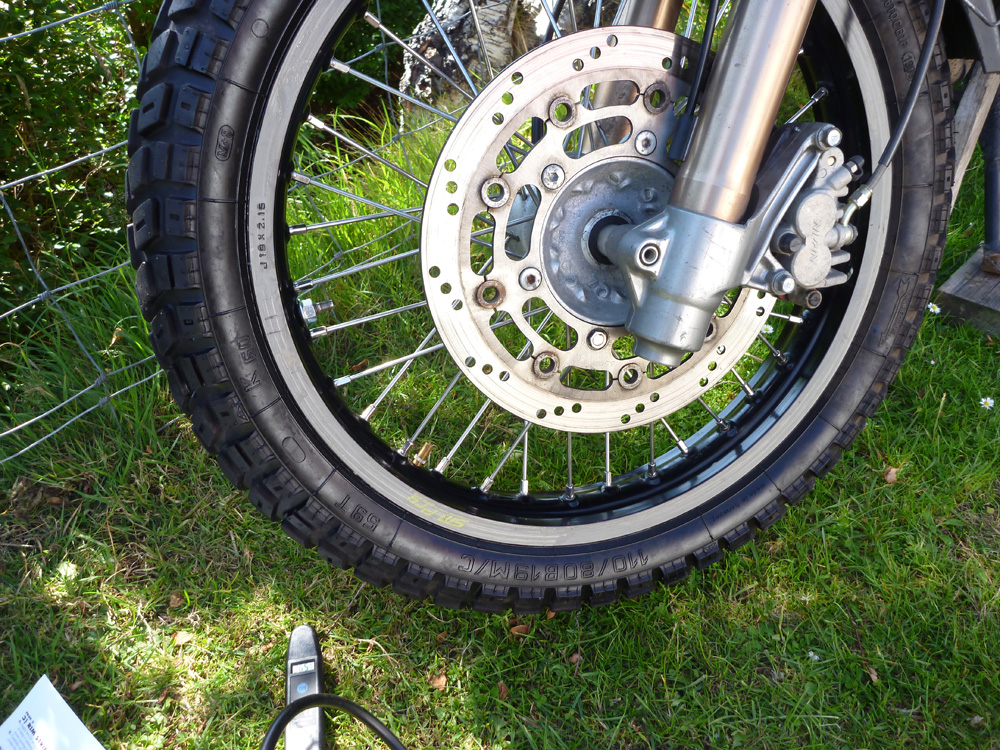
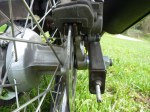
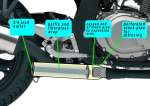
I was expecting a hard time fitting them in my Heidenau K60s – it’s a stiff tyre and you’d imagine the bulk or shape of the red plastic core and rim-lock might make tyre mounting even harder. When a sunny afternoon came by, I left the 4000-mile old K60 out against a wall to warm up a bit and then followed the clear instructions carefully. Off with the old Cheng Shin without too much difficulty, clean off the duct tape/rim tape residue and the drill an 11mm hole a few spokes up from the regular valve hole. I then talc’ed the inside of the red liner to slide better against its mini tube, lined up the rim lock clamp/tyre inflation valve and the nearby core inflator valve with the two holes in the rim (pic above; the instructions stress this is critical) and then mounted the core onto the rim.
How it works Tubliss works by using a small but extra thick bicycle-sized inner tube at very high pressure to expand the red casing onto the tyre’s bead, sealing it against the rim (see image below). By doing so it isolates the tyre’s main air chamber from the spoke nipples where air would otherwise slowly leak out.
This can be an odd concept to get your head around; a high-pressure mini-tube is still used to press and seal the tyre bead against the rim, but the tyre chamber itself is effectively tubeless. An additional hole for a rim lock is required so as to pin down the red casing and completely eliminate tyre slip and valve lean at low pressures (as happens with regular tubes at low psi). Because the thick Tubliss mini tube isn’t anywhere near the flexing tyre carcass and is inside the red casing, it would take an exceedingly long and sharp spike to puncture it. Plus everything remains cooler; the benefit of all tubeless tyres. You can still tune spokes, something not be so easily done with other spoke nipple-sealing methods. The rim lock uses a ‘hollow bolt’ which is also a valve to inflate the tyre chamber to a regular pressure. The original valve hole is used to inflate the red casing tube to 100 psi.
The core went onto the rim easily. Just follow normal bike tyre mounting techniques: make sure the red core is right down in the well of the rim as you lever the other end on. Usually I use diluted washing-up liquid but that tends to dry up quickly. This time I used more slimy 303 Protectorant; it’s the same as Armor All that Tubliss recommend. Use lots so it’s lubed forever inside. The core slipped on with no levers. WD40 will do, if stuck.
Next came the tyre. This was going to be hard, or so I thought. I double checked I had the direction arrow in the right orientation, then pushed the wheel down into the tyre using the folded metal plate which Tubliss supply, rim-lock down. Following the instructions closely (and having changed a few tyres in my time), the plate did genuinely help the core-fitted wheel slide into the tyre with less effort than normal. And if you kept pushing down as they advise, with a bit of multi-armed Vishnu-ing I got the wheel inside the tyre walls.
The rest – levering the tyre bead back onto the rim – was like regular tyre mounting: minimal lever force where possible combined with maximum lube, while always making sure the tyre bead opposite the levers is being kicked and crammed into the tyre’s well (central dip) so as to free up vital slack when levering to reduce the effort which is when mistakes are made and tubes get pinched. Like they say on the leaflet, lube is the key to this. In the end the last bit of tyre went on without the final lever. This used Heidi was not so hard to mount after all. The same-sized new K60 for the back was a bit more effort shoving inside the wheel, even with the Tubliss plate, but with slack and lube, it got there.
With all this done the next step was to see if the system held air once everything’s pumped up. There’s no reason to think the mini tube got pinched, protected as it is inside the red plastic core. The key is the red liner sealing against the bead of the tyre to keep the tyre at the right pressure. You need to put 100 psi into the mini tube to make sure it seals: You want to check your average mini compressor will have the power to do that, but because the volume is tiny it may be easier than you think – it’s not like pumping up a full sized moto tyre to 100 psi.
Testing, testing
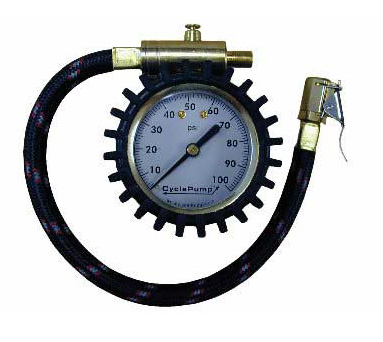
You may read complaints that fitting Tubliss doesn’t work first time round or doesn’t work at all – the tyre goes down – but so far overnight both tyres have held their pressure. Checking the tyre and core pressures after 10 days, I found both cores down by about 10%. I think that’s acceptable and can’t be sure everything was at the right or equal pressures to start with so I topped it all up to 100 psi and 33 for the tyres and will check again in a while. Tubliss do say to check pressures before each ride. Unfortunately, checking the high pressure cores blew the brains out of my digital tyre gauge (right) and those metal sliding rod types only go up to 50 psi. I have a bulky Cycle Pump gauge (left) that’s sat around for years and whose moment may have come. As mentioned, a mini-compressor able to deliver 100 psi without fatal results will be needed. Not sure my Cycle Pump (below) or anything like it can manage – we’ll see on the Himalayan. Anyway, there are always roadside garages.
Should you have a flat on the road it’s only the tyre chamber that loses pressure, not the small sealing tube of course. Once quickly plugged (left), the tyre can be reinflated with a regular bike compressor to normal road pressures.
Initially Tubliss didn’t claim to be suited to road riding let alone overlanding, but that seems to be changing as the system has proved itself. What is important is making sure the tyre sealing tube is kept at around 100psi. That may take more frequent checking than you’re used to, at least until you get a feel for the rate of loss, if any. On the road and out in the world a reliable mini-compressor is a vital tool.
A mate with Tubliss in his TTR has had no probs, including air freighting it around the world. He’s reminded me that, as the video above mentions, injecting sealant like Slime/Oko/Ultraseal (right) is a good idea and over time helps seal the tyre right up. I did the same to the Tenere when I sealed those wheels (right) and if nothing else it helped highlight leaks oozing out of the front.
Originally written 2012, overhauled 2020 There are 24 pages on luggage and racks in AMH8 See also MYO racks on this sticky HUBB thread
Off The Road rack; not too far backHorribly wide combo of throwovers and rack
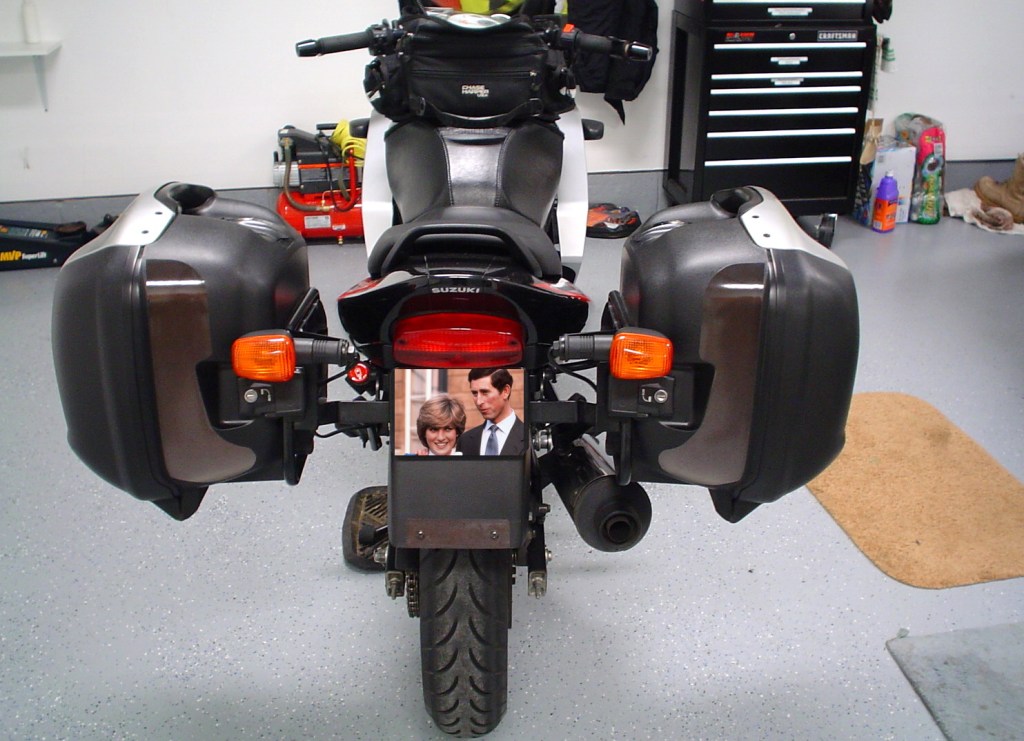
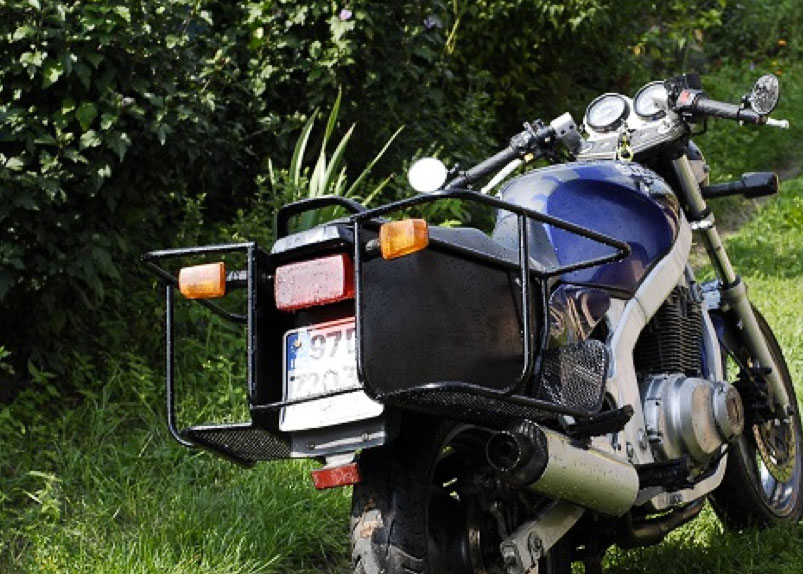
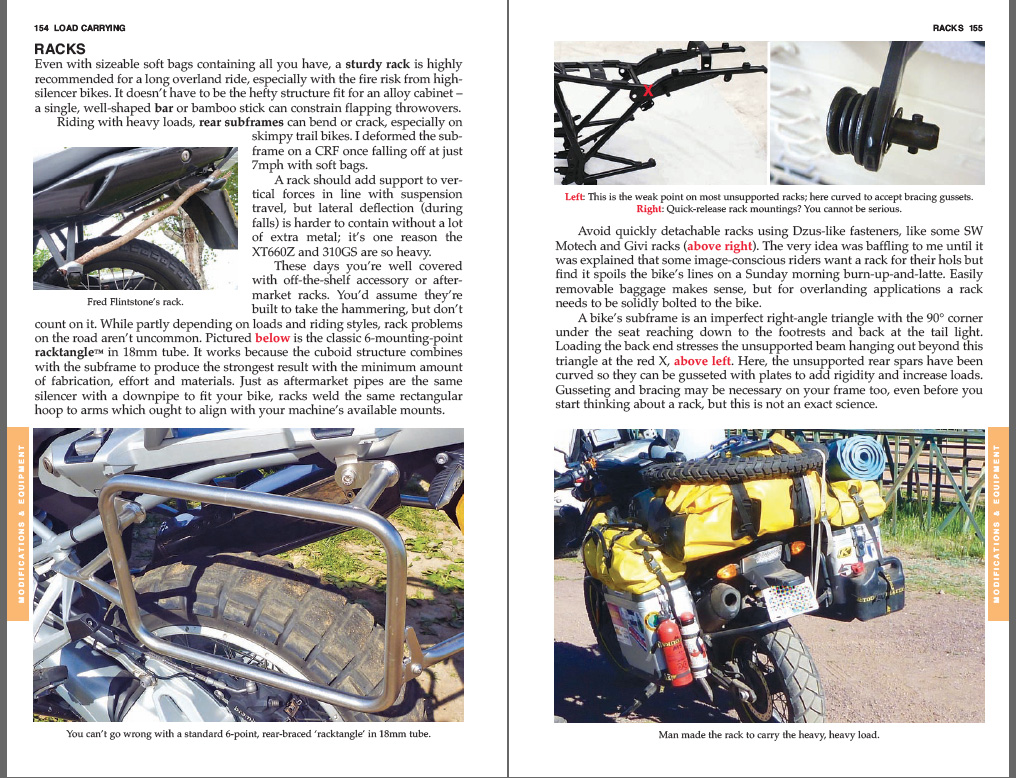
The problem with off the shelf pannier racks like the classic ‘racktangle’, above left and right, is that they:
• may not make them for your bike • may cost more than you’d like • are too wide • are often too far back
Those are some of the reasons I made my own rack for my first travel bike, an XT 500 (below), way back in 1982. It was rubbish but it did the job.
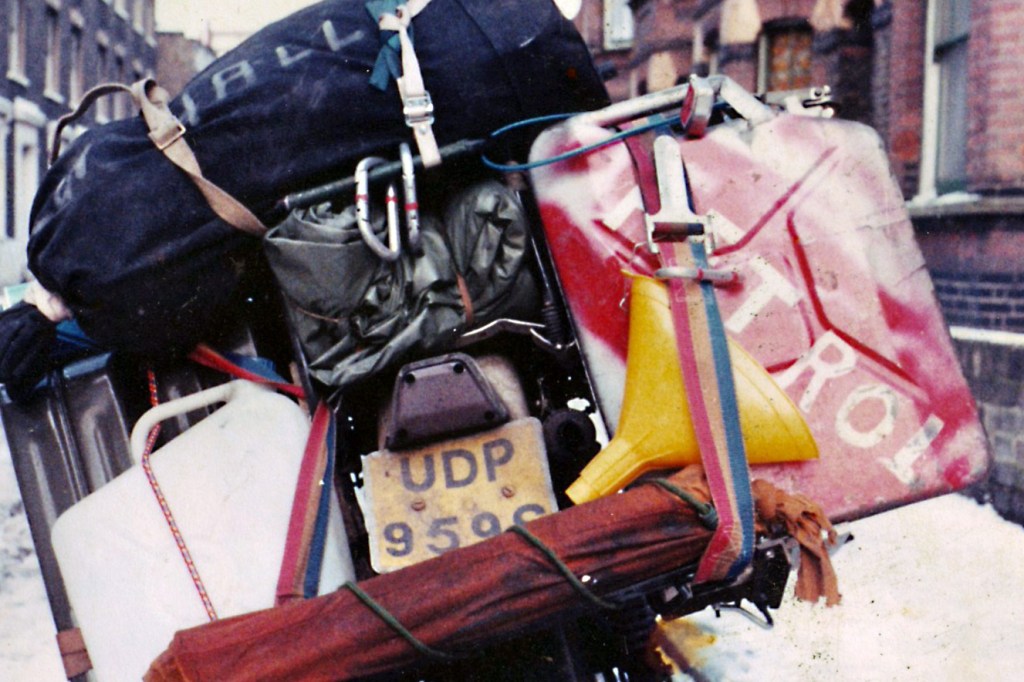
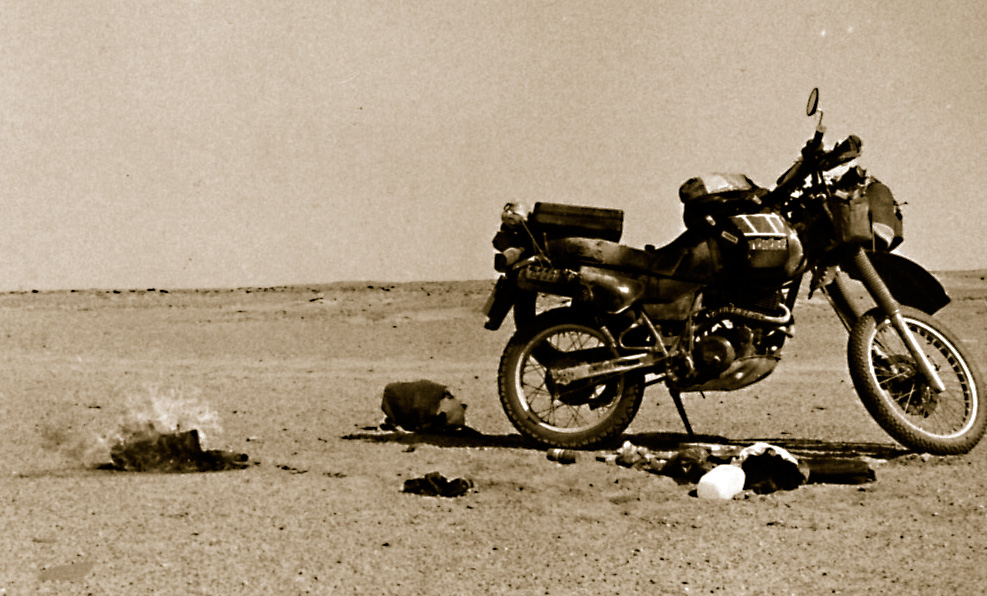
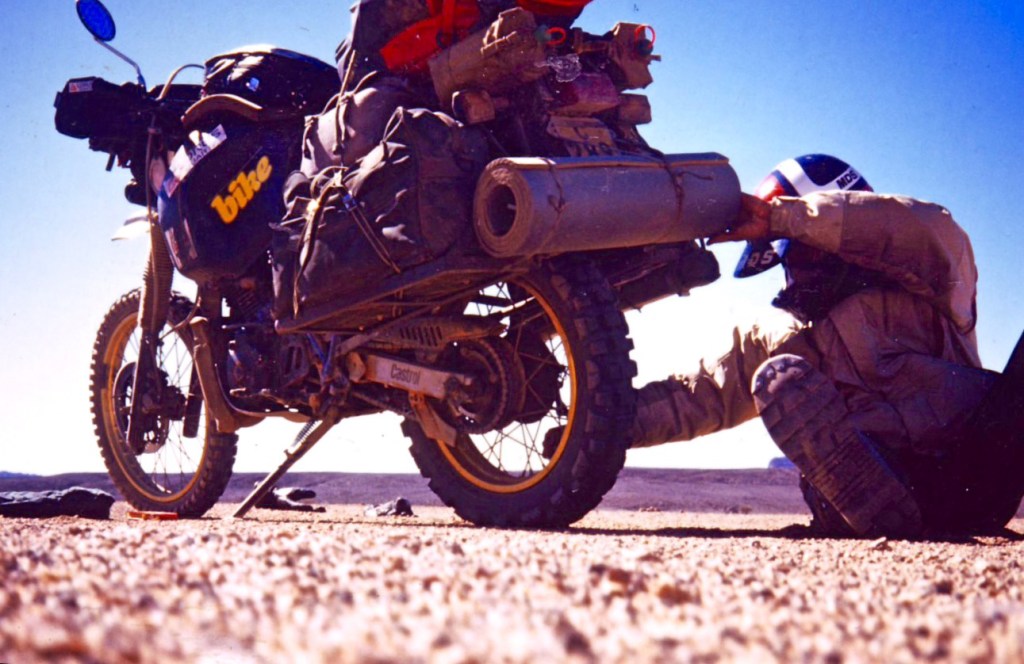
On the next couple of trips I used no rack. People do manage – usually on smaller bikes with lighter loads – but for overland travel, classic, strap-over throwovers are a throwback to a twin-shock era. The problem is usually with the high pipe of a trail bike. The bag presses on the panel which melts and – on a hot day on the south side of the Sahara (below) – the plastic catches fire soon followed by the ex-army canvas panniers and your favourite pyjamas.
Small baggage fire near Arlit, Niger.
What is wanted is a rear rack that attaches to the subframe and other key points as low, forward and close to the bike as possible so the mass follows suit, while allowing for those instinctive corrective dabs when losing control, as well as paddling in soft terrain.
I first saw a ventura rack in the early 1990s on the Tanami Track in northern Australia (left) and was so staggered that dirt touring bikes (admittedly, possibly two-up?) could be loaded like this that that I put a picture in the first AMHandbook and nearly every edition since. Ventura’s idea is that you can reverse the upright bar to point forward to load your sack forward to improve ‘weight distribution’. Tell me about it.
In a nutshell the mass wants to be as close to the bike’s supposed centre of gravity as possible which, with a load and rider aboard, is in the region of the injectors (right). ‘Mass centralisation’ became a buzz word with Honda bike design a few years ago, and was a concept applied by bike makers like Buell.
It makes sense, especially on a loaded motorcycle traversing less than perfect roads. The more central the mass the more predictably the overland-loaded machine responds to the forces of its own inertia as the suspension moves the sprung weight up and down over rough terrain. That adds up to better control, no freaky handling vagaries like tank-slappers, smoother riding and so less fatigue. All up, the key to surviving a long day on the road in the AM Zone. Above left: mass decentralisation. Think of the leverage!
Basket rackSheep rack
Platform racks
As mentioned, when it came to making a rack for my XT500, the idea was fairly obvious: make platforms (left). Even though I’d been despatching for a few years with throwovers or more commonly just a big top box, when it came to carrying a big load to the desert, a low platform down on the sides made intuitive sense.
The execution using Dexion shelving was poor, although that slack-rack did carry the load to the desert and back – albeit with a radically reduced once I came to my senses. It probably survived because there was so much jelly-like flex it was unable to summon up the tension to snap outright. The mld steel ‘L’ platform element was bolted onto a Craven rack – the ‘Jesse Luggage’ of its day, with plywood planks screwed on and sharp corners trimmed
Platform racks have been around for years, among other places used on army BSAs in the 50s and 60s (left). I’ve always liked the principle but these tinny, hinged trays were designed to take a specific panniers or to swivel up out of the way when not in use. It’s a logical and effective form of support. Within limits you can securely load anything on there; box, bag, sickly calf, bulging sack, except the sliding support arms get in the way of bigger loads.
Same goes for the solid (unhinging) version, left (notice the nifty mini inner platforms too). A secure placement for alloy boxes which would need next to nothing to stay in place. I had similar racks made for the Sahara, but using soft bags (below), but you can’t help worrying about that hard front edge on your lower legs. This never occurred to me until Desert Riders when we added big metal boxes to remind us how they might hurt.
Full-width shelf rack; perceived risk of shin snapping when off road
When using a rigid container like an alloy box there’s no need to have a full-width shelf; an inch-wide ledge will support a metal box, as it did on our Desert Riders XRL racks (below). The welding was superb but that rack was over-built, slapping metal over metal in search of strength but actually blinding the function by adding excessive weight. We did carry very heavy loads at times (left), but two of the XRLs cracked their subframes.
Way too much metal on this rack
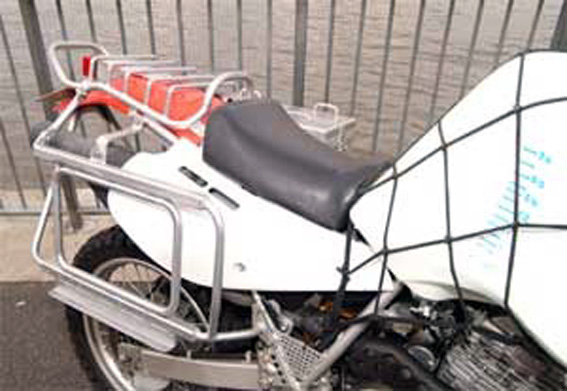
The reason platforms are not used these days is that sticking out looks inelegant, injury inducing and damage-prone in a fall. But when overlanding, your gear is on there all the time and so a fixed platform rack is no different from the angular edge of an ally box, except when it comes to removing baggage and wheeling a bike indoors overnight. Below, Sean F’s very neat fixed platform rack addressing some of the issues for his soft-bagged DR650. if you get platform racks, this would be an idea to copy.
I still like the idea a platform rack with a hinged element so as to carry anything that fits while being slim when unloaded. The problem is without using the BSA sliding struts requires some sort of unsupported platform or cantilever. As always, you need to visualise how it will respond to slides down the road or hours of corrugations with maximum loads
There are various ways of arranging this cantilever, but the only one I’ve seen was on these Chinese 125s (left) pictured in Angola. If you look closely you’ll see the pivoting platform swings out to rest on a shallow ‘L’ bar. Providing it’s chunky enough, the leverage on the pivot and load on the bar ought to be met. A wider ‘L’ rest bar means less stress but you don’t want the fixed part being too wide.
A search on Google Images most probably identified that ‘Angolan’ rack (right) as one produced by none other than The Chongqing Meihuan Machine Manufacturing Company. With a closer look you can see the pivot/support works by lowering on a spring to rest horizontally on the pillion footplate. Note the sub-racklets at the back, too.
And here is another hinged plat-rack made for this lightweight utility bike by former Italian custom bike maker, Borile. Like the Angolan rack, it’s a bit on the wide side for overlanding duties rather than transporting your goods to market, but the principle is the same.
There loads more on racks and baggage in the book.
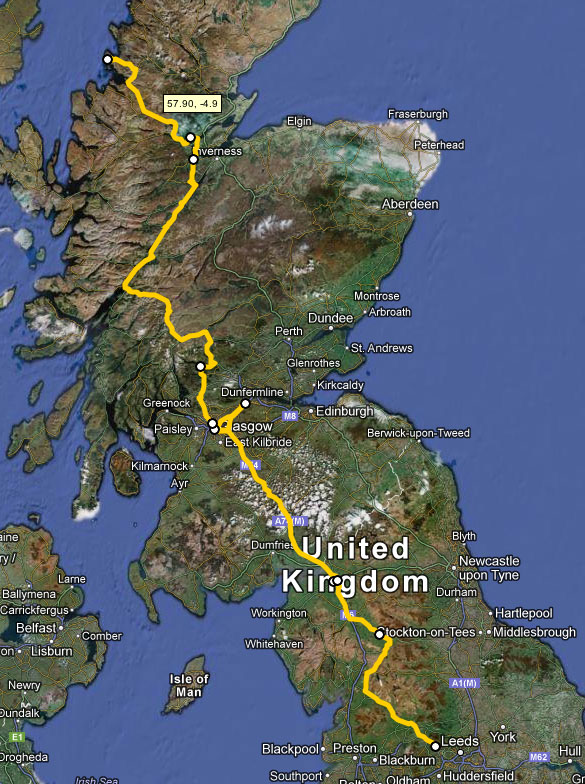
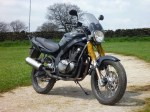
A little more than three years after I bought it, my GS-R got wheeled out of a Derbyshire hilltop hangar to prepare for it’s maiden flight – a run of a few hundred miles to far northern Scotland where development is set to continue.
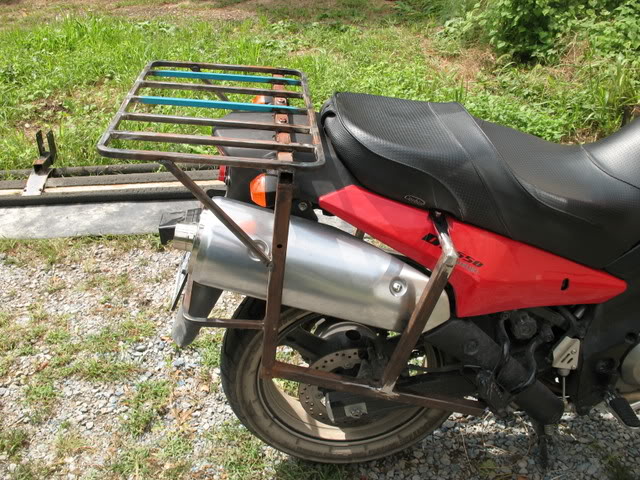
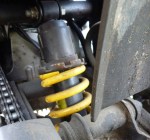
Since my last brief ride round the lanes, the suspension got lowered a bit, the stands trimmed to fit and the pipe levelled off to make room for a rack and low/forward luggage, when that day comes.
As I pulled on my clobber Matt and Andy wired in a cig socket (left) to run a satnav, and with that done I set off into the rain to see how far I’d get that night.
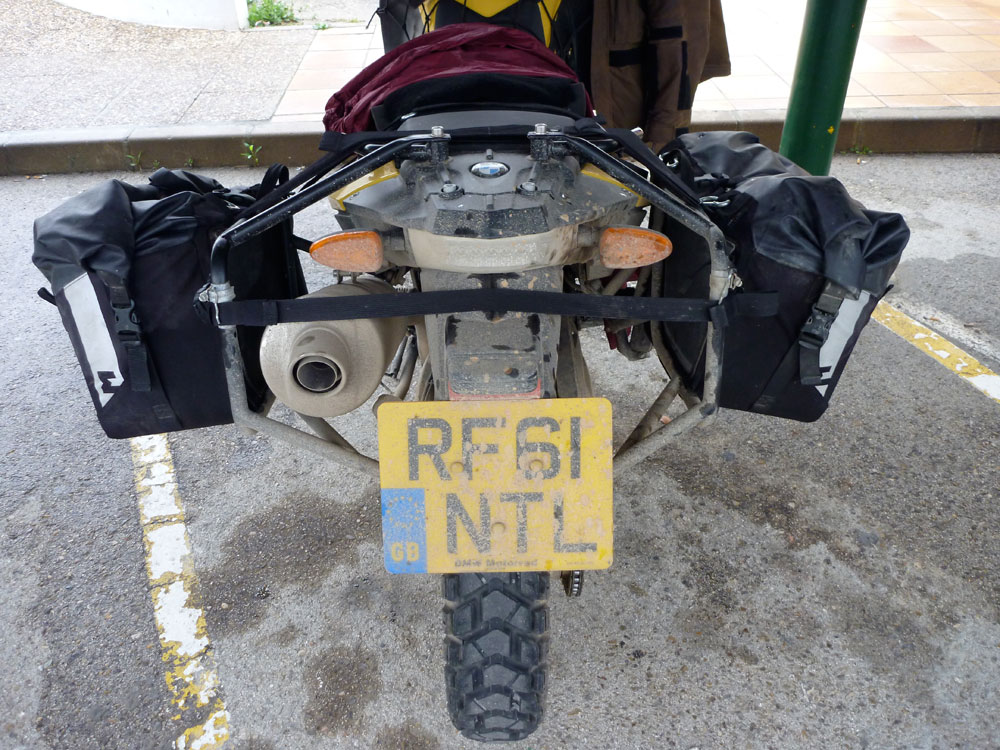
There were small problems of course. The only way to securely load my gear was to pile most of it on the back – some 20kg right off the back; anathema to good loading and balanced handling. The GS is especially bad as it has a short back; I sit only just in front of the back axle. If I took my hands off the bars they flapped like a flag in the breeze. Then there was the limp back brake. As mentioned, I suspect it’s down to a too large GS master cylinder working the DR650 calliper so the ‘hydraulic advantage’ is cocked up (well explained here). Even extreme pedal pressure won’t lock the wheel. And besides that, the bike was long unused and untested – the new front end, wheels, the chain run and so on. With a lot of scope for something to go wrong, I initially kept off the motorways to simplify a recovery or roadside repair.
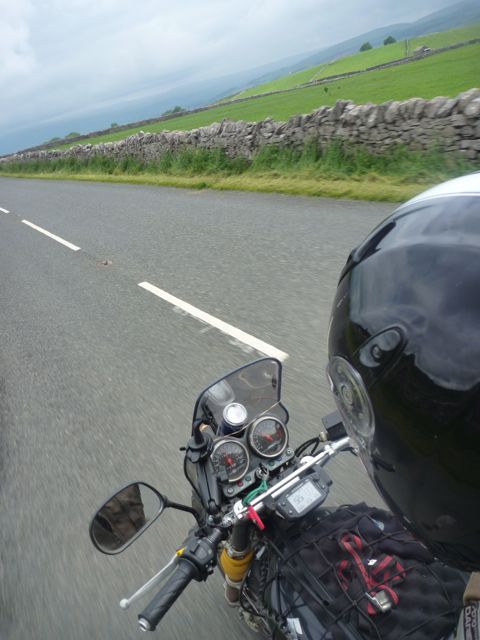
I splashed my way through the grim industrial conurbations between Sheffield and Leeds and spent the night at a mate’s in Shipley, trying to revive my Garmin Nuvi which either got wet or died of its own accord. Next day promised to be brighter before the next apocalyptic weather event (due to the displaced jet stream) bore down onto the UK. So I set off early to cross the Pennines I knew well as a walker, scooting up the A65 across the Yorkshire Dales before taking the A683 moorland backroad (left) to Kirkby Stephen for a snack in the Market Square (right). I knew this bench well too, having last sat on it at the end of a long day’s walk from Shap on the Coast to Coast path. The sun was out, but that was to be the last I’d see of it for another 10 hours.
I followed the A66 onto the M6 where the Suzuki held its own, stable enough up to around 80. I’d heard Halfords were doing specials on satnavs, but in the Carlisle branch there were no worthwhile deals. However, filling up gave here me a nice surprise: 176 miles on just 11.1 litres. That’s 25.35 kpl or 71.5 mpg (nearly 60US) – as good as the modern efi BMW I rode last March at about the same speeds. Not bad at all. With the GS’s 20-litre tank that’s 500 clicks or 300 miles to a tank. The rest of the ride got occasionally faster and fuel economy dipped by around 10%.
The weather was supposed to improve as I got further north but they got that wrong, and then I made a right mess of getting across Glasgow. I should have gone under and up the left side for Dumbarton and Loch Lomond, but with only the compass on the Voyager and not enough signs, I ploughed on northward and after an interlude in some suburbs, went back in and up on the A81 signed to Loch Lomond – but the wrong side.
Still, there was more daylight than I had energy to keep riding, so I stayed on the A81 over Dukes Pass (left). ‘It’s a bikers’ road’ said the green-haired girl at the servo in Aberfoyle – but not in the rain with a balcony hanging off the back of your GS5. Like everywhere else, she had no map for me but said turn left at Callander, by which time I was back on roads I knew; the way to Glencoe and the Highlands.
Five pm. Nine hours on the road, I should have been starving and wilting, but was feeling OK. Fish and chips is one of the most over-rated Brit dishes, but I tell you what, a haddock supper at the Real Food Cafe in Tyndrum with their home-made tartare sauce might be a bit skimpy and pricey, but was just about the best I’ve ever eaten.
From here it was about another 200 miles – probably four hours with another fuel and snack break. Up over lonely Rannoch Moor, a tempting nod towards the cosy Kingshouse Hotel and down through the famous valley of Glencoe (right). In and out of Fort William – Scotland’s ugly but functional outdoor adventure capital, and then a route I’d not done for 30 years, up the side of Loch Ness.
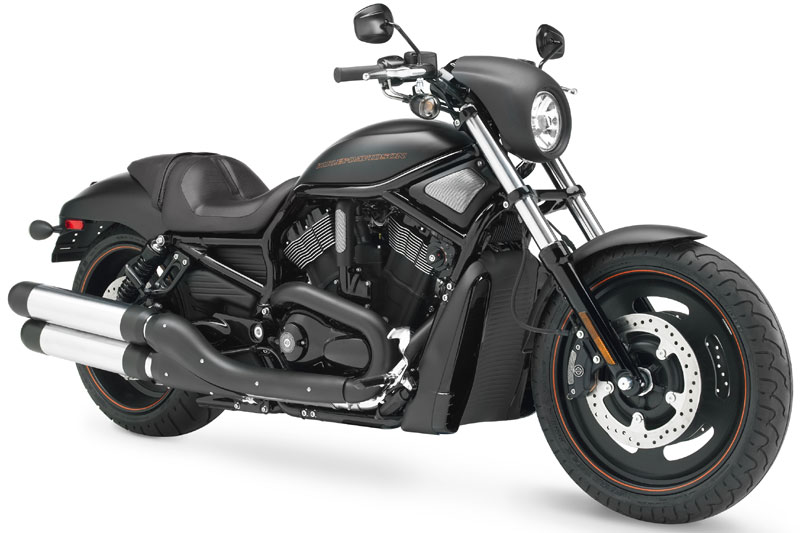
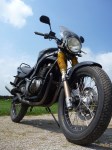
By now roads were drying out and the ill-balanced GS and I had melded into one amorphous lump. You know that feeling at the end of a long day’s immersion on a bike; you’re shagged out but riding intuitively while the bike itself is warmed through and on song. But you’re not a machine and eventually you’ll get too tired to concentrate, so I pulled into a village servo for a chocolate injection and took a quick sit on a German bloke’s knee-high Harley Night Rod (top left) with a back tyre three times wider than mine. On my near empty stomach the Star Bar the trick. I perked up and rode away from the uninspiring east coast farmland, west over the moors and down to the Hebridean shore. A moment’s rest on Ullapool waterfront to wipe the bug-splattered visor against the setting sun, followed by another hour’s ride into the mountains of Assynt and touchdown.
Five hundred and fifty miles or nearly 900km in 14 hours, with about 12 hours of actual riding rarely over 60mph. Nineteen hours of daylight helps of course, but this wasn’t like crossing the Montana prairie. I’ve not ridden anywhere near that far in the UK before, but was surprised to arrive with no single source of discomfort, be it back, butt, neck or knees. That suggests that the GS is pretty comfortable overall, even tensed up riding an unfamiliar bike in wet weather. As on any bike, the over high footrests can be dealt with by stretching the legs forward once in a while, and I plan to fit some flat track bars off an American Bonnie. The screen needs to grow to a useful height, too but must have had some positive effect. And when I think how I suffered on that BMW in March, you got to give full marks to the Suzuki seat.
The DR front end brakes fine too; it’ll be great to have the back doing the same. Most of all I feel the 19-inch front wheel was worthwhile. On a 21-incher the wet bends and higher speeds would have been a little more edgy. As for the skinny back tyre, no moments there (a pretty worn Metz Tourance 110/80 radial marked ‘front’, plus a Chen Shin Hi-Max 110/90 on the actual front). I wonder if that back radial at 36 psi helped the mpg? Either way, I look forward to having the GS shod with new Heidi K60s on Tubliss.
Didn’t have a chance to test the headlight – it’s never fully dark up here at the moment – but I’m sure it’s terrible. And that light is on all the time, even when electric starting which seems dumb. A switch is needed. The indicators and back light are aftermarket LEDs, but some sort of HID will be in order to help light the path. A mate’s recommended the VisionX Solstice for nearly £100.
According to the Trail Tech Voyager’s wheel-sensor based data, the GS’s cable speedo reads 12% over with the 19-inch front wheel on a [21″] DR hub, but the odometre is only 2% over. The Trail Tech packed up towards the end of the ride – it wasn’t charging off the bike (loose at the battery, easily fixed) but while it worked I loved it. Engine temp, air temp, compass, speed and odo – all things I like to know. And it’s has a map page too, though aimed at short range trail riding it can only handle small maps. Looking forward to delving more into this gadget.
At 30-something hp, the GS doesn’t exactly crease tarmac on steep climbs. And it needs to be spun at over 4000 to respond. At 5300 it’s indicting 70 – a true 63mph. I rarely rev it higher through the gears, but that’s still only halfway to the rather far-fetched redline of 11,000 rpm. Compared to other things I’ve ridden there’s not much torque low down in this thing, so I suspect the GS-R would be unresponsive on the dirt. It’s still on the tall side and heavy for that too, plus the pegs as so high the bars would be at knee level when standing, but the suspension isn’t flabby or harsh, and there’s more than enough of it. I do wonder about the strength of the frame for overland travel. I know it’s only a cheap a Suzuki, but it doesn’t look especially robust close up. All the more reason then to keep the load light and low.
What’s it all cost me? The bike was £1500 (five years old and 11,000 miles at the time). The Talon wheels built onto DR hubs were £400. Back shock £40, DR front end £200 by the time I bought a spindle and speedo drive. Other bits £200. I got back a few hundred quid selling the original GS500 front end, wheels, shock and other bits which paid for the labour, so we’re looking at around £2500. Add the new tyres and Tubliss cores for £250 and whatever it will cost to fabricate a rack. Spread over the years that’s not had too much of an impact, and the great thing with the GS5 (less so the DR650) is that parts are dirt cheap. There are chassis on ebay now from £30. Once completed it ought not cost much to run the GS-R.
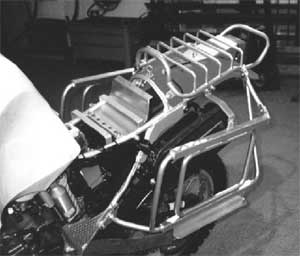
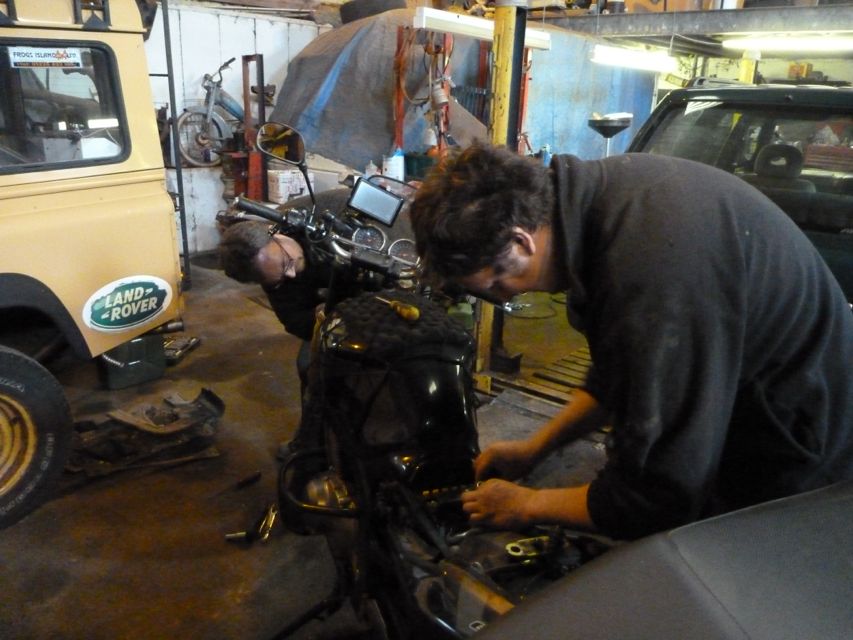
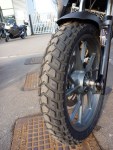
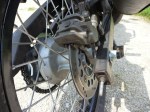
The GS500R Overlander project bike is taking shape, although it’s not quite a fully set jelly. The critical mod: adapting the rear DR650 hub and brake to fit the donor bike’s swing arm and chain run has been completed pretty seamlessly by Matt and his team of farmyard engineers (see pic below).
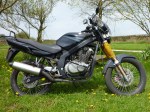
I know what you’re thinking: why does the front tyre look fatter than the back – is it the camera angle? No, it’s just that at the time I didn’t want to waste money on new 19-inch tyres in case the GS turned into what the French would call, unpiège de mort. So I bought used cheapies just to get the thing rolling, first for the front, and a while later another for the back which was not identical. Just as well really, as following my recent Morocco trip I’ve discovered that Heidenau K60s are the ‘bomb’, as the bloke on the right would say.
Half-built impressions of half-baked bike It took a bit of firing up off Matt’s V8 Landrover offroader to get the GS running while whipping out a plug to dry and blowtorch. Even then the GS didn’t seem to run well. Was there a badger nest in the air filter? I could barely pull up the track to the road, and while slipping the clutch mistakenly thought it was because the gearing was way off. As with most things on this build, we took an educated guess here, but at 42/16 the gearing’s actually turned out to be in or around the ball park.
Running down to the village to top up on fuel I thought, jeez, this 500 really is a lot slower than the BMW FGS650 twin I’ve been riding lately. Of course that bike has got at least twice the horsepower and 20 years of development on the G. Heading back, the weight of that extra tenner of unleaded in the tank saw the bike struggle to escape the dale. Something was not right. I pulled over and pulled off the left plug cap – no difference. A ha! as the bloke on the right would say. A little bit of fiddling with the plug cap got past more cobwebs, the second barrel fired up like a Saturn V and suddenly the GS500 was running like… a GS500.
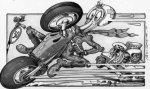
I tore off up the lane like a teenager on his first moped, awestruck at the feeling of raw power. Like Ogri’s beaky-nosed mate Malcolm (left) I was heading for a prang, so it was time to consider braking. The DR650 front end’s disc had been binding a bit as the pads off one scrapped DR got to know the disc rotor from another. A quick check at the fill up proved that the rotor wasn’t getting hot and causing the lame performance. In fact, yanking the lever did see the forks dip hard in response so it can get there if it has to. I guess it’s just not the quality of braking I’d got used to while running the 2012 BMW. The back brake was considerably slacker, partly we suspect because the DR650 calliper which had to be used to clear the Talon spokes, may not compliment the bore of the GS’s master cylinder. So the back brake is mushy and with a long throw. Maybe a bleed or a braided hose will bring it round, or a master cylinder off a DR.
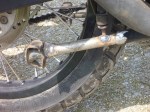
Another problem. The main stand had to be extended by several inches (right) and it now takes an extreme heave to get the bike up; not something I could see myself being able to do with baggage at the and of a tough day on the road. The feet are now clearly too far back from the pivot point for the factory-set leverage. And yet it’s as long as it needs to be, lifting the back a couple of inches off the deck, like a normal stand. Curved stand feet could get round this.
But in fact when I think about it, the GS is a bit too high; I can’t get my feet flat on the ground. With the new suspension and the 19s it’s probably jumped up at least four inches judging by at the extended stand. I really appreciated the BMs low height on the dirt in Morocco and am not looking for masses of clearance on the GS-R. In fact this will be easy to modify: slide the forks up the clamps and back the shock off max preload where it is set now (left). Didn’t get a chance to do all that, as it was a flying visit to the Mattlabs.
Steering feels a bit slow too, but I think the height may have something to do with that. As it is I don’t think the steering of a regular GS500 would get a job in a bread slicing factory. Getting used to the bike and modulating suspension levels may fix all that, and anyway there are new tyres to come. The dirt bars too felt a bit narrow for my liking, or no wider than stock and maybe could do with a lift. Again, easily done. It’s hard to tell if a thinner back tyre greatly affected the steering or ride, not having ridden a bike with back-to-front tyres before. My plan is to run identical-sized tyres front and back. One thing’s for sure, the seat feels great, although as mentioned earlier, the rear-set pegs could stitch the knees up on a long day – and that could be crippling. So maybe some sort of highway peg off the crash bars will work. One good thing, even though it’s tall right now the GS feels pretty light for what it is and a good 20 kilos lighter than the BMW GS650 which was at least 200kg. Might try and weigh it one time.
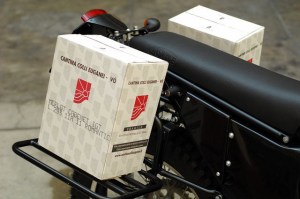
What’s left to do Once the above mods are seen to Matt the Mig or Andy the Arc are going to fabricate a rack, but not just another off-the-shelf, too-far-back, 18-mil loop jobbie like I used on Morocco on the BMW. Something as securely mounted, but with a hinged or somehow retractable platform plus a ‘sheep rack’ platform on the back – always handy. That way the pans can sit rather than hang – a much better arrangement for an overland load, IMHO.
I was going to fab’ some PVC pannier liners with a heat gun and roller, and a mate had offered to sew me up some Cordura outers. I would have kept the Monsoons I used in Morocco if only they had been my ‘Fibonnacci shape’: less wide, more long and bigger, but since writing this Adventure Spec have started selling a ‘Magadan bag‘ with input from Walter Colebatch and based on the Steel Pony Gascoyne he’s used in Russia and a bag whose dimensions I’ve admired myself, if not the canvas fabric. If all the hard work’s been I’m be happy to order me a pair.
One thing I was also thinking of is junking the fat OE pipe and fitting something like this (right). A cheap ‘one-size-fits-all’ mega can be bought of ebay for 30 quid but I’m not 17 anymore and couldn’t bear a loud pipe or unravelling all the jetting and valve-burning issues. It seems the GS muffler only weighs some 5 kilos anyway so if pannier space is so important why not just chop the regular pipe at the neck and drop the angle as in the gif below. It’ll be good to have the bags in close and the pipe underneath, and its an easy job, giving what, at least four inches more bag space. After my over-width Morocco experience and seeing how slim the GS is, it would be nice to keep it that way.
Anyway, I’m off to the Overland Expo in Arizona in a couple of weeks, a great chance to pick up some goodies in the US, including a pair of Tubliss liners (left)which enable you to run tyres tubelessly on spoked rims. As you may know, I tried doing that before without complete success.
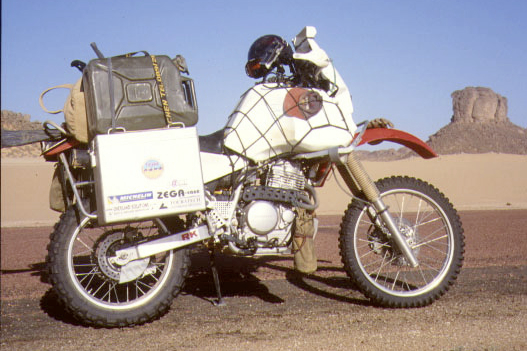
I know Tubliss are said to be for off-road use only, but I’ve interpreted this to be an issue of legal liability on the pubic highway rather than anything to do function or real-world safety. Robin, with whom I rode in Morocco last month has run Tubliss on his TT250R all over the world for years (that’s him right with all his kit – including full camping gear).
A meekly powered GS500 with a modest payload isn’t going to tie the tyres in knots. I plan to fit the front 110/80B (59 T) K60 Scout (my review) I used on the BM in Morocco (left) and another new one for the back. The 100/90 57 H is a tempting 30% cheaper and still with a load index 230 kilos and a 130mph rating, neither of which the GS will see in its lifetime, but I’d need two so I’ll stick with the wider 110/80 at another 100 quid.


 How it works