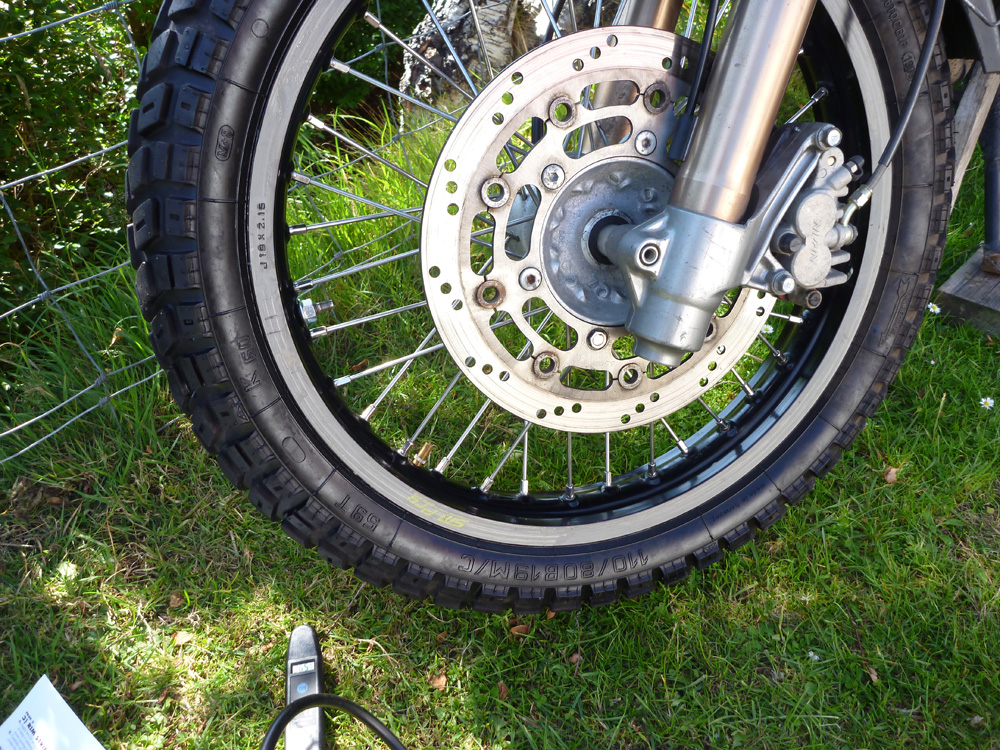
My 2004 GS runs a 2000 DR650 hub, rotor, calliper and just lately, a DR slave cylinder too, all fitted to a 19-inch Excel rim in the original swing arm. My non-bikey mechanic mate did the job, taking some suggestions from me.
The DR650 spindle is thicker than the GS so the swing arm slots and the spacers inside them were enlarged to take the DR size and a high tensile bolt was used. Can’t recall if this was because a used DR spindle was hard to find, a new one too expensive or the DR axle was just the wrong length so using a bolt was easier.
We considered lengthening the swing arm – apparently a DR650 will slot into the frame but is said to be rather long. Plus I thought the stresses on the already jacked up OE linkage with the SV650 shock might get too much and extending the GS5 swing arm a bit risky. But as it is, the bike handles normally within its limits. I can’t see myself skimming over the dune tops or powersliding like Gaston Rahier on his Marlboro BM.
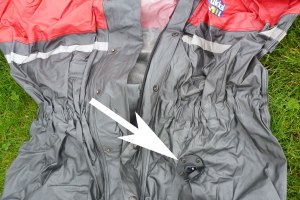
As for spacers and alignment of chain and rotor, we focussed on getting the chain lined up first (the new rim was offset to fit, I recall) and sorted the rotor after. From the picture left, it looks like the OS DR spacers or a very similar tube spacer were used with just a couple of washers between the calliper and the swing arm to fill out, so it was a pretty close fit.
A custom sprocket was ordered to fit the DR’s sprocket carrier with a guesstimate that 42T (rather than OE 44) with the OE 16T would make the gearing near identical to the original GS500 but now with a 19-inch wheel; the guess proved spot on. The same chain is used with no length changes, but with a couple of extra links I could run the wheel at up to 1.5 inches further back to lengthen the wheelbase which is currently about 58” (as short as possible on the swing arm slots – original is 55.5″) and feels fine. There are no chain tensioners needed, but an idler might be an idea to stop the lower run rubbing on the pad which makes a bit of noise.
The OE GS slave cylinder didn’t work well with the DR rear calliper – mismatched hydraulic ratios meant weak braking, or so I thought. I eventually fitted a DR slave cylinder and rear braking improved to the point of being able to lock the wheel, but still requires a long throw of the pedal, even after replacing the linkage with a slightly longer item made from a bit of 3/4 inch tube (below right). I then found an image of a DR rear slave set up and the DR pedal pushes directly up on the vertical cylinder, not leaning over at 45° like mine which effectively lengthens from the throw. The GS brake pedal mounting splines are rather coarse so moving it around one notch didn’t work either. Alignment of the DR slave on the GS mounts is a bit tight anyway as it is now, but now I know the brake is working better than it was, an adaptor plate can be made to verticalise the slave cylinder so hopefully making a shorter throw and snappier brake.
Update – autumn 2015 Had a pair ready for my next Morocco trip but sadly they didn’t fit the rack/pipe combination. So back under the bed, ready for next time.
Update – summer 2014 I bought a pair of Mag 2s and used them with a 650 XCountry in Morocco.
Update – May 2013 I finally got a chance to actually use my Magadans for a few weeks’ ride around the Southwest USA. Admittedly it was only America and I was mostly moteling, but I did enough off-roading to put them to the test. Full story on that ride here.
I am pleased to say – but not surprised to learn – that the Mags lived up to expectations on both trips. It’s only a bag, but the no-nonsense design is simply functional and effective – like the Steel Ponys below but much better construction and materials; there’s nothing there you don’t need – other manufactures take note.
Mine were actually semi-permanently mounted on prototype Al Jesse platform racks – with each siderack removable, so I either pulled out the liner to take inside – or removed each side rack where that felt a better idea – or for day rides. More news of the Jesse MonoArm racks in a few weeks.
It never poured with rain but it did when I used them last year so I have no reservations about that aspect. The corner tabs I added on not so elegantly (see below) may become a feature on future versions. For my sort of riding prefs they’re the best thing out there.
ABR magazine compared half a dozen soft bags. Highest score? Magadans.
Adventure Spec Magadans
Bags supplied in exchange for an Adventure Spec advert in my AMH6.
The Mags are based on the proportions on the 36-litre Steel Pony Gascyones [no longer made] Walter C used or my design if you include the pockets and which I feel is near perfect: bigger than the Andyz, narrower than the Monsoons, zip-free closures unlike the Zega Flexes, and with a chunky lift-out liner supplied unlike any of them.
Two layers of regular-looking (PU-coated?) Cordura make up all the panels of the outer bags, joined with a thick edging. Can’t tell if one is or incorporates the mysterious and slash-proof Twaron, but one has a ‘ripstop’ like appearance in the weave although it’s possible I may have felt the thin later of Twaron between them. Inside, as with many soft bags, a flexible panel behind a zip slips down the back panel and under the base to give a bit of shape while still retaining two panels facing the bike or the rack. Magadans are designed to be used against racks, as many other soft bag makers are beginning to realise. I made the dimensions about 24 litres rolled up with two folds (left image above) – the regular way of using them. In what I call expanded mode, with just one, less weatherproof fold on the velcro’d top edge of the outers, you can get 32 litres in each side plus 3 litres in the pockets. They weigh 4.7kg (10.3 lbs). The Gascoynes are about the same size but are 23cm wide – an extra two inches giving another six litres in the main bag. However, I’m happy to lose that extra width. The outer rolls up with a velcro closure and two chunky clippy clips incorporating enough slack to still work in expanded mode, or to lash things down on top with the bag fully rolled up in regular mode against the weather.
The two outside pockets are a great idea to keep fluids handy but also out of the main bag. It’s what’s always missing on vinyl Orliebs and something I’ve bodged on myself on other bags using army ammo pouches. Both with velcro flaps, one will take a 1.5 litre water bottle (green bottle) sticking out, or 1 litre flap closed; the back takes 2 litres sticking out with room to spare, or 2 litres closed.
The weight is taken on throw over straps, but as mentioned, with a rack. One bag gets doubled velcro ‘hook’ straps (4), the other gets the double sided ‘loop’ strap. A secure system sandwiching the loop strap from both sides to cope with the large hanging volume and onto which velcro can be re-sewn should it wear out, or a buckle easily fitted. With velcro the less you use it the longer it will last but with a buckle (two types shown right) macro adjustments up or down are much easier to make, especially when the bags are loaded. That’s what I plan to do. The distance on full velcro overlap is 50cm and I’d say you could run them out to 75cm (half overlap) if you’re bike is wide.
I was keen to see how the back of the Mags looked so as to work out how they could mount securely to my planned rack. The Magadans are designed to be merely held against a regular flat ‘hanging’ rack rectangle which most alloy box makers produce for all sorts of bikes. It does this with a horizontal strap which passes through slots behind the side pockets just above the level of the reflective stripe. To me this is not so effective, but is perhaps the best ‘one-size-fits-all’ solution for the moment. It’ll stop the bag flapping outwards but, depending on the width of rack verticals, will still allow some forward and (less common) back sliding which could get annoying on the legs, unless you add a retaining strap across the back as the Monsoons had.
The good thing with the fabric outer being separated from the inner (like the Monsoons) is that you can sew or rivet on whatever suits your needs and that’s what I did to mine (right) so there’s a direct attachment point. As it is I plan to use a platform rack so the attachment won’t be so critical and may even work without the throw over straps. If I was to suggest a solution it would be something like two horizontal rows of loops sewn across the back panel, a bit like was on the top back edge of the Monsoons (right – for what reason I was not sure). With two rows of such loops you could even eliminate the throw over element, or reduce its stress loads. But it’s unlikely that Magadans will be modified in this way. A mate asked Adv-Spec and was told:
‘We have always found that tags sewn onto panniers result in [them being] ripped off panniers as soon as there is any real load applied or a constant tugging or pulling. The Magadan panniers are designed to have a strap tied around the entire pannier and then around the frame. There are slots in the front and rear bottle holders which allow the strap to pass through to help hold everything in place.
I have to say that from my experience with similar panniers that’s not such a convincing explanation. And even if it was, a tough fabric mount could feature a ‘sacrificial’ ring or loop which could be replaced should the pannier be wrenched away in a heavy fall. But if that’s the Magadans’ biggest flaw then it’s not so bad.
I was pleased to see the inner bags are not some cheap PU-coated drawstring stuff sacks, but full size, roll-top PVC ‘dry bags’ shaped to fit the outers. Sewn seams are taped (right). I suppose I’d have preferred heat welded, like an Ortlieb or Seal Lines. The great thing with separate bags is you can lift them out clean to carry into a tent or hotel room, leaving the mucky outers on the bike if you wish. These are chunky PVC bags that will resist the rubbing against the outers as well as impacts better than most things, and anyway, you can fit a selection of your own in there to compartmentalise better.
As well as the horizontal back strap to locate the bags, the Magadans feature a similar arrangement of loops to take a vertical strap or indeed an adjustable cable lock to wrap around a frame – where used – so securing the bags against opening or removal. Combined with the slash-proof fabric, this ought to make the Mags the most secure soft bags around. It’s hard to know how effective this slash-proof Twaron is without doing the obvious. There are a couple of vids on youtube citing the wonders of Twaron for offshore and ballistic uses, but if nothing else, if you use a rack you’ll be able to cable the bag on (although you could sort of do that with any soft bag).
All up I’d say the Mags look the business: a great size, good features and modifiable for rack fitment. The quality of manufacture (somewhere in the EU) looks good too. Nice work Walter C and Adv Spec; you’ve save me doing a less good job myself. There’s more on using the Magadans here and here.
With Monsoons costing £220, old Kriega Overlanders from £500 all up, Steel Pony Gascoynes AUD350 and Andyz going for £245 in the UK, at £350 I’d say the Magadans are fairly priced when you think what a key component your luggage is on a genuine overland trip.
Tubliss Generation 2 is now widely available in 18, 19 and 21-inch sizes for WM3 (2.15”) or slimmer rims. I fitted one to the front of my Himalayan
My Suzuki GS-R ran 19-inch SM Pros and the plan was always to have them running tubeless, hopefully doing a more successful job than I did on my Tenere’s wheels a couple of years earlier. On that bike the sealed-up rear never missed a beat, but the 21-inch front leaked off-road and as I failed to monitor it, it got soft enough to ding a rim on a gnarly Moroccan climb and with that lose all pressure.
Back then I wanted to try Tubliss but they weren’t sold in Tenere sizes in the UK. I picked some up in the US for around £55 each. The vid below explains it all very loudly. Man that guy can talk!
I was expecting a hard time fitting them in my Heidenau K60s – it’s a stiff tyre and you’d imagine the bulk or shape of the red plastic core and rim-lock might make tyre mounting even harder. When a sunny afternoon came by, I left the 4000-mile old K60 out against a wall to warm up a bit and then followed the clear instructions carefully. Off with the old Cheng Shin without too much difficulty, clean off the duct tape/rim tape residue and the drill an 11mm hole a few spokes up from the regular valve hole. I then talc’ed the inside of the red liner to slide better against its mini tube, lined up the rim lock clamp/tyre inflation valve and the nearby core inflator valve with the two holes in the rim (pic above; the instructions stress this is critical) and then mounted the core onto the rim.
How it works Tubliss works by using a small but extra thick bicycle-sized inner tube at very high pressure to expand the red casing onto the tyre’s bead, sealing it against the rim (see image below). By doing so it isolates the tyre’s main air chamber from the spoke nipples where air would otherwise slowly leak out.
This can be an odd concept to get your head around; a high-pressure mini-tube is still used to press and seal the tyre bead against the rim, but the tyre chamber itself is effectively tubeless. An additional hole for a rim lock is required so as to pin down the red casing and completely eliminate tyre slip and valve lean at low pressures (as happens with regular tubes at low psi). Because the thick Tubliss mini tube isn’t anywhere near the flexing tyre carcass and is inside the red casing, it would take an exceedingly long and sharp spike to puncture it. Plus everything remains cooler; the benefit of all tubeless tyres. You can still tune spokes, something not be so easily done with other spoke nipple-sealing methods. The rim lock uses a ‘hollow bolt’ which is also a valve to inflate the tyre chamber to a regular pressure. The original valve hole is used to inflate the red casing tube to 100 psi.
The core went onto the rim easily. Just follow normal bike tyre mounting techniques: make sure the red core is right down in the well of the rim as you lever the other end on. Usually I use diluted washing-up liquid but that tends to dry up quickly. This time I used more slimy 303 Protectorant; it’s the same as Armor All that Tubliss recommend. Use lots so it’s lubed forever inside. The core slipped on with no levers. WD40 will do, if stuck.
Next came the tyre. This was going to be hard, or so I thought. I double checked I had the direction arrow in the right orientation, then pushed the wheel down into the tyre using the folded metal plate which Tubliss supply, rim-lock down. Following the instructions closely (and having changed a few tyres in my time), the plate did genuinely help the core-fitted wheel slide into the tyre with less effort than normal. And if you kept pushing down as they advise, with a bit of multi-armed Vishnu-ing I got the wheel inside the tyre walls.
The rest – levering the tyre bead back onto the rim – was like regular tyre mounting: minimal lever force where possible combined with maximum lube, while always making sure the tyre bead opposite the levers is being kicked and crammed into the tyre’s well (central dip) so as to free up vital slack when levering to reduce the effort which is when mistakes are made and tubes get pinched. Like they say on the leaflet, lube is the key to this. In the end the last bit of tyre went on without the final lever. This used Heidi was not so hard to mount after all. The same-sized new K60 for the back was a bit more effort shoving inside the wheel, even with the Tubliss plate, but with slack and lube, it got there.
With all this done the next step was to see if the system held air once everything’s pumped up. There’s no reason to think the mini tube got pinched, protected as it is inside the red plastic core. The key is the red liner sealing against the bead of the tyre to keep the tyre at the right pressure. You need to put 100 psi into the mini tube to make sure it seals: You want to check your average mini compressor will have the power to do that, but because the volume is tiny it may be easier than you think – it’s not like pumping up a full sized moto tyre to 100 psi.
Testing, testing
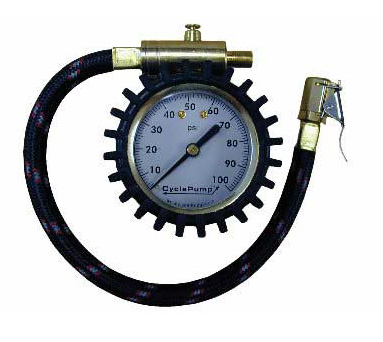
You may read complaints that fitting Tubliss doesn’t work first time round or doesn’t work at all – the tyre goes down – but so far overnight both tyres have held their pressure. Checking the tyre and core pressures after 10 days, I found both cores down by about 10%. I think that’s acceptable and can’t be sure everything was at the right or equal pressures to start with so I topped it all up to 100 psi and 33 for the tyres and will check again in a while. Tubliss do say to check pressures before each ride. Unfortunately, checking the high pressure cores blew the brains out of my digital tyre gauge (right) and those metal sliding rod types only go up to 50 psi. I have a bulky Cycle Pump gauge (left) that’s sat around for years and whose moment may have come. As mentioned, a mini-compressor able to deliver 100 psi without fatal results will be needed. Not sure my Cycle Pump (below) or anything like it can manage – we’ll see on the Himalayan. Anyway, there are always roadside garages.
Should you have a flat on the road it’s only the tyre chamber that loses pressure, not the small sealing tube of course. Once quickly plugged (left), the tyre can be reinflated with a regular bike compressor to normal road pressures.
Initially Tubliss didn’t claim to be suited to road riding let alone overlanding, but that seems to be changing as the system has proved itself. What is important is making sure the tyre sealing tube is kept at around 100psi. That may take more frequent checking than you’re used to, at least until you get a feel for the rate of loss, if any. On the road and out in the world a reliable mini-compressor is a vital tool.
A mate with Tubliss in his TTR has had no probs, including air freighting it around the world. He’s reminded me that, as the video above mentions, injecting sealant like Slime/Oko/Ultraseal (right) is a good idea and over time helps seal the tyre right up. I did the same to the Tenere when I sealed those wheels (right) and if nothing else it helped highlight leaks oozing out of the front.
Here in the south of England, 2012 had the rainiest April and June ‘since records began’. It hardly ever rains in the southern UK these days, but when it does I still can’t resist looking out of the streaming window and delight in the fact that I’m not out riding for a living anymore. Although, in a way, I suppose I still am.
I still recall a despatching June in the late ’70s or early ’80s when it rained every single day. At some point every day of that month I had to haul myself into my plastic body sack and splash about the streets of greater London, delivering stuff. I still hate wearing waterproofs any longer than absolutely necessary, but if you’re riding 10 + hours a day you’ve got to at least try and keep dry.
EU52 = UK 42″ chest. Caveat emptor.
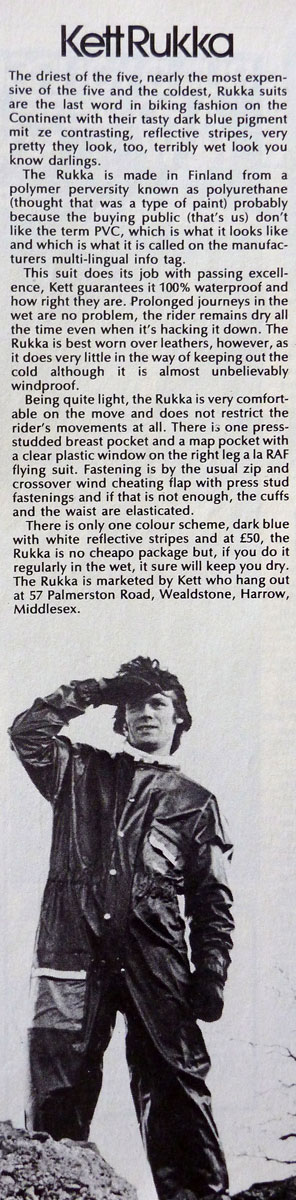
Back in the late 70s, before Gore Textiles pulled off one of the biggest illusions in the history of rainwear, London despatchers by choice wore the classic silver-grey Rukka PVC waterproof, most commonly the lightweight jacket, or the one-piece (left). Have a look at this gallery of despatchers from 1986 and spot the Rukkas.
As elegantly cut as you can expect, neither took too much space in a top box, nor constricted you too greatly once worn. I myself was too dim or tight to make this smart choice; I can’t recall what I wore, either a £5 trawlerman’s PVC smock, or a compressed polystyrene, one-piece balloon which, when allied with the ring-ding-ding of my MZ, would quite rightly irritate nearby drivers so much that they couldn’t resist taking a swipe at me just on general principles. On the right: 1980 review of the Rukka one piece from Bike magazine.
PVC seems to get singled out for not being ‘green’ but it is waterproof like a bottle of beer is beer proof. If it has a hydrostatic head, like proofed nylon or polyester tent fabric, it would be measured in miles, not inches. Of course PVC breathes as well as a canary in jam jar and so what you perspire stays locked in your own muggy microclimate which I grew to detest, especially when schlepping artwork up to the 5th floor with no lift to some receptionist that I thought I fancied.
Actually I’m not sure it was just the inner damp that put me off. My sartorial vanity could also not bear being swathed in the amorphous, baggy blob. Whatever I looked like, it certainly wasn’t Tom Cruise out of Top Gun. More like Walter White (right) suiting up prior to cooking up another batch of Blue in the superlab.
Now I’ve finally caught up with my sodden past and picked up a used Rukka one-piece off ebay. First one at EU52 was too tight as an oversuit. I wore the legs only with the top wrapped underneath my waxed Falstaff jacket through a 3-hour downpour and from the waist down at least, I wasn’t surprised to get home completely dry.
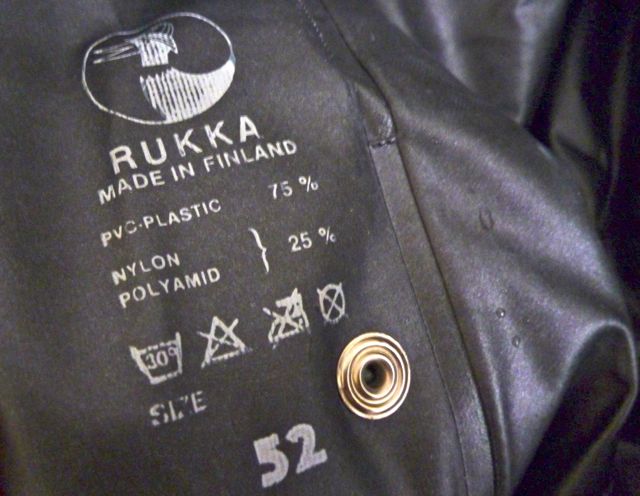
Who says men are crap at buying clothes, but I now know EU52 equals UK chest 42 inches – a common trap when buying Rukkas. So I sat on ebay until an XXL EU 58 turned up (left). Loads of space to easily climb in fully clothed with boots on without stressing the welded seams.
Construction-wise, what a great garment it is! I don’t know when they stopped making them (now they only produce dog cags in probably the same PVC polyamid fabric), but let’s assume my one-piece is from the 80s. The material is still pliant, the leg map pocket has yellowed but other than that, the studs are all still there, the half zip runs smoothly and you have an overall feeling of quality that I’m not sure you’d get today in the similar, proofed-nylon one-piece suits. PVC is thickly layered from the outside and is easy to repair with glued patch or piece of tape.
The front of the Rukka one-piece has an ingenious sewn-in, chest-high tongue/bellows (above), a bit like a hiking shoe, to eliminate anything getting past the studs or zip, bringing on that unwelcome cold-drip-in-the-crotch sensation. It rolls up and tucks in behind the studs with a zip, effectively making a chest-high Not sure if anyone still makes anything like the classic Rukka. Cheaper proofed nylon seems the current way, and what Rukka make today for bikers is the usual over-designed, over-techincal and over-priced gear which, being based on breathables, will fail in the long run and requires special cleaning. One problem was running my Aerostich Kanetsu electric vest without wires coming out the sleeves. Solution on the left below and detailed here.
If you’re looking for used Rukka pvc on ebay they usually turn up in great, barely used condition as anything less is barely worth selling. Avoid anything heavily repaired, dirty or with rusty studs.
And also search under ‘Protectorl (of London)’. They seemed to make identical garments in blue – same fabric, quality and era. I came across a brand new Protectorl lined jacket for 25 quid (abov) but again, it was a little too small. Both brands come with quilted linings. Me, I prefer unlined to roll up into a compact waterproof for rainy days only. My onesie weighs 1300 grams. The day I start wearing a Rukka as a regular bike jacket is the day I start eating with a spoon.
IN A LINE
Chunky, well featured waxed cotton touring jacket, but fabric coating may not suit everyone and mine leaked through the arms.
WHERE TESTED
From new on a 4000-mile ride to Morocco and back across Spain in Spring 2012 riding a BMW F650GS SE. Worn around Britain since.
• Plain, elegant design
Fits me just right
Well thought out features: velcro belt, vents, storm flap, chunky two-way zip, water-resistant zips on outer pockets and vents – and no less than 12 pockets
A rugged organic compromise between leather and Cordura
Feels more windproof than Cordura
Wax coating feels mucky and soon acquires a grubby, blackened patina where it wears on itself
Leaks through the velcro arm-cinching straps
Soon loses it good looks from new and can’t be washed
Less good in temperature extremes than alternatives: stiff when cold and sweaty when hot and humid, but bulky cut enables layering
Heavier than a Cordura equivalent
Abrades less well than Cordura or leather when sliding down a road, although the protector pads are more useful in most crashes
COST
Aerostich Falstaff page. Only sold in the US, as far as I know. This jacket was supplied free in return for Aerostich advertising in my books.
DESCRIPTION
The fittingly-named Falstaff evokes a solid British tradition and is Aerostich’s only waxed cotton jacket, cut to their classic Darien pattern in a dark tan waxed cotton. Inside is a tartan or plaid cotton lining that’s de rigeur with waxed leisure clothing. The Falstaff has under-arm and a back-width vents with water-resistant exterior pocket zips and pockets galore, large and small. I was still finding new pockets weeks after receiving it. I read that the Darien is a baggier and longer cut to Aero’s other popular suit, the shorter and closer fitting Roadcrafter which you commonly zip to Roadcfrafter pants. Like all Dariens there are elbow and shoulder pads and I was also sent a spine protector, but preferring a less bulky jacket, I didn’t take any of these pads on my ride to Morocco. There are four 3M reflective patches too, though you can specify ‘no reflection’ for a subtler appearance. (I read that France now requires riders to have a certain area of reflectiveness on their clothing – hopefully no more than a typical ‘Stich jacket). In fact with Aerostich you can specify any mod you like – with a few clearly labelled exceptions it’s all made in Duluth, MN and they’re happy to oblige. Great customer service plus the cool cataloguis one of Aero’s hallmarks. The size I have is large which weighs about 2.3 kilos or just over 5lbs without the padding. Though I read complaints in reviews about short arms, they were just fine on me.
REVIEW
The Falstaff replaced my 9-year old Aerostich Darien Light. There was nothing wrong with my little-used DL, but I fancied a change and wanted to see what was new and so gave it away a an auction for the Ted Simon Foundation. On the big night my DL scored the second highest bid just behind Ted’s famous Jupiter’s Travels open face helmet. Before the Darien Light I also owned a Darien which is identical but made from a heavier Cordura fabric. I used that in BC on a very rainy ride, but found it a bit too stiff (they say they do give over time). Scanning the web for a replacement in the understated and functional Darien style was much less successful than expected. Obviously there’s plenty of cheap stuff out there, but also too much over-designed or over-priced gear for my taste or wallet. And then there’s this new trend for separate breathable liners that you wear if it’s raining/cold, or not if it’s warm. That means the outer jacket gets soaked or ‘wetted-out’ in rain which makes the inner liner’s job of breathing through it all the more difficult. As it is, I suggest in the new AMH that I doubt membrane type clothing works that well when applied to relatively passive motorcycling; sitting still in the rain at 70mph is less effective in getting the membrane working than hiking up a hill which produces sufficient energy to purge the built-up moisture as the active body generates heat. I suspect this separate breathable liners trend is nothing more than a cost saving measure that’s being sold as a ‘have your cake and eat it’ option, but I’m happy to be corrected on that.
Anyway, after an afternoon’s browsing, on looks alone I think I was heading towards a Dainese Evo or whatever cropped up used in my size on ebay when Aero offered another Darien. I like to keep trying new stuff as it’s good for the book so after some discussion we settled on a Falstaff – an ‘organic’ Darien. So you know, the Falstaff and other gear I get from Aero is a contra deal in return for an advert in my AM Handbook and associated titles. Having worn waxed cotton Belstaff clothing back in the 1970s and avoided it since, I was a bit ambivalent about going down that road again with the Falstaff but hoped things may have changed. My recollection was a robust-feeling material (compared to a regular nylon Belstaff of the era), but with a messy coating that left indoor smears on my mum’s prize-winning wallpaper, felt unpleasant to touch and was not so snug in the cold. This was all just before the Cordura + Goretex revolution in moto clothing. Out of the box the Falstaff looked great – I like that tan deserty colour, what a shame it’s now mostly gone under an oily brown patina. The fit too was just right for me once the TF3 pads warmed up.
A functional touring jacket has to be at the core of your overlanding gear; a place to stash stuff and feel protected from the elements and possible crashes.
On my ride the temperatures ranged from 1°C with snow flurries while crossing the High Atlas, to about 30°C (86°F) on the hotter days down on the Sahara’s edge; days which also coincided with slow riding and pushing the bike through the sands. I also wore heavy leather trousers, and under the Falstaff either the electric Kanetsu liner over a thick shirt, or just the shirt.
Above all I love the array of pockets – no less than a dozen, but you don’t have to use them all. I don’t like to wear daypacks or use a tank bag and so my jacket becomes a kind of ‘ditch bag’ containing everything I think I need or can’t afford to lose. It’s all there in the pockets at hand’s reach, not in a backpack that needs talking off, or a tank bag that needs removing when you’re stray from the bike. I especially like the big ‘Napolean’ pockets inside and out, and just as I was thinking of getting a pocket sewn into the back lining to carry my iPad while away from hotel rooms, I realised there was a huge net pocket inside the back vent which could take a 17-inch MacBook Pro if need be. It’s an Aerostich, I should have known they’d not waste that opportunity! (In fact it mentions that pocket on the website, so RTFM). As expected, the strong initial whiff of wax or paraffin lessened after a few weeks in Morocco, though it took a good few months to go away. It’s just about gone now but if it smelled of warm leather there’d be no complaints here! In Morocco I was deliberately wearing only a shirt plus my Aero Kanetsu electric liner to put it all to the test, and never got chilled except when I got in a muddle with the Kanestu’s switches. Even then I do wonder if a Kanetsu is essential with a chunky Falstaff. Depends where you live and when you ride of course, but if your bike can’t handle the output I suspect a thick fleece and a Merino under layer would still keep you warm – the waxed cotton feels very wind-proof, even if in itself it can’t be described as a cozy garment.
One piste I did in Morocco was a hot day which ended up with a lot paddling and pushing the GS through soft sand. At this time the Falstaff was just too hot and all the vents in all the world, including the front zipped down made little difference with a hot backwind and speeds of less than 10mph. I ended that afternoon with the liner soaked and evaporated sweat encrusted as salt on my shirt. I have to say it would probably have been the same with any jacket, but I have a feeling my nylon Darien Light might have been less sweaty or maybe just less heavy. The Falstaff can feel as hot as a leather jacket. As I neared my destination that evening and got onto easier terrain, I undid the front zip completely and let the jacket flap around and air itself out. By the time I got to my lodgings it and I were almost dry. I do wonder though if something different – more modern dare I say – could line the jacket interior instead of cotton plaid and if, as the blog guy suggests below, it might even be removable for washing, so you don’t get bogged down in washing the whole garment. As it is waxed cotton doesn’t seem to be washable with any detergent, all you can do is wipe it down with a sponge which won’t shift road grime. Something wickable maybe? Cotton is notorious for sapping away body heat when wet and had I had a long ride in colder temps following that sweaty afternoon I might have got really quite chilled. Of course powering up the Kanetsu electric vest would have seen to that.
All of which makes me wonder, does waxed cotton breathe? Intuitively I’d say no and if it does then it’s at the cost of waterproofedness, but Aero and this googled blog post (worth reading, plus his half-dozen follow-up posts) suggests it does a bit, while the chat here says not really. If it does breathe then I’d say not as much as Goretex in optimum conditions and circumstances, but a lot better than a PVC bin bag sealed up with duct tape. I must admit I never felt sweaty on the ride as I’d have done in an impermeable PVC mac, so perhaps it breathes better than I think. Knowing what wax is, I find it hard to see how while retaining waterproof qualities, unless the wax-impregnated cotton fibres swell when wet (like cotton tents supposedly do) to seal against rain, then as it dries a little porosity returns. Interestingly, I’ve also learned that ‘oilskins’ is another name for waxed cotton.
My thoughts on Goretex
Like the blogger, part of my rationale in thinking the Falstaff was a good choice was that unlike GoreTex, wax cotton can be reproofed indefinitely, just like an old pair of leather boots. (Have you tried getting a pair of non-membrane hiking footwear lately, btw? – near impossible). Goretex might work well when it’s new, clean and undamaged, but as far as I know we’re talking about a cling-film-like miracle pore layer bonded onto the inside of the jacket onto which is bonded a permeable inner liner, more or less (left). Although in the middle of a sandwich, once that film gets damaged or the nylon either side gets clogged with body oils or grime, it will let in water for good and/or it won’t breathe like it did.
Goretex seems a short-term solution but you still have to marvel in how WL Gore have managed to so dominate the market in ‘waterproof’ leisure wear, although work wear, I’m no so sure. There must be something to it but I do remember thinking when it came out in the late 70s that the whole ‘condensation vapour out / no water in’ malarkey sounded a little far-fetched and I think the same now.
I really wasn’t keen on buying another expensive GTX jacket, even an Aerostich, that would require washing in special soaps and curing with DWR (surface water repellent) only to know the ‘magic film’ would eventually fail. This is a jacket that I like to think I’ll be wearing on a long trans-continental trip, not a touring holiday. The infinite reproofability of the Falstaff was an attraction and as the chat site above notes, it’s tough (maybe no more so than a 500-weight Darien; Aero say it’s a bit less abrasion proof) but also immune to melt holes from campfire sparks.
Waterproof?
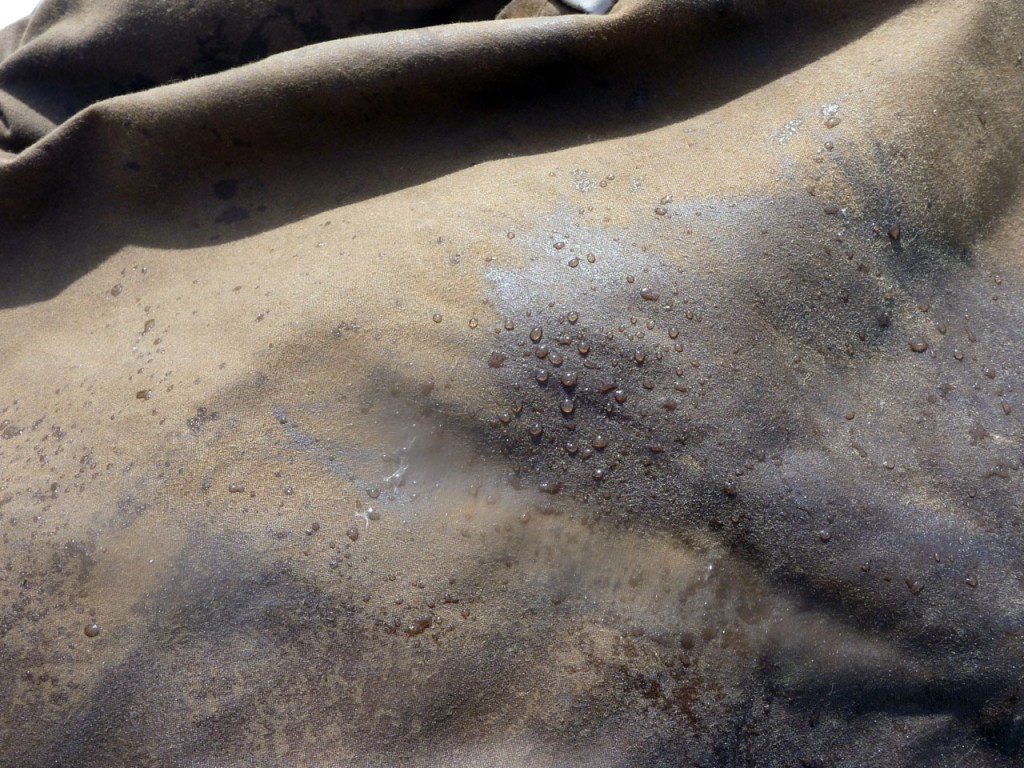
In Morocco there were a few showers. Unlike Cordura once it’s lost it’s DWR treatment, water rolls off the waxy Falstaff as off a duck’s back. There seems little possibility of the fabric letting any rain through (but see below), but of course on any garment the stitching is the weak point. I know Aero’s synthetic clothing is finely sealed with taped seams, but I’m not sure how the Falstaff’s panels are joined together and sealed. Maybe the wax impregnation takes care of it. It was on a long day across Spain that I had a chance to put the Falstaff to the rainproof test. Several short spells of heavy rain had no effect but a huge deluge let rip by early evening at which time both lightning and a rainbow where arcing across the stormy sky simultaneously. I turned off into some town to pull on the €3 waterproof leggings I’d bought in Fez (my ageing Darien pants got stolen on the Morocco ferry – I’ll miss those). By the time I turned the bike around the roads were ankle-deep in run-off and commuters were inching through the flood. Back on the motorway the rains pelted against the screen which admittedly largely protected the front of the jacket, but after maybe half an hour I felt the tell-tale twinge of wetness at the more exposed right elbow. Getting to a hotel that night after the 800-km day, I pulled the jacket inside out and the cotton lining of both arms was damp. It had then come through the Kanetsu vest (not turned on) and a thick cotton shirt. Nowhere else had let the rain through, neither pockets or front zip nor even the cuffs exposed by the BM’s undersized hand guards, nor the neck with its suede trim. The front inside lining had soaked up some run-off from the overtrousers. (Amazingly the cheap overtrousers held up and so did my leather boots which I’d waxed before departure and got quite a beating on the dirt in Morocco. I attribute it to wearing thin socks that day which were loose and so are slow to wick in any leaks – or perhaps the well waxed boots just simply worked – like a waxed jacket should…) My theory is that the rain leaked through the sewn-on velcro straps (left) which cinch in the sleeves to stop them flapping, hold the elbow pad in place or to reduce the air gap to keep you warmer. Many bike jackets seem to have this feature now. Without cutting the lining open it’s hard to tell if the velcro seams are glued and taped from behind. It doesn’t feel like it and on the inside of waxed cotton that would be tricky anyway. But if that’s a weak spot it’s surprising Aero didn’t think of it or owner reviews mention it.
In summary, my reticence with the Falstaff is the same as with any waxed garment, the ‘ickyness’ of the weatherproof coating. It’s something you only notice when putting it on, using the pockets or walking around, but you wouldn’t want to slump onto your mother-in-law’s albino calfskin sofa in it. Like leather it certainly steadily acquires characterful creases, unlike a nylon Darien or any other synthetic moto jacket.
Update
Six months from originally writing this, I have to say the Falstaff hasn’t grown on me. I don’t particularly relish putting it on as I do with favourite clothing, because of the feel and appearance of the waxed cotton; that stuff won’t wash off with soap. The jacket now looks like I’ve used it to make several messy oil changes under a car. Waxheads know it’s just the polished wax coating, but some civilians will just perceive you as another grubby biker. Then there was the annoyance of popping a car satnav into one of the outer chest pockets during a downpour – it never recovered. The pocket was wet inside; now I know I should have used an inside pocket, but as you’ll see below, even that is not immune. I’ve since performed a EU-accredited suction test: clamping your mouth around a bit of fabric and sucking. On a plastic bag – full seal of course, no breathing possible; on unpolished parts of the Falstaff like the back, slow suction possible, but slightly more than on my near-new breathable Rab Bergen Event™ jacket. On the grubbier, patina’d front pocket of the Falstaff, notably more suction possible – the fabric here is more breathable and so less waterproof than other sections. Perhaps it all just needs a light reproof on the shiny sections followed by a hair dry, as this article recommends.
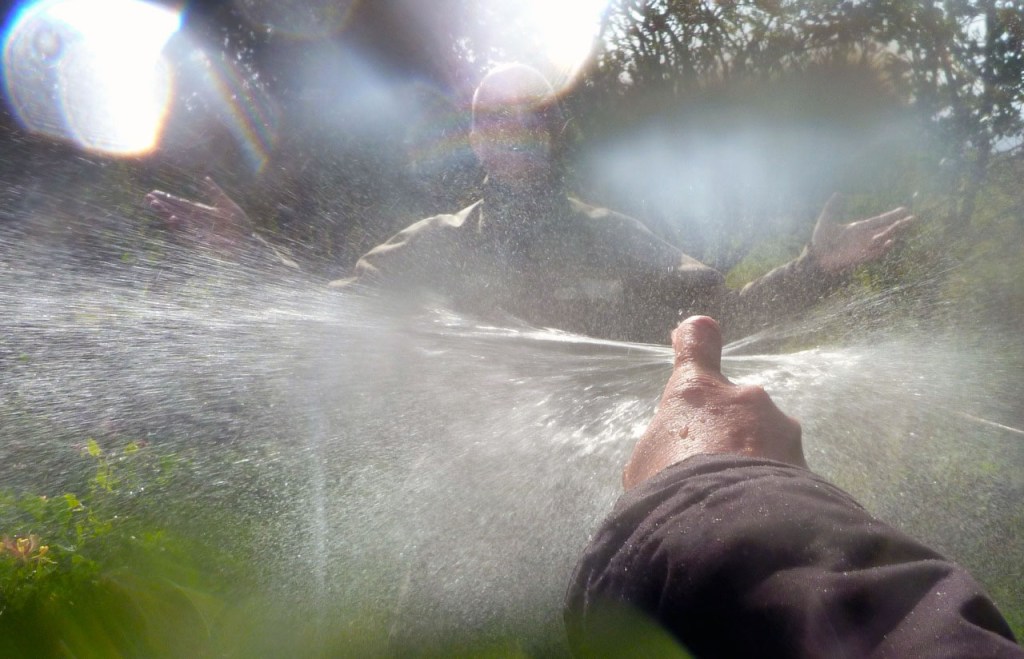
I’ve since carefully reproofed the pockets on one side of the front with Granger’s Waxed Cotton Dressing which as expected failed to resort the Aero’s original sandy colour – in fact it’s gone quite dark and shiny, but at least dried to a less waxy mess than I anticipated. It certainly doesn’t look as good and smart as when it was new, but I got the g-friend to give me a damn good hosing (above) and the re-waxed outside pocket was dry inside, the patina’d one on the other side damp. And on the shoulder where I reproofed a bit, the droplets clearly pool on the wax while they get absorbed into the original, unpolished matt, tan section. So reproofing looks like it works but will re-patina and in my opinion ruin the jacket’s original appearance.
In a couple of weeks I’ll be riding back south to London during which time I’m bound to get rained on. More news then but as I’ve written elsewhere, to keep dry from all-day rain, whatever you wear, get an impermeable one-piece riding suit in coated nylon or better still, PVC, like the old style Rukka (left).
A couple of weeks later…
I got rained on. At the end of a cold, 450-mile day, for two hours on the motorway and another two across town the skies let go. I pulled on my Rukka one-piece over my legs which stayed as dry as, same as my boots which I waxed months ago. But within an hour I could feel wet arms, as in Spain months earlier. And when I got back home I found the entire lining of the jacket was wet apart from a small patch in the middle of the back (below).
The inside pocket was wet with my phone and wallet – one place you hope to be dry. My thick merino cardigan was damp but kept the wet off my trunk, but the arms were soaked right through. Exterior pockets that I had judiciously wax-proofed a fortnight earlier also had wet contents, maybe through the zip. The jacket took a day or more to dry. Imagine being mid-trip and having to put on a sodden Falstaff for another long day at 6–9°C. It’s possible that seepage through the jacket’s leaking arms may have spread right across the lining, but whatever the reason, it was soaked inside. Not good.
PS. I’m informed the similar £500 Belstaff Trailmaster comes with a ‘waterproof seam-sealed jacket in light coated nylon‘ … and in the US this Melville wax jacket from Rev’It comes with a removable Hydratex waterproof membrane liner. I believe ‘oilskins’ must work on a certain level but there’s a message in there somewhere.


 How it works