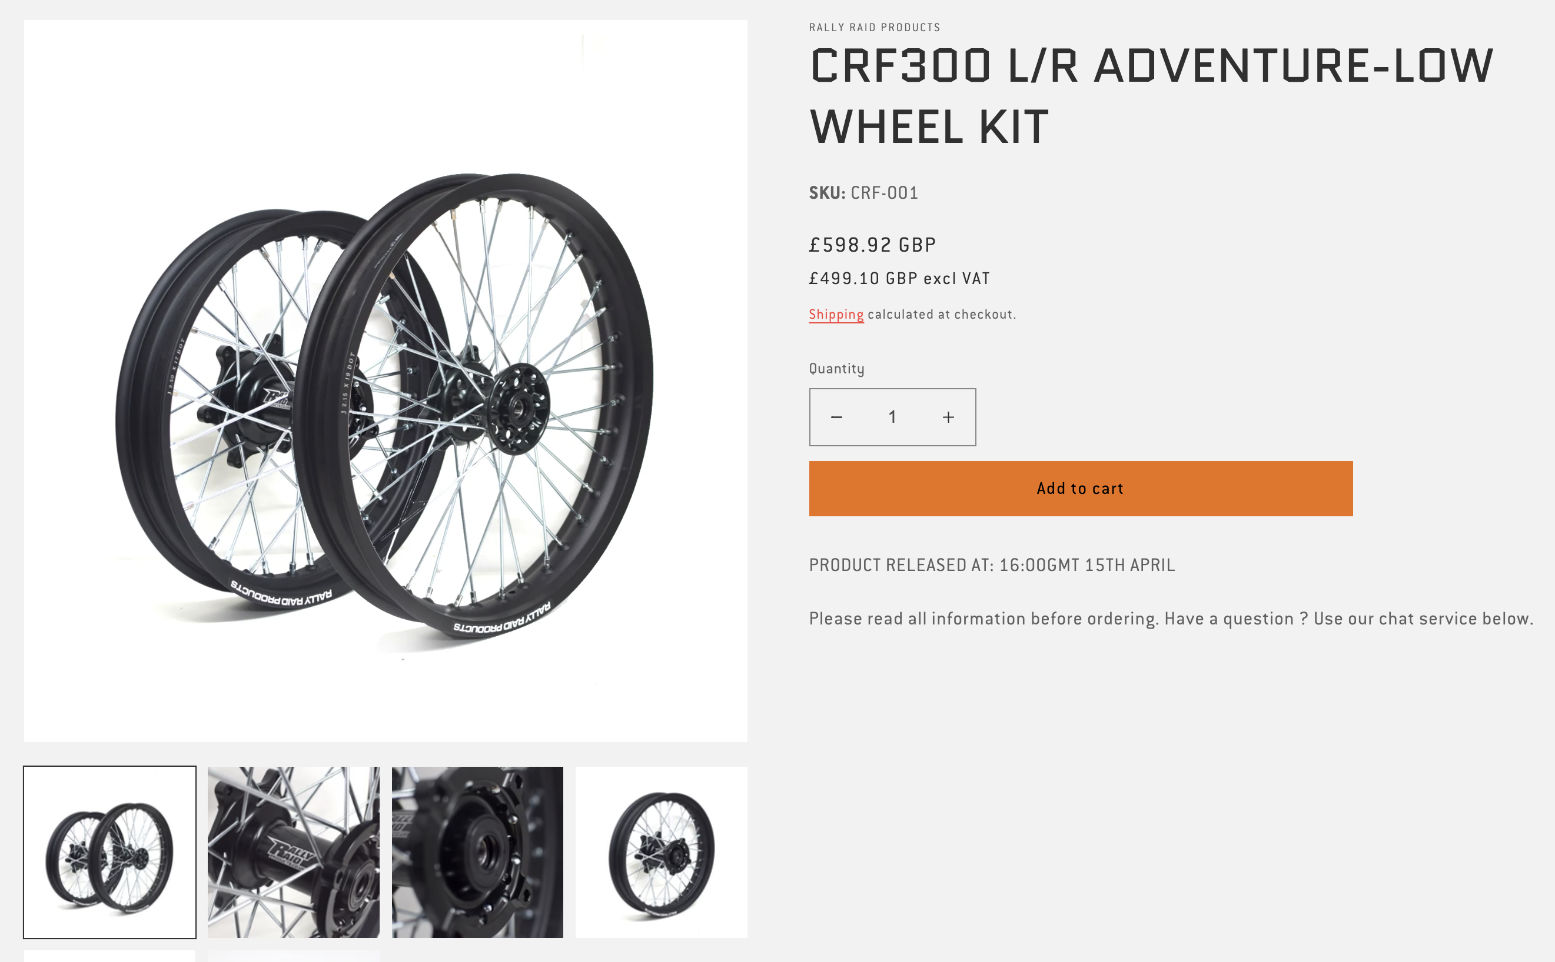
Author Archives: Chris S

300L – Dorset’s Great Western Trail 1

CRF300L Index page
Dorset’s Great Western Trail 2

This summer I find myself relocated in the English countryside far from London and with a usable trail bike, not some fraken-mutt. ‘Dorset’s good for green lanes’ I was told, but it didn’t look like it on an OS map.
As it is, I gave up on English green laning long ago, convincing myself that, certainly the southeast of the country was too congested for trail bikers to mix with ramblers, Nimbies, Just Stop Trailbikers and all the rest. I know well it’s the same limited access story – worse, in fact – with river paddling in England. A ride around adjacent mid-Wales a couple of years ago didn’t raise my hopes much either: beautiful country but more gates than Terminal 5 on a bank holiday getaway.
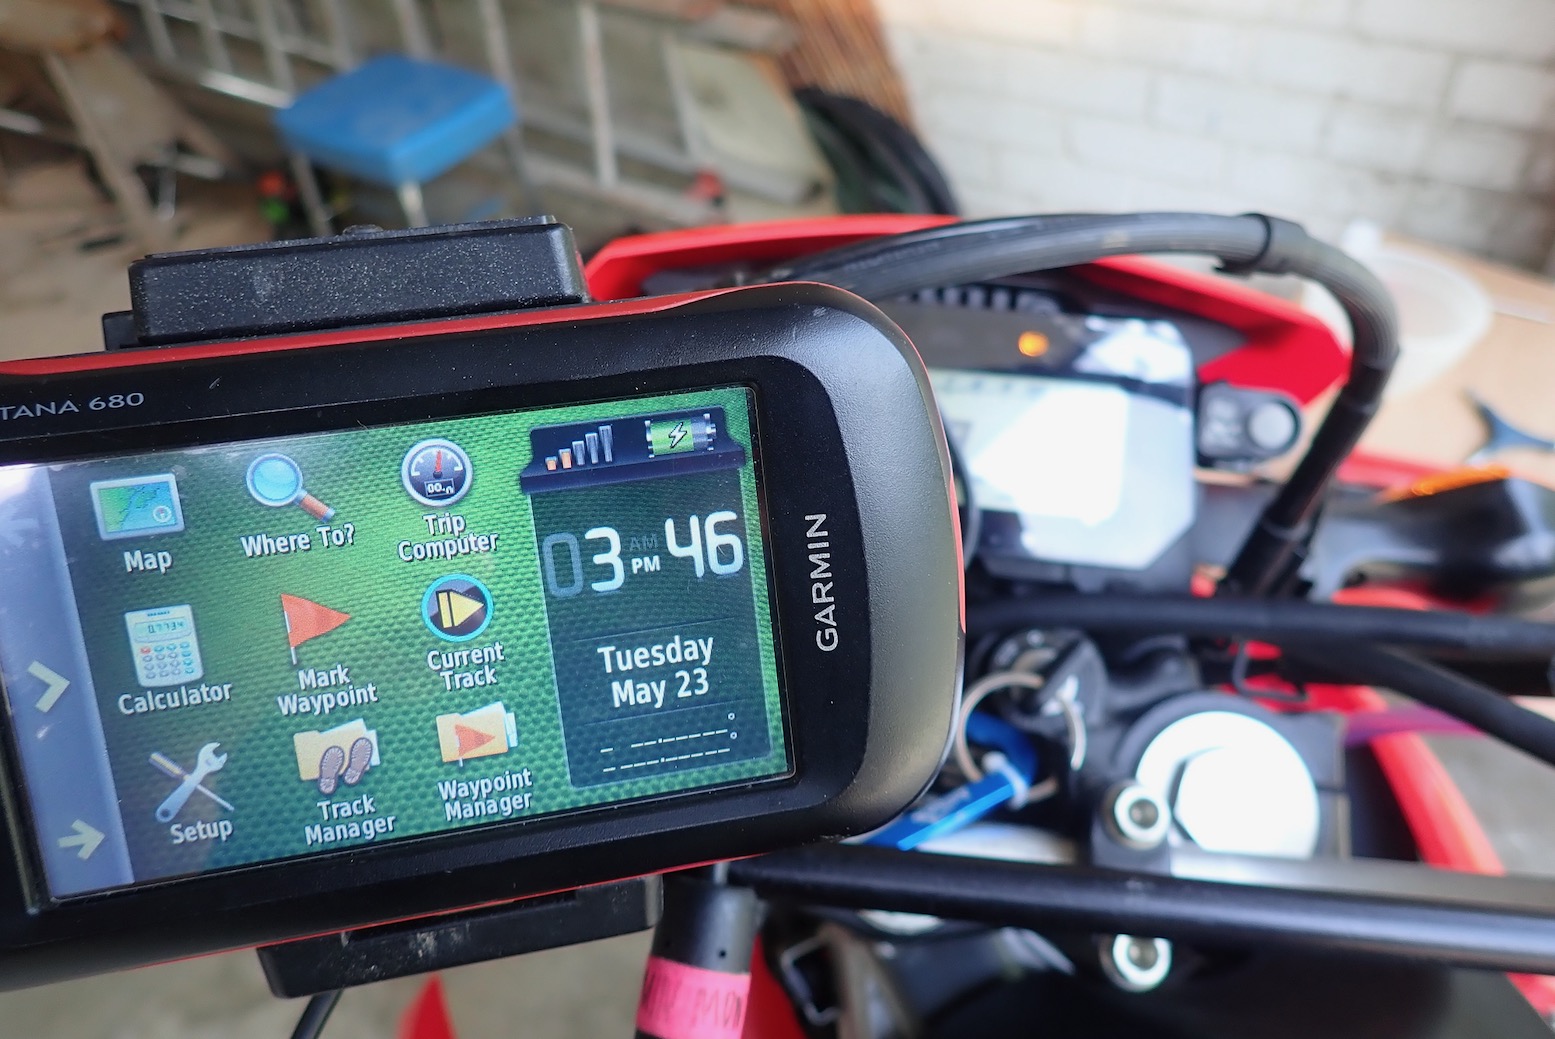
But we can thank the Trans Europe Trail (TET) initiative, based on the successful BDR project across the fabulous western US – some of which I’ve ridden and which may have been inspired by the legendary TAT. Supported by Adventure Spec among others, knowledgeable local volunteers across Europe have threaded together a network of TET routes which you might struggle to unravel yourself using maps. It’s all laid out on a plate and once figured out, TET releases 1000 of miles of trail biking adventures in the form on a free .gpx tracklog to stick in your digital navigation device. See the TET link above. Users send in updates and you can view this post as one. In a way it’s a bit my like route finding guidebooks. There’s also a Dorset TRF behind a private FB page (not all regional TRF groups are like this). I was happy to send a donation to TET.

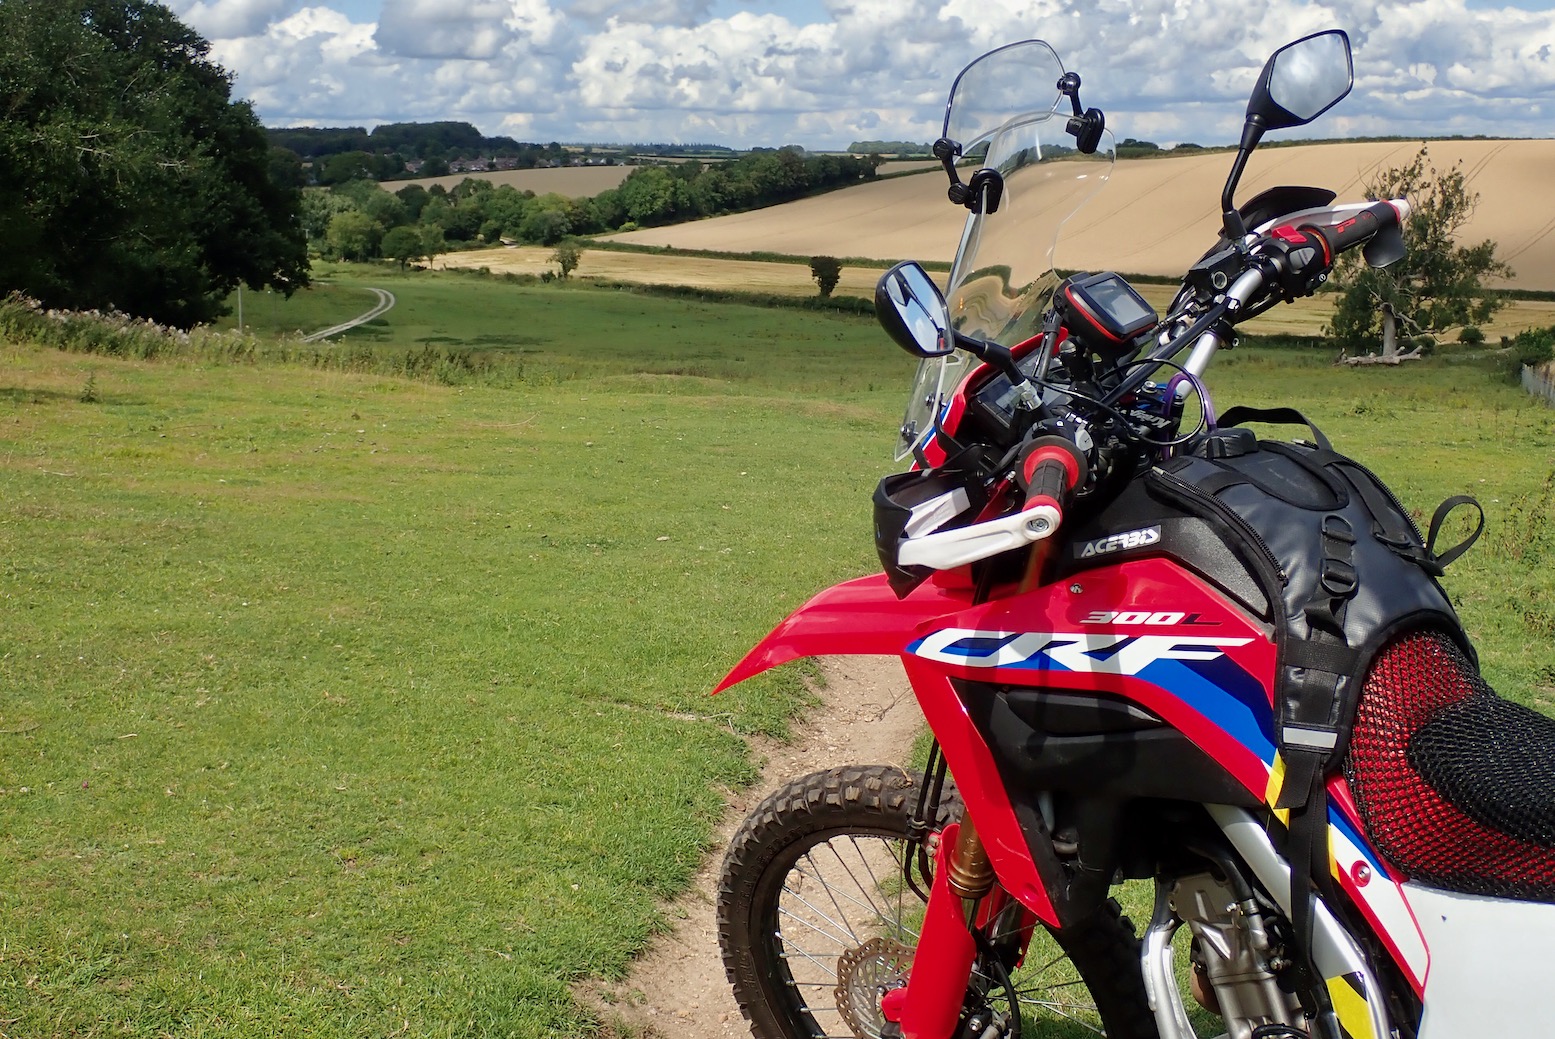
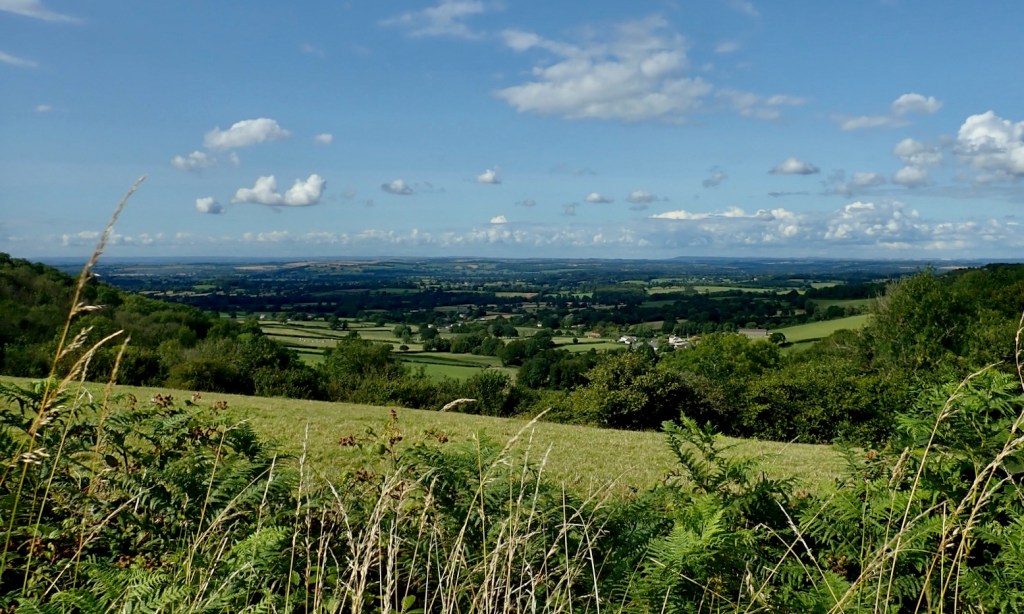
A mile of track here and there seems insubstantial, but thread them all together and you’re in business, and the road sections give you a chance to recover. And compared to up north, ancient Dorset dodged the last Ice Cap and is thick with prehistoric trails most of which became today’s footpath, lanes, green or otherwise. It means there are enough footpaths and bridleways to share. I also suspect inland Dorset is helpfully overshadowed by its spectacular Jurassic Coast. Add no conurbations away from Poole/Bournemouth, no National Trails, outstanding medieval cathedrals, or even motorways. Things might be different in Devon and Cornwall.
Of course most of England won’t be like North Africa or SW USA where dirt trails can fill a day, but it’s the best we have and gets you out exploring your nearby countryside on your bike.

GWT southern arm

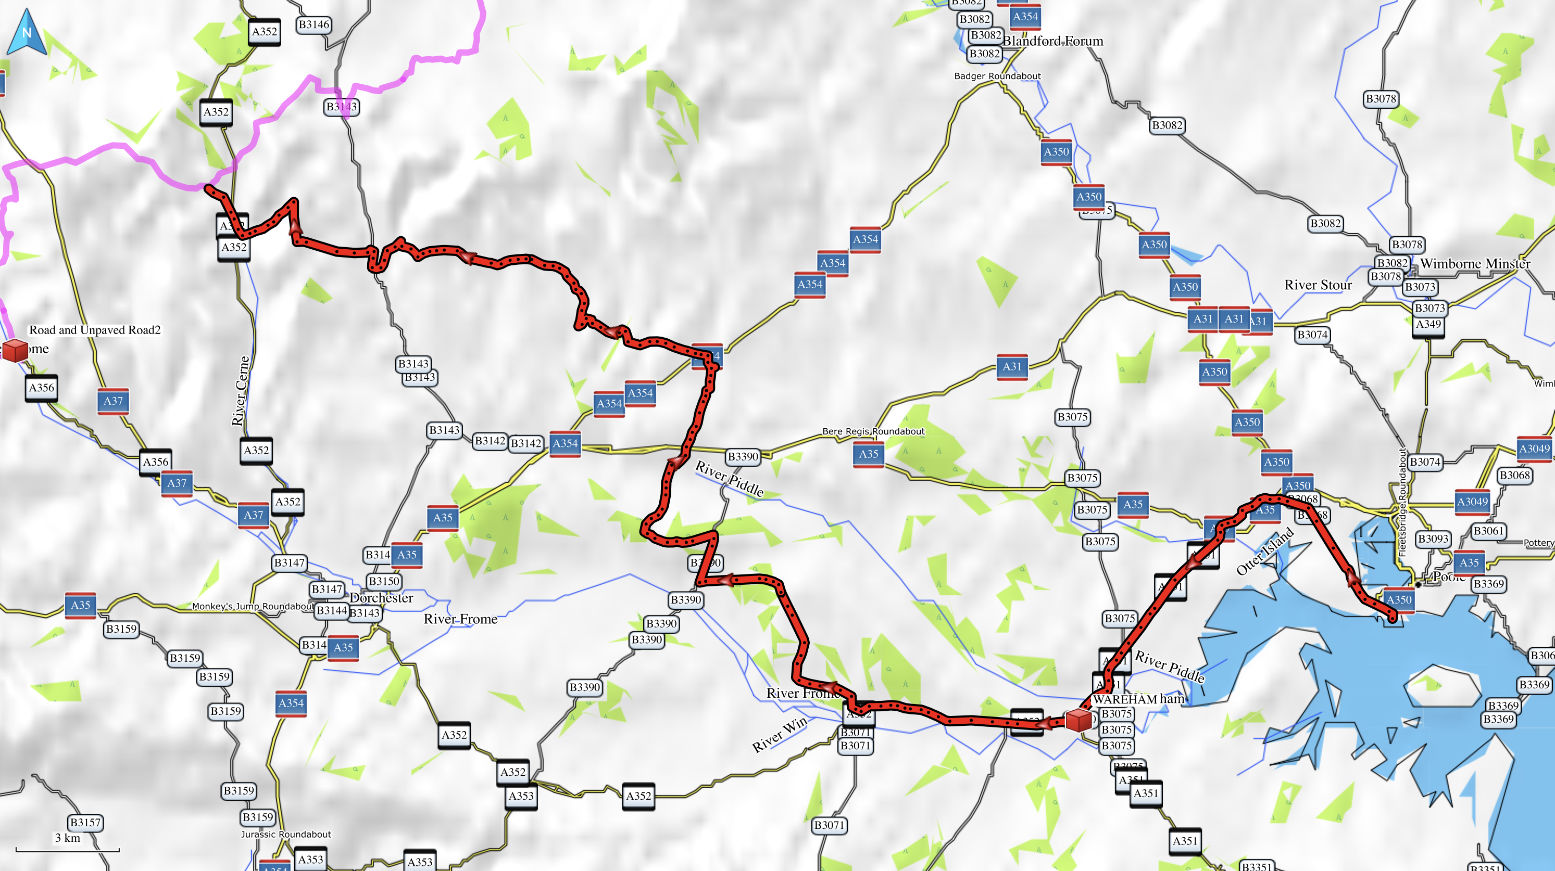
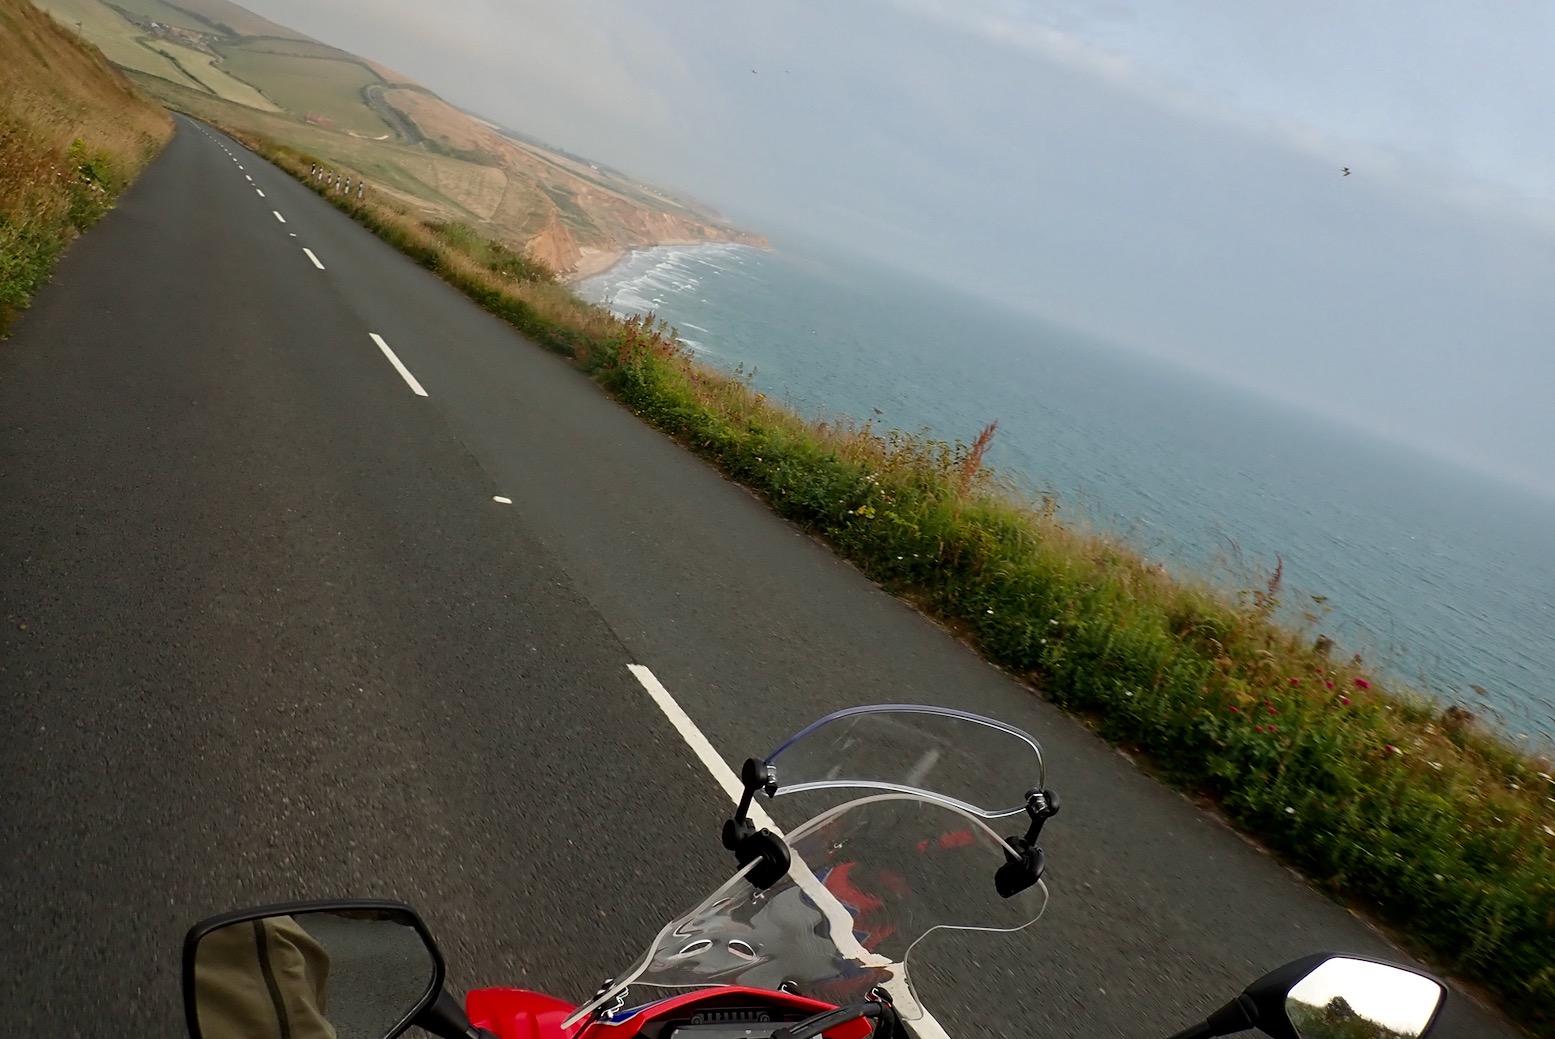
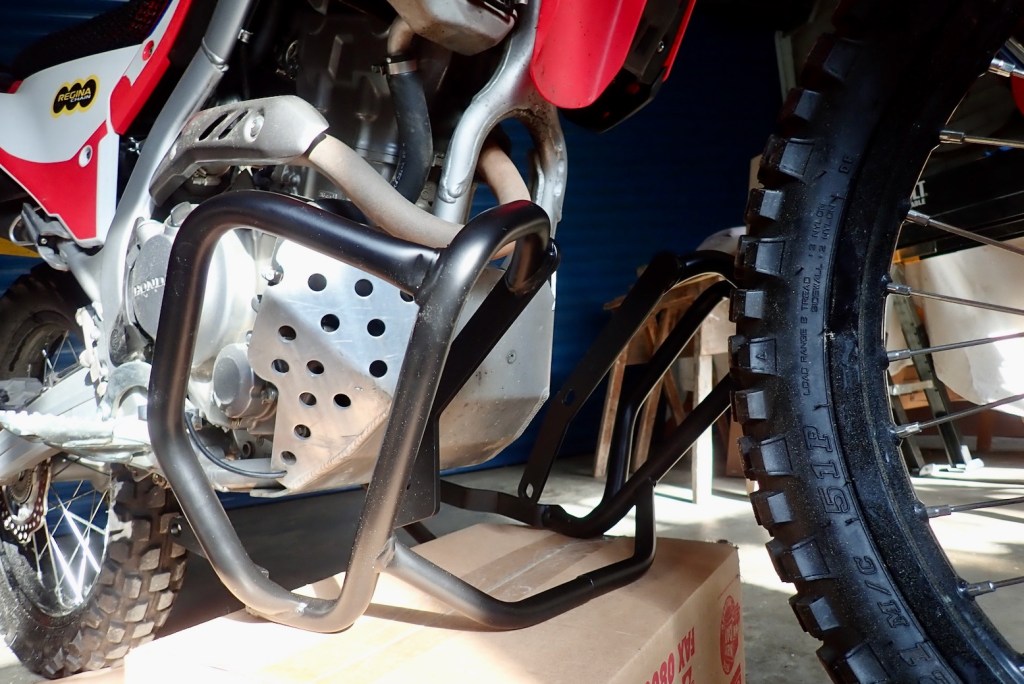
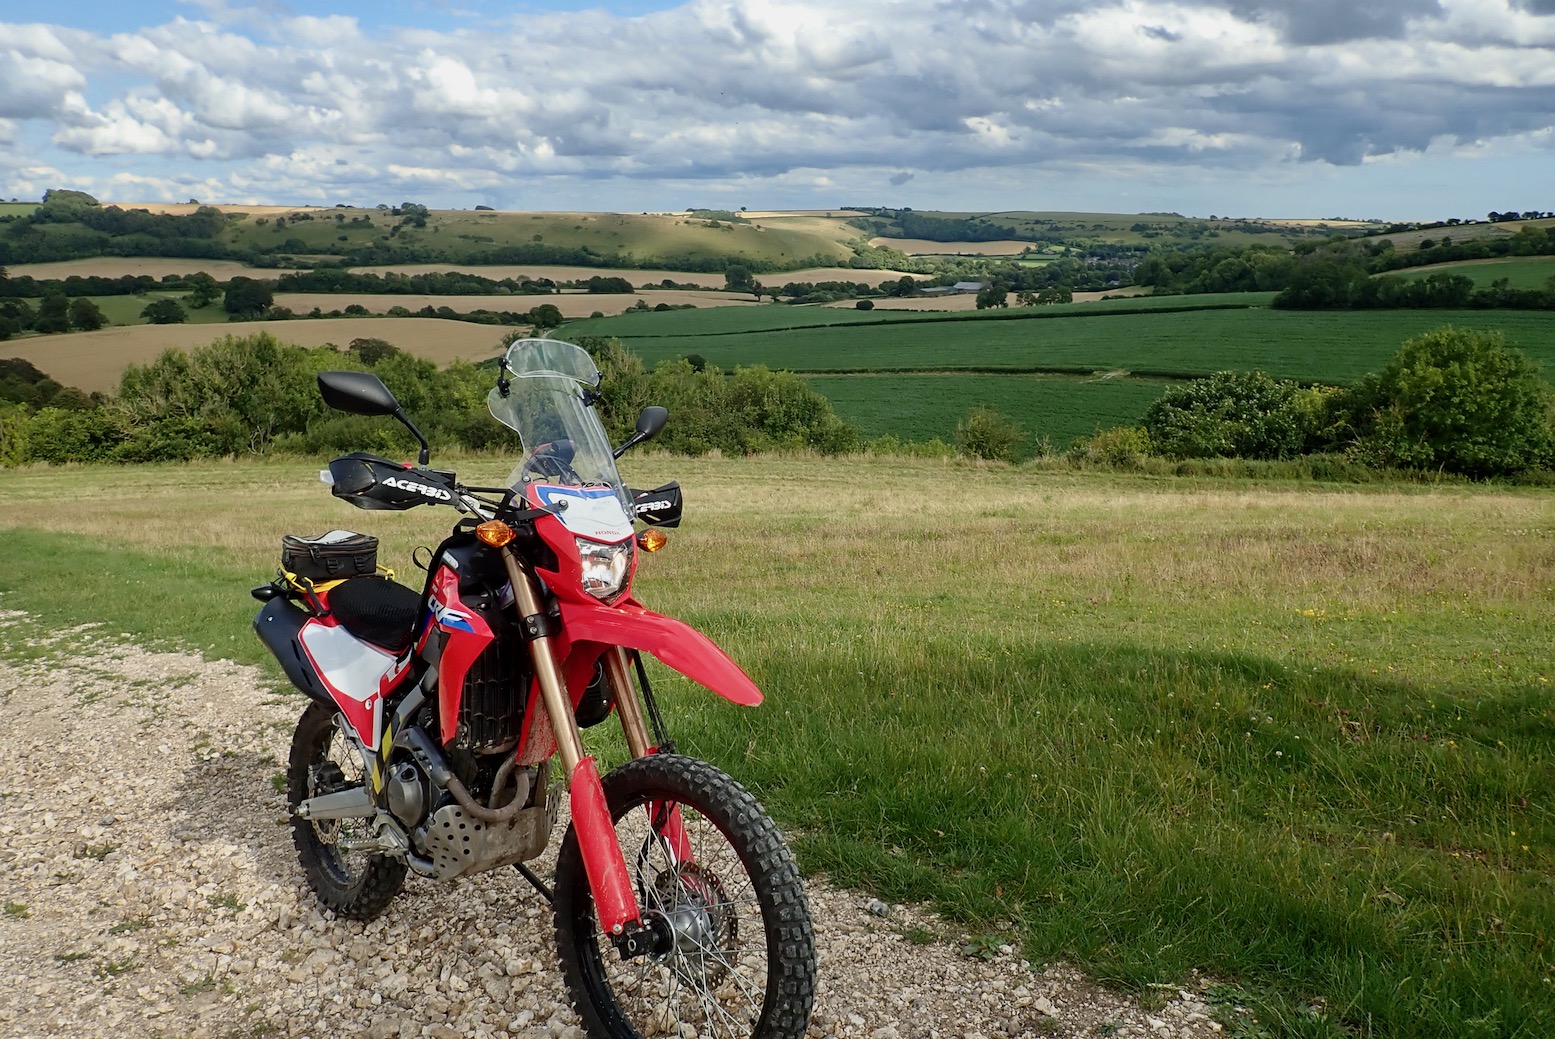
The Great Western Trail is one of two named TET UK sub-routes – an 800-mile loop reaching down from Wiltshire to Land’s End and back. It’s pitched at more agile trail bikes, not giant Advs.
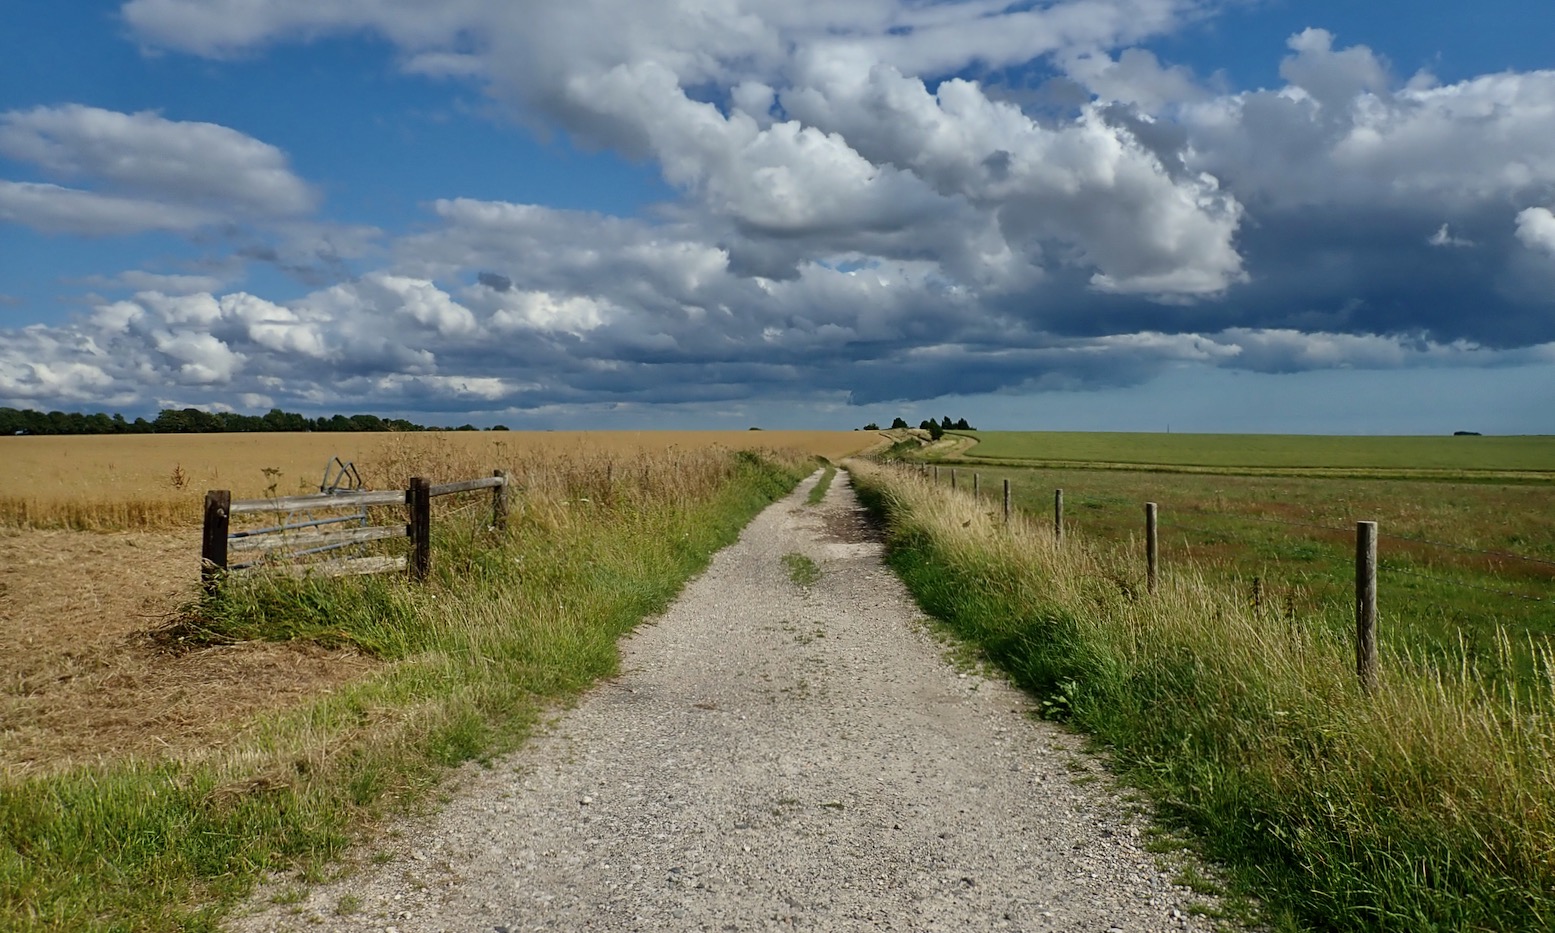
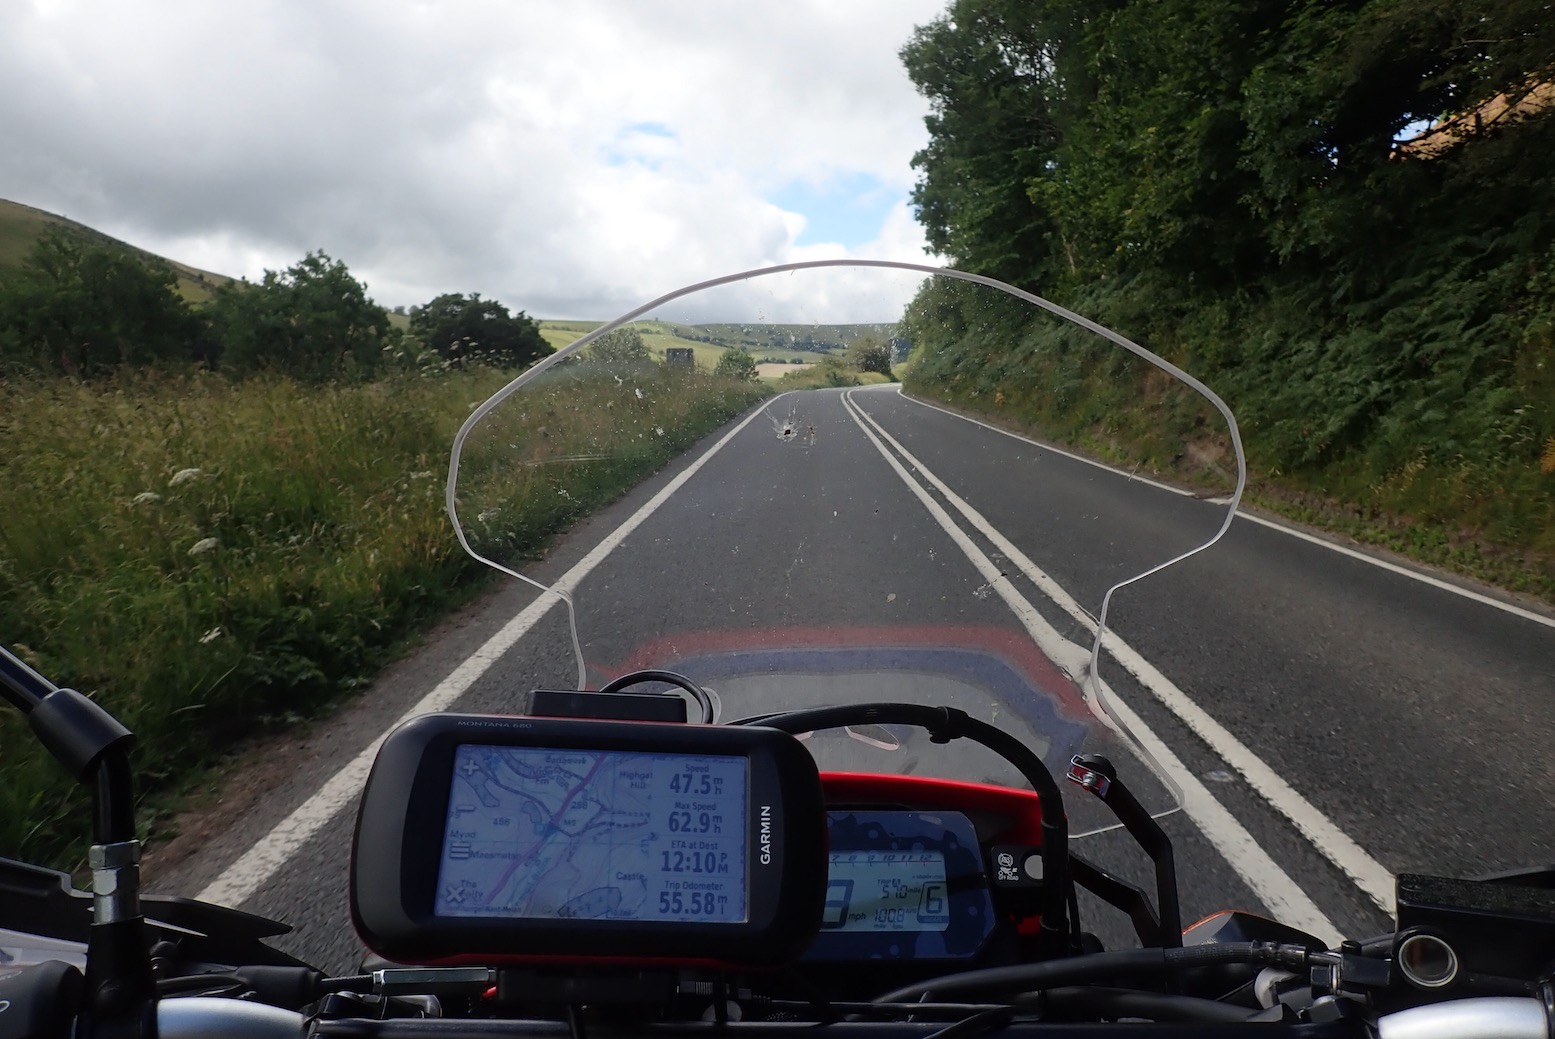
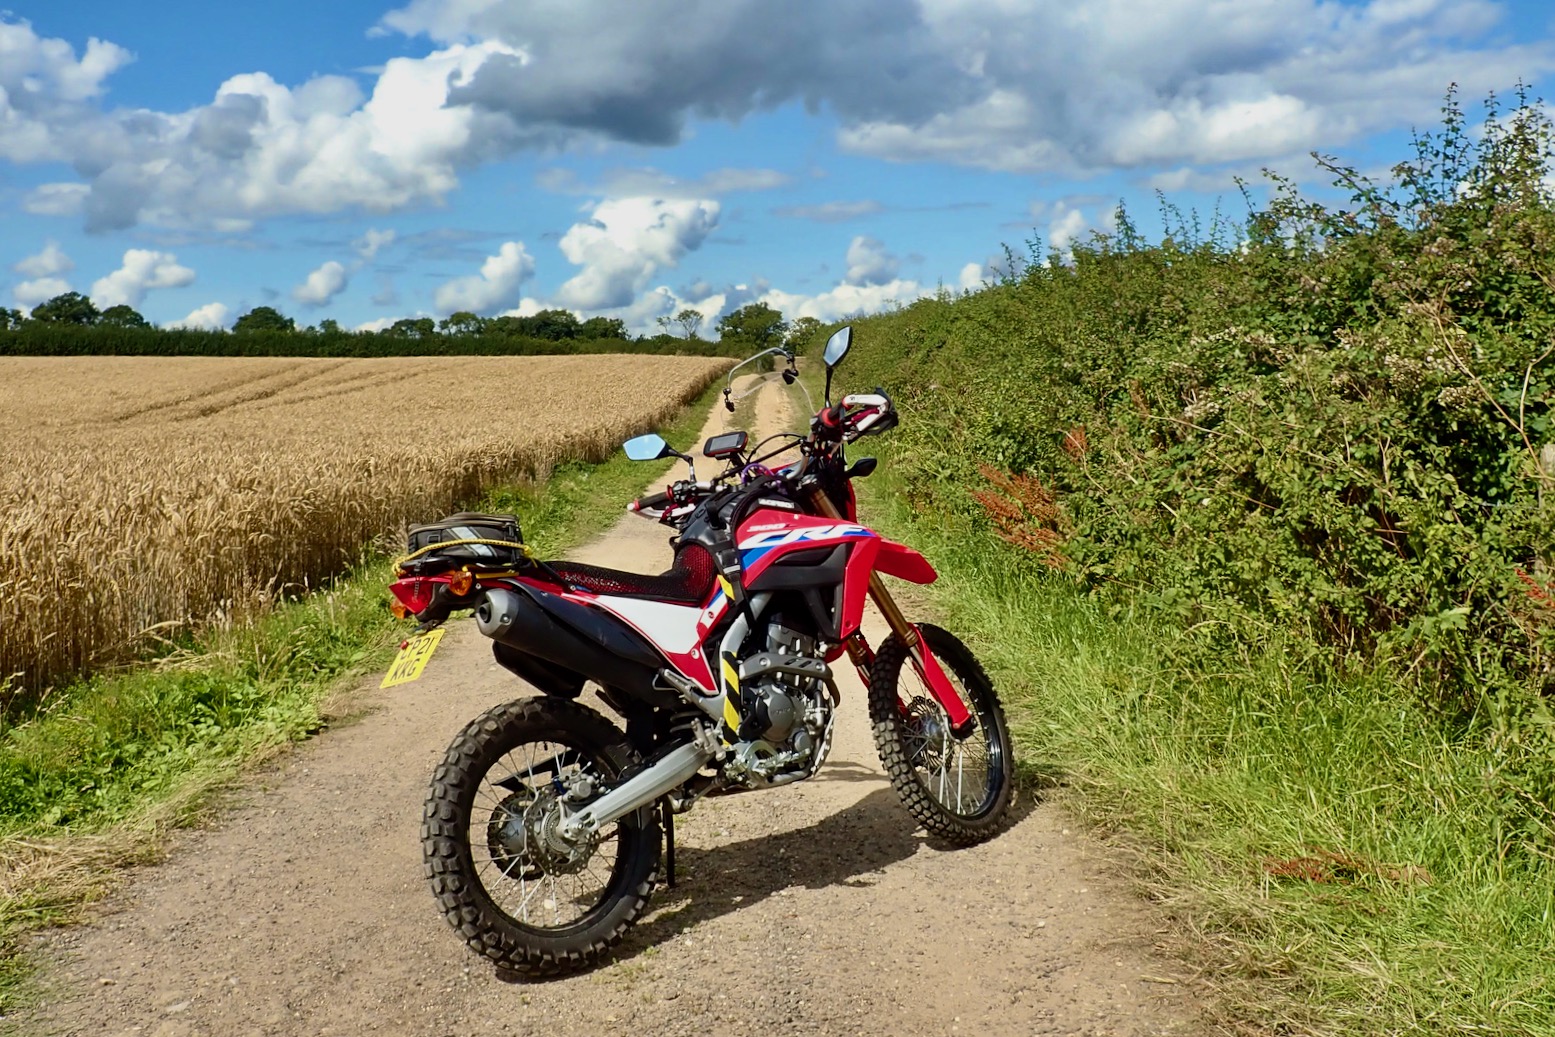
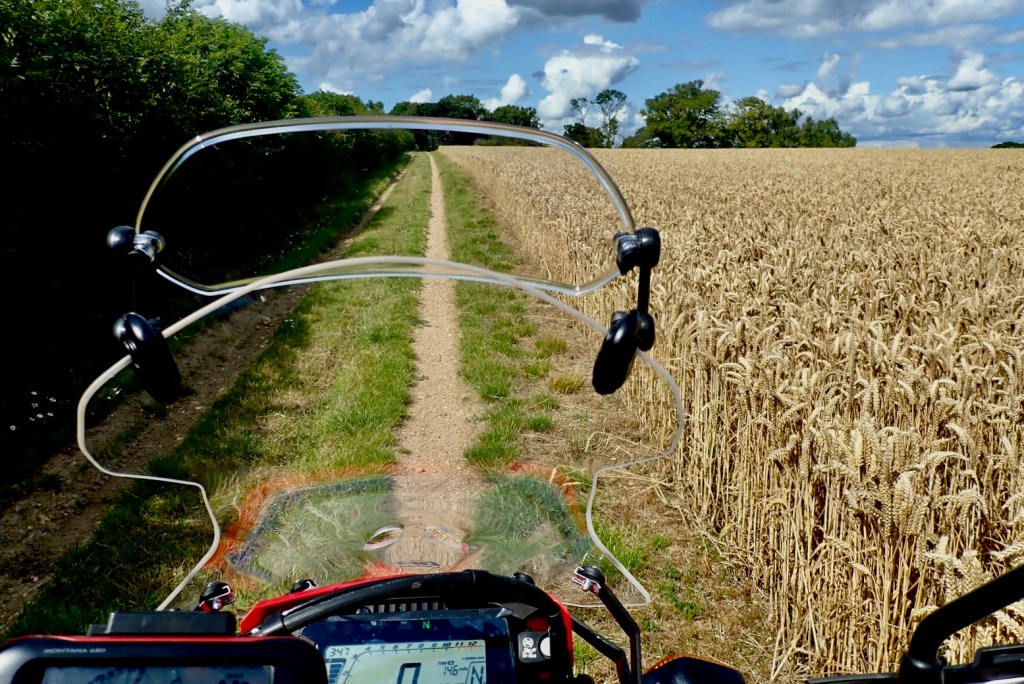
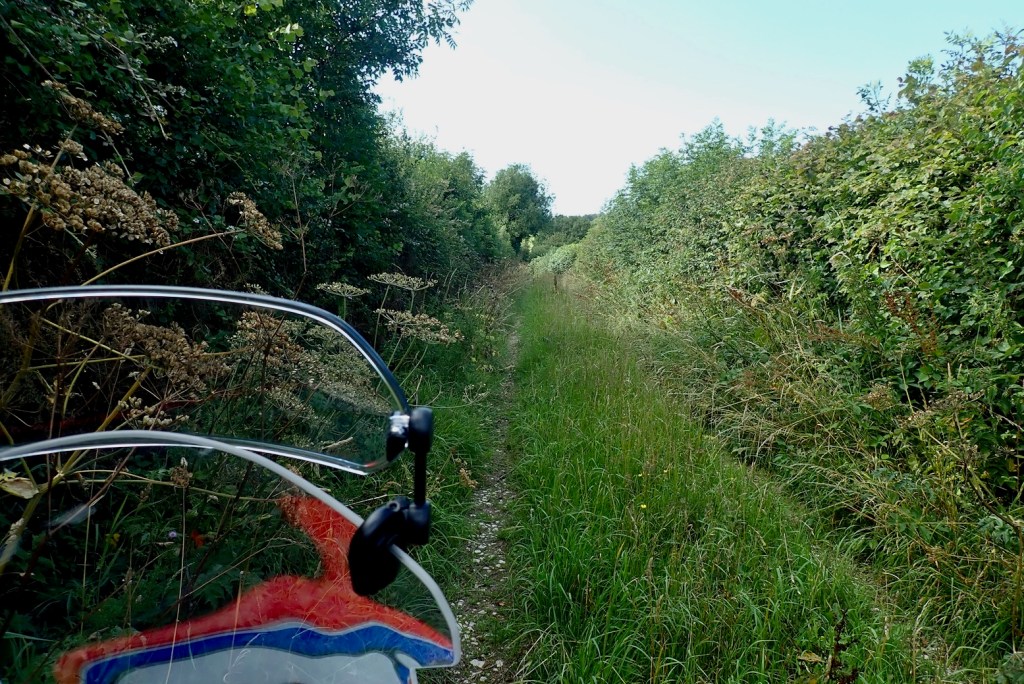
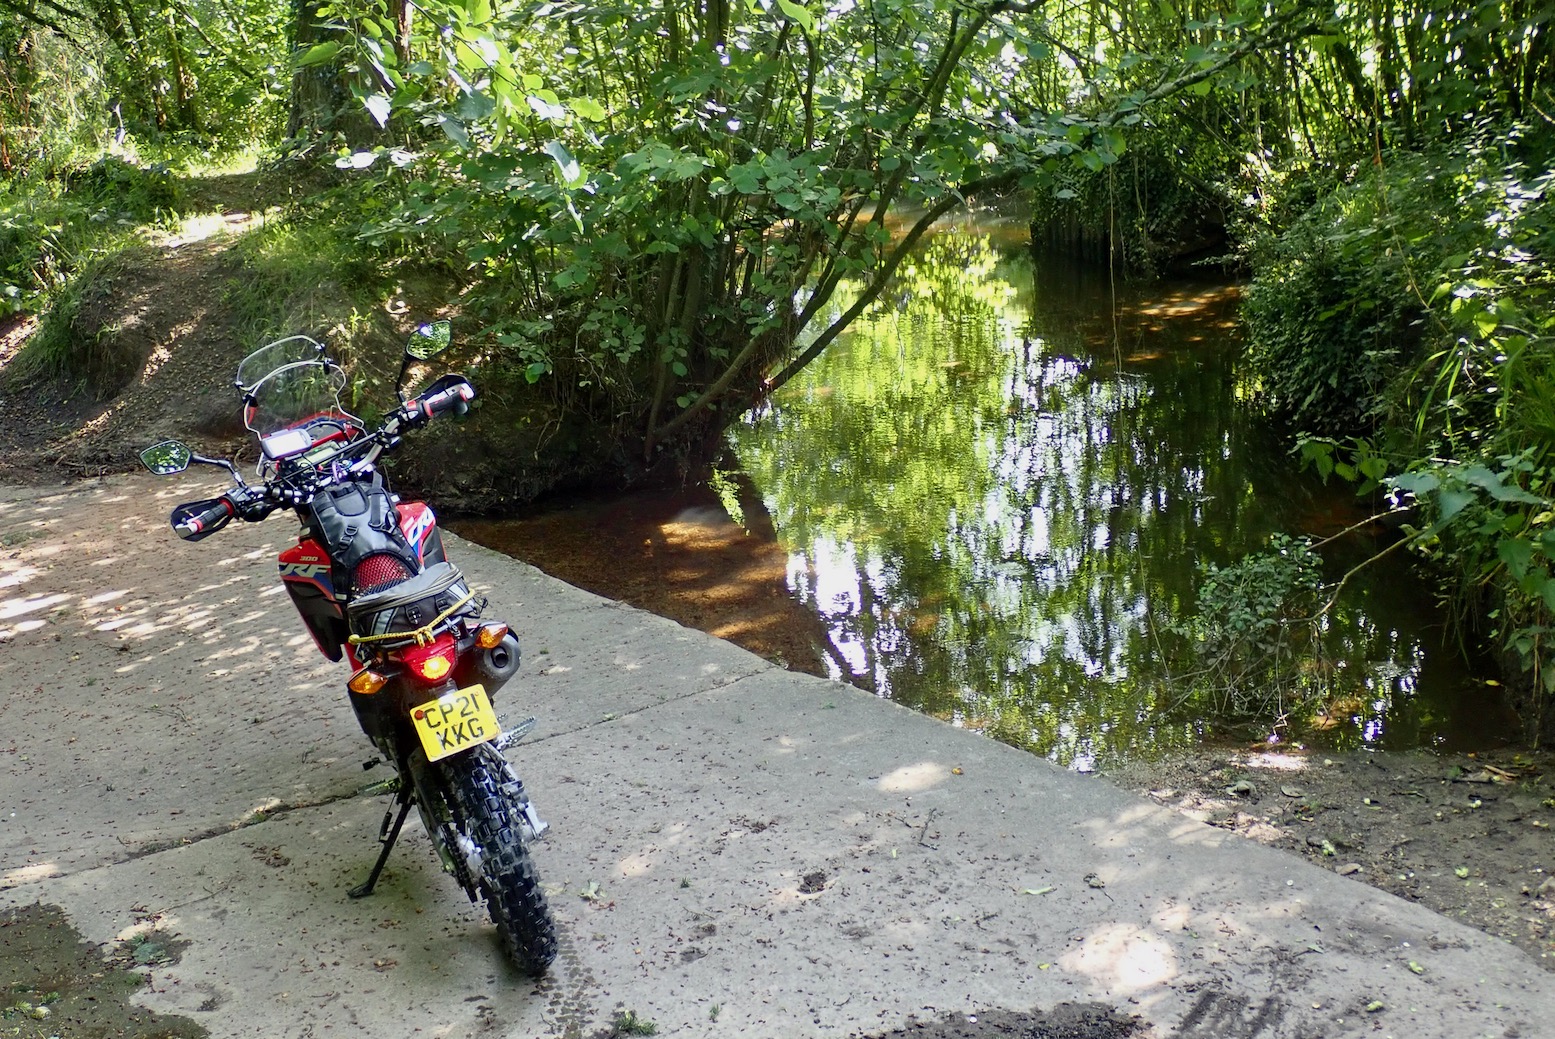
It has a southern arm of about 60 miles from Poole to west Dorset. Being close to it, I set off from Wareham one afternoon on the 300L to see what I might find. I fully expected to encounter frequent or locked gates, road closures (TROs) and maybe even hostile natives unschooled in the legal status of green lanes. I could not have been more wrong.

First, I needed to fill up. The true (verified) mpg was actually 31kpl or only 88mpg. It’s not looking good for a true 100mpg
I’m trying pricier E5 this time. Some say it’s better all round, including mpg.
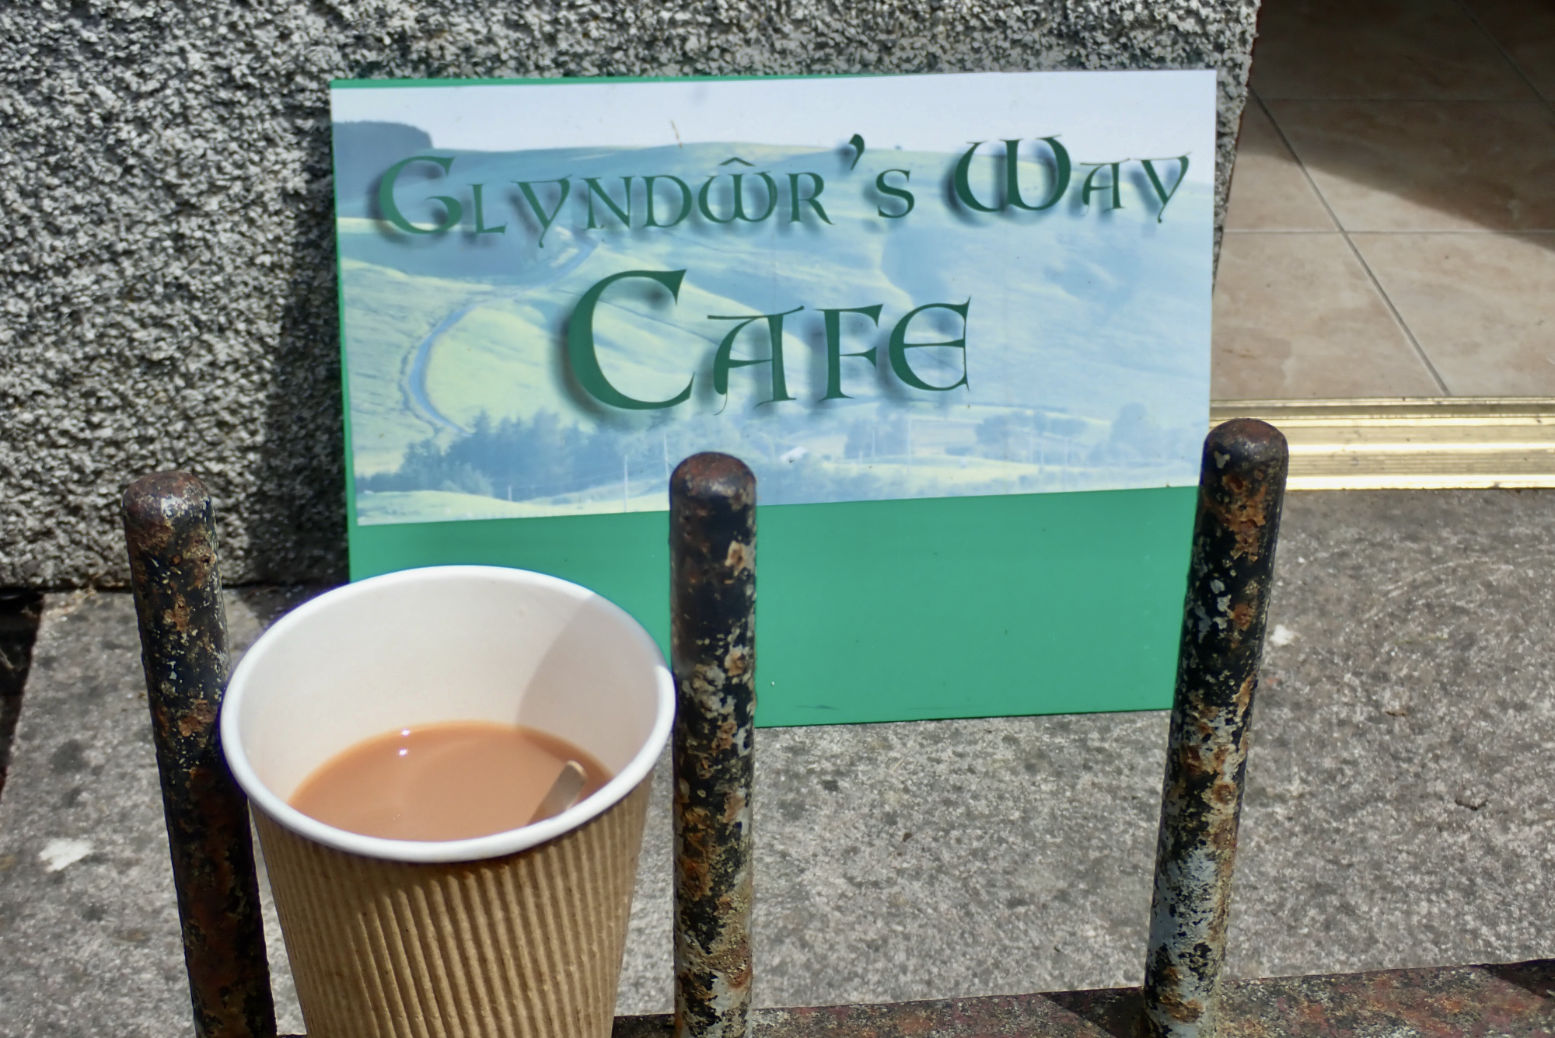
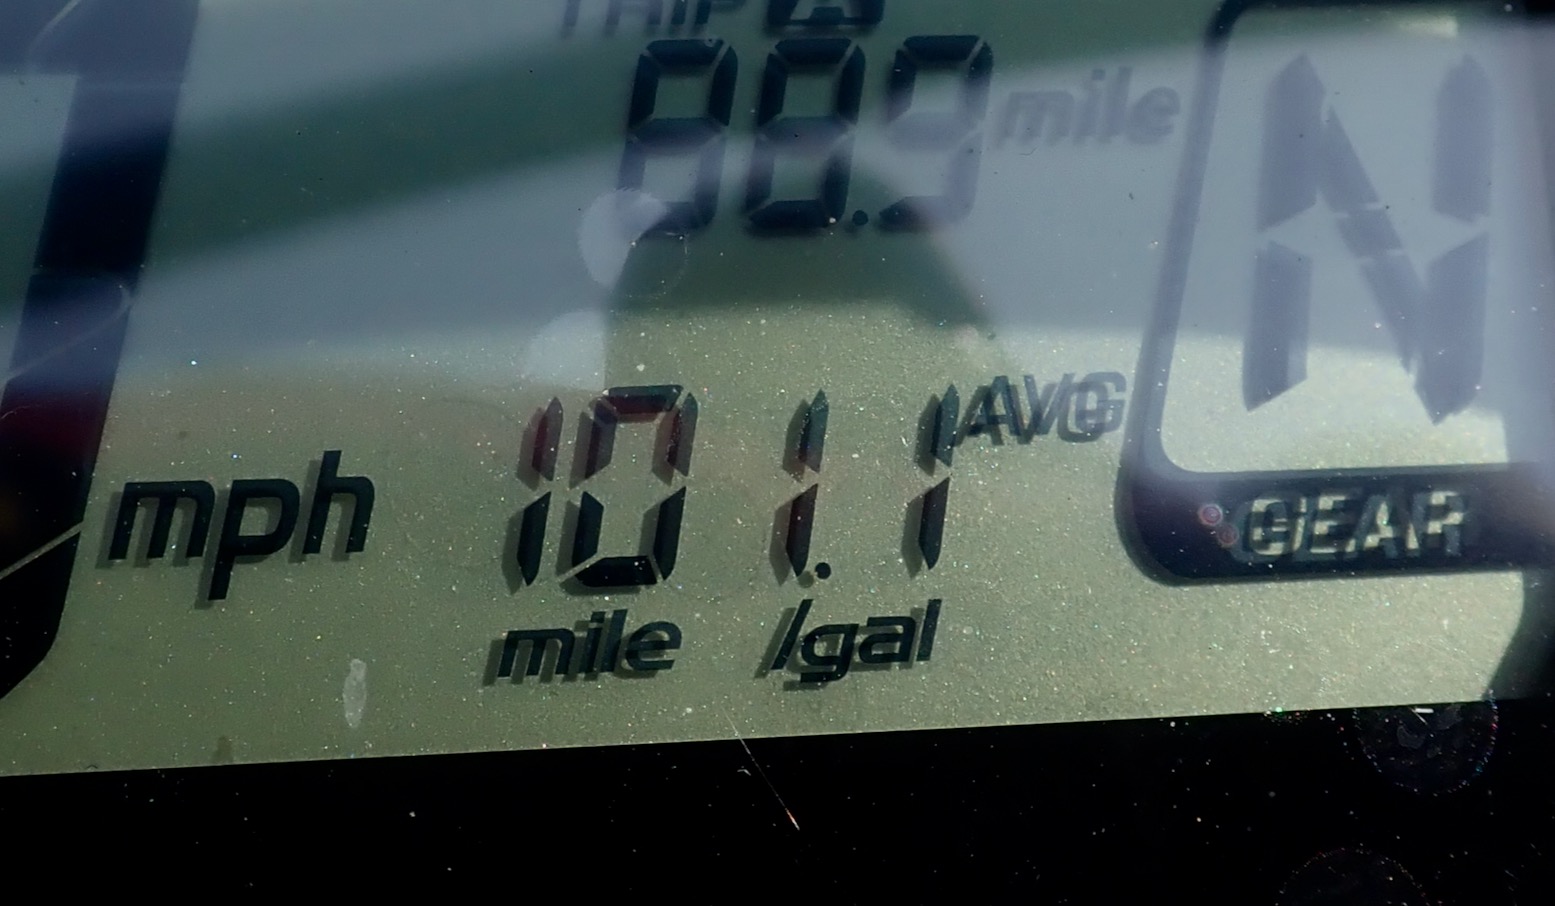
But 99 octane? I never knew there was such a thing away from a drag strip. No wonder the planet’s on fire.
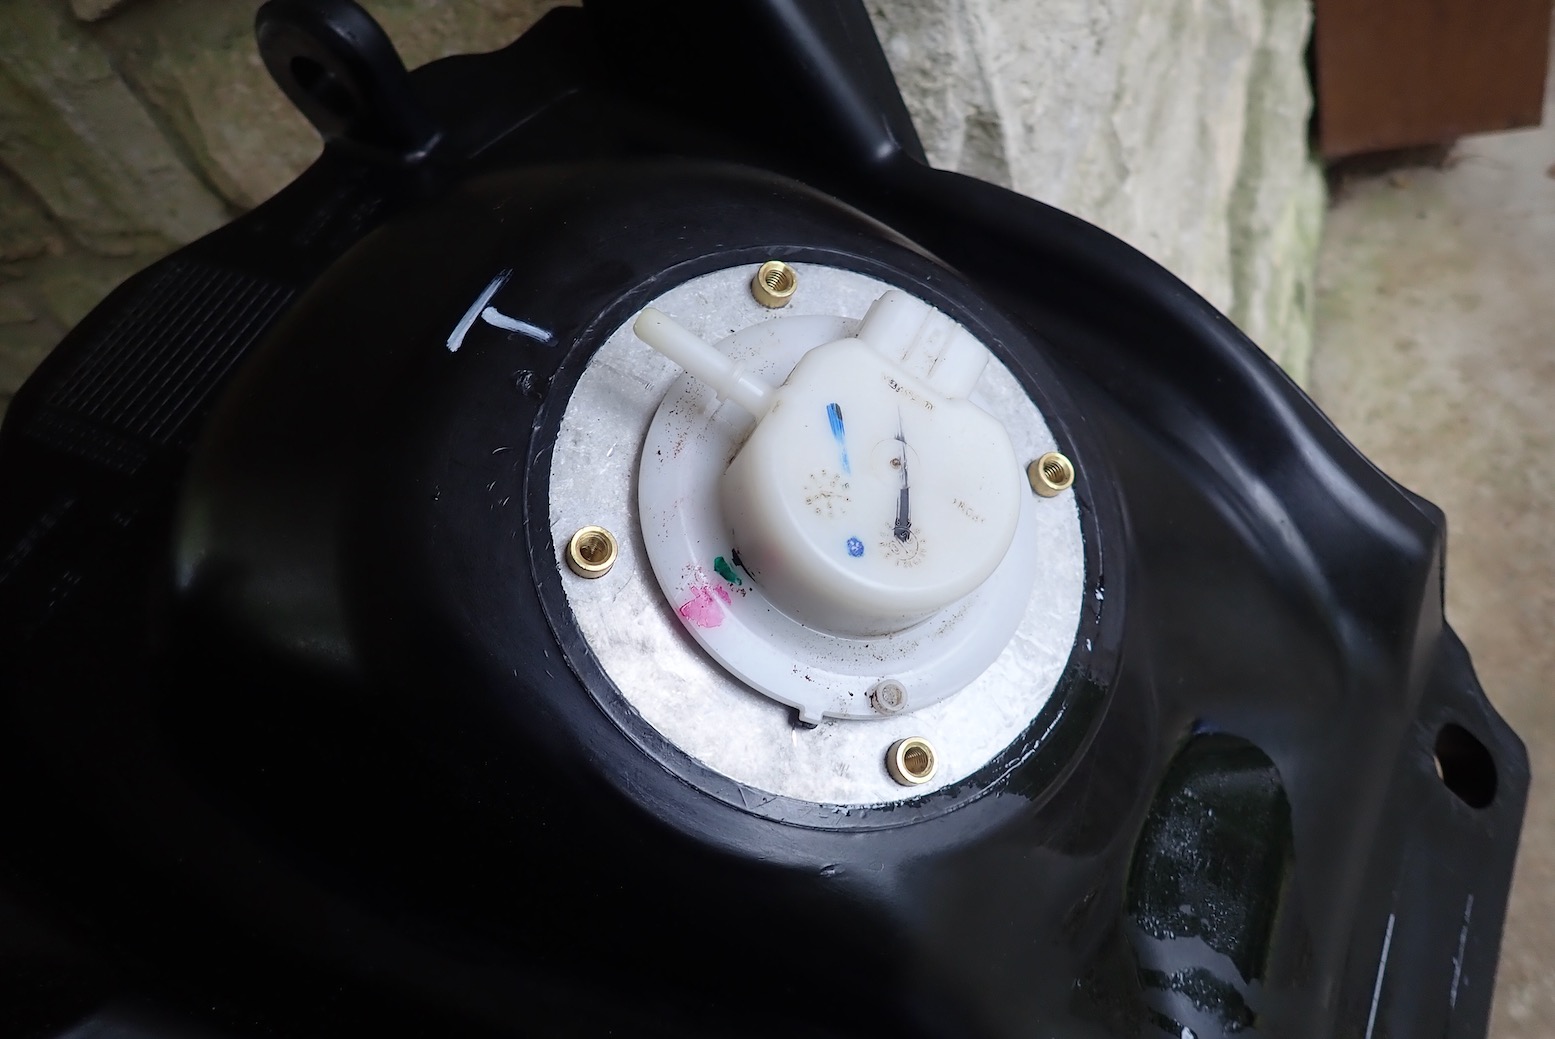
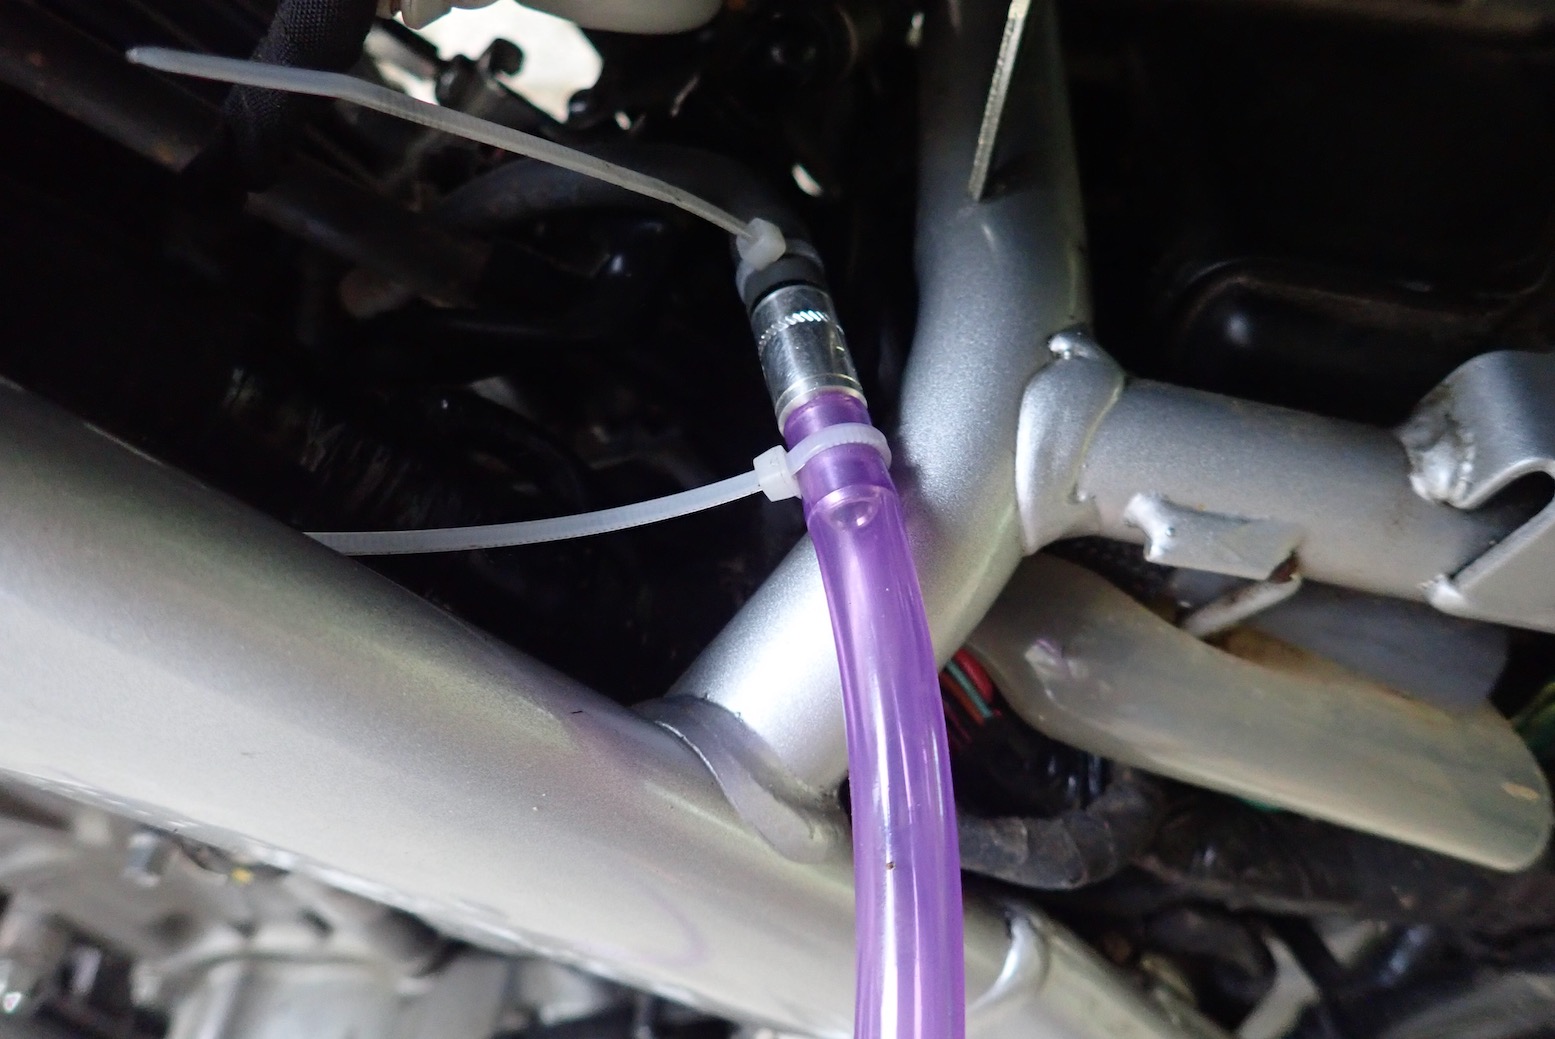
A fellow L-head told me there’s a setting on the dash to show volume consumed since last fill; a more useful way of gauging range once you’ve verified your capacity (13.8 litres or on my Acerbis). Actually my bike seems only to display gallons, maybe because it’s set to miles, but my volume is 3 Imp gallons.

Is the bike running smoother and pulling better on E5, or do I just think it is?
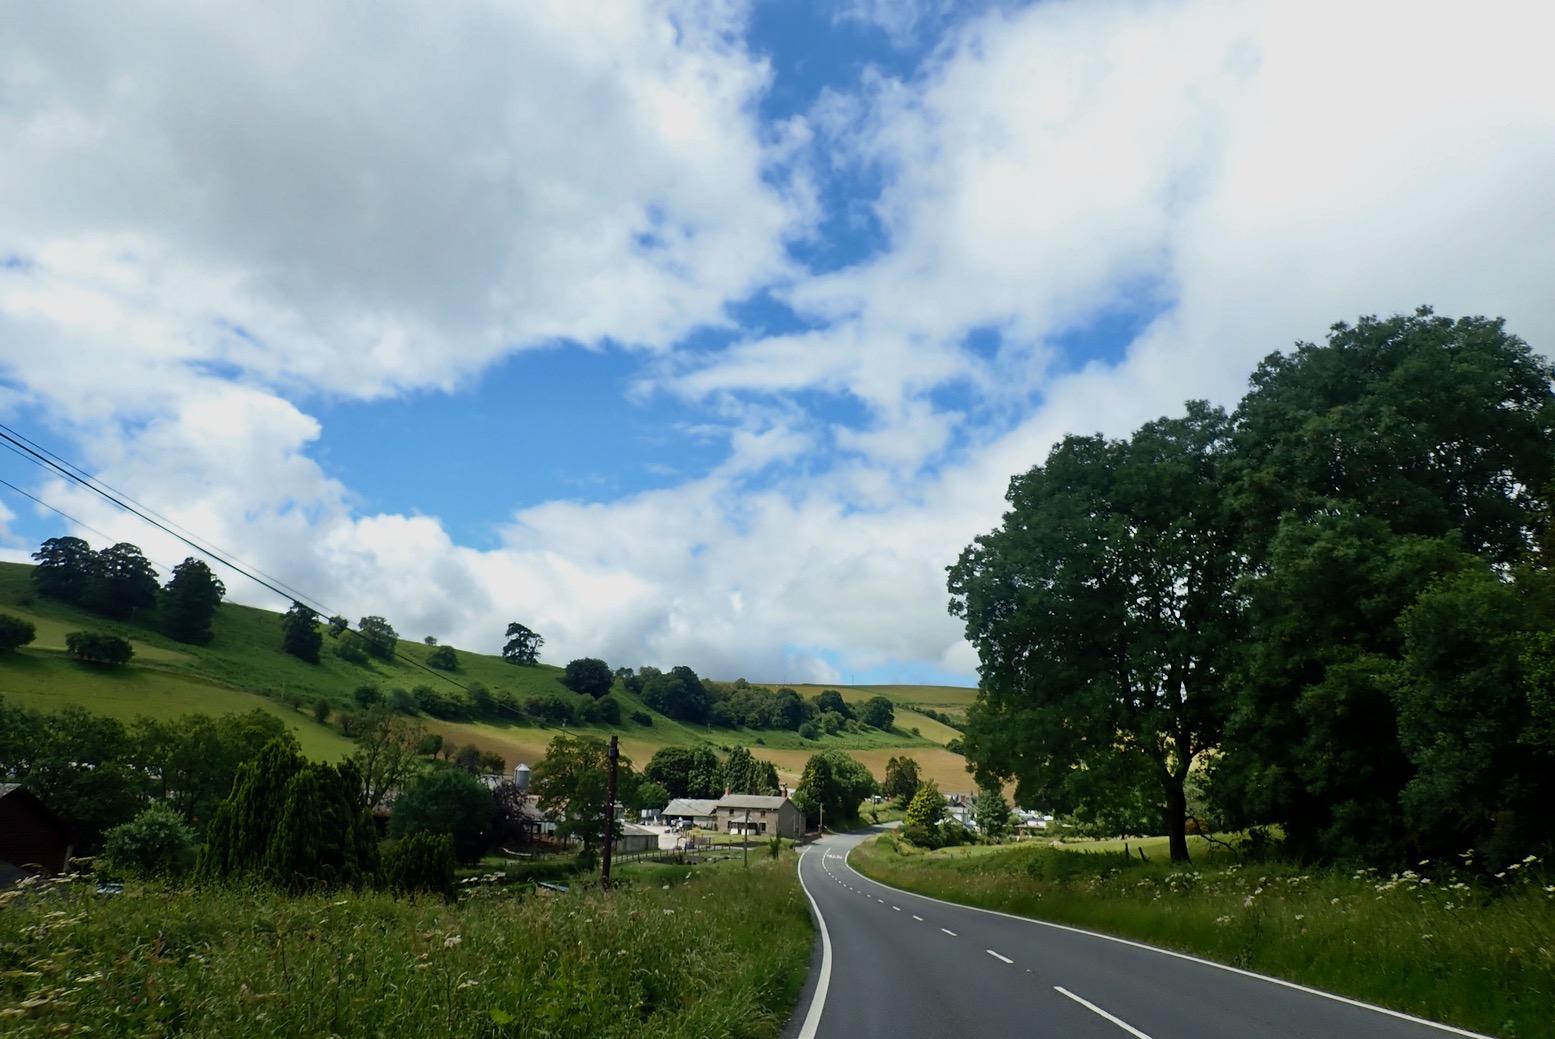
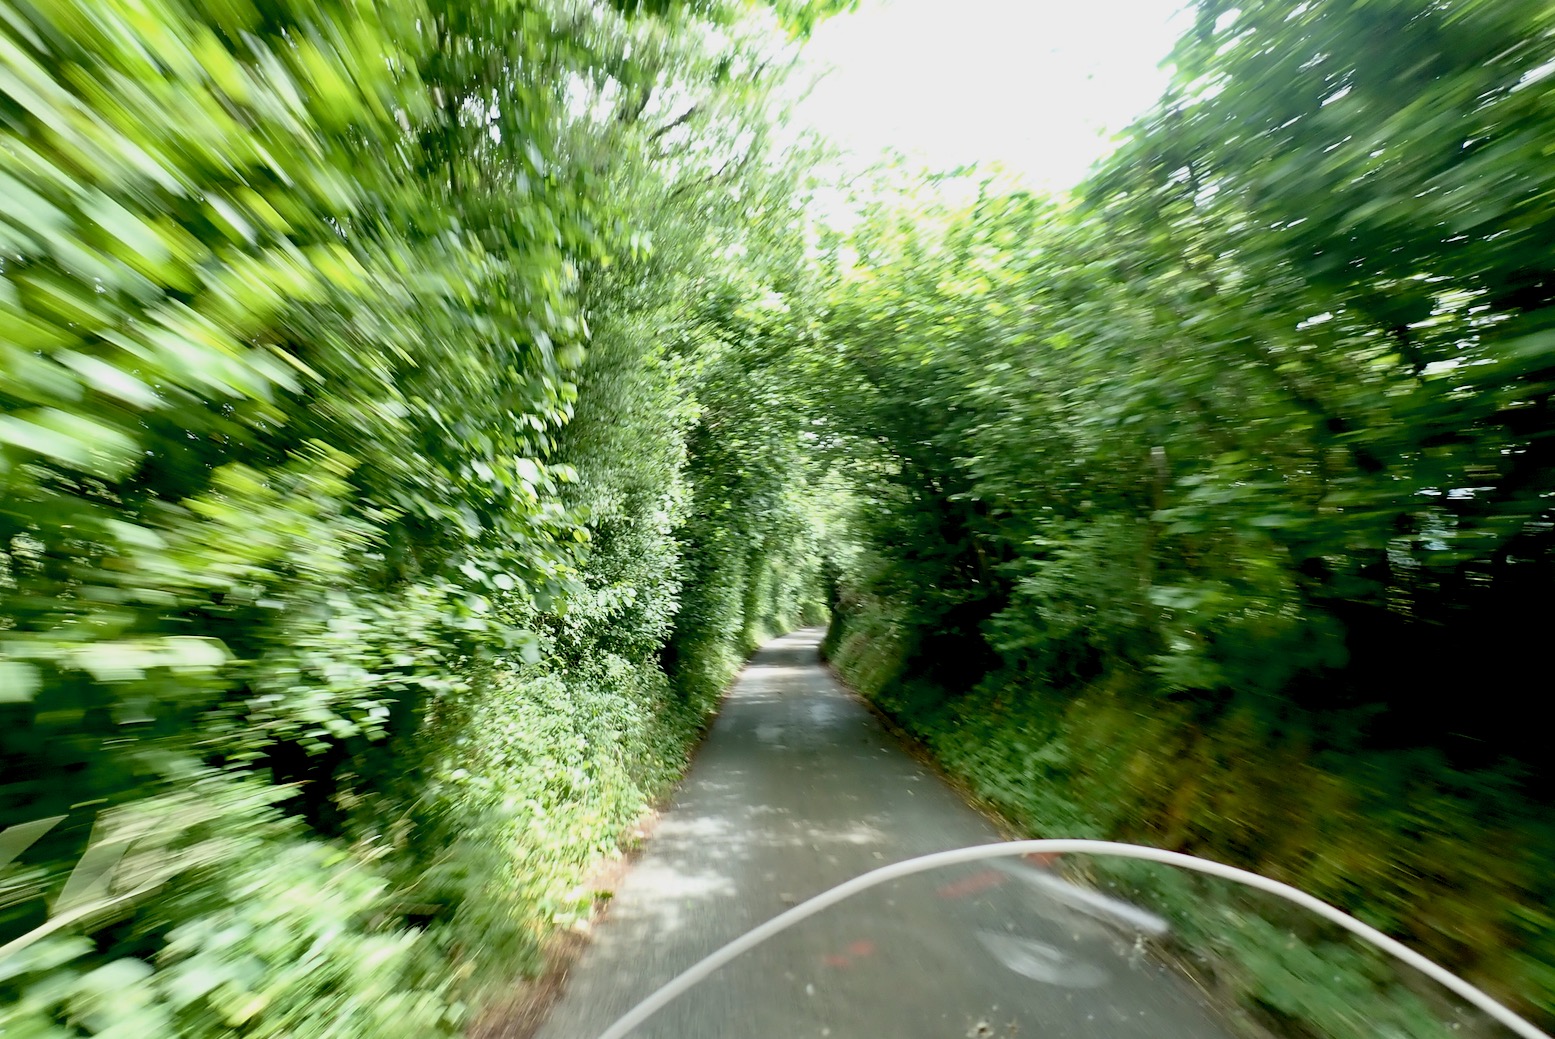
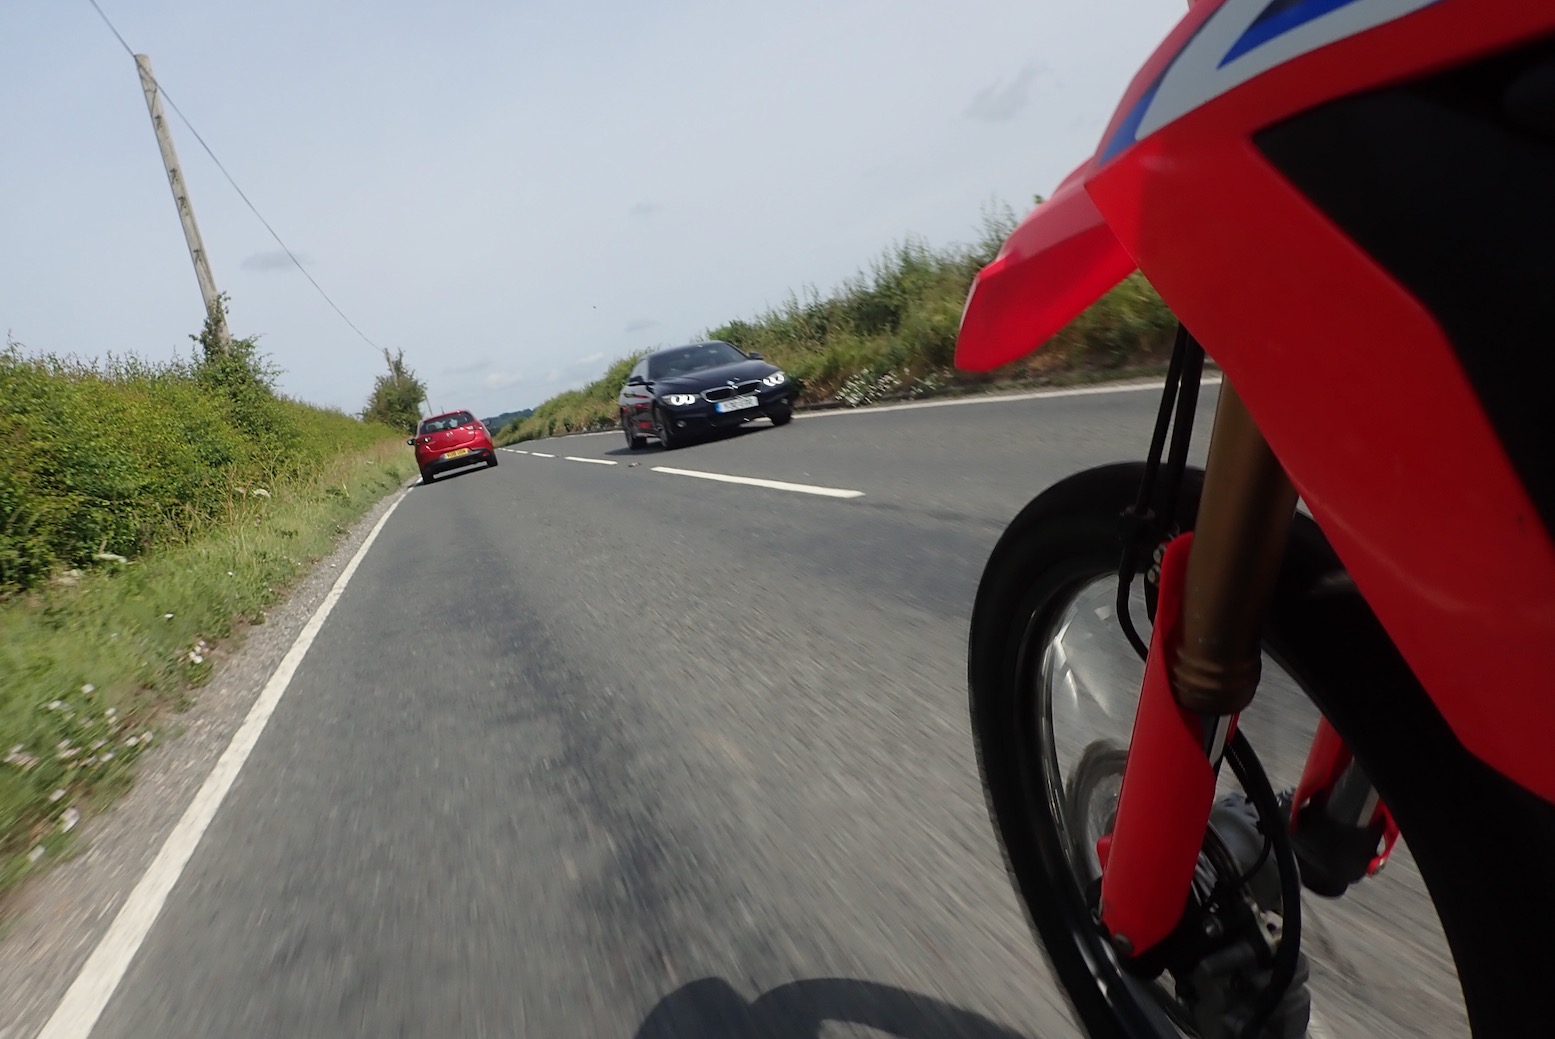
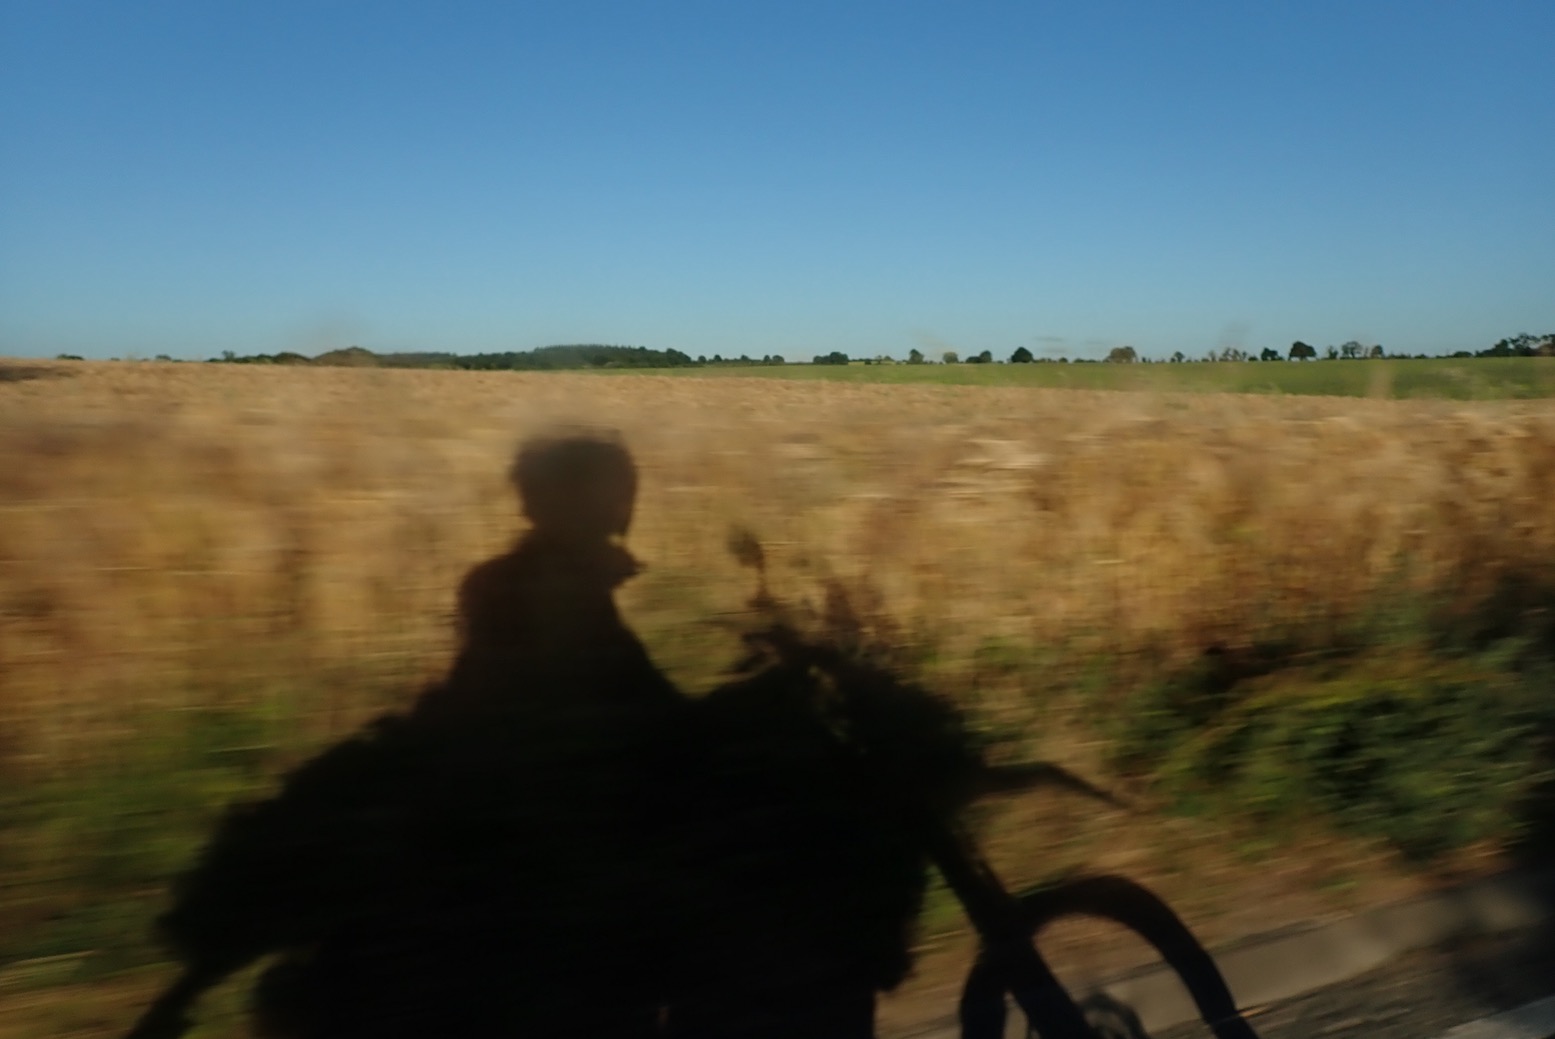
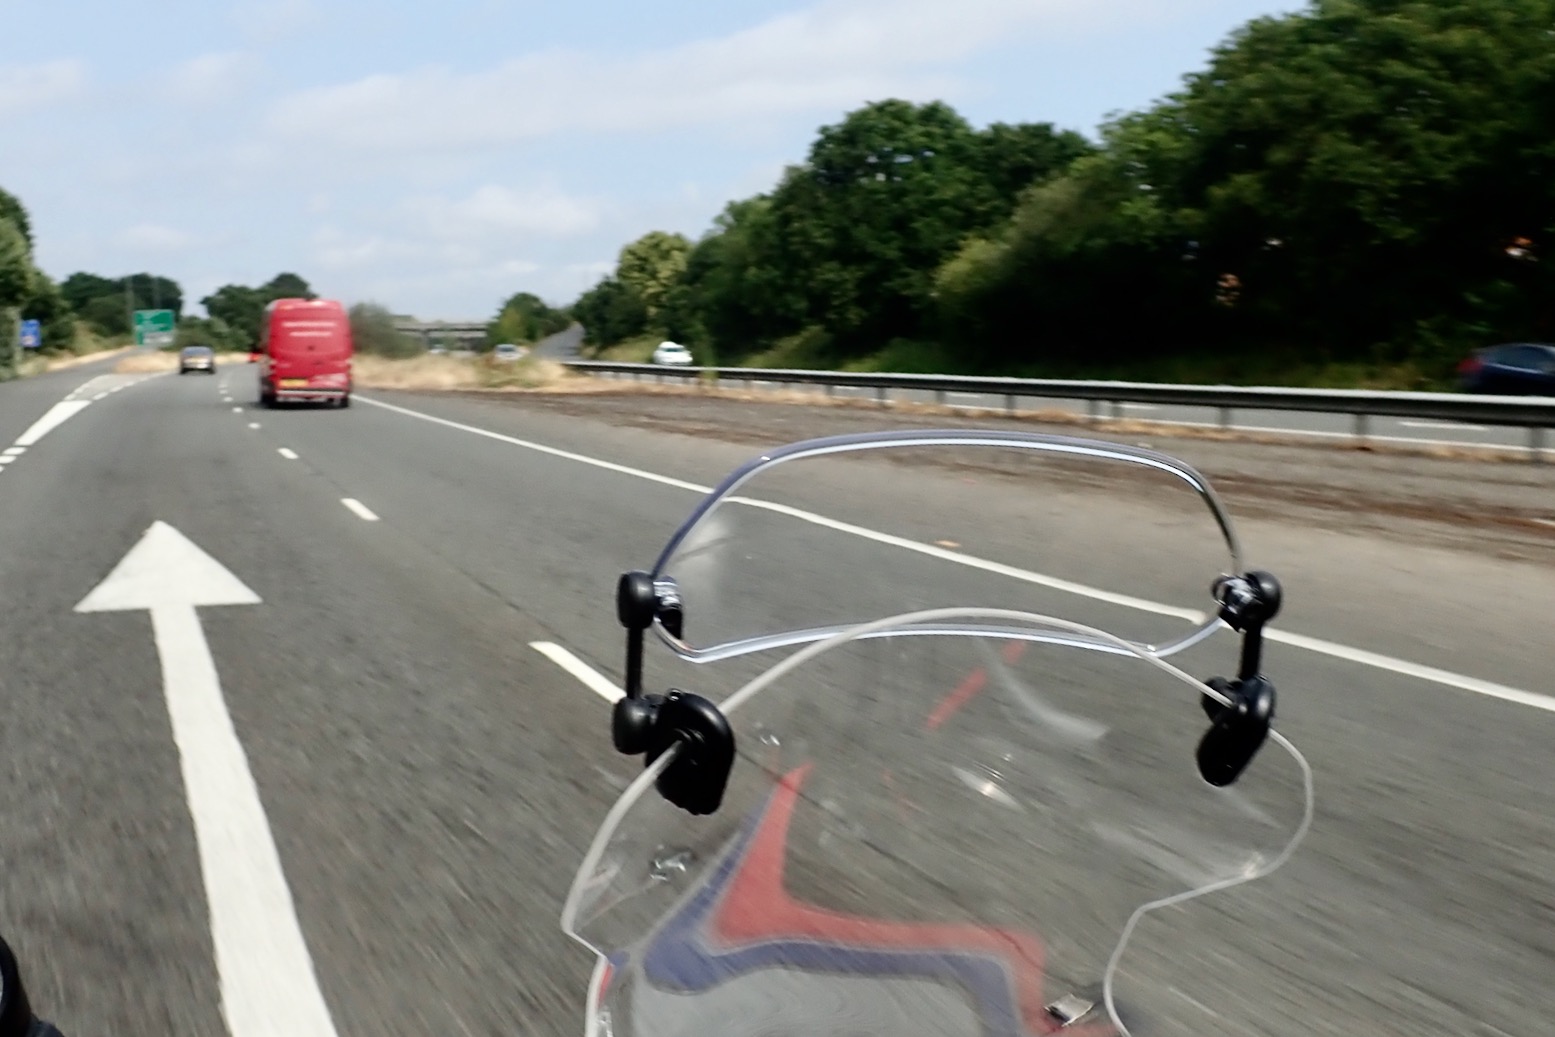
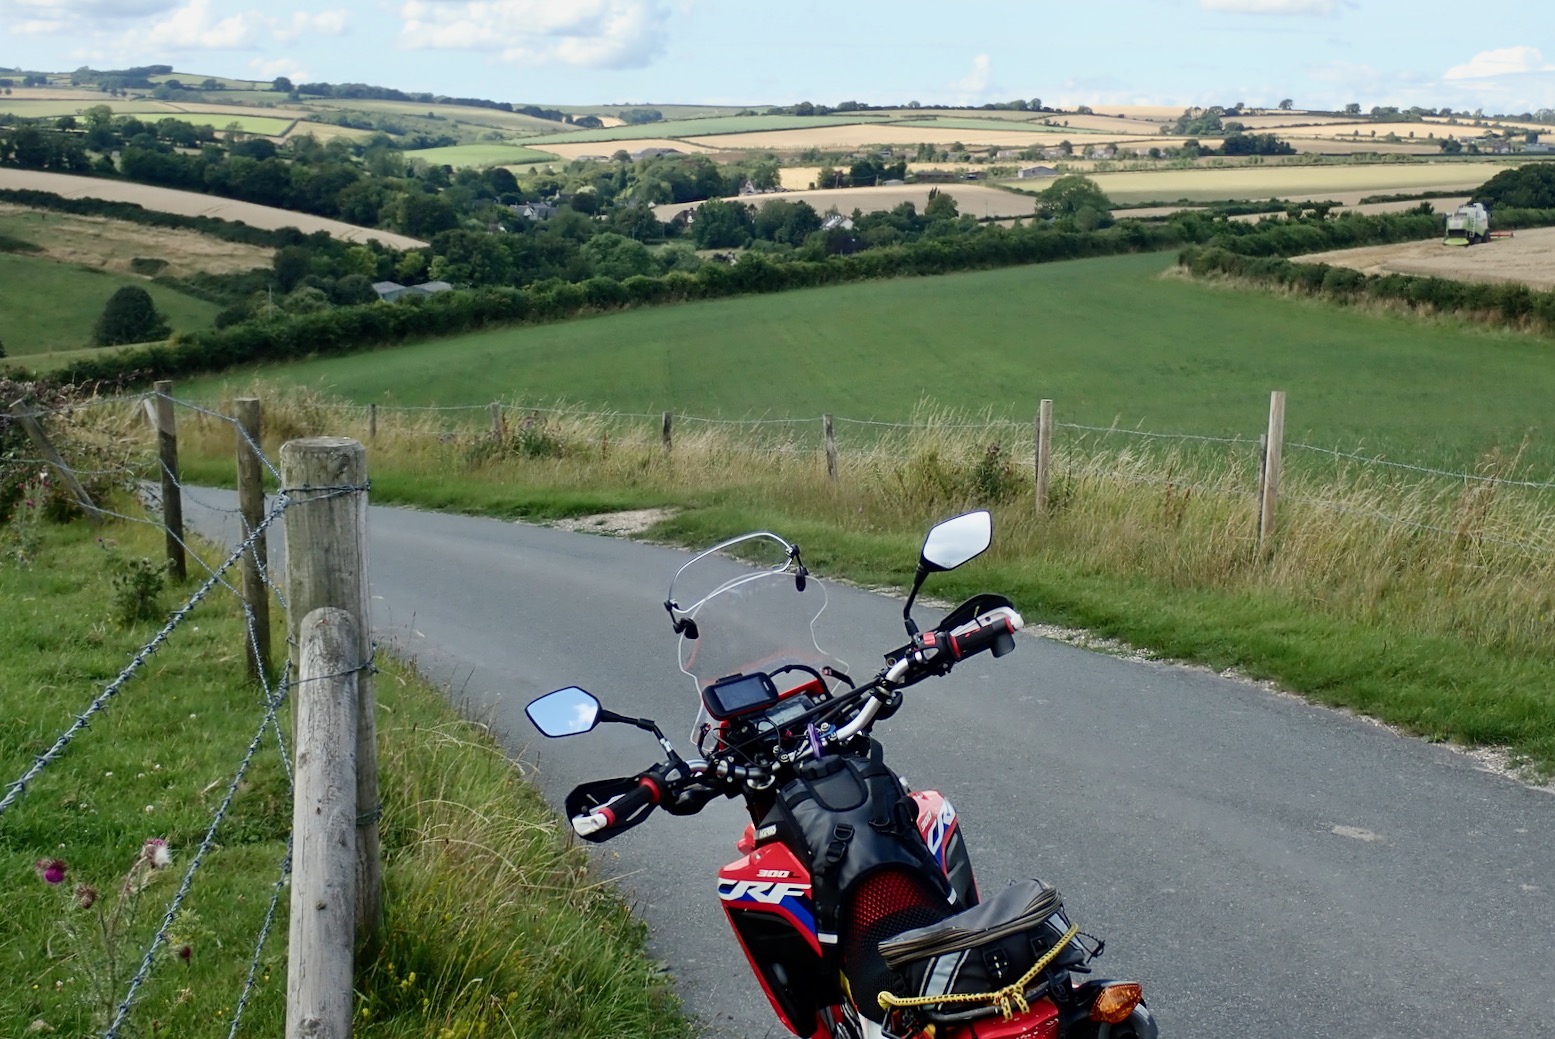
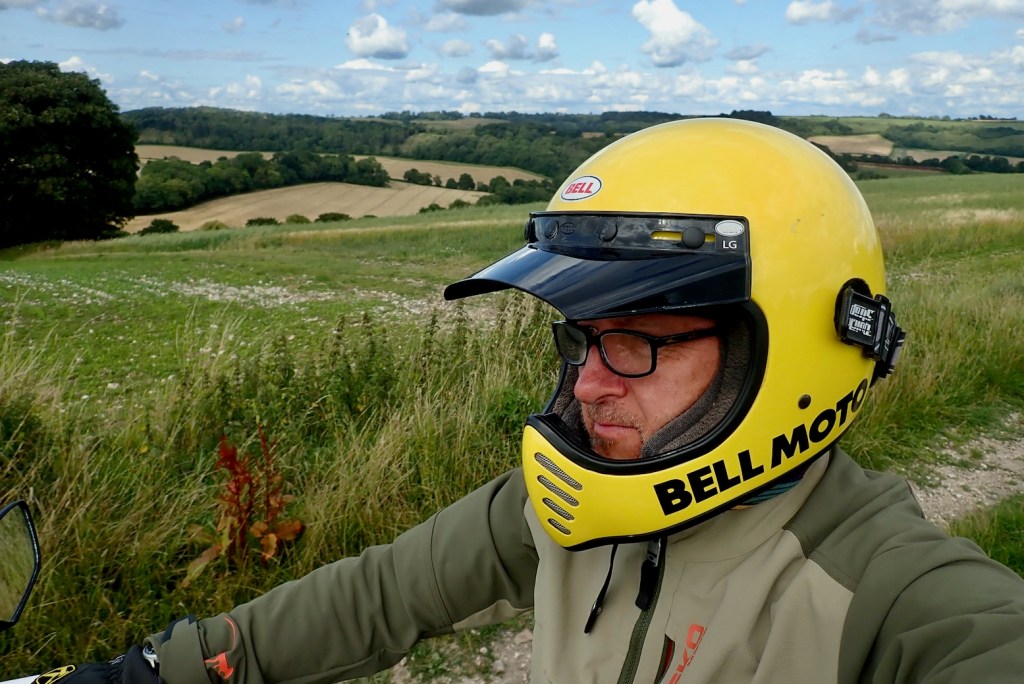
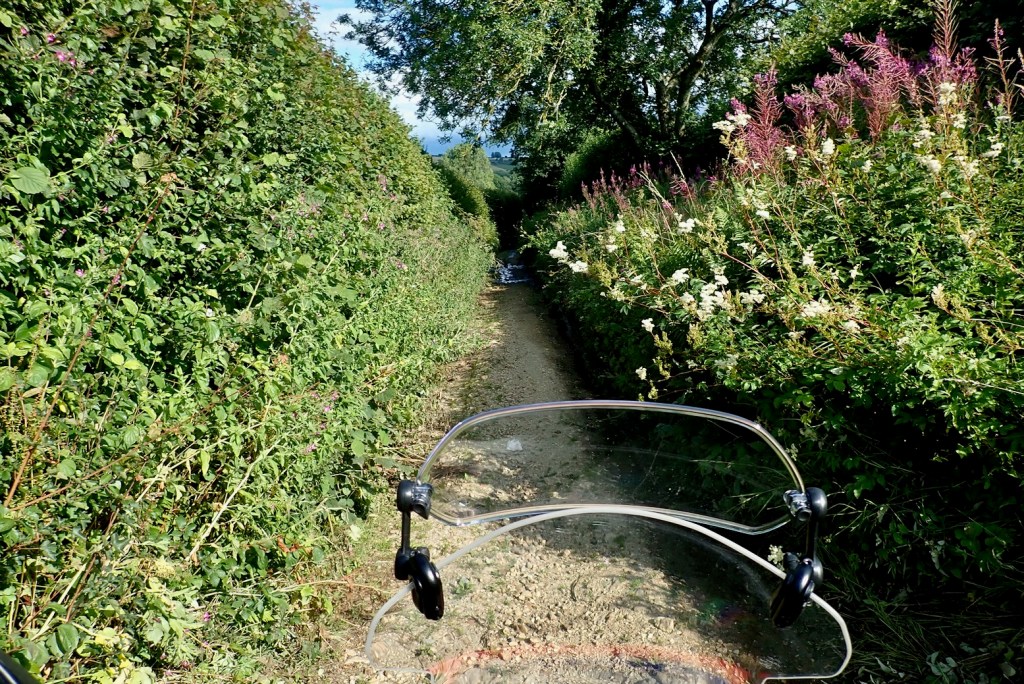
Still, it’s nice to be bimbling along deserted backroads and heading into the unknown.
North of Bovingdon the tracklog flicks left up a wooded track.
It feels deeply transgressive to be riding here, and in sleepy Dorset too, not the North York Moors. Can it really be a right of way?
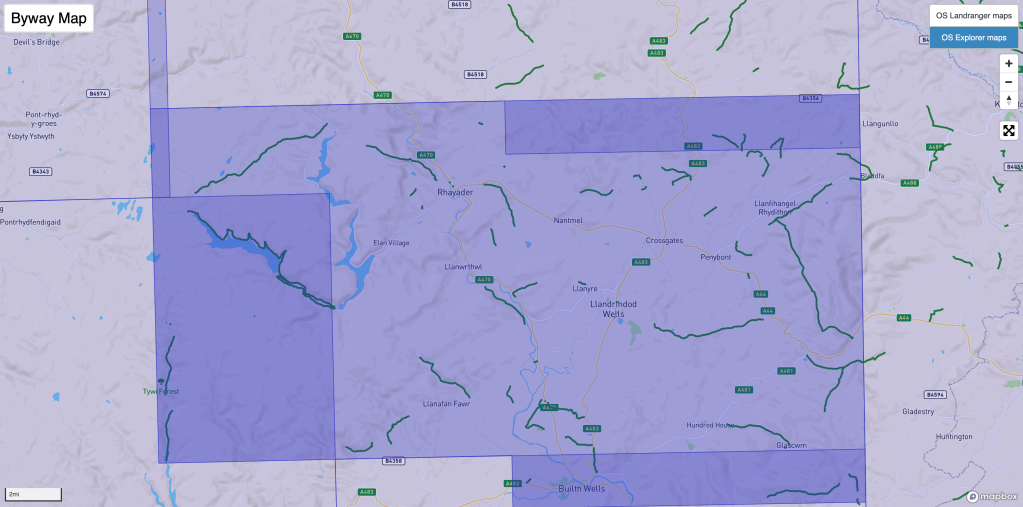
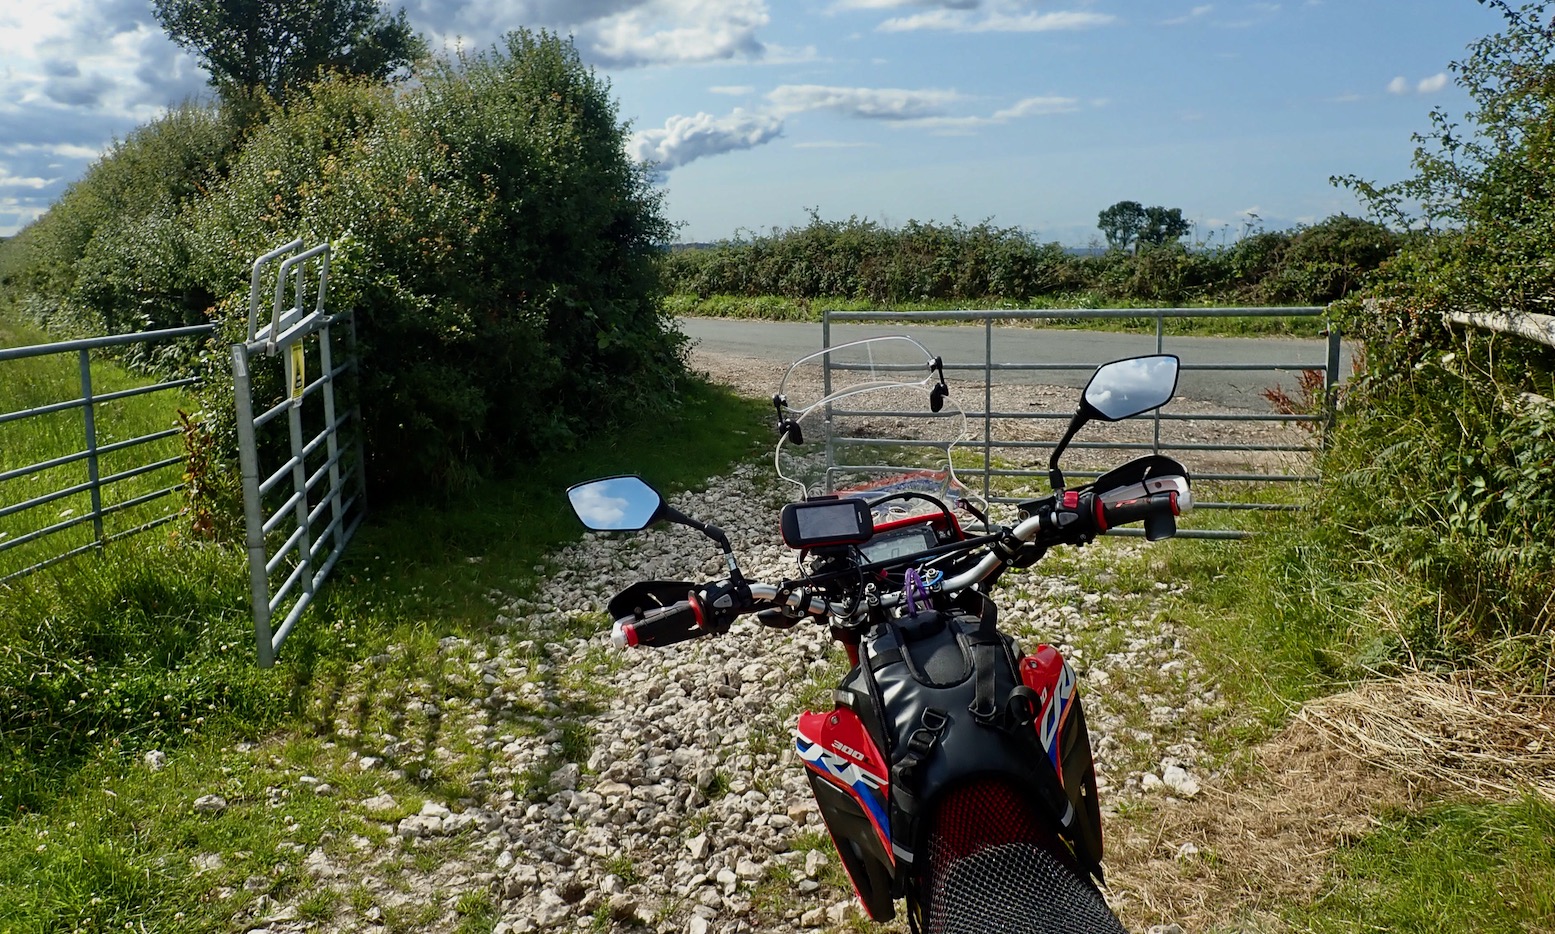
Looking later at a 50K OS map, red dots indicate ‘other routes with public access‘, or ORPA as I will now call them (below), along with the better known BOATs and RUPPs. Never knew that one, but I wouldn’t be surprised if like some of the latter, an OPRA does not necessarily indicate a vehicular rights of way. On the day, how can you tell? You have to hope the TET Linesmen did their homework and the status is unchanged.

A very pleasant 4km trail through the woods leads to the famous village of Tolpuddle.
Home of the Tolpuddle Martyrs, hard-up farm workers who, following a pay cut in 1834, formed a legal workers’ union but got trapped and 7 years transportation for ‘swearing a secret oath’. Again, you’d expect a story like this up north, not in quaint Dorset.
The TET takes a bridge over the A35 and winds its way along farm tracks.
Surely any minute now I’m going to get harangued by some angry bloke in a tractor?
My first gate. Here we go, I thought…
But what can be better than a lonesome track winding its way down a grassy valley, like a scene from the Hobbit.
Down the bottom some blokes reposing by a pond gave me a chummy wave. Later on, some dog walkers did the same. Where are the brandished fists? Have I unknowingly brushed against a psychedelic fern and slipped into a parallel universe?
The post office in Milborne St Andrew after a shave and a short back and sides.
Internet fact: Dorset has more thatched roofs than any other British county, with nearly 10% or around 4 per square mile.
I knew it was out here somewhere. This week there’s been much chatter about the Portland barge. The bloke at the MoT place was not impressed. Portland is to Dorset as Barrow in Furness and Windscale are to the Lake District.
I toodle along deserted country lanes which, but for their asphalt coatings, would all be BOATS, etc.
A semi overgrown shortcut. On an OS map this is marked as a yellow road.
It leads down to Piddletrenthide. All this Piddle and Puddle is Olde Saxon for ‘stream’ or ‘wetland’.
Piddletrenthide high street after I digitally tidy away unsightly cables.
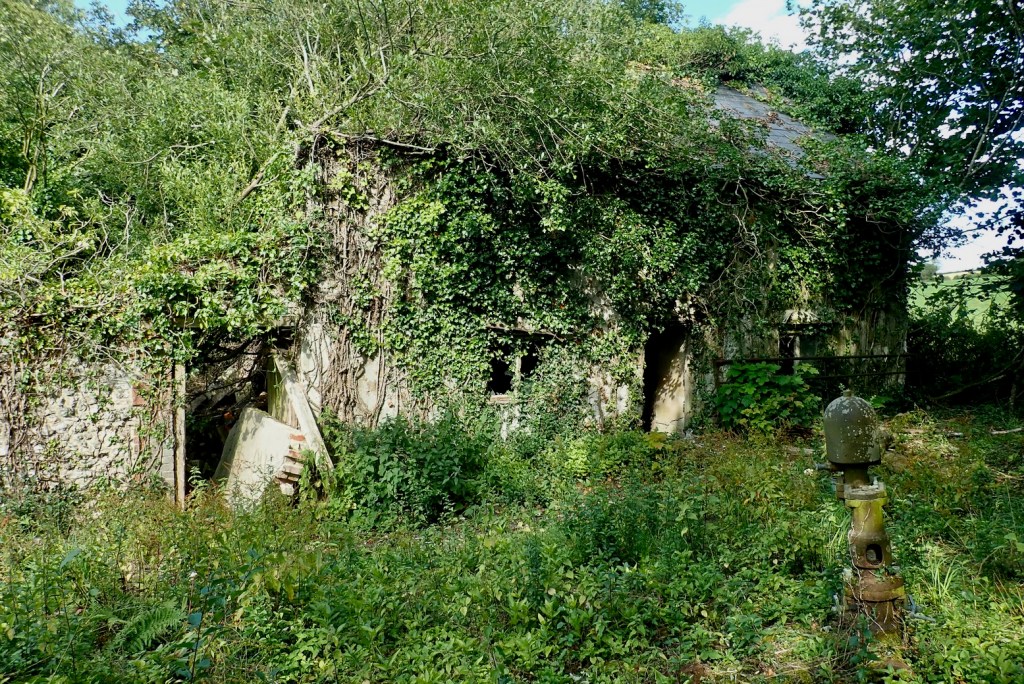
Immaculate, postcard pretty villages like this are two-a-penny in west Dorset.
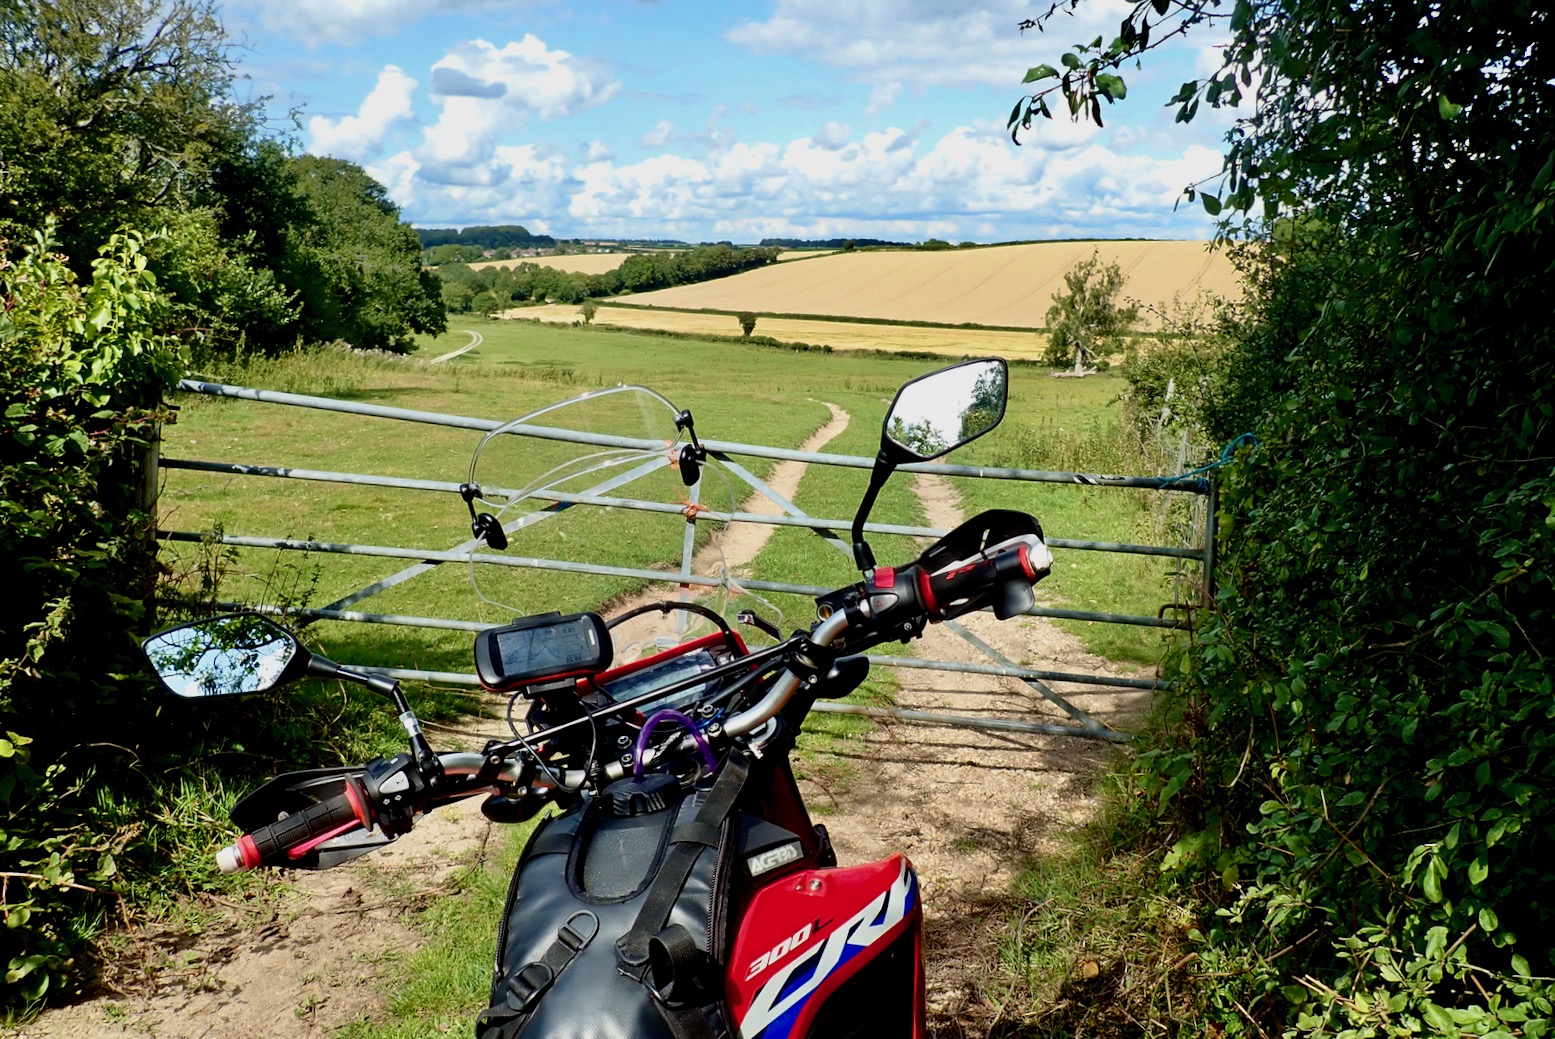
Interestingly, there is a misleading T-junction sign at the top of this road, but it leads to an unsealed BOAT on the TET which I suppose would flumox a campervan.
I pass through Cerne Abbas, home of the famous Giant.
You’d hope this is a pre-Christian representation or someone is going to be saying a lot of Hail Marys.
It was actually carved in the Saxon era.
A stony trail leads from Up Cerne up Seldon Hill. Along with ruts hidden in long grass, about as technical as it got. Hereabouts the trail peaks at 260m (850 feet) and joins the main GWT loop to Lands End.
I decided to wear my Moto 3 for the first time since my AT debacle, but next time I’ll wear the HJC so I look less Darth. This goodwill can’t last, can it? Obviously there is much to be said for bimbling along and silencers the size of locomotive pistons, but being alone in mid-week must aid tolerance too.
We walked this way one very hot day a few weeks ago. Also very enjoyable.
The rolling hills of west Dorset. It’s great to be out but don’t show this picture to Theresa May.
The L occluded by thistles and grasses. The bike is of course effortless to manage but around here I check the tyres which seem a bit hard. In fact they’re at a lowly 25/20; maybe I’m under-eating. The Rally Raid suspension is barely taxed. I do wonder how the bike will ride such trails with the fat 19er front I have in the pipeline. Nothing I’ll ride today couldn’t have been managed on an AT, GS, T7 or a Chinese 125 scooter, come to that.
My second and last gate of the day which has been a big surprise – or is it just mid-Wales that is gate crazed? Last year on the Glyndwrs Way I counted 70 gates in 15 miles walking. A sheep thing perhaps.
Wessex in mid-summer – not a gigafactory for miles (off to the left in Somerset, actually).
Unusually overgrown. I’m getting splattered with exploding seeds.
I reach a ruin and realise I’ve followed a footpath by mistake. The red tracklog line on my Montana is extremely thin and hard to see. I fiddle with the settings but can only change the colour to green. Later I find my answer:
Who may have lived here and where did they go? Why did they leave the place in such a mess?
Road signs from a Famous Five era. Many of Enid Blyton’s FF adventures were based on Dorset where she vacationed annually for decades.

Crossing the infant Frome near Cattistock and which meets the tide from Poole harbour at Wareham quay (below).

Wraxall Lane – another ORPA. It gets a little muddy; the CRF tiptoes through.

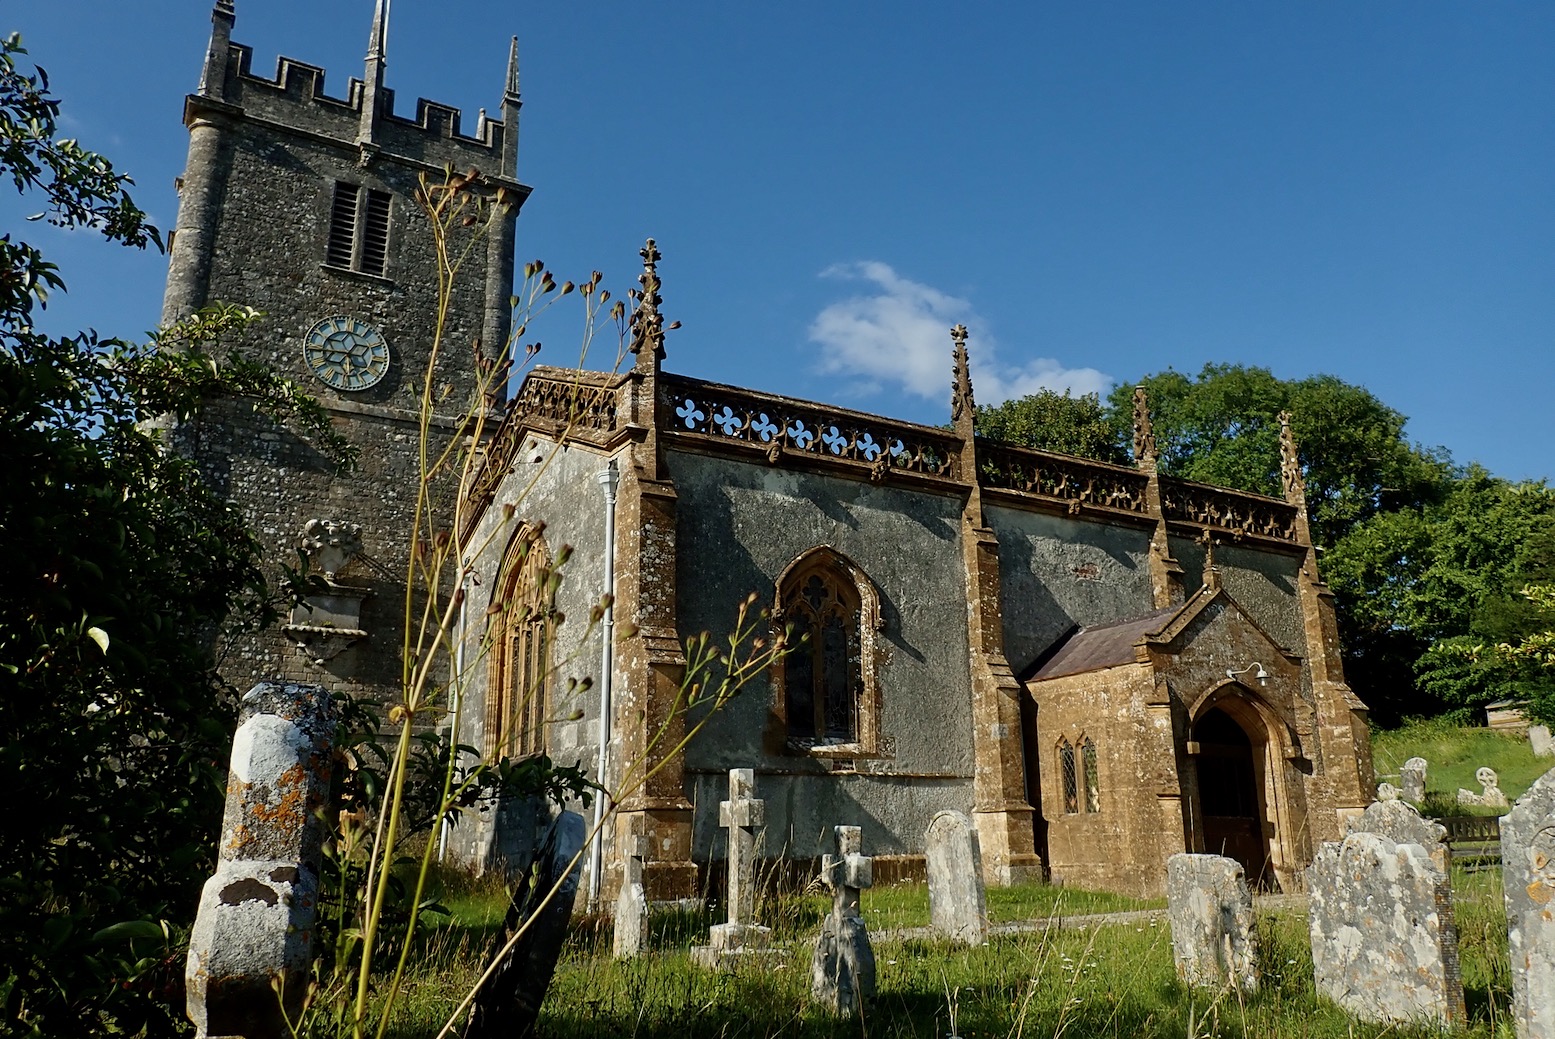
I pop out of the thatch and meadow wonderland at Maiden Newton on the A356 north of Dorchester and where this ornate ancient church catches my eye. It’s now nearly 6pm; 2.5 hours to cover 40 easy, fun miles. I’m hungry so it’s either buy something or ride home. I head back 25 miles. From Maiden it looks like the same distance along the GWT to Lyme Regis on the Devon border. I can’t wait to tick that one off and maybe inch my way west with what remains of the summer.
Who knew in 2023 I’d rediscover trail riding in England after 40 odd years! Sure no track is more than 2 miles to the next road, but old tracks are thick as ascents down here, and it’s not really about what’s under your wheels, it’s where they lead you. And as we know it’s the ‘Blue Highways‘ and dirt roads where adventures and discoveries are easiest to find. More to come.

Dorset’s Great Western Trail 2

CRF300L: tubeless wheels 1

CRF300L Index page
Tubeless Wheel Conversion index page

Thinking of going tubeless on your CRF300L or Rally? This page might be a good read.

Since my 2008 XT660Z I’ve been converting nearly every project bike with spoked wheels to run tubeless tyres, using various methods. The main reason: ease of puncture repairs on a hot day in the middle of nowhere (like left, Mali), let alone the added bulk of tubes and levers. Bombing around outback Morocco isn’t always like a day ride on the TET with your chums.

No bead-seating lips ;-(

I want the same for my 300L which I might keep for longer than normal. One annoyance is that even the rear 18 x 2.15 wheel (right) is not an MT type rim needed for a secure tubeless tyre seal. Up front, Jap OEM 21s are rarely MT, so it means new wheels all round.

Third one along is ‘drop centre’ MT type with the all-important raised lips suited to TL tyres.

In my CRF TL MT quest I learned that ‘250cc’ bike wheel widths – typically 21 x 1.60 and 18 x 2.15 – are below the size where MT rims are commonly offered, especially once you factor in the Honda’s spoke count of 32 rear / 36 front. I did the usual scan on ebay looking for used rims that might work, but for the rear couldn’t find anything in MT with the width and spoke numbers needed.

OEM tubeless spoked. Rare

Buying used rims
For the front in 19 inch (see below) I found a couple of MT contenders at 2.50 wide with the right spoke count (holes) and diameter, but buying used you also might need to consider the drilling pattern in the rim. The angle that holes are drilled through a spoked rim relates to the line of a spoke hooking up to a hub. There must be some leeway as the nipple can pivot in its seat/socket and new rims are sold drilled with no bike model designation but, broadly speaking, a rim drilled for a big bike twin-disc hub won’t match the dinky 300L’s hub. So, on top of the cost of the hubs, that leaves the following choices:

  • Slightly wider new Excel front 21 x 2.15 rim in MT, £170
  • Or a new wide Excel 19 x 2.50 MT front. £220
  • Same as above, used from £70
  • A rear Excel 17 x 2.50 32H MT with a wider adv tyre choice than stock 18″. £220
  • Wheelbuilding a the above rims onto new Honda hubs – £130+ each
  • Optional Airtight sealing at CWC, £125 a wheel

That will mean slightly bigger tyres all round, but they’ll wear slower and lightness is regained by ditching tubes (I’ve already junked the rim lock). A mate who regularly experiments with his TTR wheels tells me a stock front 21 with tube weighs the same 10kg as an 18er in tubeless (left). And on a CRF there’s just enough clearance in the swingarm for fatter 130 rear tyre*. He tells me offsetting the rim away from a chain by 5mm is actually a thing in wheel building and says you won’t notice the slight wheel misalignment.

Shopping
A used 300L wheel goes online for over 400 quid from breakers – all to dismantle just for the hub. Best UK price I could find for a OEM rear hub was over 200 quid. Meanwhile on ebay, outlets from Thailand (left; where 300s are made) sell front and rear hub combos for £270 plus about £55 tax.

So I returned to Partzilla in the US who I used while repairing my XSR700 a couple of years back. US-sourced Jap OEM parts with shipping and UK tax can still be up to half the cost of UK, EU and even Thai prices, depending on the item.

New hubs come assembled, no need to buy bearing and collars. Drat!

OEM rear hub $120; front hub $60. Add another $80 of collars, bearings and seals (actually not needed; the hubs came fully assembled) + $80 air freight and it came in at £340 taxed on my doormat 10 days later, with a spare air filter for luck. So that’s the same as Thai hub combos but with a full set of spare bearings and an air filter for free. Mistakenly buying the bearings and collars was an annoyance; I assumed the OEM hubs were bare. But wheel bearings are consumables so it’s not a total waste. Fyi; CRF250L 2017-20 hubs are the same; there might be more chance of finding those used from a breakers.

That all potentially comes in at around £1200 for a tubeless, Airtight wheelset ready to roll on new tyres. A lot of money to save on a sweaty puncture repair. I could save £250 by laboriously sealing myself, as I successfully did on the AT (left). This DIY method is better than proprietary Airtight or BARTubeless smotherings, in that individual leaks can be isolated and repaired. I might get 500 quid for my stock wheels if I’m lucky. I’m not sure there’s a cheaper way of doing it.

Non-MT – shame

Rally Raid UK do sell an Asian-built low wheel 17/19 wheelset for just £600. RR spell out the low-wheel rationale here, and I agree with what they say. But even though the front 19er is a slim 2.15, neither wheel is MT type. John at Rally Raid runs a mousse on the front of his 300L low wheeler. I’m not fully convinced by mousses (see below); or should I say tubeless is more suited to road speeds; it’s no big drama to fix when flat and pressures can be varied if needed.

I’d actually be interested in a low wheel 300L as a CRF has ground clearance to spare and a chunky bashplate when it hasn’t. I’d also be interested to try a do-it-all 19 on the front as the light 300L wanders about a bit on the road and, like many 21-inch bikes, won’t cut through road turns so sharply. A 19er would feel more planted on asphalt, mostly down to a fatter and heavier tyre than claimed reduced rotational forces from a smaller diameter. On an agile bike and the sorts of easy trails I ride, I can live without a 21 incher.

To go full tubeless on 19 means getting a 19 X 2.50 MT Excel rim. The 2.50 width would limit the fitting of slimmer 19 inch tyres which I’d prefer, but puncture-wise the bike would be bombproof.

Mousse-tubeless combo?
I had a thought: seal up the non-MT Rally Raid rims then stick a mousse in there for back-up, even at £120 + fitting aggro, added weight and lube issues.
That way I could run normal 25psi road pressures in the tiny air space which is way above a typical 15psi mousse rating, The mousse would keep the tyre bead on the rim in the event of a flat, like they’re supposed to do. Meanwhile, you’d hope at 25psi and a typically moderate 60mph max cruise on a 300L, there’d be less tyre flex to heat up and degrade a mousse. Of course that assumes cool conditions and light payloads.
Part of the reason mousses get hot, soften and crumble or even explode, is that they’re not psi rated for road riding. On the Dakar Rally they used to get changed every day (maybe still do). Low low psi in a tyre means much more heat at higher speeds as the carcass flexes and unflexes on each wheel revolution (the same reason we get hot exercising; muscles flexing). Higher pressures from a tubeless sealed wheel might limit flex, especially on a light and lightly loaded bike.

I could even glue the tyre in place for good measure. I know TL pushbikes use some bead breakable (non-permanent) glue and there is one for cars with rusty wheel too (right). Of course cars have TL wheels with bead-seating lips and I’m pretty sure TL pushbike rims have some sort of sealing lips too. Without that lip to retain the tyre bead, back-up from a mousse is important.
This TL/mousse/[glue] idea seems a better idea than just shoving a lubed-up mousse in there and hoping it will survive a long road stretch on a hot day. As always, if it plays up, just stick tubes in there and anyway, I rarely drop pressures below the low 20s on stony Moroccan trails. I prefer to get traction from a suitable tread pattern, not ultra-low psi which is more suited to competitive events, not travelling.

But thinking this mousse and tubeless idea over, it’s all a bit far-fetched for travelling when added to DIY rim sealing. Too many variables. Better to keep it simple stick with a tried and tested tubeless (DIY or proprietary) for what I do. Less weight, less expense, no mounting and lube aggro.

* Fyi: the CRF’s skinny stock 120/80 rear IRC is 117mm wide and has 22mm clearance on the chain guard side, over 30mm on the other side and about the same up to the front of the swingarm shock guard. So add 22mm each side means anything up to 160mm wide ought to fit and which sounds loads.
Then again, on the left JMo fitted a 130/80×17 Bridgestone AX41 on her 300L DIY converted to TL with not much room to spare. 130 sounds fine; the lighter the better for a measly 28hp to turn.


CRF300L: Midsummer ride: saddle, screen & mpg

Project 300L Index Page

You probably know that feeling at the end of a long day’s ride in the UK. You’re tired and butt-sore but the bike is warmed right through and after hours in the saddle you’re in the zone and fully at one with the machine, darting through roundabouts with a flick of the hips and tuned in to the hazards around you.

I left Dorset for the 130-mile ride to the ABR bike show armed for discomfort and a low average speed. The two-lane A350 covers half the ride and there was less than ten miles of dual carriageway on the whole run. Instead it was old-time motoring with frequent roundabouts, occasional traffic lights and small town bypasses, plus the odd individual who thought it best to keep under 40 just in case. Fine by me on a slow bike. With the 300L’s limited ability for decisive overtakes, I sat back and watched the mid-summer verdure inch by and the mpg creep up to over 100.

In just a few years the ABR Festival has deservedly become a hugely popular event. And as a regular speaker there, it’s also one of the best organised of its kind with loads of things to actually do and a switched on admin crew inviting some serious people, not the usual Adv-UK suspects like me.

Nearly four hours later I rolled into Ragley Hall much less crippled than I thought I’d be considering my diverse musculoskeletal ailments – aka: getting old. These were the benefits of an enforced slow place. Narrow saddled ‘two fifty’ trail bikes are notoriously uncomfortable over long distances but my one-hour presentation and subsequent chatting proved much more draining, not being used to that either.
I spent the night in a garden in nearby Upton and next day headed off towards mid-Wales to rediscover some of the backroads I’d walked and cycled on the Glyndwr’s Way last summer. At some point I’d need to head back for another ABR talk at 4pm. After yesterday’s ~200 miles, this time the thinned-down seat soon gave rise to that familiar discomfort, a feeling as old as all my biking years. But also one that’s fixable.

Lovely mid-Wales

Rhayader – Wales’ trail-biking Mecca, such as it is – proved to be that turn-around point, but rolling through the town, no cafe jumped out at me invitingly. So I followed a single track road out towards Abbeycwmhir on the GW and where a back way wound its way on to Llanbadarn Fynydd (GW) which I knew had a cafe.
Walled in by lush summer hedgerows, a narrow country lane turned to gravel which led into a forest. Is this a rideable trail I wondered? Why no prohibition signs or locked gates?

My Garmin is loaded with OS mapping which showed this was not* a green lane (‘BOAT’, etc). But it led less than two miles to Bwlch y Sarnau on the Glyn’ Way, a deserted hamlet at over 1000 feet whose name evoked pre-Christian Wales and where there was a self-service ‘porch cafe’. It also saved a long diversion, so unexpectedly I found myself outlaw off-roading in mid-Wales. How thrilling! There were a few MTB tyre imprints in the earth but nothing from a moto. Doing this is bad form and not something I’d knowingly do again, but in just a few minutes I reached Bwlch via a couple of gates. There was no one around, same as last year walking and pushbiking in this area.
* Turns out it was a green lane after all – a UCR or ORPA. Explained here.

Let’s off road!

At Bwlch cafe I chatted with some bikepackers having a brew during a three-day tour. This is such a great region for that as I found last year. But for legit trail biking, a quick glance at the OS map on my Garmin didn’t reveal many permitted green lanes much longer than what I’d just illegally ridden, In search of uninterrupted off-road adventures, that’s why I went to the Sahara in the first place way back in 1982.

Byways around Rhayader but read this first. Then again, there is always the Welsh section of the TET which will probably be quiet backroads with occasional off-asphalt excursions and doubtless a very nice ride across rural Wales.

By the time I’d selfied myself and finished my cuppa, the Garmin’s ETA back to the ABR show was cutting it a bit fine. Sod the mpg – I’d have to crack on!

Mamils & Saddle Sores
In getting lowered, my seat has lost some padding, and the slippery Cool Cover saw me slide forward on a downslope; a common annoyance with some bike saddles.
As a back up I’d packed my padded lycra cycling shorts which they say can improve moto saddle comfort, but first I pulled out one of two slabs of 20mm rubber foam (neoprene) last used on my Himalayan, and sat on it for the two-hour ride back to Ragley Hall. The anterior agony slowly subsided but the bare rubber was too grippy so I slid around inside my loose trousers which wasn’t so comfy either. Plus I couldn’t up stand to aire mon derriere as the pad would’ve blown away.

I rolled up to the Bridgestone tent with 10 minutes to spare and did my chat with Simon & Lisa (left), but apart from the fact that it was another lovely mid-summer’s evening, I wasn’t looking forward to the four-hour ride back home. So I decided to do something about it and set about shoving the foam pad underneath the Cool Cover. If it worked well I’d trim it all properly later.
It made me wonder do you want a grippy seat surface or not? I do notice grippy seat covers for trail bikes on ebay. It must be related to riding – active off-roading or low-energy road touring plus what you’re wearing too; how close a fit and the fabric’s own grippiness. With my baggy cotton cargo pants, the Cool Cover is slippery which can cause friction, but sat directly on the neoprene pad back from Wales, the grip was massive and I slide around inside my trousers which was as bad. I do seem to recall leather trousers which I wore for years helped prolong comfort, whether down to good grip on seat vinyl or the close fit.
Heading home with the neoprene underneath the Cover, the saddle was levelled off and I slid about less on deceleration. It was all round a big improved on the sore morning’s ride and a few days after I got home I trimmed the two pieces of foam to fit the 300L’s seat, glued them together and fitted them under the Cool Cover. The seat is now about 35″ (890mm), 14mm more than before (half being the airy Cool Cover mesh) but a whole lot more comfortable. See more bottom of the page.

Other comfort matters
Leaving Morocco in March, I retired my old X-Lite X551 after ten years. The vent never worked well (wrong angles for upright trail bikes), the sun-visor lever fell off years ago and after multiple removal and washing, the lining was coming adrift.
But I’m a longtime big fan of this type of lid so got myself an HJC i30 for about £110. Grey comes shiney not matt as implied online but so far so good. It fits snugly with quick-clip chinstrap, the sun visor lever is much easier to operate and the top air vent is more effective. It remains to be seen how long the lining fittings will last after regular washing. But the HJC not quiet or, to be precise, I’m a bit too tall for the 300L’s unadjustable screen and the buffeting makes a racket, even with earplugs. Crouching down puts me out of the turbulence but is unsustainable.

Back home I remembered I bought myself an MRA XCreen adjustable draught deflector (left) for the Him but ended up not needing it.
I dug it out, made sense of the instructions and decided to clamp it to the screen with a view to drilling and bolting it on if it proved effective or necessary (you get both options in the mounting kit). Articulated arms on adjustable splines lock it in position so you can set the optimal angle at a standstill. It looks like it ought to work funneling air up and over my head and looks better than the simple spoiler Touratech still sell and which I tried on my XT660Z 15 years ago. You can view my meticulously annoted Mileage Diaries here.

Other than that the ride back with just a refuel break was great. The pad under the Cool Cover soothed the posterior on what ended up being 500 miles of two-lane blacktop over two days. On a bigger bike I don’t think I’d have been that much quicker on these types of roads without lots of speeding and other risks.
I never rode my 300L stock but the Rally Raid suspension definitely keeps the bike in shape darting around roundabouts. I got in about 9pm, visor and screen thick with bug splatter but still with energy to pre-wash the bike with Muck-Off and lube the chain while it was warm. It all bodes well for the long ride to Morocco later in the year.

True mpg
The 300L has one of those handy average fuel consumption displays and my ride up to ABR saw it settle at 102mpg as I rode through the gate. Pretty good but this is an estimate. For the true mpg I evaluated the bike’s odometer error off the GPS over 200 miles. Result: the bike indicated 205.6 miles over a GPS recorded distance of 200 miles. Not bad but 2.5% over.

Somewhere on the ride up I topped up with 11.8 litres over a corrected (true) 221 miles. That’s 355km which divided by 11.8 = 30.1 kpl or only 85.5mpg (see table on the left) – over 15% out. On the bright side the two litres left in the 13.8-L Acerbis tank meant another potential 60km which gives a possible range of well over 400km. That will do nicely, whatever the mpg is. It sure is great not having to think about fuel twice a day.
The next fill up on the way home included the rushed ride back from Wales with the display now indicating ’91mpg’. I put in 11 litres over a true 217 miles, which is 350km. That was 31.8kpl or 90mpg. A lot more accurate and oddly, a big improvement on the slow ride up, despite the faster pace. I suppose a full tank’s worth at steady pace may have helped, or could the bike’s computer be ‘learning’, as I’ve read they can do? We shall see but I am still hoping to get a true 100mpg one day.

Update:
I set off to the Isle of Wight a few days later with the seat padded to full length and the MRA fitted. I soon noticed I was not dropping my helmet visor as soon as possible. With a guesstimated angle set at my eye level the MRA was working just right, shoving the windrush over my head, not into my face. Now all I heard was muted tyre and engine noise instead of wind and a steady 60 was much more tolerable.

Join not good

But fix one thing and another flaw becomes more apparent. My glued up join between the two bits of old neoprene was noticeable. Can’t be having that. I have time so may as well spend it trying to get it right.
I replaced it with a single piece of 20mm neoprene: a 250mm x 500 slab was 20 quid. Note, even with a sharp knife or scalpel it’s hard to get a smooth cut. Scissors are better, but anyway the grubby edges are hidden under the Cool Cover.

CRF300L: old tubes and dirt bike rims

Project 300L Index Page
See also: Tubeless conversions

After less than 20 miles I’ve already got myself a rear flat, luckily at home. At some point I was going to remove the stock IRCs, seal the rear rim for tubeless tyres and fit some proper tyres for the ride to Morocco. May as well do that job now. While I’m here, allow me to give my usual shout-out for Motion Pro Bead Breakers, an alternative to standing on or otherwise levering the tyre bead to achieve the same result.

I spun the wheel on my exciting new stand you just read about but couldn’t see any nails or similar. I did wonder if I pinched the tube a couple of weeks back, but if I did, it only gave out now.
Pulling the tube out I was shocked to see a huge gouged hole like a mouse had got in there. Maybe I did it just now removing the tyre, but can’t say it was a struggle. Who knows, but I also noticed how the folded rubber tube cracked like it was ancient. Then I clocked a date stamp from November 2014. Yikes, nearly 9 years old! Well I suppose I should be impressed that a: Michelin date-stamp their tubes (can’t say I’ve ever noticed this feature before) and, b: that this tube lasted nearly nine years without a repair (assuming it had any use in that time)! Obviously the tube isn’t worth repairing. Good thing I noticed now. I just picked up some old Mich tubes from 2017 and they are nowhere near that far gone (nor do they have that date stamp). Could it even be a fake Mich tube?

Cracked rubber; not a good look.
No MT stamp
No lip so unsuited to DIY tubeless sealing ;-(

When it comes to sealing the rear rim, I was also bummed to see the stock Excel J 18 2.15 rim has no safety lip, which complicates a TL conversion. That’s odd as, like I’ve mentioned over the years, I recall actually grinding the safety lip off a rear DID rim on my tubed XT600 way back in 1985 to make desert tube repairs easier. I assumed such safety rims had become defaults on all spoke/tube rim as they help a tyre stay on the rim when it loses pressure. But not on smaller sized rims, it seems.

This means I’ll have to lace a new lipped MT rim onto the hub to get TL – a couple of weeks and a few hundred quid. And while I’m at it I may get professional CWC Airtight sealing (left; as on my Himalayan) instead of my labour intensive DIY efforts, as on the Africa Twin. Or I could just live with inner tubes. On a travel bike (as opposed to a weekend trail bike) not sure I can go back to all that potential puncture repair aggro and added toolage.

I also noticed there’s no cush drive on the 300L. It makes me think this is a dirt bike rim from Honda’s MX bikes. A part number check would reveal all. Cush drives add weight and expense and absorb a little power, but reduce drivetrain lash to the transmission including the chain.

The thing is, at 28hp and however few torques, a 300L hasn’t got enough grunt to strain the components that much, so I can live with no cush. Apparently my old XR650L was the same but I never even noticed. A mate who’s currently importing one has, and dug up various rubber-insert sprockets (left) to reduce the lash from the much torquier 650 thumper. And in fact the 250L I had years ago didn’t have cush.

So net result of today’s puncture:

  • it pays to verify you inner tube’s age (if you can) as well as old tyres (all have date indexes). Or just get new tubes.
  • If I want a tubeless rear I’m going to have to get a new wheel built up on an MT rim, in which case I may as well have a proper sealing job done like CWC Airtight™.
  • OMG there is no cush drive ;-0
  • Is it time to consider mousses? A light, slow bike like a 300L is suited to them, but afaik they come rated at no more than 15psi which to me is on the low side for road riding, even at only 60mph.

CRF 300L: Acerbis tank, crash bars, USB

Project 300L Index Page

My Acerbis ’14-litre’ tank finally arrived from Italy, not as fast as some crash bars from Guang Zhou in just 12 days. So high time for a day of spannering and probable gnashing of teeth. Rally Raid are also sending me their trail wheel wrench with a 24mm ring for the rear and 14mm hex for the front.
Rally Raid suggest that from new you may want a full-size socket and tool to undo the axle first time so the hex is another tool to buy – an afternoon wasted locally before I submitted to amazon ‘next day’. But the idea of a recessed hex fastener in the front axle is actually quite clever – I’m sure the AT had one too and car gearboxes have similar drain plugs so there’s no protruding bolt head getting rounded off by rocks and kerbs.

The other day after swapping the front tyre back to OEM IRC, I wore myself out trying to refit that front wheel axle with the bike perched over on a log. A lip on the axle shaft makes shoving it over to reach the thread on the other fork leg confounding.
I like to think an upright, stable bike sat on a bike lift will make life easier. Luckily there was one an hour up the road for just 99p. Years ago I’d have scoffed at such decadence and just used a milk crate. But when’s the last time you saw one of those?

Acerbis 37 litre

Acerbis tank
In the old carb days, Acerbis plastic tanks had a reputation for not always fitting well – like so much aftermarket gear, tbh. And now in the efi era you have to swap a huge fuel pump assembly with associated hoses and wiring.
But it seems Acerbis have upped their game in the 20 years since I fitted a gigantic 37 litre whale to the back of my XR650L (left). With none in the UK, my black-only tank cost me £320 imported from Italy. The finish looked a lot better than I recall, and the complex shape suggests a nod to the precision potential of CAD. Here, J-Mo describes the Acerbis tank job in meticulous detail, including tips and possible traps. Time to follow her lead.

New tank adds 6 litres to the 7.8 stock without looking massive.
After years I [re]learned syphoning. Use a thin long hose; shove it all into the tank to flood the hose; then pinch the end and pull it out and down way below the tank to the container, then release the pinch. It will flow at more than a litre a minute. A good skill to know in the post-fuel tap era.
Once unbolted, to release the tank pull off a vent hose coming up from the emissions canister (it pipes up through the tank to the fuel cap so fuel will not pour out). Then unclip white electric plug and unclip thick fuel line (can be a bit stiff). All explained on J-Mo link.
Acerbis tankside protuberance may protect radiator on RHS a bit?
In black you’d hardly notice the difference. Nice job Acerbis!
I also fitted a Cool Cover. Will improve comfort and easy to add padding underneath, if needed.

A calibrated refill revealed the tank holds 13.85 litres or A tad over 3 UK gallons which is a figure I’ve seen elsewhere. That will do me – at a dependable 85mpg or 30kpl = 415km or 260 miles range.

Protection

A slim bike like a 300L doesn’t need engine crash bars – a well spec’d bash plate like the Ad-Tek the seller fitted to mine does the job.
But CRF-Ls have a vulnerable rad (like Africa Twin 1000Ls, as I found shortly before D-Day). The 300’s rad sticks way out into the RHS breeze so when you fall it takes the impact via some plastic. I think they’re all like this these days but what a crumby design for a small trail bike! Adventure Spec make a radiator brace (left) which bolts a sturdy frame round the rad and looking again, it’s actually seems OK for £66 and 240g.

What I really wanted were currently unavailable Outback Motortek bars (above right) which protect the rad, not so much the lower engine which a good bashplate does. Plus I could mount my Lomo sidebags on them; not be possible with the ASpecs. Looks like the OMs may be back sooner than I thought, but in the meantime I bought some Chinese no-name crash bars (above left; 4.2kg). Tellingly there was no fitted image but they looked similar to the Outbacks, or maybe I just saw what I wanted to see. They’re well made but turns out they fit low and the bashplate would have to go. Bash is non-negotiable so I sold them on.

Wrong bars. Or are they? Bags would fit nice and low. May have a re-think and revise bashplate.

As it is, unlike an AT etc, a 150-kilo 300L has much less self-destructive mass when it tumbles, So I think 22mm ø tubes at 2mm thick as used by China bars and Outback Moto are a bit OTT. I bet 18mm would do fine, as on the Himalayan’s tank racks (left). But 22 is what we get – possibly because of a shortage of well-braced/spaced mounting points to securely support a thinner structure. That’s how it seems on the China bars. My weldy chum who made my Him’s rear ‘ear racks’ was insufficiently motivated to tackle a complex pipe-bending task for anywhere near direct-from-China- let alone Outback’s prices.

Another reason for wanting tank/rad bars is to carry luggage up front where you can see it and get to it from the seat. That way you dispense with a rear pannier rack so the weight penalty can balance out) and just use a tailpack. ‘Fishform‘ they call this in kayak hull design – ie: more width up front. This way the engine/radiator bars double up as pannier racks.
I tried this idea with the AT (above left), and when I got back noticed serial RTW-er Nick Sanders had done the same on his T7 RTW bike (above right). A side benefit with soft bags on tank-side racks is the bags absorb impacts before the rack, leaving the rads asleep in their beds. I do wonder if these low Chinese bars with a wide frame are to mount a pannier may work well after all.

Later I lined the bars up under the engine and it was clear for small panniers the mounting would be way too low and probably drag on corners. Back on ebay they do go.

The Outback Motortek radiator crashbars arrived a few weeks later. They’re hefty at around 4kg with long, carefully shaped 5mm plates clamping to the engine mounting bolts on the downtube. As mentioned above, it all feels OTT for a light bike that doesn’t have the mass to destroy itself, as if they’re just transposing ideas from heftier bikes which do need heft. The design has the entire top part unsupported apart from cross braces and so depends on the strength in the plates to resist the deforming leverage. Were there a single mount somewhere on the headstock the whole set up could be half the weight, like a 400 Himalayan, above.

USB power plug
I took the chance to fit a USB power plug. You can buy them on ebay pre-wired with a fitting matching a spare switched socket somewhere behind the headlamp. ‘Switched’ means it only powers up with the ignition on. Annoyingly mine turned out to be just a USB adaptor fitted into in a cigarette lighter which means another layer of electrical connection to play up, but I suppose the USB plug can be easily inspected changed. Not all work or for long I found in March.

First I had to remove my GP Kompozit screen which weighs just under a kilo, fyi. Next, undo a pair of allen-head rubber mounts either side of the headlamp assembly and remove the whole thing. The auxiliary socket is soon located among the black spaghetti and the over-long USB plug lead clicked in.

Annoyance. Or is it just getting the knack?

But to quote the late Haynes ‘assembly is not a reversal of dismantling’. Is it ever? The lower mounts wouldn’t line back up. I assumed the new wiring was in the way and pulled it through but still no luck. Rubber grommet spacer-washers get pulled off as you try and shove the headlamp onto the mounts. Then I enjoyed a bolt dropping down onto the mudguard top. I managed to flick it out and resumed alignment; it did seem like the mudguard top was fouling the cowling – as John Cooper Clarke might have said. I removed the mudguard (loosening might have been adequate) and loosened the top headlamp mounts: that did the trick. It all went together like it should.

Next: will the Garmin charge off the bike once the ignition is on or go into mass storage mode. It did the later when the USB gets in a muddle. Go to Garmin Menu > System and change from Serial to Spanner mode. The Garmin will switch on as normal and a sign that it’s working is a flashing charging battery icon, as below.