For my kind of riding I’ve not been a great fan of tankbags. When you get off the bike it’s another thing to unclip and lug around with you, along with your lid. For the stuff you can’t afford to lose I find a backpack like Kriega’s R15 more functional – it stays with you on or off the bike, but over nearly a decade I’ve reluctantly gelled with my ‘dango.
Fyi: I bought this Fandango Pro used off ebay for £35.
What they say: Fandango Tank Bag PRO™ (8 litres) represents a major upgrade of Giant Loop’s largest, most popular tank bag. Expandability, electronics compatibility, and features driven by rider feedback inspire this adventure-proof state-of-the-art design.
What I think:
• Solid and well made • Still using it on all sorts of bikes 5 years later • Perfect size for my needs – not too big • More handy compartments than Secret Squirrel
• A hundred and sixty quid for a PVC tank bag? Nope, now £220! • Mounting zips are a faff when filling up; would prefer clips or even velcro
Review I like to try new stuff, or up to a point, retry ideas I’ve given up on. Once I strung some high-end Rova-Flex zip ties round the frame and headstock the Fandango perched securely on my WR’s big IMS tank. It stayed there for a month, zipped off every 4-500kms to refill the tank, or right off when overnighting in lodgings. Since then I used it on an XR400 in Algeria, on my XScrambleR 700 in Morocco and on my Himalayan.
The volume is just right for me, though the map pocket’s surface area os a bit small. It closes with a velcro patch, but that wasn’t enough to stop my vital notebook falling out while battling through a oued on the Western Sahara border. Going back to look for it was just ‘too hot, too hard, too far’, to paraphrase GL’s motto. Make sure you velcro down well, especially with toll-highway tickets. The back mesh pocket was great to whip out my P&S camera on the move, and inside under the top is a nifty hidden zip pocket, but it’s starting to fray. There’s another under the base (may get wet) and inside the body is a velcro divider I have no use for as the bag is not that big. I just stuff in what’s needed.
XR4 in Algeria
There’s a port to let a cable out so your phone can recharge, and they’ve neatly addressed securing the loose ends of the harness to eliminate flapping. As expected, the zips can be a pain some days. It takes just a few seconds of fiddling to get them to hook up, but I got things to do and places to ride! I’d prefer clips. The breather hose from my WR’s fuel cap didn’t get affected by the bag pressing on it, and lightly loaded as it was, the sat stayed in place over rough terrain.
890R in Morocco
Once the harness is on the bike, it will be nice to ditch the backpack and just use the ‘dango like a small top box as it’s been a dead handy accessory on my trips. Lately I’ve fitted it to my Himalayan where it sits nicely with some more Rova-Flex zipped round the frame tubes. Only this time I’ve taped some tape to the tank top to stop the base vinyl from scuffing the pristine white paint. Just remember all this goodwill is based on the great price I paid for it used.
Giant Loop are well known for their innovative ‘horseshoe’ bags which wrap around the back of a dirt bike but which, in my opinion, are not especially easy to use day-in, day-out and have been proven not to be waterproof and have zips which can be weak points. That may not matter for a weekend run with your mates in the hills, but does on the overland.
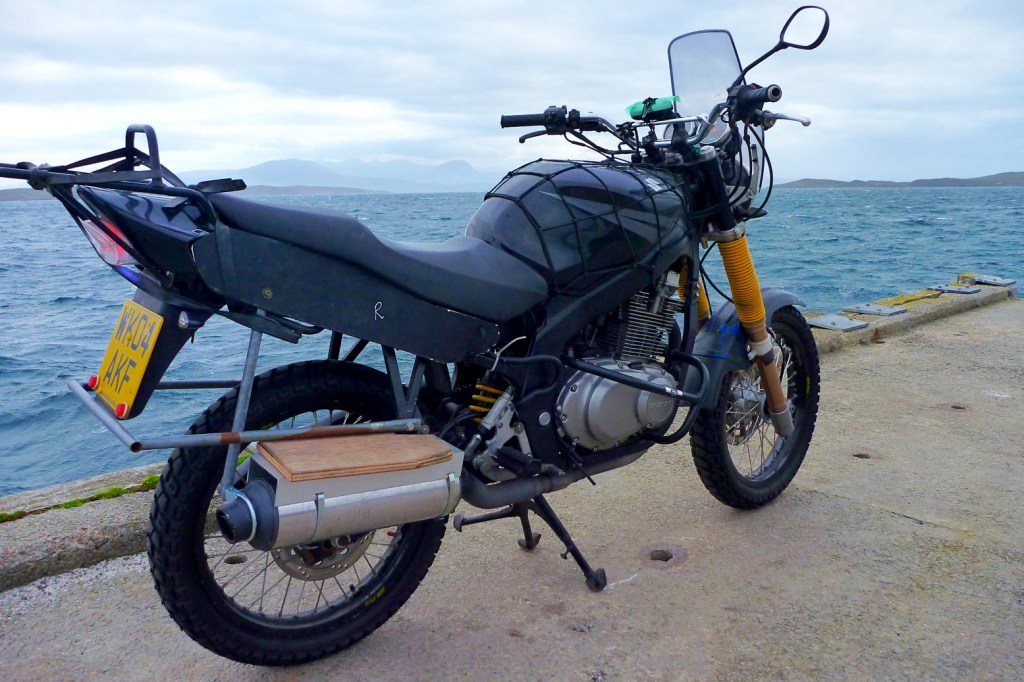
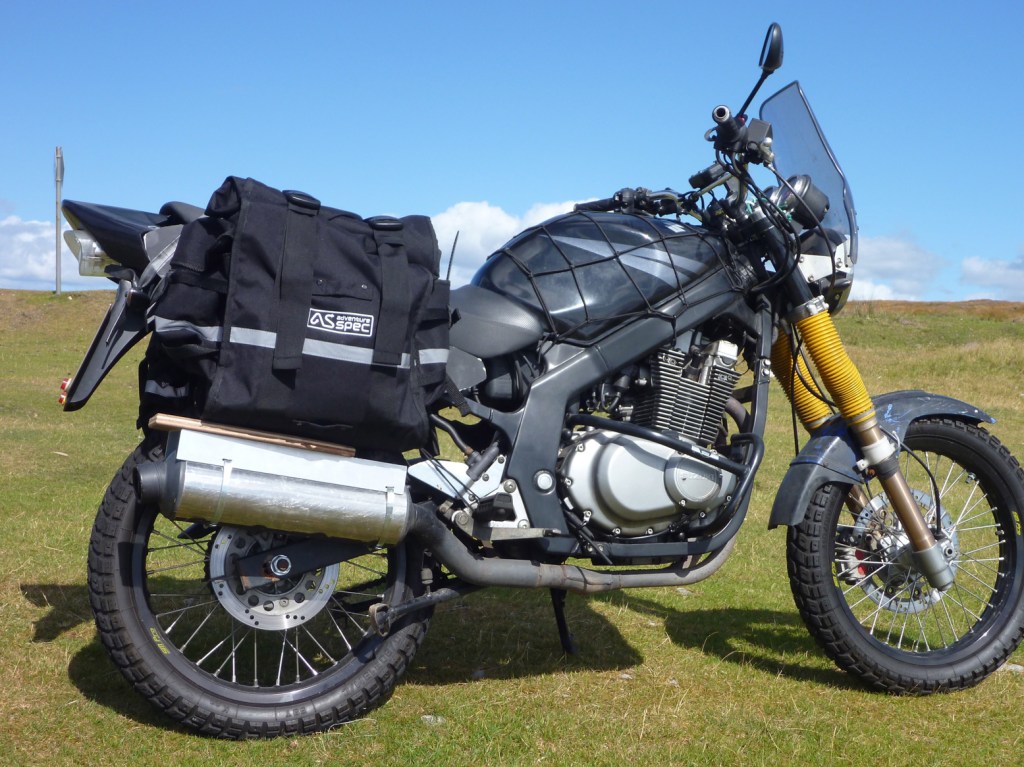
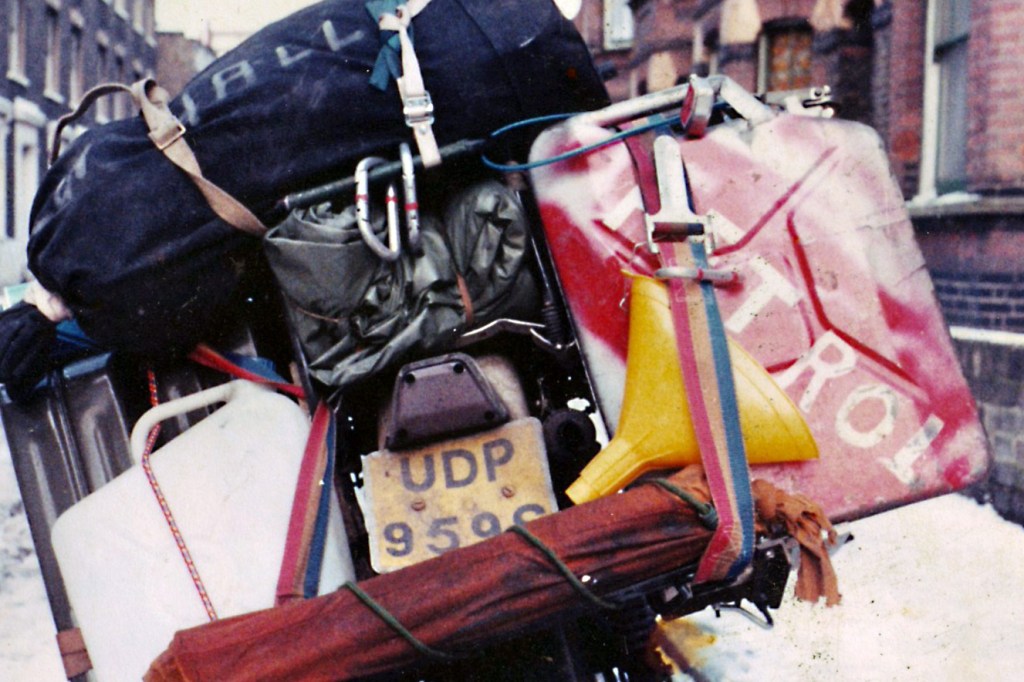
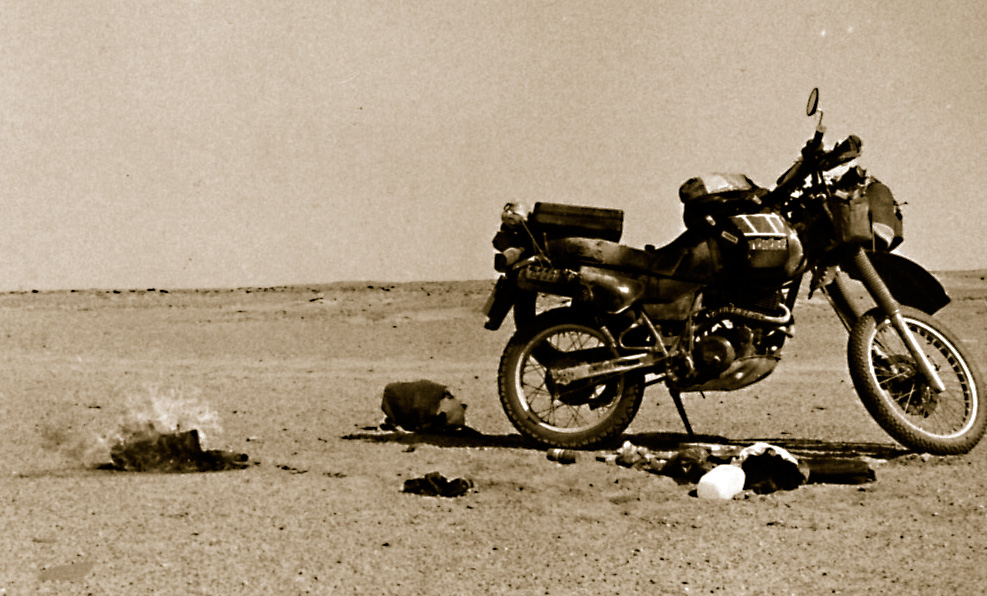
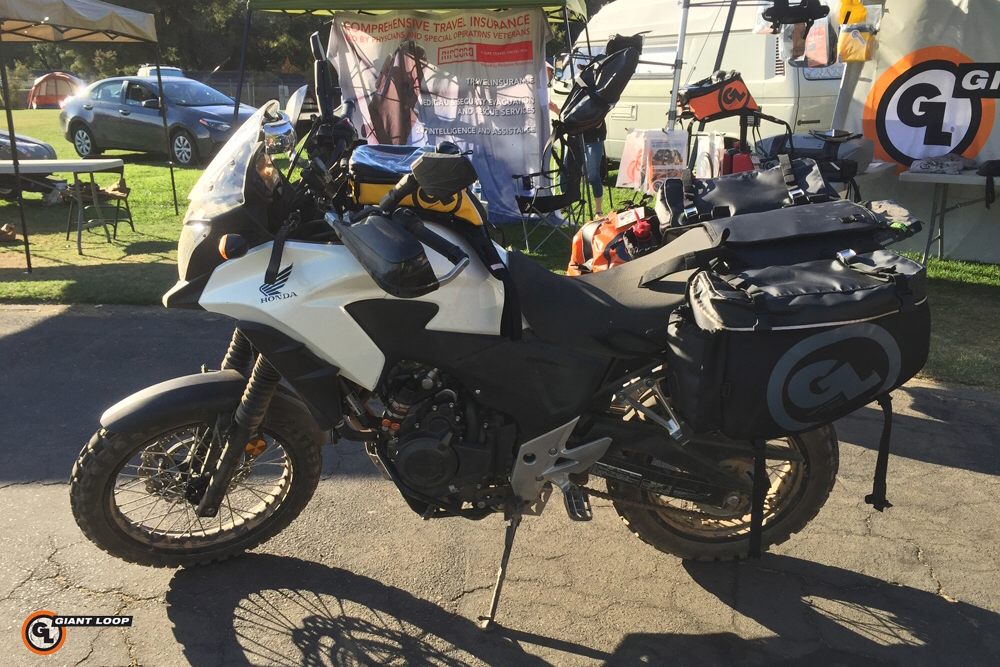
Now Giant Loop have joined the likes of Enduristan, Adventure Spec and a few others in producing a conventional throwover pannier, the Siskiyou, named after a mountain range in southern Oregon. These types of panniers are just about as old as motorcycling of course, up till a few years ago Ortliebs were widely used by moto travellers. I recall my first pair of ‘soft bags’ in the late 70s, elegant lightweight cases (left) crafted from a lustrous space-age combination of vinyl-coated cardboard. But this was the advent of the monoshock era where soon they’d be no more twin shocks to keep the swinging pannier backs out of the rear wheel or final drive. As I say elsewhere, over the years I’ve melted my fair share of soft panniers and even dealt with small luggage fires (right). Nevertheless, I still prefer soft luggage for overland or adventure travel despite the drawbacks of security, perhaps combined with one small detachable hard case for valuables.
These panniers were sent to me for a quick look by Adv Spec
WHAT GIANT LOOP SAID AT THE TIME … A ‘round-the-world contender, Giant Loop’s Siskiyou Panniers™ combine the convenience of hard panniers with all of Giant Loop’s performance advantages. Rugged, rackless, lightweight — and damn sexy…. Backed by a Limited Lifetime Warranty…
The GL website specs shown above left also claim each pannier has a volume of ’35 litres’. I’m not the first person to question how they arrived at this figure; my calcs put it at more like 24 litres. We’re all used to exaggerated claims, but that was quite a discrepancy. I read that they measure their luggage products by filling them with beans and doing so I suppose it’s possible that a soft fabric pannier would bulge out. In fact I’ve since found that that is exactly the case so Giant Loop’s estimate of 35 litres is right in the ball park.
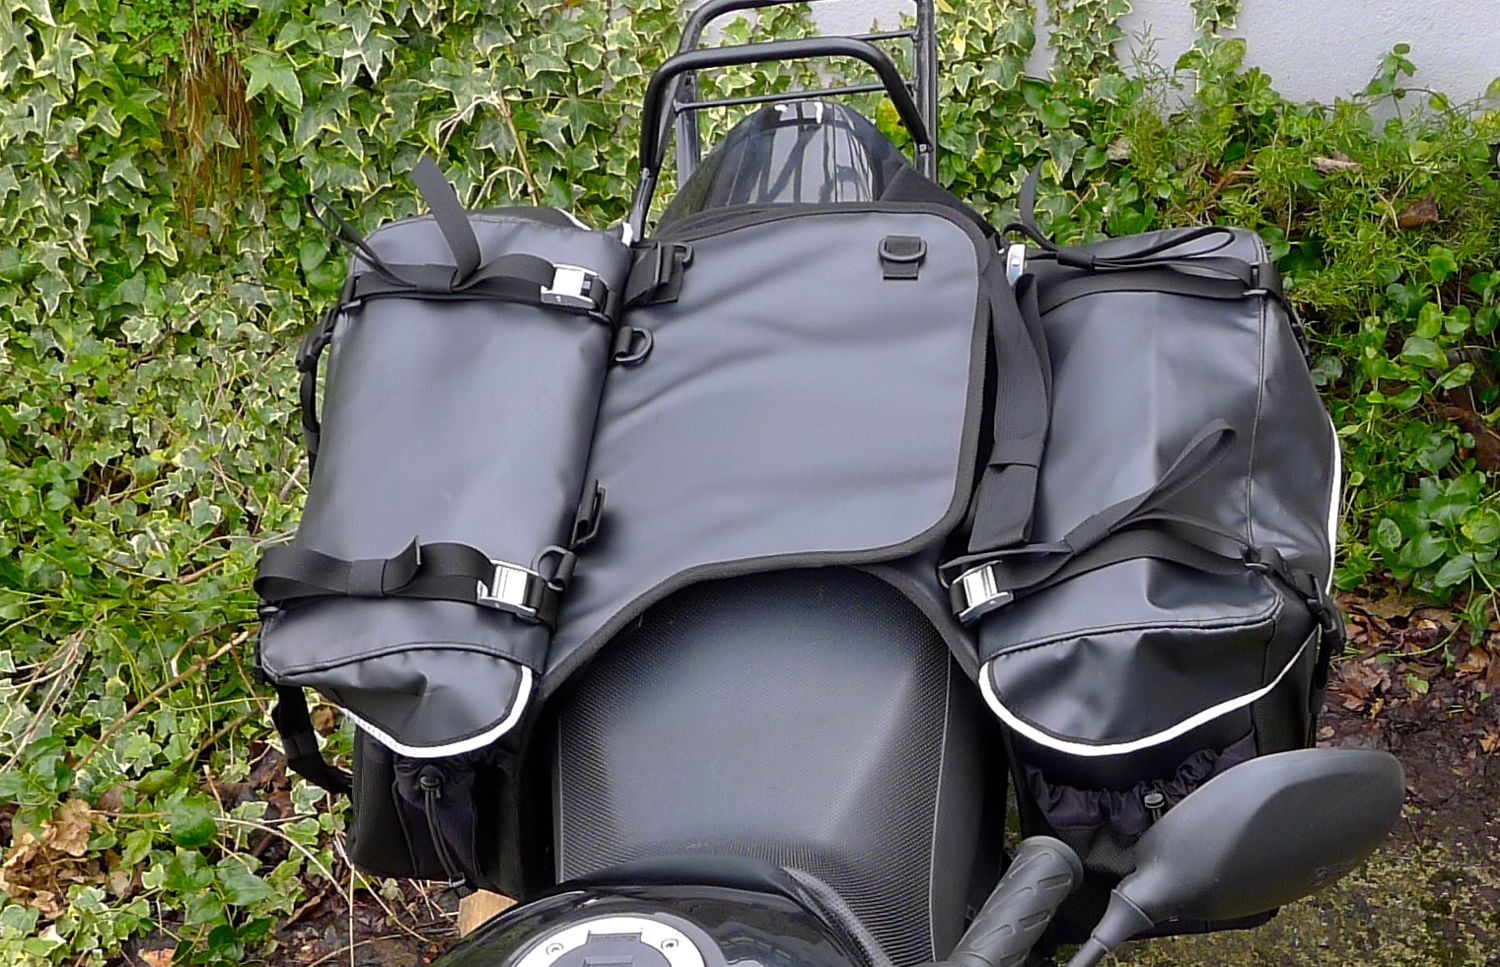
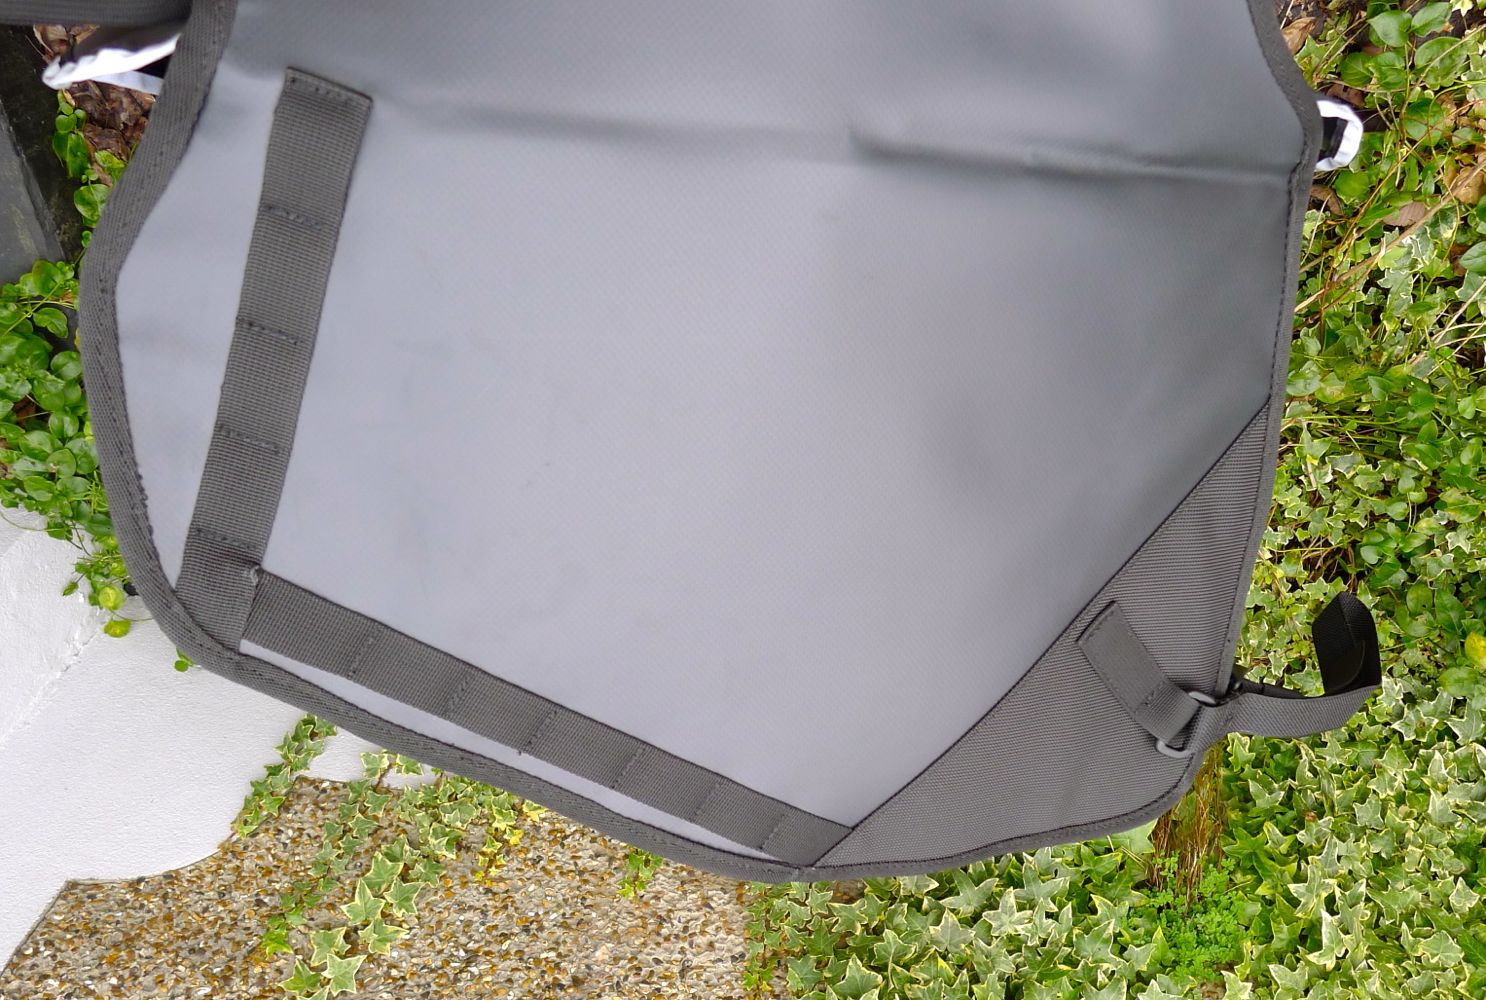
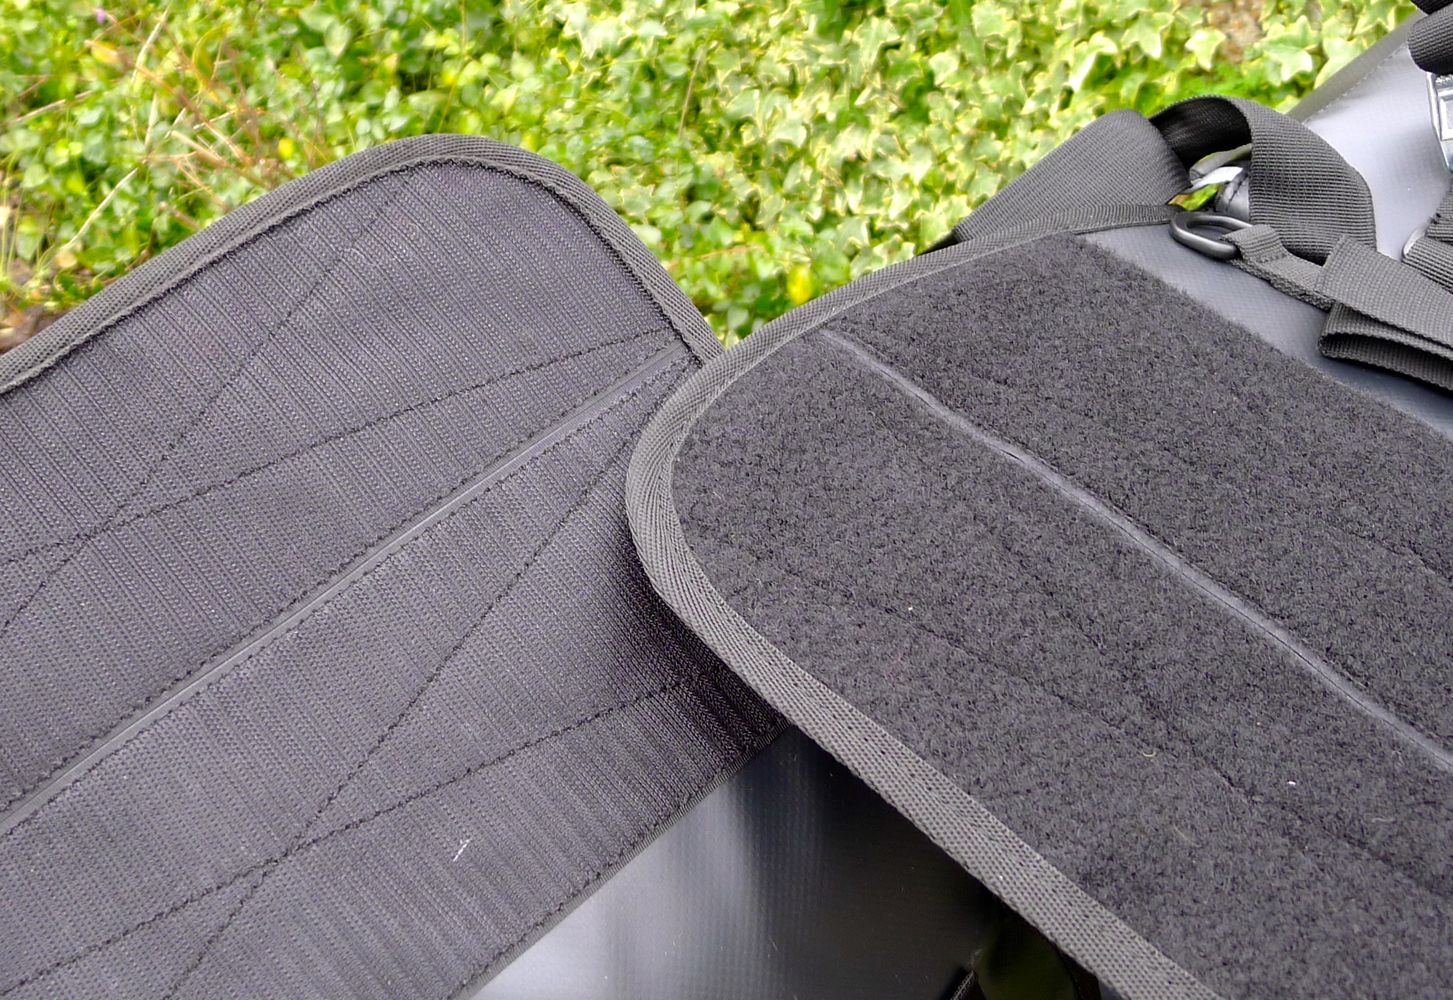
GL are fairly ambiguous about what they’re made from other than ‘military-spec materials and construction‘, but it looks like the well-proven and widely used combination of a Cordura shell with a vinyl back, interior and lid. Unusually, sandwiched inside this thick shell is an unseen additional layer of closed cell foam, or something similar. It helps shape the bags and also reduce damage by padding the contents when you crash. GL wisely suggest that any hard-edged items in the baggage are well wrapped for such an eventuality: it’s standard practice in packing soft baggage.
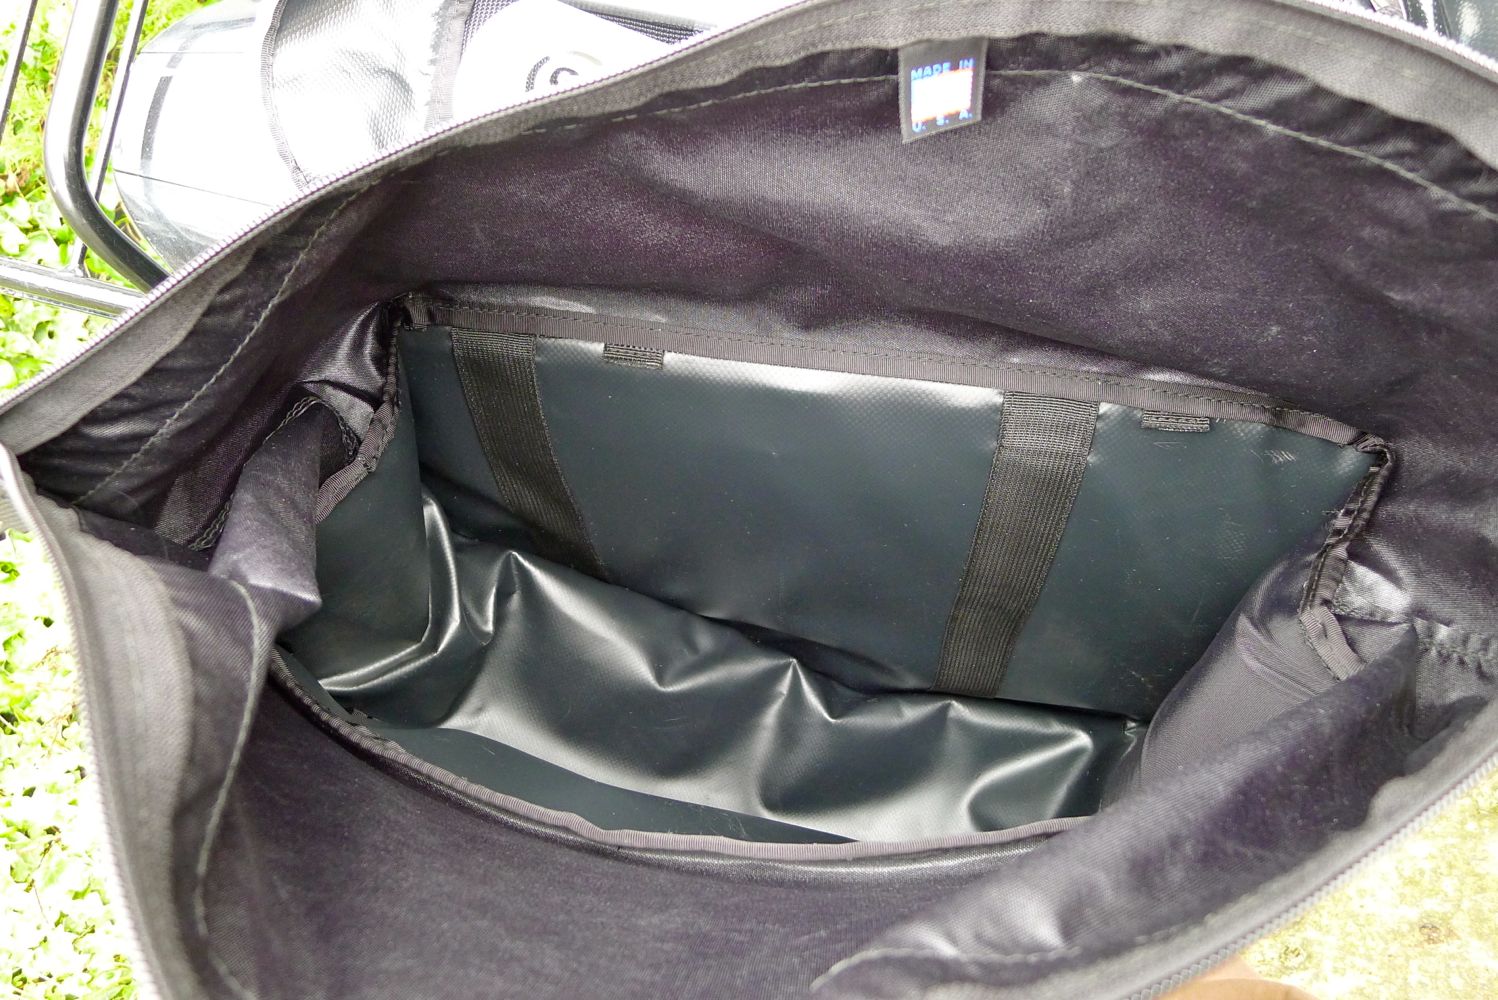
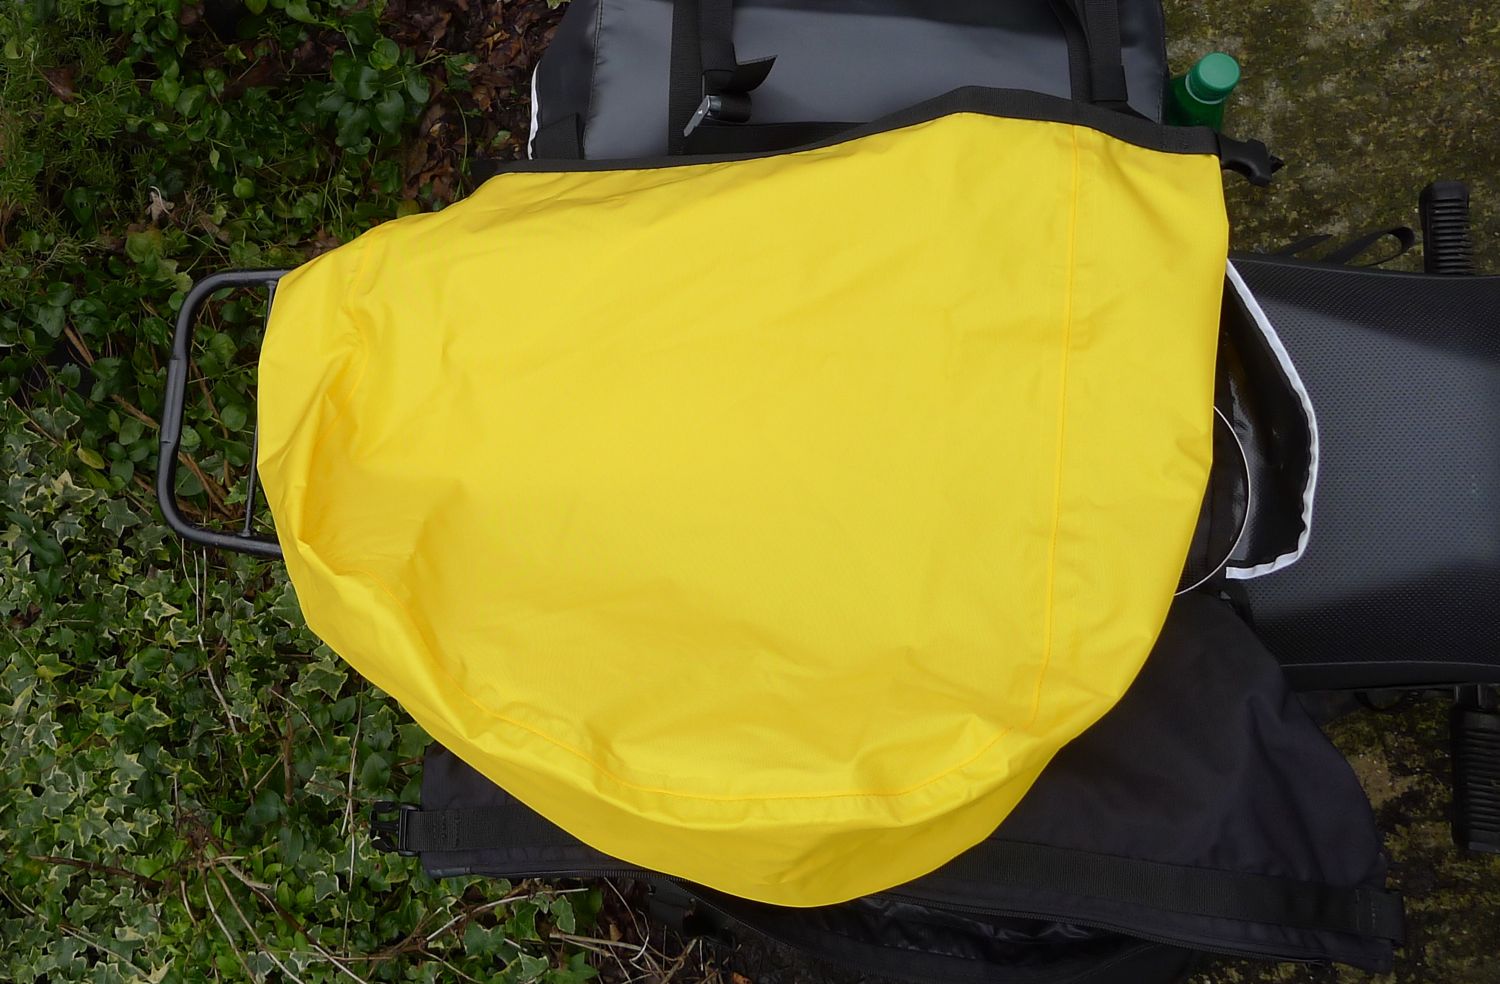
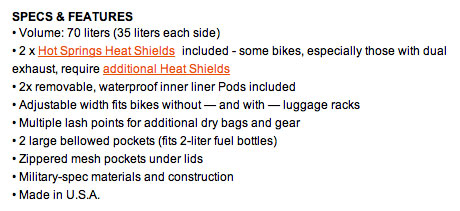
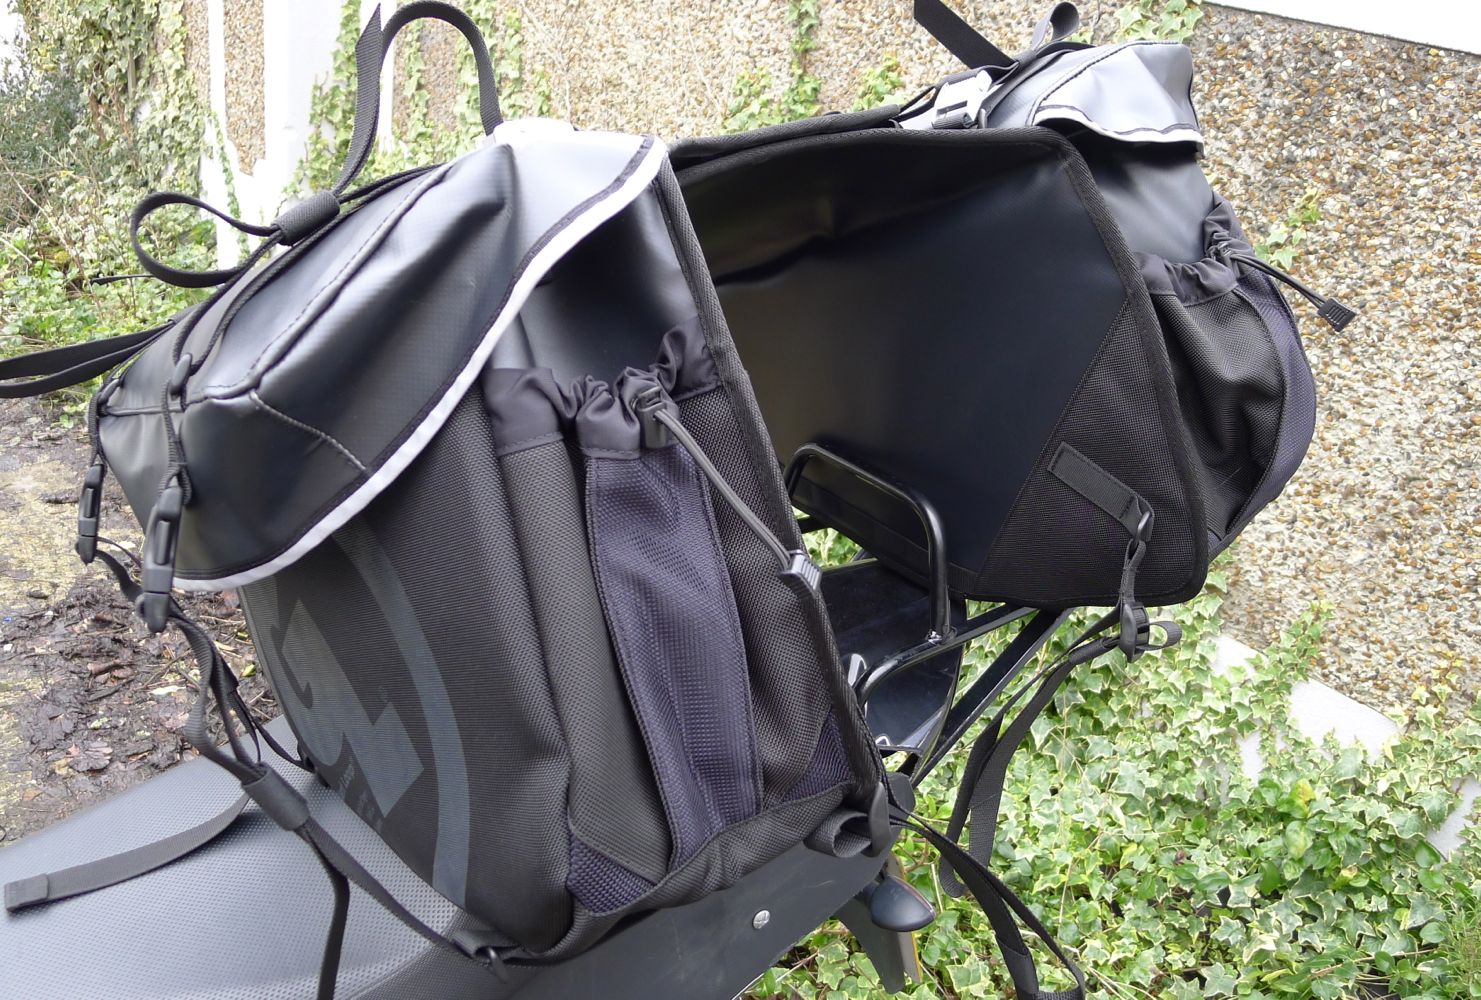
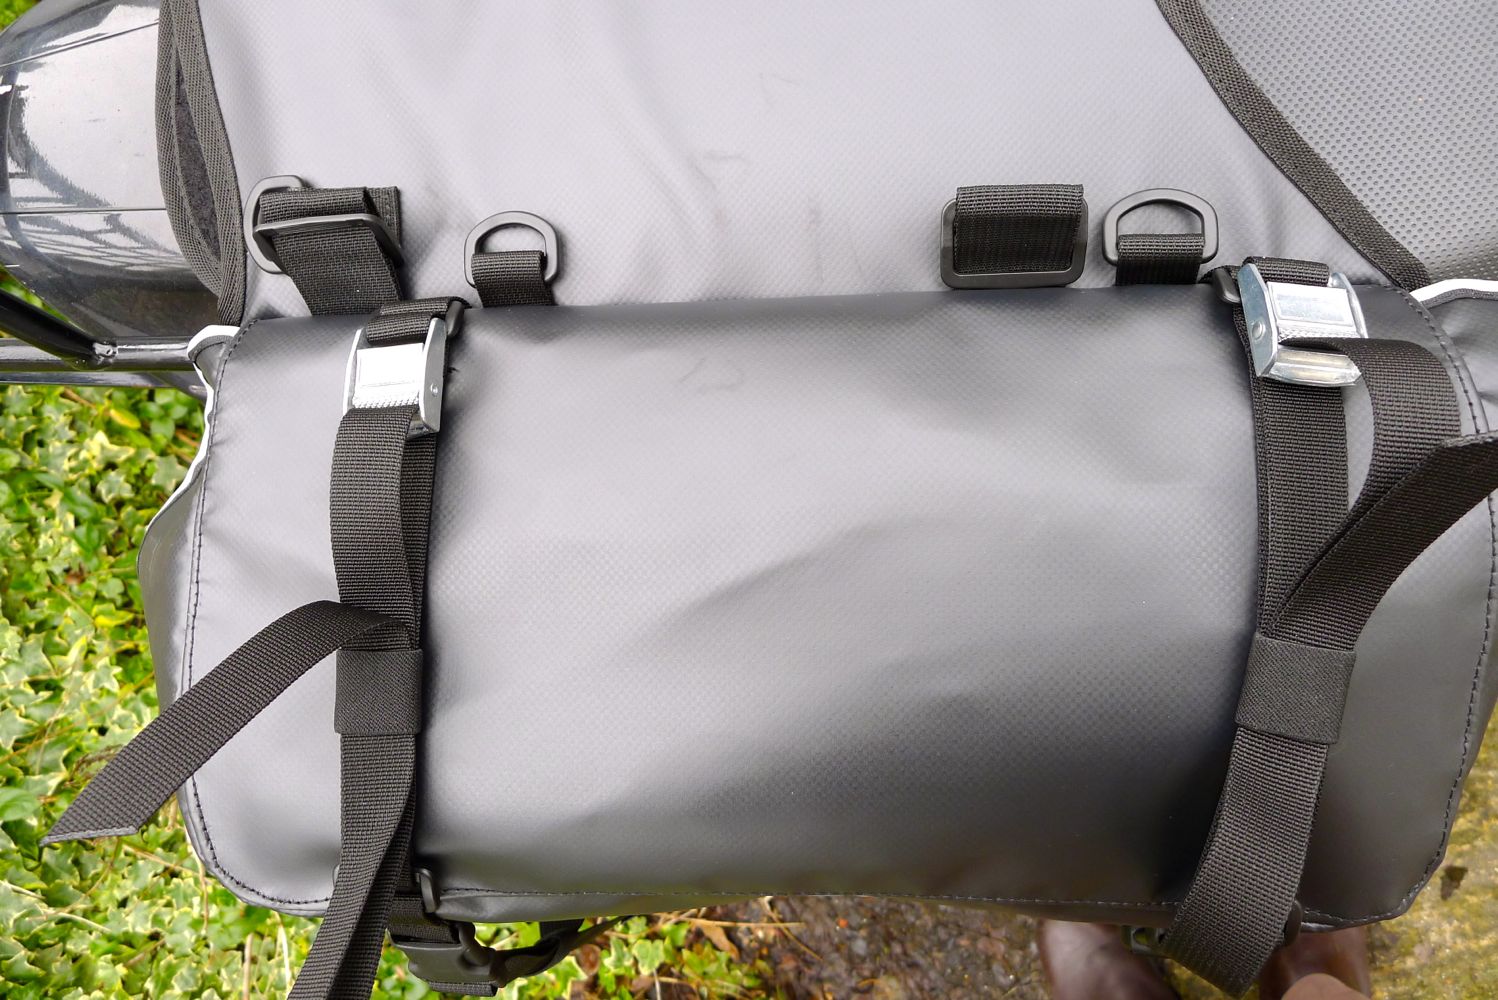
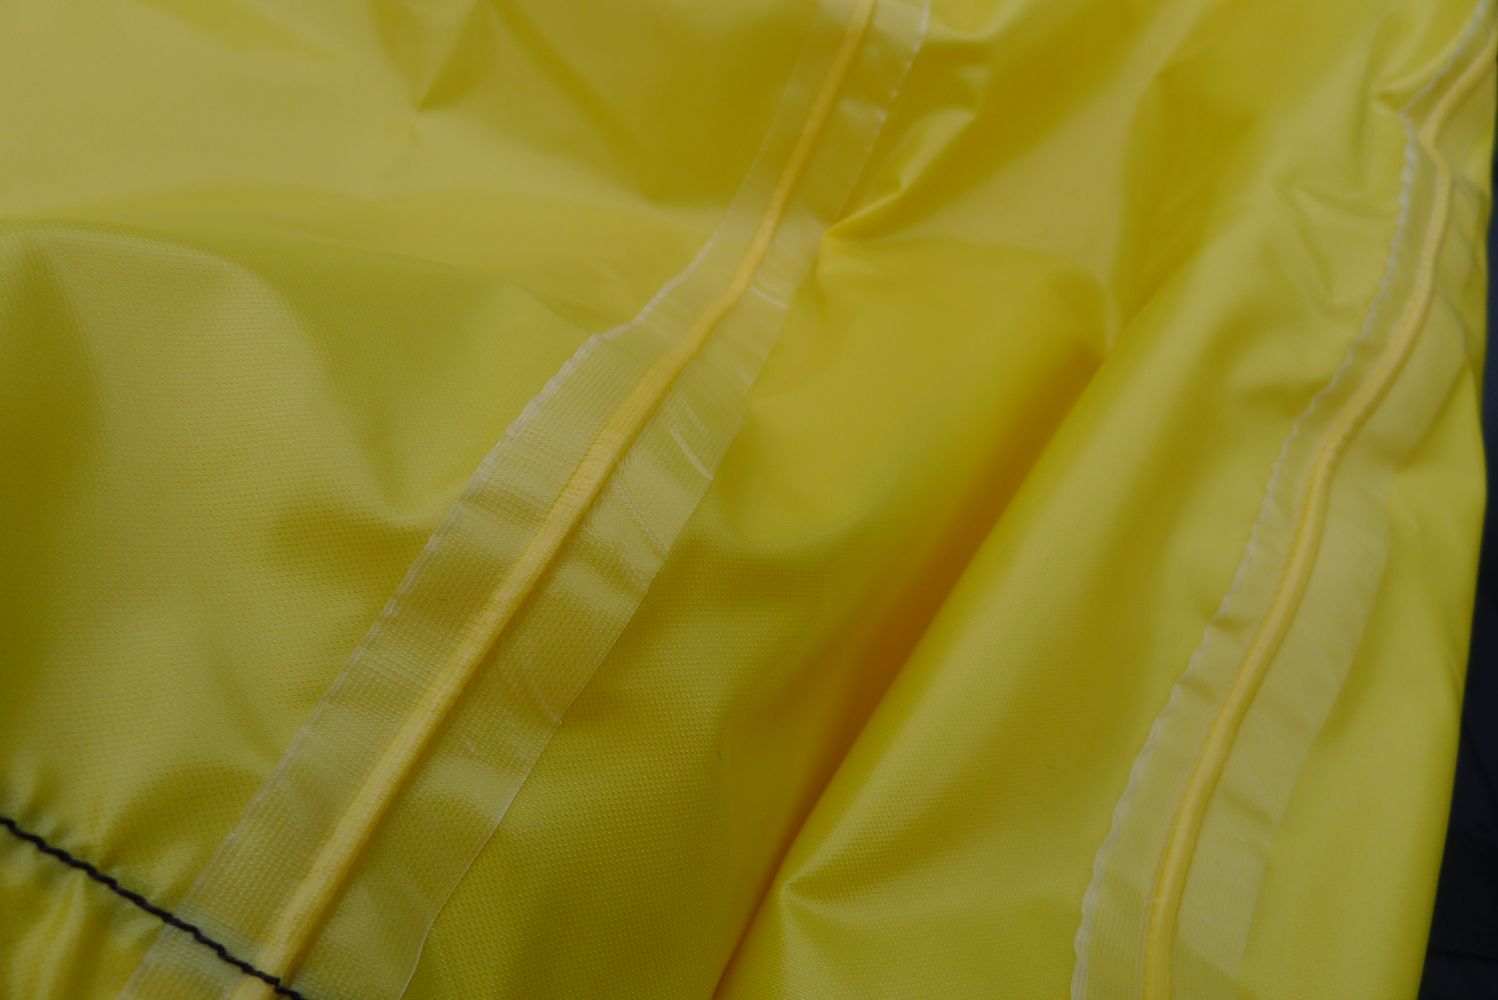
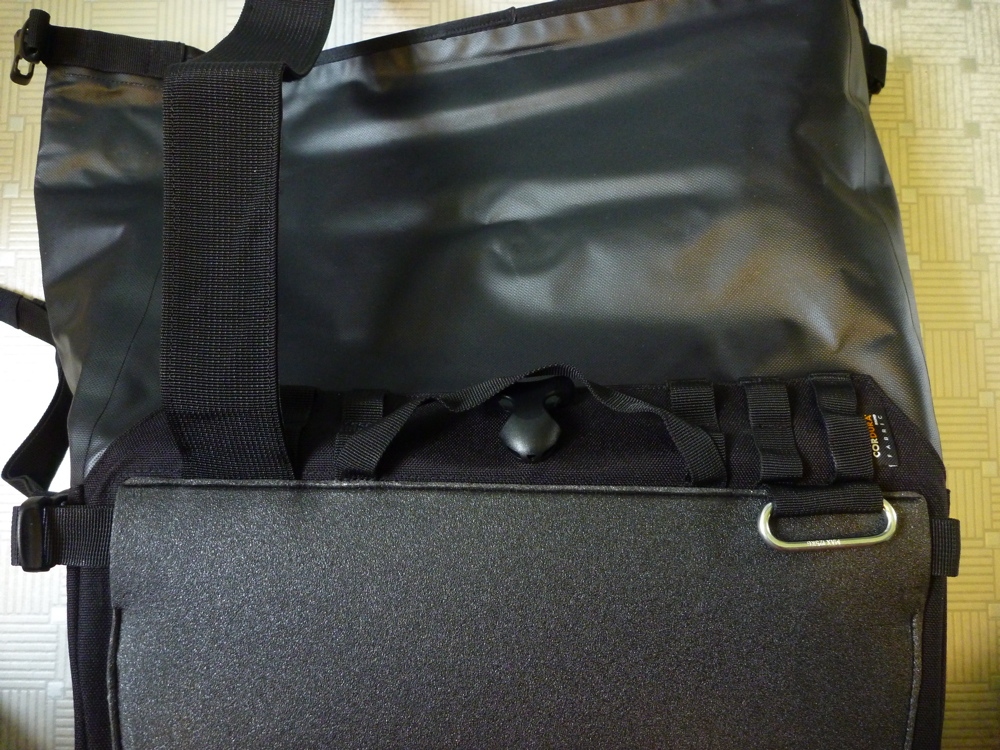
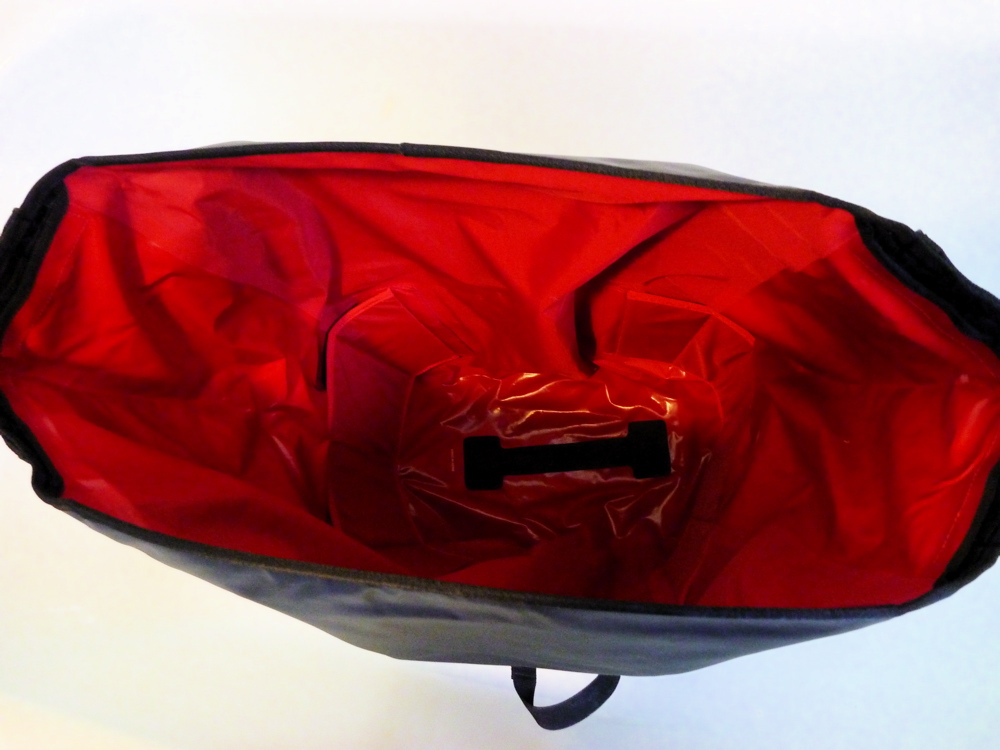
Rather like the Monsoons, the top edge of the Siksiyou’s shell has a sewn-on sleeve of coated nylon with a thin zip and roll-up clips, similar to a dry bag. Inside you get a separate yellow nylon liner (below right) cut more or less to fit in the panniers, with well-taped seams, a thick layer of TPU coating on one side, plus another thin zip and roll-top clips. Over the top of this drops the thick PVC lid which clips down on straps, with additional separate straps for attaching stuff to the top of the lid rather than tucking it under the lid straps – another nice touch. Inside the lid is a flat zipped mesh map pocket.
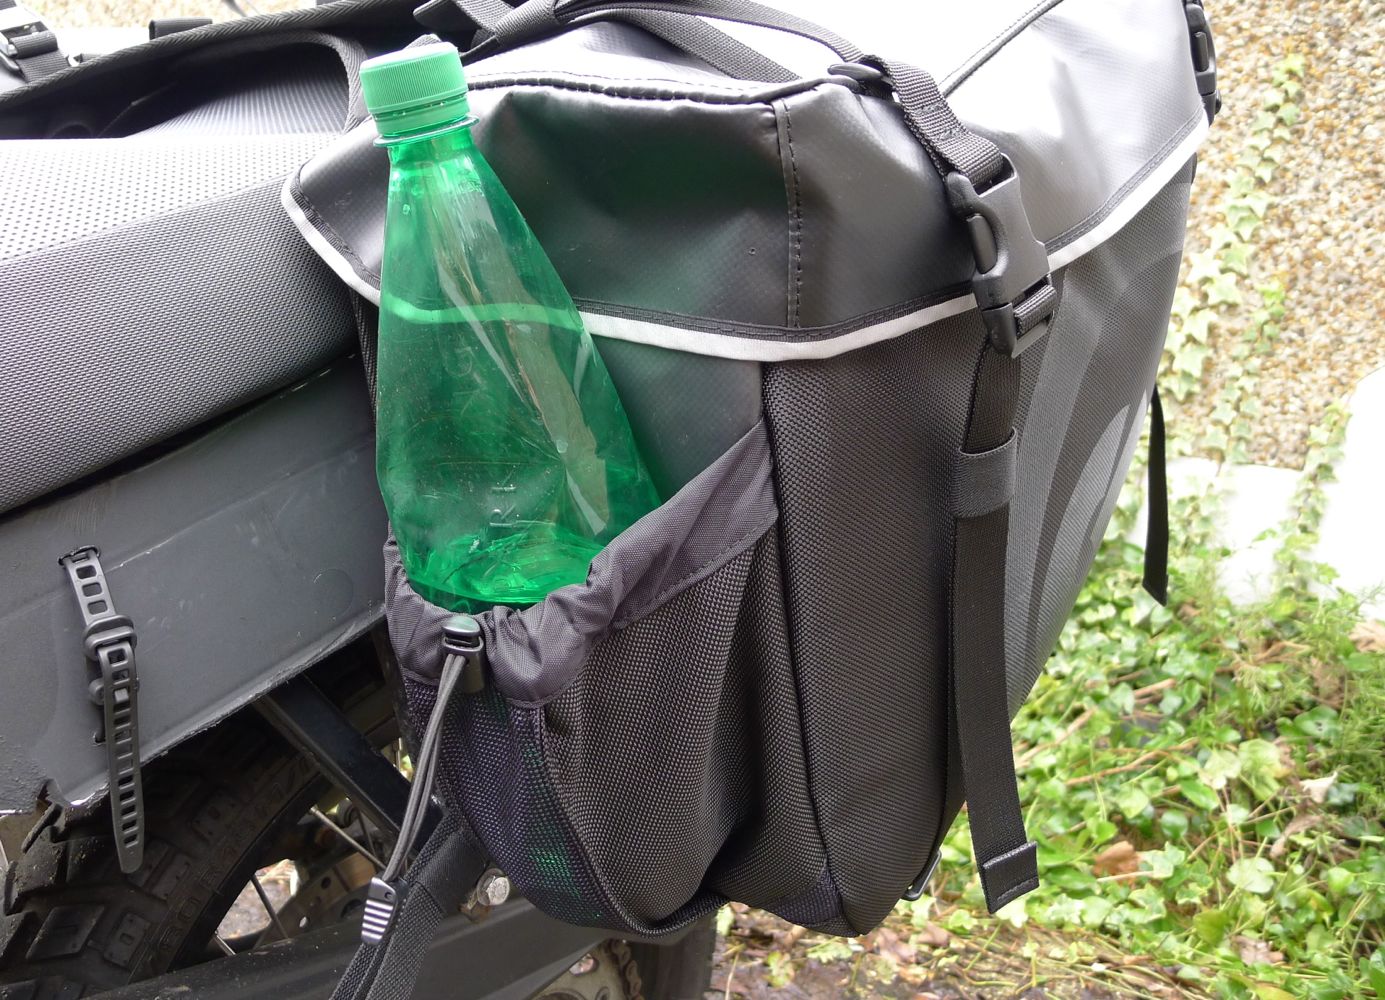
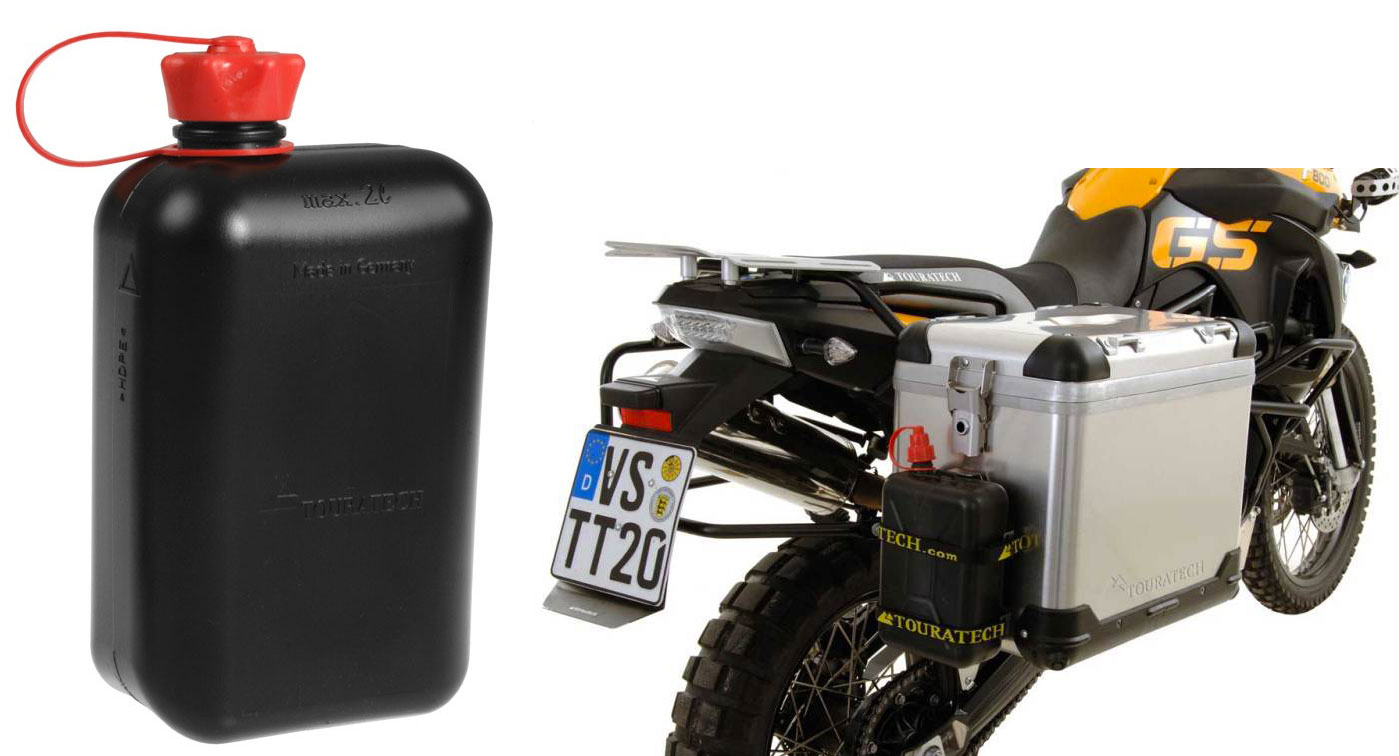
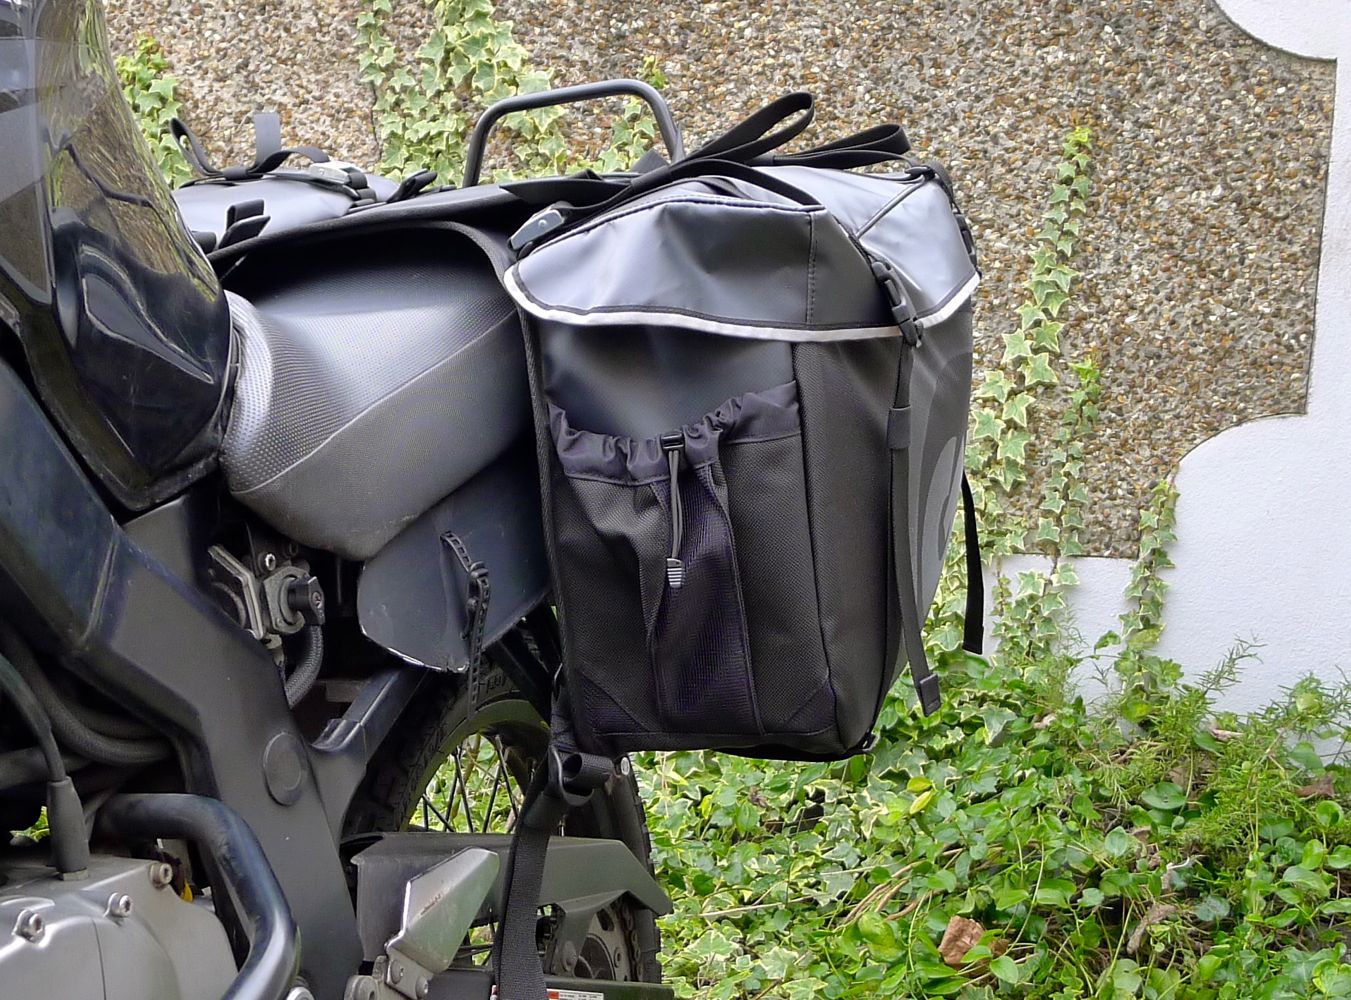
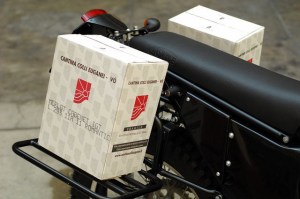
There’s also a small cinch-cord pocket on the front of each pannier, but although they describe it as ‘bellowed’ it’s actually a simple wedge that’s nowhere near as big nor usefully box-shaped as the four pockets you get on Magadans although it’s said they’ve been designed to take 2-litre Touratech cans, as pictured left. On the right, a 1.5 litre water bottle in the pannier’s pocket.
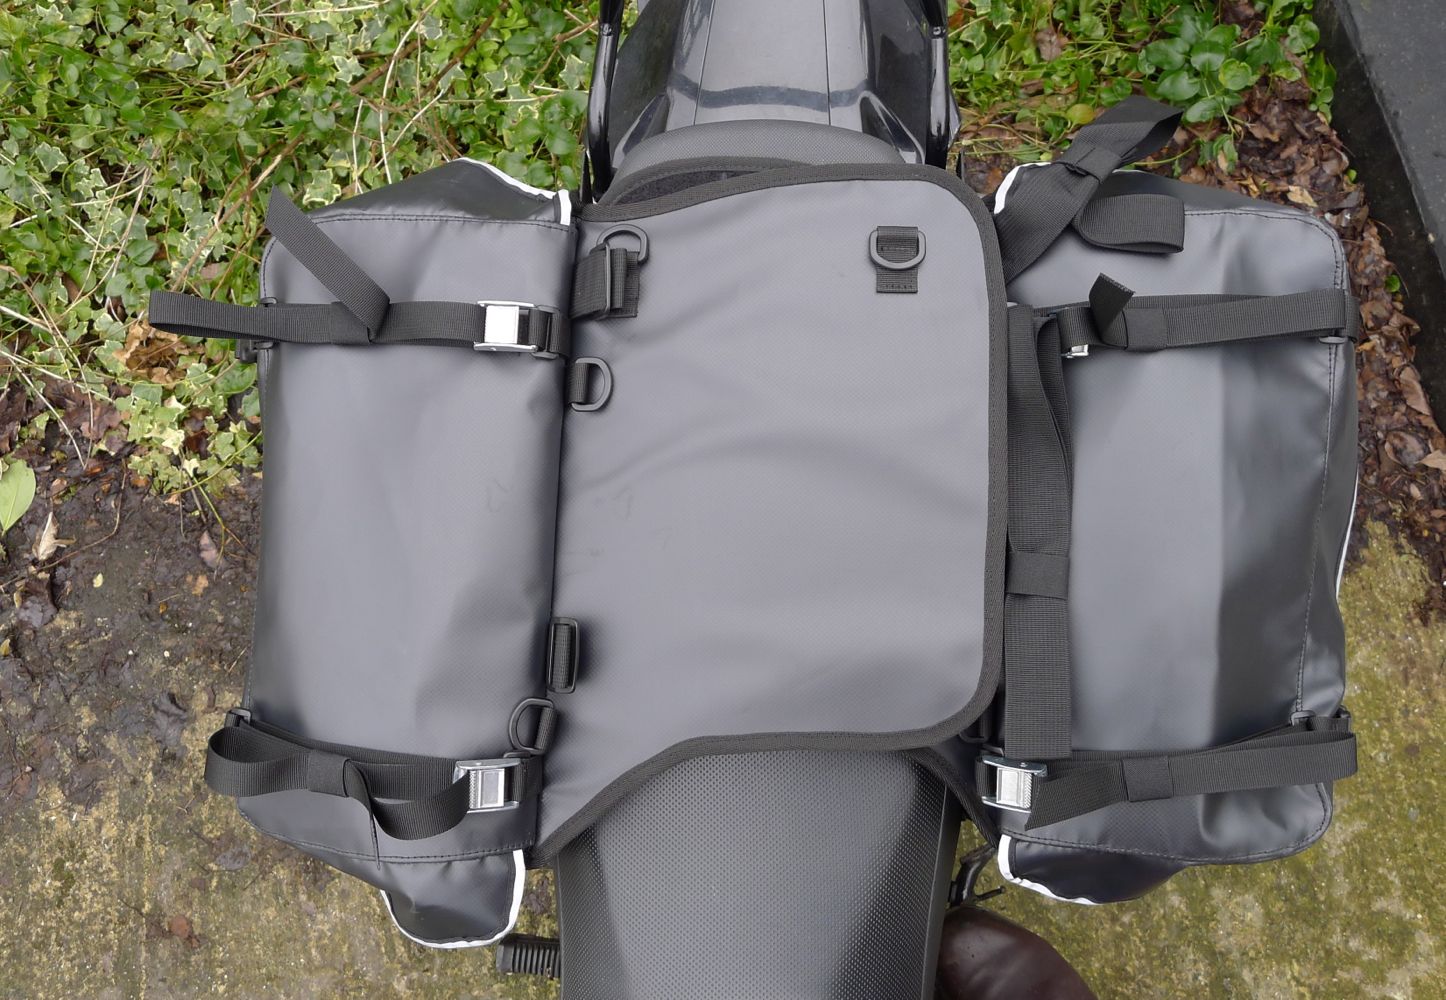
The two bags join together using broad vinyl velcro pads. These pads feature additional lashing rings to secure other luggage or to fix it all to your bike. The Magadans use the same system, but with a pair of wide velcro straps rather than full-width pads which seems bit OTT. Me, I’d prefer buckles and straps over velcro anyway, because as the volume of your load changes or rough roads take their toll, fine tuning the tension may be required – and that’s much more easily done with adjustable buckles that super sticky velcro, be it strap or pad. On the Mags such a buckle mod is easy to do – with the Siskies you’re stuck with the pad which I’m also not sure would be great to sit on on a hot day. The GL installation page suggests: “For 2-up riding, affix a small seat cushion to the top of the Siskiyou Panniers“.
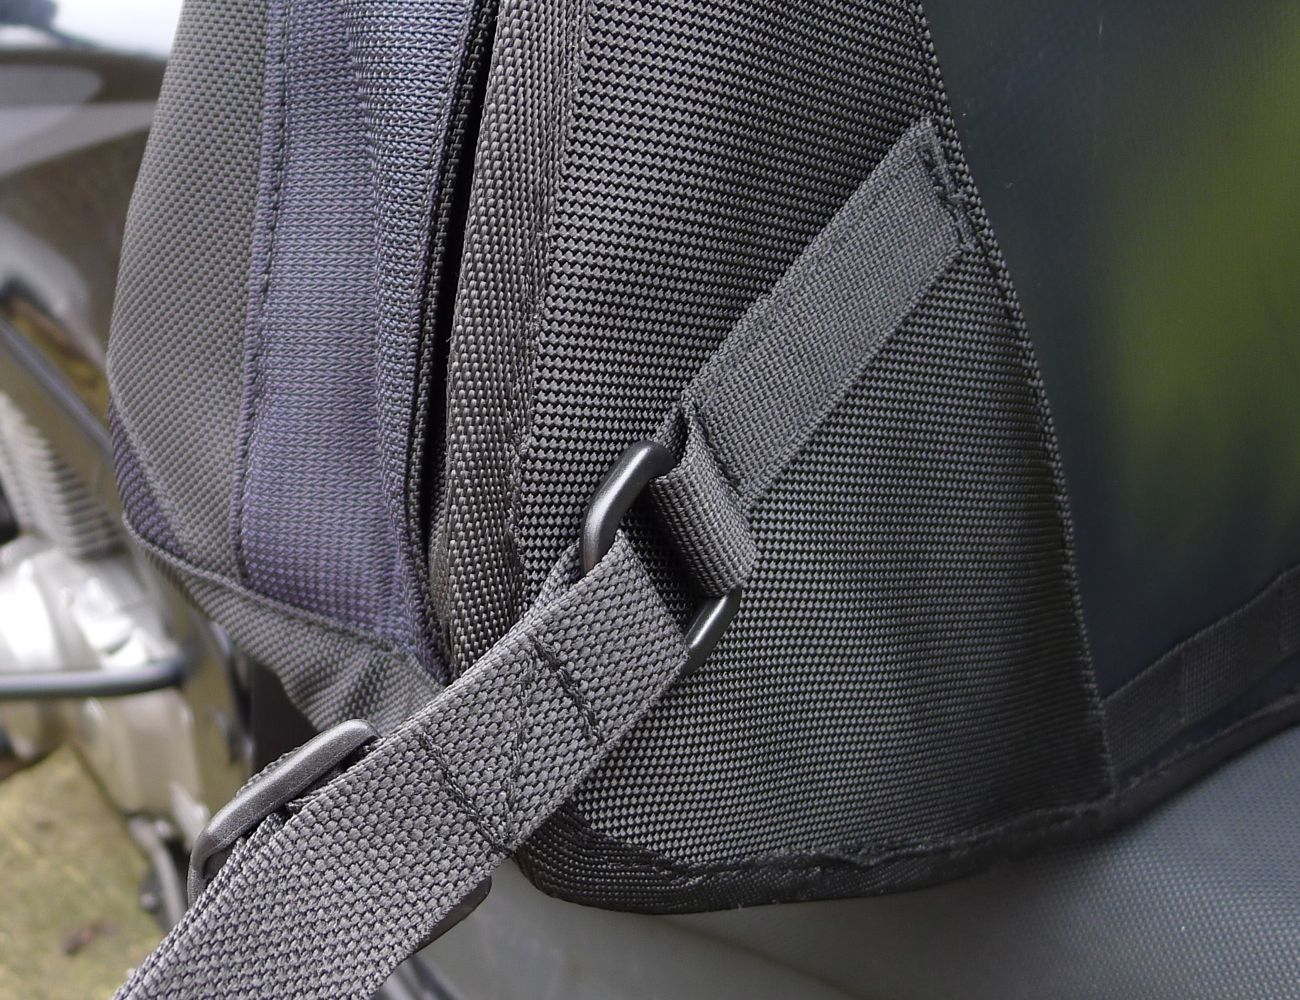
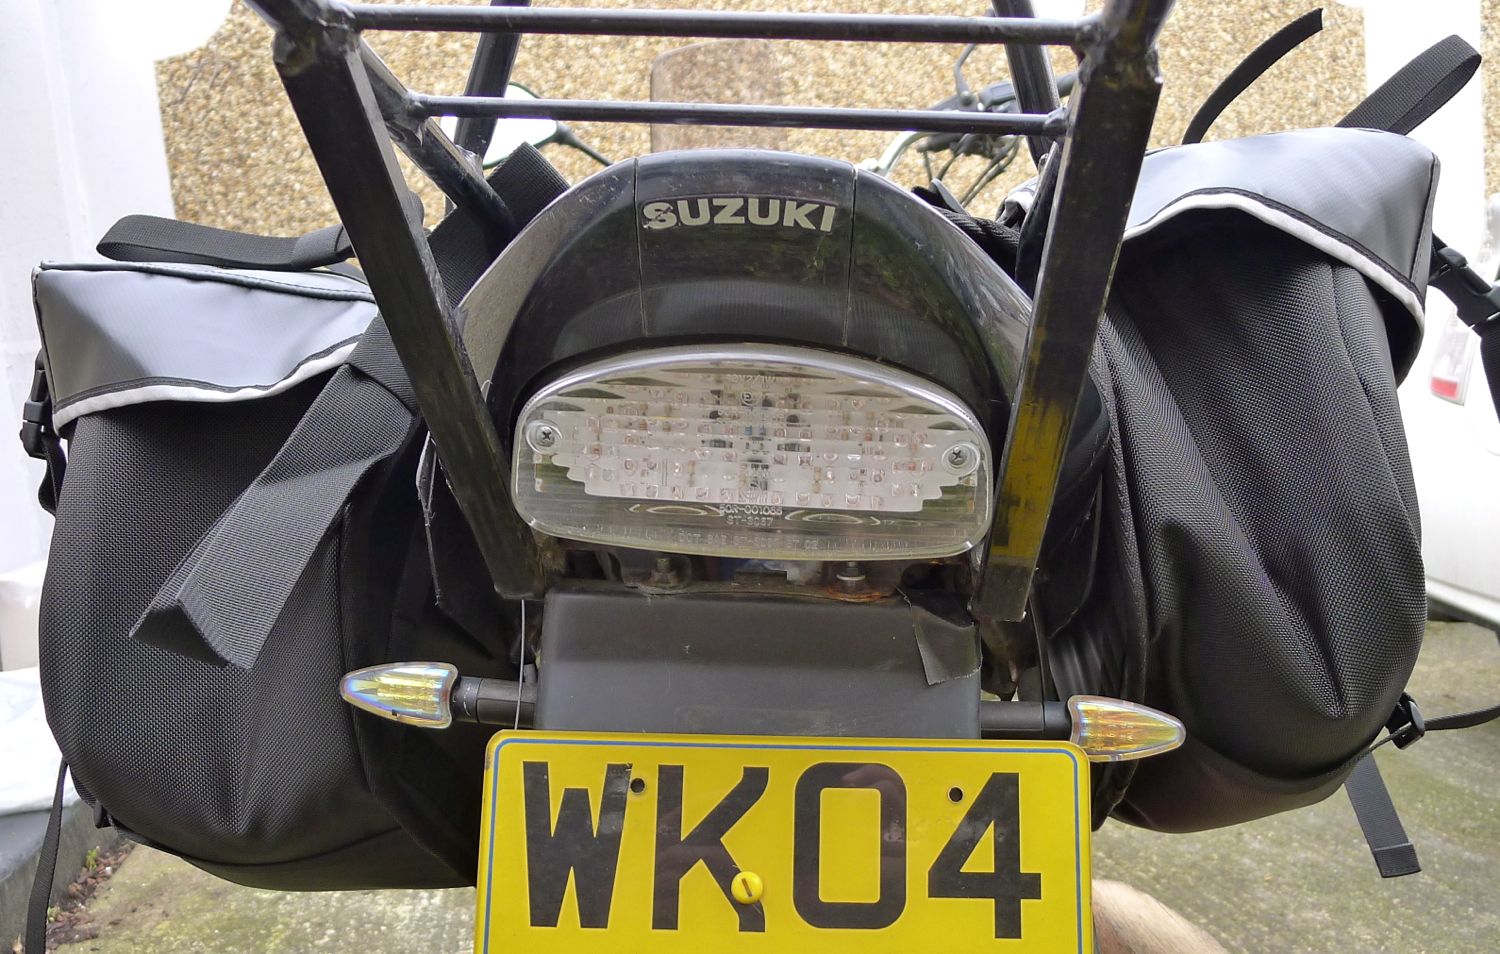
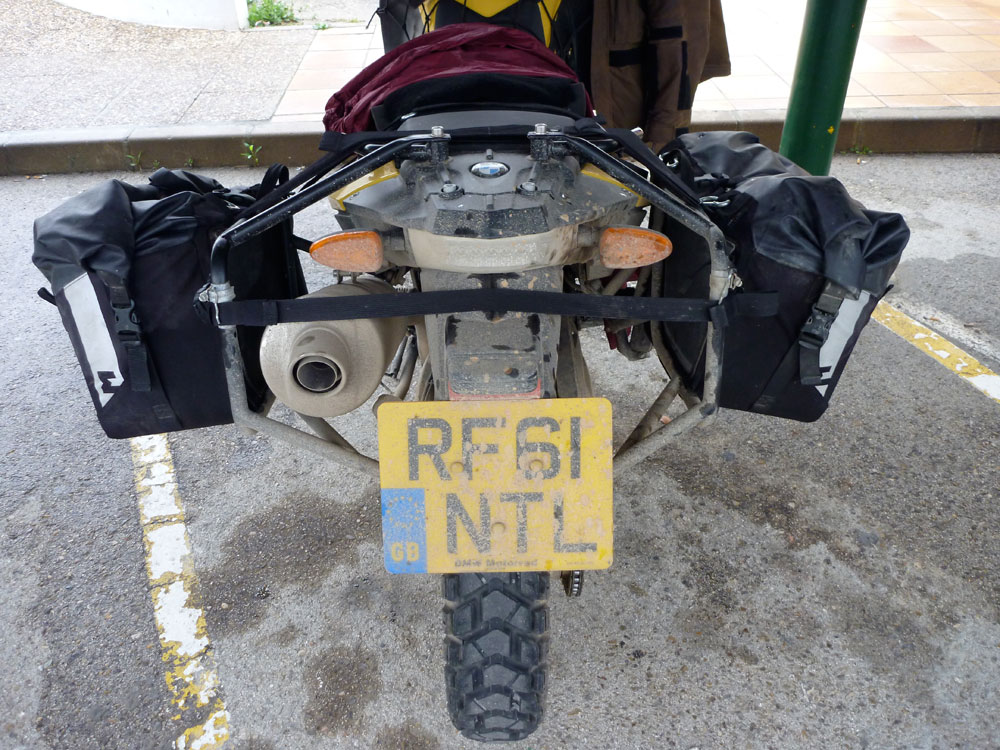
To stop the bags sliding back you get a strap to attach to the pillion footrest or thereabouts (left), as on the Monsoons but something that was missing from the Magadans’ first version. Subsequent versions low have a tie-off D-ring.
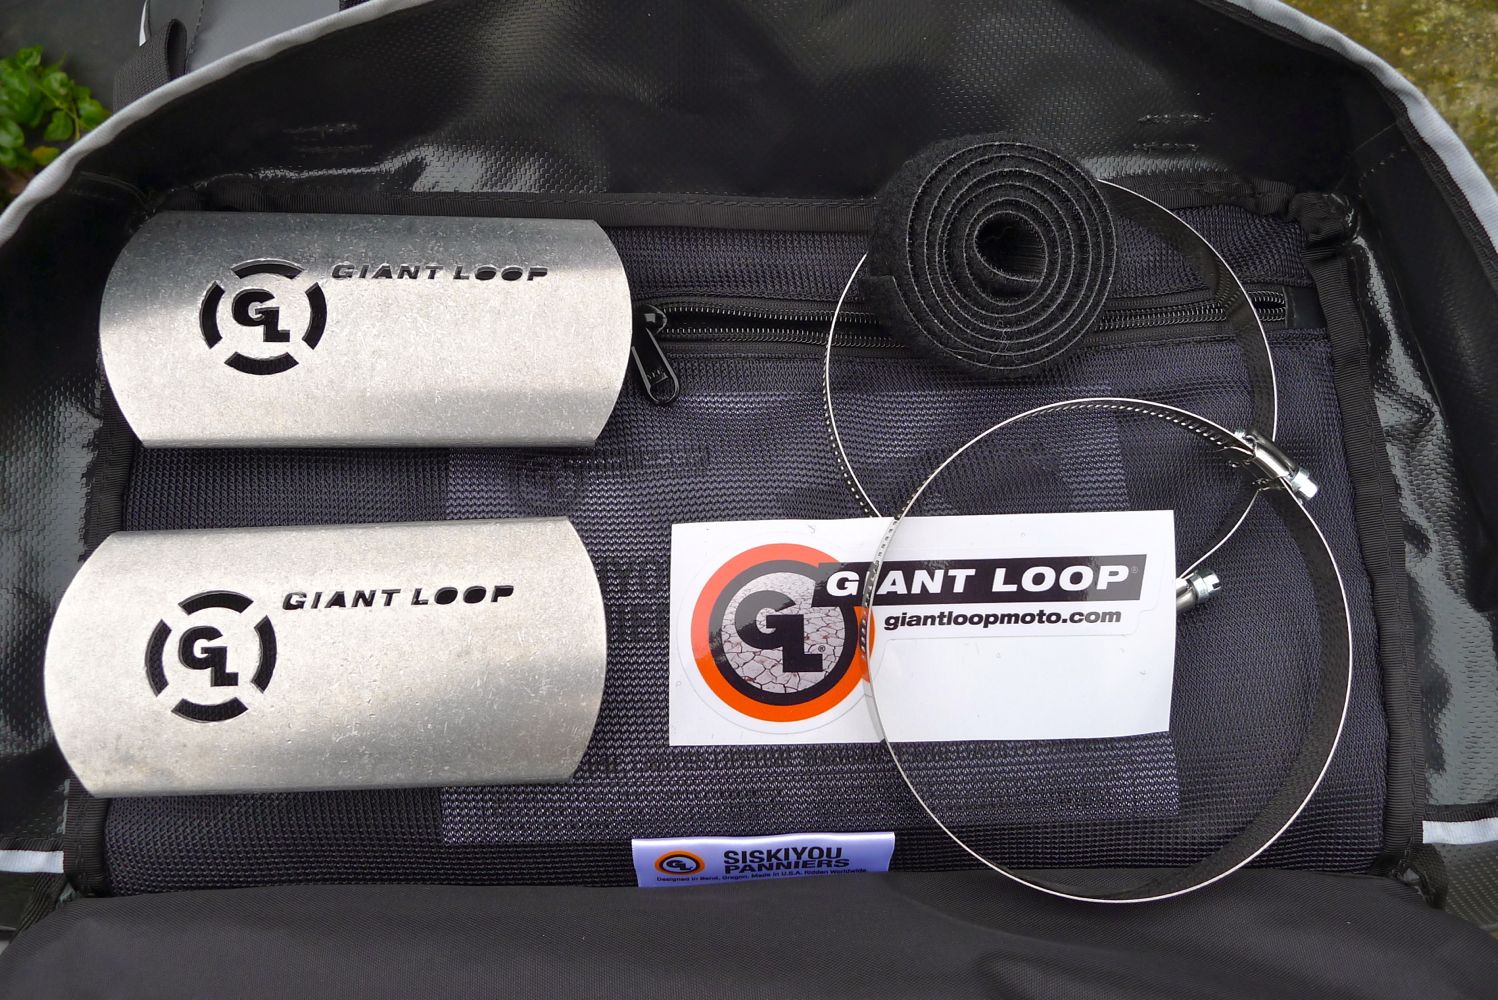
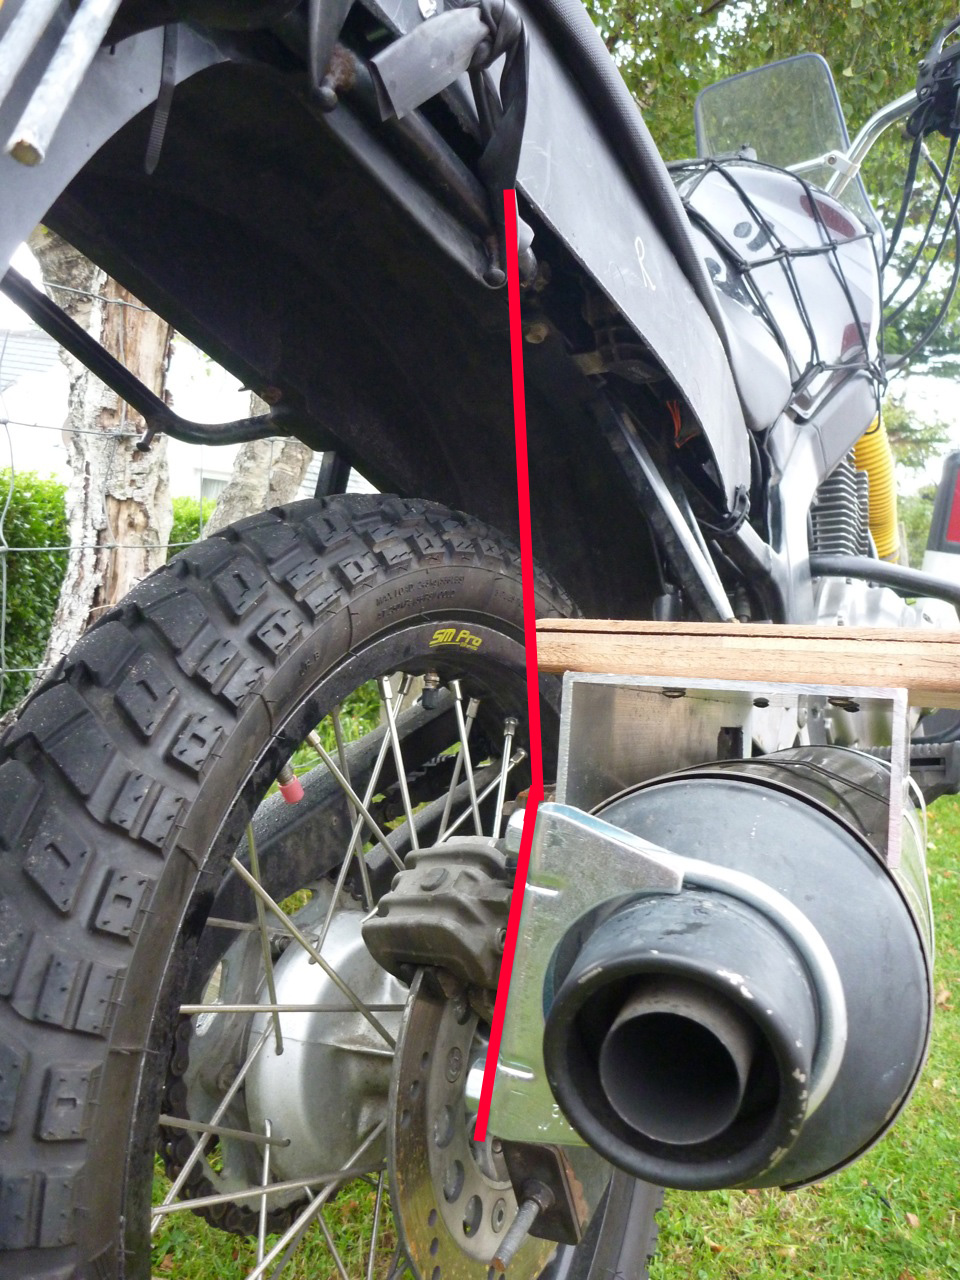
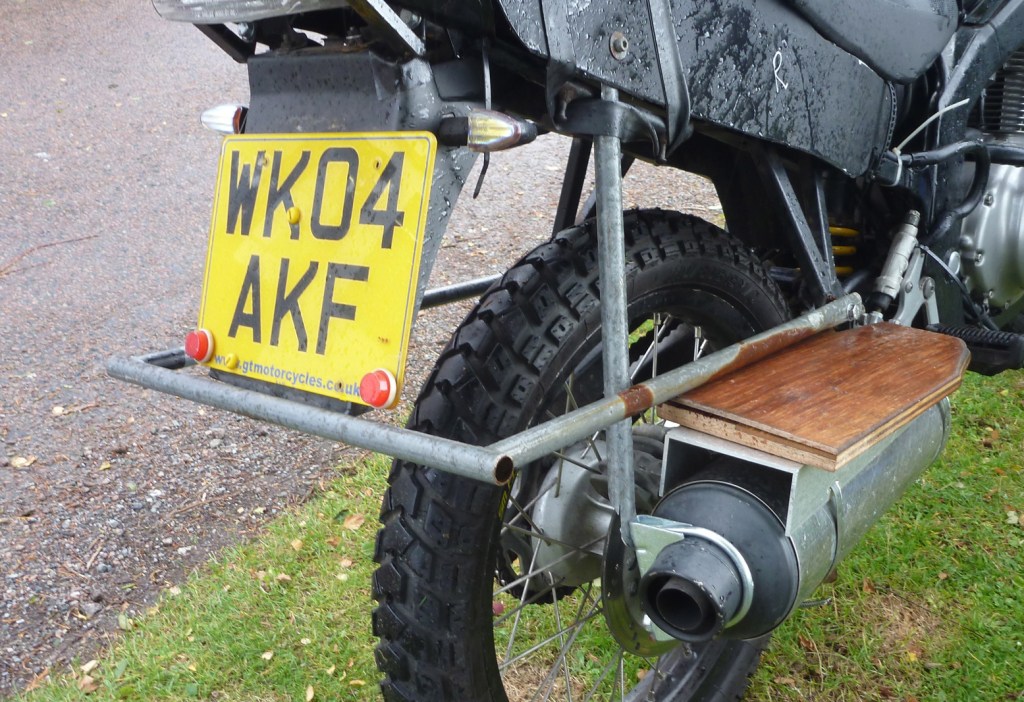
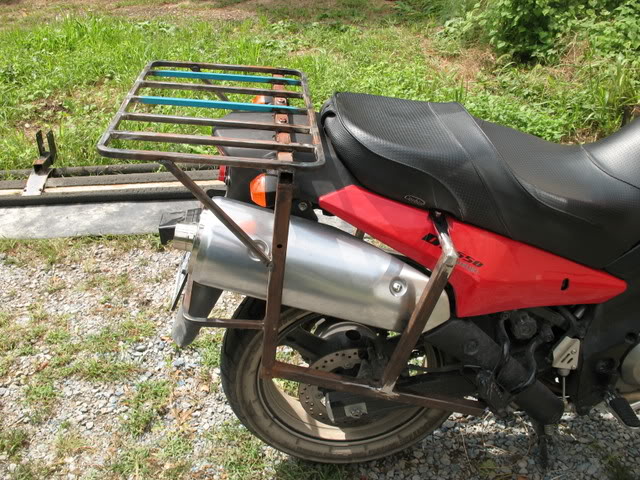
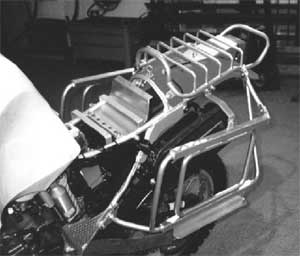
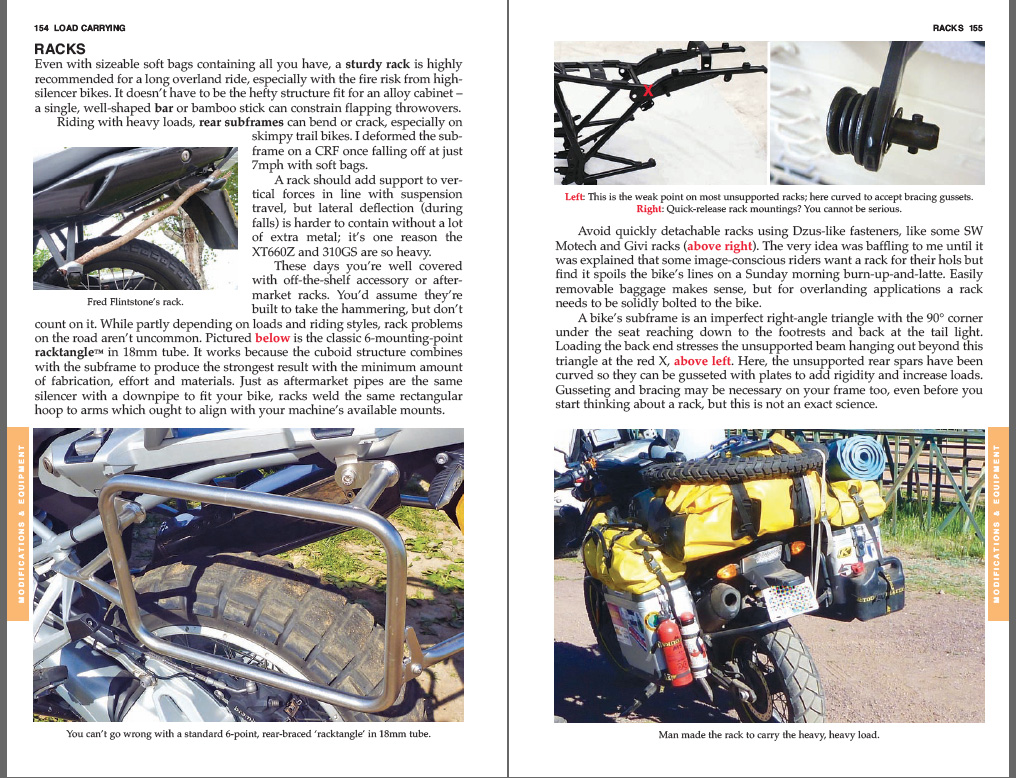
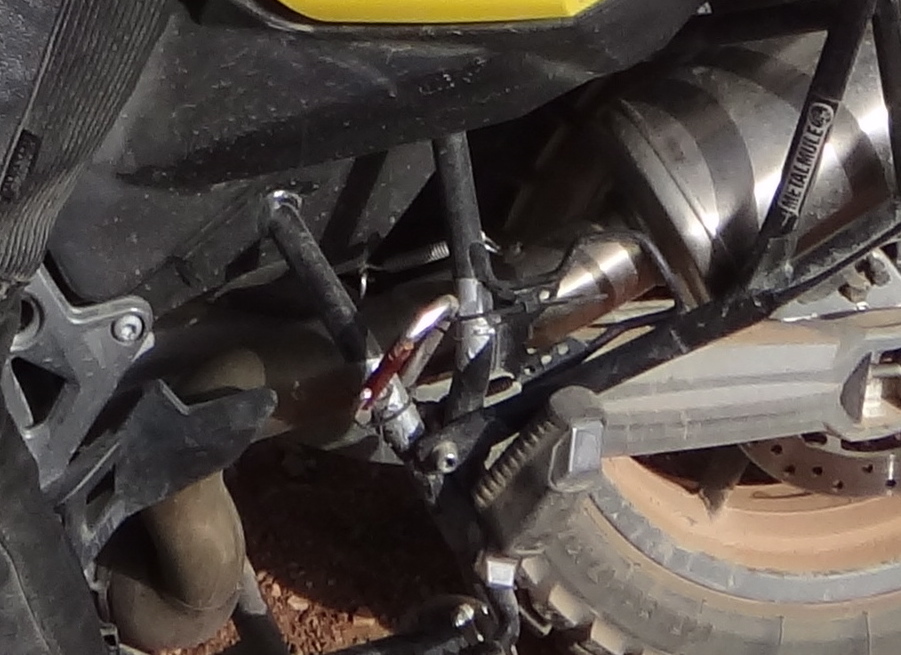
Included with the Siskiyou bags are a pair of alloy exhaust guards (rather like I bodged on my Suzuki – I got the idea from GL). You also get two hose clips, some instructions and a sticker and to stop your sidepanels getting scuffed GL can also supply some protective vinyl film. The exhaust guards are an admission that many a soft pannier has melted like a Cornetto when it shifted or otherwise got too close to the pipe. Modern efi bikes with catalysers run especially hot and indeed the Siskiyou panniers tested on a Husky Terra by Cycle World magazine (April 2013) melted. So like GL say, additional guards may be needed. On any bike you need to think carefully how loaded throwovers will react when they shift on rough roads against a hot pipe. This need avoid or deal with meltdowns with soft bags is why some riders understandably prefer hard alloy or firm resin boxes, although in my opinion mounting soft bags on some sort of rack is the way round this flaw.
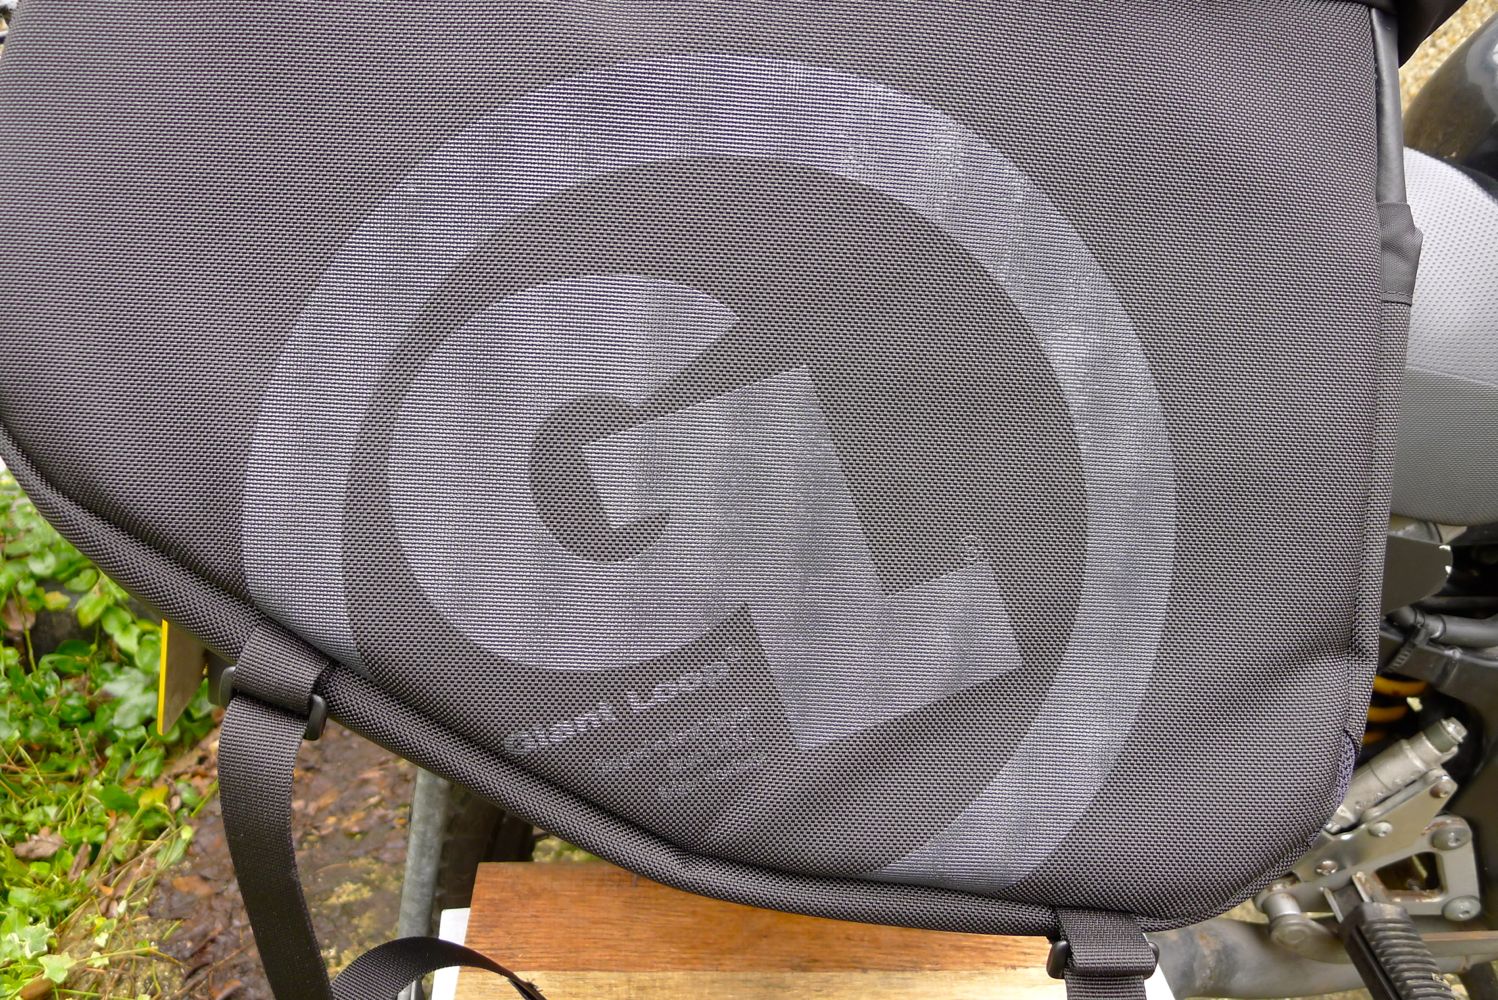
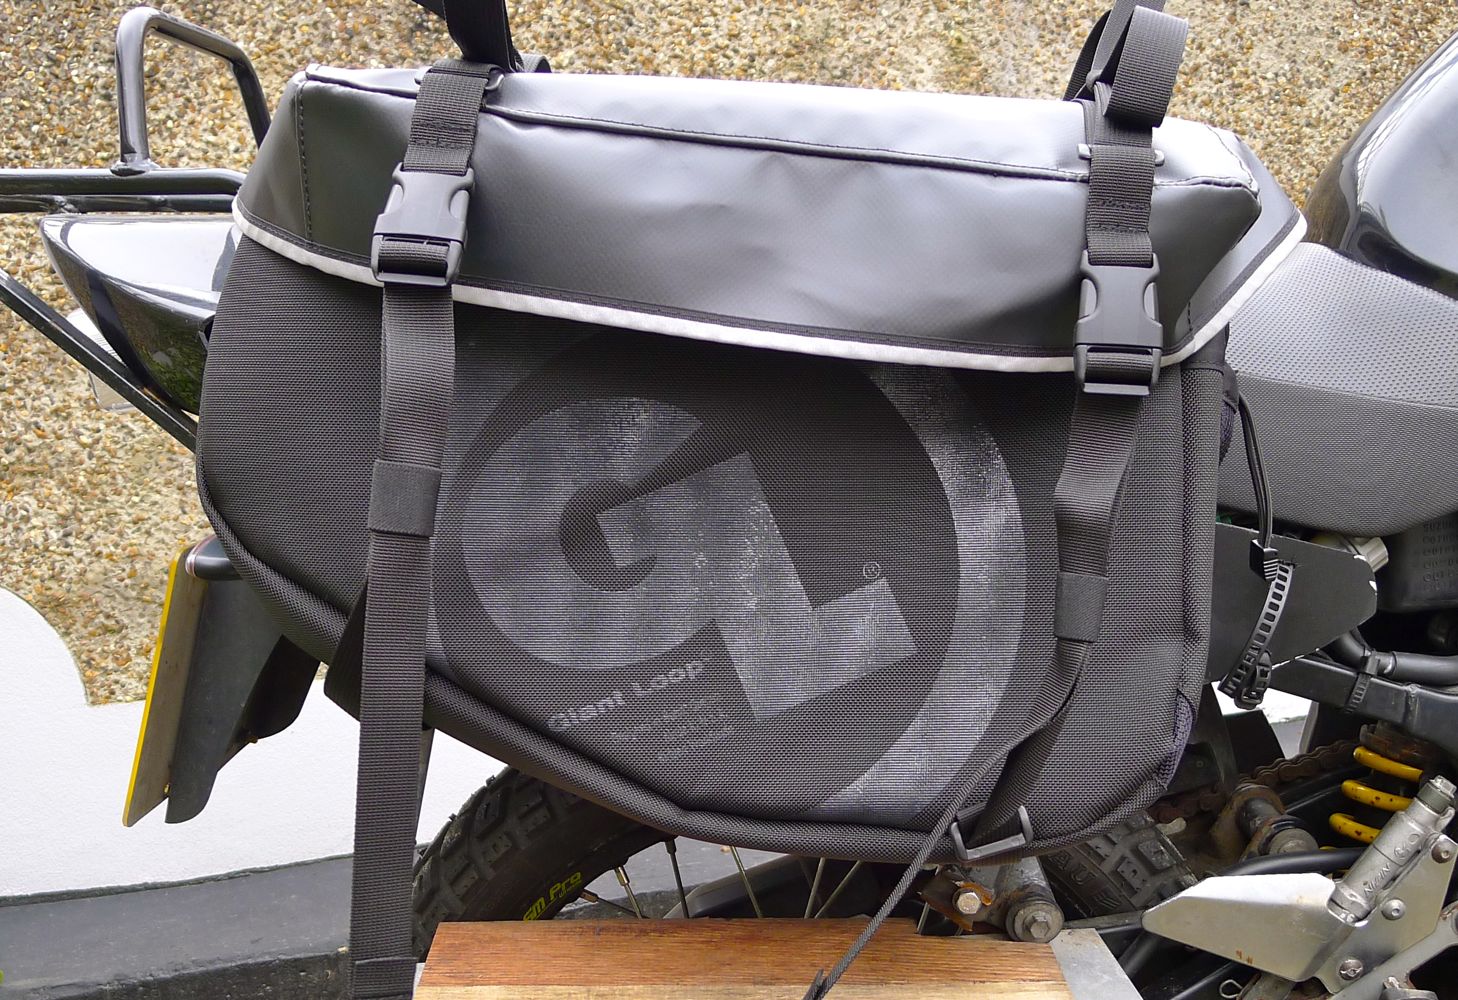
The Siskiyous have a sporty cutback base which makes them more suitable for regular bikes with low, upswept pipes. Whatever, this shape will greatly increase the Siskiyou’s fitting options to many more bikes than the usual adv suspects. The GL logo is emblazoned on the sides, but in a pleasingly understated way. Unless that ‘GL’ logo glows, I’m not sure there any reflective surfaces as found on the Mags and Monsoons – possibly the thin edge of the lid?
I did also wonder if access would be a bit of a faff. If they’re fully locked down you unclip the two lid straps, unclip and unroll the outer bag and unzip it, then unclip and unroll the inner bag and unzip that – and you’re in! Of course you don’t need to use those zips; their protection against waterproofing is minimal and zips can jam or break when dirty or used carelessly. In this respect I prefer the bomb-proof, roll-top simplicity of the Magadans and the Monsoons.
So all up you’re getting a good sized touring pannier that looks well made and is usefully featured. The foam protection sandwich is a nice touch, as is including exhaust guards and several lashing points on under and behind the bags; you get a feeling they took a lead from Enduristan here. But – is this £475 ($700) worth of pannier when in the UK Magadans go for £350 and Monsoons for just £230? I wondered that perhaps if you’re paying for the ‘limited lifetime warranty‘ but that only covers the “original purchaser… against … defective materials and craftsmanship only, and does not include damage due to normal wear and tear or misuse“, so no big deal there; after a year they could just put any failure down to wear or misuse.
Siskiyous look like they were designed for on a Honda CB550X Rally Raid
The Siskiyou panniers certainly feel like they’re up to the rigours of overland travel and design and features fit the bill without any radical innovation. You just need to ask yourself in turn whether the bill for a set lives up to your expectations.
I don’t think you could describe a GS500’s chassis (left) as something that Brunel would have tipped his hat to. Thin bits of box section glued together with spit and braced with stamped bits of plate. You get what you pay for and GS500s are not to be mistaken with the GSX-R pocket rockets.
Anything too clever or hefty would merely see the GS’s subframe wilt like late summer corn. Up to a point a beam could be added from the pillion mounts down towards the footrests to help support the back end (right).
Trying to work out how to make the platform (or get it made), it occurred to me that a metal support tube as strong as any on the machine was staring me in the face: the silencer. By chance I’d had the pipe lowered to make room for my planned DIY panniers (which eventually became a set of Magadans) until a light bulb flickered momentarily: use the pipe.
All that had to be done was separate the pipe’s heat (not that much on the pre-catalyzed GS5) from the bag’s base and possibly add support at the back. A mention of Giant Loop’s good-but-too-short stainless pipe guard (above right; £15) gave me the idea to make my own from a bit of 2 by 4 ally off-cut.
On top of that screwed a layer of plywood on which rests the pannier. The good thing is that my Mags are throwovers so the full weight need not be taken on the platforms. But there’ll come a time when that needs to be done so I added a support from the silencer’s snout to the subframe using a 2 1/2 inch exhaust clamp (left).
Supplies were getting low so it was time to saddle up and head to town, a good opportunity to try out the Magadans and also see how the bike managed with a heavy load.
I’m still dithering about exactly what sort of rack to make but did have a bit of a brainwave the other day – I promise you you won’t have seen a rack like this before! So for the moment I taped on a couple of sticks (left) to keep the swinging bags out of the wheel and chain. If I got lost I could rub them together to make a fire.
The Mags are intended to use straps to wrap it around a rack, and have a couple of loops to enable that, but they could also do with some regular fixing straps, additional loops or D-rings on the back edges (as on the Enduristan Monsoons, right, or most other throwovers), to stop an empty bags flying about. That’s easy enough to sew on by hand, especially as the outer bag isn’t the main waterproof element.
And here on the left is a picture of one I made later. The sewing was easy enough providing the needle was thin, but poking a red-hot rivet shaft through the pannier fabric to make a hole for the rivet took a couple of goes which makes me wonder if there’s more to that ballistic Twaron fabric than meets the eye. Maybe it really is stab proof, or certainly very resistant. The hot shaft sailed through the nylon strap like it wasn’t there.
For the moment I looped the bags’ pocket-tightening straps round the pillion mounts and set off. It’s got to be said the Suzuki motor’s characteristics aren’t exactly in the 900SS- or even SV650 category, with a pre-watershed power deliver that’s flat enough to host a roller disco on Friday nights. Is it still restricted, I wonder some times. I’m sure the previous owner supplied the constriction washers for the carbs loose in a bag. But, it gets you there and has yet to drop below 60mpg, and the seating position with the flat track bars is just great.
With supermarkets an infrequent treat these days, you can get a bit over-excited and after an hour’s drooling I trollied out of Tescos wondering how a hundred quid’s worth- and a good 30-kilos of tucker would actually fit on the bike. It took about 20 minutes to pack correctly, with the heavily loaded bags now swinging into the wheel, – like post-twinshock throwovers do. It’s made worse by the GS’s ‘aero’ side panels with their fake bulge. The sticks helped a little but I hoiked the bags up high and over a box of spinach and polenta ragu on the back seat as the velcro overlap was otherwise too short to take that kind of load, even though the straps are innovatively velcroed on both sides for extra grip.
As mentioned in the review, I’d prefer a more versatile, ordinary buckle relying on fiction, or even the same q/d clips used on the roll top straps. Maybe velcro (also on the Monsoons) is more pillion-butt friendly but I doubt they’d take the weight of an unsupported bouncing throwover for long (hence AS’s advice for straps round a rack). However, I plan to sit my bags on a rack so the back seat strap arrangement won’t be weight bearing. I’ve ordered a few likely buckles as well as some brass D-rings to sew onto the bottom corners to help locate the bags.
On the road the loaded GS-R still felt well balanced. It seems a happy coincidence that my guessed at suspension mods – DR front end and a longer SV650 shock have worked out so well, especially on the back end which so far feels just right, though that might all change when it gets hot, or the over-levered GS linkage snaps.
At a guess I’d say the fortnight’s shopping added up to the same as a maximum overland load, but the back end didn’t droop and the bike rode through the bends well enough. I’ve still got to change the back brake master cylinder for a DR unit to match the caliper to regain full braking, so I can’t tear around with impunity just yet. As it was I stopped a couple of times to make sure nothing was melting or rubbing. It was all just about hanging together on the back, but reminds me I’ve really must get on the case with this rack. Oh, here it is, nearly.
AMH contributor Nick T dropped by while on tour through the Western Isles on his ’05 Dakar 650 equipped with his new Kriega Overlander baggage system. I saw prototypes at a bike show earlier in the year and had another chance to take a closer look at Nick’s set up and hear his views after a few day’s use.
Kriega’s solution to the soft baggage option is a modular system using up to four of their Overlander 15 roll-top bags (15 litres; left and below) mounted on a ~8mm-thick plastic plate – or as they call it, ‘Adv Platform’, right. This platform in turn screws onto your regular 18mm tube hanging rack (more about racks here) using four clamps with a quick-release cam mechanism like the q/r skewers found on pushbike wheels: you screw up the slack with a knurled knob and then lever over the cam-pivot to clamp the plate securely to the rack. That can be done to the two horizontal bars as Nick did – so allowing some forward and back repositioning of the load – or as the Kriega image of their plate above right suggests, attach one clamp to a vertical element of the rack to eliminate forward and back sliding – something I’d say is unlikely to happen if clamped on correctly, except in a crash.
The ability to slide forward and back even a few inches (Nick-mode) is useful as it means you can position the bags as far forward as possible when not riding two-up. That’s good for CoG and so, handling. One of the Jesse Luggage systems has this feature with their boxes. With a heavy load it can make a big difference to how a bike responds, especially on rough tracks.
You don’t have to use two pairs of Kriega’s 15-litres bags. You could mount an alloy box or any other soft pannier to the plate, providing you have the rack of course. In my opinion, a rack is the way to go for hardcore overlanding with soft baggage, as well as with hard boxes or firm cases.
The Ov-15 bags look like they simply strap to the plate, rather like Wolfman bags do to their racks (right).
But Nick explained, five screw-and-lock rivets also fix the bags to the plate and help support the weight. The straps do pass through slots in the plates edges but mainly to compress the bag’s load volume. If I understood him right, Nick also mentioned that the tensioning cam buckles pulling into the gap between the bags was awkward, but perhaps the straps can be easily reversed to pull outwards. The rivets screw through holes in the back of outer bag (right) and require an allen key or similar to tighten into place or release. Once fixed on like this, the bags are not easily removed from the plate should you decide to reconfigure your set up. To remove the baggage you remove the entire plate (see below).
The zipless, roll-top bags themselves use Kriega’s usual 1000D ‘Rhinotek’ Cordura fabric, similar (in appearance at least) to my Magadans. Inside white liners are velcro’d to the top edge of the outer bag. It struck us both that white was a good idea for better visibility when digging around looking for something. And as I mentioned in the Magadan review, removable inner bags are the way to go. The Kriega inner bags are made of something like PU-coated nylon with taped seams, but reassuringly thicker than your average stuff sack and it’s all guaranteed for ten years according to the website. Like I say in the Magadan review, I think PVC- or PU-type fabric with heat- or RF-welded seams (like Ortlieb baggage) would be bomb-proof, high-wear solution for a liner, but it’s less flexible when cold compared to nylon which as a result rolls up tighter and so makes a better seal against water ingress. Nick said he rode through a downpour on the way up which got through his Rukka membrane jacket, but his three Kriega bags survived bone dry.
The Kriega platform can be easily adapted to take accessories, most commonly a pair of tough Rotopax rotomolded fuel or water cans at 3.8 litres (1 US gal) each. They lock on with a rotating clamp mount (Kriega accessory) which presses the cans against the rack. All up that’s a weight of up to 11kg on the one-kilo spindle mount, so you’d hope it’s up to a long session of corrugations (which starts me of again on my platform rack preference: separating the location/mounting from load bearing). I must say I prefer bags for water and fuel: they’re lighter and take up less space when not in use, but a rigid fluid container is so much easier to handle than a floppy bag, especially with water which gets more frequent use. (I use a rigid day bottle and keep the mass of water – when needed – in a bag).
Nick demo’d the removal of one side from the rack and I have to say that it still looks a fiddly procedure, just as it did when I saw it done at a bike show a while back. We’re talking a minute or two, but it’s quite tight in there between the back of the plate and the rack (possibly near a hot pipe, too). You need to loosen the four knurled base wheels and then swivel all the cam levers to get enough slack to lift the plate clear of the rack tubes, but not so much slack so the cam spindles unscrew completely and fall out. You’d soon learn just how many turns are needed. I was just pushbike touring for a few days, using my Ortlieb Classic QL1 bags and as I’ve said elsewhere, it feels great to effortlessly lift the bag off or clip it on, especially when you’re shagged out or distracted.
Whether you’re camping or lodging with the Overlanders, you’d probably need to remove them daily (unless you lift out the inner bags) which could get a pain. Removal could be speeded up with only a little loss in solid mounting by replacing the lower lever clamps with fixed, weight-bearing slot-in U-mounts as found on many metal boxes. The use of four fiddly q/r clamps does seem OTT to me** and they’re not actually theft proof either (though that could easily be done by drilling the cam levers to take a thin cable lock). And if you’re removing the plates frequently then a handle across the top cut out (strap or part of the plate) was something they may have missed.
**Oct 2012: I’m told the lower mounts are to be redesigned, possibly along the lines I mention.
I believe a simple and foolproof but solid mounting system for anything regularly removed from a moving object – moto baggage; crash helmet; running shoes – is important because with anything repetitive you can get both blasé or distracted midway if it takes a while. All the more when it’s not a simple ‘clip on’ procedure when half awake in the morning surrounded by two-dozen spear-wielding tribesmen or a pilfer-prone crowd. While at the other end of the day, when worn out after a tough ride, irrational levels of frustration can be focussed on uncooperative inanimate objects like your baggage, when all you want to do is get inside, fed and rested. Meanwhile, a slick system like Ortlieb’s QL (admittedly not perfect or robust enough for overland moto use) can be a pleasure to use. If it’s also field repairable and secure against opportunist theft, so much the better.
As for modularity, for overland use, I feel that’s not so useful. You set off for months with what you have: a pair of big bags like Magadans, Gascoynes, or metal boxes. That suits me more than three or four small bags to deal with. The necessary and useful compartmentalisation of your stuff is of course addressed inside the bags, along with something mounted on the back, on the tank and elsewhere round the bike. It’s possible Kriega may bring out a bigger, 30-litre+ side bag (or, as said, you could mount your own), but having looked again, I still feel the removal system (perhaps intended as a one-size-fits-all solution) could be refined [and is being so – see **].
The cost of a plate with clamps is £139 while weighing 1.2kg. Each Ov15 bag is £59 (600g) with the five rivets. The Rotopax mount kit (1kg) is £59. Their fuel can is £55 and water can £32 (both are listed at 2.3kg). So at a guess Nick’s set up would have cost £600 or $976 in the US if you add up the online prices and it would weigh in at 7.7kg (17lbs) empty, according the Kriega/Rotopax online figures. I didn’t get a chance to measure the bags, but the 15-litre volume looks about right. For a four-bag set up I’ve seen an advert in ABR quoting £489.
Tough build quality with some clever features, but in places over-designed, that’s been my opinion of some of Kriega’s moto baggage products over the years. To be fair the company produces load-carrying solutions for the much larger mainstream motorcycling market where I believe it goes down very well, rather than specialising in overlanding like say, Touratech. Stuff like their tool kit or the R3 Waist Pack are great, but for my sort of riding I’d take a full-size pair of roll-tops like the Magadans – easily [de-]mounted and ideally locked onto a platform rack.
The fact is though, there are nearly as many ways of equipping your bike and carrying your gear as there are places to take it. The Kriega Overlander system offers very secure mounting for gear, fuel and water making it well suited to recreational rough riding in wilderness areas such as deserts outside the AMZ on your small-tanked enduro bike (as the imagery on their website suggests). In this scenario you mount your bags once off the pickup/leaving home and may not need to remove them against theft or downpours each night – something which you do when riding most of the time from town to town in the AMZ.