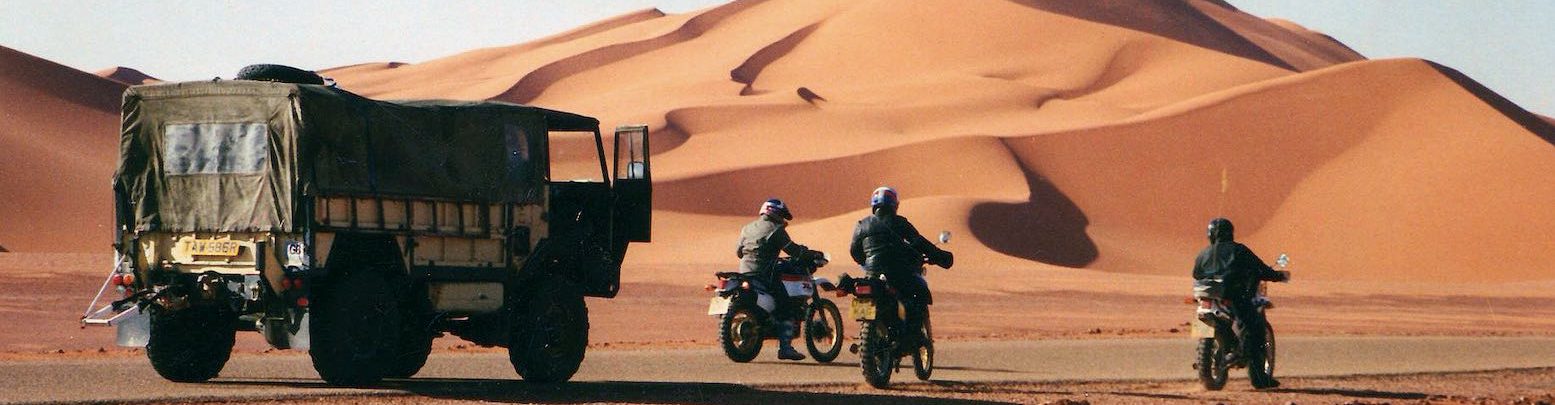
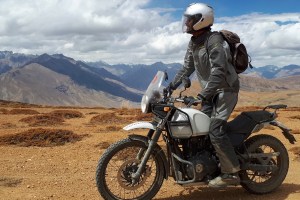
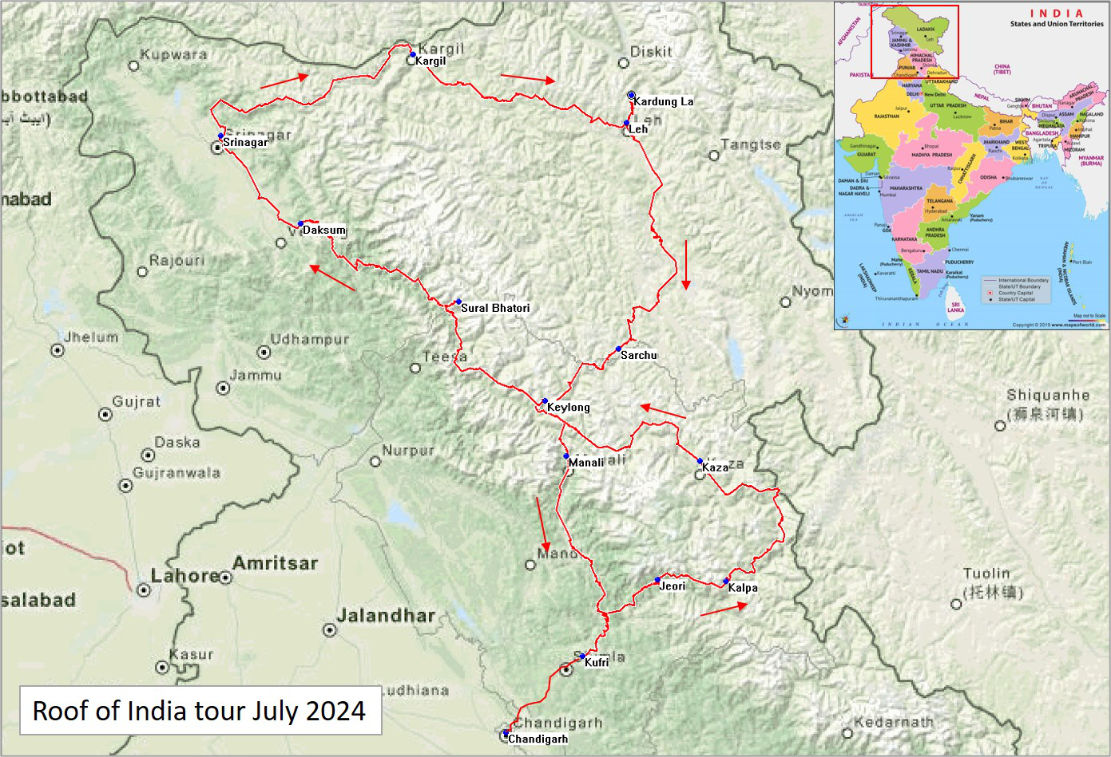
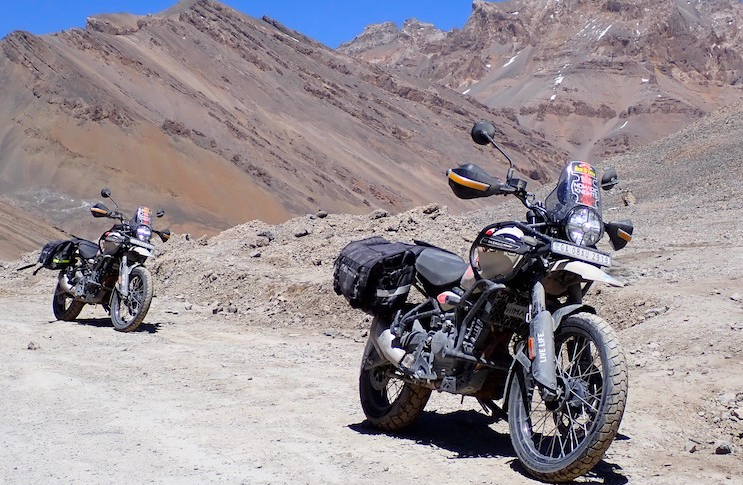
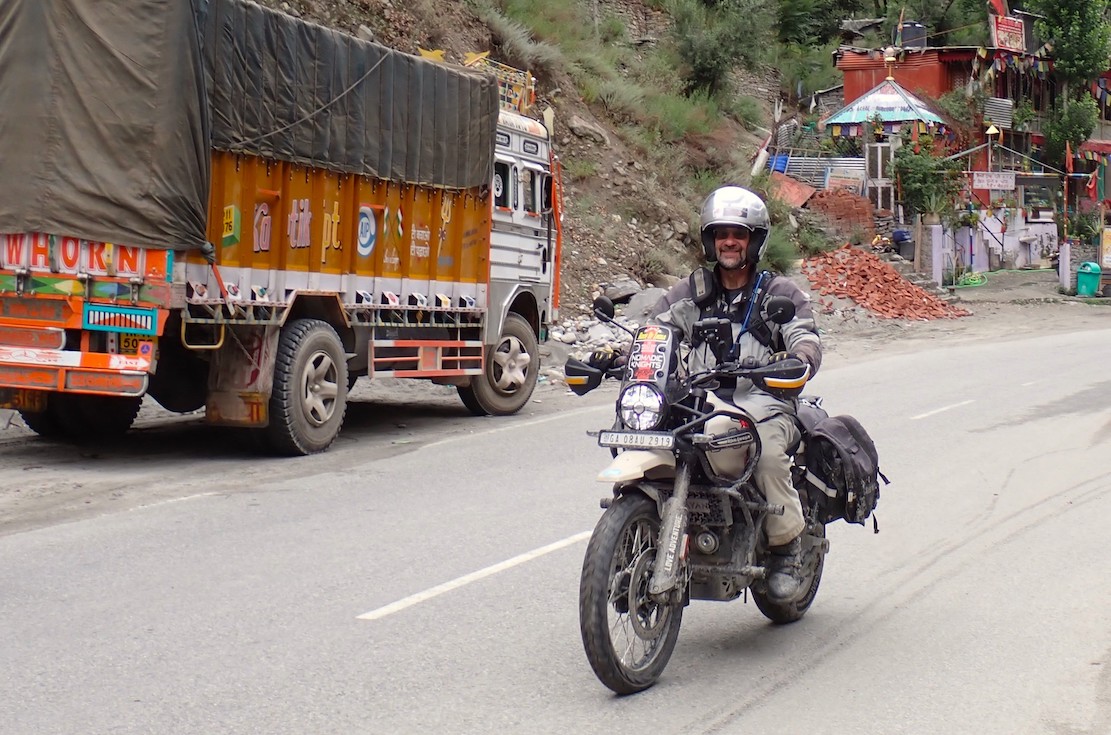
Danielle (Dan) and I recently returned from a two-week bike tour round the Indian Himalayas, riding the new Himalayan 450 adventure bikes. The Roof of India tour, organised by Nomadic Knights, was billed as ‘extreme adventure’, rather than a holiday. It certainly lived up to its billing, with a faster pace, greater distances, and longer days than previous trips we have undertaken in the Himalayas, including the month-long trip we undertook in 2017 on the original Himalayan 411s (left).
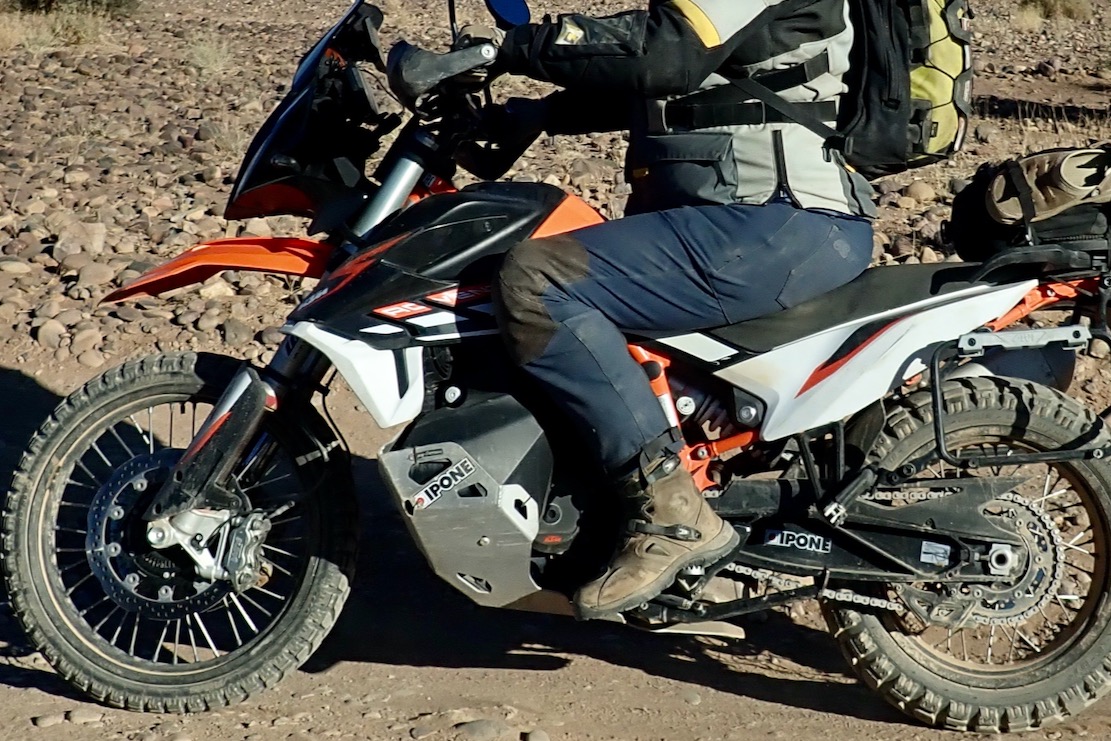
The new 450s were perfectly suited to the trip. They had better engines and suspension than the Himalayan 411s, although were noticeably heavier and (arguably) less attractive to look at. According to the Royal Enfield website, the 450 has a kerb weight of 196kg, which is actually lighter than the 411 kerb weight of 199kg. However, the 450s we rode on this tour had substantial additional crash bars (with steel bobbins), a rear racking system, stronger hand guards and a larger bash plate. I suppose if you are encouraging punters to have an extreme adventure, you can expect them to crash from time to time. The weight is felt most when using the side stand or centre stand. The bike leans over a long way on the sidestand but this does result in it being quite stable when parked on uneven ground.
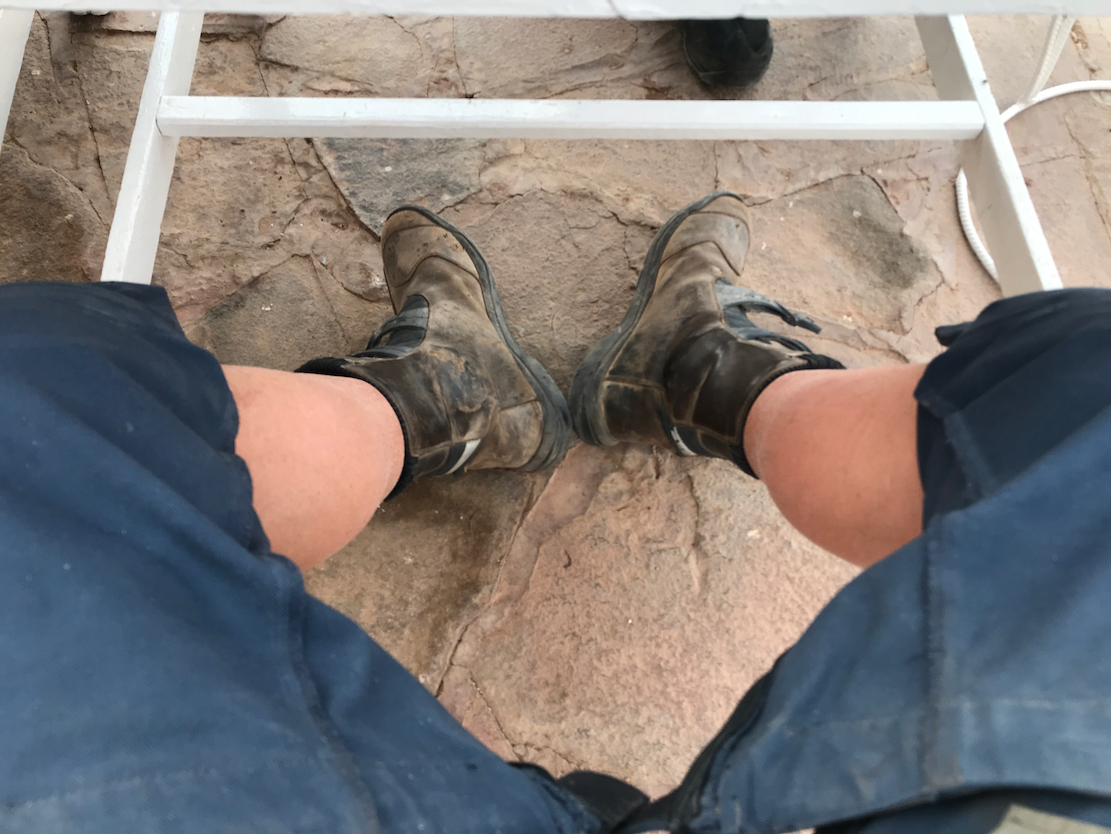
Once the handlebar levers had been rotated down a bit and the seat raised to the higher position, the ergonomics were very good, both standing and sitting. Because of my height (a bit over six foot) I fit bar raisers to most of my bikes but didn’t feel this to be necessary with the 450. The seat was very comfortable, although this would have been helped somewhat by the padded cycling shorts I always wear under my enduro jeans. The engine feels quite torquey and pulls strongly between 4000 and 6000rpm. My first impression was that first gear was rather too tall but this is countered by the engine’s reluctance to stall at low revs and so I soon got used to it. Tight manoeuvres require a bit of clutch work but that is also true of the Husqvarna 701 I ride at home.
Him 450 vs MT450 vs KTM390 vs 300 Rally
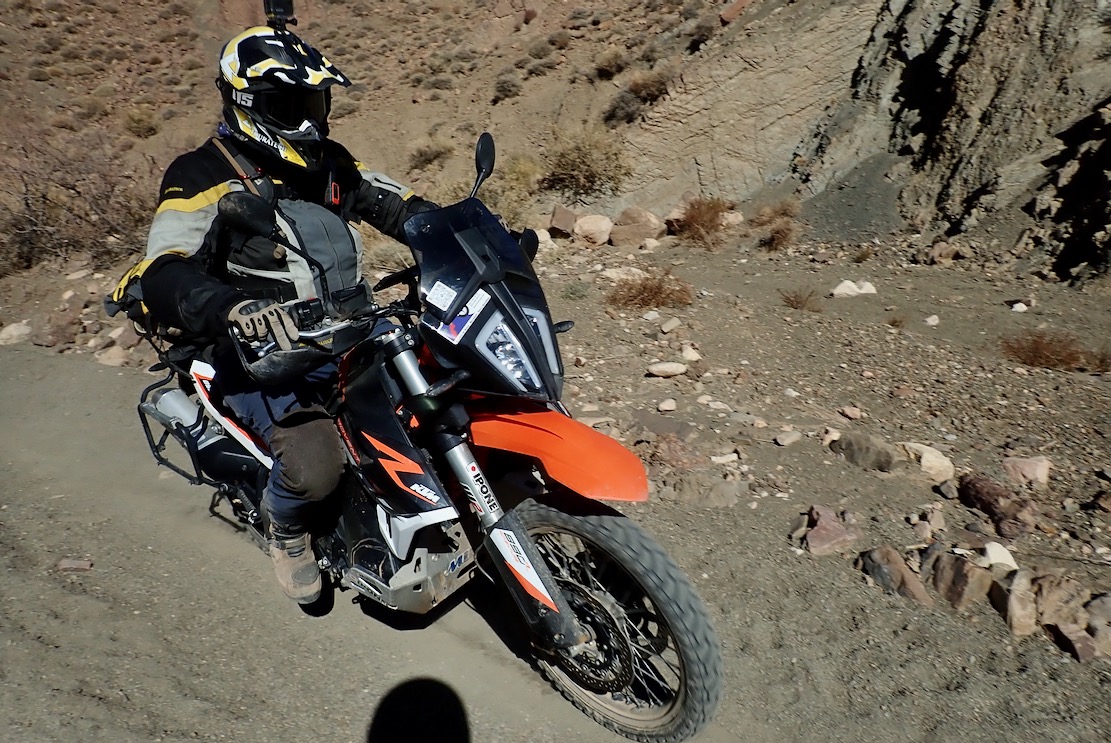
The bikes we were using were new and the fastest I saw on the speedo was 122km/h. I didn’t want to push it further than this because the engine still felt a little tight and it was just not appropriate for most Indian roads. A top speed of ‘over 150km/h’ (94mph) has been quoted by Bike India magazine and I have no reason to doubt this. Other reports have suggested that the 450 is more than comfortable on UK dual carriageways, which, from personal experience, was not really the case with the 411.
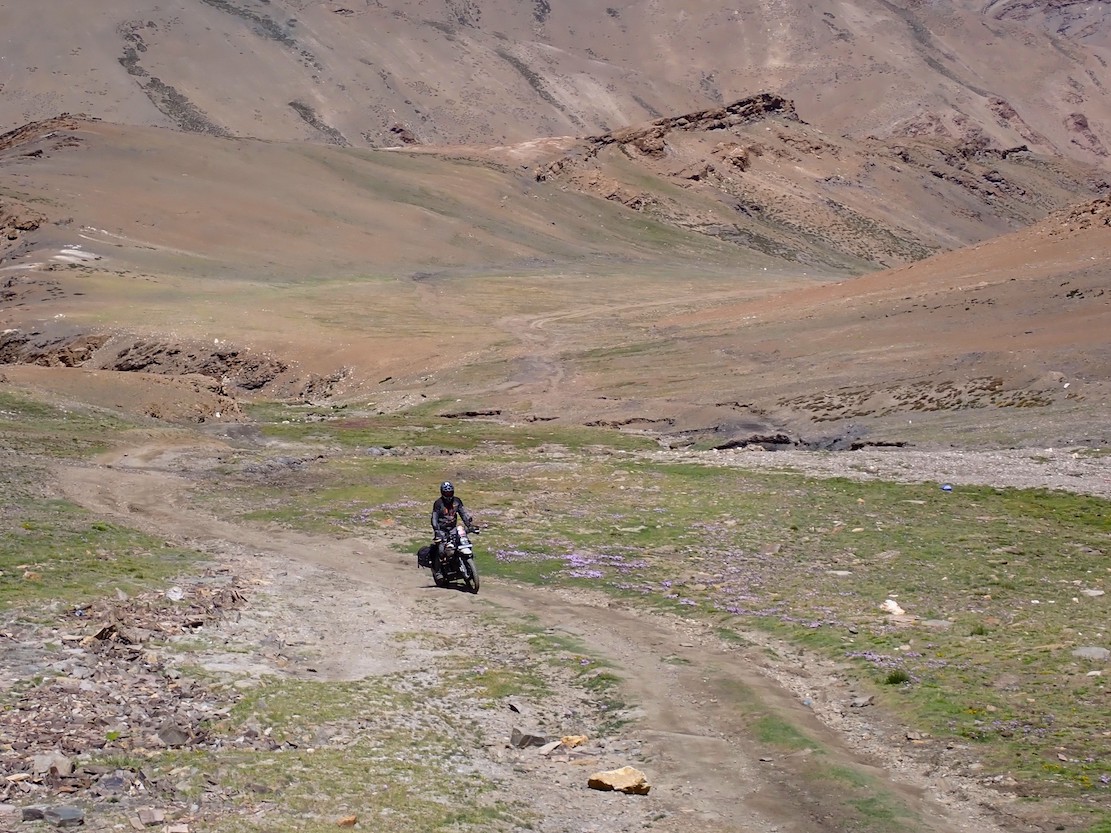
The brakes were fitted with braided lines and were very good. Like many modern adventure bikes, the rear ABS can be switched off for off-road use. This is done using the Mode switch on the right switch cluster. However, if the ignition is switched off then on again, the system reverts to full ABS. This feature resulted in my only concerning moment of the trip. I applied the brakes while traversing loose stones in an off-road section and the bike took an uncomfortably long time to come to a halt. The suspension on the 450 is made by Showa. The only adjustment is the rear preload but I found the default spring rate and damping to be perfect for me. It might have helped that I am close to the ‘standard’ weight of 75kg but nobody in our group had any complaints about the handling or stability. The standard SEAT tyres are not particularly knobbly but worked very well on this trip, both off-road and on. The only time they were a bit challenged was on a short section of snow and soft mud. For UK trail riding, I would replace them with something slightly knobblier, probably Michelin Anakee Wilds, but for the roads and tracks in the Himalayas, the original tyres were perfect.
The clear screen is quite small but, being located fairly far forward, did a good job of reducing wind blast without excessive wind roar. Most of the time I didn’t use or need ear plugs although I put them in before a couple of relatively fast road sections, just in case. None of us had punctures and the only reliability issue was a dodgy fuel pump on Bob’s bike. Benny damaged his bike by riding off the road and into a water-filled culvert but that was not the bike’s fault.
New water-cooled 450 Him
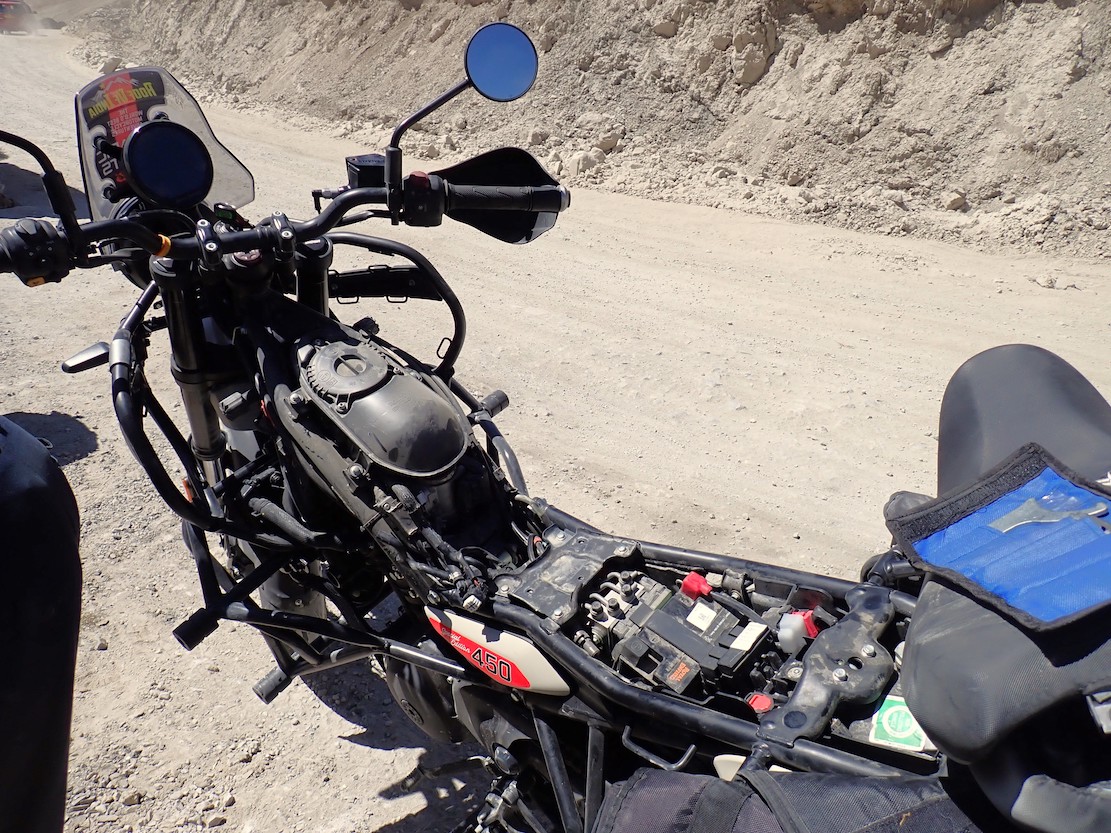
Royal Enfield had quite a large stand at the 2024 ABR Festival, which included a Himalayan 450 without its tank, seat, side panels etc. to make the frame more visible. The stand also included a sectioned 450 engine. The impression given by both frame and engine was of components relatively cheap to make, designed to last, and easy to work on, with a fine finish only applied where functionally necessary. It made an interesting comparison with KTMs, where components are made as light as possible and appear delicate and almost watch-like compared to their Royal Enfield equivalents.
I toyed with the idea of buying a Himalayan 450 in the UK and stripping off the tank crash bars, centre stand, etc, to reduce the weight a bit. However, I already have a Husqvarna 701 and I have no doubt that this would always outperform the 450 off-road. However, I also considered what would happen if relatively inexperienced rider were let loose on 701s in the Himalayas. I suspect it would be expensive carnage. So, for trips like the one we just completed, the 450 is just about perfect. Out of interest, the Himalayan has a similar weight and power to an old KLR650, which I rode across Tibet one time. So much for forty years of progress. Soon after the India trip, I rode my CRF1000L Africa Twin on two days of the UK ACT in Wales. It felt significantly more top-heavy than the 450 and, overall, didn’t appear to be as good off-road. Also, during the Wales trip, my friend and I had cause to pick up his Tenere 700 from flat on the ground. This took about as much effort as doing the same thing with my Africa Twin. Certainly the 450 has a lower centre of gravity than both the Japanese bikes and is easier to pick up.
So, in summary, I rather liked the new Himalayan 450. The Indians appear to have thought long and hard about what people need and done their own thing, rather than make a copy of somebody else’s design. I’m also getting more used to the way it looks and might still buy one.
While editing this post, out of interest I decided to click this option which has cropped up on WP lately (and in many other places like ebay): “Create and use an AI generated featured image for your post.” Below is what it came up with, presumably based on the post’s words and pictures. As bad as expected – or have I accidentally rendered RE’s imminent 650 twin Himalayan! Who knows but I won’t bother again.
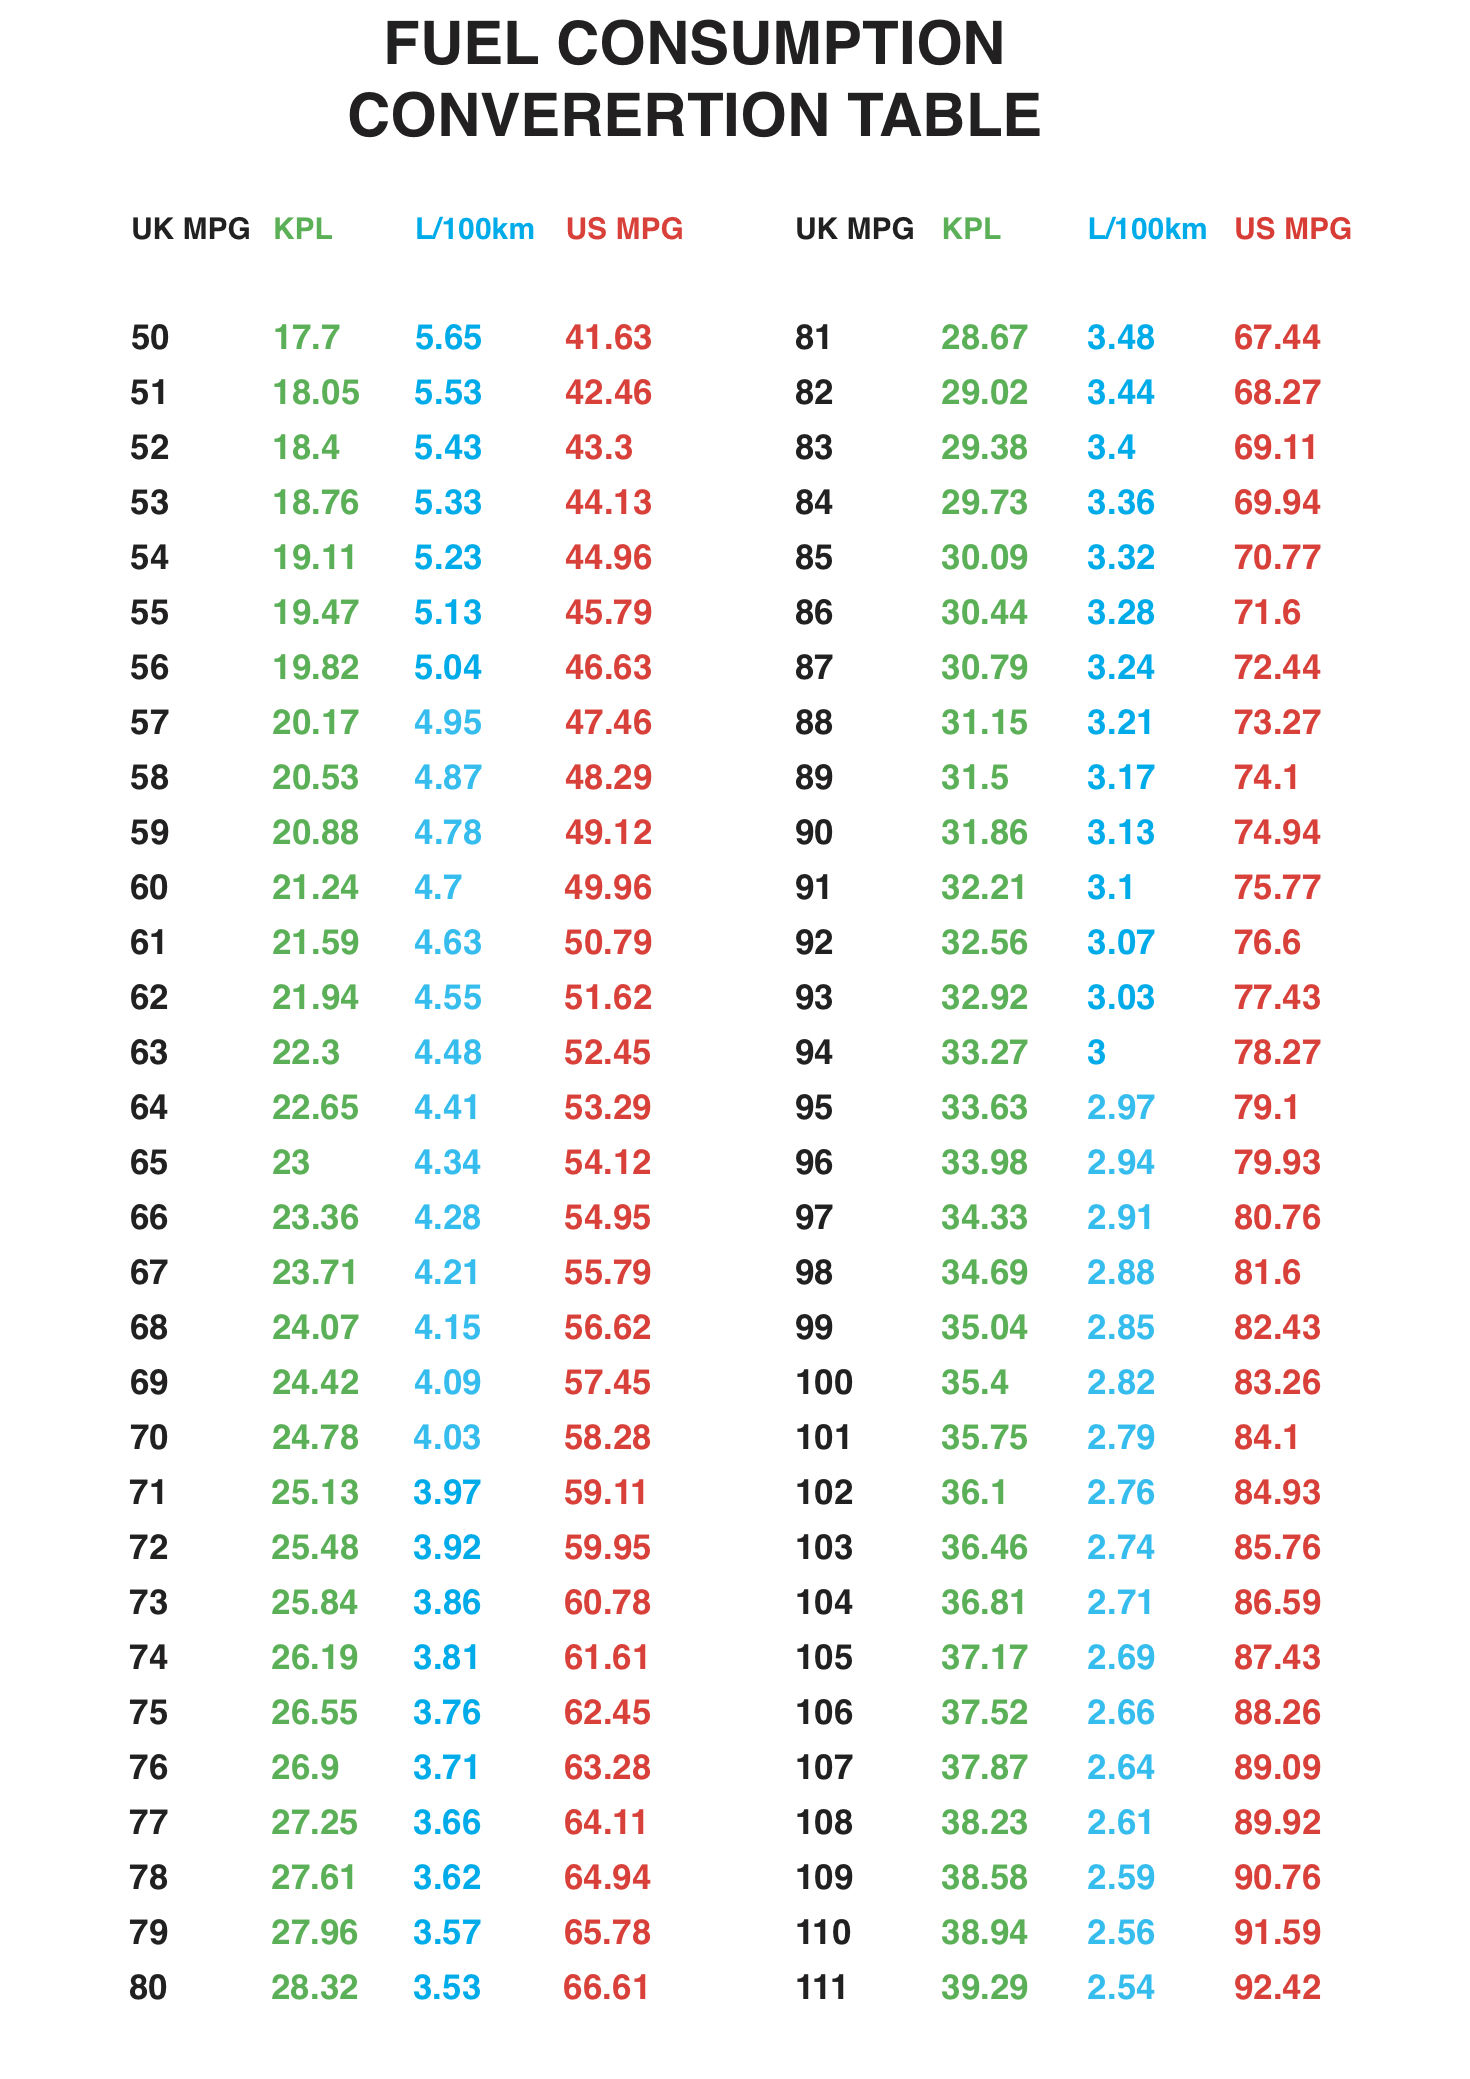
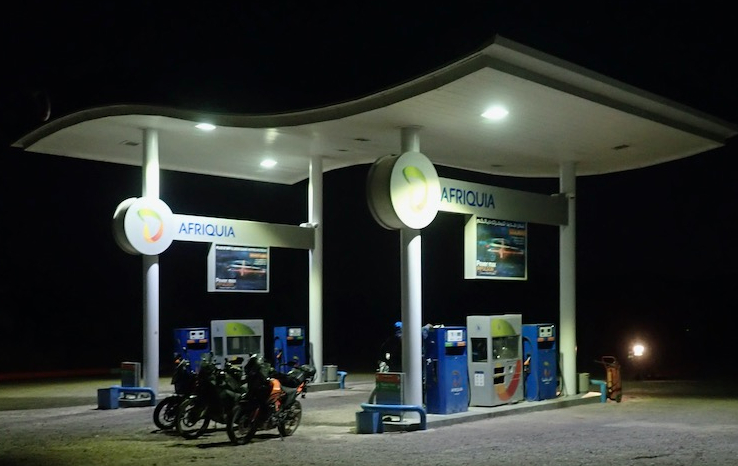
Fuel consumption on my CFMoto 450MT from new. I’ve yet to work out if the odometer reading is accurate against a GPS. The tank is a claimed 17.5 litres. The speedo shows a better-than average 5-7% over reading. Click the table right to convert UKmpg or kpl to other formats.
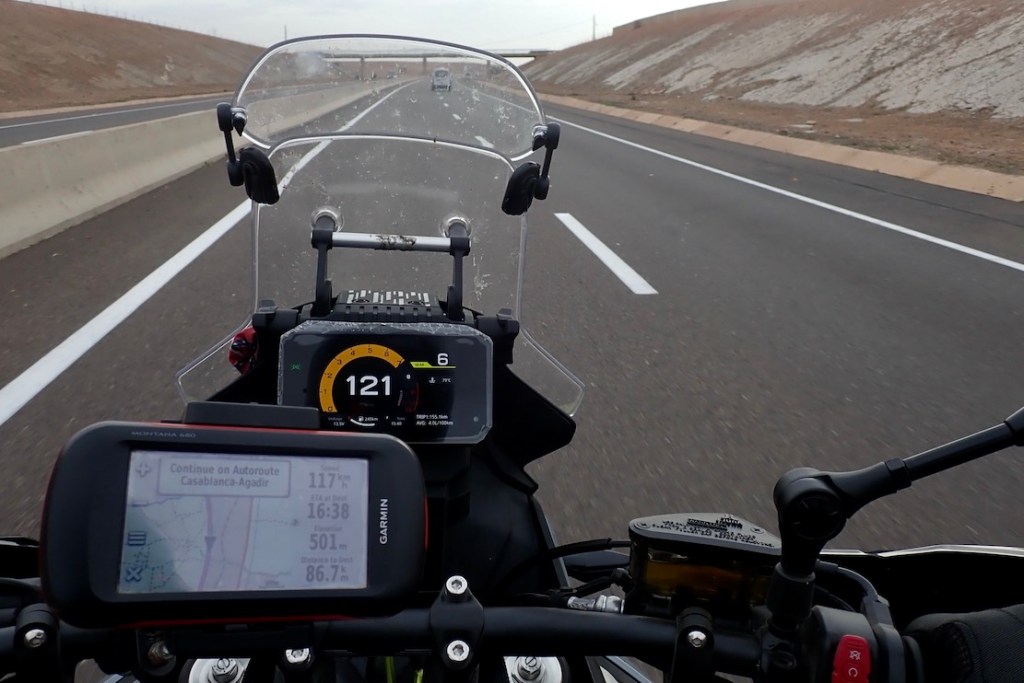
First reading at a true 73mpg was a bit poor considering the running-in speeds I was dawdling at but it never really improved. The bike’s L/100km/mpg read-out is up to 10% optimistic than the true figure, but it becomes more accurate as the mpg improves, same as the speedo reads more accurately at higher speeds (<3% over; see image below). In the UK I’m still not convinced E5 is more economical than E10 which is 10% cheaper. But I suspect running-in on the higher octane E5 was a good idea before filling with E10. In southern Morocco I get the feeling Unleaded is only E5. Here the bike is wide at the front and carrying 15kg but mpg has generally improved. Tyres @ 30psi road or trail and speeds are rarely over 100kph for long.
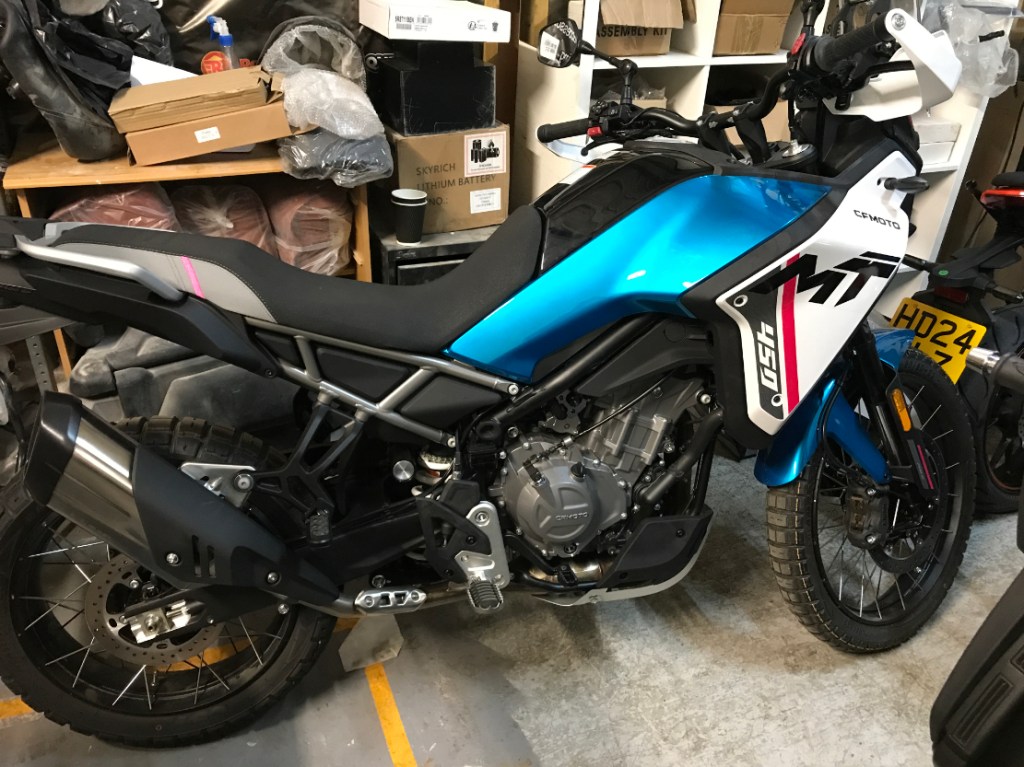
My internet-sourced CFMoto 450MT preview last year has been a very popular post, and was even referenced by this repetitive, AI-generated review. Now the 450MTs are in UK showrooms, but most are long sold to the fearless early adopters who bought the bike unseen, months ago. I’ve made this mistake before and am not in a great rush, but had a chance to look over one in a packed storage shed at my LBS.
Impressions It’s a whole lot of bike for £5699 with a 4-year warranty. You do wonder if that price is set to jump once it catches on. Alongside a Him 450 (which this shop also sold), the MT is clad in plastic like a 300 Rally vs a 300L. Sat on it, the ‘tank’ feels about 2 feet wide, reminding me of my Africa Twin. We don’t want that. Behind the panels seems to be a lot of space and maybe some hidden ancillaries, where the Him has crash bars, but unlike the AT or 300L, the radiator looks protected.
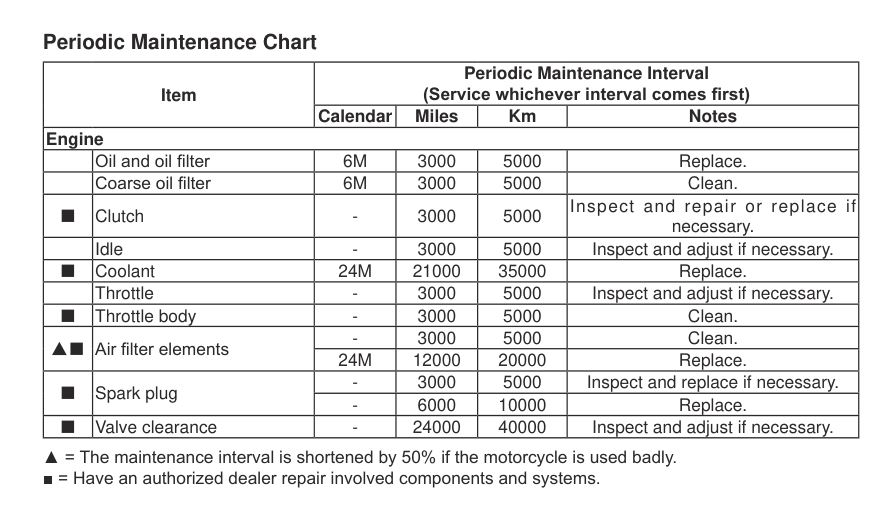
As with the new Him, it looks long and low with a spacious feel which you hope will mean on-road comfort, but results in a lot of off-putting ‘visual mass’ to handle on the trail. I’d hope that impression may disappear once the bike gets ridden. One fly in the ointment I’ve since learned is oil changes at 3000m/4500km and even new plugs at 6k. Oil capacity is 2.5L (full specs here) which seems to be adequate. Surely it’ll last longer than 3000 miles? Or is it a dodge to cover/pay for the 4-year warranty? My 300L was 8000 miles on 1.8 litres (though I didn’t leave it that long). 175-kg dry they say and swinging it side to side it didn’t feel top heavy, but I assume the tank was empty. The quality of the finish looks as good as anything from better known brands; there’s nothing cheap and shoddy here. Taking off some of those panels or the seat might reveal some rough edges, but it doesn’t look like it.
Attention to detail
Screen adjusts with big hand knobs, but only by 2-3 inches
Seat is long, low and wide, with a grippy surface texture
Clutch is very light
Single front disc is big
Stock wheels are tubeless and seem to look good
Rear shock has relatively easy to get to preload adjustment rings
Thin plastic handguards are flimsy
Both gear and brake lever fold
Mirrors pivot in easily
Wide footrests
Bashplate is thin pressed steel with a few too many slots, but has a flat base for added protection. There’s also a whole lot of space up front – for a rally-style water tank?
Tyres are CST Ambro A4 – no, never heard of them either
Pipe is as tucked in as it can be
With wall-to-wall rave reviews, I was set on a 450 Himalayan in tubeless for about £6300, despite the hideous graphics (which might have hair-driered off). I still think the Him would feel easier to manage on the trails, like a 300L. But once you factor in the irresistible appeal of a 270° twin, swinging a leg over and pressing the button takes on a whole new thrill.
Himalayan 450 vs 450MT
The weight, power and tank volume are about the same
I imagine the Him’s economy will be a bit better
I prefer a rectangular dash and can live without engine modes
MT is loads cheaper
Himalayan 450 lacks Adjustable screen TL wheels on base models Handguards Fully adjustable suspension
CF450MT lacks Centre stand and tank crash bars Proper handguards Ride-by-wire/engine modes (good) Naff graphics (also good)
Tbh, that list was scrapping the barrel. Both of these are two of the best real-world travel bikes we have at the moment, but the Him costs 10% more in tubeless. Having seen one up close, there’s nothing I’d revise in last year’s preview.
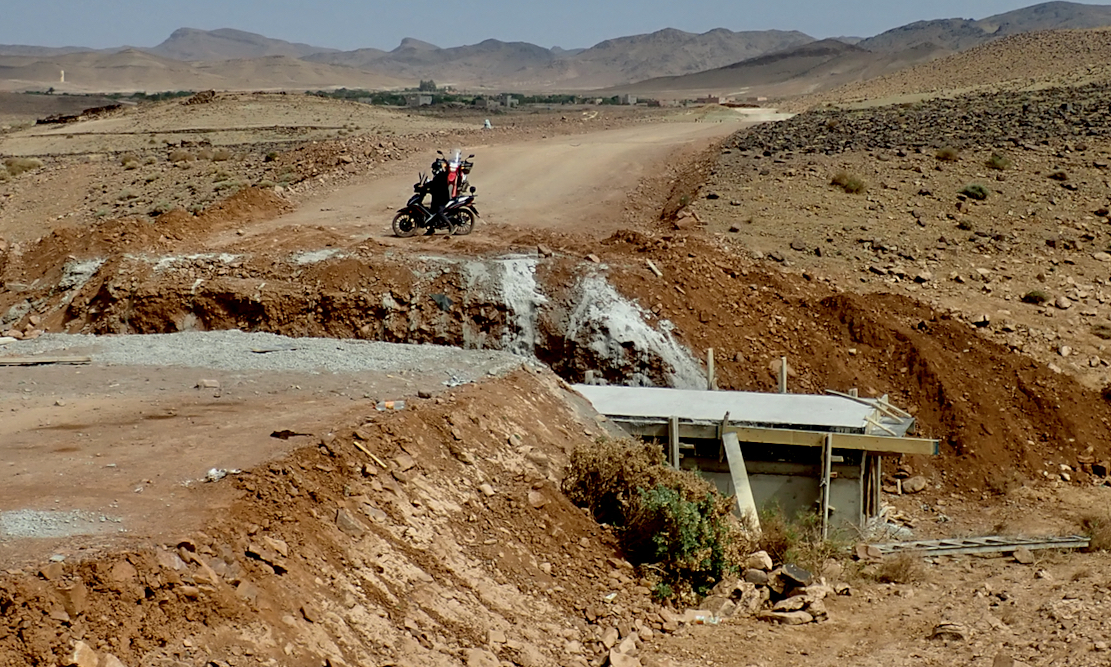
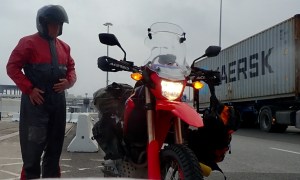
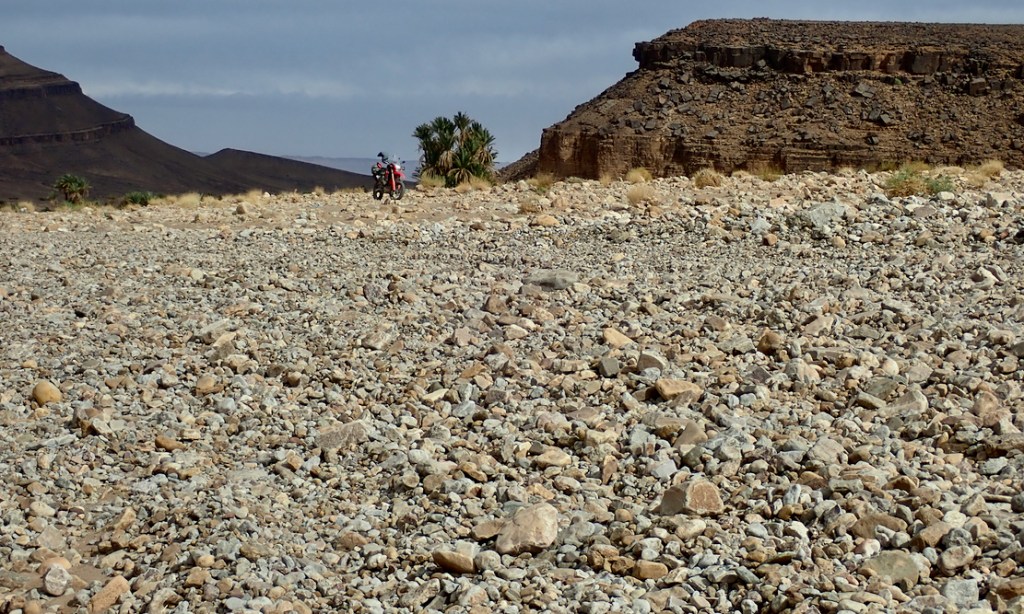
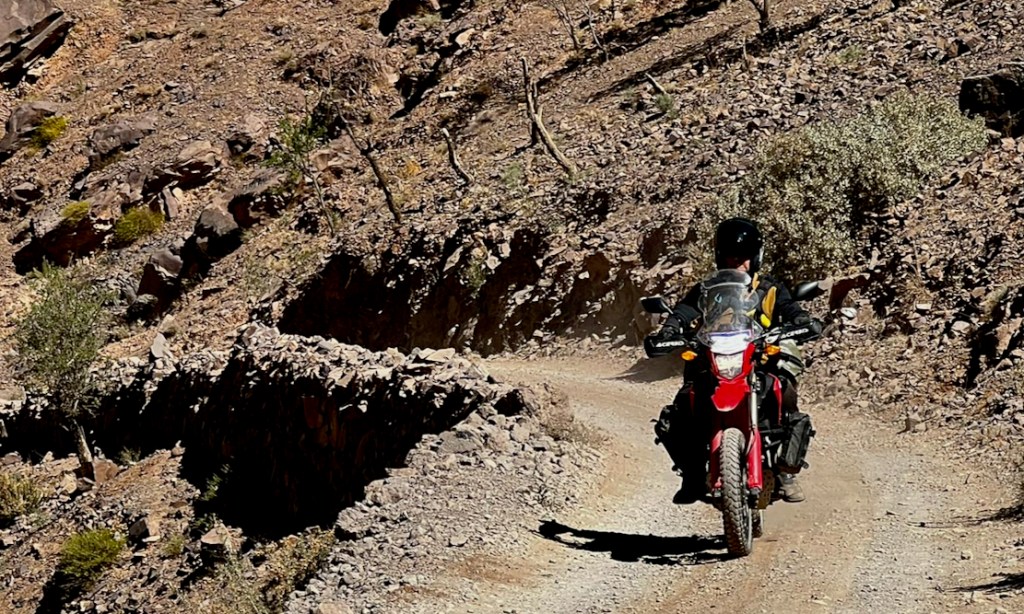
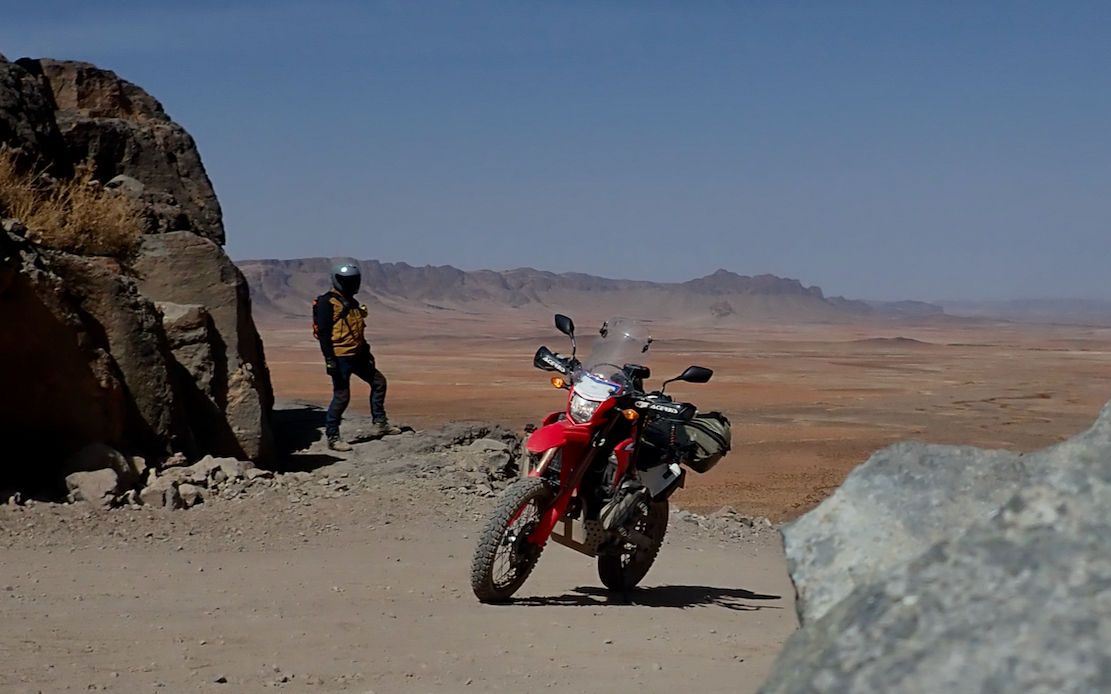
After a year of logging routes in southern Morocco – most intensely with several visits since last October (including occasionally renting 4x4s) – just a mile from completing my final piste on Jebel Ougnat I came across a pipe trench dug across the track that had yet to be filled in. They were improving this entire route but oddly, there was no way round this one. To one side, a local on a 125 had slithered down the steep bank and up the other side. I scrambled down to see if it would be rideable, and as I did so, a guy on a moped turned up, took one look and turned back (below).
Hmm. Would those planks take the weight of a jury-rigged launch ramp?
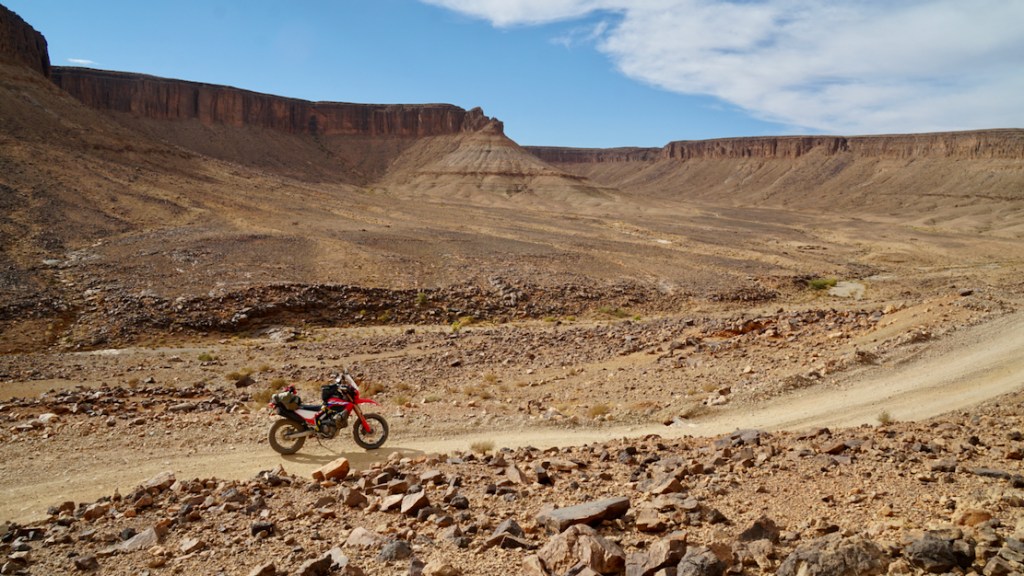
I cleared a few stones and figured I could do it, getting off and pushing if I had to. It’s always easier than it looks and anyway, I was one sodding mile away from finishing months of research. I wasn’t going to turn back now and mess up my final hard-won GPS tracklog! I managed it with ease, but it was the anticipation of tackling such rare obstacles – not least an exhausting riverbed in the Anti Atlas a few months earlier – which validated my choice of getting the 300L for this big Morocco guidebook update. Whatever its other shortcomings, the CRF was as light and lowered as practicably possible, while having enough power, range and protection, plus more than enough suspension and clearance to complete the task.
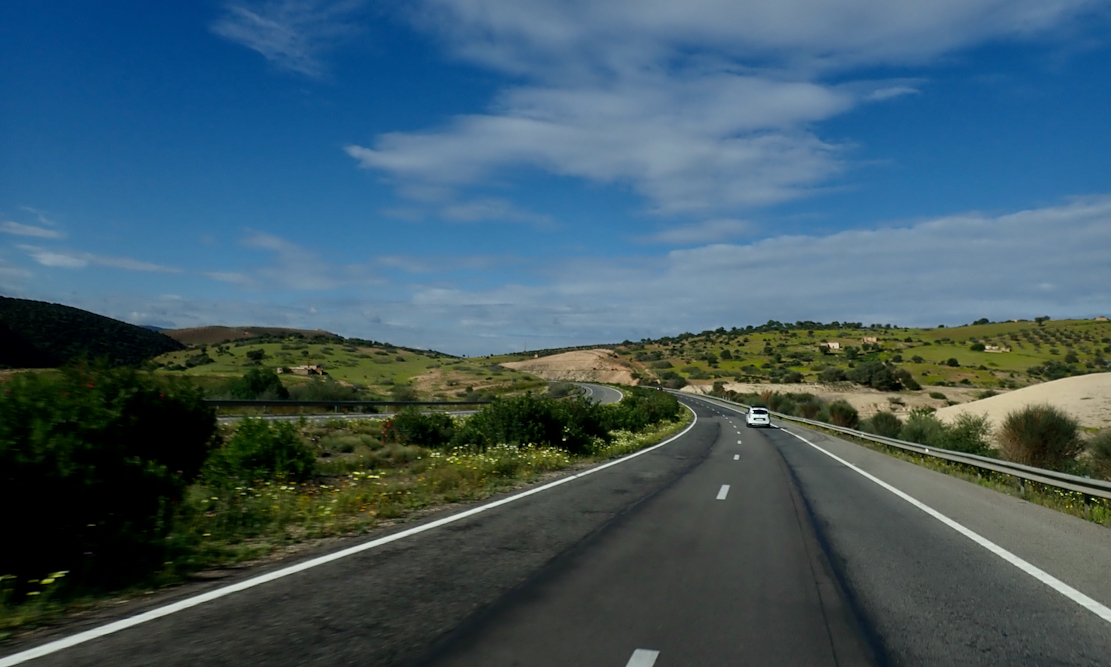
Full-frame greenery near Meknes. Quite a shock on the eye after a month down south
Another late revelation came on the ride back across Spain which I was dreading, principally at the thought of enduring saddle soreness while wanting to get the miles in with a ferry to catch. I gave myself spare days just in case, but came the day that agony never materialised. I got another agony instead.
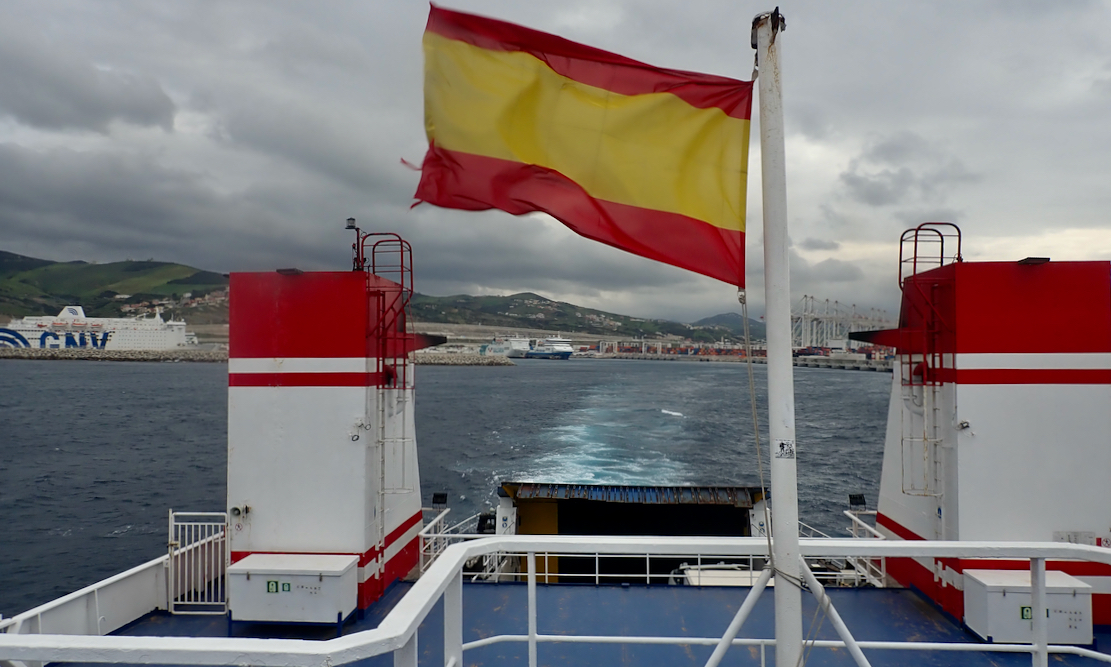
I’d had an amazingly good run this winter, often achieving more than I planned, but the turbulent springtime weather had broken in Morocco, with a violent overnight dust storm sweeping through Tinejdad. That meant I had to abandon a final high-altitude recce on Jebel Ayachi so, lacking the time to sit it out and wait, I may as well head home. I started with a 400-km day from the desert up to Meknes, covered it with ease and getting in just as a hail storm rolled off the hills and hammered at the hotel room windows. Next day, neither of the forecast heavy downpours (one said morning, the other, afternoon) materialised, so I whizzed past the Hotel Sahara in Asilah to Tan Med and caught the next ferry to southern Spain, ending in wind and rain to Alcala.
I’d underestimated the Honda and my ability to cover distance, so decided to put it all on red and next day went for 600km along the familiar and effortless A66 ‘Ruta de la Plata’ to Salamanca – effectively a deserted motorway. It was a gamble made easier by knowing fuel and leche bars were frequent, as well booking a couple of days at a roadside hotel in Mozarbez, while in a holding pattern for the Santander ferry. Unfortunately I didn’t anticipate single-figure temps and a numbing southwesterly. I was cold for the entire 9-hour ride to Mozarbez which ended in sleet at around 3°C. I arrived seriously frozen, but comfort-wise, had magically acclimatised to the CRF’s seat with the help of the Moto Skiveez.
Putting it all on red
I was grossly under-dressed for all this, recalling teenage biking sufferings when I knew no better. Increasingly desperate stops for fuel and hot food were needed. On-bike exercises – a new ploy – eased the long distances in the bitter cold and occasional showers, which saw me edging towards hypothermia. I rarely exceeded a true 100kph, but had the weather been what I’d hoped for in March, that 600-km ride might have been stretched to 700 or around 440 miles. A pretty amazing distance on a 286cc donkey. All you need to do is try not to ride for more than two hours at a time. That said, even with the strong southwesterly pushing me, fuel consumption was down to 70mpg/25kpl; an all-time low. (Fuel log here). Imagine what a CB500X would return holding a true 100kph in the same conditions? My guess is a lot more – or a much faster transit if riding at whatever 70mpg is – probably 120kph. This is the often overlooked payback with small motos. The only benefit is lightness, but of course that matters a whole lot when roaming around alone on the dirt. Sadly, you don’t gain good economy at highway cruising speeds as well. After >10,000km the 300L averaged a verified 30kpl / 85mpg / 70.8US. I tried but never quite managed to get a true 100mpg, but I think a lighter rider could. I was the slowest private vehicle on the Plata, inching past trucks while cars raced up to my mirrors, but the Honda did a lot better than I expected. Was I wrong about the 300L being a compromised travel bike?
Stepping back a bit The bike I rode home was a little modified to what I’d ridden out from Malaga in October. By now both tubeless wheels had been properly sealed with a continuous band of Puraflex 40 by the mechanic at Loc in Marrakech. I’m a bit slack on checking; turns out the tyres still lose a bit of air, same as I’ve found with proprietary sealing systems like BARTubless. But on typically stiff TL tyres, it has to get really low – 1 bar or less – for you to notice. It might be leaking from the bead/rim face and it might settle down. DIY TL sealing needs to be checked regularly, just like tubed tyres. Or fit TPMS.
Pic: Matt W
By now the stock-sized AX41s had worn out and I was running over-fatMitas E07s as that’s all they had in Marrakech. These bigger tyres – 130 80 17 and 110 80 19 – improved cornering confidence on the road and were fine on the dirt for what they are. The front did slip a bit more on the loose stuff than the knoblier AX41, but felt more reassuring on wet or dry asphalt. By the time both fat Mitaii had been fitted, the NiceCNC ‘Schmouba’ link didn’t lower the bike that much. And the Skiveez ended up the best all round solution to saddle woes. That and trying to stand more which is actually quite enjoyable until my insteps start to ache. Refitting rubber inserts into the pegs didn’t solve this; it must be my TCX boots or I need massively wider pegs.
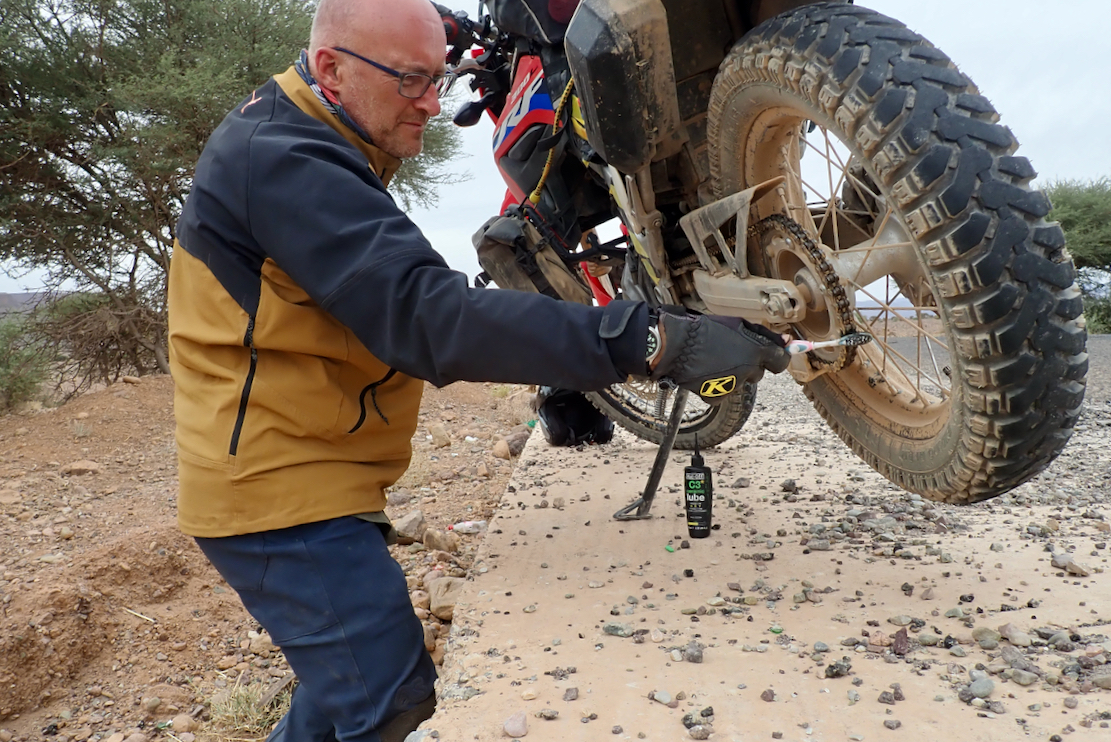
The Rally Raid suspension hasn’t sagged that I can tell. The fork seals have held up amazingly, and the DID chain has been adjusted once in 10,000 miles with hand cleaning and lubing as often as practicable. The lame front brake holds me back from going full WFO supermoto in the canyons – well, that and a lack of nerve and skill. There’s still loads left, but I’ve ordered some EBC pads even though I may not reap the full benefit before the bike gets serviced and sold. I tried swapping the grips in a bid to reduce vibration at the bars, but fell for some ‘duo-foam’ marketing with no improvement. Perhaps fatter, Moto Gloveez are a better idea.
Sothe answer is no, I wasn’t wrong about the 300L as a travel bike. It’s still a 28-hp ‘300’, bought for on-trail lightness, not it’s ability to generate motorcycling joy as you pull away or power out of a bend. It’s about where you can take it with confidence. Thanks to the low first gear (resorted on fitting the same-tyre-ø-as-OE Mitas) the power is absolutely adequate on the sort of dirt I ride and loads I carry. But I bet most 300L owners have another bigger ride or two in the garage. Satisfaction may be found with something with a bit more poke, machine #65 I think it’ll be. As I won’t be off-road exploring so much and my skills in recognising what’s doable will have improved over the last year, the expected added weight of <200kg juiced up will have to be manageable, providing the seat height isn’t in the clouds. And ideally, unlike the Honda, it won’t need masses of added kit and mods to turn it into a good traveller for road and trail. What is that bike, you ask? Click this.
Close-fitting, coarse woven, somewhat rubbery fabric not particularly pleasant against the skin and can snag
Loaned by Adventure Spec for review
What They Say The Linesman Pant is a lightweight CE AA certified over the boot adventure motorcycle pant / trouser designed for trail, adventure and dualsport riding. It features Bi-Stretch Panama fabric that combines extreme comfort with high abrasion resistance. Toned down styling makes the Linesman Pant a perfect choice for those looking for a more subtle adventure rider look. Designed to work with the Linesman Jacket. Removable Forcefield Level 2 hip and knee armour included. Weight (size 38 Reg) 1700g / 59 oz.
REVIEW Preferring a plainer look, for seven years I wore loose-fitting Klim Outrider heavy-duty jeans without the armour (and with modifications), until they literally started to feel a drag to wear. It’s more me and my age than the 1090-g Klims when worn OTB (Over the Boot). But I wondered: might a stretchy pair of riding trousers drag less on the knees when standing/sitting or more particularly, swinging the leg over a tall saddle when getting on and off? Buying a pair of very light and stretchy Mammut hiking pants for walks and an MTB ride got me thinking this way. A more practical alternative to Ron Hills, they roll up to next to nothing and now are my off-bike trousers for moto travelling.
I considered Mosko’s Woodsman (right) with my kind of pockets and earthy colours. But I’m not convinced by the idea of partial waterproof knee and seat panels. Either do it or don’t, as with their less pocket-optimised Surveyor pants. I also assumed the sort of stretchy, softshell fabric, presumably as used on my Mosko Moto Surveyor jacket, wouldn’t be suited for off-road riding protection unless armour is fixed to the body (Mosko’s recommendation), not integrated in the clothing – as others do.
Adventure Spec recently brought out a thick, basket weave Panama fabric for their Linesman range: ‘a hiking pant built for adventure riders, that’s CE AA certified‘. (Fyi, I was prepared to buy these, but ASpec supplied a pair for review, as they’ve done previously). I am a big fan of the original green Linesman jacket they brought out years ago and wish I’d kept it. (Imo, the jacket’s current colours don’t look as good.)
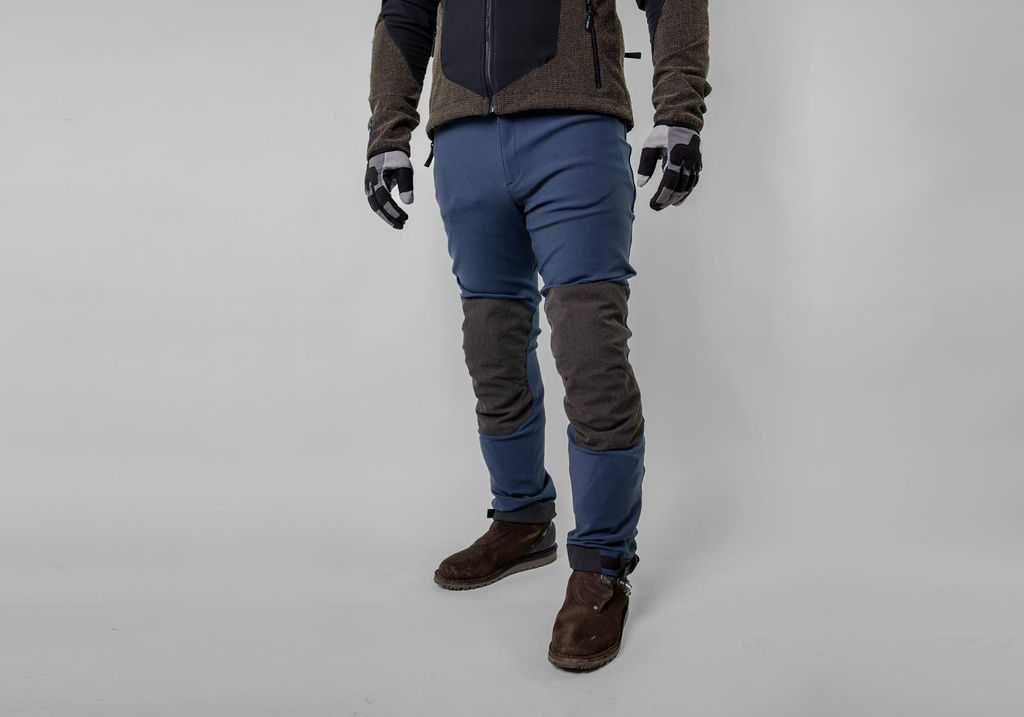
James in Linesman; me with AD1
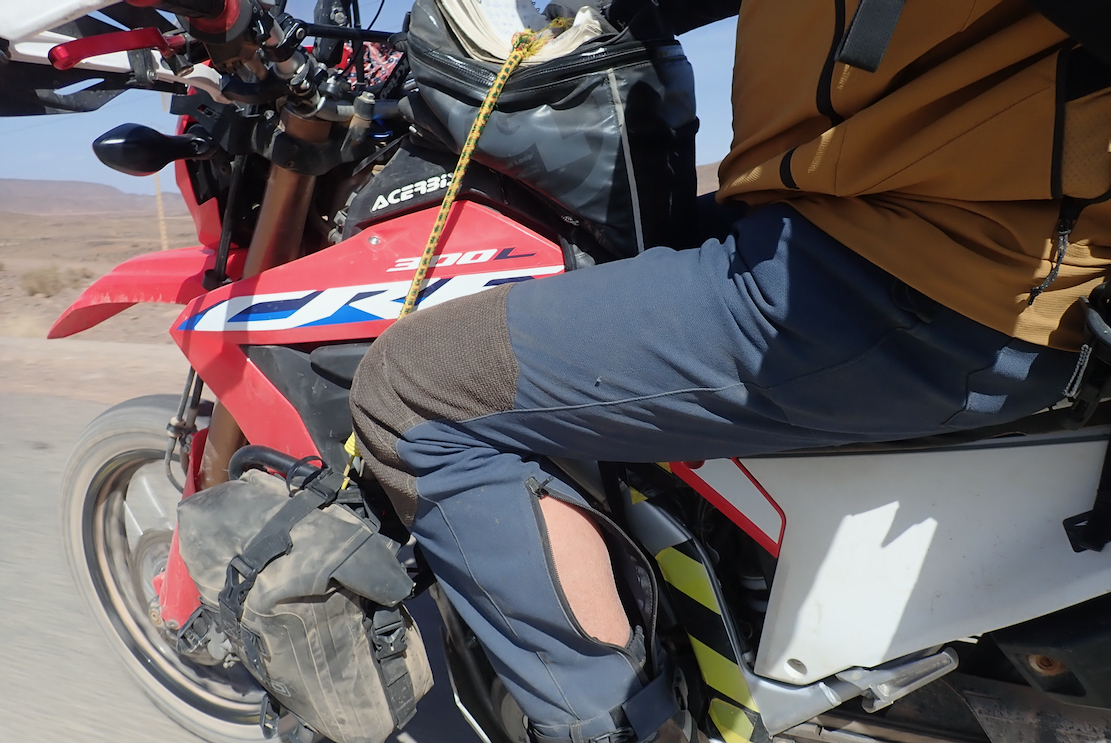
Just before my Linesmans got sent out, I spent a fortnight in Morocco with James in his own pair. (See his Second Opinion, below.) They did the job, as trousers do, and he was never cold for long in the mornings or up at 10,000′ – a sign of things to come. Expecting it to be much colder, I was wearing my underused, grey Aerostitch AD1 Gore-Tex overtrousers (above left) which also proved surprisingly comfortable in what was globally recorded as the warmest February ever.
Out of the box The coarse-woven Linesmans feel heavy but pliable, like a damp towel. Without the armour they weigh 1250g. The supplied Forcefield armour adds another 450g. Pockets are like regular jeans – two at the front, two at the back, with no zip closures. The ‘hiking trousers built for adventure riding‘ idea is a bit… stretched. Walking and MTB-ing are much more kinetic than even moto off-roading where protection is more of an issue and which the Linesmans address well. It’s hard to see where the weight is; lifted to the light, you can see through the fabric which ought to mean good breathability.
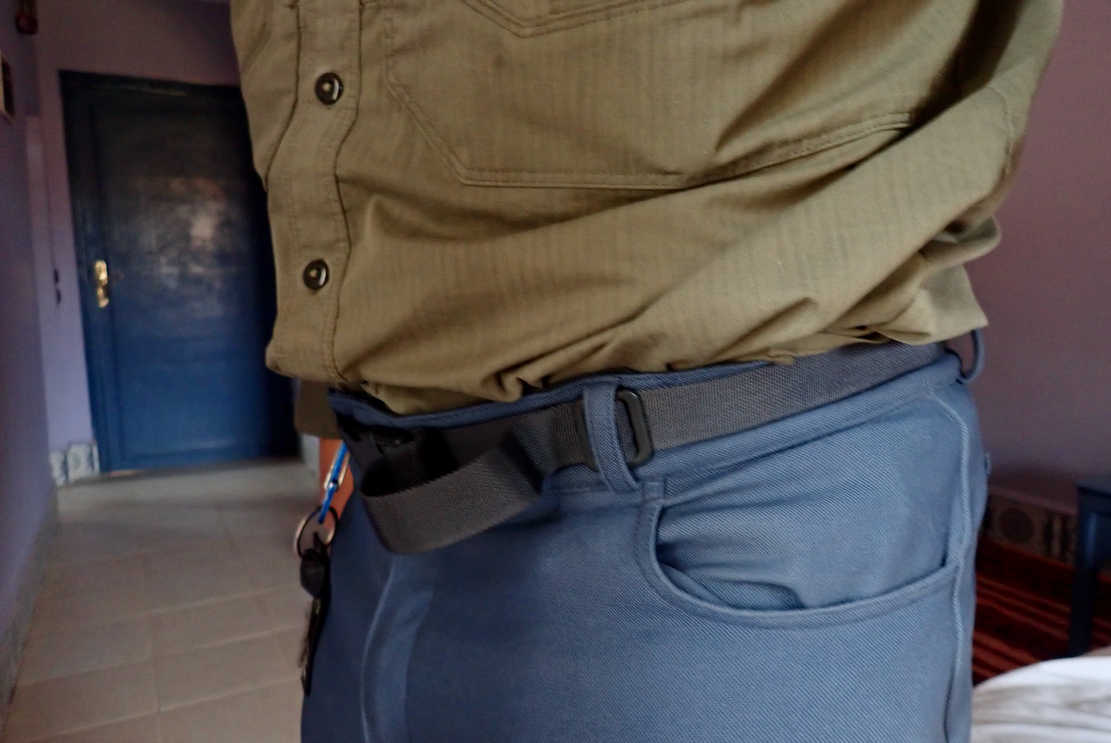
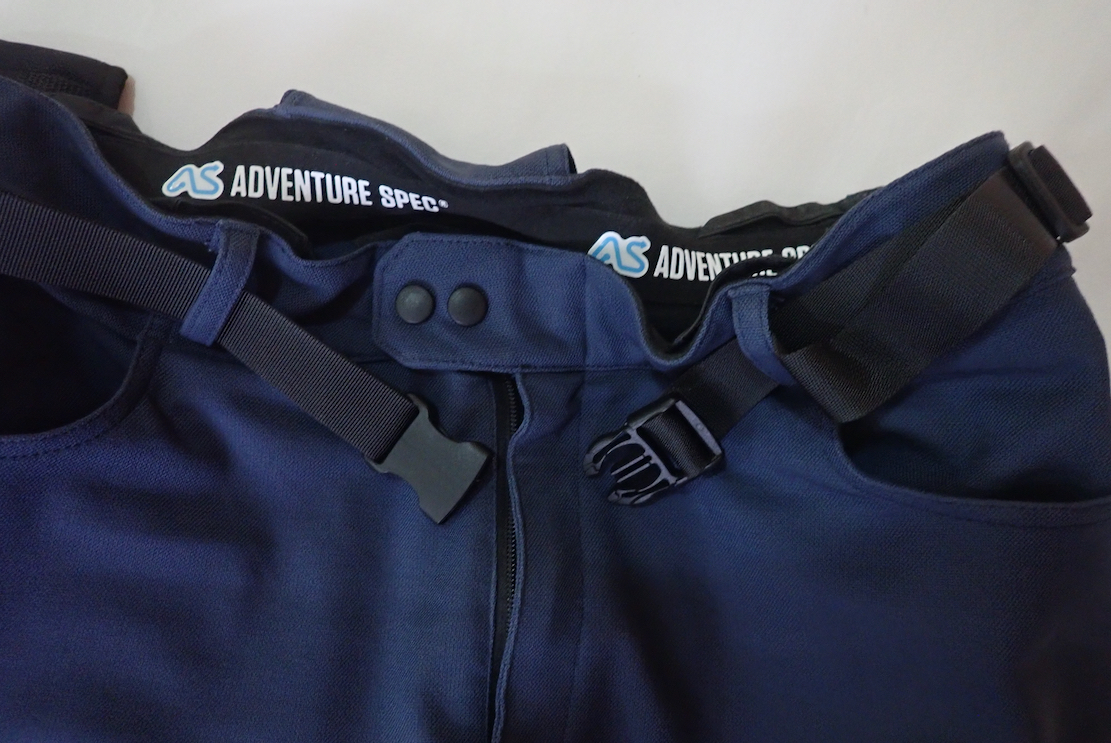
“Integrated [waist] buckle allows for an easy cinching tight if you lose weight on long RTW trips…” Not what I found. The waist belt has two ends, each sewn to the waistband with unnecessarily complicated buckles to take up slack. This was the first annoyance. Adjusting the belt at the closure to accommodate the ebb and flow of my generous abdominal span would have required two actions to remove slack. In the end I just left the loop slack (above left), despite being an entrapment hazard, to borrow a kayaking term. The left side excess could be cut, unneeded buckle removed and then be adjusted normally at the cinch clip, but the right side buckle catches in the belt loop when doing up. I may have missed the point here, but no need to over-complicate things or reinvent the belt; just focus on day-to-day function. Inside the waistband are bonded strips of grippy, ASpec-branded silicone – nice touch to hold up the weight, although the slightly rubbery texture of the relatively coarse body fabric is a little grippy too.
Silicone brandingStash my wad
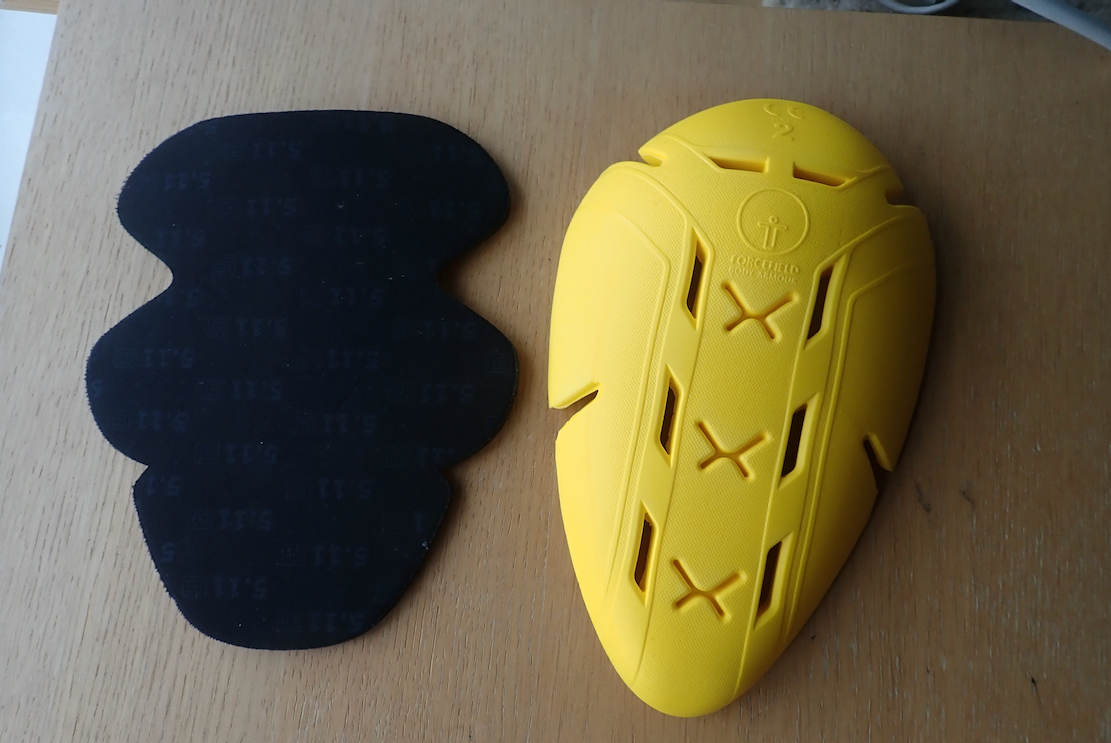
Yellow L2 Forcefield included
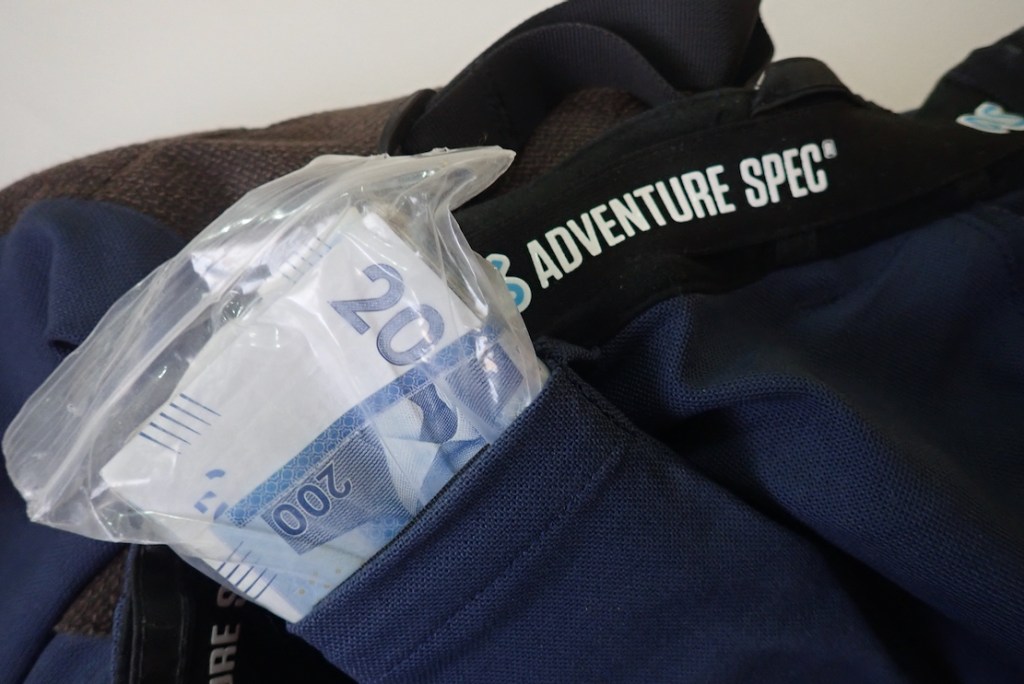
There are armour pockets on the hips and of course the knees. Here the lower edge hangs loose so you can slip them into full-height boots to stay in place. Another nice touch. I wear short boots and removed the Forcefields before fitting some 5mm neoprene pads (left) I had going spare. I never wore the Linesmans with the supplied armour. Instead, I used the armour sleeves for stashing cash and can confirm you can stuff 30,000 Moroccan dirhams into a hip armour pocket, and at least another couple of grand of £ and € in the knees. Providing you’re wearing your trousers, you never need worry where your bulky stash is. If you’ve lost your trousers, the missing cash will be the least of your worries.
As I’ve said before, knee, hip or elbow, armour pads won’t stop broken bones, though these joints often take the impact of minor prangs. Unless you ride hard, armour has more real-world value for racers or on the road where crashes are faster and abrasive. But of course it’s a personal choice which depends how you ride or feel about ATGATT – or ‘clobber’ as I call it. I avoid riding too technical stuff, plod along like a lonesome donkey and fall off once in a blue moon.
Toyota body torsion test. In my pants!
… In my Pants! Out the box I spent a day wearing the Linesmans at the desk where they felt a bit clammy which did not bode well. I then forced myself to wear them for a week in the desert in an a/c 4×4, and then another month on the bike through Morocco, across freezing Spain and back to the UK. All up, about 4000km riding from mid-30s to 3°C rain and sleet over the Tichka pass and in northern Spain.
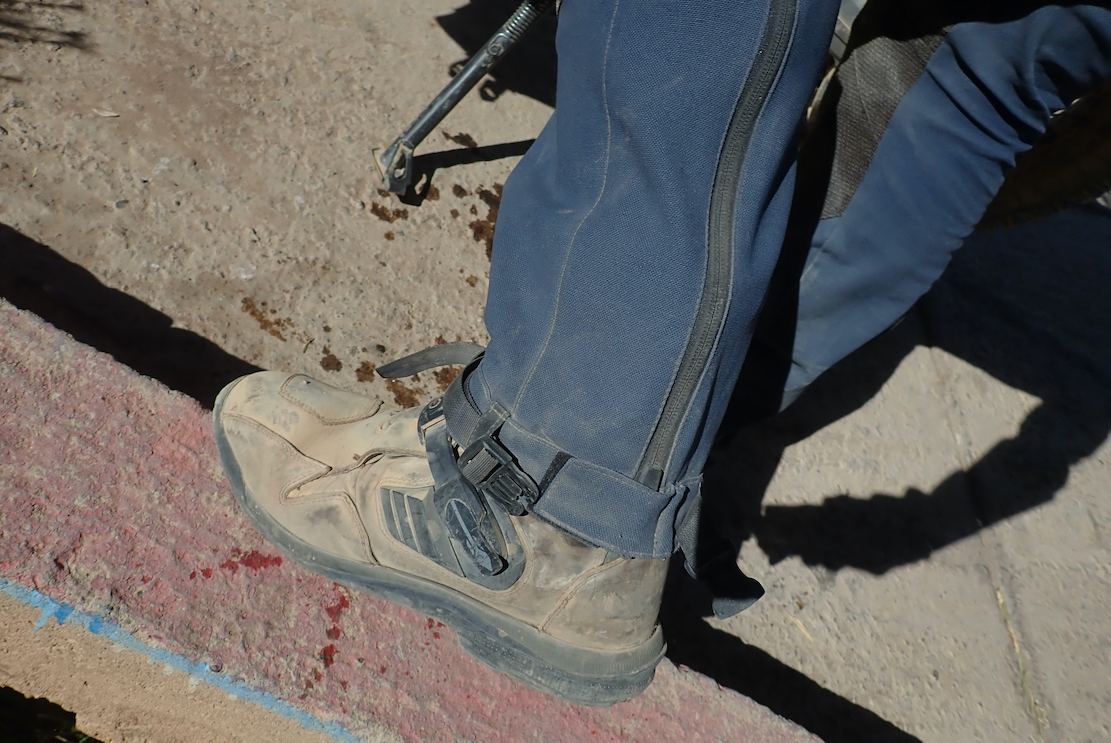
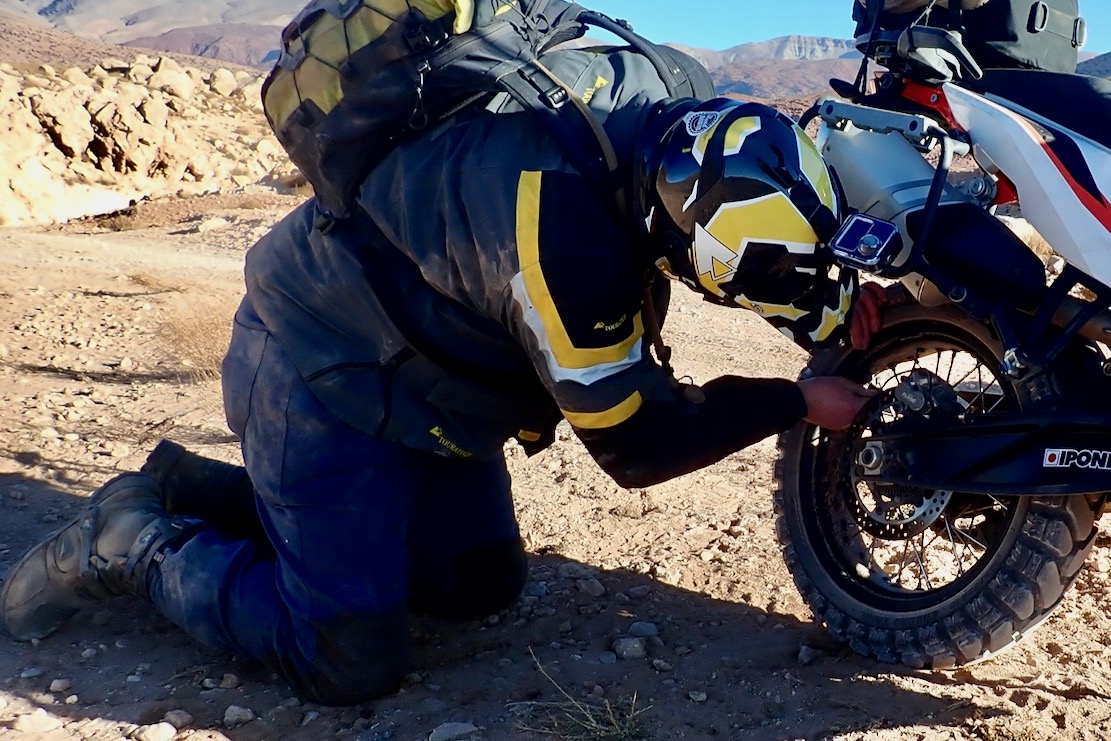
First thing I noticed on James’ Linesmans in February was the untidy strap at the ankle. Linesmans are designed as close-fitting OTB trousers, with a zip down the calf covered by a small velcro tab at the ankle. Is a strap also needed and, if yes, could not a way be found to reliably tuck away the loose end like Kriega manage on their packs? I tried wrapping the loose strand around the belt loop (above) but of course it worked its way loose. I thought these straps might be redundant before I got mine and, having now worn them, I think they are. Again, I might have missed some ingenious application, but remain unsure of their purpose. To stop the pants riding up? To add tension to keep knee armour in place? To hold the weight of the trouser and armour off the knee? To stop the wind or fording water going up your leg? To cover the forward-facing velcro tab from otherwise getting snagged open? To reinvent the zipped trouser leg closure where just velcro might seem a bit cheap?
Who knows. I tried some days clipped and some unclipped. No tangible difference; just another flapping thing to do up and undo at each end of the day. The velcro does the job – and if not, use a larger, ‘contourable’ patch of velcro, like my AD1s. But most annoyingly, these ankle straps can’t be removed if you also take against them. Like the waist belt, each end is sewn to the hem. A one-piece strap could have easily ran through the hem’s fold like a normal belt, to be pulled out and perhaps reinstalled if you changed your mind on its usefulness. A simple solution to please everyone without resorting to Occam’s Razor. ASpec say you can ‘remove’ it, especially to wear the Linesmans ITB. But you don’t pay 300 quid from riding pants to chop bits off, when a non-destructive option could be easily offered. And I know I’m not one to talk design elegance, but aesthetically, these flapping buckles also spoil the slimline Linesman’s line.
I also found the coarse-woven but close-fitting fabric didn’t lay against the skin that comfortably at times, and annoyingly, one evening the leg caught a protruding nailhead in a cheap chair and pulled out a loop of thread. You’d think this will also happen in brambles and so on, and soon make them look like a grotty old jumper (as James may have found, below).
‘These pants will feel comfortable in relatively dry temperatures between 10 C and 21 C / 50 F and 70 F.’
‘These pants will feel comfortable in relatively dry temperatures between 10 C and 21 C / 50 F and 70 F.’ They said it right there. That is actually a narrow temperature range but in practice sounds about right, so can’t say I wasn’t warned. Legs don’t really feel the cold like the body core, and riding in light rain and some settled snow over the 2200-m Tichka Pass, I was ruddy freezing in my wholly inadequate clothing. But I knew it would warm up once over the other side. On that day the Linesmans never got sodden or uncomfortable and quickly dried off.
Hot day. Getting the wind up ’em
Morocco’s desert-sea-mountain location with its radical elevation and temperature changes make bike clothing choices especially tricky, but in March temperatures rise steeply and by the time it got to the mid-30s°C down south, the Linesmans were just too hot, even on the move, same with the Klim ITBs I tried a few years ago. Meanwhile the baggier, part natural fibre Klim Outriders have proved tolerable in similar heat. I tried undoing the calf zip with little effect. I then tried resting my legs on my Lomo bags (above) to get some wind up them, but that only works on road and is probably not what they teach at CBT school. At least when you stop for a break you can pull them up to air off a bit (below).
Airing off
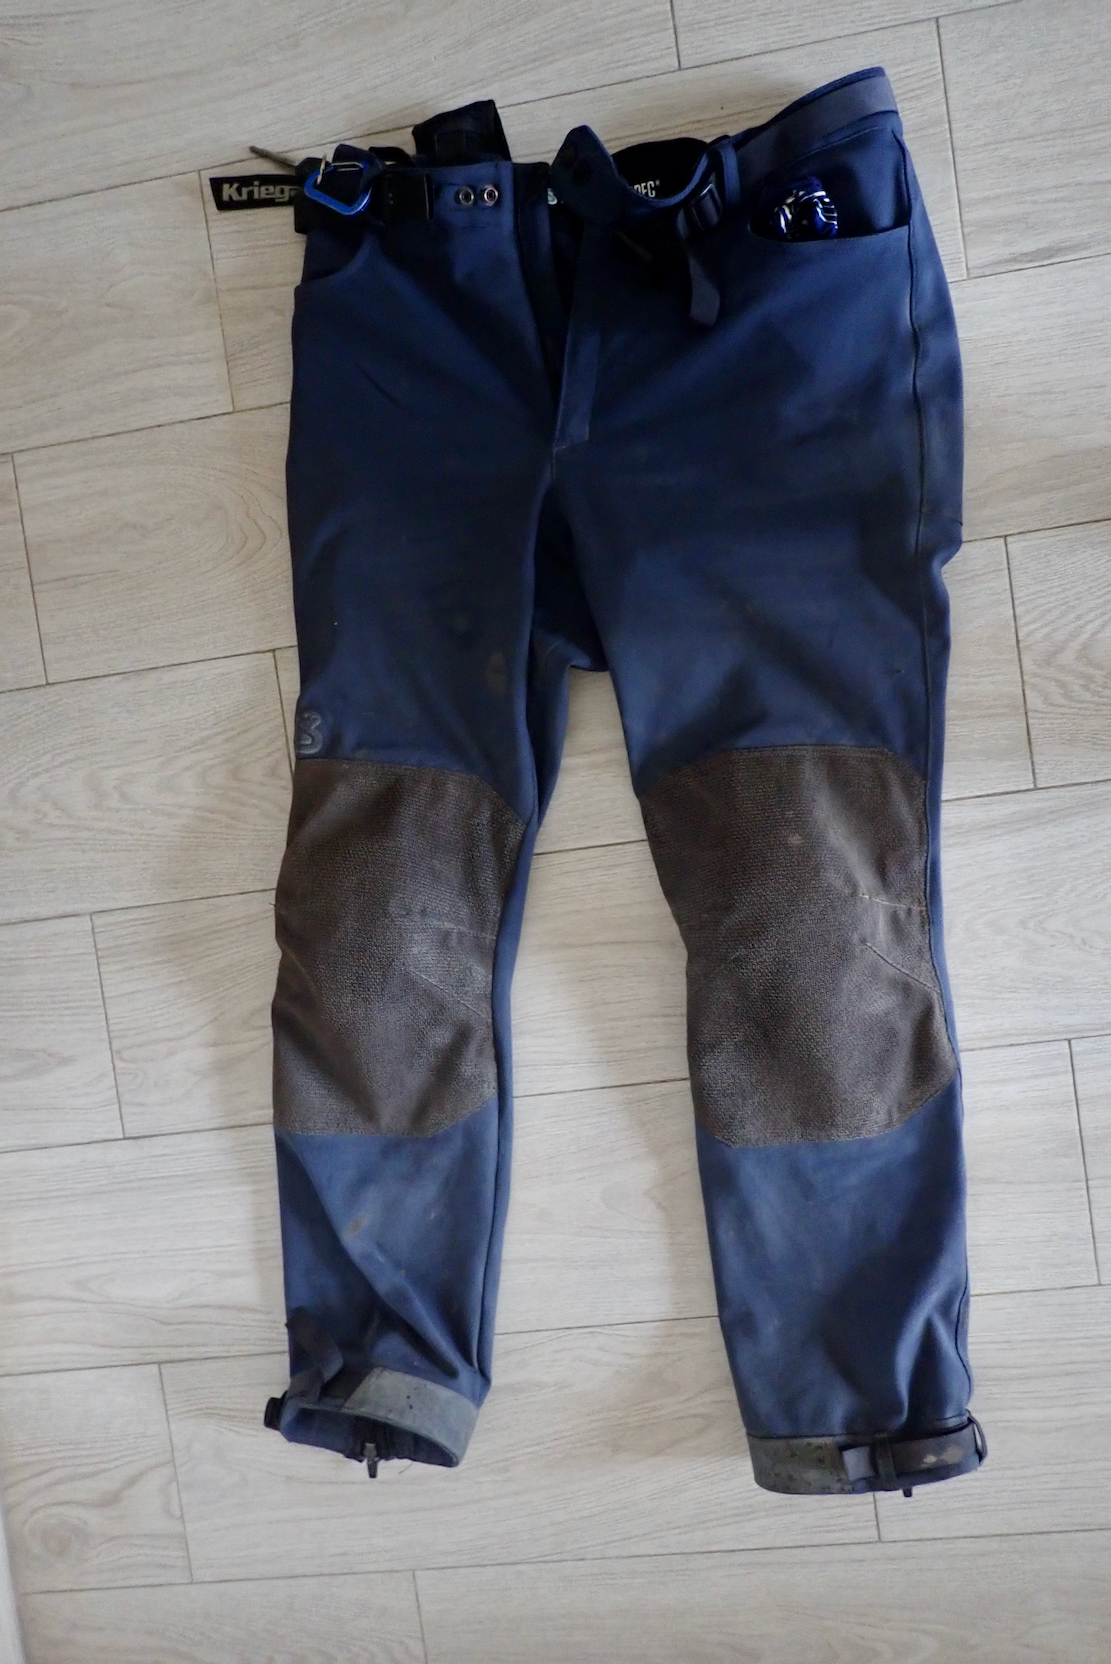
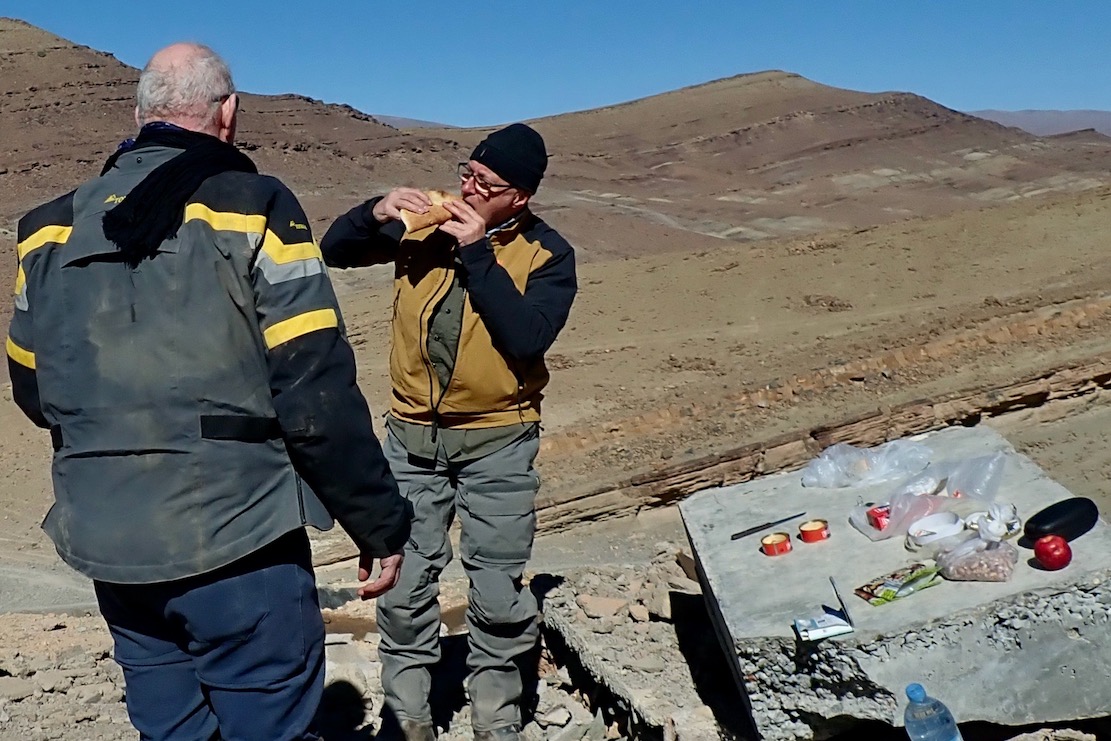
In the heat the tight fitting fabric clung to the skin, minimising any stretching benefits and, come the end of the day, I couldn’t wait to peel them off. I wondered how my AD1s would have managed? Their bulky cut may not be so flattering, but would have kept the fabric off the legs, creating an air gap. And with the ankles velcroed down snuggly, I could have unzipped the sides from either end to got some venting on, or air-off fully at a stop. This looseness won’t help keep integrated armour in place, but I do believe if you’re serious about armour, it’s better attached to the body, not in external clothing. After a month with a lot of dust and mucky, tuna lunches, the Linesmans didn’t look too grubby – I do notice that non-black shows the dust less. I hand-washed them once in my Ortlieb tailpack in a hotel shower and they dried off overnight in the room. Back home after a proper machine wash they came out as good as new, bar some snagging.
As you can tell, I didn’t gel on with the Linesmans for my sort of riding. But not for the first time my PoV is out on a limb; on the ASpec website comments are broadly positive. Sure, the ankle straps could be snipped off for good, but as expected, once I saw them I suspected the pants would be too hot for Morocco. This is why the lairier designed off-road pants like ITBs, have venting zips and mesh panels. It’s also just occurred to me that any trousers – particularly heavy ones laden with armour – worn OTB will hang unsupported and drag on the knees, including these Linesman’s and even with the ankle closures. ITB trousers support some of the weight when they’re tucked in. Therefore, Linesman’s worn ITB (ankle buckle cut off) may be more comfortable. And while it’s nice not to be black (now available, above left), I have to say, the bland blue colour with brown/grey knee patches didn’t do it for me. I hate to admit it, but the new black version looks loads better. Bring us some tan or olive shades, or even dark grey. For UK TETery they’d be fine; shrugging off the odd puddle or shower, but flattering though the skinny-jean look might be, my clothing prefs are more ‘boxer’ than ‘Y-front’. The Linesmans became too much like putting on a wetsuit each morning, rather than slipping into something all-day comfortable. I presume ASpec sell mostly in the UK, but perhaps they should consider a lighter, airier Desert Linesman for the US market. I’m sure I’d have something to say about that that, too! Queueing up for passport control at Portsmouth, a bloke on a Gas Gas 700 recognised my Adventure Spec pants. ‘Any good?’ he asked. ‘No for me’ I said.
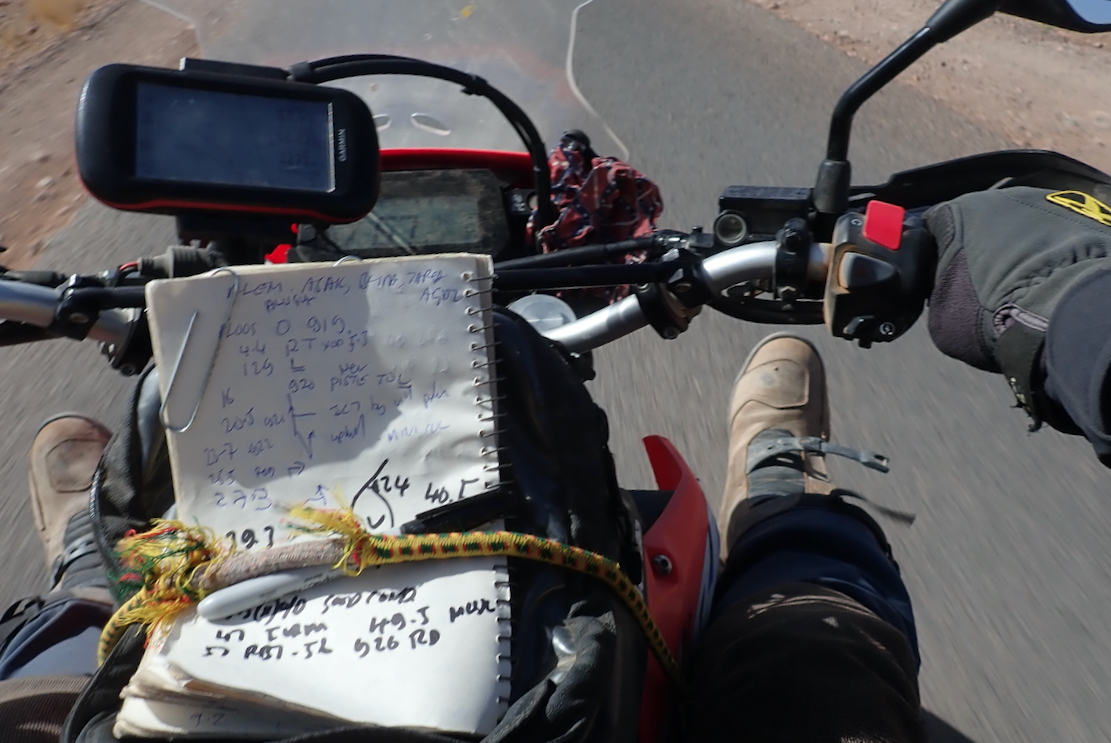
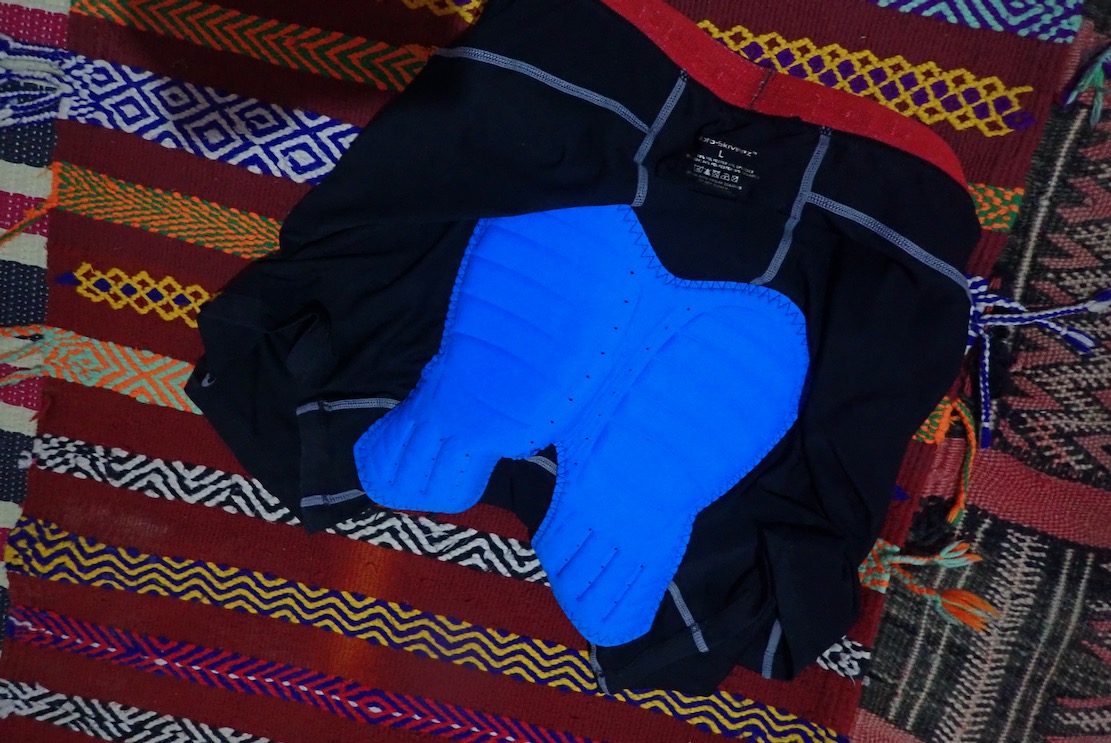
That reminds me: I rode every day with Moto Skiveez because the CRF would have been agony without them, and despite close fitting ‘cycling shorts’ not being to my taste either. But getting dressed, many mornings I’d forget to pull on my irksome but essential padded nappies. The thought of then having to de-boot and remove the trousers to put on the Skiveez became… annoying.
Brainwave: integrating Skivee-like pads into riding pants I can’t be the only one who feels like this about uncomfortably narrow saddles on light trail bikes which are otherwise well suited to all-terrain travels – ‘adventure bikes’ if you will. So I think integrating Skivee-like pads into riding trousers would be a practical idea. Ideally, they’d slip into armour-like pockets, maybe even with varying densities of foam for heavier riders/harder saddles? I mentioned this to ASpec and Mosko, but I’m not sure either felt the same way. Me, I’m already booked in to pitch my Butt-R-Kupz™ on the next season of Dragon’s Den. I’ve more to say about saddles here. For what I do I’ve never been a fan of synthetic fabrics, not least with membranes, but next trip out there, I’ll try my AD1s again and see if their day-to-day comfort, utility and easily modified temperature span are as good as I think they might be.
In my pants
Second Opinion: James S Over a year I’ve worn my Linesman Pants whilst off-road training in Scotland, riding the Kielder 500 rally and around the High Atlas and desert of Morocco in January. And by the time you read this I’ll be out in Morocco riding the Sandraiders rally on my 3AJ. I even wore them with the armour on the Ryanair flight. I surprised UK airport security whilst they frisked me down, but the Moroccan Security agent had obviously come across knee armour before. The blue/black pattern help them look like regular hiking pants.
I found them quite comfortable on the plane and evening time, was in no hurry to take them off, apres-piste. I replaced the supplied Forcefield armour with my Acerbis kneepads but copped an injury on the unprotected side of my knee when I crashed my T7 at 30mph. But the knee and hip protection served their purpose as I rolled down the track. I wear mine outside my MX boots as I’ve not brought myself to cut the straps off, but the fabric along the inner calf has started to snag, so I will. AS should extend the hypalon or add some knee fabric to this area.
Coming out of Anergui in the High Atlas, I wore the Linesmans at 2°C one morning, but my legs didn’t get any colder than my upper body. I’ve not experienced prolonged rain, as I wear waterproof over-trousers, but the occasional shower is no problem. They dry off fast. I also wear Bull-it jeans which have abrasion resistant Covec for when riding on the road, but prefer the stretch flexibility of the Linesman Pant for off-road. Buying them was a significant expense, but other than the inside snags, I’ve not disappointed. For a bit of fun, I also asked Chat GPT4 for their opinion. See below.
Chat GPT4 Review [for amusement purposes only] The Adventure Spec Linesman Pant is designed for trail, adventure, and dual-sport riding, incorporating several features that aim to enhance the rider’s experience in different terrains and conditions. Here’s a comprehensive review of its pros and cons based on information from various sources: Pros: Lightweight and Comfortable: The Linesman Pant is lightweight and made from Bi-Stretch Panama fabric, which offers extreme comfort and high abrasion resistance, making it ideal for long rides【5†source】 Protection: It includes removable Forcefield Level 2 hip and knee armor, providing good protection from abrasion and impact injuries without feeling like typical bulky motorcycle safety pants【5†source】. Versatile Design: Designed to fit comfortably over adventure boots, the pant features a large lower leg zip for easy on/off and a tough buckle to secure the pants. It also has floating pockets for knee armor, allowing for adjustability and compatibility with knee braces【5†source】. Temperature Range: According to users on Adventure Rider, the Linesman Pant feels comfortable in relatively dry temperatures between 10°C and 21°C (50°F and 70°F), making it suitable for mild to warm weather conditions【7†source】. Durability and Design: Users have praised the construction and fit of the Linesman Pant, mentioning that it feels substantial yet roomy. The design allows for easy layering underneath or on top as needed【6†source】. Cons: Temperature Limitations: While the pants are comfortable within a specified temperature range, they might not be the best choice for extremely hot or cold climates without additional layering【7†source】. Price: With a price point of $355.00, the Linesman Pant is an investment, which might be a consideration for some riders looking for budget-friendly options【5†source】. Splash Resistance vs. Waterproofing: The pants are splash resistant and fast-drying but not waterproof. Riders will need a waterproof shell for continuous wet conditions, which could be a downside for those looking for an all-in-one solution【5†source】. In summary, the Adventure Spec Linesman Pant offers a blend of comfort, protection, and versatility for adventure riders, with a particular emphasis on a more subtle, toned-down style. However, considerations regarding temperature suitability and the need for additional waterproofing should be taken into account, especially given the higher price point. For riders who prioritize lightweight, protective gear that can handle a range of conditions with the right layering, the Linesman Pant could be a worthy addition to their riding wardrobe.