Category Archives: AMH News

Tested: Michelin TPMS review

Product withdrawn

After problems with the original 2019 kits (explained below), Fit2Go (who sold the Michelin branded product) updated their TPMS software for 2020. They also redesigned the magnetic mounting following negative reviews on amazon. In 4000 miles of riding on and off road, the magnetic fitting wasn’t a problem for me.
I tried the seemingly identical Mk2 version in March 2020. See pros and cons, below.

Update Summer 2023: UK Michelin no longer list TPMS for bikes and the Fit2Go page says a new version is due in 2023 after the original Michelin branded product was discontinued following scathing reviews.

michelin-tpms

Tested: Michelin TPMS (tyre pressure management system)

Where: Spain and Morocco 2019 and again in 2020 and 2021

Cost: £80 (kits suppled free by Michelin for review)

Weight: Negligible

In a line: Once you discover TPMS there’s no going back. (More here)


michtpms1

What they said
Introducing our first tyre pressure monitoring system (TPMS) for motorcycles, mopeds, scooters and all two-wheel modes of transport – bringing new levels of safety to riders for whom tyre condition is paramount.
MICHELIN TPMS – Bike detects a tyre in distress through loss of pressure, fast leakage or an increase in temperature – often the sign of an impending blowout. Its compact display flashes as brightly as a mobile phone torch if it detects an issue, plus identifies whether it is the front or rear tyre affected.
Our patented solution can be fitted in less than two minutes, bringing the same direct TPMS technology already proven in the passenger car and van markets to two-wheels for the first time.

This wireless system needs no programming and features a compact LCD screen which fits into a magnetic mount placed on a prominent part of the bike. The fully sealed and buttonless device can be quickly removed for security and is small enough to fit in a pocket. The display offers a battery life of up to three months, with the USB-powered inductive charger making it simple to top-up.
Once fitted, the unit displays the pressure of both tyres, in either psi or bar, toggling between the front and rear at set intervals.
Riders will see a low-pressure warning if a tyre becomes under-inflated by 15%, an enhanced alert when the pressure either drops by 25%, or if over-inflated by 35% or more. There are also alerts for high tyre temperatures or fast leakage (at least 2 psi per minute).

What I think:

tik

• Real-time tyre pressure data at last
• USB rechargeable – should last a couple of months
• No hard-wiring so fits in a couple of minutes
• Magnetic retaining dish secure off road
• Reads bar or psi
• Rated up to 7.5 bar (100psi+)
• Various warning displays
• Mk2 2020 kit paired up fast and worked seamlessly

cros

• In 2019 original and replacement units played up after a few days (see below)
• Doesn’t live-read from a static start (e.g.: overnight). Wheels need to turn first
• Expensive at £80, but there are both less elegant kits and pricier kits out there
• Green/yellow on black background hard to read unless under your nose
• Valve-cap lock-nuts complicate tool-free topping up of air
• The valve caps can be too shallow (not enough threads to grip the valve body)
• On the 2020 version the F&R display interval was too slow for a quick glance

Review
There are some metrics I like to know while riding: speed, engine temperature, fuel level are the obvious ones.
Now wireless technology has enabled inexpensive TPMS kits to display live tyre pressure readings, too. This is something that’s really useful to.

tpmsp1

I only realised how much I missed my Michelin TPMS kits once they both packed up mysteriously after a few days in Morocco.
A few days later I hit Tubliss tyre troubles in the middle of the desert. Luckily I wasn’t alone, there was a road 25kms back, and I was able to ride on the flat tyre slowly for hours to the coast and fit an inner tube. But being forewarned of low pressures or other tyre anomalies is what TPMS is all about.
I headed back north and a day or two later the tube slow punctured, then went suddenly after a dirt road short-cut pushed it over the edge. This time I couldn’t ride the collapsed tyre ten feet. Cue more laborious roadside repairs. This is why we like tubeless.
Because you never, ever get just a single puncture, I’d wisely bought a spare tube and was back on the road in 40 sweaty minutes. But especially with a slow puncture, with a TPMS I’d have been aware of it much earlier.

michtpms1
Lock nut is a faff

Michelin TPMS
The Michelin kit was made by Fit2Go TPMS, an official global licensee of Michelin. It was composed of two over-sized valve caps marked F and R. You screw them on finger tight to the appropriate wheel and lock them off with a valve stem nut (yellow tool and nuts supplied; left). The round display module sits in a stick-on magnetic dish fitted wherever suits your eyeline and an appropriate surface. Putting the module in the dish activates the display: usually battery level (said to last for 3 months) plus front and rear pressures which flash up alternatively every few seconds. You may not get a pressure reading until the wheels are turning. There are no buttons or switches; place the module in and out of the dish three times and the display changes between bar and psi, though it may take a few minutes to read.

Playing up
The first kit I had was fully charged by me, but on fitting in Spain took many hours of riding to pair up and show pressure readings. That would be inconvenient if you regularly removed the module to save it getting pinched. Once things worked, I left it in place. (As I was only out for a month, I’d not brought the USB recharge dish.) Fitted flat like a plate on a table, it didn’t budge on rough tracks but was hard to read at a glance; at an angle like the bike’s clocks would be better, and probably still secure. Or there’s always the tank bag. I’d also find black digits on a light background easier to read – like my Trail Tech temperature gauge, below right. Ten days in, after briefly removing it, the module went blank.
A replacement kit was brought out to Morocco, appeared to show a nearly full charge, and this time paired up in seconds and flipped to psi with no bother. But it also went blank after just five days. Neither unit was more than half discharged. I decided to put the original unit into the USB recharging dish from the replacement kit on the off chance, and it responded by charging from ¾ full (as it had been when it went blank). After just half an hour it was fully charged. Back on the bike it showed pressures in the original bar, and on changing to my preferred psi, displayed that too after about 20 minutes of being blank.
This suggests the display modules might discharge in a few days rather than three months, but while still indicating they’re more than half charged. Popping it in the recharge dish revives it, but it can be slow to pair up. This discourages you from removing it, if it indeed discharges when immobile. The blurb doesn’t advise removing it when not riding, but if it does discharge unused, it’s not reflected in the battery level status display.

Especially when travelling in the AMZ where – as I found – tyre troubles can leave you up the creek, knowing the state of your tyre pressures is less a convenience and more an important safety measure. Now, when I could swear I have a puncture, I glance at the TPMS and relax; it’s just the road surface and my paranoia. Very reassuring. Best of all, the easily fitted and recharged Michelin TPMS kit now makes maintaining your tyres at optimal levels a whole lot easier.
But because my two kits seem to play up, I’d wait a bit before buying one. They sort of work, but not as they should. I sent both kits back to Fit2Go for analysis and will update this review with any news.

Updated kit – 2020

Fit2Go sent me their revised kit which I used on my Africa Twin ride in Morocco in March 2020. The kit was welcome as again, I’d DIY converted my rear tyre to tubeless and so wanted to keep tabs on pressures. (The wheel lost 20% over a few days – fixed by adding Slime).
The kit looks identical but no problems at all this time. Without making an angle bracket, I couldn’t find a secure and legible position on my AT (red arrows, left inset below) so put the display and dish inside the clear lid of my tank bag (below right). The opaque vinyl made it hard to read easily but there was no danger of it falling off. Had that ride not ended prematurely I’d have worked out some legible-angle bracket in the cockpit or stuck the dish on top of the tank bag.

Places to fit on a AT

The only complaint is that the display intervals seem slower than before: 10 seconds on Front then 10 on the Rear. It means you need several glances to ascertain both pressures, whereas a higher flip-count might mean you catch both in one glance. I still think the display could be brighter, too. Other than that and the high price (which dropped for a while), all good.

Update 2021
I got my AT running again in October 2021 and needed to recharge the TPMS unit which after 18 months would have been flat. It recharged in less than two hours.
But when it came to topping up the tyres after 20 months, I had to faff about with that cheap valve cap locknut removal tool, and then found the rear TPMS valve cap wouldn’t screw on to the rear tyre’s valve body. I remember having this problem last time I topped up in Spain, February 2020. It felt like the TPMS valve cap was too shallow: there were not enough threads to bite onto the tubeless tyre valve before the pin in the cap pressed on the tyre valve stem and let the air out.
It could be a problem with whatever TL valve I have on my tyre. In Spain I’d managed to over-inflate the tyre and then cram the cap on before too much air escaped. This time in baking hot Marrakech, I didn’t have the patience to re-learn the knack and gave up on re-fitting the TPMS.
But travelling alone on road and trail over the next week, I sure did miss not knowing what my tyre pressures were doing, just as I’d miss not knowing what my fuel level or engine temperature were.
I’m not finished with TPMS yet: I will give it another go on the 300L once it gets its tubeless wheels.

Not enough threads in the TPMS cap to grip the valve before air is released

Tested: Bell Moto III review

See also:
Airoh TR1
XLite X420 GT
Bell Mag 9
HJC i30

OLYMPUS DIGITAL CAMERATested: Bell Moto 3 helmet

Where: Spain and Morocco

Cost: £185 ebay

Weight: 1650g

In a line: Looks cool and works great with Qwik-Strap goggles, but not practical.

OLYMPUS DIGITAL CAMERA

What they say
The iconic legend has returned! When the original Moto-3 was created back in the late 70s it was a product ahead of its time. Quickly becoming the industry standard in performance and style, today’s Moto-3 is everything it was style-wise, with the added benefits of modern safety and production advancements. From the fiberglass composite shell to the EPS-lined chin bar, we left no detail unpolished. The solid colors use the original style terrycloth liner, which is removable and washable.

What I think:

tik

• Looks cool
• Feels light
• Chin guard not too close
• No visor hinges or other fittings to break
• Works well with Qwik-Strap goggle straps
• Good price, compared to recent X-Lites
• Yellow

cros

• D-rings a bit fiddly and pin-down stud came away
• Not full visor protection; the old bug or chip will get through
• As unaerodynamic as it looks


OLYMPUS DIGITAL CAMERA

Review
For years I’ve been mostly wearing a costly open face X-Lite 402 or an inexpensive Bell Mag 9 with full face visors. Best thing is the great visibility and protection plus you leave it on to talk to people (less faff with glasses, too). But sometimes I miss a full face’s ability to be securely cable-locked to the bike via the chin bar (doing so via the D-rings never fooled anyone). And it has to be said thee types lids look good too.
I don’t usually get on with ‘in your’ full face lids like an X-Lite X551 I tried, but after  few thousand miles the Bell Moto III has suited me just fine. The wide aperture and the fact that the chin guard isn’t right in against your mouth makes it unobtrusive on the road while not feeling too claustrophobic when not on the move. Usually I can’t wait to get a full face helmet off my face.
I’ve been riding a Himalayan with a low screen at no more that 65mph, and at that speed buffeting or neck strain hasn’t been a problem. There’s no annoying bobbing around and the wind noise is what you’d expect when riding a motorbike.
Inside the lining has a nice, towel-like surface (terrycloth they call it) and all of it removed and refitted easily after washing – not all lids manage that. Only the double D-rings can be a bit fiddly – I seem to recall the X-Lite does it better.

bell84

I had an original, but beaten up old Moto III in the early 1980s – a nice-looking lid but as cozy as a brick-like inside. Goggles were always a bit awkward to move easily one-handed while riding. Decades later we have Qwik-Straps which I tried in Algeria last year and bought again for the Moto III.

bell1

As you can see in the pictures, two short straps fit in your regular goggle anchor slots, then two separate attachment pads glue to the side of your lid. One is velcro (best fitted on the left); the other is a clip-and-pivot stud. Clip the right strap to this pivot then pass the goggles over your face attach to the velcro. Undo the velcro and the goggles swing down to the right. Or – as I got used to doing – unvelcro and swing the goggles over to the back and re-velcro. Goggles are securely out the way but not dangling. It’s a clever system which definitely helped make the Moto III a much better travel lid than I expected.

I enjoyed riding around in my Moto 3 but after one final ride in Morocco in 2025 (below), I sold it. For what I do: stopping frequently, riding slowly, taking pics and making notes, an open face full visor lid like my HJC suits my needs much more.

Himalayan: Impressions at the edge of the Sahara

Himalayan Index Page
OLYMPUS DIGITAL CAMERA

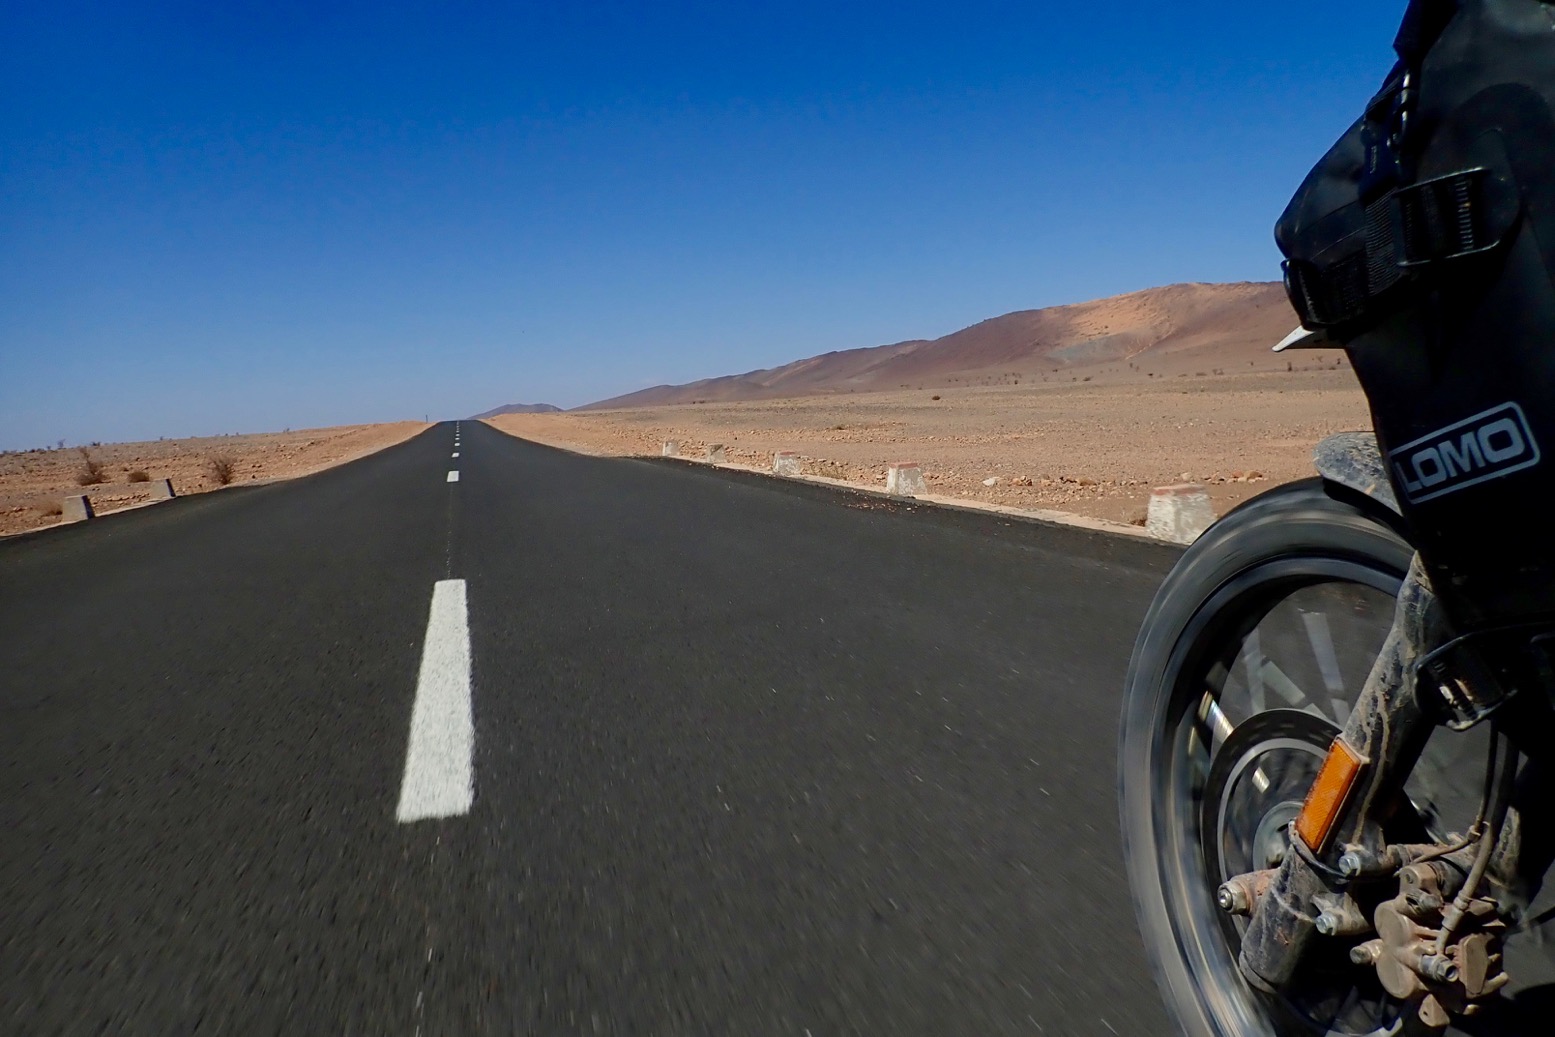
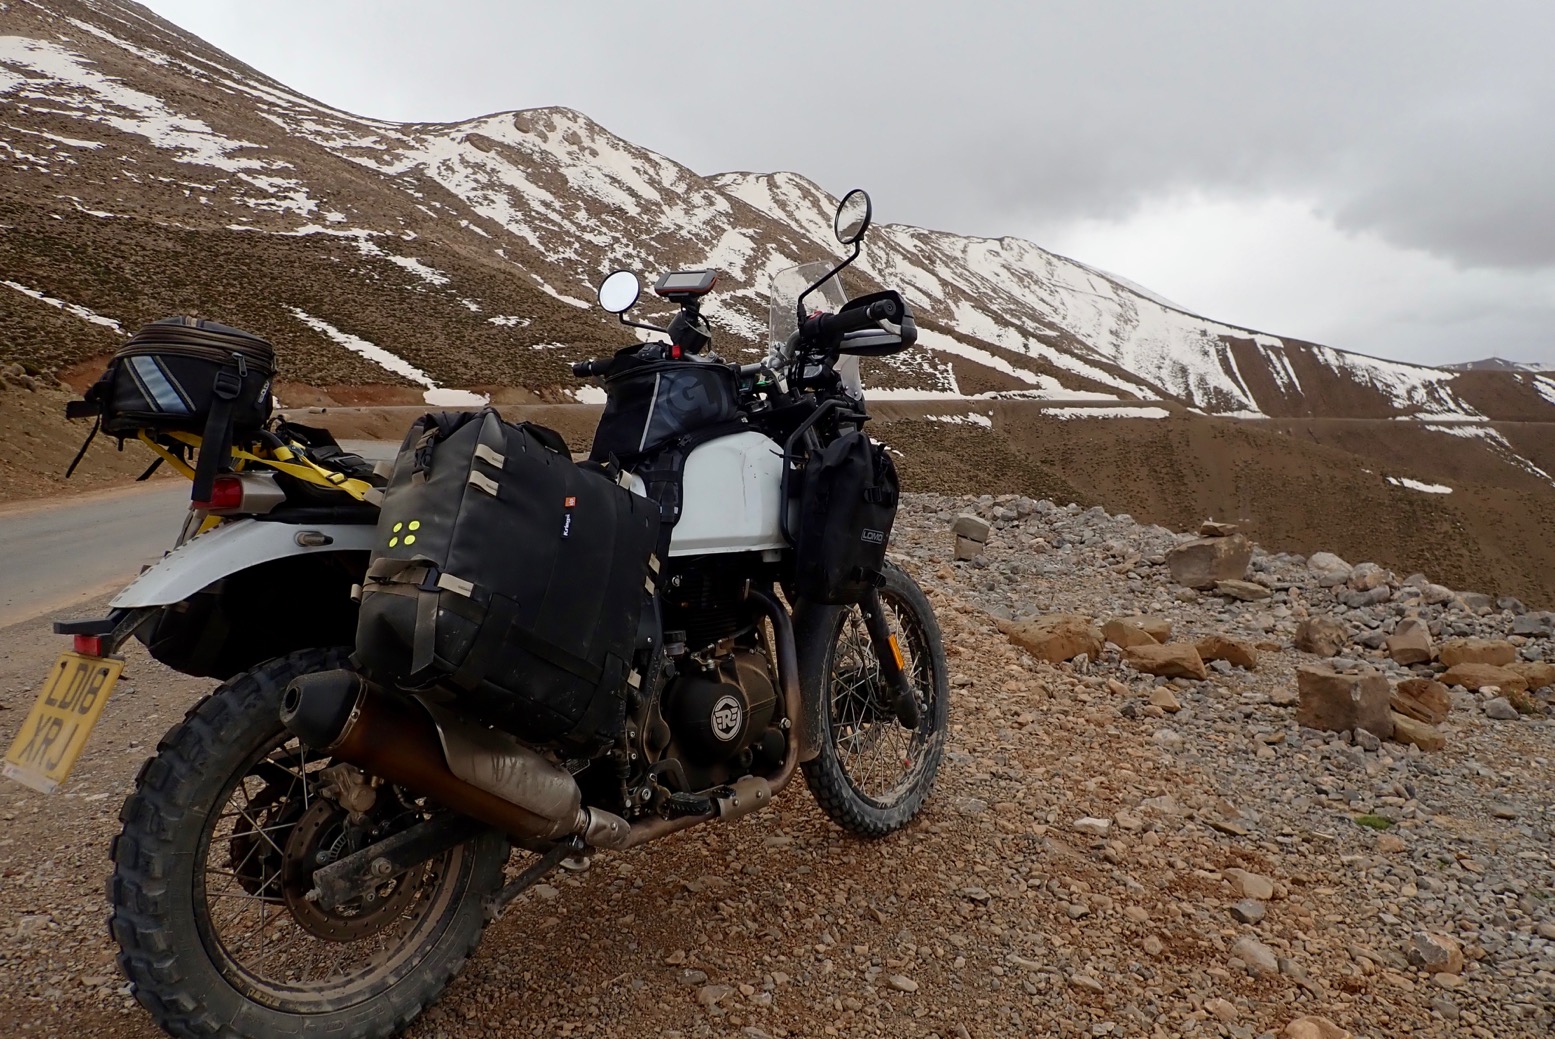
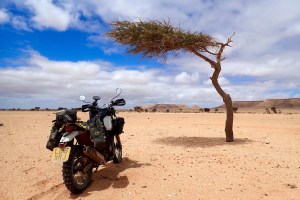
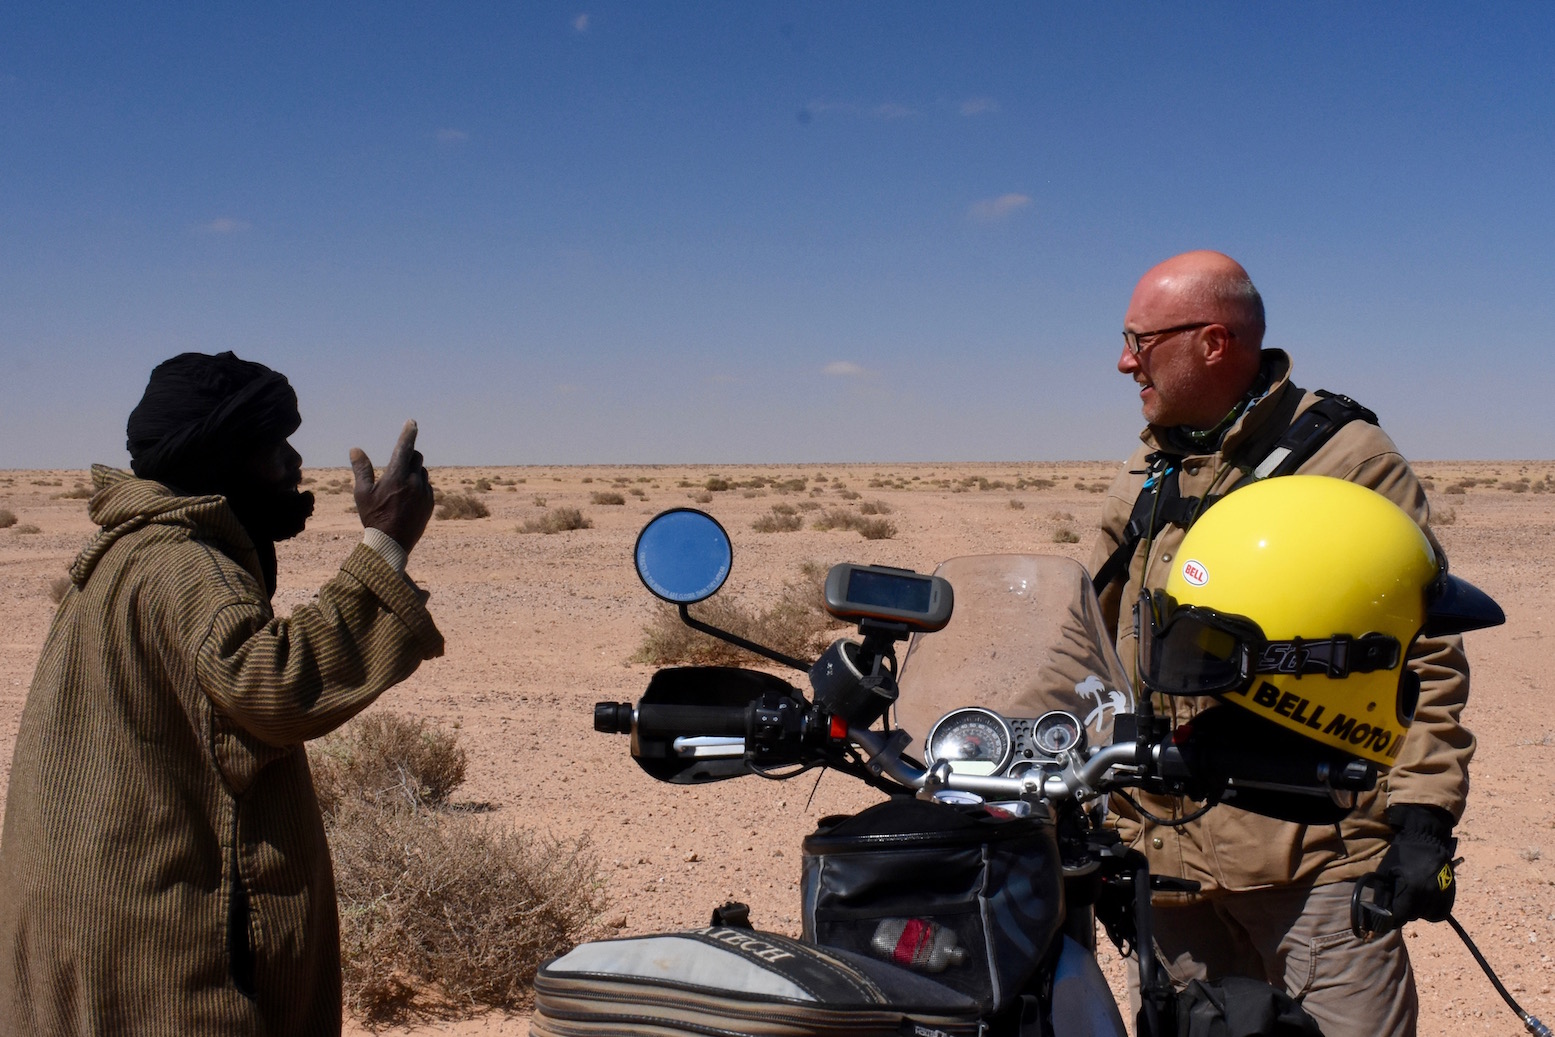
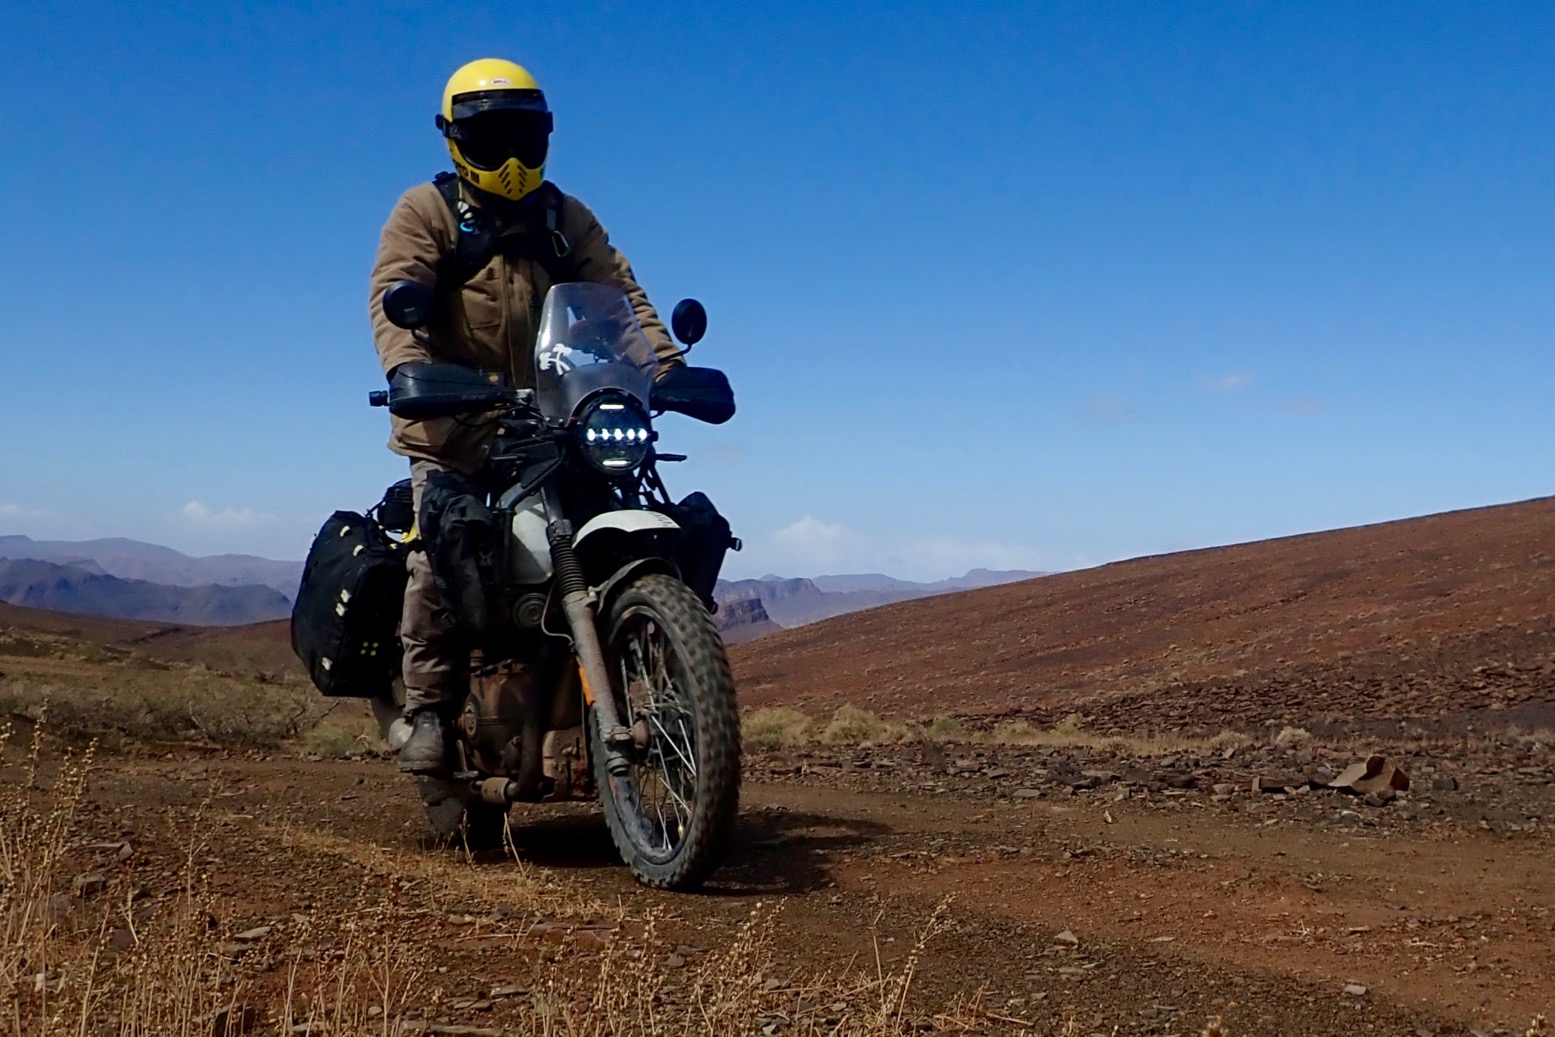
Just got to the desert about a 1200 miles in. Two wheels on my wagon and the Himalayan still humming along. Hard to believe it hasn’t missed a beat running down from Malaga over the High Atlas and down here to the edge of the Sahara. The tension is unbearable!
Fuel economy has slowly improved and is now averaging 77mpg Imp (about 27.2kpl; 64.1 US). Bear in mind since leaving the autoroute from Tangier I rarely go over 60, where that’s possible. At yet at these modest speeds the REH is a very satisfying and undemanding ride. It’s an ideal low-profile machine for Morocco, if not so much the getting here. That’s because the seat still needs work; an easy enough fix.

OLYMPUS DIGITAL CAMERA

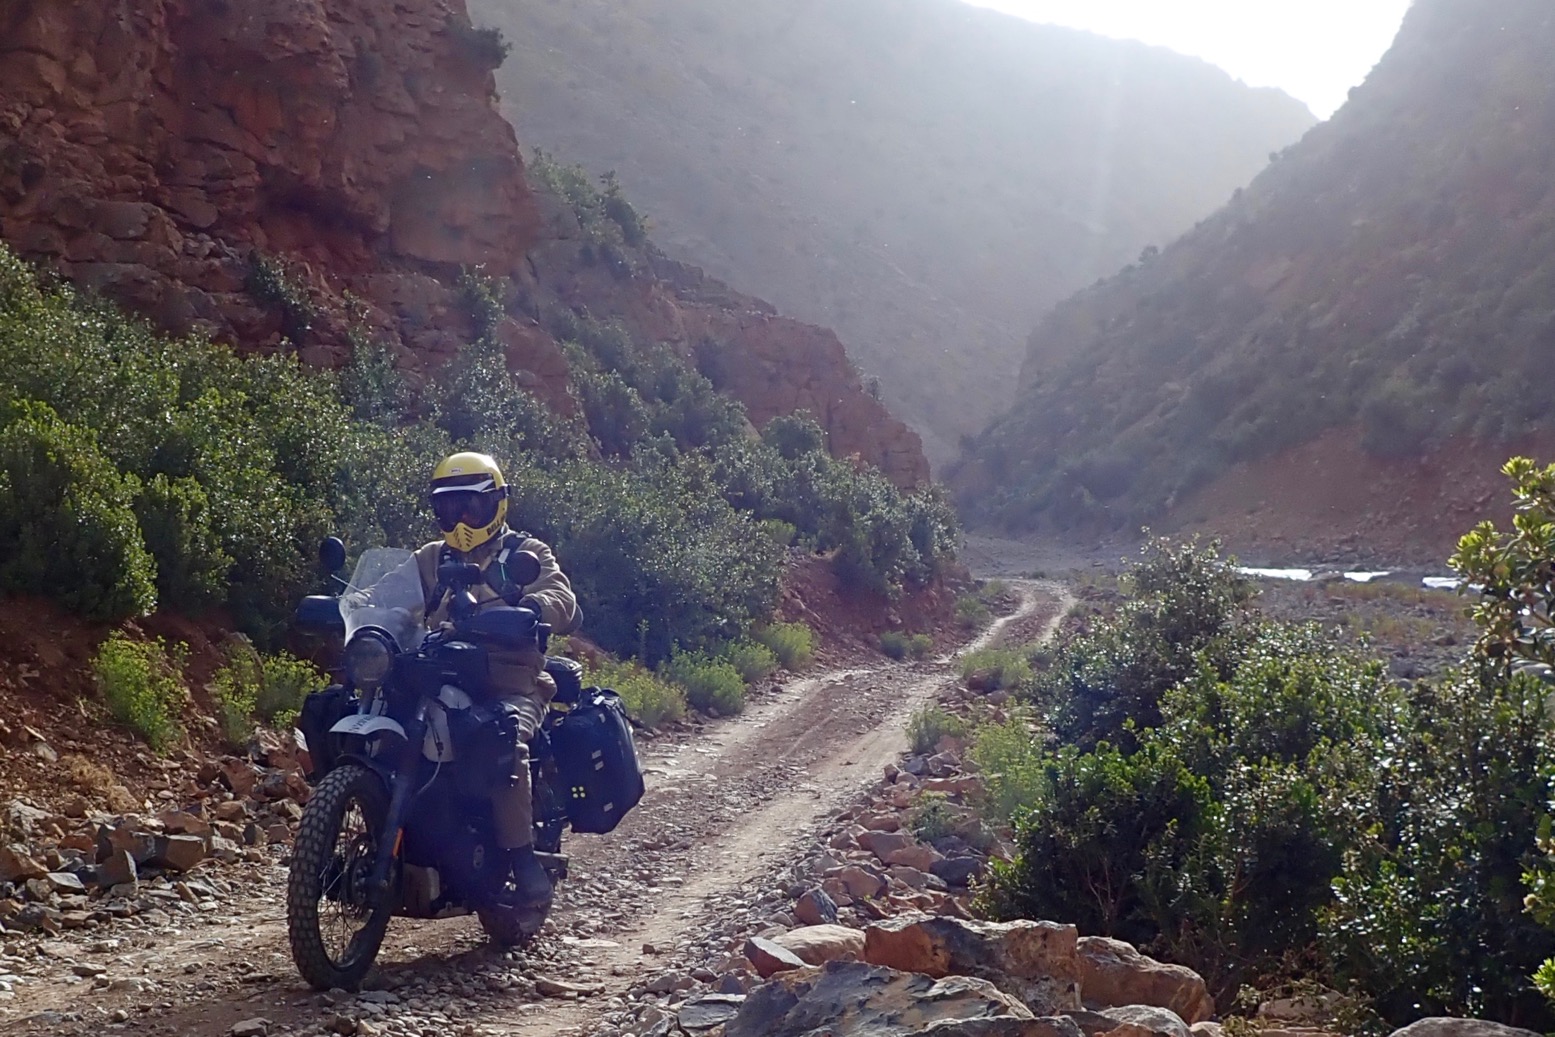
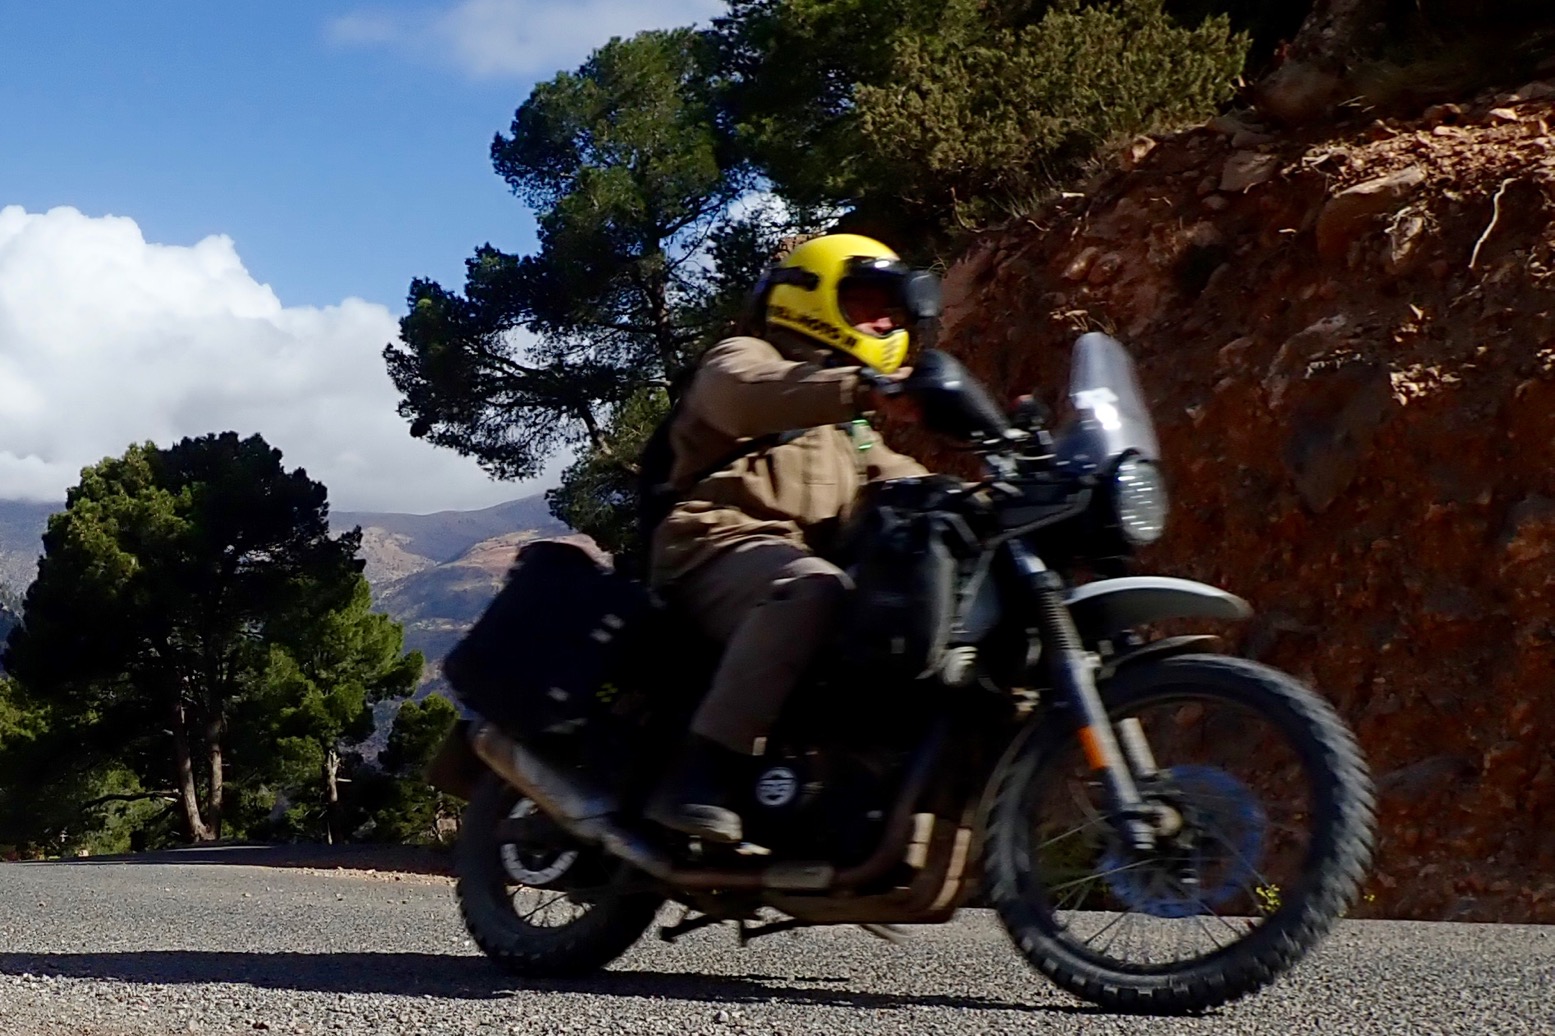
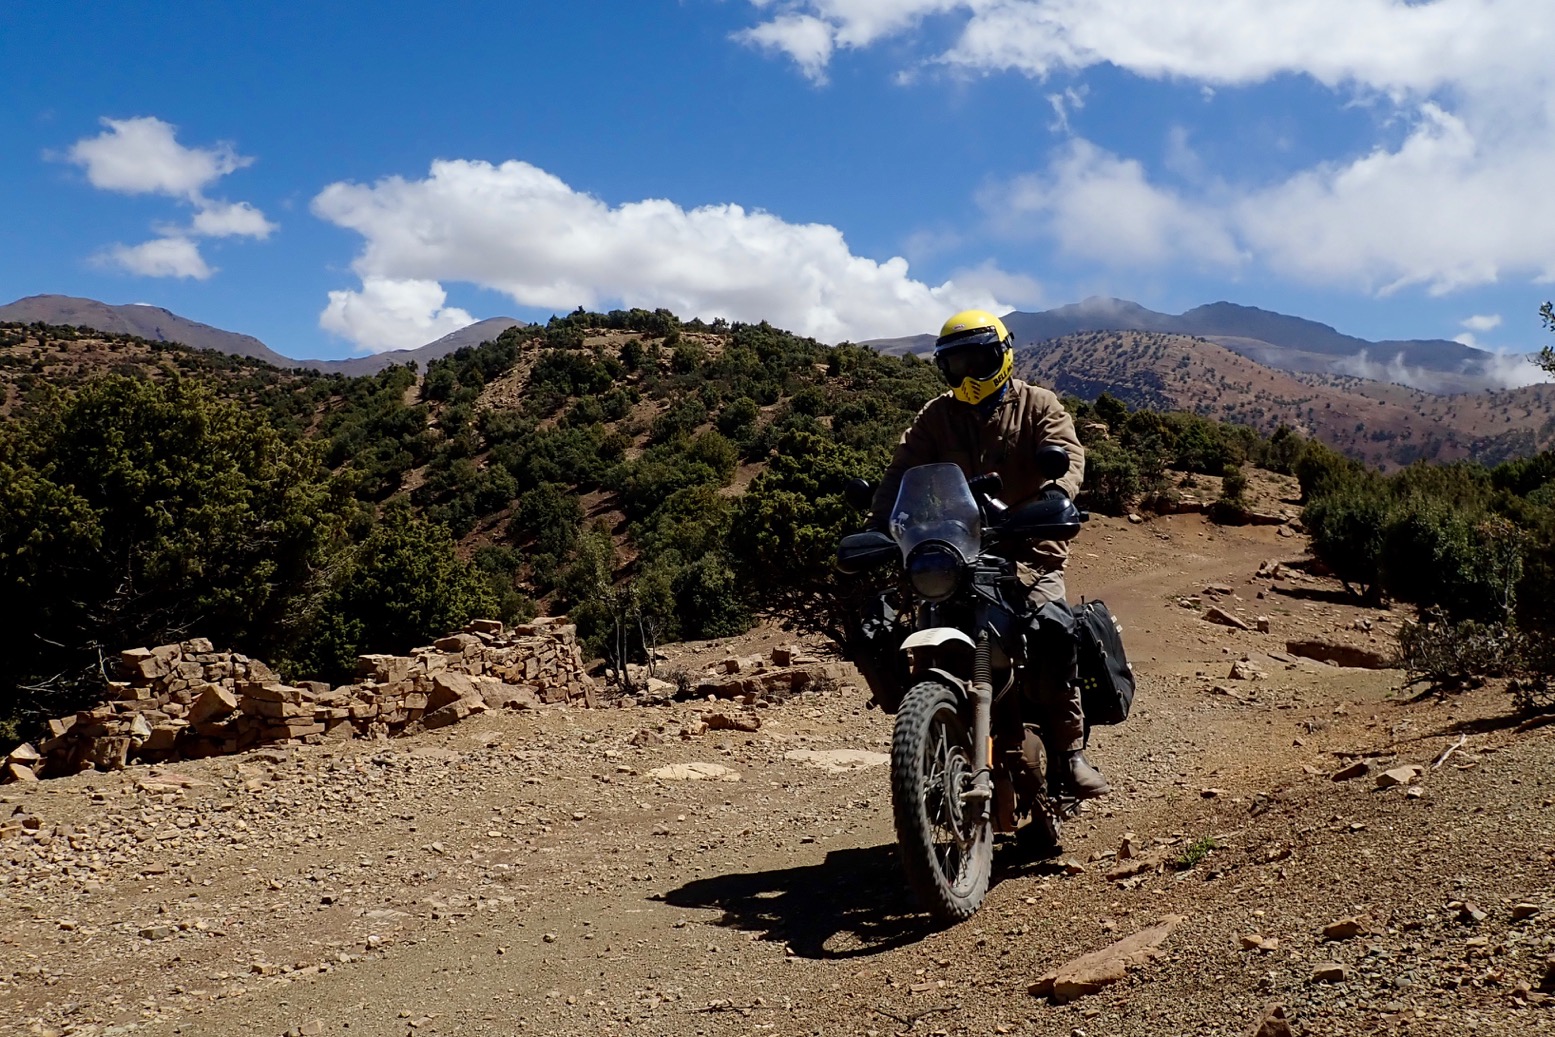
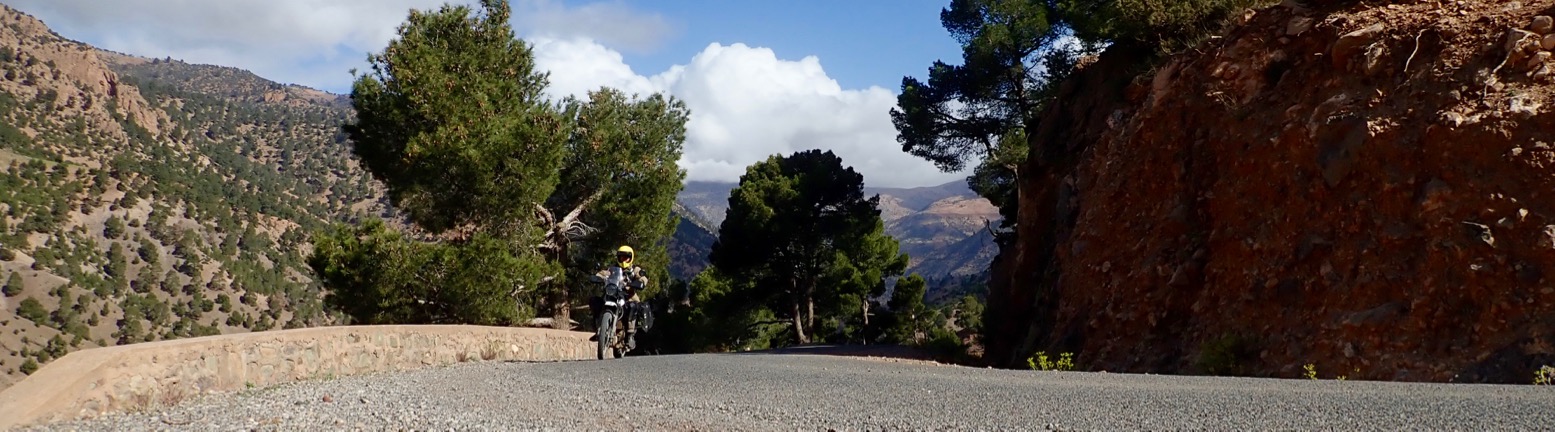
I’m really impressed how well this thing rides on the dry stony mountain tracks which sum up most of ‘mainland’ Morocco. It’s so effortless you don’t even notice at first. Can’t say the same of a 310GS which I’ve also ridden out here a lot: more concentration required on the dirt. The 310 motor and brakes are more suited to shredding tarmac canyons – another adventure-styled bike that’s not really an off-roader. The REH doesn’t look like anything you’d know – maybe a civil partnership of Rokon and MZ.
It must be down to the Him’s combination of low CoG, torquey, long-stroke motor, wide gearing and 21-inch front, plus on my bike, the Anakee Wilds and YSS shock which help make it one of the best bikes I’ve ridden in Morocco for years. On one epic high mountain day I even managed to zing the centre stand on the supermoto track they call the to Sidi Ouaziz.

OLYMPUS DIGITAL CAMERA

Brakes are fine on the dirt. The weak-on-road front is as you’d want; the back a tad sharp, but that’s normal, easy to manage and even useful.
To me the ABS is not an issue at the speeds either I or the bike can manage on the dirt. If it engages you probably need to slow down. Both wheels lock easily on really loose stuff before the ABS even reaches for the alarm clock. On the road I’m sure there will come a day when I welcome it.

OLYMPUS DIGITAL CAMERA

My proof-of-seat concept (2 x 20mm foam sandwich under a Cool Cover) is an improvement but not there yet. Two days over 400km more or less non-stop and I wonder if the foam slabs are crushed out already. It’s worse on rocky dirt where I tend to stand only when I must. The aerated Cool Cover may help, but it’s slippery and tends to slide me forward. Next version wants to be more level and maybe more foam.
I think what’s still a short distance between seat and footrest (for me) makes levering the body upwards harder that it would be on a KTM450 for example. Removing the footrest rubbers will add an inch more leverage while the 2-inch rise in the bars is nearly just right for me.

OLYMPUS DIGITAL CAMERA
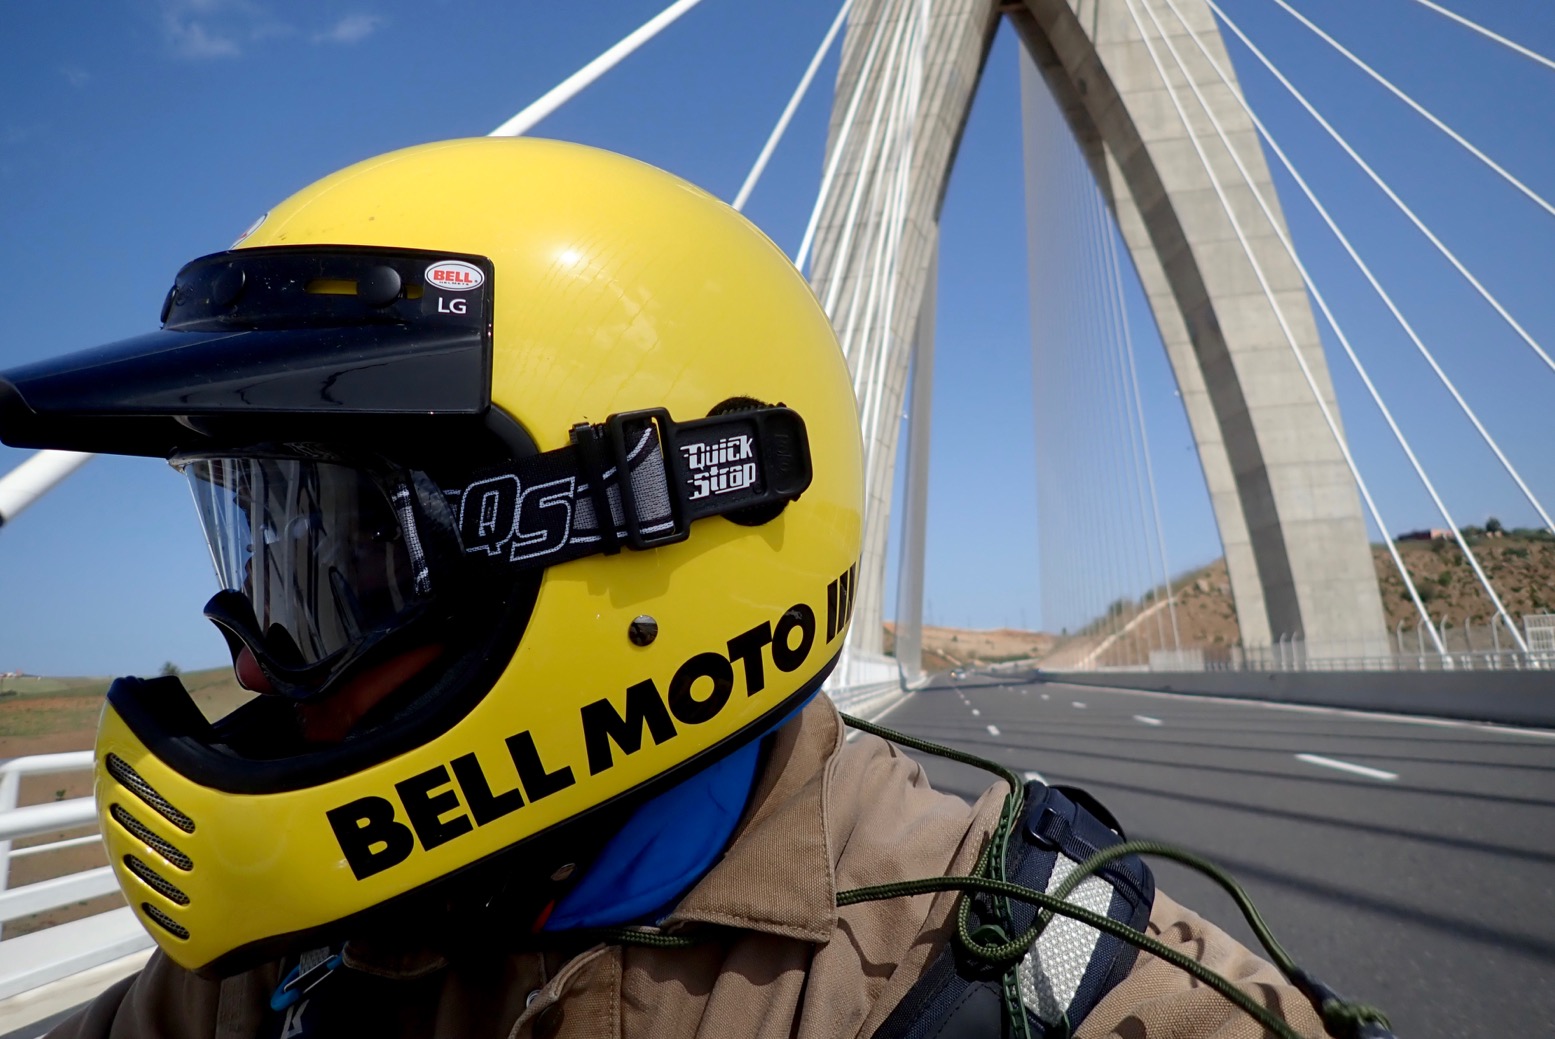
Even though I’m wearing a Bell Moto III I don’t find the buffeting from the short screen intrusive at 65 – my self-imposed max until I know better. It needs to be about 4 inches higher to push the wind over my head but I wonder if one of those air lip/dams might also help lift the airstream. I bought the MRA one but it was too wide to fit without drilling or other bodging. Of course on the dirt the screen is as unobtrusive as you want which is why a spoiler is a better idea than adding height.
The Enfield catches you out with firm stock suspension – the opposite of most of my recent bikes, especially the Jap ones. I bought a YSS shock and fork preloaders as soon as I got the bike, and the YSS shock works as well or better than the Hyperpro (XCo, WR), Tractive (CB500X) or Wilber (XSR700) I’ve run out here recently. All it needs is a pricey HPA to be truly useful, because adjusting preload will be a right  pain (unlike a 310GS, for example).
I suppose they’re now a bit shown up by the YSS shock, but road and trail the RWUp forks are just right for my sort of speeds and load. The preloaders are set on zero – rats! that’s ten quid down the drain.
Because my Anakees are knobbly I tend to leave them at road pressures on  the trail, which makes the suspension feel harsher than it is. I know dropping just a few pounds will make a difference, but I tend to endure rather than fiddle, until necessary. Fyi I’m 95kg (210lb) and my gear is probably another 20%.

OLYMPUS DIGITAL CAMERA

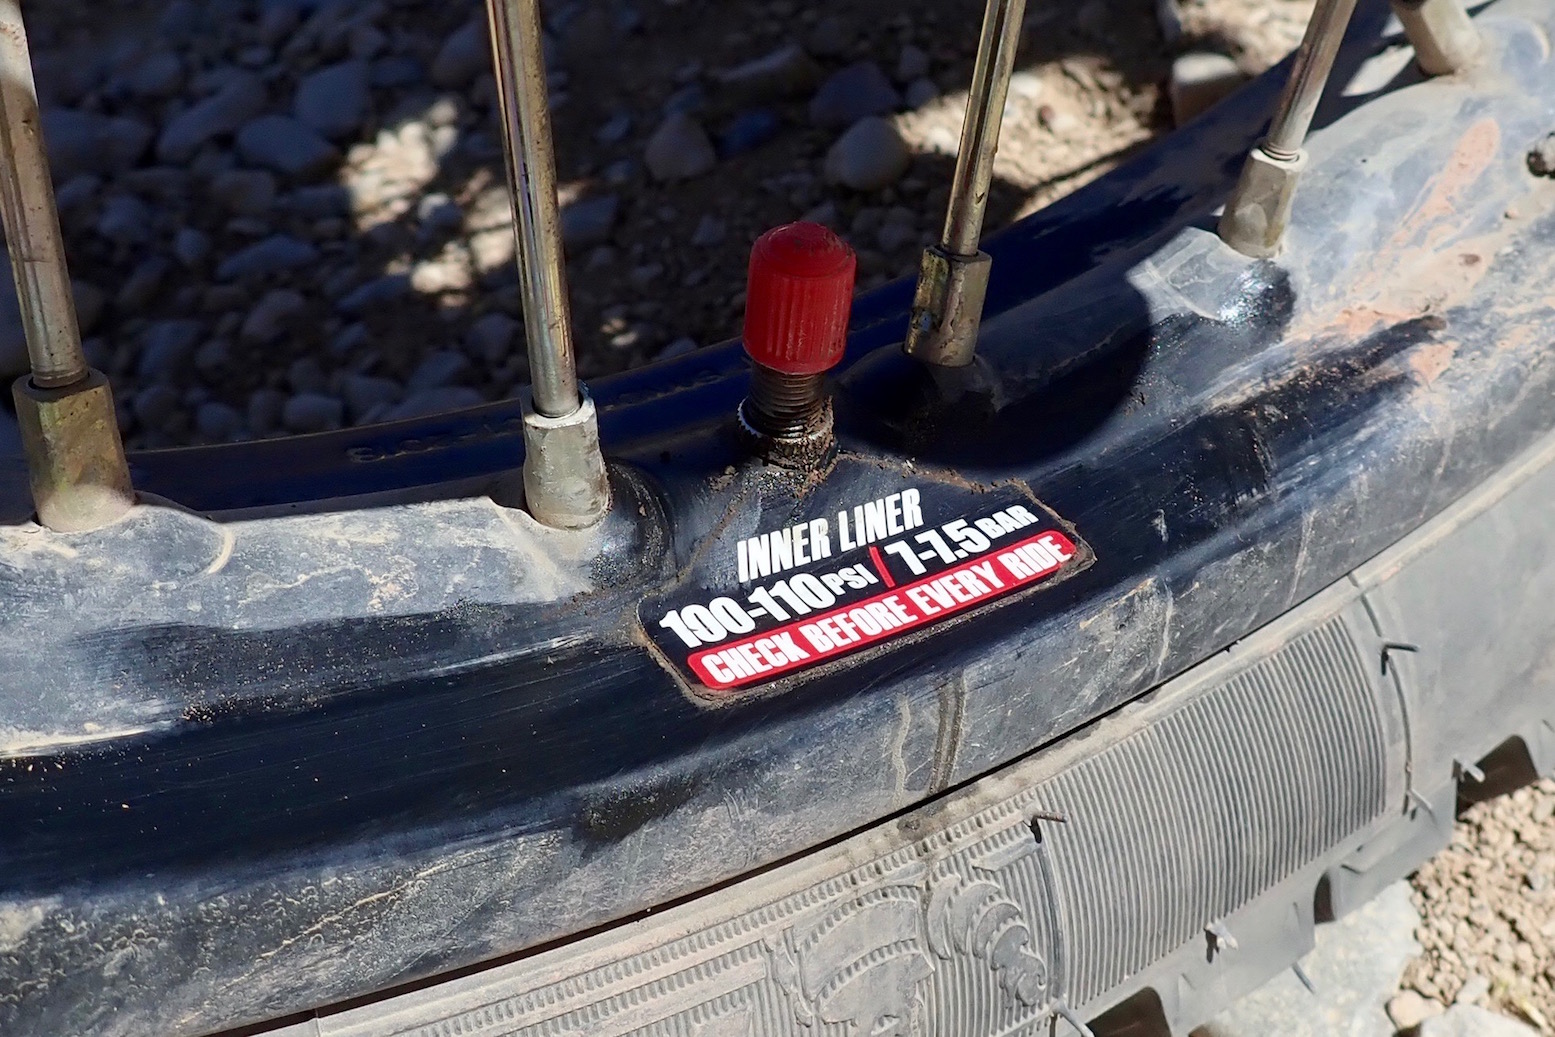
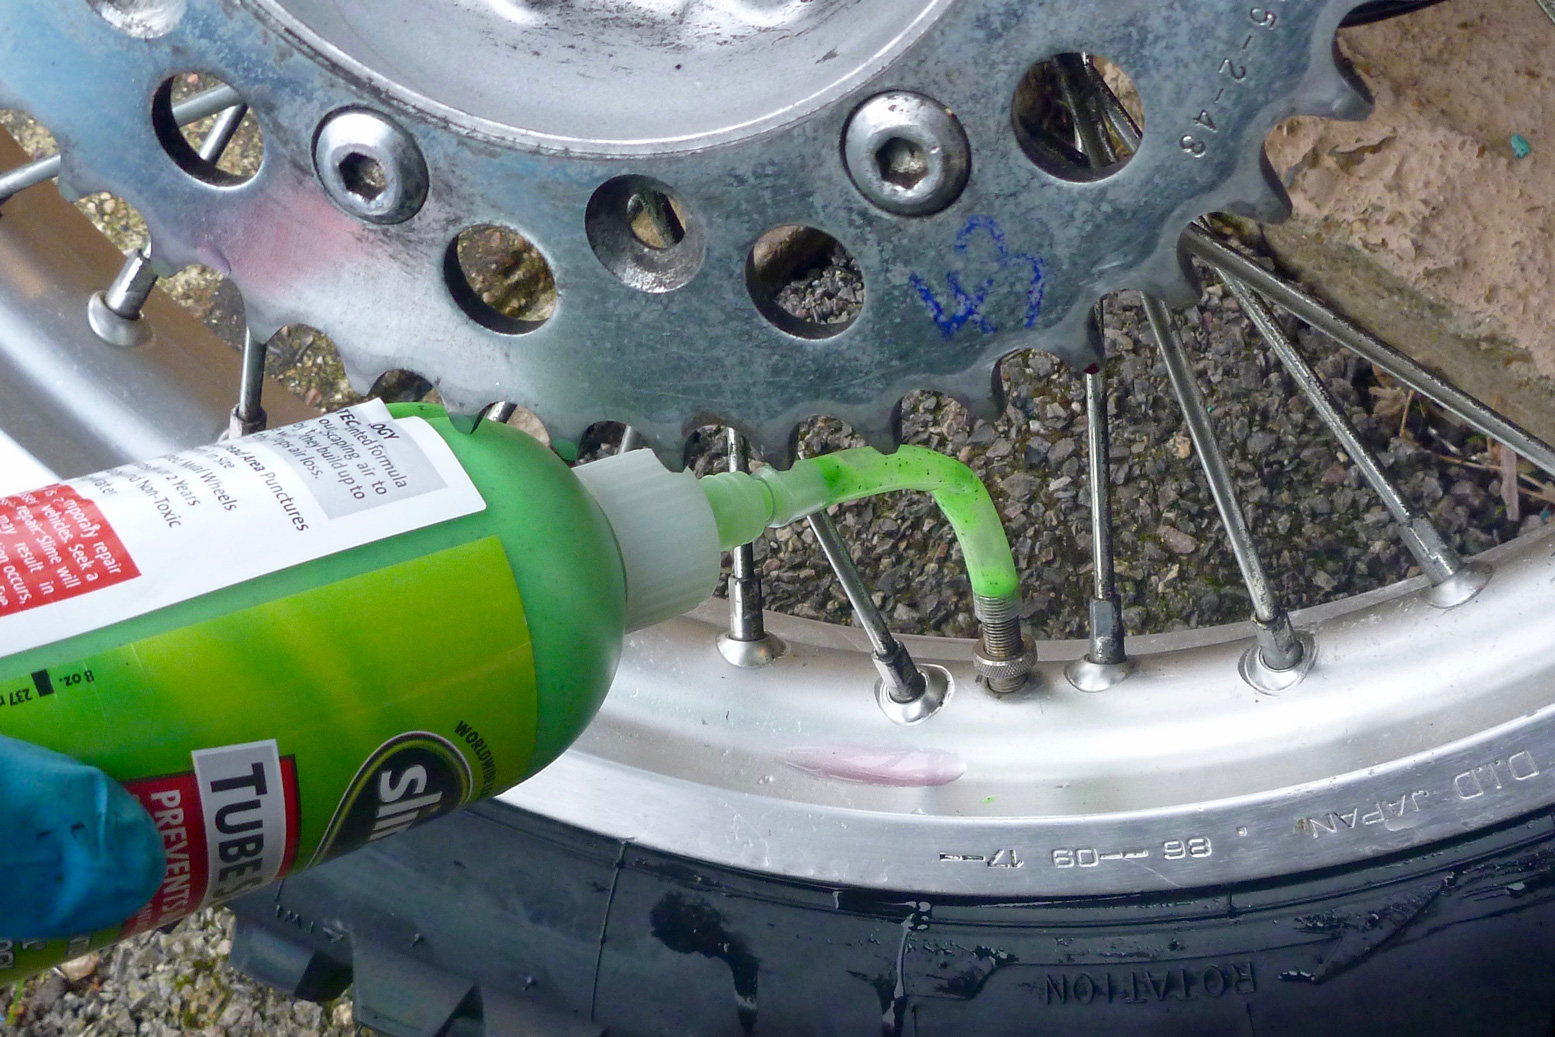
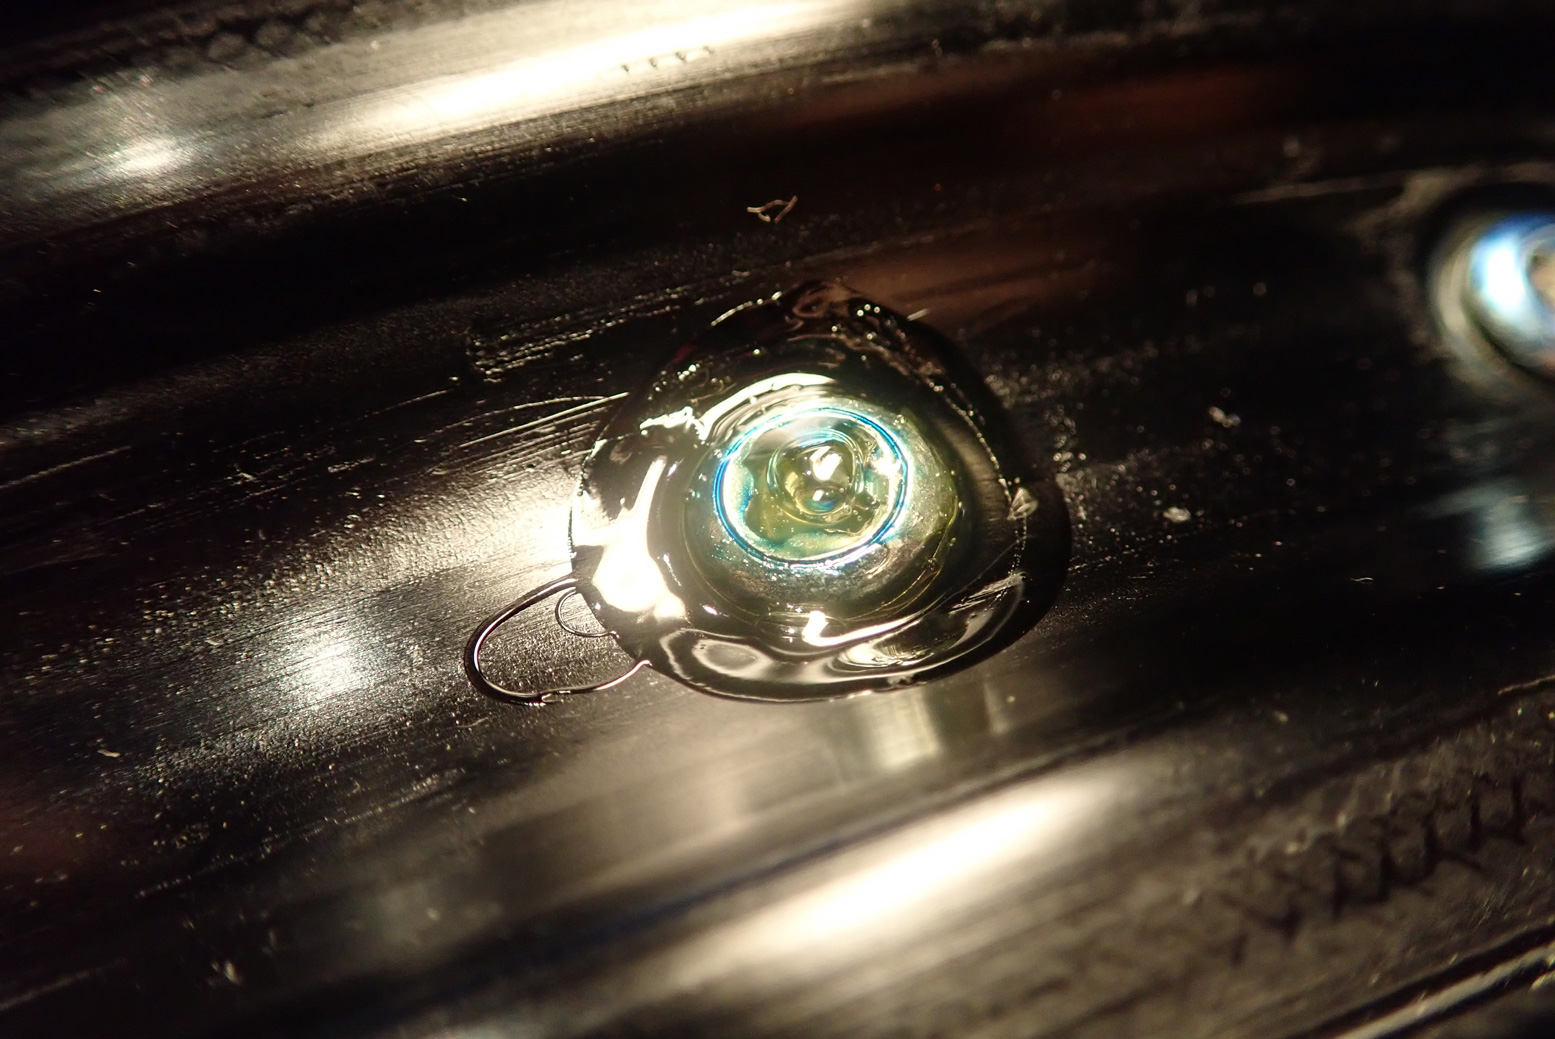
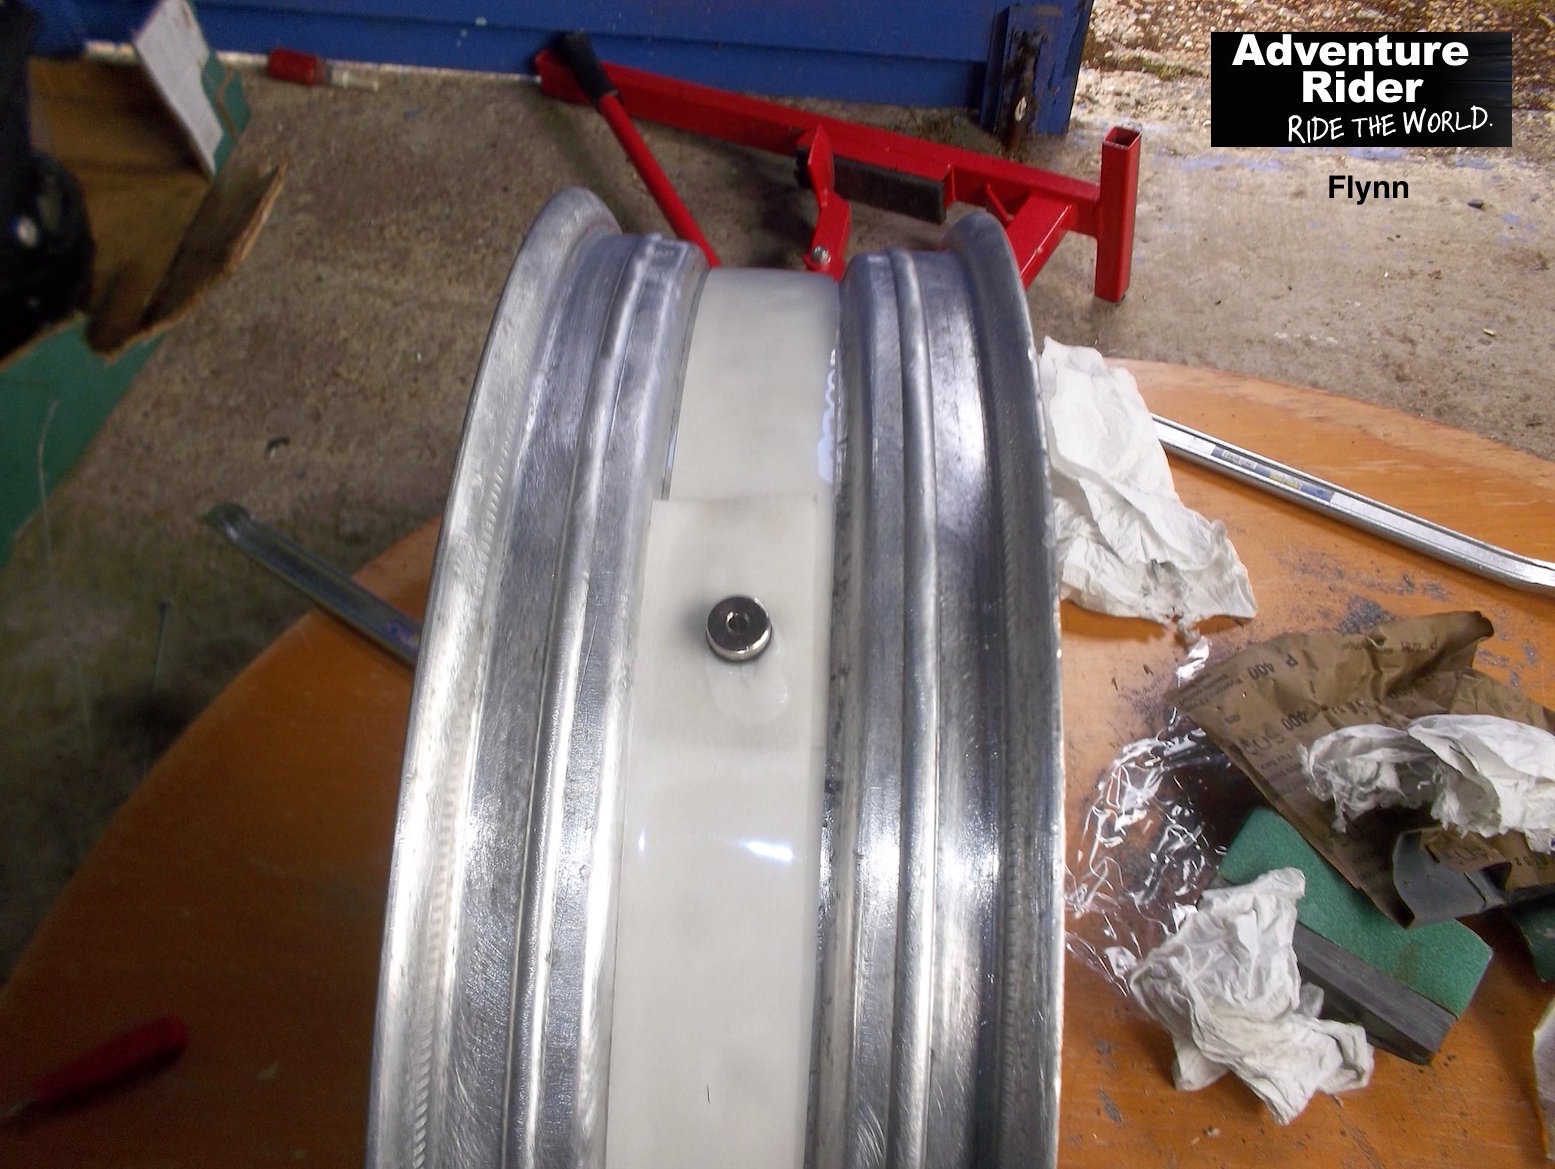
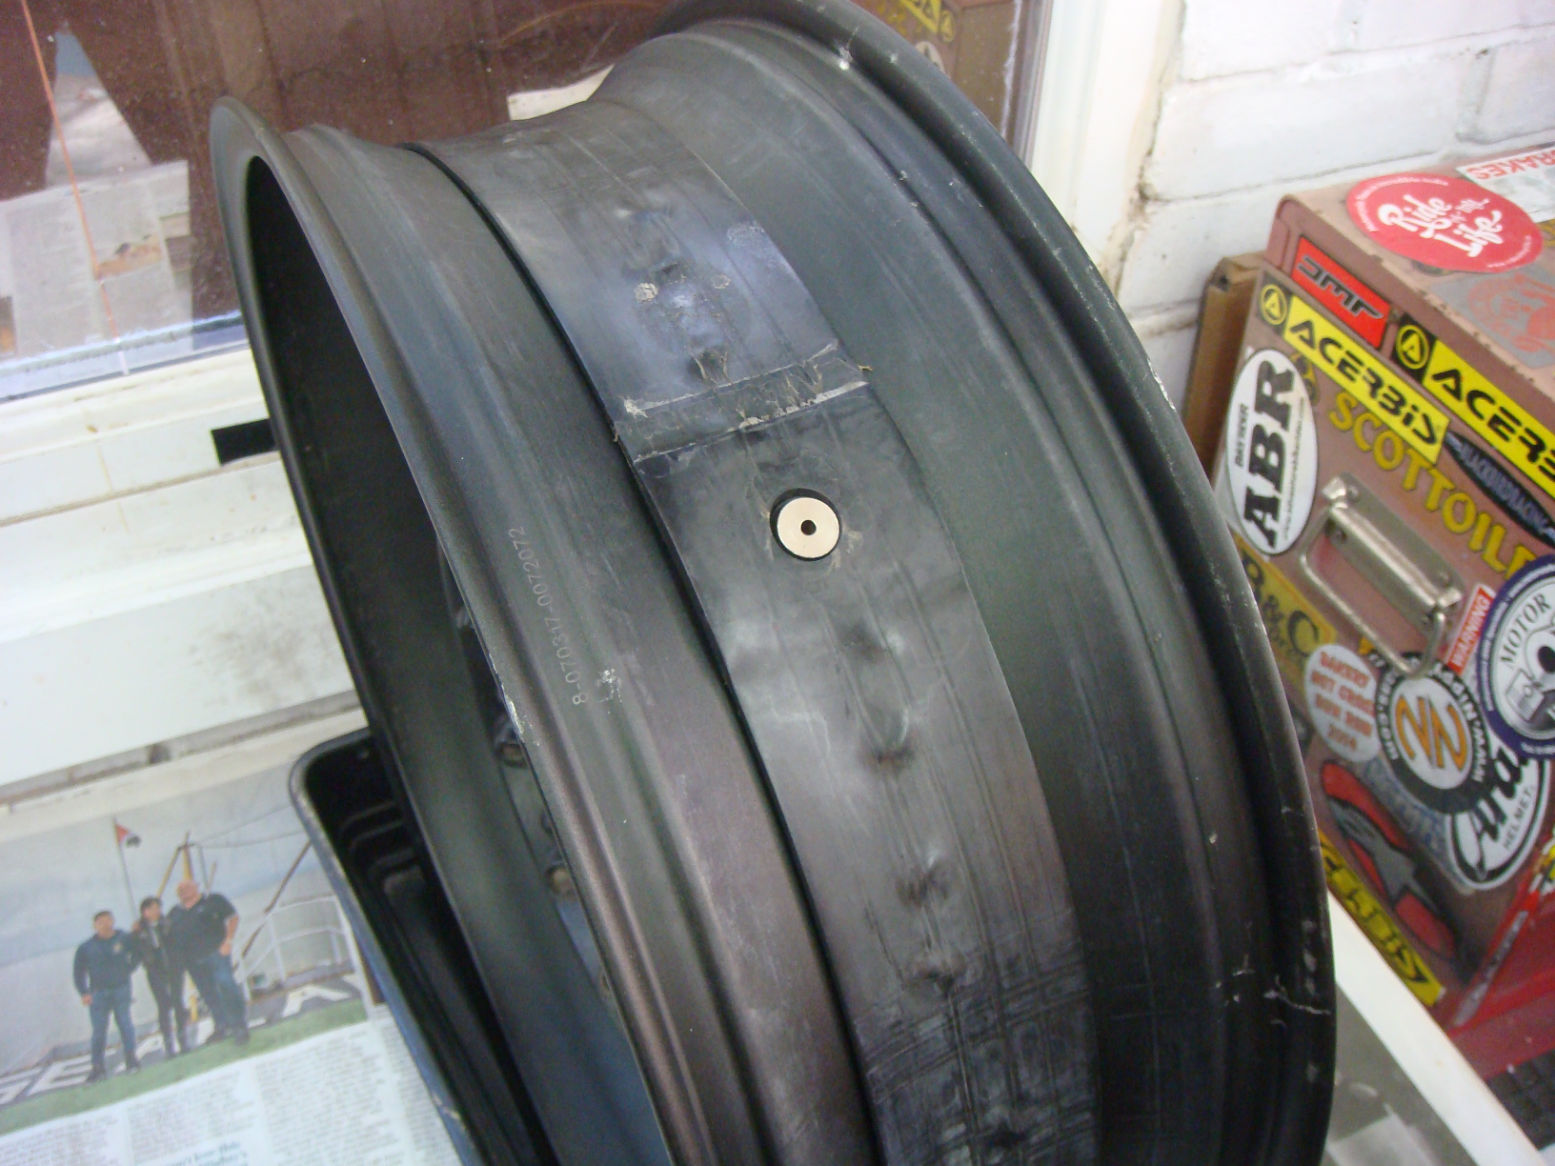
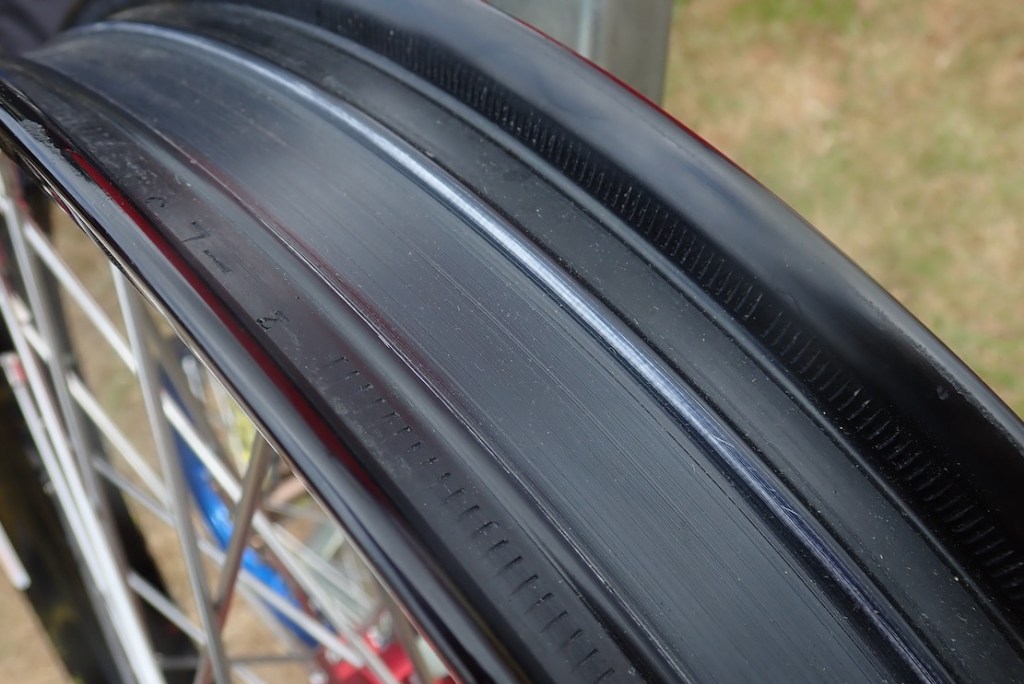
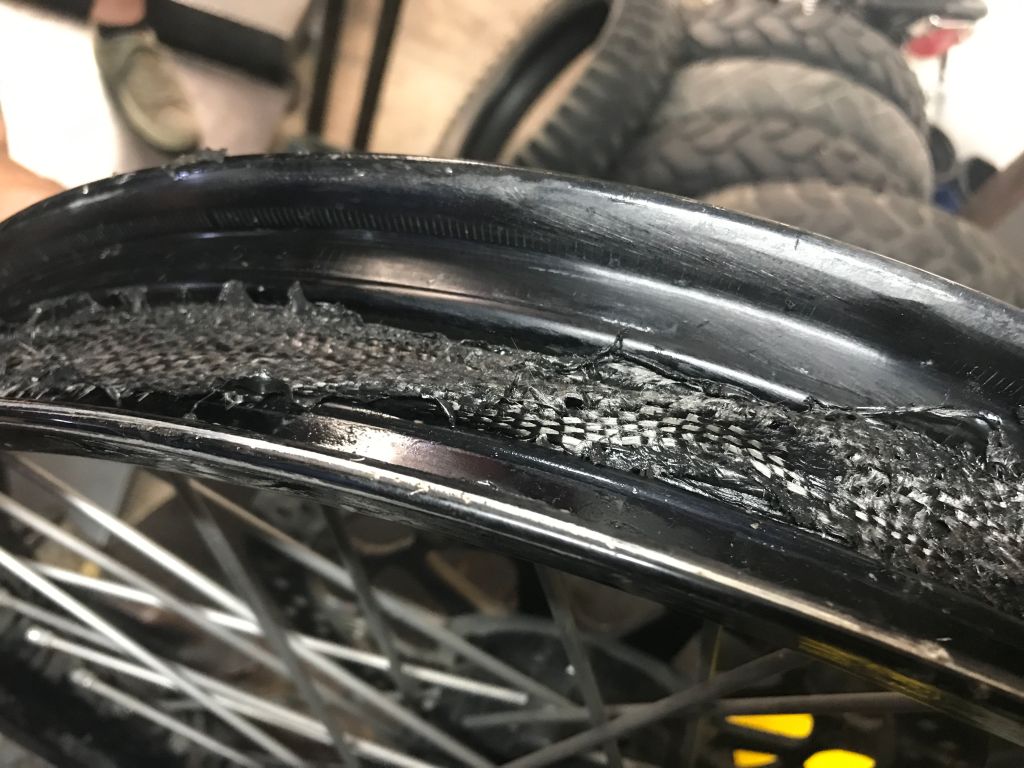
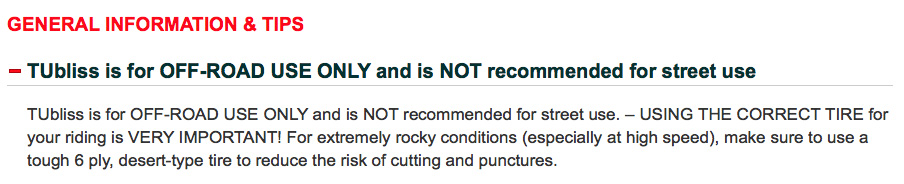
My tubeless tyres hadn’t lost any air on collection but the back (vulcanised band) lost a couple of pounds after a few days then settled down. The Tubliss front was doing the job until I saw a bit of Slime oozing from the red valve which means it’s getting past the 7-bar high-pressure core. I tried to top it up, but the crumby garage hose was split and purged more air than it put in. Don’t meddle until you must! Now I realise my pressure gauge doesn’t read to a lofty 7 bar (100 psi) and my Cycle Pump has no gauge. I pumped it up for 3 minutes which hopefully has got up to 7 bar until I find a better garage pump. I said this years ago when I fitted it on the GS500R:  Tubliss is a pain for overlanding rather than rec dirt biking. Or maybe I should have anticipated the need for a gauge that reads 7 bar +…
Out of Malaga the fully charged Michelin TPMS took many hours to pair up and show readings, but since was very handy in monitoring the experimental tubeless tyre pressures. Sadly, 10 days in it appears to have packed up – not even the battery level is indicated.
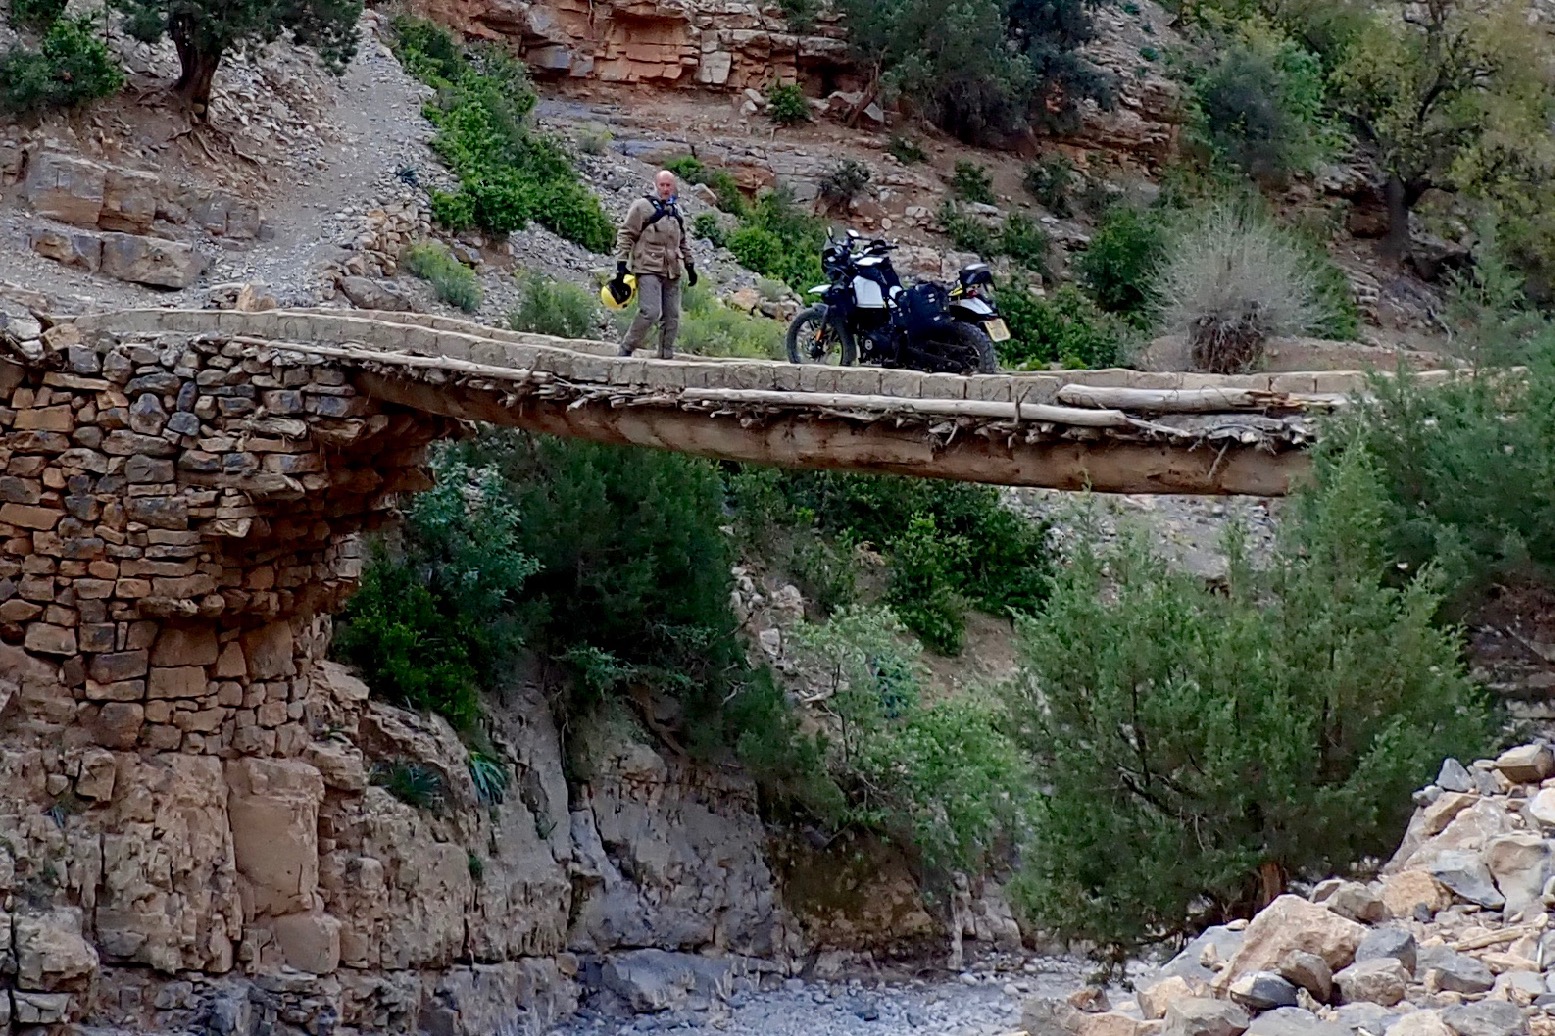
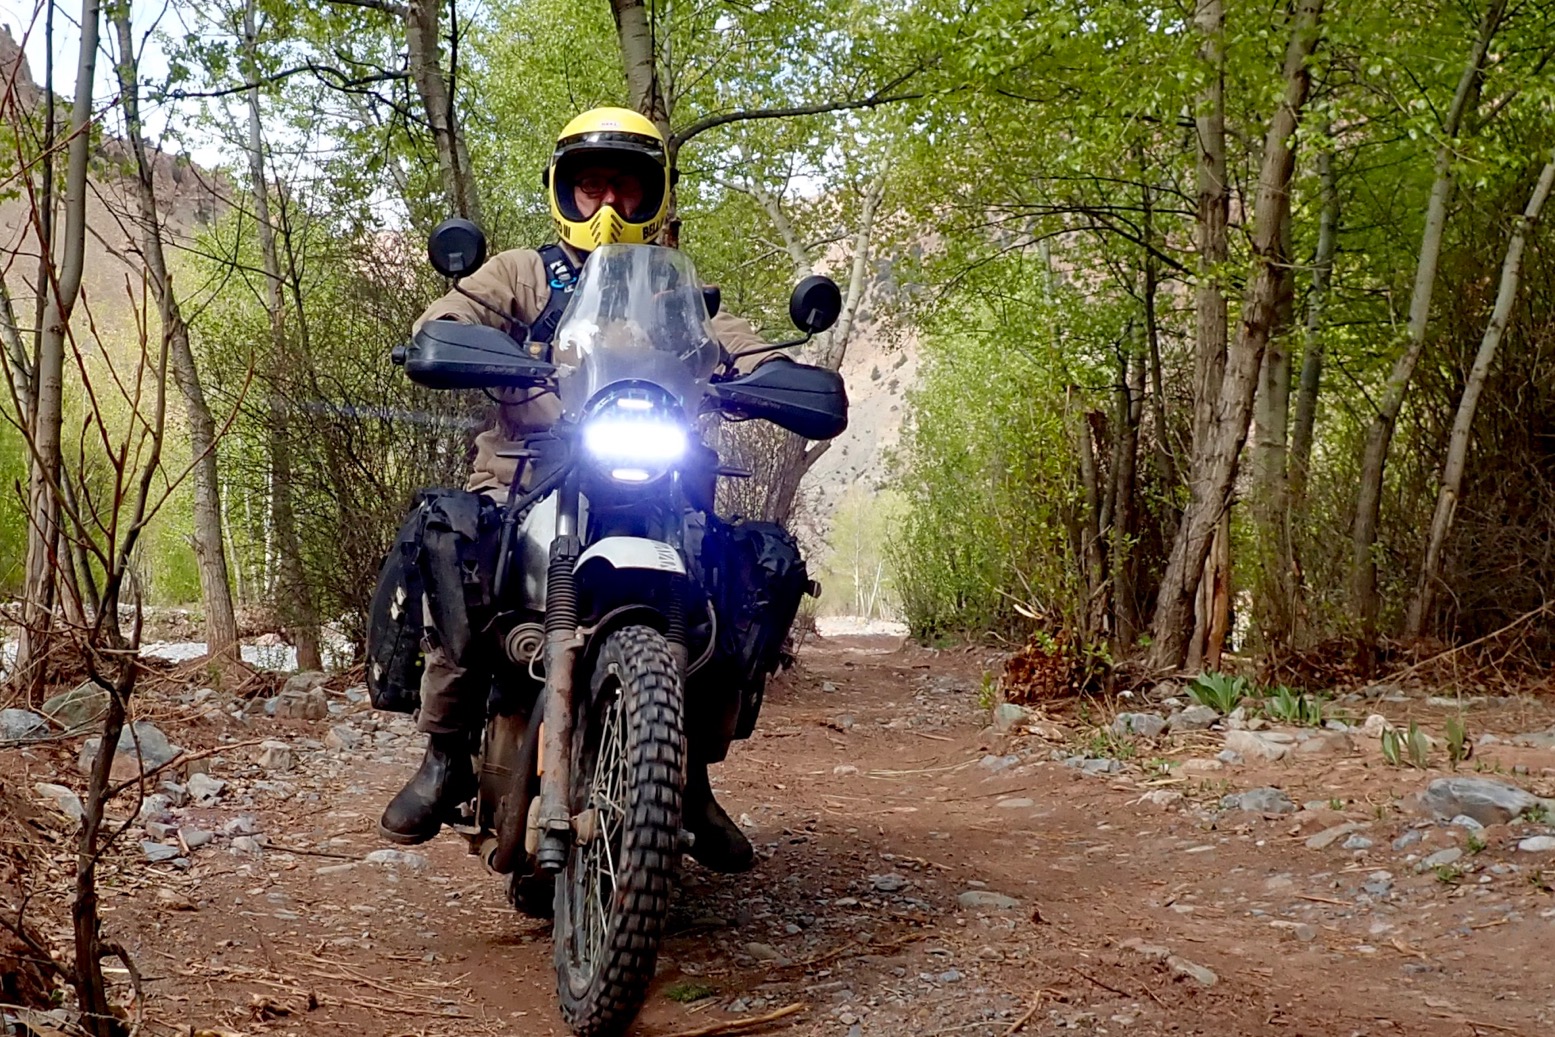
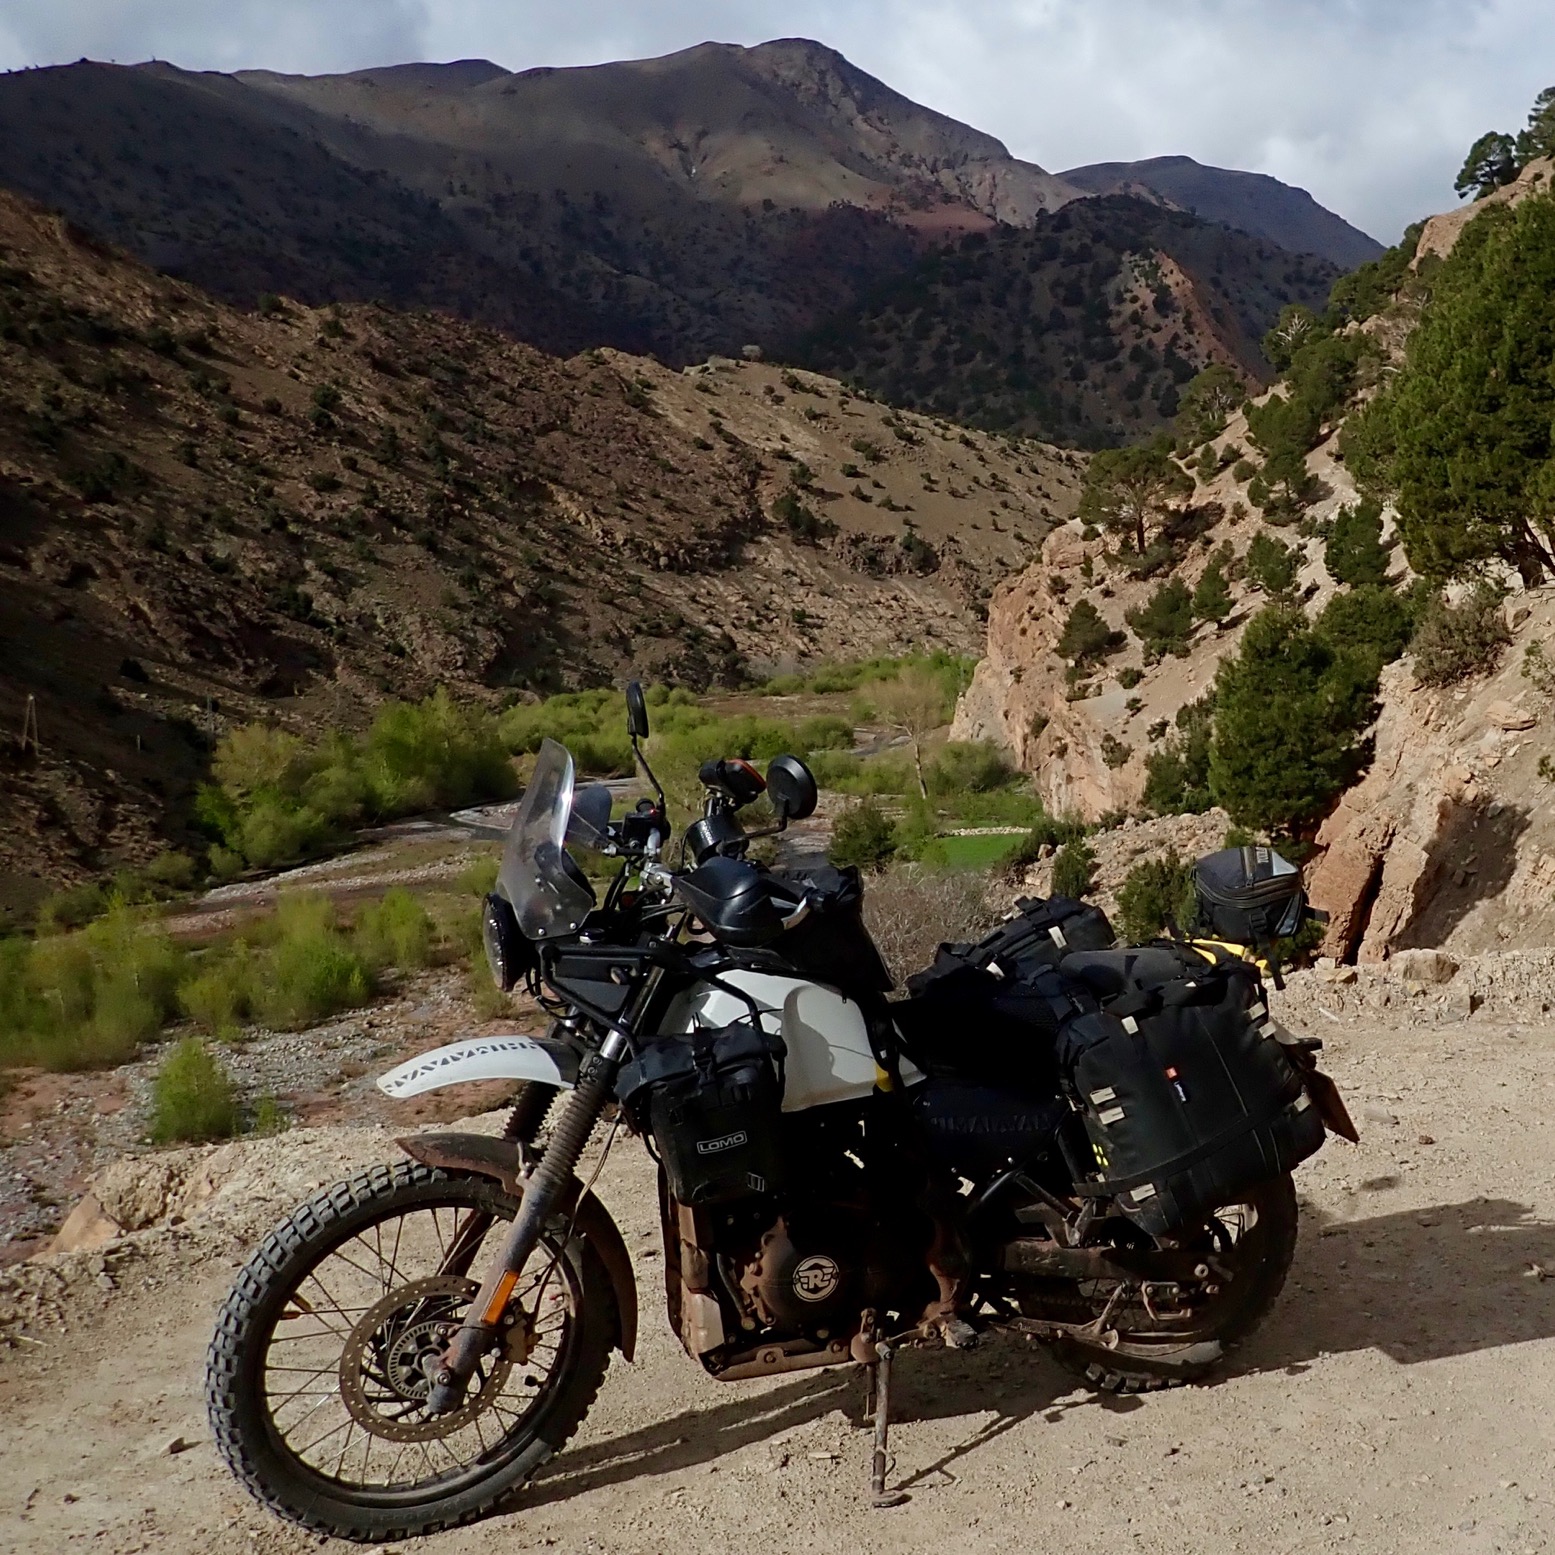
Now I’ve refined the strapping, the slim Kriega OS20s throwovers sit tight and are easy and quick to access. Total demounting would be easier with the HDPE Kriega platform, but I just pull out the white liners if I need to strip the bike overnight (rare). Their slimness is a real benefit on some narrow and gnarly canyon tracks where catching the cliffside with metre+ wide alloy cabinets risks being ejected into the abyss.

OLYMPUS DIGITAL CAMERA

Even with bivouac camping gear (everything bar a tent) there’s no need for a tail pack because the nifty 6-litre Lomo bags either side of the tank take up the slack and help spread the load evenly. A very handy spot for gear and, with the Kriegas, a sacrificial crashbar for when that days comes.

OLYMPUS DIGITAL CAMERA

So, after 10 brilliant days in the mountains managing to dodge hail, bandits and lightning, all is good with the Himalayan and pretty good with my adaptions. It’s somewhat nerve-wracking but then it always is as I tend to come out here on a wing and a prayer with roughly adapted bikes I’ve barely used.
The XCountry came with the various lip-chewing issues of that series (but nothing went wrong) and the WR250R had dodgy fuel pump activity when hot (but with care got me round OK). Clapped-out Tornados only had age- or user-related issues. Even a Husky 650 Terra, a 701 and an F650GS loaner and 700GS rental with 100k did me a week. Only the Tenere 660Z CB500X and tasty XSR700 came with- and delivered absolutely no worries. You can’t pay enough for that (bodes well for the XT700, too. You can see where I’m going with this).
I met a gnarly KTM450 overlander carrying a spare injector, fuel pump and clutch. Me, I have spare underpants. In fact I brought two by mistake. One will have to go.

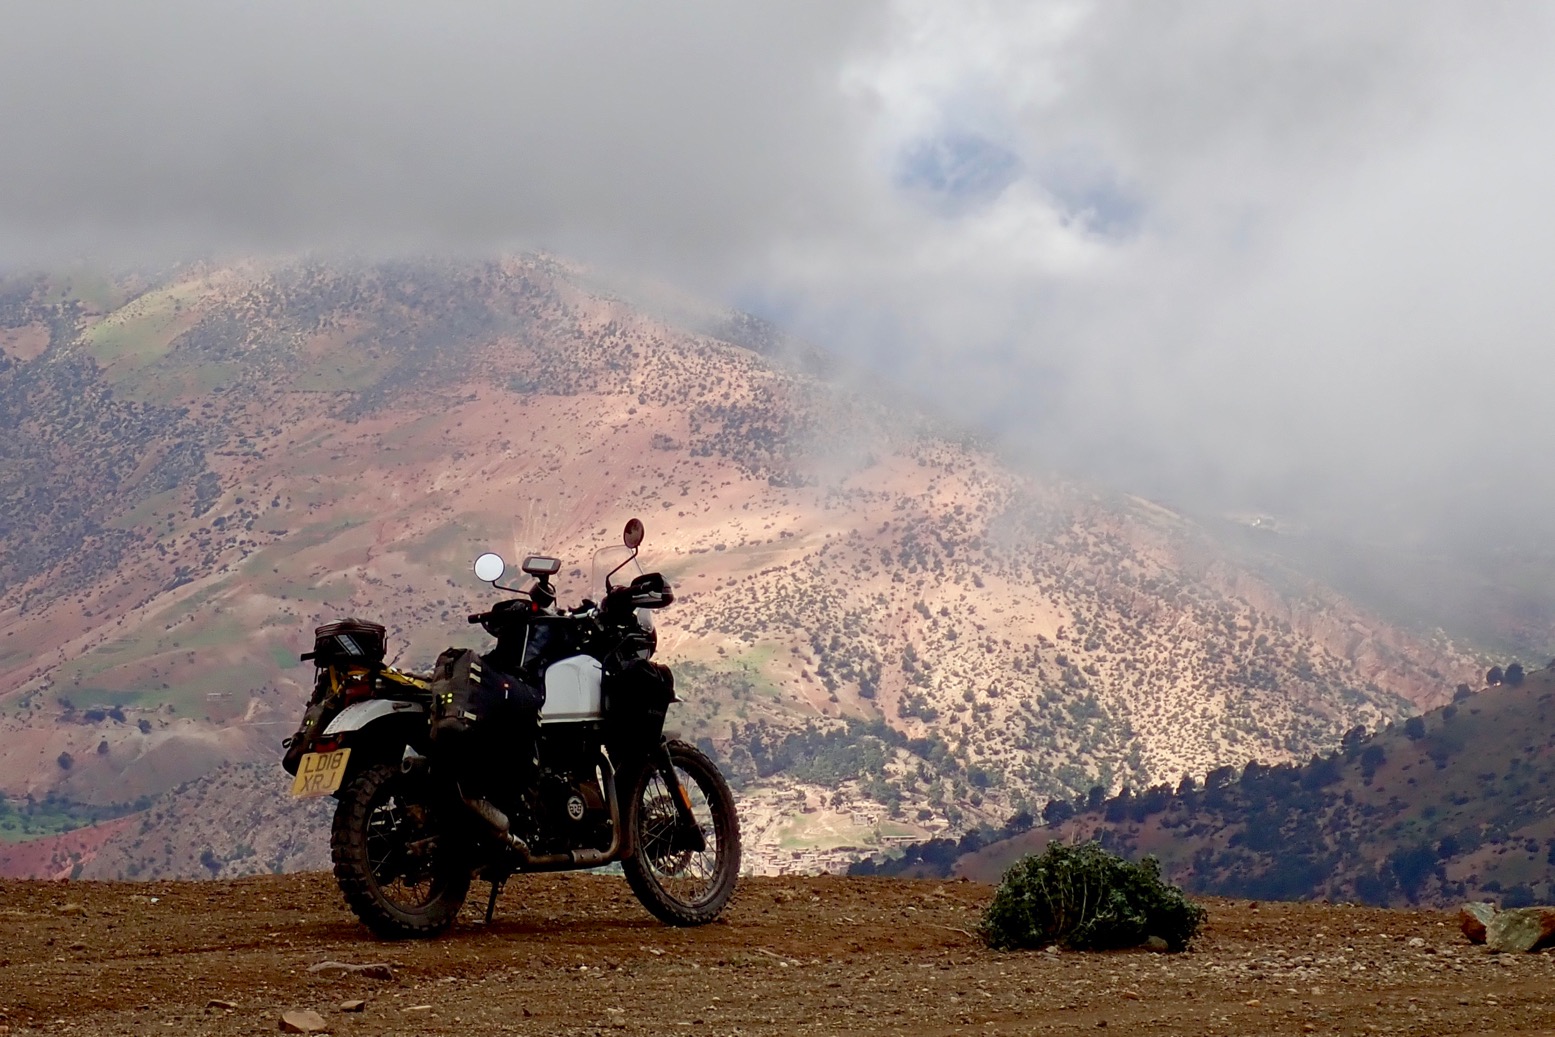
Time to see how the Himalayan manages several hundred miles of desert piste.

OLYMPUS DIGITAL CAMERA

Himalayan in Morocco: High Atlas

Himalayan Index Page

Has it really only been six days in Morocco? Seems like ages.
A few photos from the ride so far.

Balleria: €83 open-return at the counter.

Nice boat mister.

Gibraltar: Rule Brexannia!

Big advs as far as the eye can see. And a chimney stork.

Pointy bridge – no stork nests on there.

Bell Moto III + Qwik-Strap. Good combo on the non-ballistic Him.

In to the hills.

Windy and 6°C.

Popcorn and peanuts for lunch + a tub of Vache for emergencies.

Anergui – always wanted to visit.

Mule bridge.

Up the Assif to MH18. Easy enough if not too wide.

Follow the river.

Two mules on a bridge.

No way through to Taghia they say. Fair enough.

2900m – highest sealed road in Morocco. Probably.

Ait Bou’ valley.

Overpriced kasbah. You live and learn.

That centre stand needs bending before it gets bent.

Low route to Demnate. Glad to have the grippy Michelin Wilds.

Old Bedford AWD – an Enfield among lorries.

Back in the clouds on the Demnate crossing trying to outrun a forecast downpour.

Never ask a duck for directions.

Himalayan just laps it up.

I appear to have soiled myself.

Young Berber ninja patrol in Amzeria.

Back down to Skoura.

Your classic Moroccan lunch.

Goat in a crate + some seasoning.

Leatherman sugar breaker.

Midday at the oasis. Boots nearly dry now.

…..

Next – a couple of day trips back into the hills, then down to the Sahara for some desert biking.

Tubeless DIY: Techniques, Sealants & Tapes

Tubeless Conversion Index Page
TL-diy
TL-tyrewell

I and others have come to the conclusion that the key to successful and safe DIY spoke sealing is using a rim with the safety lips (right). These rims are stamped ‘MT’ as opposed to ‘WM’.

SHORT VERSION: AT rear wheel: easy to DIY • Front 21s: use an MT rim
at-wheels

L o n g e r  explanation
All cast tubeless wheels have these lips, and just about all rear spoked, tube-type rims have them too, right as far back as IVJ Teneres from the mid-80s. These humps/ridges/lips keep a tyre’s bead seated on the rim and out of the well (but make tyre changing harder).

However, stock 21-inch tube-type spoke rims hardly ever have them. I don’t know why as having a flat tyre come off the rim is more perilous than on the rear. So with a typical 18/21 spoked bike, like my AT, DIY-ing the stock lipped back wheel is easy and safe. But the front requires tracking down a lipped 21. Giant and Takasako Excel (above right) make them from about £110 but you won’t find ebay flooded with them. Once you have laced that rim on you can try and DIY seal it too, or you can spend from £120 on a BARTubeless or Airtight professional sealing.

The video above demonstrates the rim sealing procedure. Nice job but can you see the big flaw?
The rims, even the rear, do not have the TL safety bead or lip to make a good seal. I see trouble ahead.
tl-ianwheel

PU sealants
Way back in 2008 I bought the new XT660Z Tenere for a research trip in Morocco. I asked on Horizons if sealing the well of the spoked rims to make them tubeless (left) was a good idea. The discussion concluded it was do-able and had been done.

tubeless-sealed

I like to experiment with new ways of doing things, so I went ahead. Full DIY XT660Z article here. Short version: the stuff I used (right) didn’t adhere that well, plus I didn’t do a good enough job in preparing the rim: and then on the road, I forgot all about it, tyre pressures dropped after 1500km and I dinged a rim and lost the seal.

tL-selfetch

Above: over a decade later Ian C. tells me he once had good results on his KTM V-twin with Ever Build Puraflex 40 PU sealant; about £6 for 310ml. This was after thoroughly degreasing and then spraying etch primer (right) on the wheel before applying a couple of layers of black Puraflex and screeding it down smoothly.

tl-goop

Cyb’s DIY procedure listed on the index page does it another way: carefully sealing each nipple with two types of sealant but not covering them in an overall band or even a tape. There’s much to be said to this: individual leaks can be more easily pinpointed and fixed. He recommends specific glues: which he seems to have researched rather than hoped for the best. First, two applications of runny Seal-All on each spoke nipple (see below). Runny – even like SuperGlue – is the key so it will seep down into the nipples’ threads and along the outer collar.

TL-spokwash

Don’t forget there’s a curved spoke washer (right) between the spoke nipple and the rim, so that’s an extra leakage surface to seal. Then, once cured, each nipple is capped with a thicker blob of Goop from the same manufacturer, Eclectic Products in Oregon.

TL-1782

In the UK Cyb’s exact products are hard to find or are expensive if bought from the US where Seal-All is just a couple of dollars. I found Goop for a tenner. There must be something identical here to Seal-All – is it so different from the Bostik 1782 I have in the desk drawer? I put a test blob of 1782 on a rim to see if it would peel off easily. It didn’t so I used it on my Africa Twin’s back rim, then cap with the Goop.

TL-siloconesealant

Others have used plain old Silicone sealant. Something that’s designed for tent seam sealing (Seam Grip, Seam Seal) will be runny enough. Another good thing with Seal-All and Goop (and 1782) is they’re clear so you can see any too-big bubbles or lifting. They definitely look better than the creamy texture of the 3M 5300 mastic I tried years ago.

wrslime

The good thing is tyre pressure pushes these tapes and sealants into the rim, so improving the seal. But if you inject water-soluble Slime or similar instant puncture sealant (right), it may not agree with your sealants and it will all come apart.
As it is, water can seep down a spoke collar from the outside and get under your sealant. If you’re doing wet trip, like Siberia, there’s something to be said from sealing the nipple/rim/spoke contact area from the outside too. Just a smear of whatever you got ought to do.

TL-blob

Glass sealant DIY
Another DIY suggestion is using glass sealant again, being meticulous with your pre-cleaning and patient with your sealant curing – see below. Sounds similar to Cyb’s process.

1. Glass (windscreen) sealant
2. 16″ Harley inner tube or rim band
3. Glass cleaner or oven degreaser

• Clean the wheels with the degreaser/cleaner, mini wire brush wash (left) if old, then with water to make sure any swarf or chemical is washed off. Wait for a day in dry. Use a blast of air if indeed
• Apply the sealant to each spoke nipple, wait for a day to cure, apply another layer, wait again
• Apply sealant to the inner part of the wheel. One layer for one day, do it twice then wait until it’s completely cured
• Fit the rim band (or tape, see below)

Good tip from CyclePump man: check spoke tension before your seal the nipples forever. A bit slow but worth watching in full.
TL-tapewheel

Builders’ Sealing Tapes
One guy told me he simply taped up his rims with duct tape and topped up his tyres once a week. Using something more airtight might even enable a proper job.

tl3mtape

I’ve seen 3M 4411 Extreme Sealing Tape mentioned (right; technical sheet). In neutral (N), grey (G) or black (B), it’s 1mm thick (more pliable than the 2mm 4412N) and comes in 50mm width for big bike rims, or 38mm (1.5 inches; product code: BLA193840). A 5.5-m roll of 38mm costs £20 and is enough to do three ~1.5m circumference rim wheels once.

at-wheels

Another mile-long thread on Advrider with some good ideas and solutions. This tape works best where the well/drop centre of the rim is nice and flat, as on a wide supermoto rim shown above left, or my Africa Twin (left, upper wheel). You’d imagine a curved profile will work less well with tape, but see Cycle Pump vid above.

ap111

If I was doing such a DIY sealing job again, this time I’d consider forensically cleaning the rim with something like 3M Adhesion Promoter 111 (AP111; right; £20 for 250ml) (‘A quick wipe of AP111 on the ionomer is suggested for best performance of the overlapping tape. AP111 will approximately double Extreme Sealing Tape’s adhesion to its own ionomer backing).

glu-mek

But £20 for a half pint is quite expensive. I know from kayaking that brake cleaner, acetone (paint or nail polish remover) or any number of other highly noxious solvents like rubber or plastic-eating MEK (Methyl Ethyl Ketone, (right) or Toluene also work.
Then I’d seal each nipple with some runny glue so it seeps down into the threads. Let that cure, do it again then a dab of silicon like McNett Aquasure or Bostik 1782 or a mate tried EvoStik Sticks Like Sh1t. Then cap with Goop or whatever before letting it all cure again and taping it all up (so similar to Outex, then). I  note Cyb says silicone is not as oil-resistant as the glues he uses. 3M is a big name for industrial applications but there are all sorts of waterproof, self-amalgamating or self-fusing silicone tapes out there in rubber and plastic for household leaks.

All it’s got to be is soft and pliable to contour the rim well closely, be stuck on to a very clean, oil-free surface, exceedingly non-porous and darned sticky, come what may. I’d hope 4411 or the DuPont equivalent: Tyvek, have all these properties, but Tyvek only seems to come in 60mm widths, a bit wide even for a giant adv rim.

Another tape that’s been mentioned is Muc-Off MTB wheel sealing tape (left). Costs from £10 for 10m in Muc-Off pink up to 35mm wide for smaller moto wheels.
Tesa Tape 4289 (above left). It’s tensilised (stretchy), like self-amalgamating tape for leaky-pipe-repair (right). Not tried Tesa yet either but at 66 metres a roll it’s a fraction of the cost of 3M if you have several wheels to do. Yes it’s only an inch wide, but at 12 quid a roll you can do a few taut wraps round a wider back rim to get a good seal.
You might not bother with the laborious individual nipple gluing and go straight to tape (or do a continuous band, as above). It’s worth experimenting with at home before a big trip. The risk with tape-only is they might start separating when things get very hot. Don’t underestimate the centrifugal forces working on the tape inside your wheel. Warning below, the original rim tape put over a DIY sealing ‘for good measure’ span itself into pieces and blocked the valve. Things need to be glued down securely.

outex

Outex pads and tape
I came across Outex sealant tape which a mate has been using on his TTR for years. As with many of these DIY methods, some get on with it, some don’t as this post shows. Here’s another on Adv. Central Wheel in the UK used to sell it but stopped, presumably due to unreliable results from customers. IMO you can do as good a job with the off-the-shelf items mentioned above for half the price.

rollerrasp

Basically, it’s nothing more than a set of sticky pads for each spoke nipple plus a very sticky and wide double-sided tape applied into the rim well with as few creases as possible. And then a thicker protective tape over the top. Application video below; a higher-res video here. Costs from £90 to £125 in the UK which seems a lot when you see the other tapes, above. As mentioned, I was about to fit it to my WR, but stopped once I saw my rims lacked the safety bead I go on and on about. Take your time they say, to try and get all the air pockets out. Using an inner tube patch roller rasp (right) helps; you often get them with better puncture kits.

Have I missed any ideas? Let me know.

Back to Tubeless Conversion Index Page