Normally I’d plug a 12-volt power plug for GPS etc direct to the battery via a fuse – not ideal but it’s less of a faff than finding a place to take power that’s switched via the ignition (usually off the always-on lights).
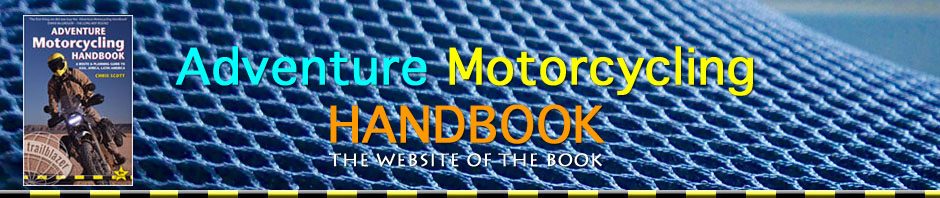
But on the CB-X forum someone unearthed a stray ‘options plug’ under the seat (left) that does just that and so is ideal for electrical accessories. It even comes with an unwired wiring block clipped to it that’s ready for spade terminals. In the UK it’s a 6-wire block but with only 5 wires (inset left). Trial, error and much discussion on the forum divined which wires do what. Short version: purple is switched live and green is negative. These are the two you want to wire up stuff that will only work with the ignition on.
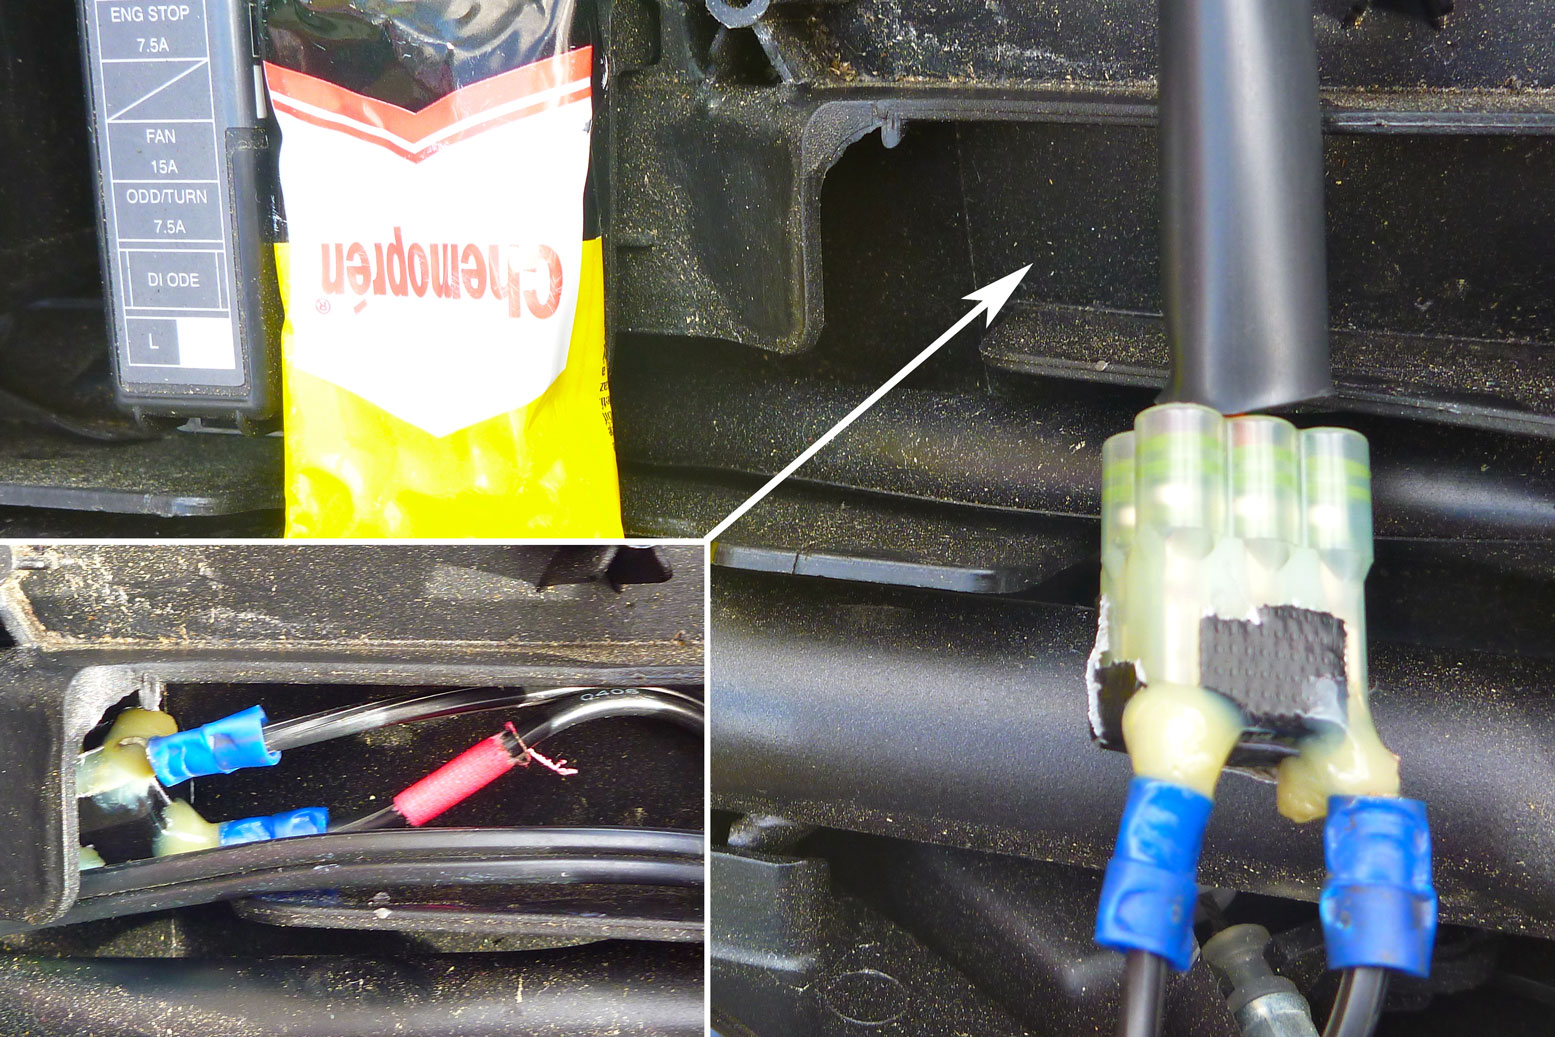
I thought about tracking down the exact correct terminals (right), slipping them into the unwired block with the seals and wiring it up, but realised it would be as simple if less neat to simply shove two wired spades directly into the live block’s end and ditch the unwired block. It all wants to be waterproof of course, so I carefully taped over the block and dabbed rubber solution where the chopped down spade connectors went in. I then repositioned the block in a plastic channel alongside (above left) and hopefully out of the way of any back-wheel spray. And while I was in the area, with a hacksaw blade I trimmed off bits of sticky-out plastic molded into the mudguard (right) to make more room for underseat tools and stuff.
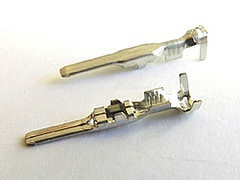
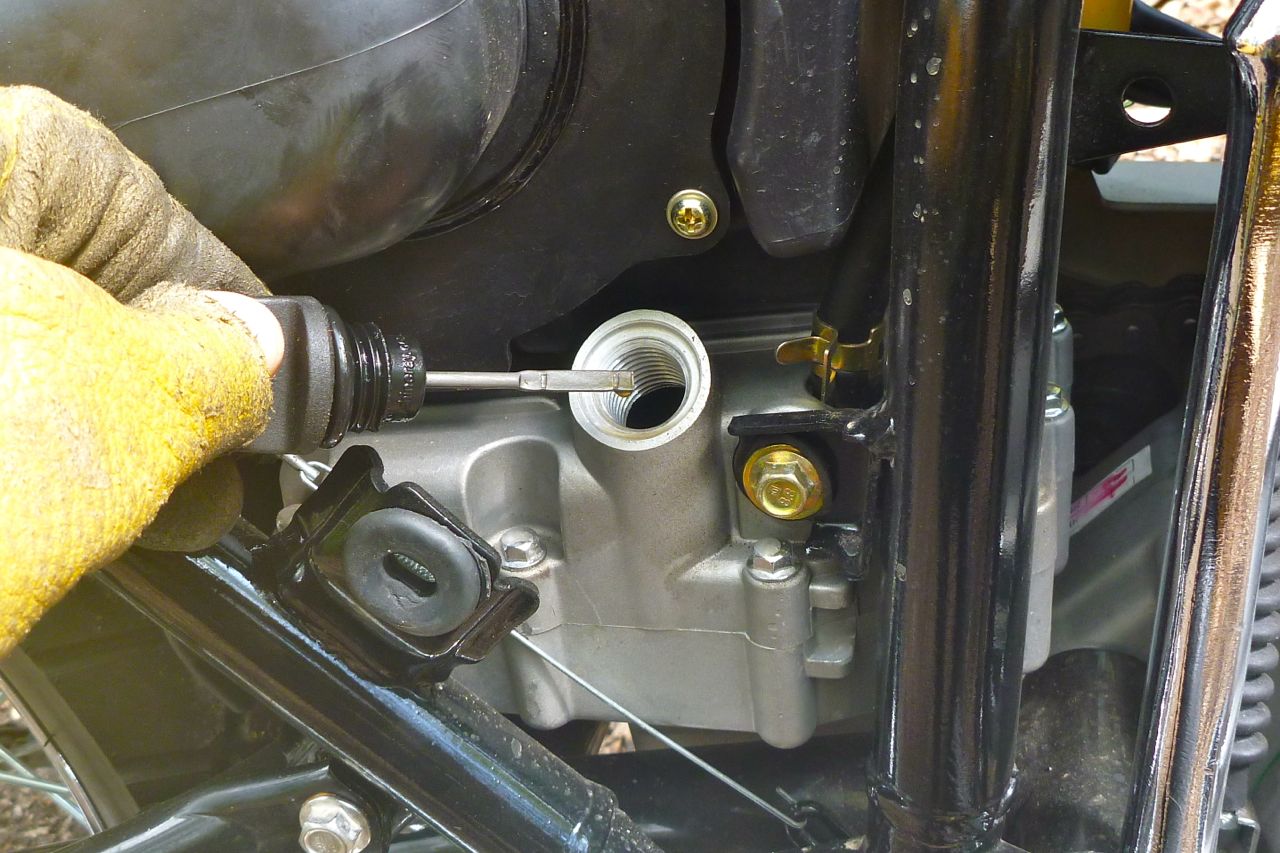
Getting the wire to the ignition key area for the 12v PTO socket was easy too: just two hex bolts removed the black LHS side panel and the wire feeds through over the radiator. It would have been neat to set the PTO into a hole in the dash below the speedo but I’m told there’s not much room behind there and finding out for sure would require protracted disassembly. Life’s too short for that so a secure slot was zip-tied next to the ignition key (above left).
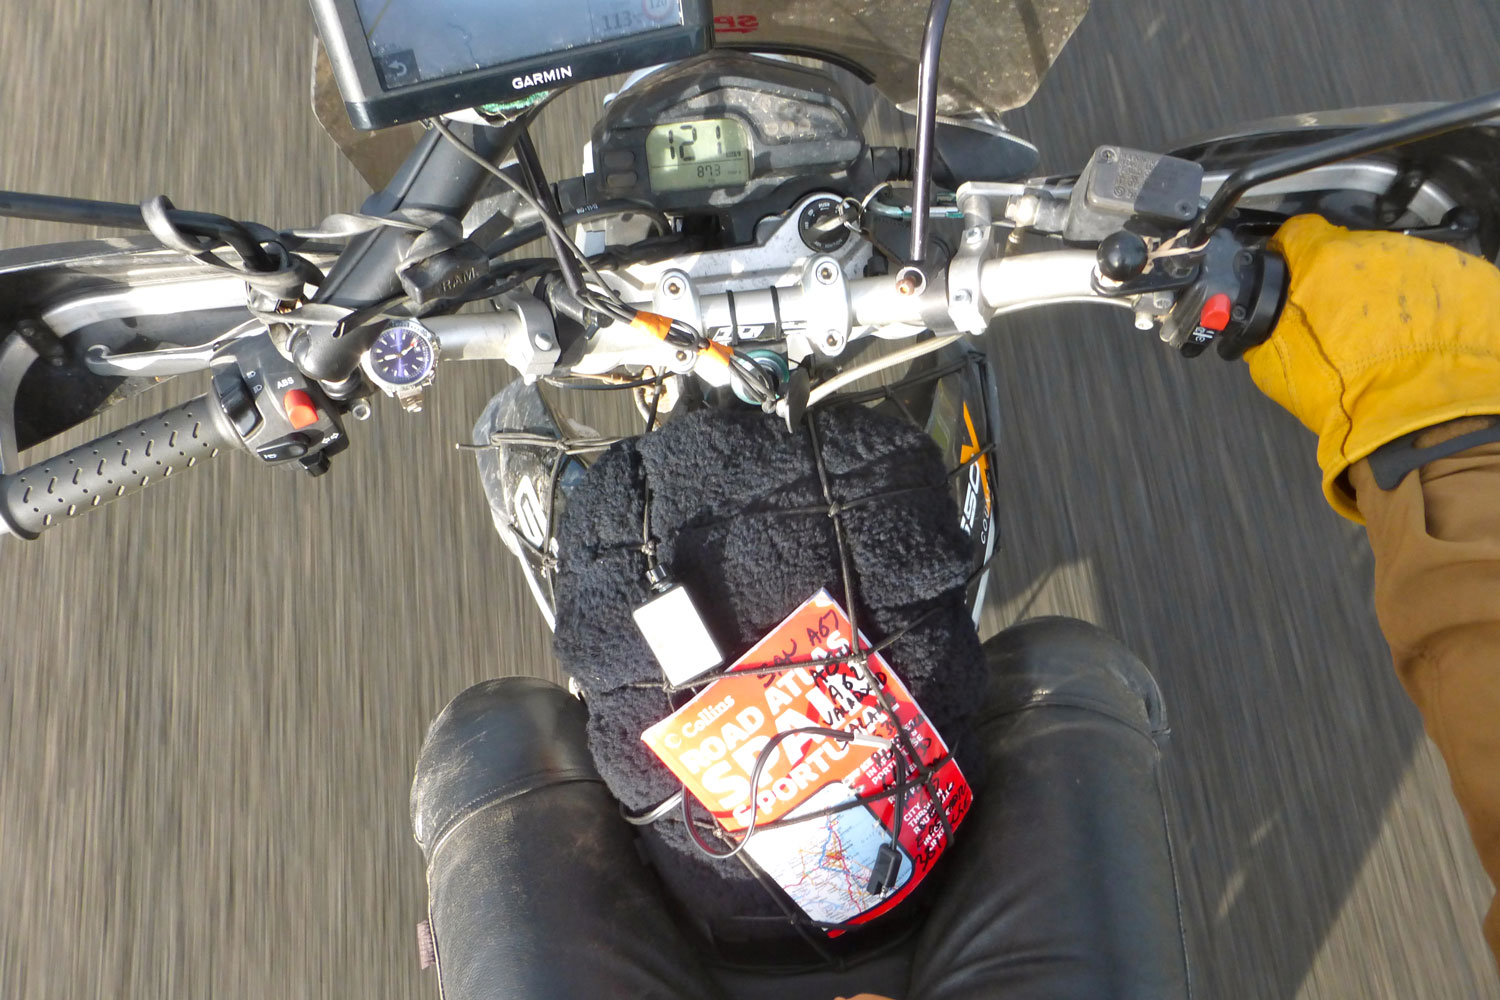
Still awake? From bike to bike I’ve been running my Nuvi satnav on a RAM mount off the mirror stalk, but it’s a cumbersome combination of hardwear, better suited to a camera. My Palmer screen mount came with a half-inch accessory bar for that very purpose. I wanted something tucked in close to the bar to avoid leverage and wobbling, and the only idea I came up with was taking apart a spare Nuvi sucker mount, cut it down a bit then drill a half-inch hole through the neck and glue it onto the accessory bar. The irresistible lure of bodging.
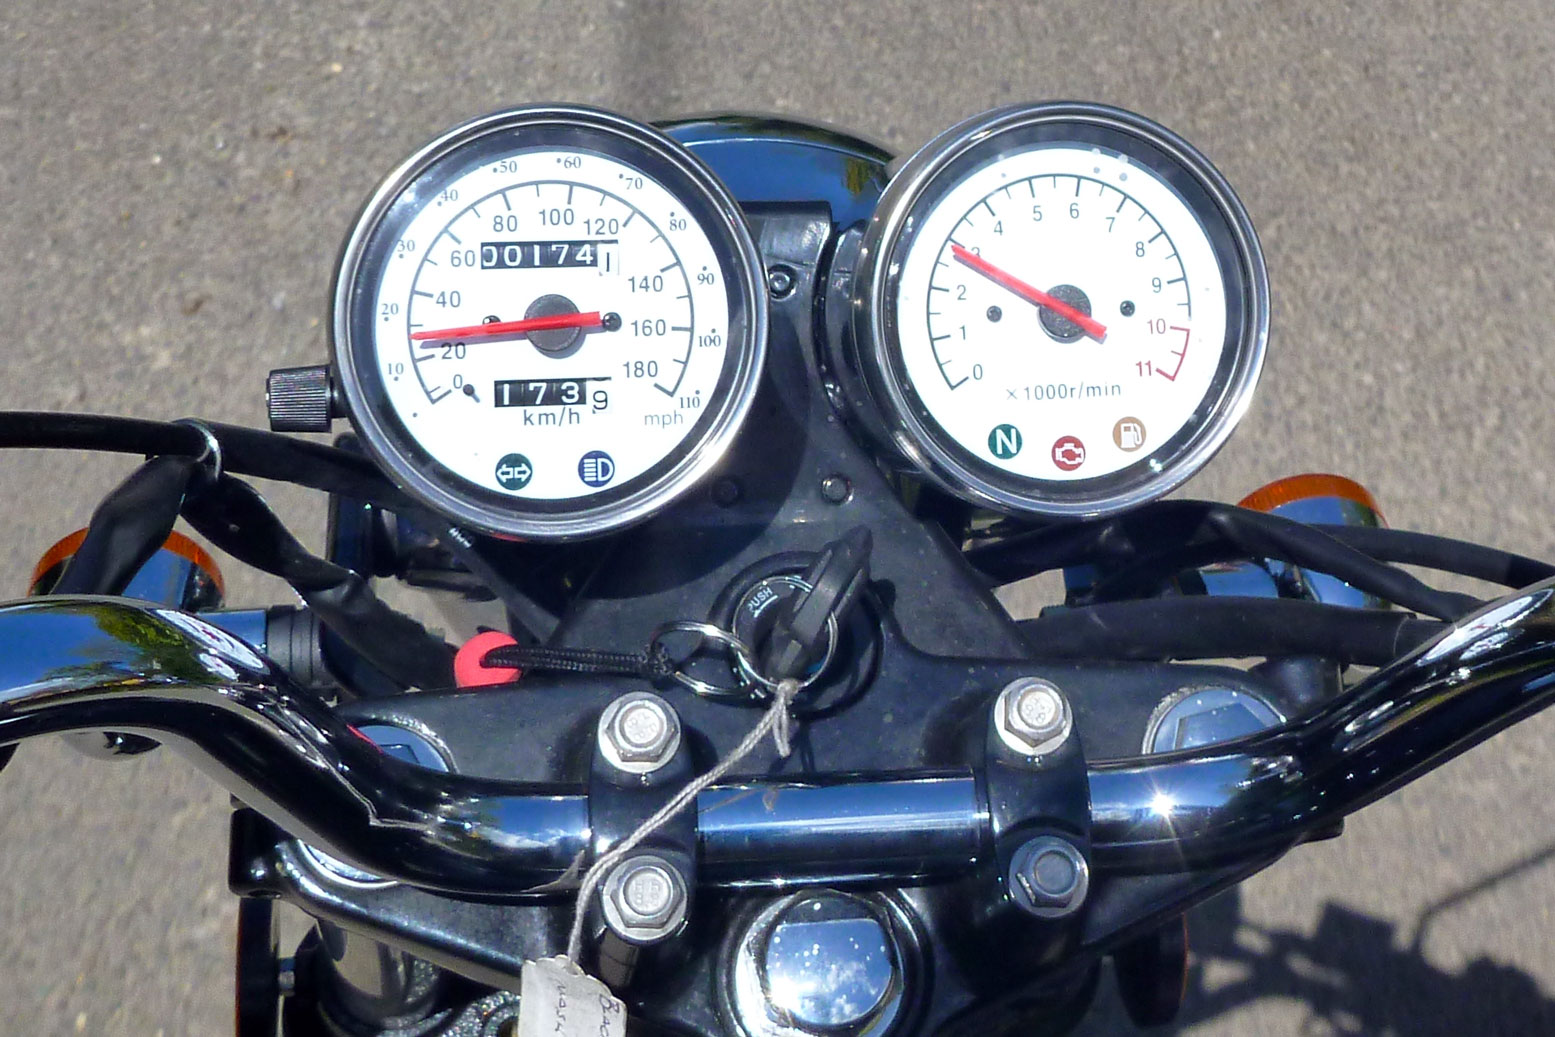
Looking forward to a long, 700-mile ride to the other end of the country this weekend. A chance to test out the screen, assess the seat which I think may not be so good, and get a feel for the bike in readiness for Morocco and beyond this winter. Latest mpg is 93 and that was trying a little, so I reckon 100mpg might take some doing. Plus this is off the odo though unlike the speedo (7-8% over) is actually only 3% over. Had this same odd discrepancy with the CRF; you assume they’re linked. Anyway, more like a true 90.
The CB-X comes with an 80s-style plastic belly pan which then as now, just keeps the flies off te engine. Along the right side is a thin, stainless cat guard but none of this will protect the pipes or the sump from a heavy dump onto a rock or from flying debris.
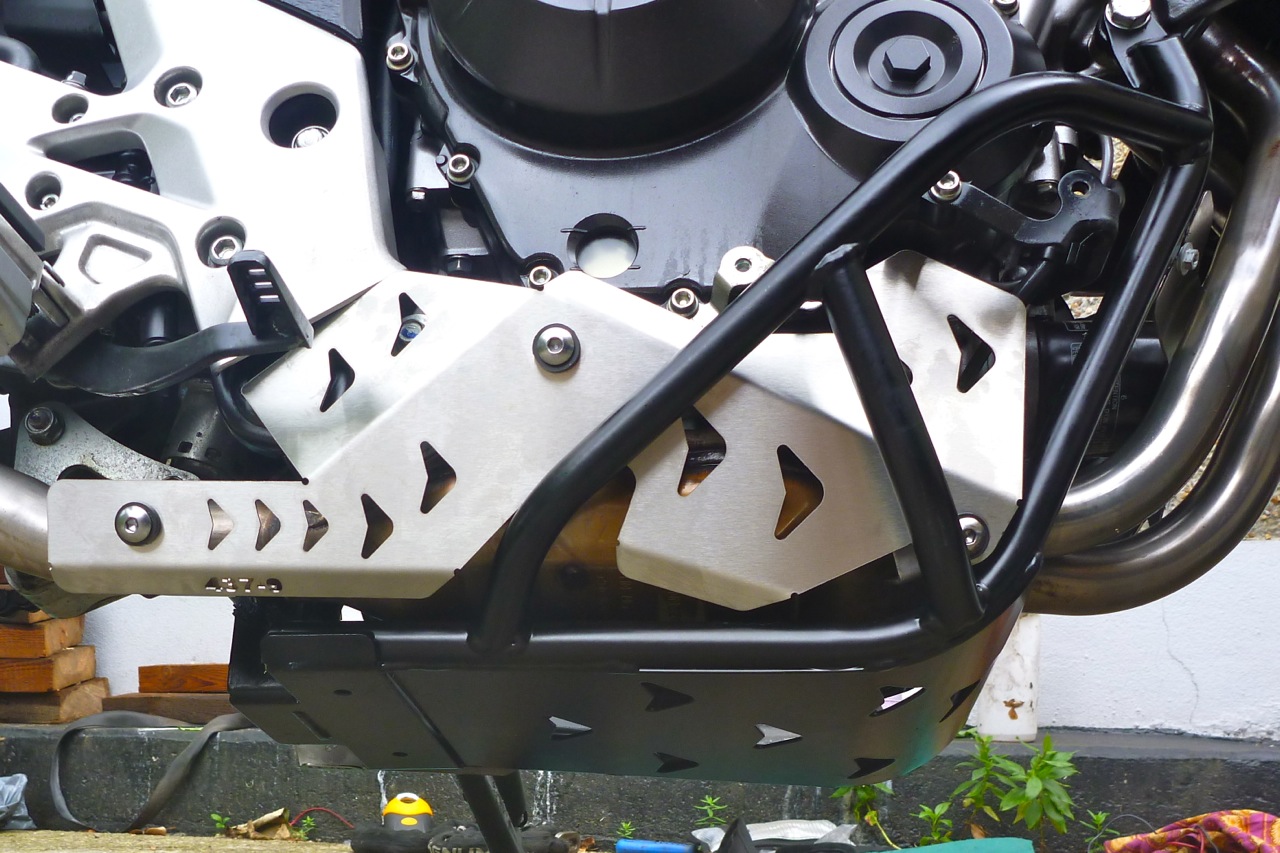
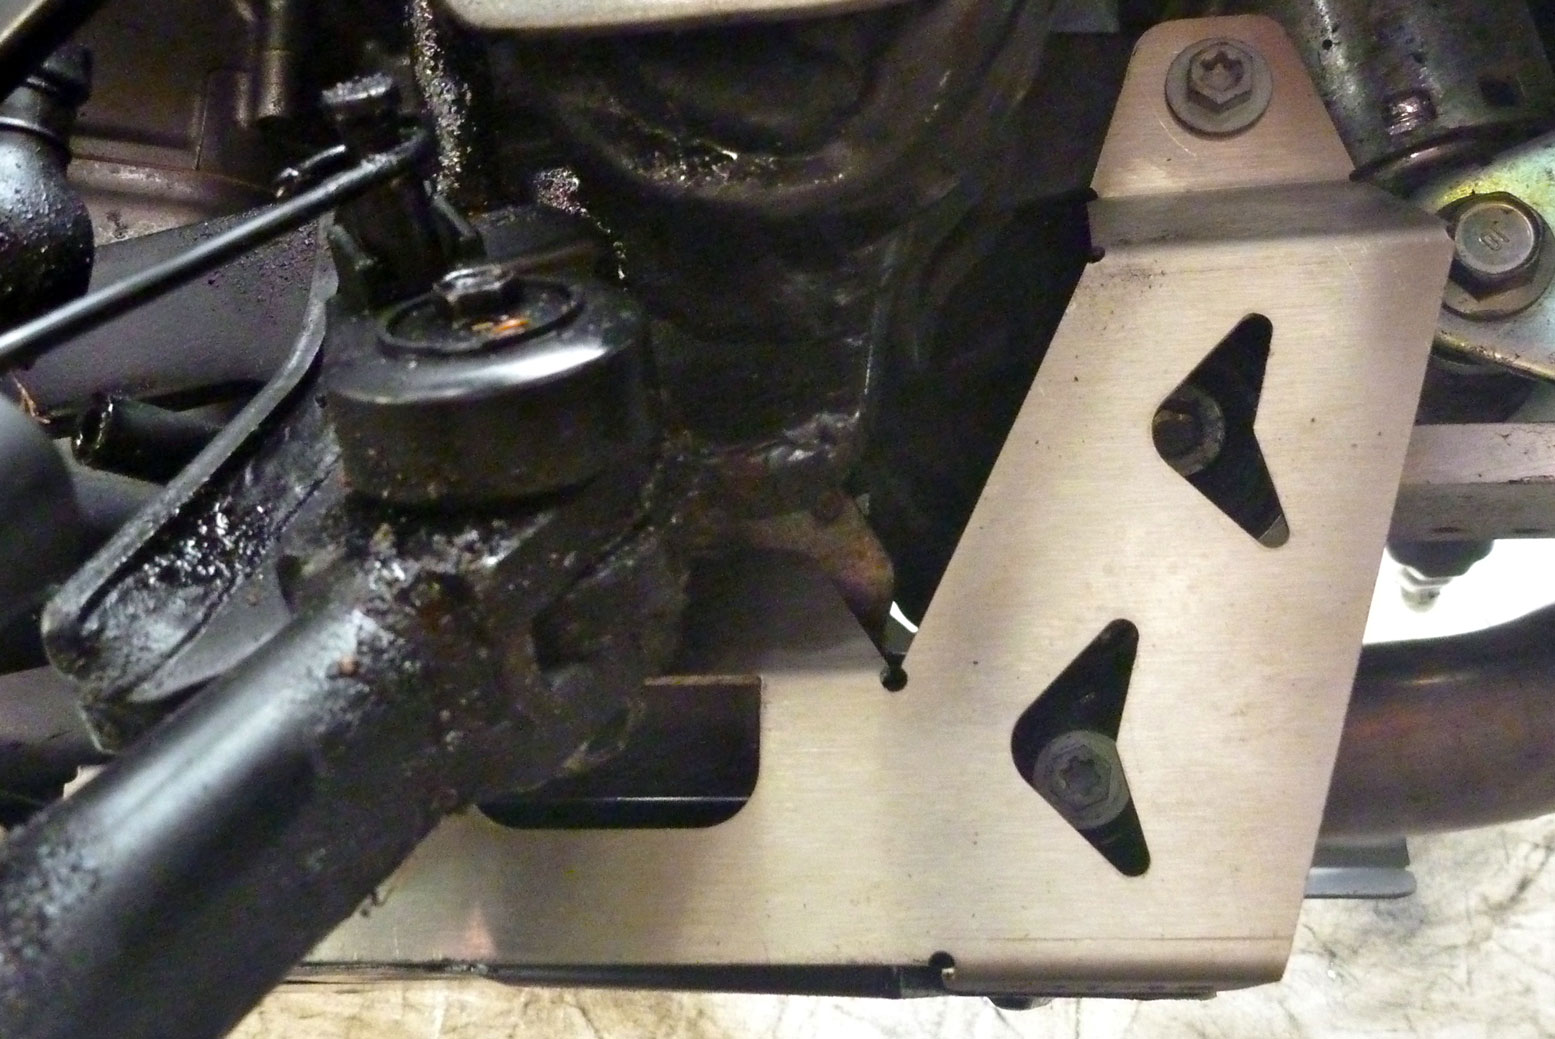
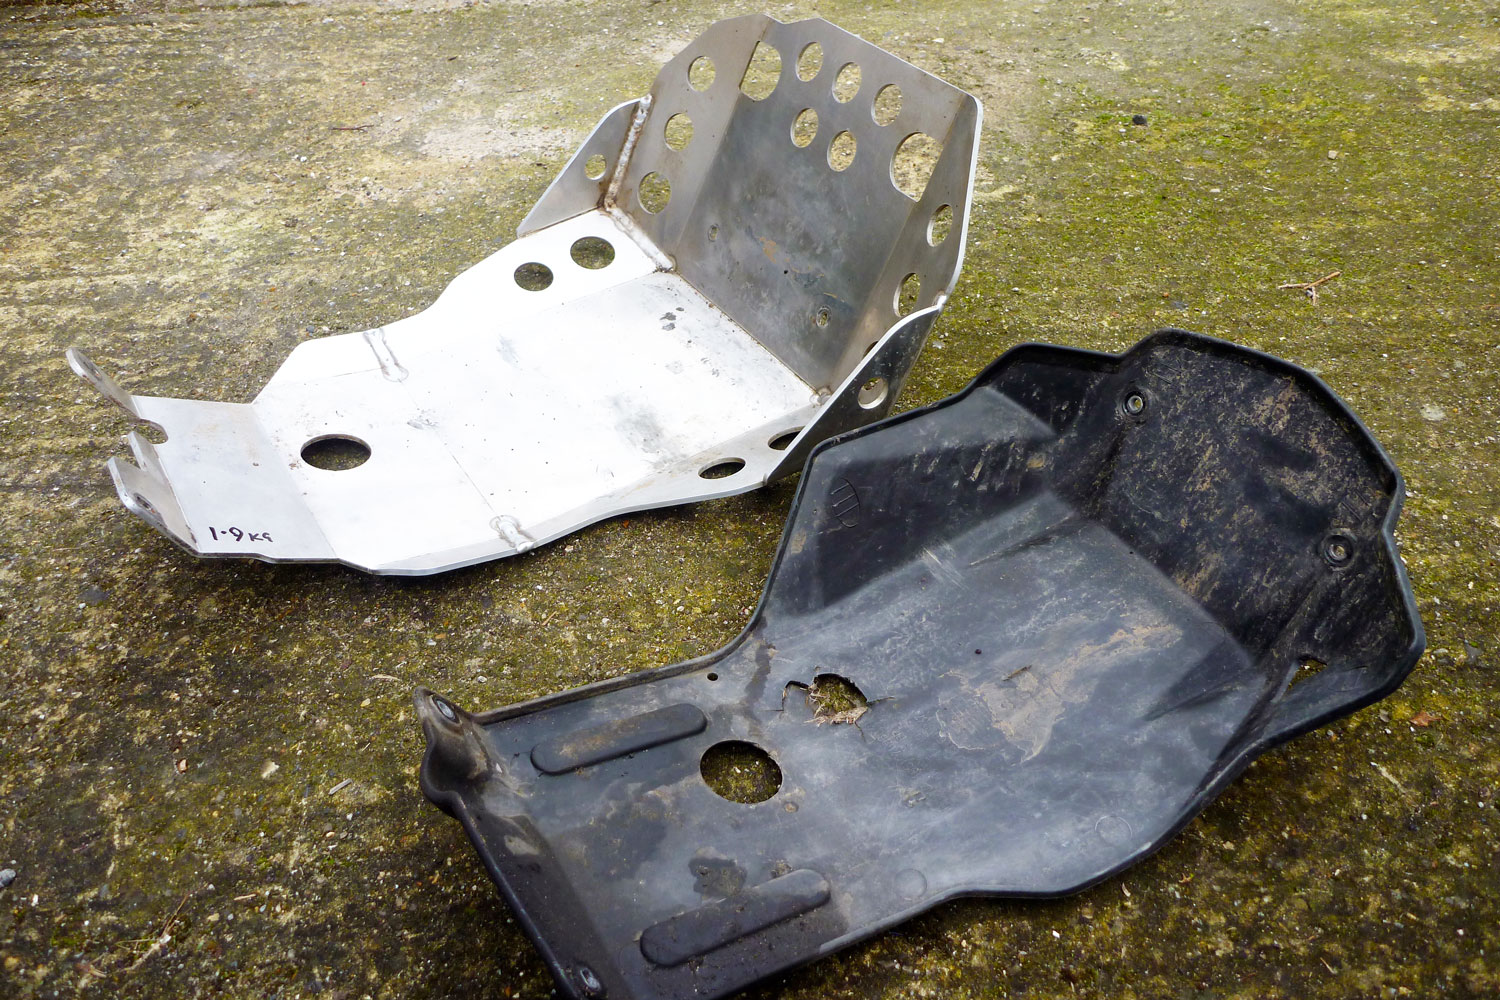
The Rally Raid bashplate crashbar cost a hefty £238 but is more than just a few slices of alloy bent, cut and welded into a protective clam shape. The CB-X is a bit different from a typical single cylinder trail bike in that the pipe goes under the motor. The slim cat is actually neatly integrated in the headers which tuck in alongside the sump (right) so cleverly, no extra depth is added unlike my last two ‘under pipe’ bikes. But the oil filter sticks out the front and the engine cases are vulnerable and so proper protection is needed all around.
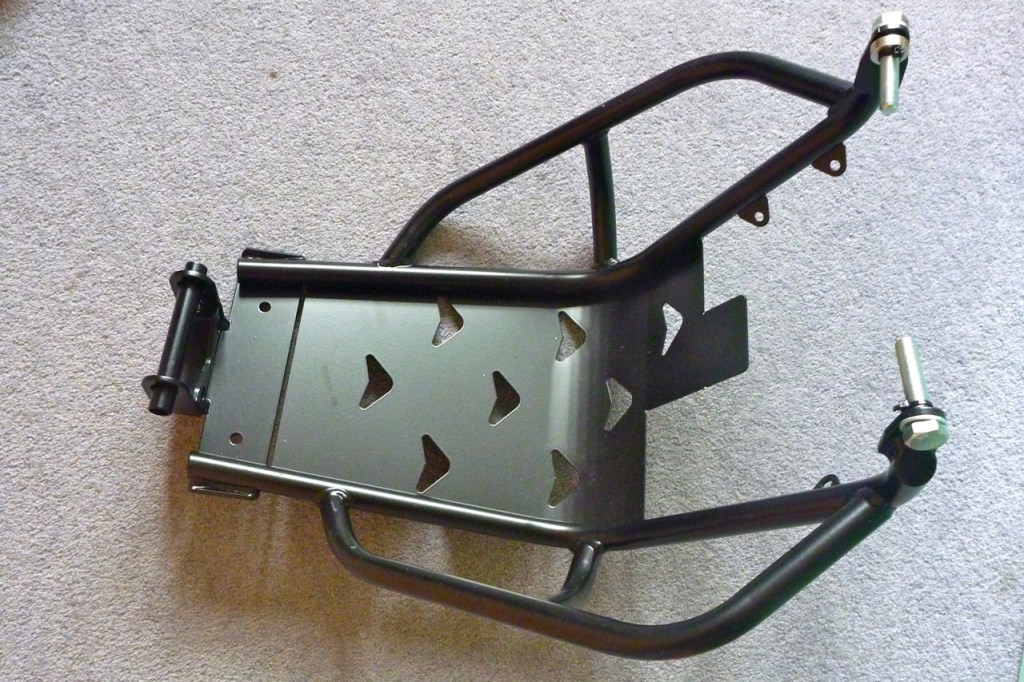
I didn’t look for alternatives but they are a couple out there (left) – both at around £100 but in relatively flimsy 3mm alloy and both retaining rather than replacing the thin stainless cat guard. SW Motech do make lower engine bars and upper tank guards at about €100 each, but it’s unclear whether their sump guard and the crash bar are compatible – it looks like it could be one of the other. With the Rally Raid unit the steel crash bars are integrated with the steel underplate and the whole thing weighs 3.4kg. Separate thin stainless panels are added behind the frame over the cat, across the front of the oil filter (right), and underneath the shifter on the left.
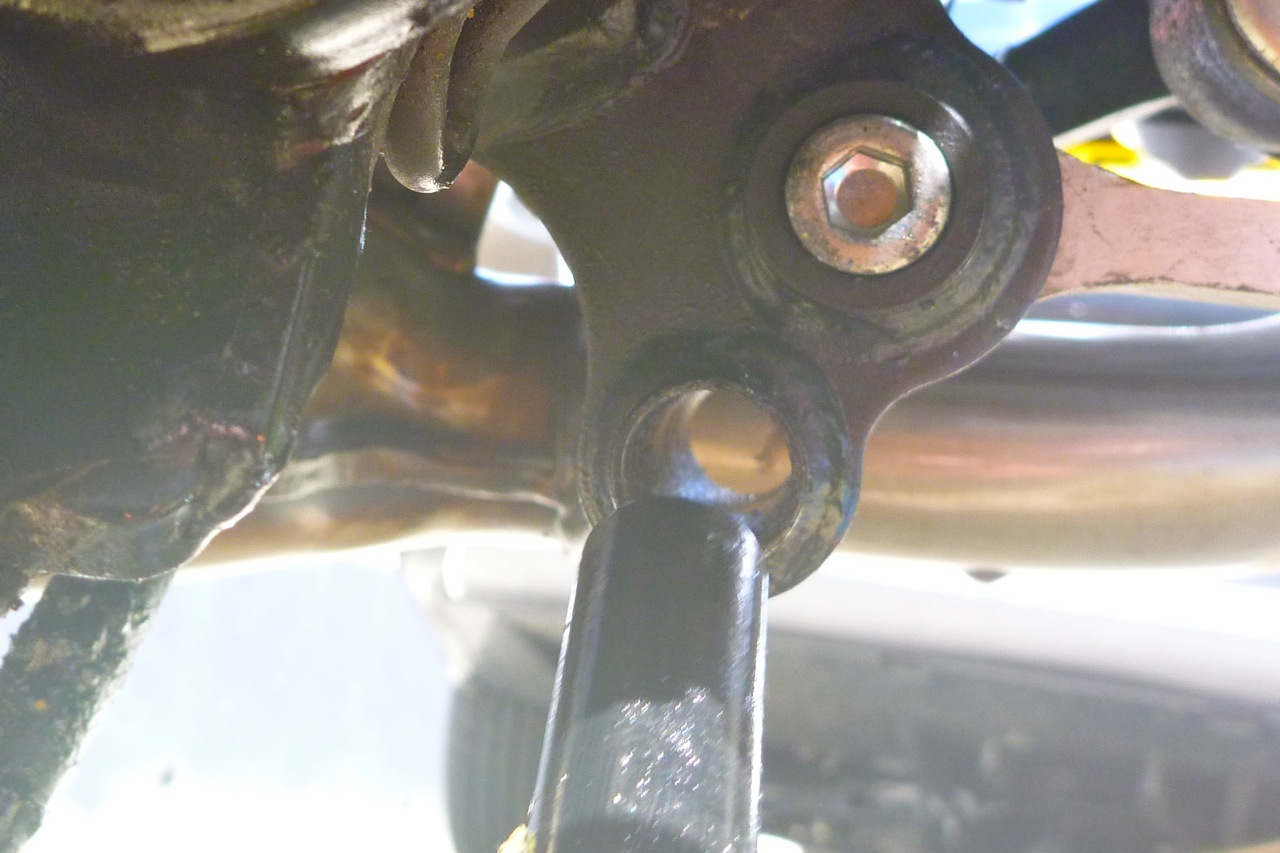
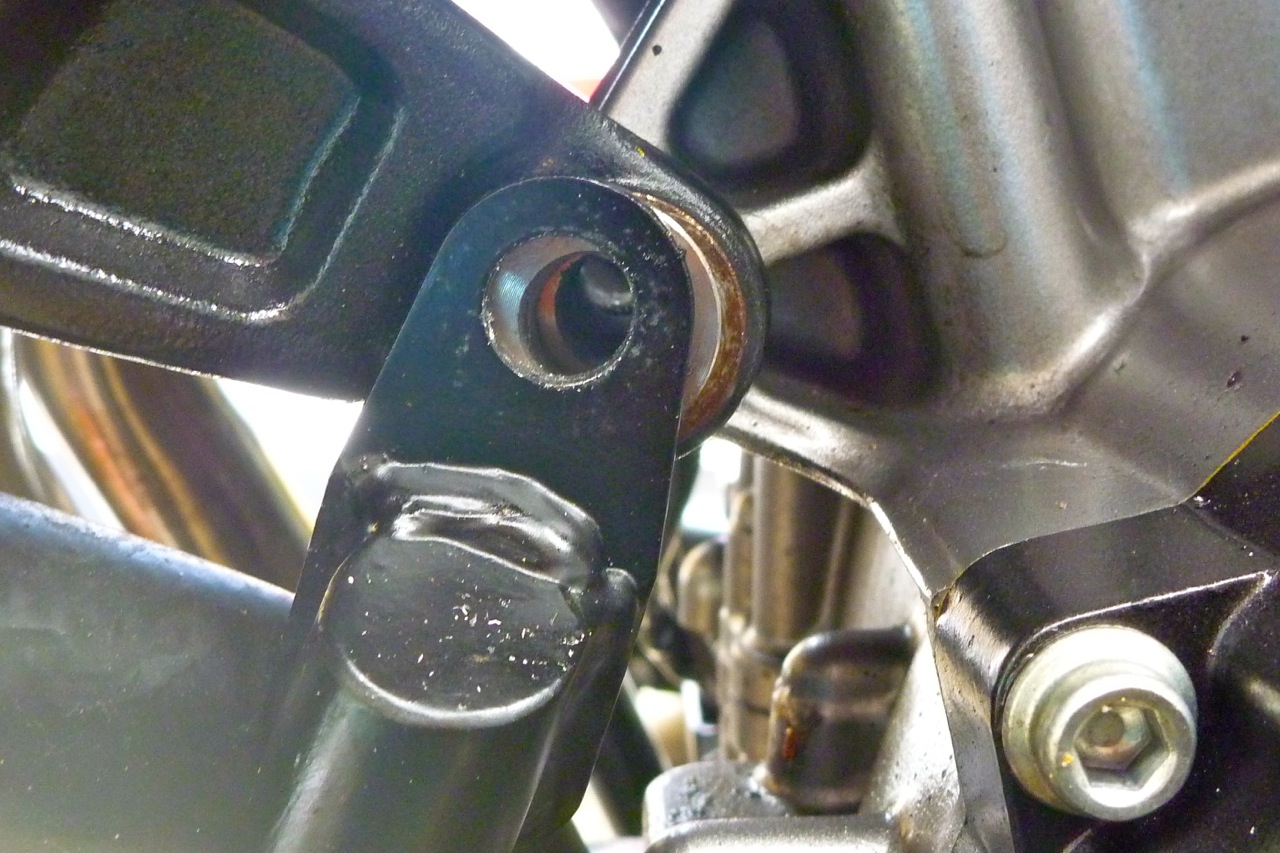
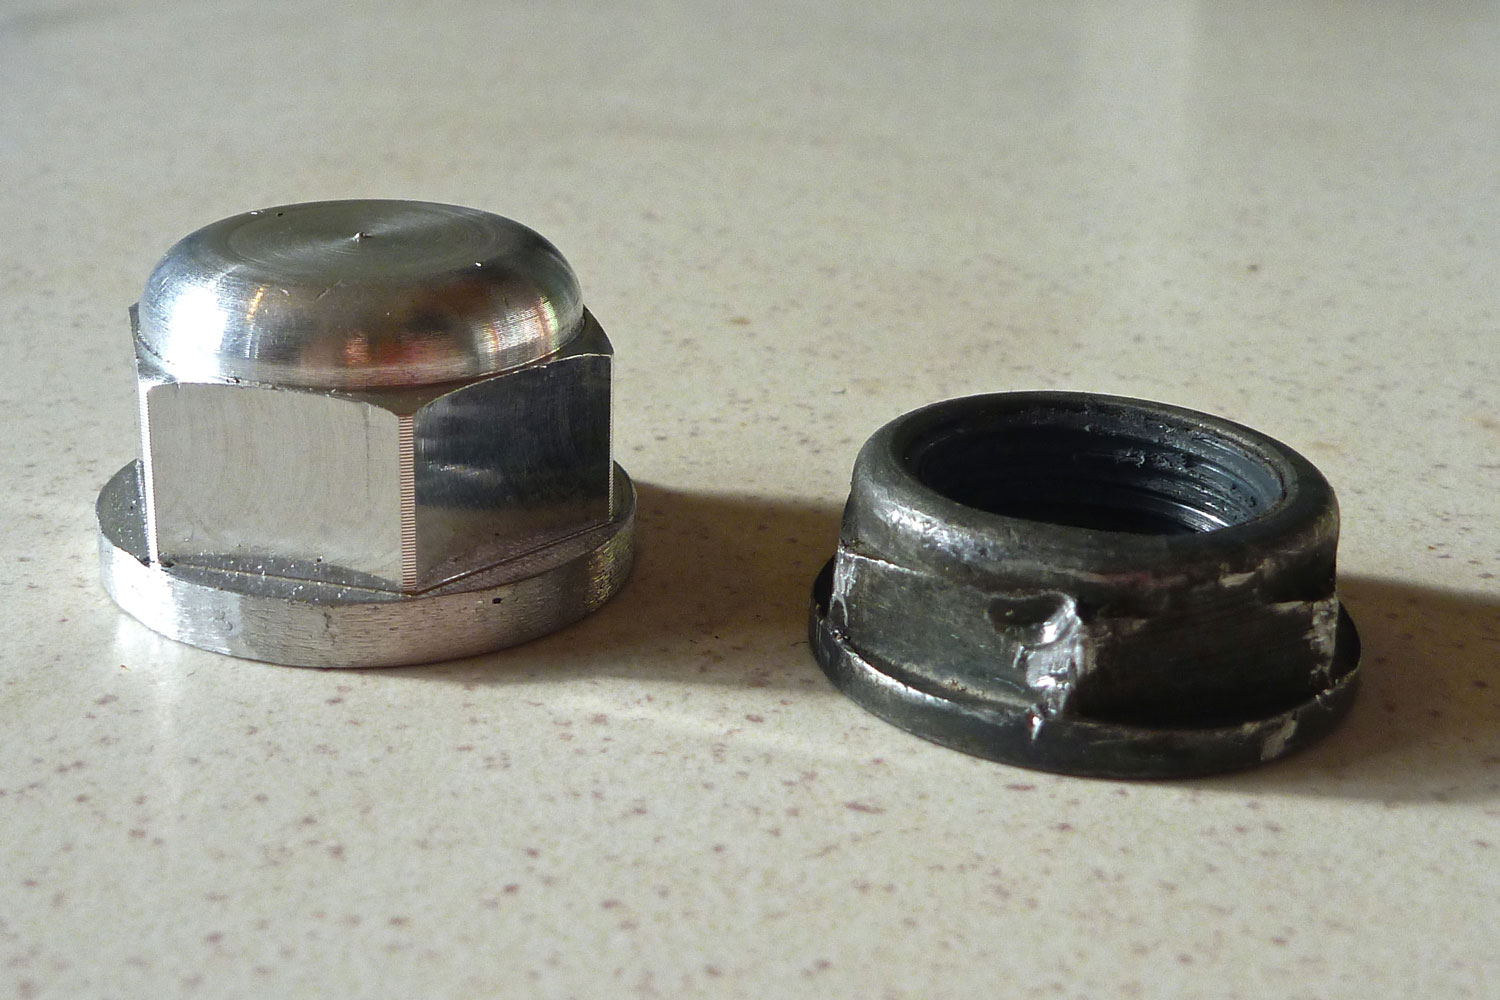
After removing the bellypan and cat cover, fitting started by slotting a pin to mount the back of the plate on the unused centre stand pivot tube. The powder-coated RRP pin felt just half a mil too thick, actually because a bit of rust has developed inside the centre stand pivot tube (left). Once that was scrapped out with a hacksaw blade it fitted in with some hammer aid, but even with a good greasing I get the feeling that pin may be in there for good.
The RHS stainless cat cover (left) lined up just right – 10/10 for bend and cut – and the steel plate was ready to swing up into place to be bolted in place with the replacement front engine mounting bolts supplied. RHS bolt went in OK but on the left it was 5mm ahead (above right). Seems ‘they all do that, Sir‘ and some tactical levering with a hammer handle sorted the alignment to get the bolt in without cross-threading the engine’s alloy which would be deeply vexatious.
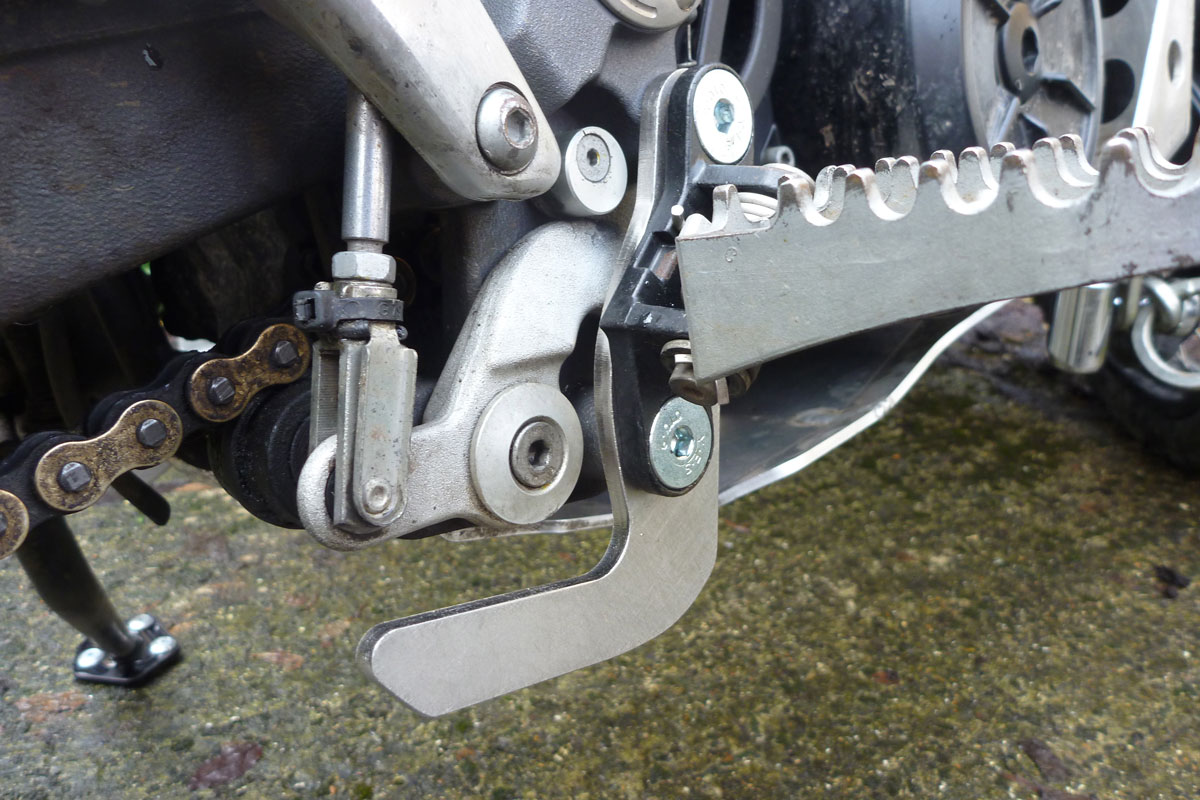
I’m not quite sure what the separate plate behind the side stand is protecting (left). Something to do with the shifter linkage? That’s reasonably well protected by the side stand mount and held on with a single bolt the plate looks a bit flimsy to do anything substantial, assuming it’s trying to be similar to plates which Erik Bok makes for X bikes (right).
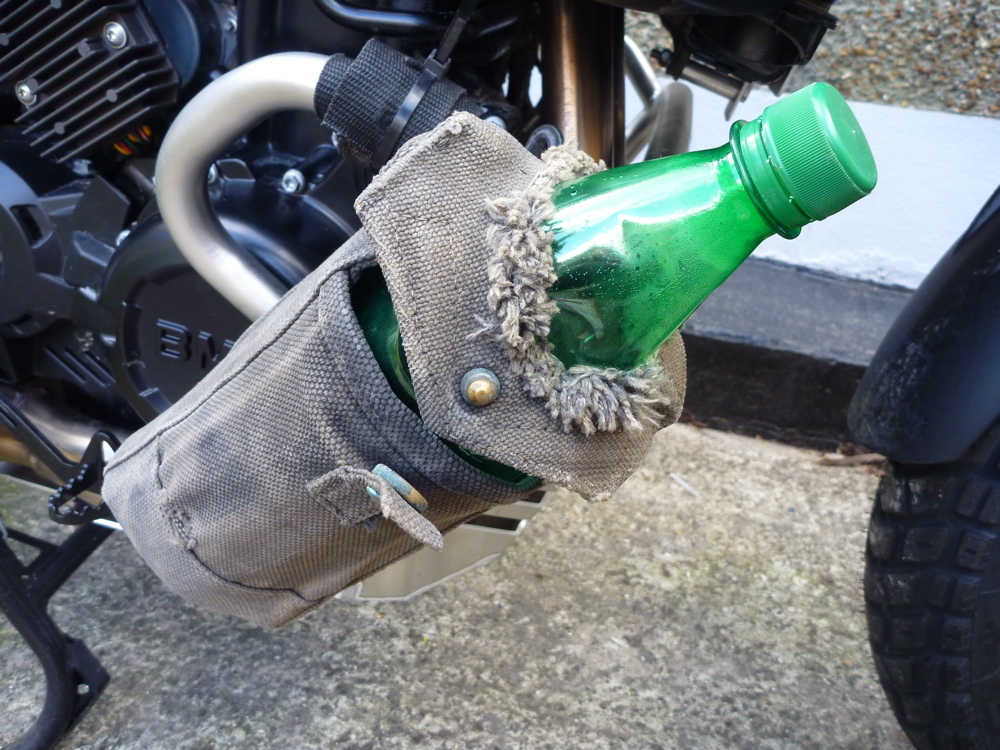
All up that took about an hour, plus another hour of going back and forth to the house to get extra bits and pieces, but I’m confident that any rock that dares to intimidate the steel base of this plate will end up with quite a headache. I did a 100-mile run and was pleased to noticed no resonance as you can get with some slabby bashplates, and the handy bars mean I can attach my ‘signature’ ammo pouch.
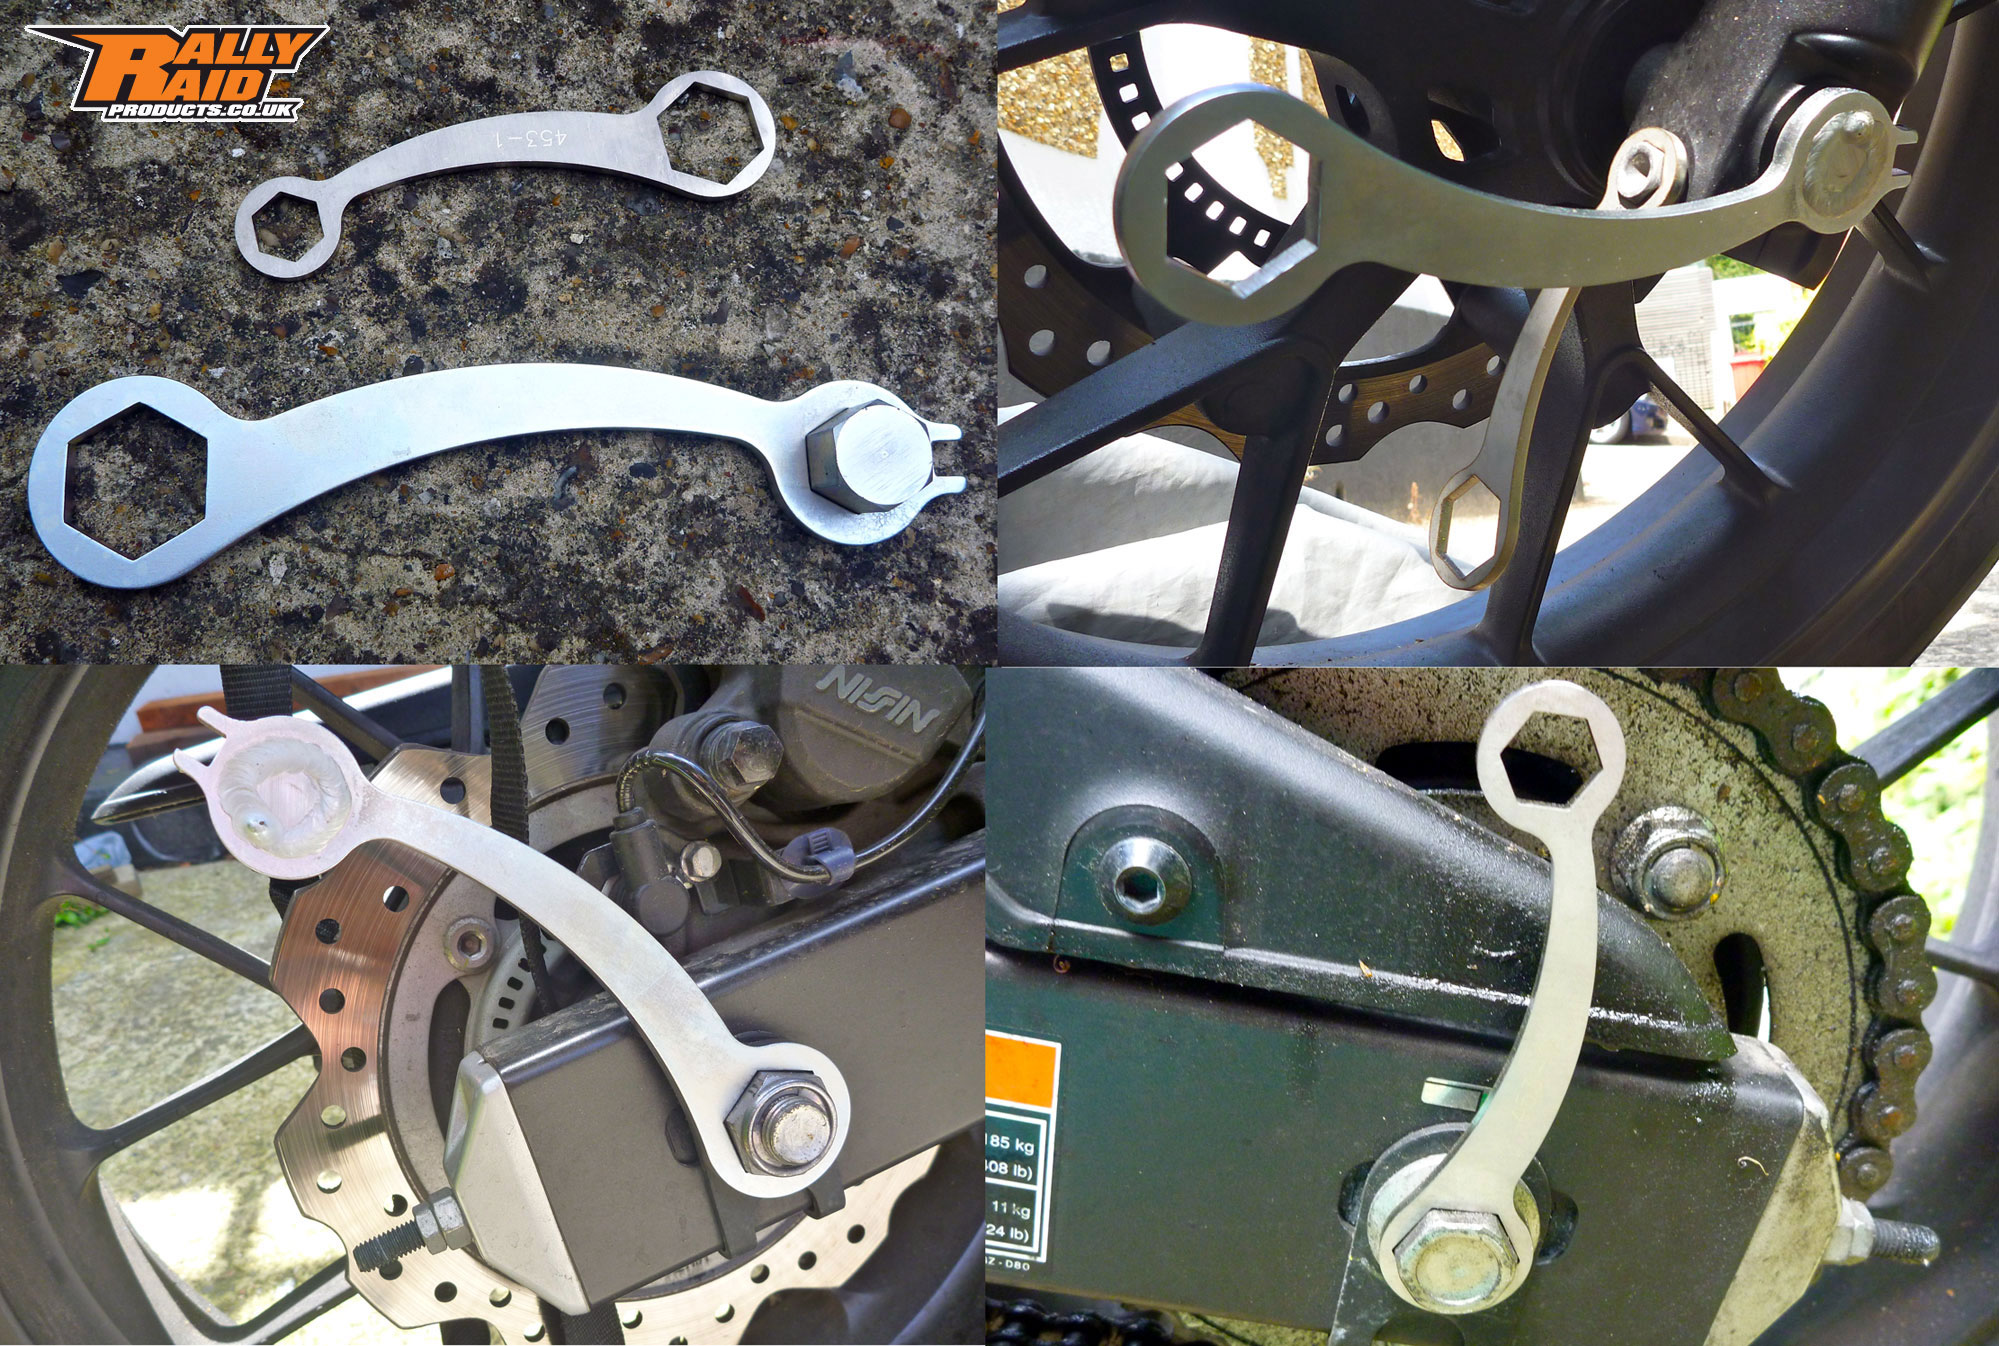
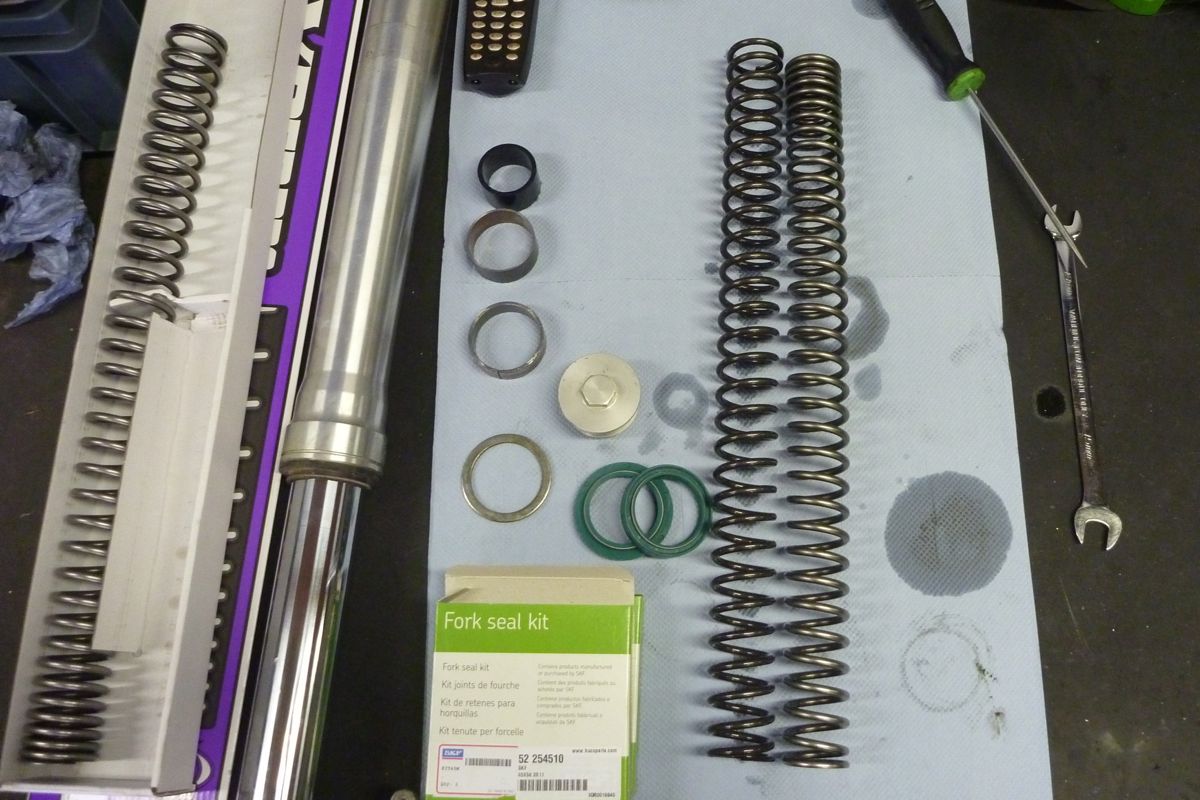
Rally Raid wheel wrenches
My bike came with no tools, even though the (used) test bike I rode in January had a set under the seat. Odd thing is they’re not even appearing on ebay or listed anywhere and word is some CB-X markets get them and some get nothing more than a hex key with which to pick your nose. Not even a C-spanner for the shock. It’s a bit like a car not coming with a jack. I know we know OE Jap tools aren’t exactly Snap-On Platinum Line but you do wonder if there’s some autistic bean-counter at Honda who isn’t able to fully appreciate the ill-will caused by absent tools with the tiny cost of sticking some under the seat. But we’ve been hearing this ‘spoil for a hap’orth of tar…’ business for years.
Rally Raid’s hard-working laser cutter to the rescue: two double-ended ring spanners in 2mm zinc coated steel (left) to cover all fittings for front and rear wheels and even a spoke key for the optinal wire wheel.
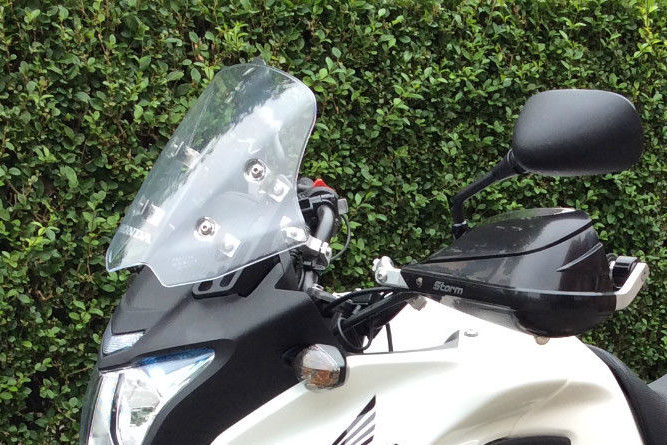
Windshield Adapter
On the CB500X forum there’s a l o n g thread on screen options, and one thing you’ll soon learn is that what’s sauce for the goose is something else entirely for the gander. Some riders say stock is best, others find an aftermarket screen to be perfect/terrible and others even claim the bike is best with no screen at all. Well that just about covers it all then.
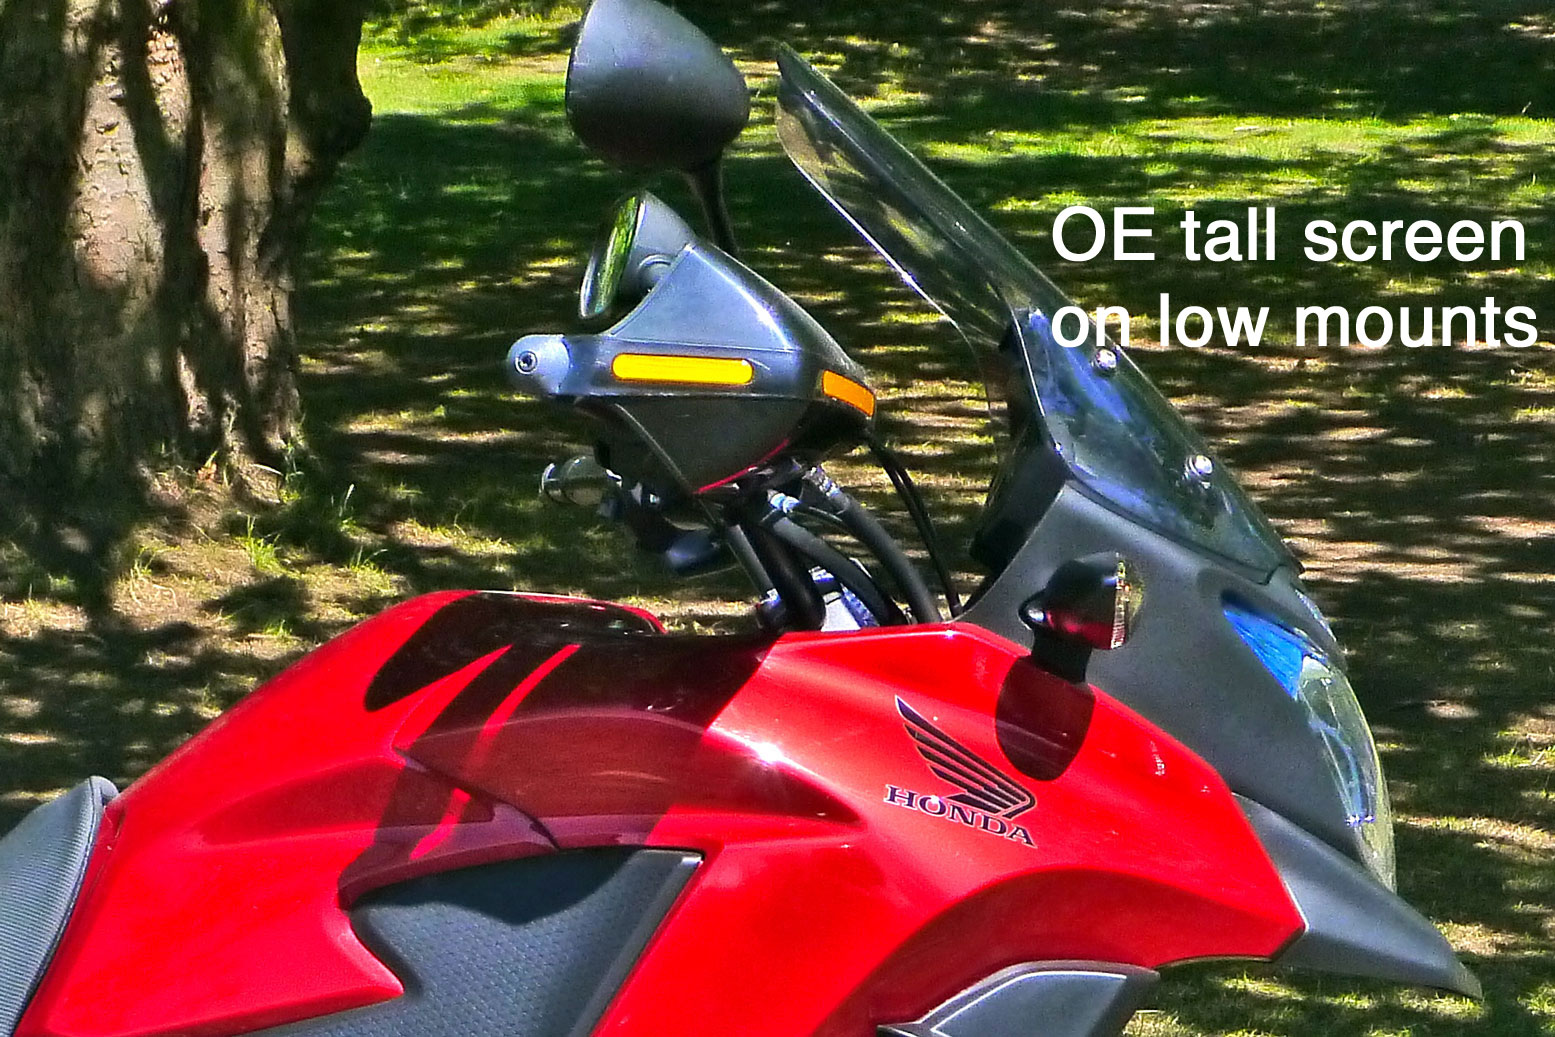
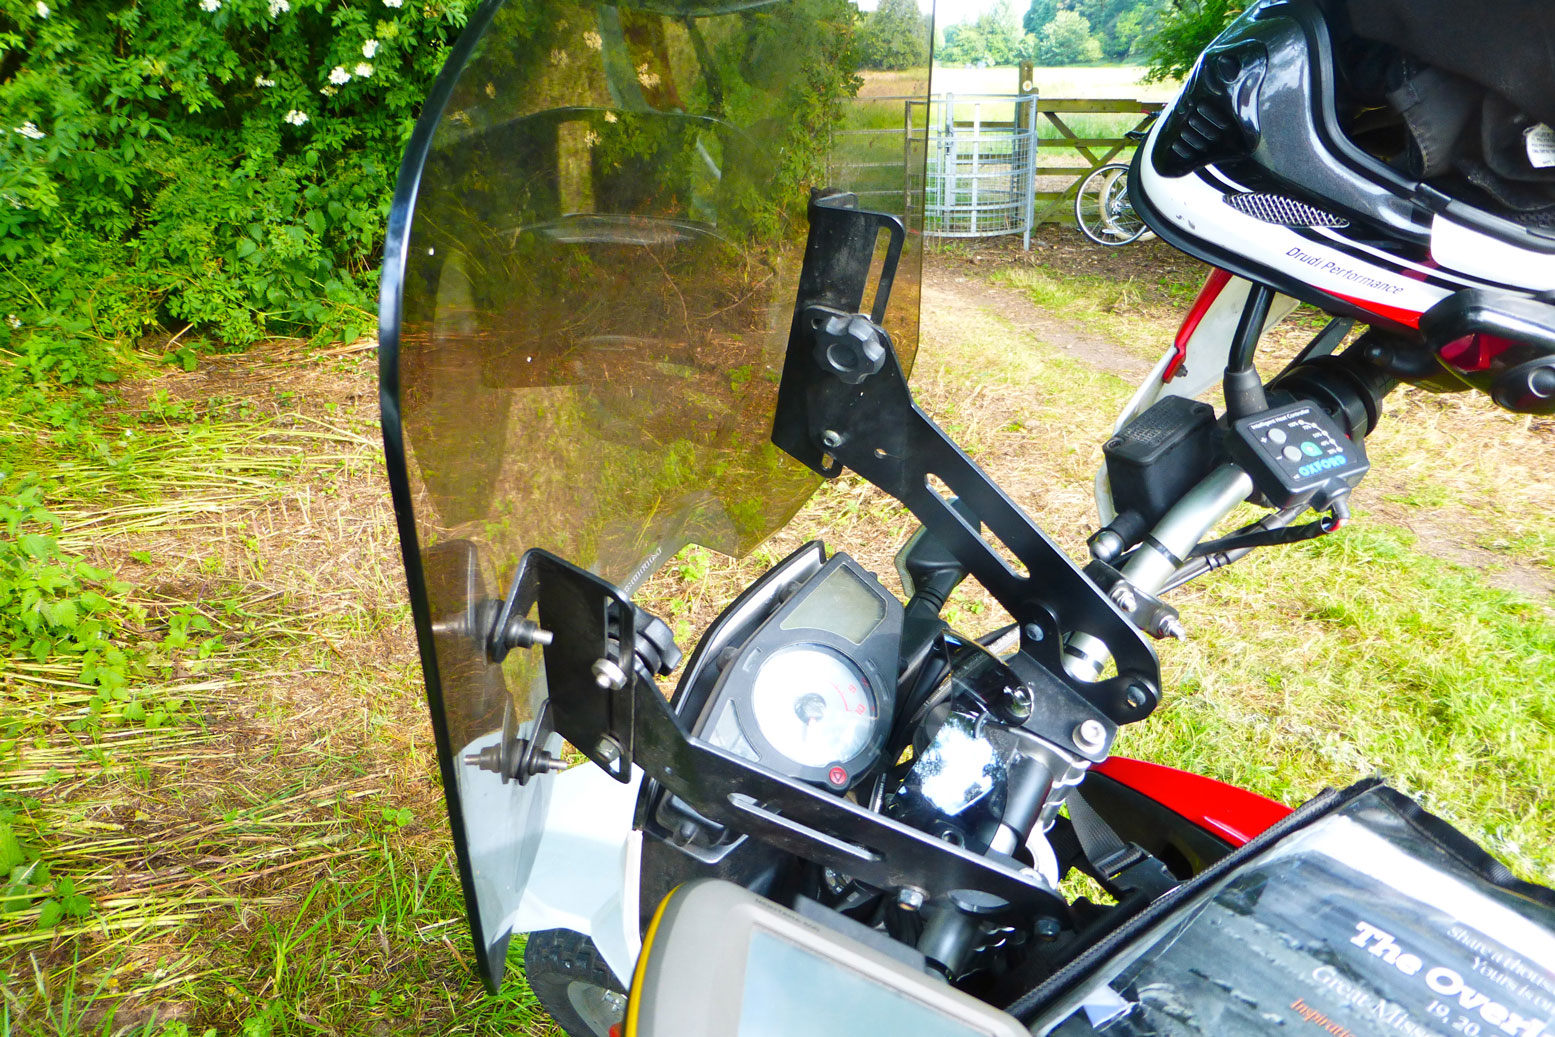
My bike came with a taller Honda screen installed which at 17″ (430mm) high x 15″ wide (curved) is OK but leans too far back (left). I can feel the air hitting the top 4 inches of my lid but I can’t say it’s unbearable buffeting or especially noisy. Let’s face it, I’m riding a motorbike not reposing in the back of a stretch limo listening to the Chemical Brothers. The bloke of the woman who sold me the CB-X suggested spacing the top mounts out by an inch or so to set the screen more vertically. It’s the sort of bodge I’d do without thinking on an old hack, but let’s try and keep this relatively new Honda looking proper for a while.
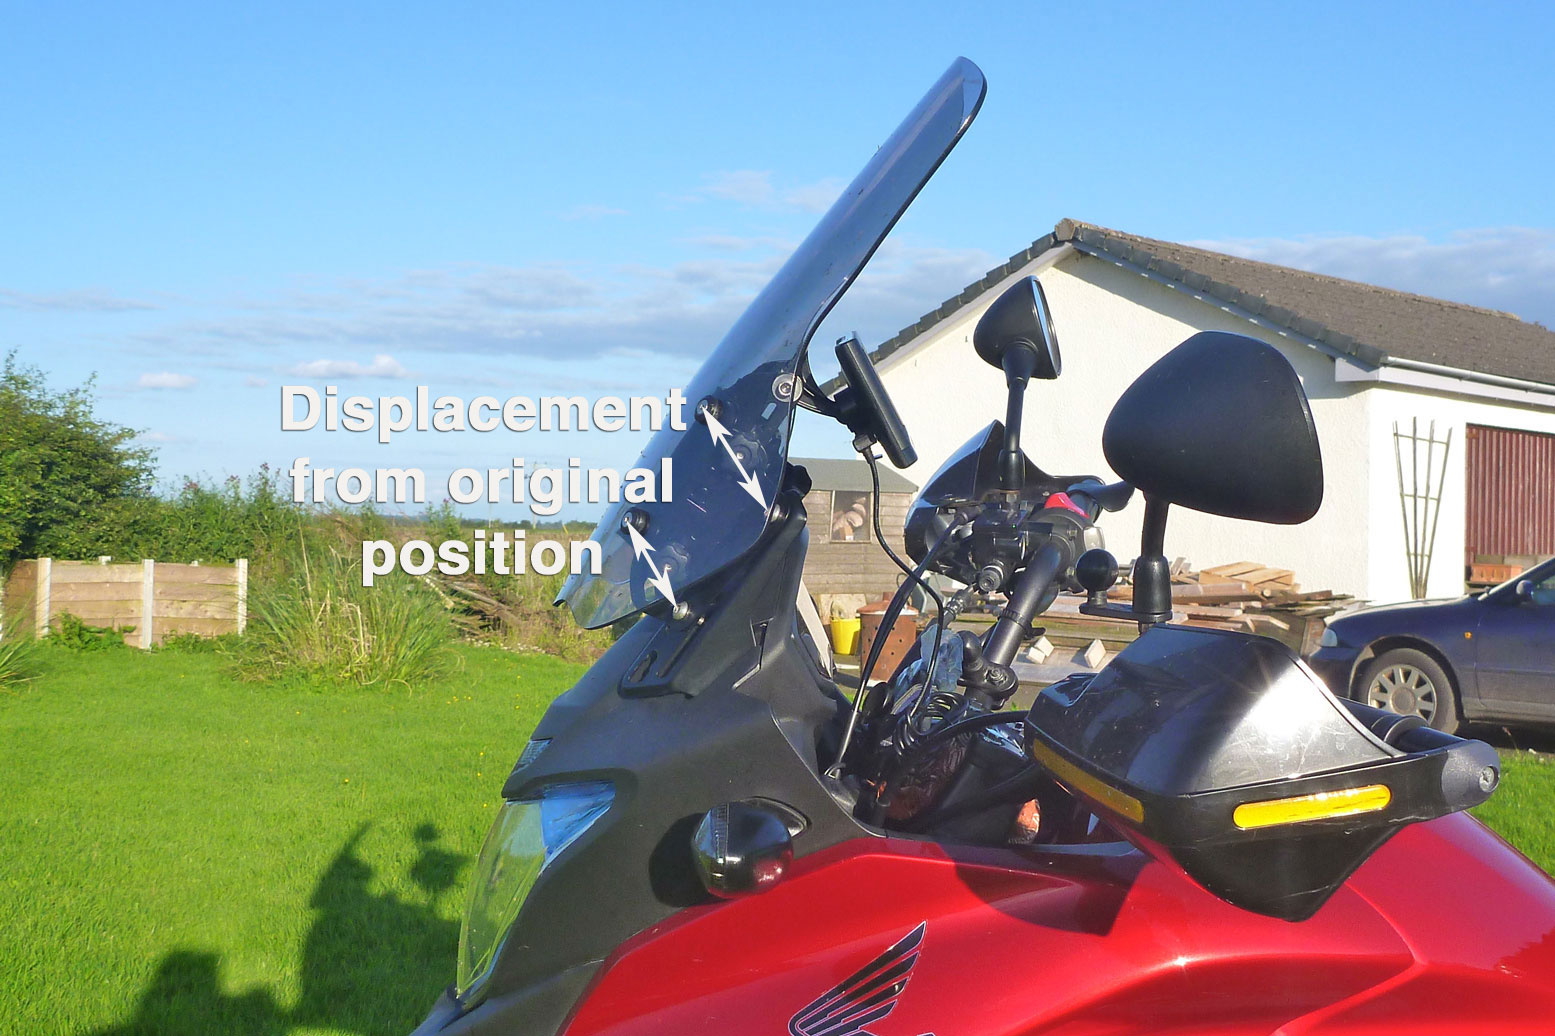
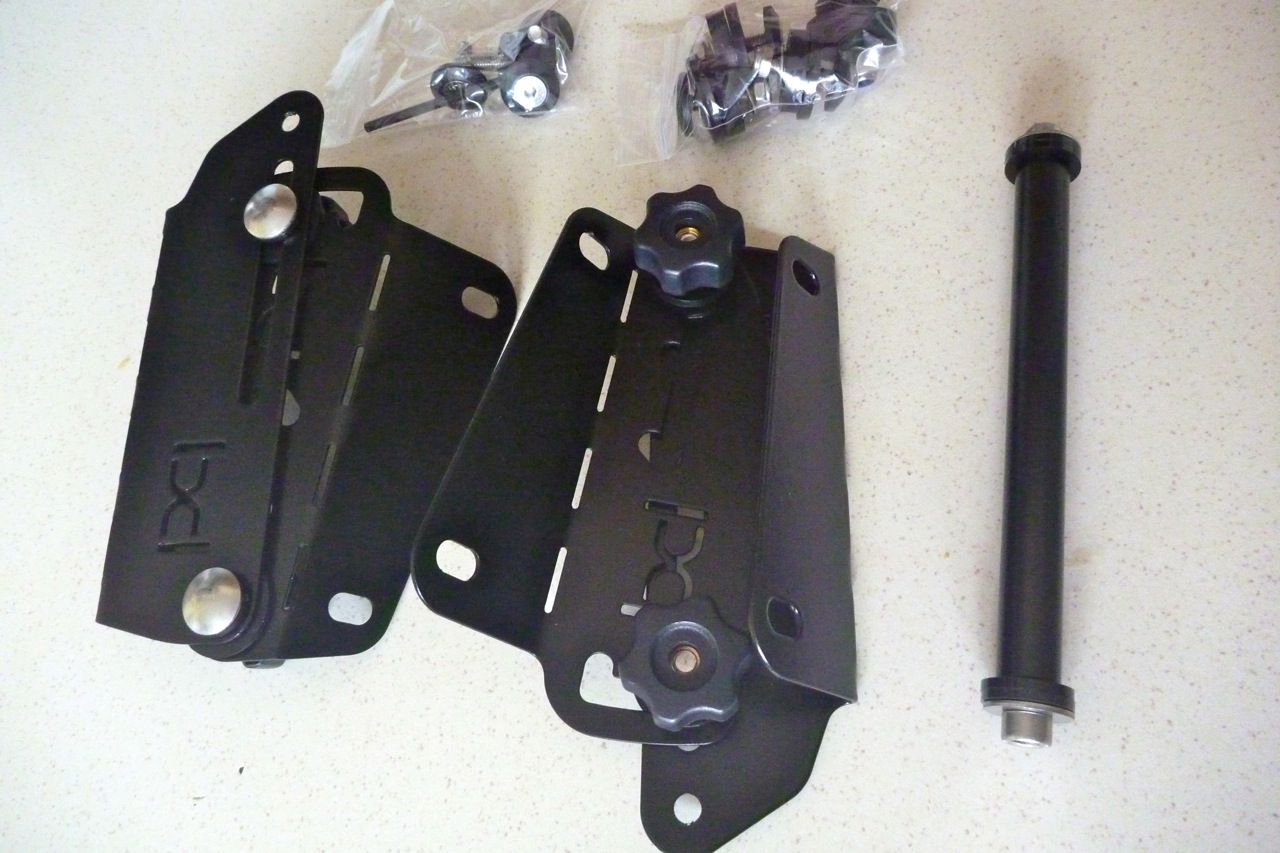
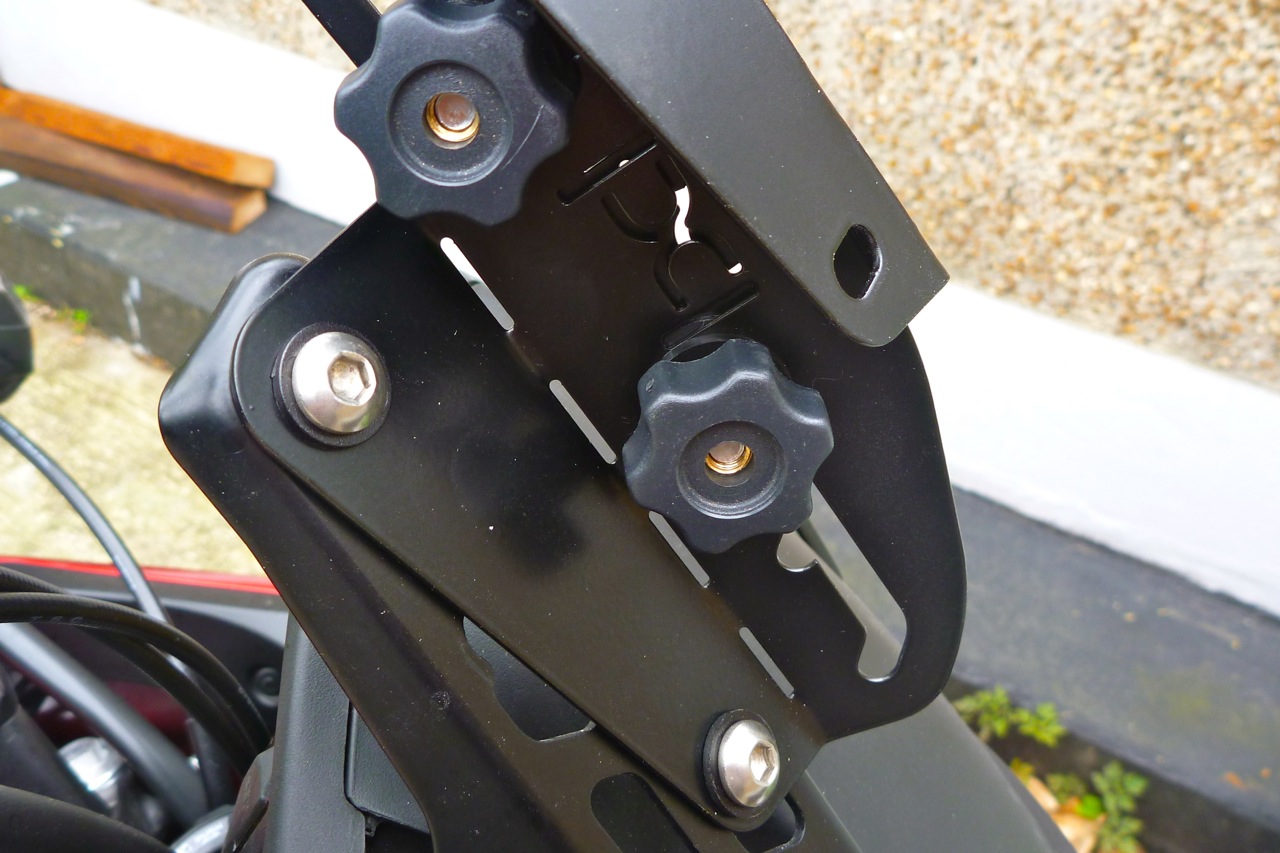
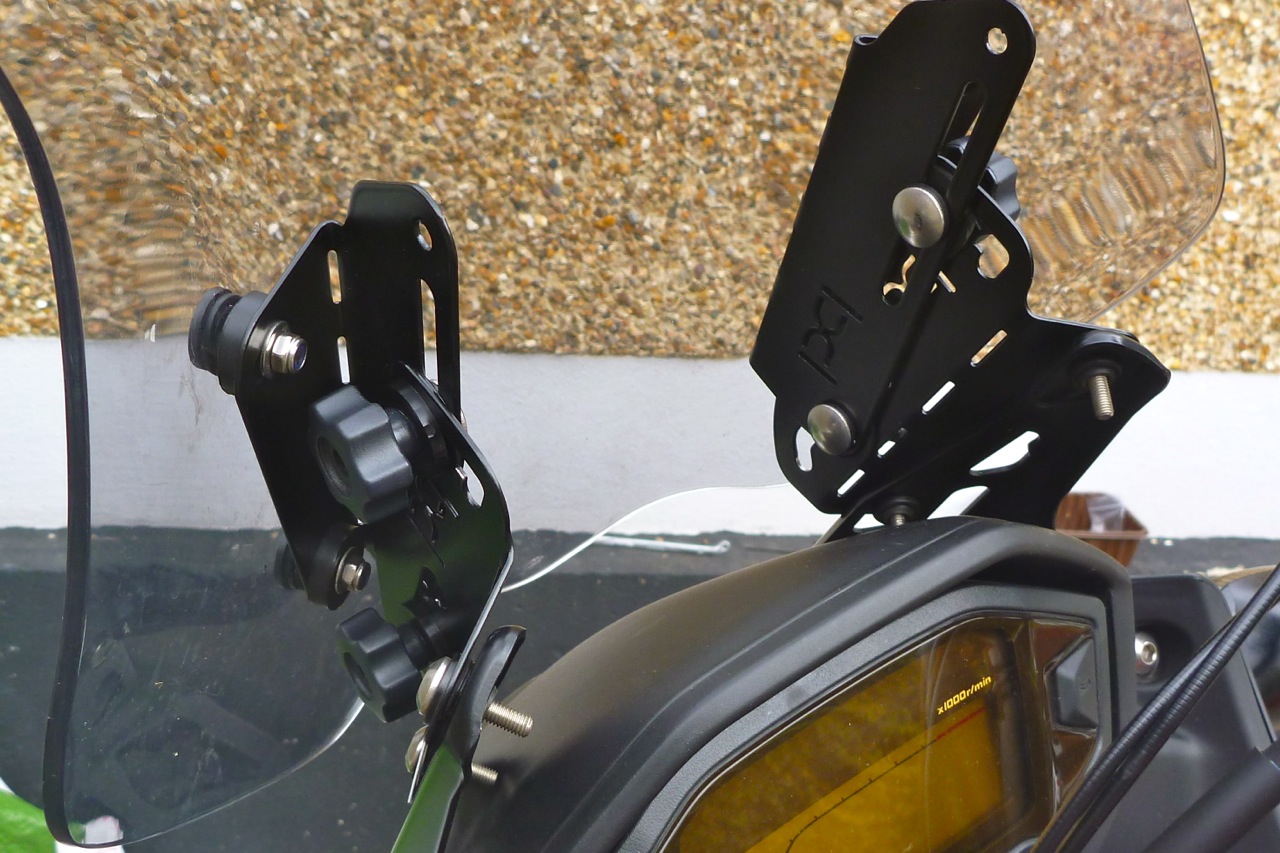
After reading that thread it seems to me that screen adjustabilityis the key if the goose and the gander are to be accommodated. There’s much more choice out there for CB-X windscreens than bashplates, from the likes of Givi, Puig, MRA, Madstad and others, some of them with fully adjustable mounting brackets. But because my screen is tall enough but just at a bad angle, I figured all I needed was a repositioning frame and the thread mentioned just such a thing: an adapter kit by Palmer Products who make them for dozens of bikes, and other stuff besides. Never heard of Palmer until now but their adapter fits between the OE screen and the fairing mounts to give three heights and three angles. Added to the Honda’s high or low position, that’s 18 possible positions. The full kit weighs 520g.
It took only 20 minutes to fit, reusing some of the Honda bolts despite a full set of fittings supplied. I paid extra for the knobs option to be able to adjust without tools, and in black rather than bare steel to perhaps make it less obtrusive on the move. With an accessory bar (not fitted yet), that came to £116, quite a lot but all nicely powder coated, well made and fitting right.
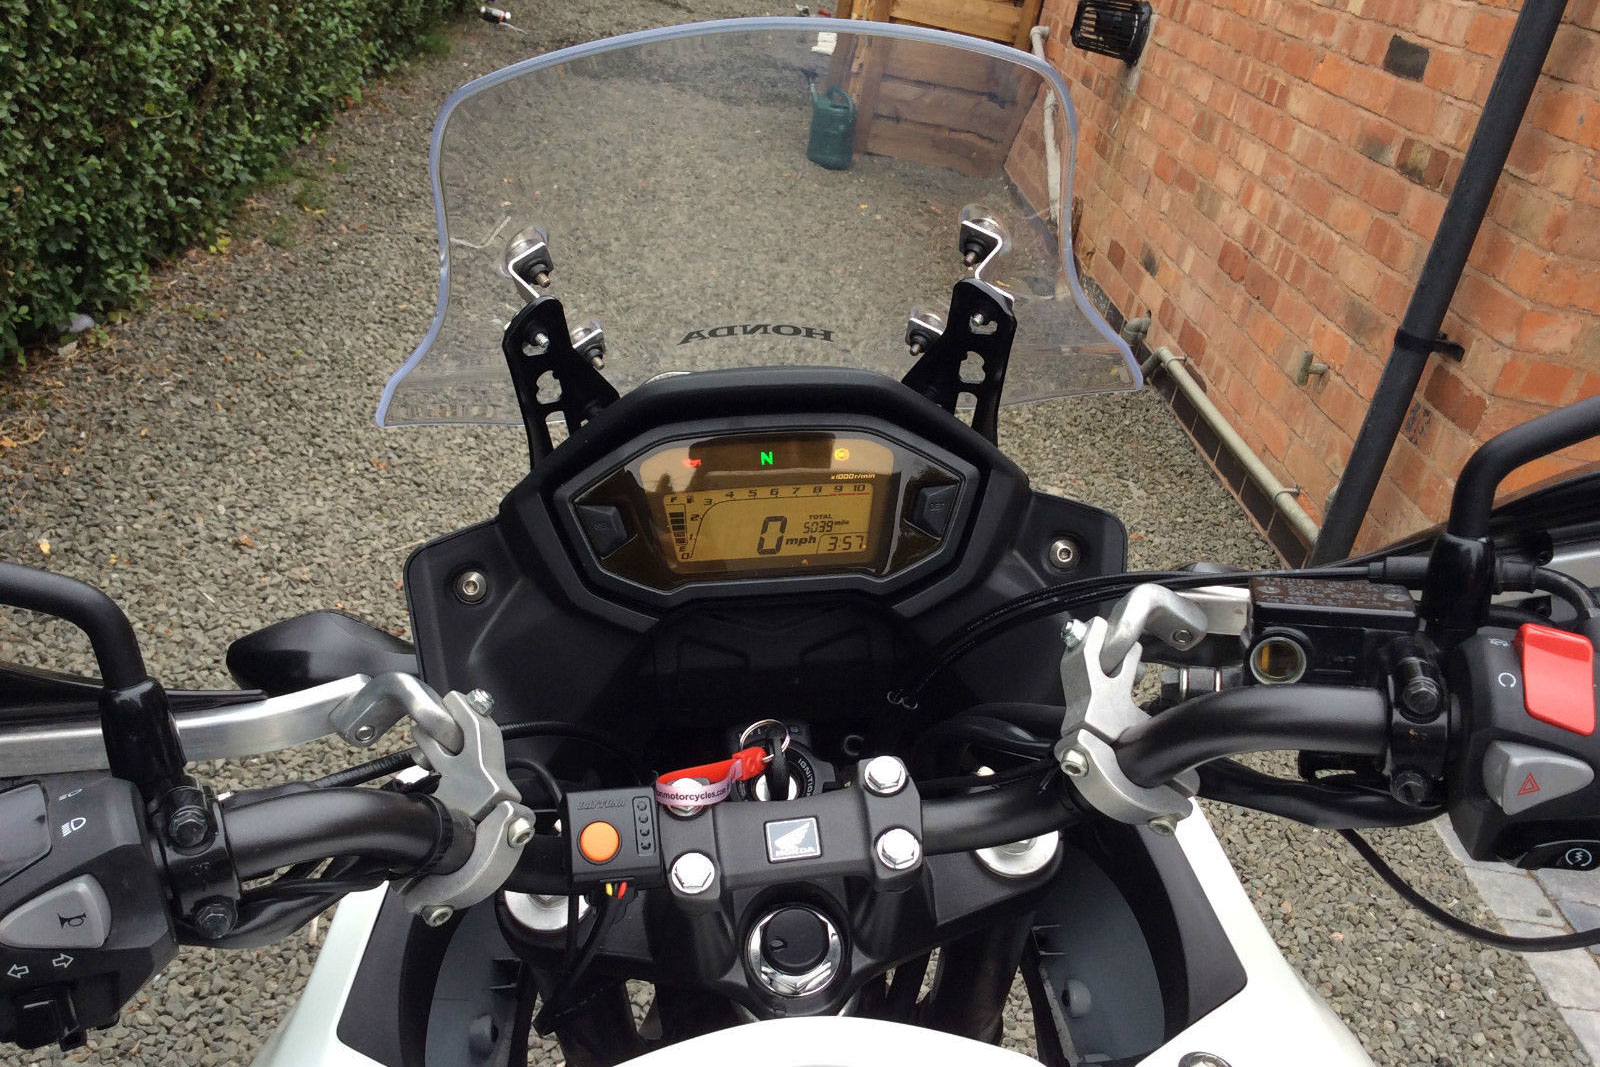
In the end I set mine up on the higher Honda level and then height 2/3 on the Palmer and 3/3 fully forward. The Palmer system looks broadly similar to a Madstad I saw recently at an overland show (right – a bar-mounted kit; they do CB-X too, see link below), but has indexing notches to give the three height and forward positions (though I suppose you could position between notches if you wanted). As it is with a US-made Madstad you have to buy their screen, costing over £200 although the few comments I’ve read not surprisingly rave about it because of the fine tuning.
I’m off on a long ride to far north Scotland next week and hope that before I arrive I’ll also have found an optimal position for the PP adjusted screen. More news about how it fared later.
Other bits lying in wait for the CB-X include a pair of fat Renthals to go with the RRP triple clamp when that gets in, and some RRP fat pegs which they kindly chucked in with the plate after John put me off some Pivot Pegz I was going to try off Adventure Spec. Right now I’m still enjoying the Honda’s non-pivoting rubber-capped units but in the dirt they say wide platform pegs are the way to go and as part of my mission is to try new stuff, new stuff I shall try.
London to Ullapool ~ 777 miles later…
Even before I got to the end of Park Lane (a rare 40mph road in London) I could tell the Palmer wasn’t going to transform my ride to like sitting in the back of a stretched limo. Later, out on the A1 it didn’t feel much of an improvement, but as the OE screen wasn’t bad, this wasn’t bad either. Good impressions (or indeed a comparison) weren’t helped by the fact that I was now wearing my cheaper, noisier and more rattly Bell Moto 9 lid and not my X-Lite. And I keep forgetting to use earplugs. At one point in the journey I moved it from Palmer height 2/3 and 3/3 fully forward to ⅔ and 2/3 – in other words angled a little more back. Well that didn’t make things worse so I’ve left it at that. The screen catches most bugs but a few still get to the visor – same with rain drops so the visor’s not out of the airflow which you’d think is the point. And the screen feels far forward for it’s slim width. The arms and shoulders catch some blast but, as has been said, I am on a motorbike. Later I noticed that over 70mph the flow does go right over which would suggest re-steepening the angle to 3/3 to make it do the same as slower speeds.
Interestingly, a quick scan on ebay found a CB-X for sale and though he doesn’t mention it, at some point in 5000 miles of commuting he added some crude angle brackets to space his short OE screen forward an inch and at the same time raising the height a bit. So there must be something to it. More experimentation is required with the Palmer, or just accepting I’m on a bike and remember the earplugs to retain what’s left of my hearing.
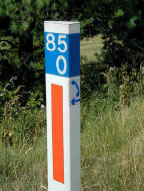
Other observations: helped a little by an Aero wool pad, the seat actually supported a 520-mile day. While doing 70mph where possible and down to 50 in traffic, the mpg was 80, with the odometre some 3.2% over (measured against roadside PKs (right) over 20km. So that’s a true 78mpg. And all in all, a great machine that’s about to get even great-er.
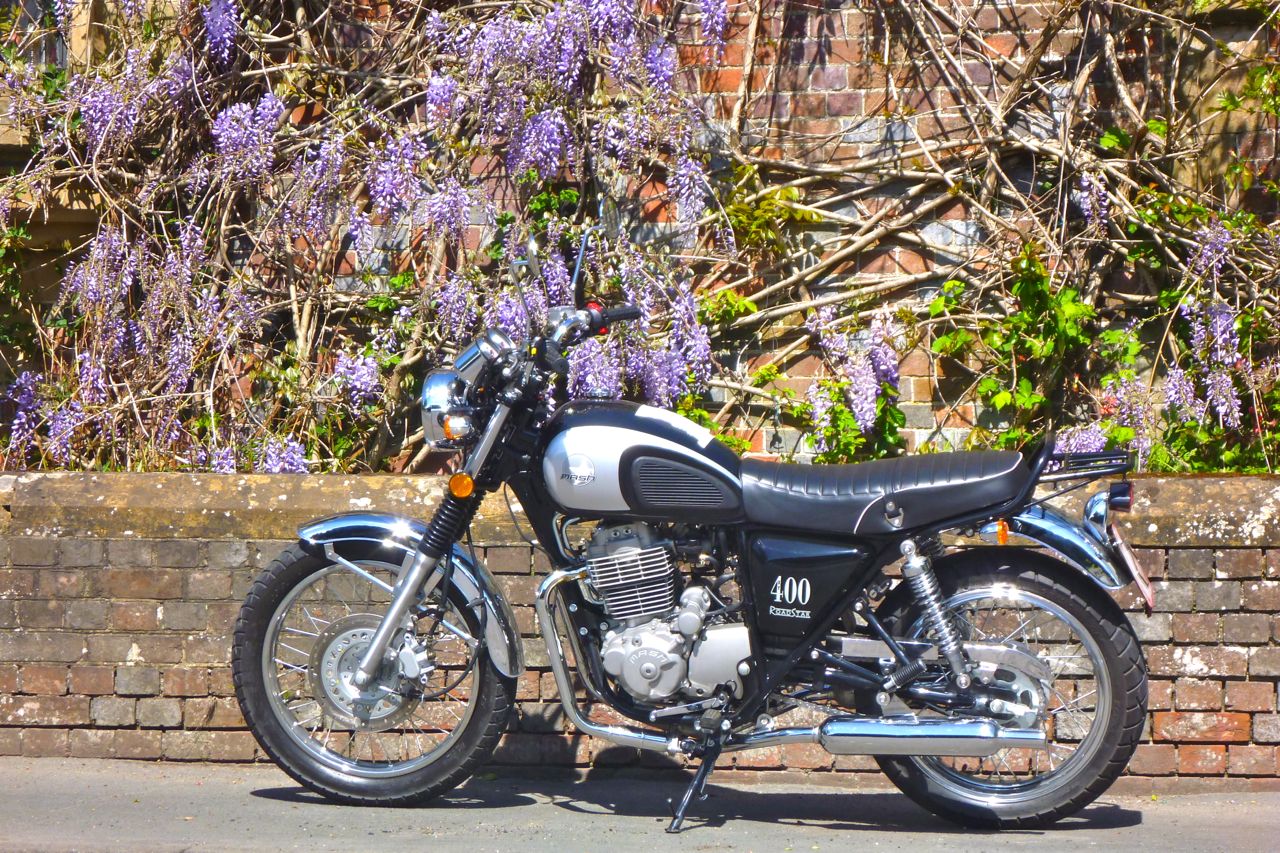
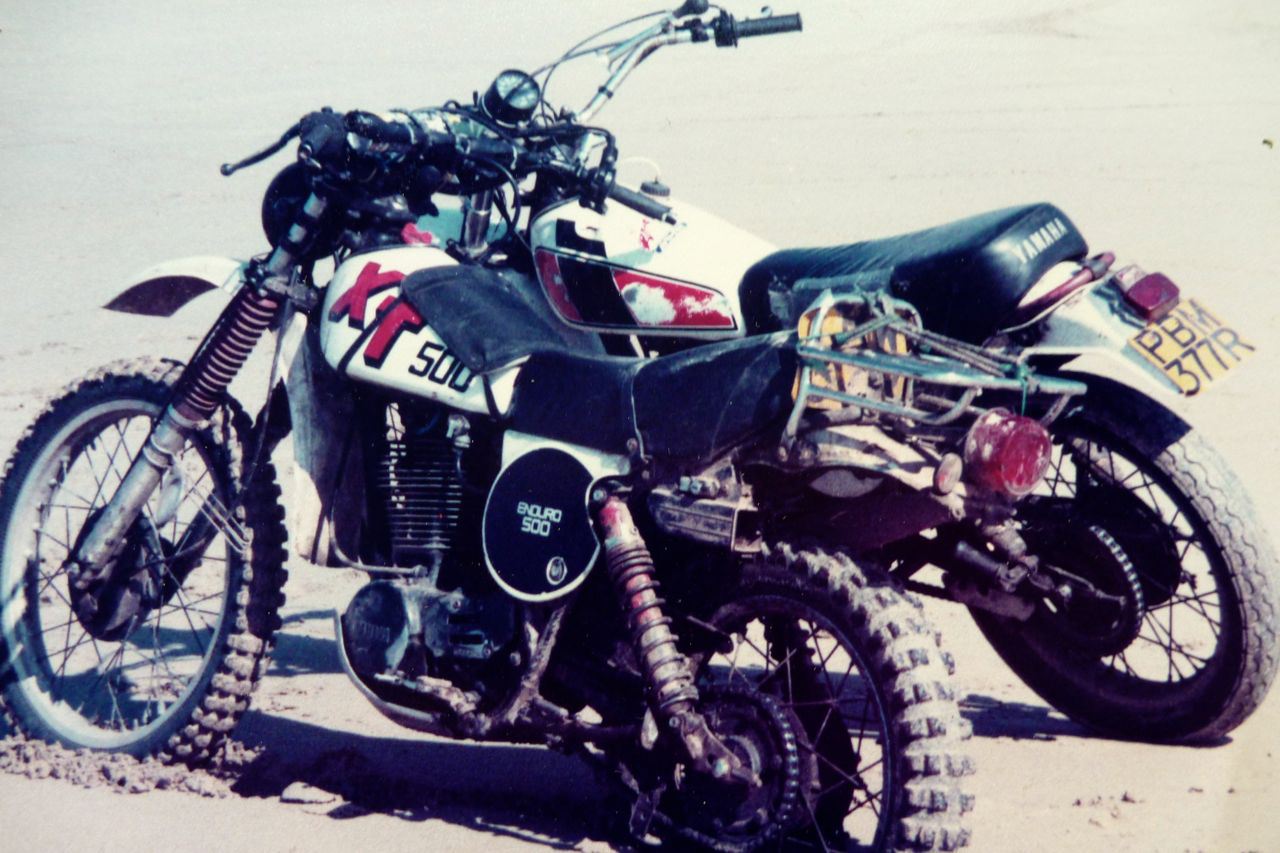
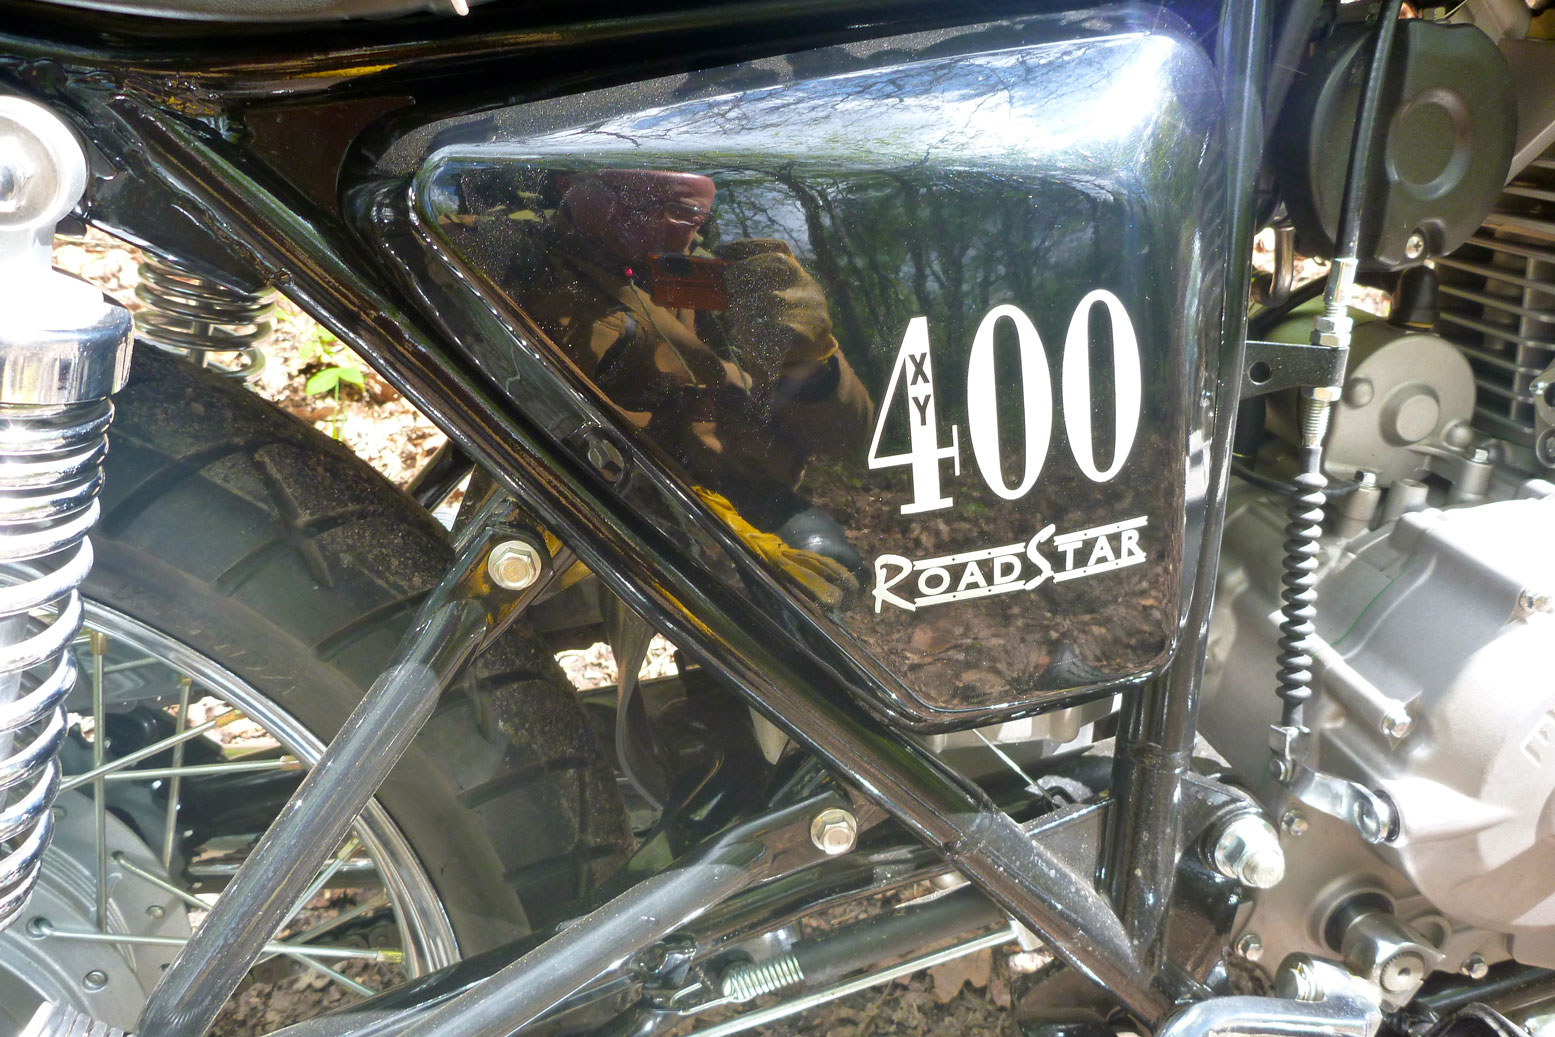
For a while there was a bike I was curious about: the French-branded, Chinese-made Mash Adventure 400 (left) that was briefly available in France and the UK alongside other 400s. It was near identical to the similarly short-lived WK Trail 400 mentioned here. Both use the same Shineray XY 400 engine from Mash’s Roadstar retro. In the UK you could pick up low-mileage WKs from £2500 and end-of-line Mash Advs were going new from £4750, complete with panniers.
Other than the engine, those two Advs were quite different to the Mash 400 Roadstar I tried out (above). The frame’s monoshock back-end and bigger front forks made a much taller machine; both ends were said to be fully adjustable; the wheels are 18/21 and both run discs. There’s a bash plate, screen, handguards and digital clocks plus the mandatory beak.
The WK Trail 400 (left) was briefly sold in the UK and a couple of magazines, including Overland Mag and Rust Sports tested it. Its price dropped from around £4k to a more realistic £2999 £2499 before they all went.
I spent about four hours on the Mash Roadstar provided by T Northeast, a small bike shop in Horley, near Gatwick (they no longer sell the 400s and Mash UK seems to have closed). The bike only had about 150km on the clock and I added another 120km riding the back lanes of Sussex and Kent.
Some specs Engine: air-cooled 397cc SOHC 4 valve, EFI, electric and kick Power: 26–29hp (sources vary) @ 7000 rp Torque: 30Nm @ 5500rpm Weight: 151kg claimed Alternator output: unknown Seat height: 78cm/31″ Fuel tank: 13 litres Wheel size: 18″/19″ Brakes: drum rear, hydraulic disc front Suspension: twin shock with preload, 35mm fork
For comparison • Honda XR400: 31hp and 32Nm @5500, 130kg • XBR500 43hp, 43Nm @6000, 167kg • Yamaha’s short-lived SR400 23hp, 27Nm @ 3000rpm and 174kg • Himalayan 24hp, 32Nm @4500 and 192kg • Saturn V space rocket 10.6 million Nm @ sea level, 496,200kg
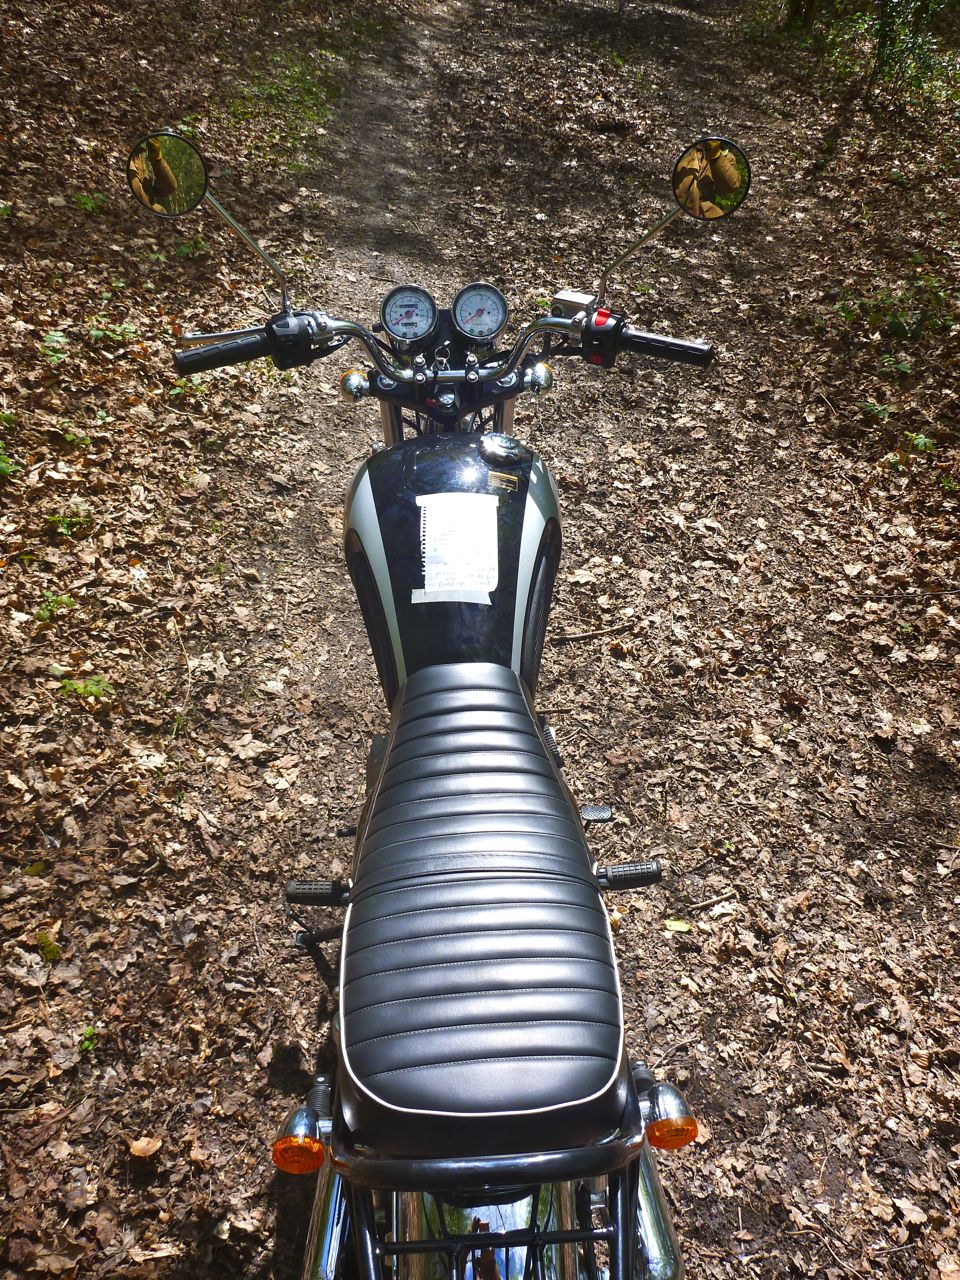
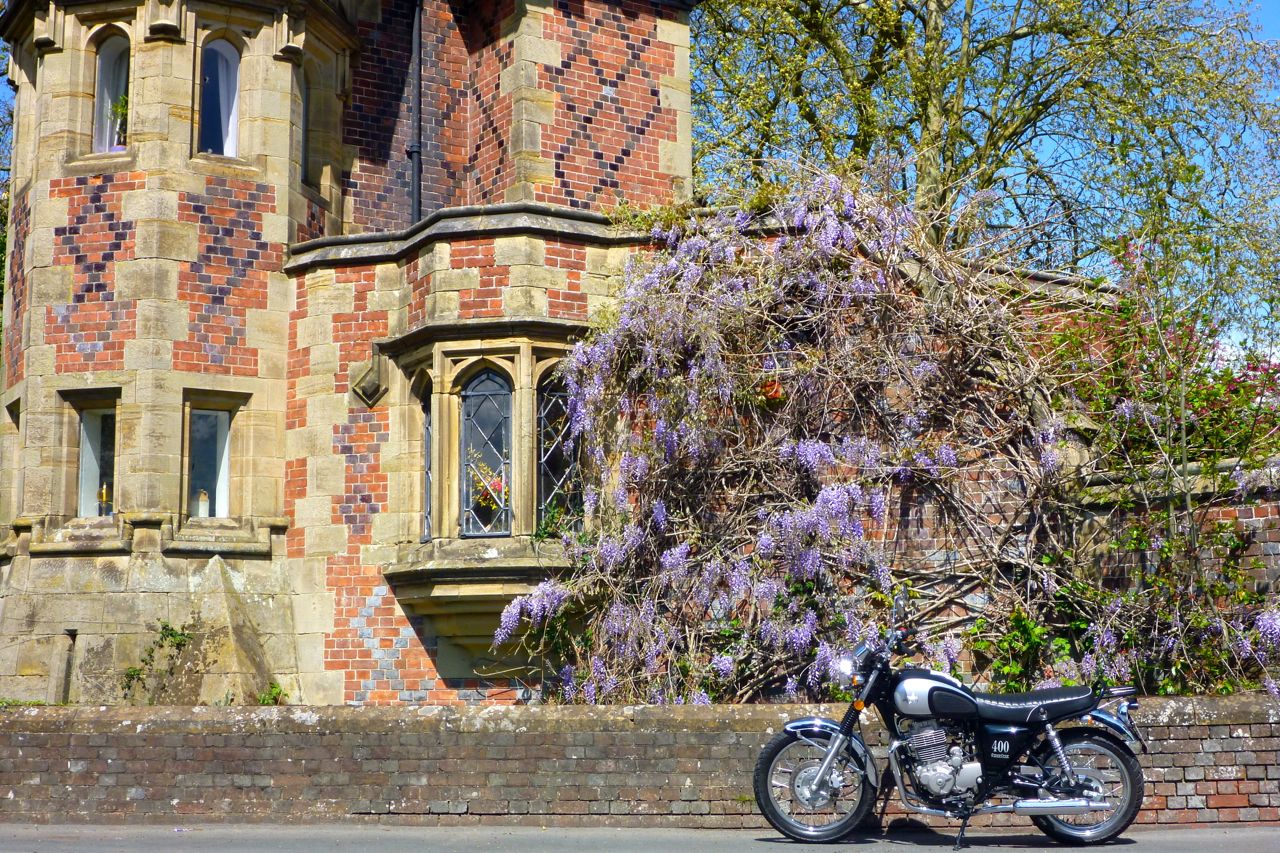
The Mash Roadstar is a great looking machine with an idealised Brit-retro ‘T120’ (left) profile that’s as cool as the originals it’s imitating. The flat bench seat, fork gaiters, peashooter pipes all set off the right cues.
You’d think it’s small but that’s mainly because it’s low. It fitted me (6′ 1″) fine: the footrests felt farther forward than normal with my thighs almost horizontal and me sat midway on the seat. I didn’t get a picture of myself sat on the machine – had I done that the proportions may not have looked as flattering as they felt. The gear lever was a bit short for my boots, but changing was light and near-silent compared to the granny-startling clunk into first on my Versys or my previous XCountry. Though it’s not a habit I’ve ever managed to maintain, clutchless changes up the ‘box were similarly effortless with no backlash.
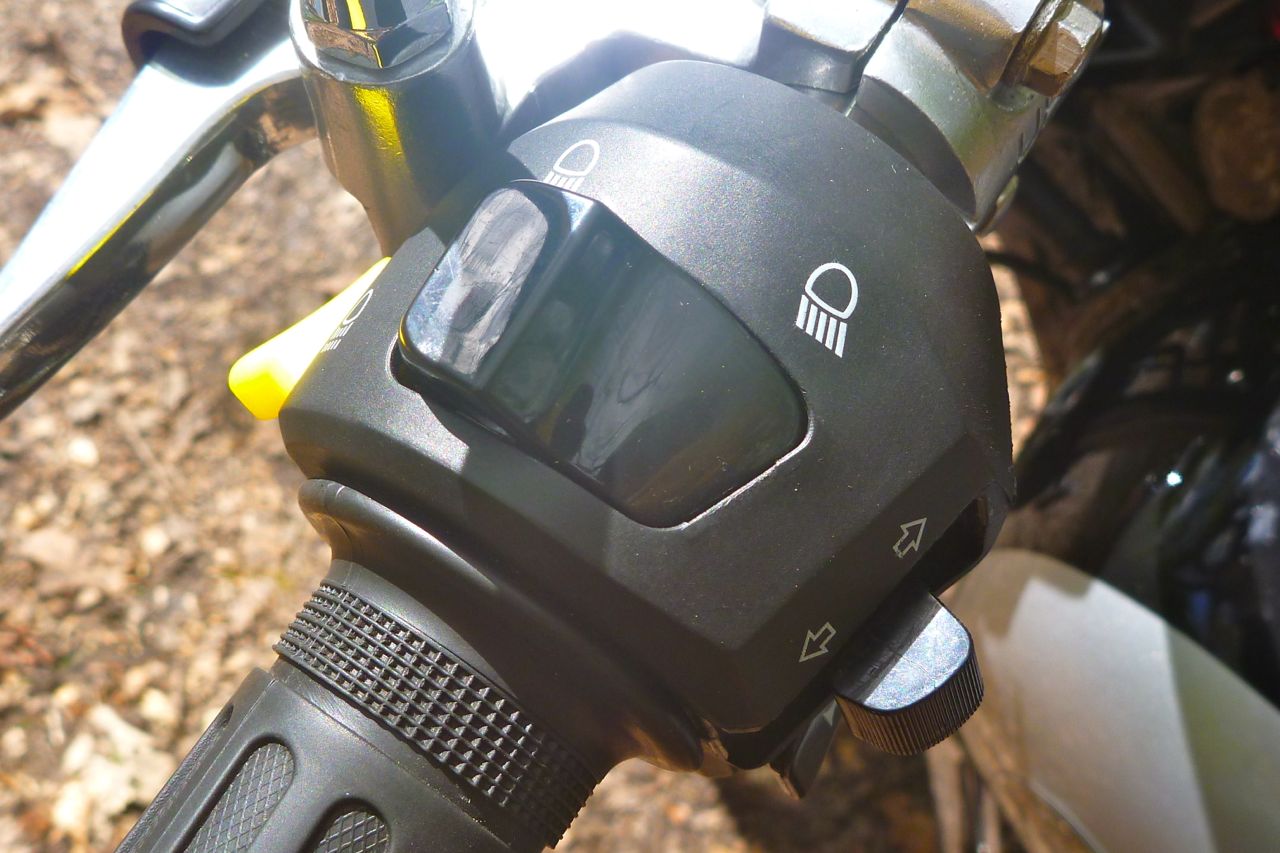
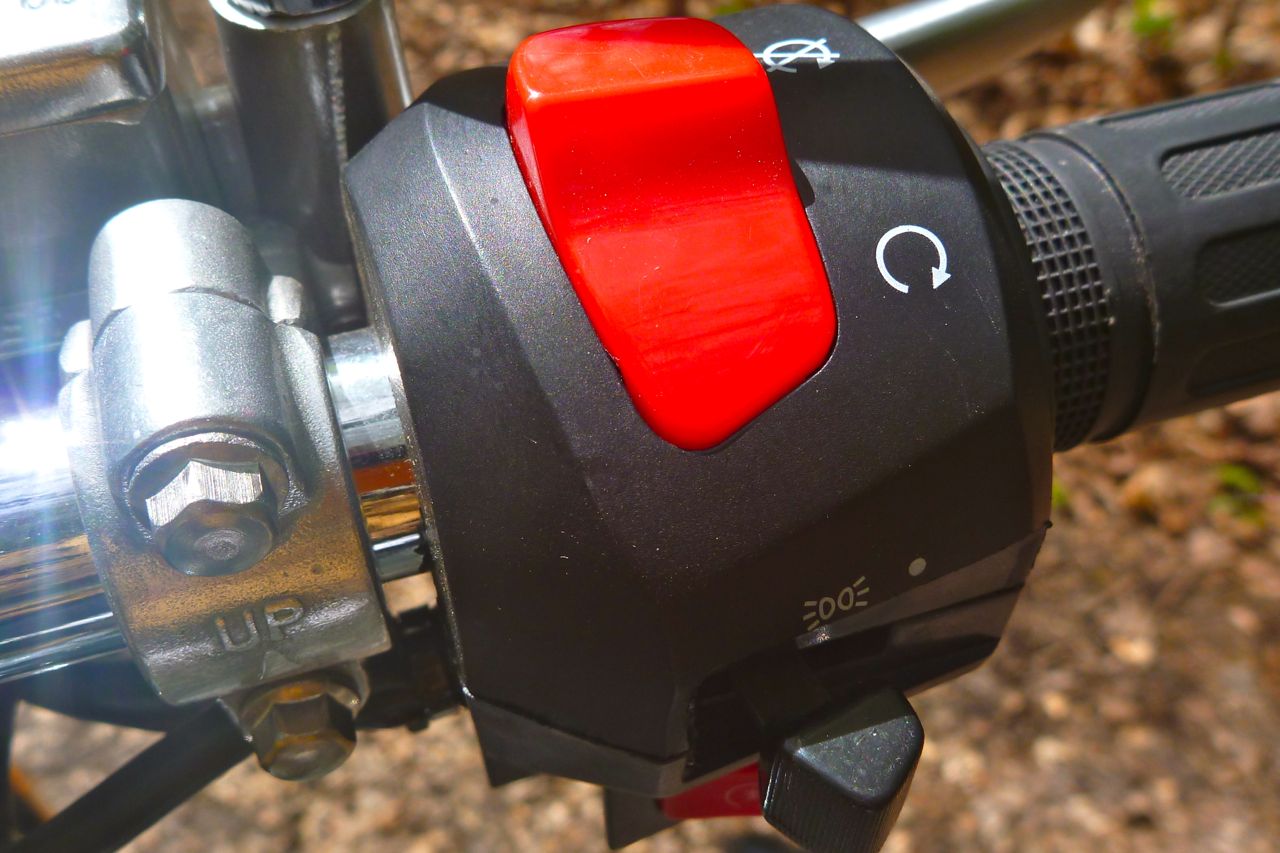
The switchgear didn’t quite give off that intangible feeling of solidness and quality you get from your Japanese or European machines, though all I used were the indicators. The headlamp is always on, though you slide a switch to turn the back light on.
The Mash Roadstar resembles Yamaha’s UK-reintroduced but soon dropped SR400 (left). The mini SR never caught on, despite the retro trend. First time round in the late 70s the original SR500 wasn’t such a big hit either, while the XT500 with which it shared its motor had already become the classic it remains today. Alongside the Roadstar, the £5200 SR400 merely looked overpriced and heavy. What it needs is some of this!
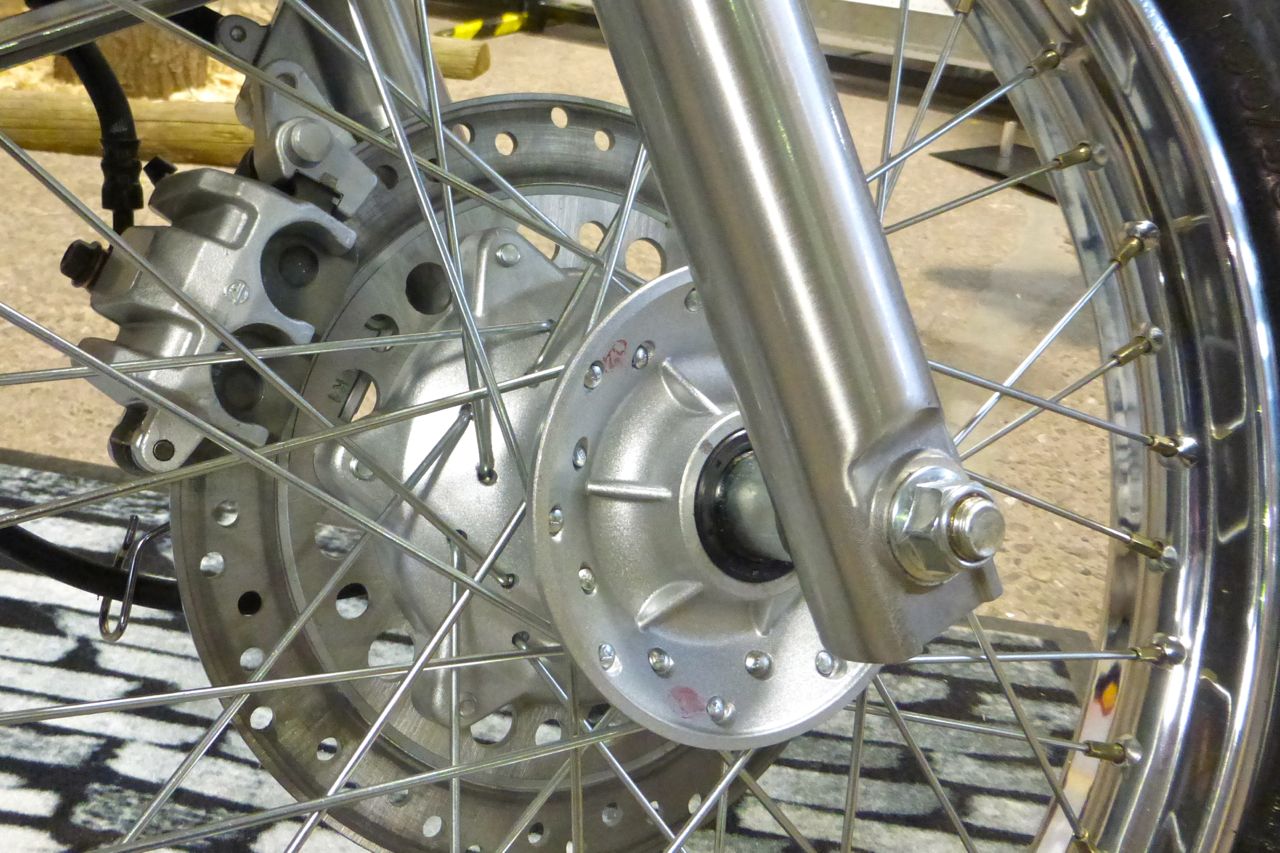
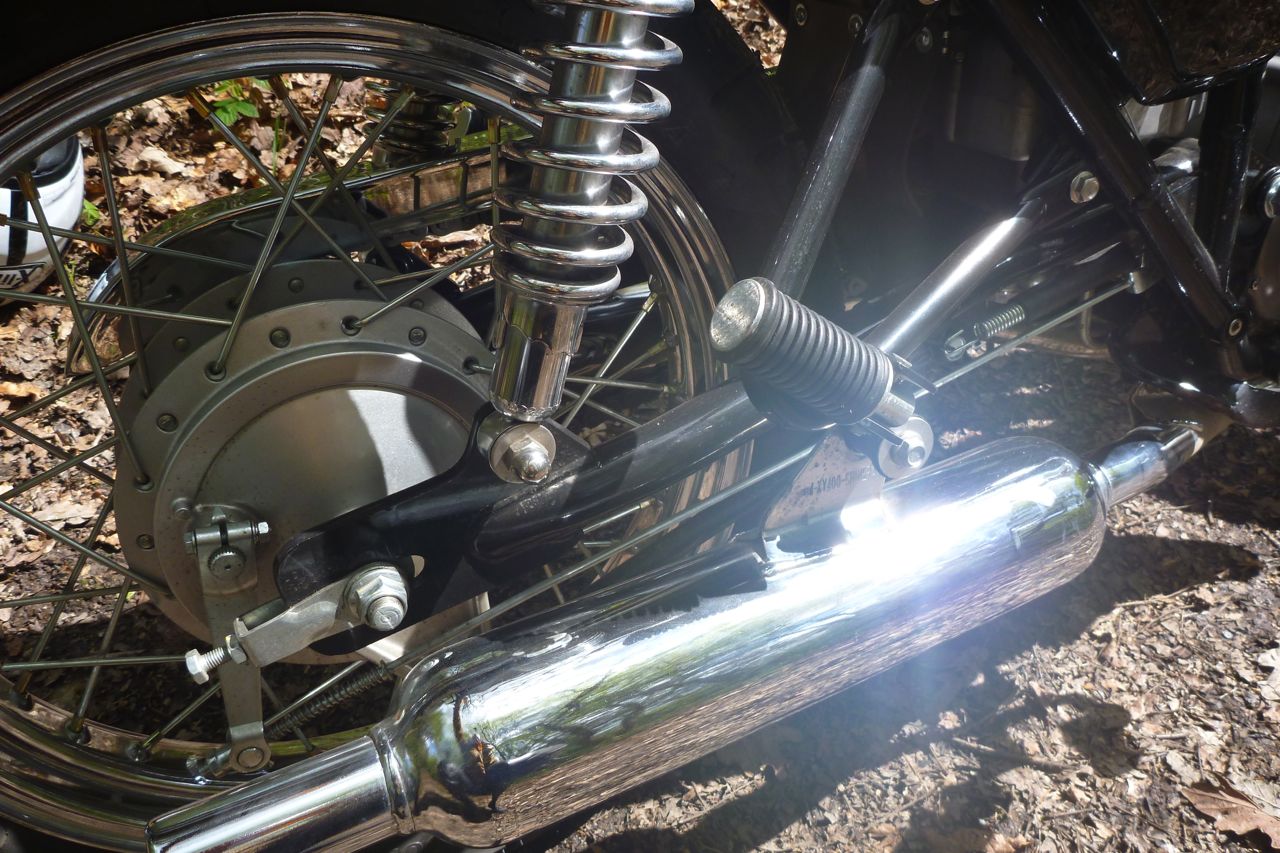
Back at T Northeast I was warned the front brake was poor – a braided hose is said to be in the works. It was lame but over the hours I found applying more pressure than I’m used made it work like a normal brake. Of course you lose finesse yanking on a brake like that, and I’m not sure that can be purely down to a cheap rubber hose. The rear, rod-operated drum was fine and I dare say would lock up with a panic stomp. One old trick we used to do was remove the brake rod and put a light bend in it to reduce the over-direct actuation. Wheels are your classic 18/19 combo and the Kenda Cruiser tyres hardly got stressed on my ride. There was a downpour on the way back but riding with the conditions, they didn’t skip a beat.
Initially riding away from the shop the bike felt as skimpy as a 125. This lack of bulk and the airy front end detracted from the planted feeling on my Versys (at the time), but that can’t all be down to an extra 70-odd kilos of weight. It could be due to the spindly 35-mm forks alongside the proportionally hefty front wheel.
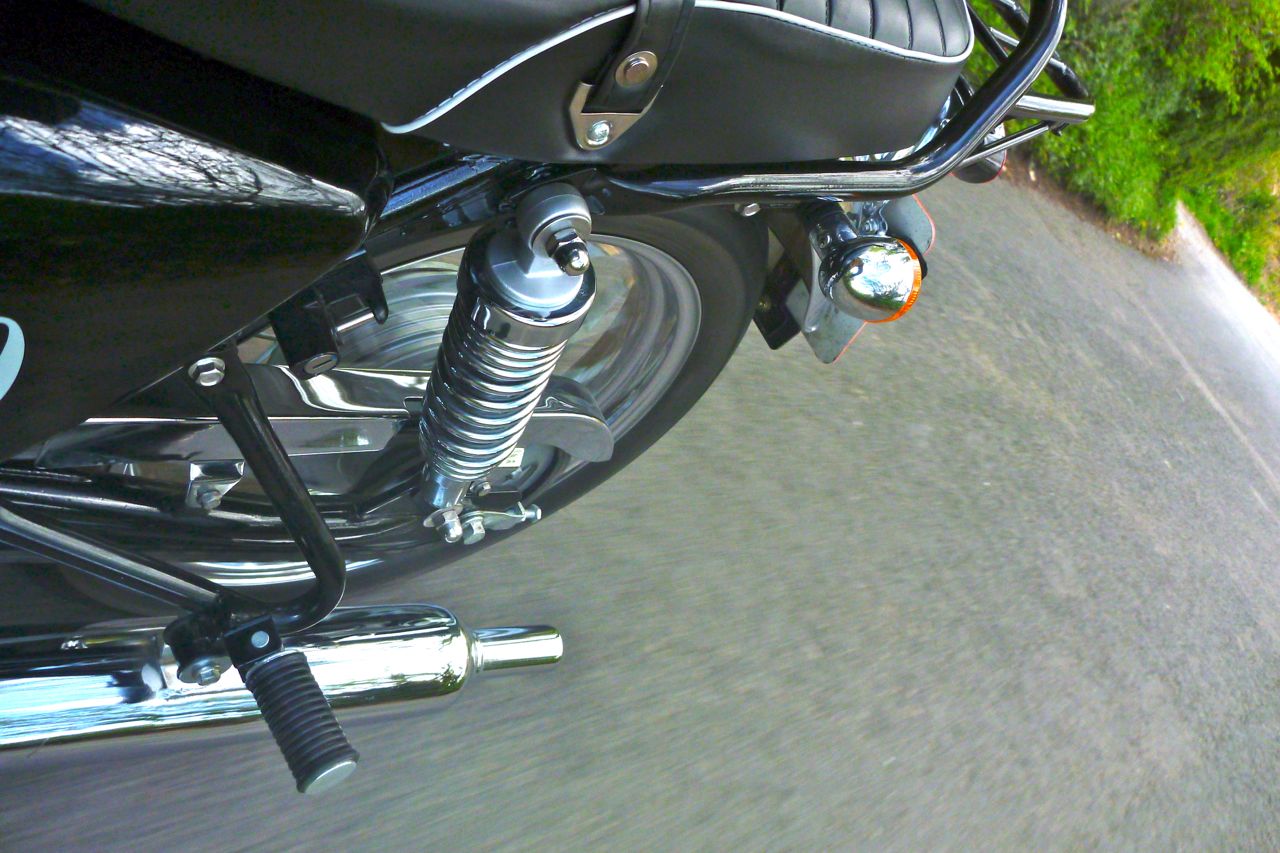
The suspension is basic on the Roadstar. Out of the shop on notch 2/5, my dressed-to-ride 100 kilos bottomed out the back-end on country-lane potholes until I cranked them up to 4/5 with some pliers I happened to have on me (no tool kit that I could find). It’s possible the steering feel improved on doing this too, or maybe I was just getting used to the bike. It takes some effort not to compare a new bike to your normal ride, even if it’s another type of machine entirely.
I know the Roadstar is low but the bike does feel very light and I wonder if that claimed 151-kg figure could be wet. My XCo was supposedly just a few kilos over that weight before I layered on the travel clobber, but the Roadstar felt more like my CRF250L (144kg wet).
And it’s not like the Roadstar goes out of its way to save the kilos. Just like the bikes from the period it evokes, sidepanels, mudguards and the chain stay are all metal. Even the oil tank sat behind the gearbox (left) looks like an unusually hefty casting and the chain this bikes runs is much heavier than what’s on my Versys with more than twice the power. It may well be a Chinese cheapie, but once that’s shot and you slap on a DID I can imagine it would easily last 20,000 miles with something like a Tutoro drip luber. Along with the low seat height, this lightness has great benefits in doing a quick u-ey to nip back for a self-timed photo or follow a lane that looked like it went somewhere good. I had a delivery in Kent, but as there was no 12-volt plug to run a satnav I was navigating the old-fashioned way with a cryptically scrawled roadbook taped to the tank.
Running along Kent’s lanes at up to 50mph (clock and odo in km with mph scale on the speedo) the bike ran well, though I’m not sure I was doing the indicated speed. Push it to 60 and you start to ponder the limits of the brakes and suspension.
The five-speed gearing felt wide and tall: top gear was more of an overdrive rather than something with which you could usefully pull. It could be the very low mileage, but the Roadstar didn’t feel like it could have outrun my CRF250 or the XR250 Tornados we used in Morocco. And I’d expect to feel that power right off the bat, not by wringing the bike’s neck like it was a mid-80s two-stroke triple. For me the point of tracking down a 400 over the much more prolific 250s is either gaining a lack of balls-to-the-wall revviness or the ability to pull in lower gears with fewer gearchanges, but all without the weight penalties you get once you exceed 500cc. I was changing gear around 4000rpm – to rev much further would have felt a bit frenetic and unnecessary, but the 26-hp Roadstar’s motor felt more Jap 250 than XR400, let alone my old XT500 (below) which is listed as 27–31hp but 39Nm torque at broadly similar rpm. Another few hundred kilometres on the engine may have changed that, or it could be down to flywheel weight or the stroke of the motor. Mash don’t mention it, but the WK lists an identical bore and stroke to an XR400 just 0.4 bar less compression (8.9 vs 9.3). These are all just numbers off the internet where I found claimed power and weigh figures can vary by over 10 per cent for the same bike.
Whatever the style of bike, one big attraction is fuel injection combined with a low-compression, air-cooled motor onto which it would be easy to graft an oil cooler. That might not be necessary or all that effective as with 8.9:1 compression ratio and the lowly power output, this 400 ought not get that hot in normal conditions. The low compression also means the motor ought to tolerate low-octane fuel out in the world, though I’ve found efi systems on big singles like the XCo and 660Z Tenere can handle detonation from low octane fuel, whatever the engine’s CR. Another benefit of all this is should be fuel consumption. I filled up at the start but forgot to fill up again at the end to work out what I used, but surely the retro Masher will return at least 25kpl or 71mpg. With the 13-litre tank that would deliver a fuel range of some 325 kilometres or 200 miles – about 80% of what I’d consider optimal for a travel bike.
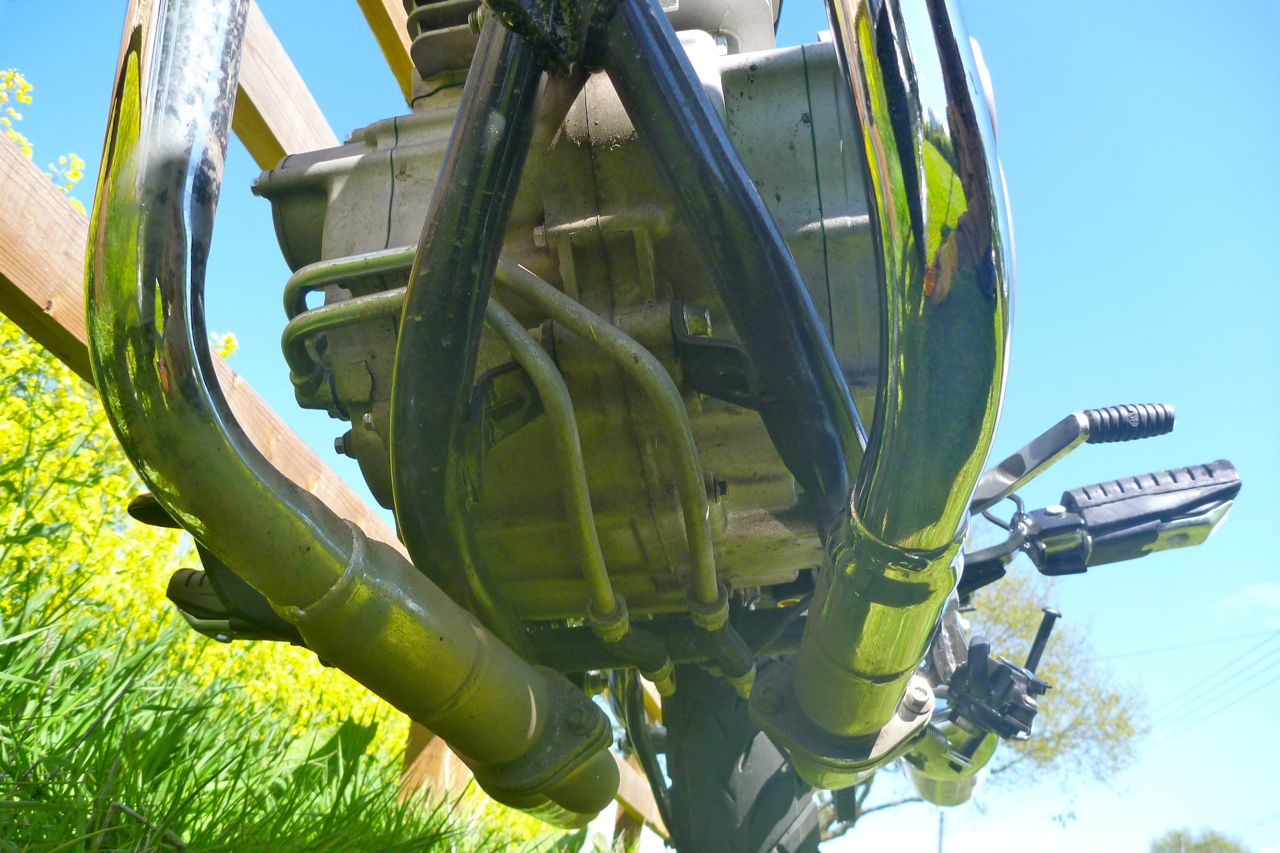
You might get used to the modest power but the main thing that would limit an adventurised Roadstar would be the suspension. At 35mm the unadjustable forks look skinny even if the preload-only twin shocks could be swapped out. The metal chain guard and front mudguard would be better in plastic too and the low-slung pipes as well as the under-engine oil lines would need protecting or moving over the top like an XBR. Without crash bars the foot controls might suffer in a fall too; the gear change could be easily swapped for a folding-tip item, but doing the same with the brake pedal would be tricky to pull off.
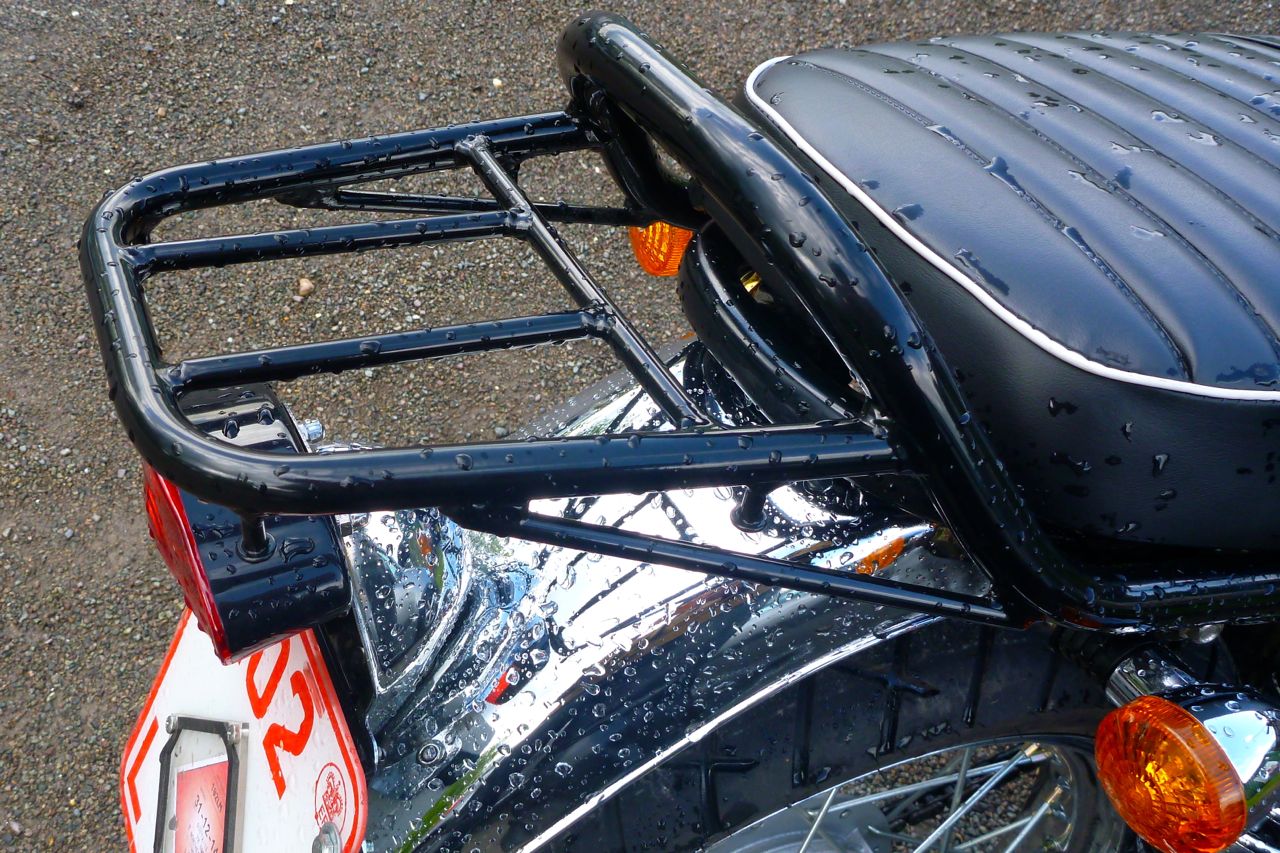
One good thing about being twin-shock is you could get away with using throwovers without a rack to keep them out of the wheel. The little racklette (right) that comes with the bike is neither here nor there – I’d sooner take it off and fit a wide sheep rack as I did on the XCo. I couldn’t work out how to remove the seat other than with an awkwardly accessed 12mm, and only managed to remove one side panel, but the subframe does seem well up to the job compared to 250 trail bikes like the CRF and Tornado where it’s their biggest weak point. The Roadstar chassis has thick gussets inside the triangulated sections and, though slender by monoshock standards, the long swingarm looks solidly mounted via the back of the gearbox.
I did something on the Roadstar I’ve not done on a bike for many, many years: swung a kickstart. I assumed the Mash would kick into life like a CG125 with one swing, but it seems I’ve lost the knack and it took a few stomps to the point where I lost interest in doing it ‘for old times’ sake’. I recall how we lamented the dropping of kickstarts from motorcycle engines, but then and now a button just gets the your motor running. And should the Mash not start on the button I bet it would take a lot of huffing and puffing to fire up an engine with a kick. It’s been discussed before but a weak battery is likely not to have the spare juice to power up the efi and fuel pump as well as fire a juicy spark across the plug. Better to just do a jump start.
My parting impression of the Roadstar was of a bike whose welcome lightness makes it effortless to ride along quite roads and in town, but which on the open road looked a bit better than it went. Compared to a 250, I didn’t get a sense of any added grunt from the 400cc motor, even if it wasn’t a revvy machine.
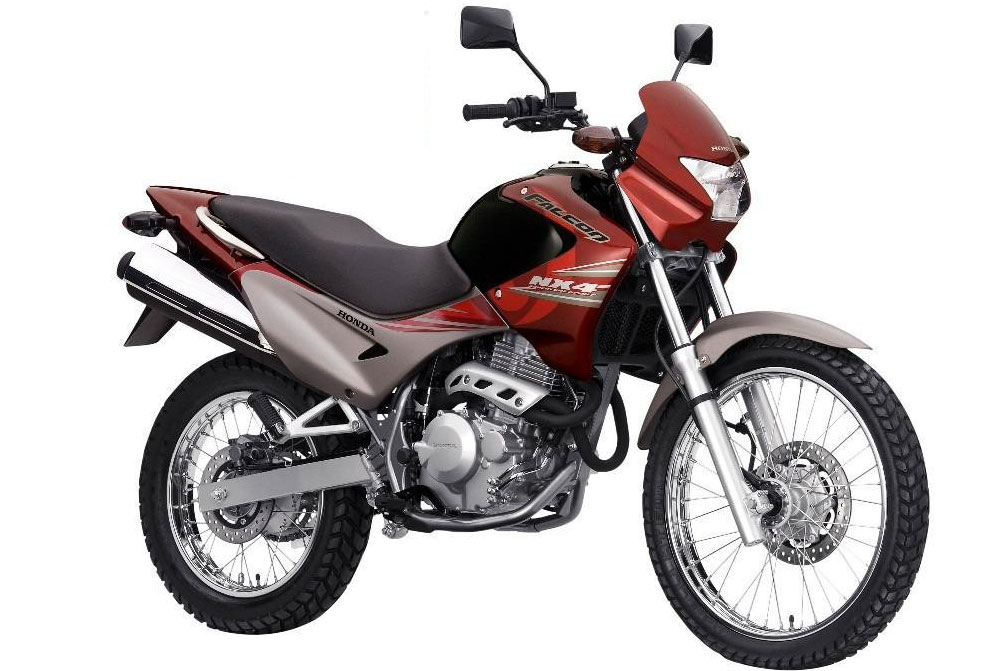
In 2018 I finally got to ride an XR400 – you definitely know you’re not on a 250. And that’s as it should be and why 400s are an overlooked ‘missing link’. Actually no so ‘missing’ as ‘not here’. Bikes like the Brazilian-built carb’d NX4 Falcon (above) went for £4000 new in Mexico, or the 250 Tornado never officially imported to emissions-conscious western markets. The Roadstar’s widely spaced gears would need working to move along, though you’d want to get that front brake sorted first. The saddle probably wouldn’t sustain a day’s riding, but then even with a screen, the Roadstar isn’t intended for that sort of use and there are much more sophisticated bikes with truly terrible seats.
As for the price [at the time of testing]? Even with the warranty I still think nearly four grand in on the high side for a basically equipped Chinese 400 single. If it follows the UK imported and branded Honley 250 Venturer, that price may well drop after a while [still €4000 in 2020), because as things stand the depreciation on a used Chinese branded bike will surely be monumental. Otherwise, for that money I can take my pick from a used CB500X or buy any 250 I want.
Motorbike capacities come with certain expectations and on this test ride it was the 400cc engine I was keen to assess. In terms of more-than-250cc grunt, the Roadstar was a bit disappointing or perhaps just needed more running in. Add it all up and as a low-tech adventure tourer I think the Roadstar is a bit too basic for the money. You can pick up used low-mile Roadsters on eBay from around £3000 so the depreciation isn’t that bad, but in 2019, my same-priced Himalayan ticked more boxes.
Thanks to Ian at T Northeast for the test ride on the Roadstar.
The BMW 650X range came and went between 2007-08. They were light and powerful but early reliability issues as well as a high price saw the models sell poorly and then get dropped. After a pause which saw the 800cc parallel twins make their mark, within a couple of years the lardy Sertao and later G650G reset things back to the pre X-bike F650s in terms of weight and performance. Some people think that was a shame.
The bikes from Planet X were a one hit wonder and you get the feeling that the X range – helped in no small way by Walter Colebatch’s extensive Siberian travels and associated development of his XChallenge – might be turning into a cult travel bike, not least due to their limited availability. There’s more on the history of X on the XCo intro index page.
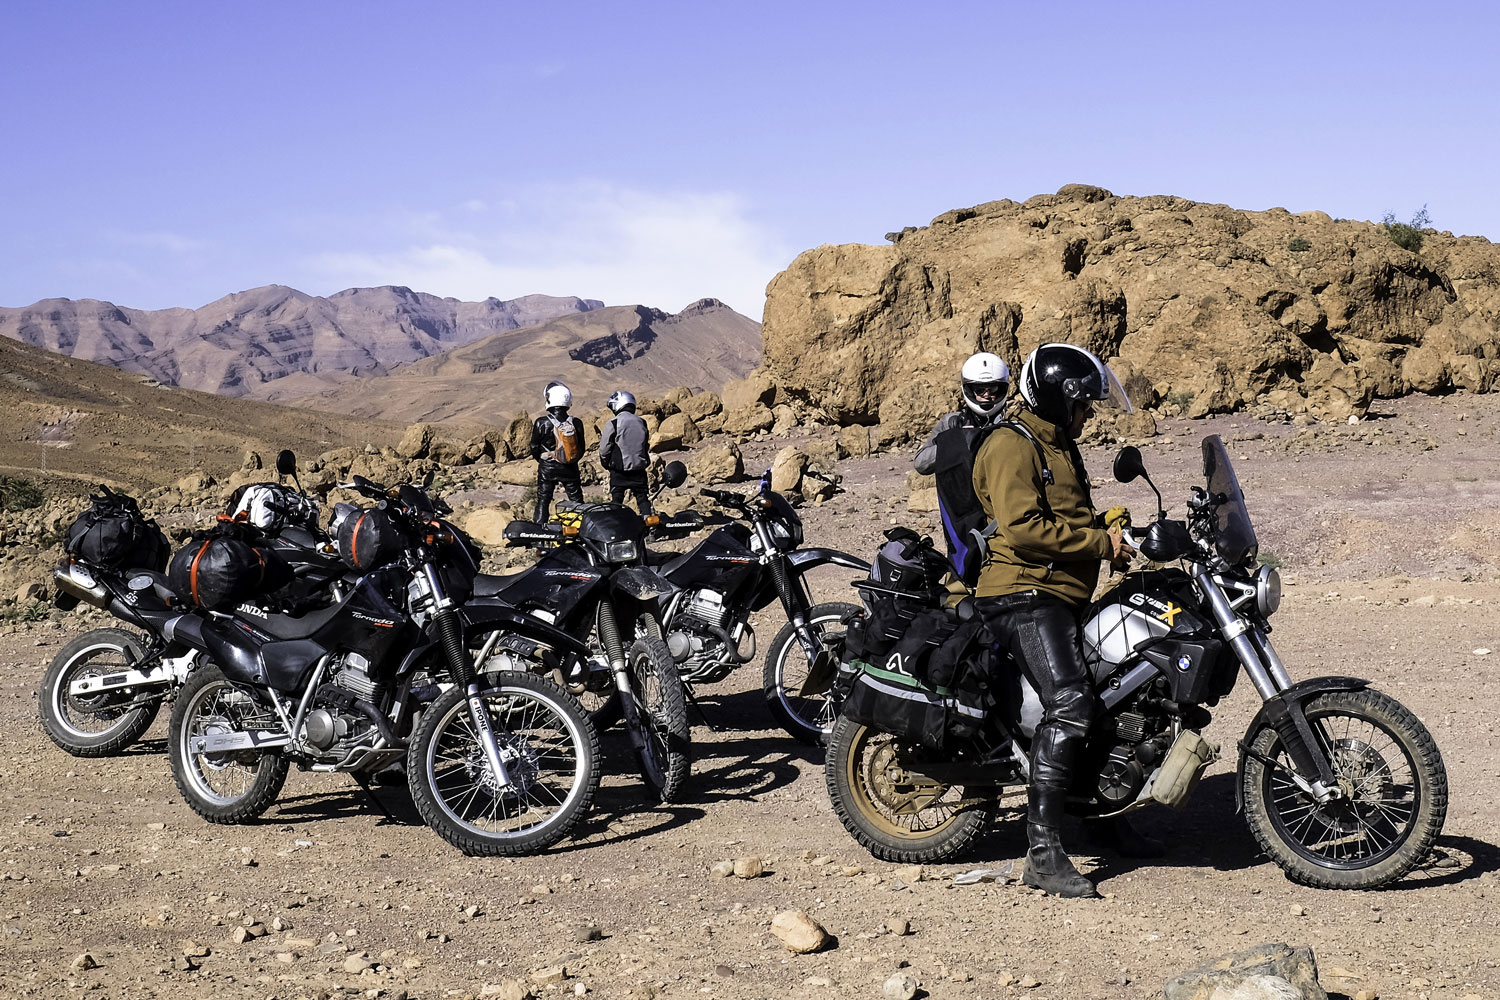
My plans for my XCountry were to run it on a couple of Moroccan tours and maybe take the bike deeper into Mauritania. The later part didn’t pan out this year, but over ten months I racked up 10,000 miles, including 4000 to Morocco and back. I sold it at 16,000 miles.
Photo: David W
My XCo set up
Soon after buying it I adapted my X bike as follows (see intro index page for more details on fitting these accessories).
All those items I’d fit again without hesitation except maybe the TT side stand plate which fell off in Morocco as I was warned it might. I spotted a better, vibration-proof solution (right) while at Hyperpro. Not totally won over by the Booster plug, but if it runs cooler (richer) and hardly affects mpg then probably worth it.
Comfort When I first sat on the bike I was surprised how small and short it felt and wondered if this might affect comfort. I dare say I may look big on it if I saw myself reflected in a shop window, but at 6′ 1′ and ~92 kilos the XCo proved to be much more comfortable than it looked. By the time I sold it, 700-km days in winter didn’t mean flopping onto a hotel bed exhausted.
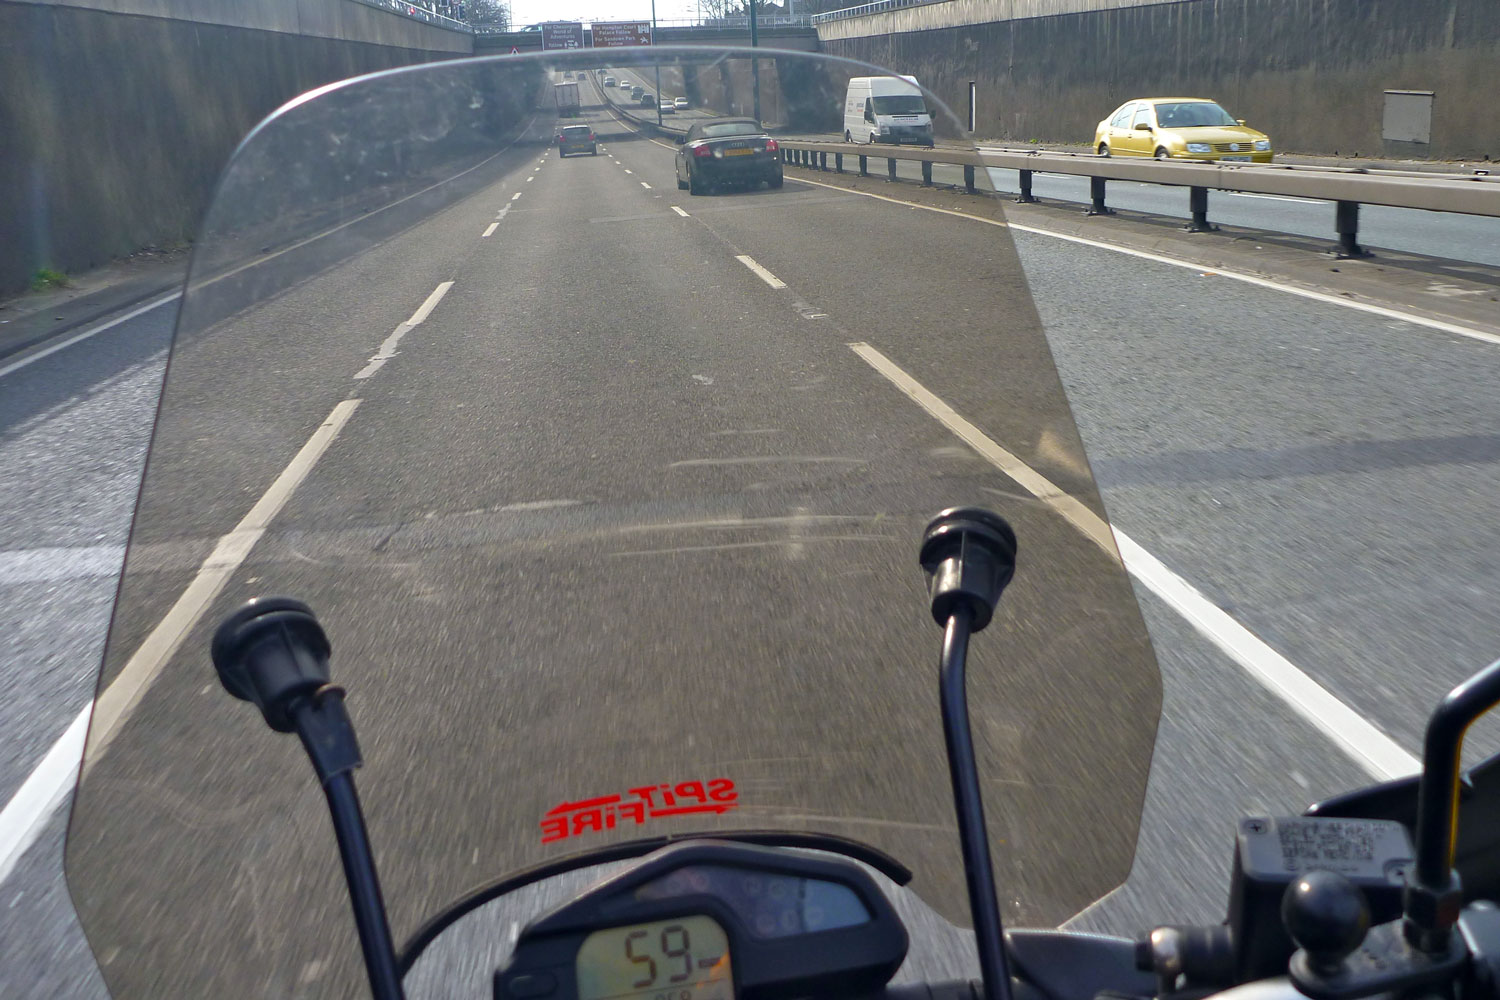
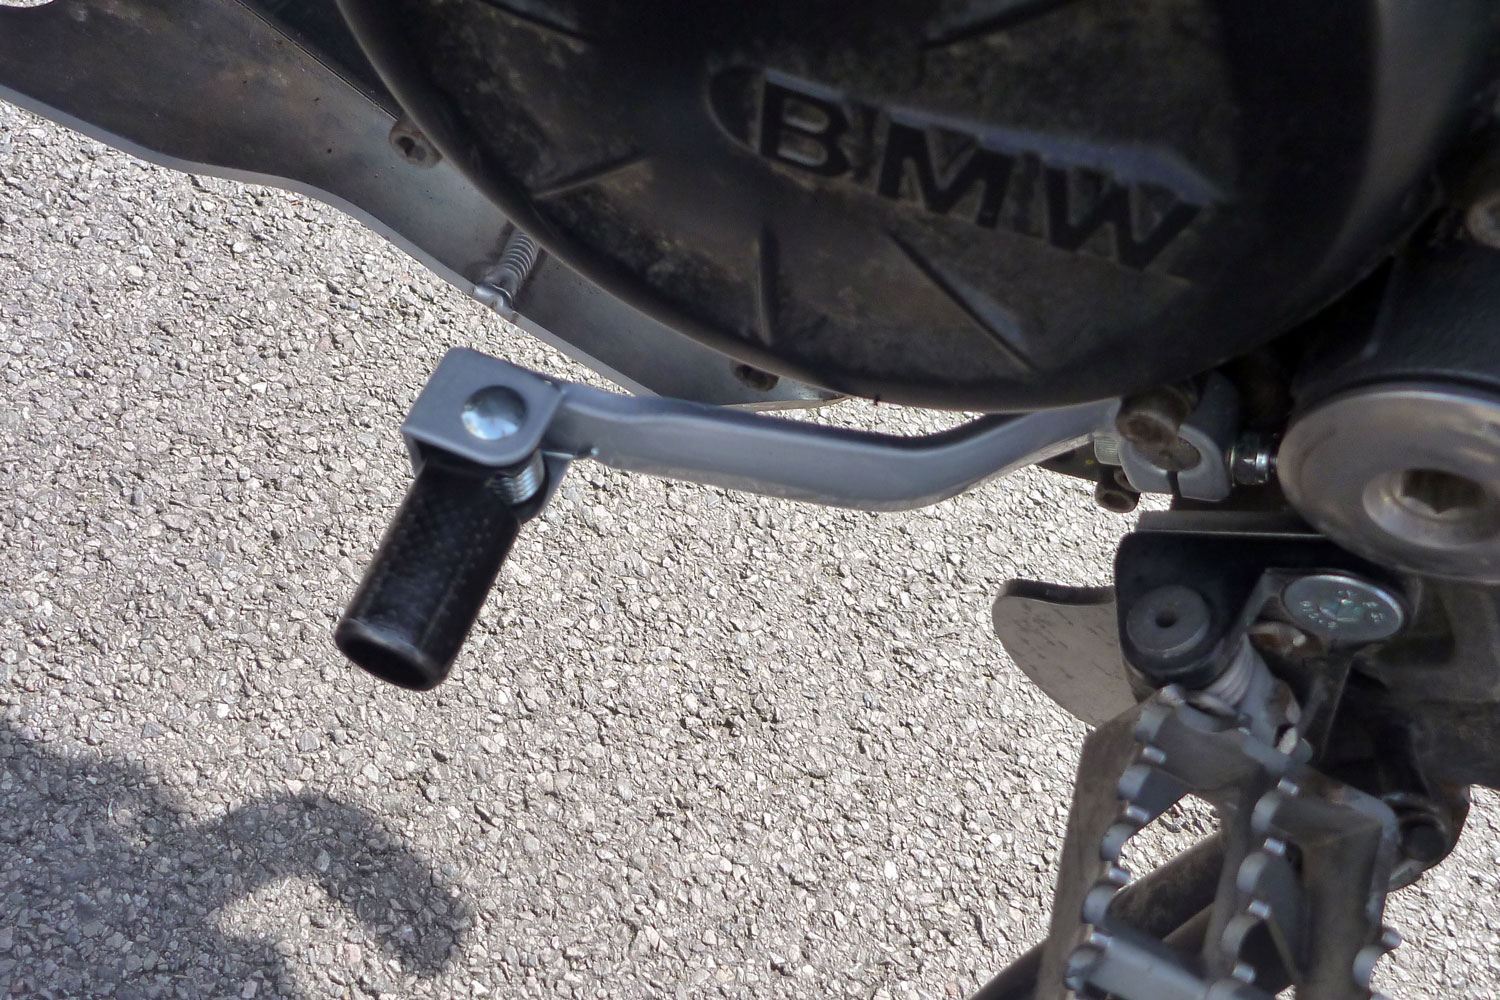
Soon after buying it I refitted the small and cheap Spitfire screen from my CRF. There are doubtless better and flashier windshields, but the Spitfire did a brilliant job in keeping most of the wind blast and rain off me. It did this without introducing any handling anomalies at high speeds or in strong winds, nor feeling like it was in the way when riding technical dirt. Fitted on just a pair of stalks clamped to the bars, it didn’t ever budge in all that time. I may well fit it to my next bike. Following a trip to Scotland, at round 8- or 9000 miles it felt like the foam in the seat had collapsed a little and the pad was less springy. However, that didn’t have any effect on long-day back-end comfort which suggests the shape and profile of the seat works as well as the foam in it. I came off a 750-km day in Spain with no soreness in the limbs or my butt, even if getting off to refuel every 2–3 hours revives the circulation. I also suspect leather trousers – or perhaps any fabric that doesn’t slip on the seat vinyl – extends posterior endurance. This whole experience was the opposite of the crippling seat pf the F650 twin I ran on a similar trip a couple of years ago. Vibration at cruising speeds was never intrusive, though as with all big singles I’ve had, air-cooled or otherwise, some days at some speeds or engine or ambient temperature or load or fuel quality it feels harsh. I’ve never got to the bottom of it, but as it’s common to big singles it must just be the way they are. My main theory is fuel octane and overall engine temperature. I bought some Wunderlich bar risers but never got round to fitting them. I had a feeling the added leverage on the rubbery bar mounts might not do them any good. On the dirt in Morocco I was a little stooped when standing up, but not enough to be uncomfortable. Had I also fitted the Hot Rod footrest lowering brackets I would have had a very comfortable standing stance, though I can’t say my legs felt cramped during regular seated riding. Part of the reason was I suspected that lowering the gear lever and brake lever may have been a faff and made them more exposed to damage on the dirt. As it is, on the dirt I tend to sit when I can and stand when I must. The Hyperpro suspension went a long way towards enabling such lazy riding. The OE cast-alloy gear change lever is light but too strong and is said to transmit shocks to the gear shaft rather than bend. I fitted a folding-tipped steel gear change lever from some Yamaha or other. Although it was identical to the OE unit, it never felt in a natural position for easy gear changes, though the long throw of the clunky gear change doesn’t help. Although they’ve been around for years I’ve never used a throttle hand rest (or whatever they’re called) but this XCo really benefited from one. The throttle spring must unusually hard. Other’s who rode the bike also commented on the handy hard rest which can be spun out of the way in a jiffy when off-road.
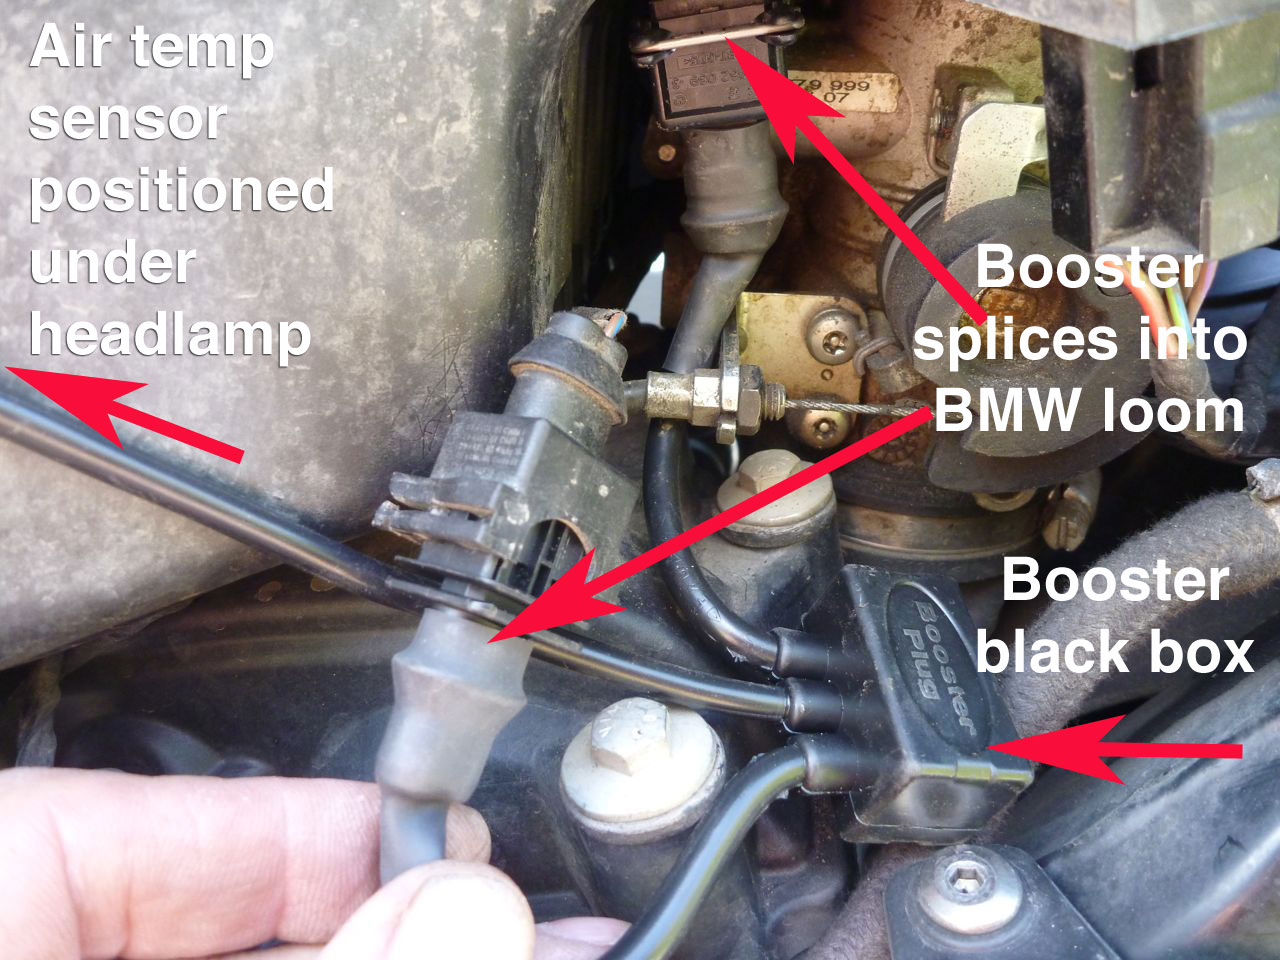
Fuel economy and Booster Plug Like my Tenere which I ran over similar mileage and use, the fuel consumption on the XCo varied for not always obvious reasons. Twenty four fill ups before the Booster Plug saw an average of 70.5mpg. Worst was 53mpg (18.8 kpl) – the only reading below 60mpg so may have been a miscalculation. The best was 79mpg (27.5 kpl) with a few others in the high 70s, so probably not an error.
With the Booster Plug (~£100, right) I expected slightly worst readings: the average was 67.2 with a low of 56.5 in mid-Spain cruising at up to 70mph (on under inflated tyres, it turned out) and 80.5mpg over the Tizi n Tichka pass in Morocco (the same place my Tenere recorded a similarly high mpg one night). Reading the ambient temperature below the headlight and not in the air box, they say the Booster increases (richness) fuelling on acceleration but levels off back to normal settings at cruising speeds. If Morocco could be said to be less cruising and more accelerating on and off the piste, the lower average is less bad than it looks.
To double-check and to see if I could feel any difference, I unplugged the Booster on the way back. Within a couple of miles tooling round a small Spanish hill town looking an ATM, I’d stalled a couple of times at low speeds; never did that with the Plug. And later, pulling off the motorway to do something, the fan soon came on. The bike was running a little hotter as expected, but two fill ups saw an all time low of 56.5 and 54mpg for no good reason. Can’t think why that was unless the ECU mapping had adjusted to the Booster settings and was over compensating. Apart from the stalling and possibly mpg, I can’t say I detected any genuine difference with the Plug while riding the bike. I replugged the Plug in north Spain. Next mpg was 61.5 – less abnormal.
As is well-known the X bikes come with a 9L tank giving a range of 150 miles/250km -too small to be useful. The 6.7-L Xtank increased this to a comfortable 370 clicks/230 miles at average mpg. After fitting the Xtank, a couple of times I got outlandishly high readings of over 100mpg when filling only the Xtank which I assumed emptied before the BMW tank. On the second occasion I realised that with both tanks full, the bike probably initially draws some fuel from both tanks, but definitely drains the Xtank first.
So overall the X bike’s average fuel consumption was identical to the F650 twin at 68.3 mpg, and about 5% less than the XT660Z Tenere while being a lighter, lower and more powerful machine (Had I meddled with a similar Booster on the XT it too may have used more fuel.) Click Esso for Xcountry fuel data pdf.
Oil and water consumption; drive chain I changed the oil to fully synthetic at around 10,000 miles and used about 1.5 litres on the 5000-mile Moroccan run – more than a Tenere, iirc. I was told the bike might consume more oil using fully synthetic. But the bike also felt like it ran better by this mileage, though that may have been the more open, day-long steady riding doing the engine some good. It sure would have been handy if they’d designed the dip stick to be more accessible without removing the seat. And I never really got the whole oil level business: run it till the fan turns on, then walk round the bike three times, turn off and wait two minutes. I’m sure previous dry sump bikes weren’t so fussy (actually they were). Good thing is it’s an oil tank and so has more leeway for running low than a wet sump engine.
One hot summer’s day in London I noticed the coolant level down an inch – it may have been that way for ages. Again, it’s hard to tell the level without carefully peering in the slot. Once I topped it up it never went down again. I’d heard of X bikes suffering mysterious episodes of coolant drop with no actual leaks. The bike will get hot and the fan come on in town or on slow tracks with a backwind, but the fuelling never went off in such conditions, as it did with the F650GS twin in Morocco.
With help from the Tutoro oiler from about 7000 miles, I only adjusted the chain twice in all the time I had the bike and when I sold it at 16k, there was still had plenty in it. Was it these bikes that had chain problems when they came out? Whatever’s on there now is as good as anything.
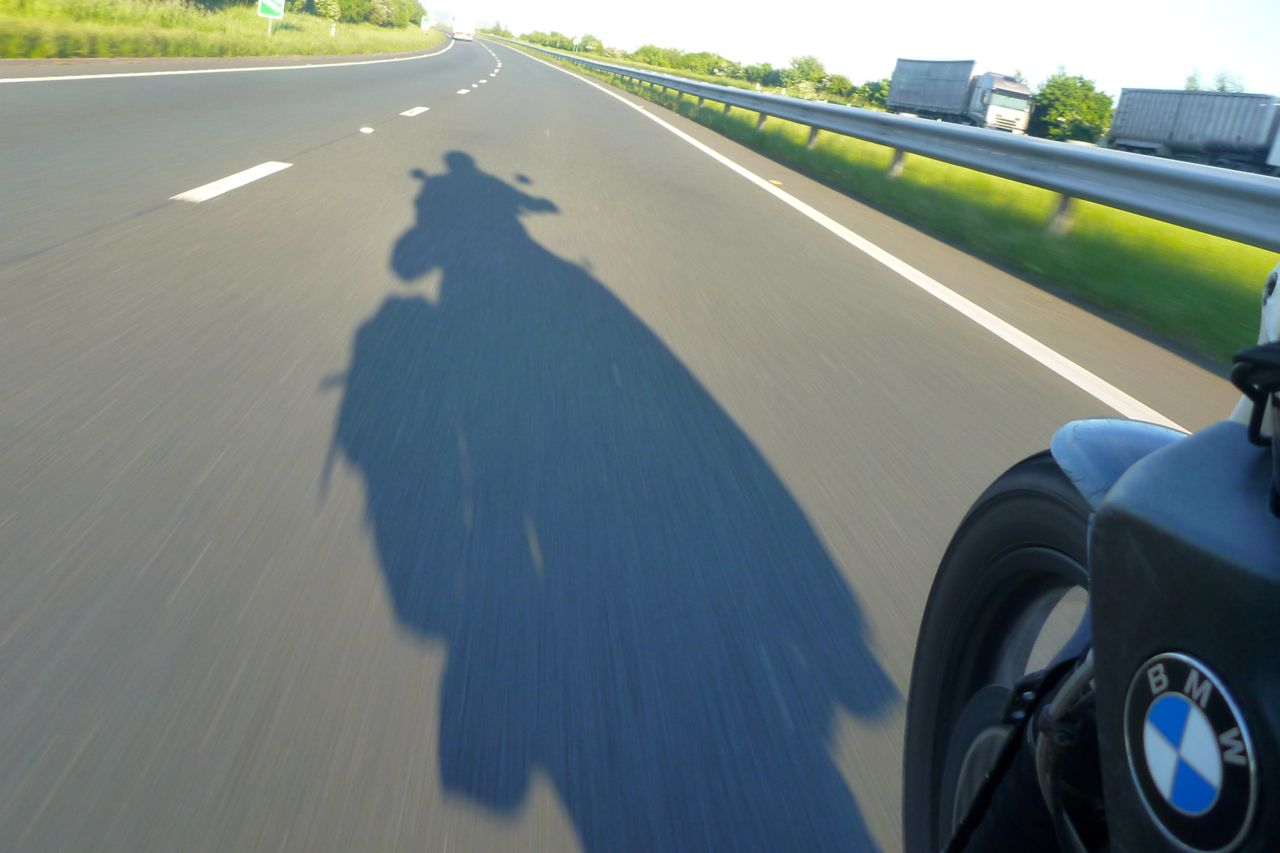
Performance The XCo was one of the most powerful 650s around. I imagine a KTM 690 has more poke (but closer gearing?) and the Husky TR650 I rode last gear has five extra hp and certainly sounded more sporty but carried proportionally more weight. There are times on technical dirt when the X power feels too much with the hot engine and pokey response, but of course there are as many other occasions when you blast past a vehicle with assurance. This extra power didn’t seem to affect the fuel consumption or chain and tyre wear, but does make the engine harsher and lumpier than say a Tenere or a docile Sertao/G650G. The fastest I ever went was a true 85mph, briefly. The Xco was happy to sit at a true 65-70mph (75 indicated).
The brakes feel pretty ordinary but there was only a small single disc up front. The front pads were going by the time I sold the bike so lasted at least the 10,000 miles I had the bike, maybe more. The back wore very quickly – at 9000 miles they were gone and I didn’t notice till I damaged the disc. A used rotor off ebay.de was £30. ABS works fine. I never had to rely on it on the road and on the dirt it could be forced to actuate, but in a useful way. I don’t see the need to turn off ABS for the sort of dirt riding I do.
Suspension On the road, initially the OE suspension felt pretty good and firm compared to Jap bikes and considered it had been a BMW Off Road School bike. Best thing was the easy-to-use knob on the Sachs shock though on the front the UPD forks are unadjustable. But what works OK riding UK roads may come up short loaded on the piste. After just a couple of thousand miles the rear Sachs gave out no matter how high I cranked the knob. Various options existed to re-spring the back end including rebuilding the Sachs unit for about £120 while maybe adding a firmer or progressive spring. That’s probably the route I’d have taken but for an intro from Walter Colebatch to Hyperpro suspension in the Netherlands. I rode over and got the full custom set up from Bas at the HP workshop. The full story is here but there are more or less three levels of shock: a progressive spring replacement; an emulsion shock and spring; and the full-on gas-charged, remote reservoir, preload, compression and rebound adjustable version.
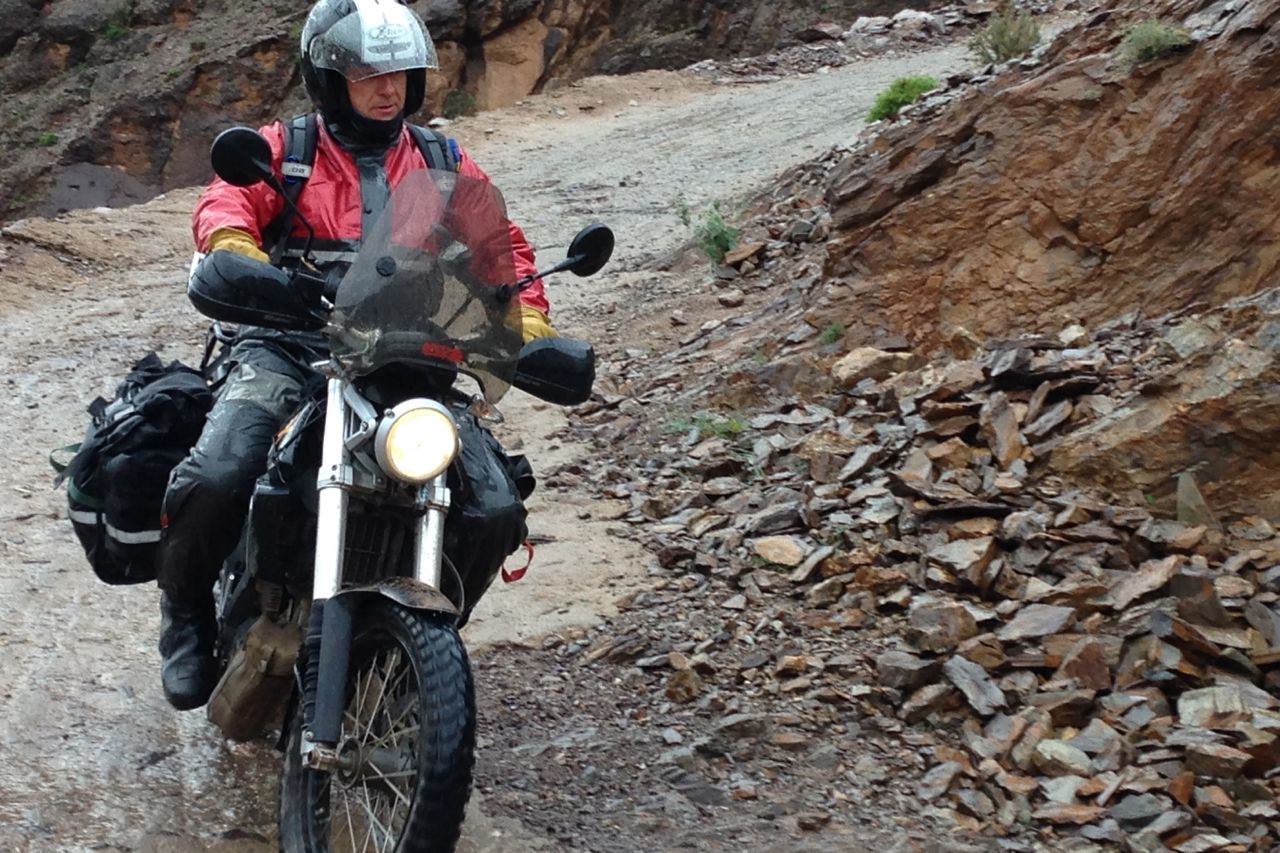
That was what Bas did for me, along with a fork oil and progressive fork spring replacement, chrome slider polish and neoprene gaiters plus a new headset which had gone in an incredible 7000 miles?! It was only months later when I experienced the real benefits of the custom Hyperpro set up while battling with five other bikes over an abandoned old track up the Jebel Timouka in southern Morocco. The difference is control: correctly tuned suspension responding predictably to riding over football-sized rock cubes without bottoming out. Although the Desert Riders Honda XRL was notably better sprung than the XTs I’d used up till then, I’ve never had the luxury of a properly suspended machine. And certainly on the dirt I can now see the value.
I bought a chunky and adjustable 48mm DRZ400 fork (right) but never got round to fitting it so assumed the reworked OE UPDs would be ill-matched with the full-on 461 back shocker. But over the Jebel and on other tracks the fork responded predictably and the whole bike felt well-balanced. At the bottom of this must be the progressive springing front and rear and the shock’s adjustable damping. Progressive is nothing unique to Hyperpro but it works in using the near-full range of movement without bottoming out. That and the hydraulic preload adjuster knob similar to the OE Sachs made the shock very useful. The settings for compression and rebound damping on the remote reservoir I didn’t touch. The Hyperpro set up transformed the XCo on the piste and I’ll get one or something similar for the next bike.
Road riding With its do-it-all 19” front wheel, the bike swings predictably through bends compared to the more dirtsome 21″. After a few months the front end developed a heavy feel which I put down to the weight of the gear (rack, screen, plate, etc) I’d fitted. Turns out it was just the tyres and on replacing the worn Tourances which came with the bike with more dirt-ready Mitas E-07s the bike was entirely transformed in the bends – maybe even better than when I bought it. I won’t be in a rush to buy Tourances – not the sort of tyre I use anyway – though by this time I had the Hyperpro set up which probably didn’t do any harm to the handling. The XCo was notably better – lower C of G – than the XT660Z on the road, though not as low and long and stable as the F650GS twin. And the XCountry was a lot less scary than the Tenere in gale force crosswinds too. In town the worst thing about this bike is the clunkygear change, especially from neutral into first. Add to that the length of the throw needed. Trying out an XR250 Tornado in Morocco was snick-snick-snick and this unobtrusiveness to something you may be doing every few seconds makes a real difference to riding enjoyment.
Off road riding
Photo Chris W
Off roading in Morocco mostly involves rocky or gravel tracks, and while not TKCs, the Mitas E-07s did the job without any drama at full road pressures. Add to that the top-notch suspension and the XCo – loaded with maybe 15-20kg – never got out of shape on the dirt. I never came close to falling off and rode some gnarly shite on occasions. Like all trail bikes, the gearing is too high and especially on the 650X, too widely spaced for technical off-roading. You just can’t go slowly enough at tickover in first gear which at times was too fast to negotiate some hairpins or rubble sections. The clutch worked hard on Jebel Timouka but with frequent rests for bike and rider, it never complained. I can’t say I missed a 21-inch front wheel on the dirt – that only comes in to play if the bike is usefully light and agile. I’m 6′ 1″ and the XCo was easily low enough to get my feet on the ground when necessary. I didn’t have a single hit to the bashplate. Again, I put that down to the progressive springs.
Loading Even at £450 I didn’t hesitate in replacing the OE alloy subframe with the steel version from the Mk2 XCo (right). having said that it’s unlikely my Morocco trip would have stressed the alloy item. As on my Tenere, this is one part of a travel bike where I don’t resent the extra weight. On the side the Hot Rod Welding Xrack gave the Magadans something to lash to and I especially like the wide ‘sheep rack’ design at the back (Walter C’s idea – right). I know it’s not the latest in adv bling, but a wide back rack made of good old-fashioned tubular steel is much more useful than the mini CNC plates you get these days, especially when it comes to manhandling the bike or even just tying things on. CNC is just flash and quick/cheap to cut. On my next bike I hope to adapt a Hod Rod sheep rack.
Equipment The dashboard is about as basic as they get – just the speed reading (can be changed to kph with a bit of a faff disconnecting the battery) and a trip or odometre plus an array of colourful warning lights. I would have liked an oil or water temp gauge but didn’t go as far as fitting my Trail Tech gadget. A fuel light comes on with about 2 litres or 40km left in the main tank. The speedo was typically 8% over compared to a GPS read-out, but the odometer (used for mpg calcs) was spot on over 100 true ground kilometres. No tools came with the bike and even if they had, they’re probably not enough to be useful, as is the trend these days.
Durability and problems With BMW’s reputation of late, initially I didn’t feel so confident in this bike. Using it as a tour support vehicle you can’t take chances. One time in Wales the ignition didn’t come on with the key, but switching on and off again fixed that and it never happened again. When did that last happen with a Jap bike? The coolant level drop proved to be a one-off anomaly and in fact the XCo took its month and 4000 miles in Morocco in its stride. I sold that bike feeling a lot more confident about it than when I bought it. A better gear change and smoother running would have made it much easier to live with, but the answer to that may be just round the corner.
“You go first.” “No, no, after you, I insist.” Photo: Chris W
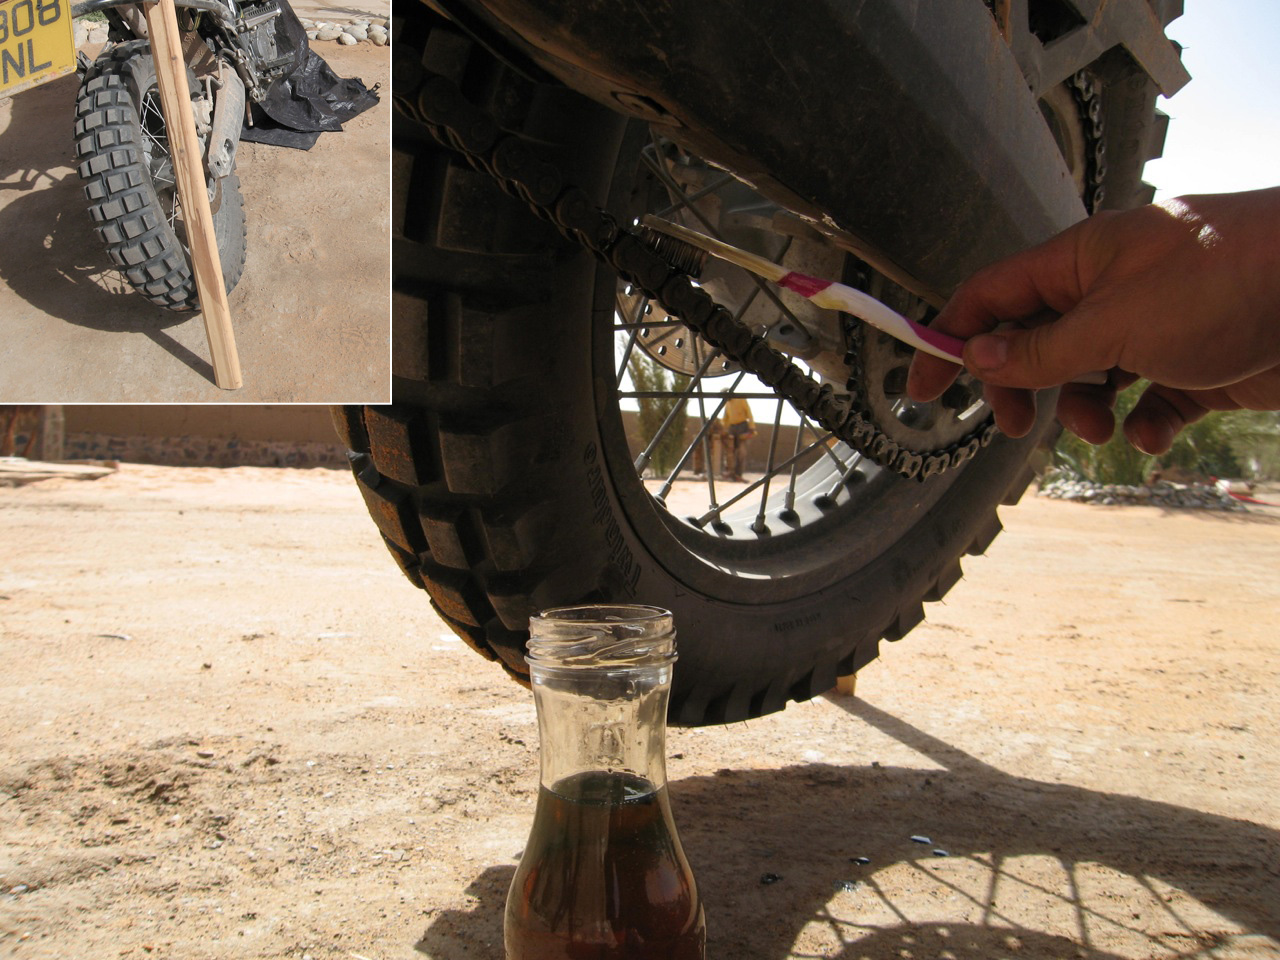
Although I haven’t scoured the internet to establish every possible alternative, to me the Tutoro auto luber is all you need to get the job done at a reasonable priceand without unnecessary complications. But because nozzles get knocked off and lost off-road, in 2023 I have reverted to simply brushing the chain with good (Tutoro) oil, as shown below left (2008)
Brush on – but now I use proper chain lube oil.
It’s not sprocket science Even if your bike has a centre stand, some sort of automatic chain oiler is the best way to keep you chain lightly lubed all the time if you do a lot or riding. On the long road a bulky aerosol will eventually run out and while brushing on manually (left), is as good if not better, it’s a faff to do regularly. Sealed-ring chains are amazingly durable, but that range can easily be doubled if they’re coated in a near-constant film of oil, and cleaned once in a while.
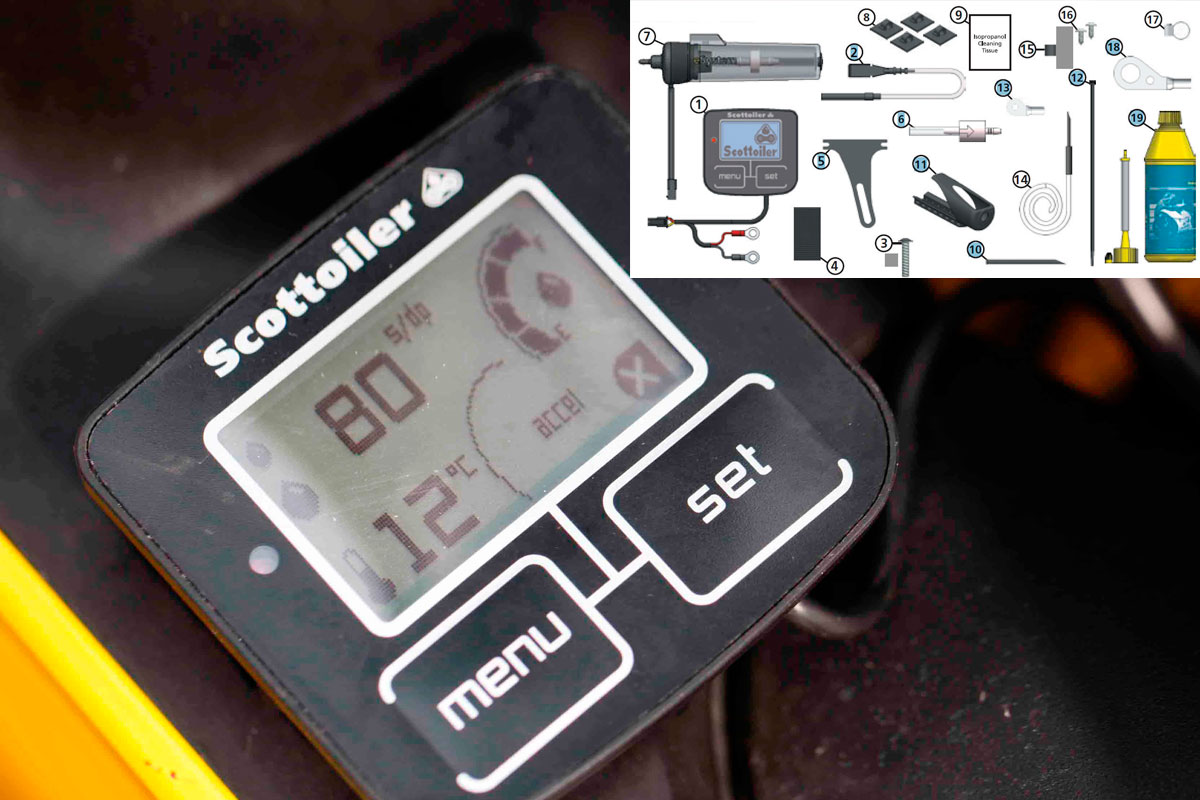
Scottoilers have been around since I started biking – or so it feels – but I never bought into their idea of plumbing the unit into the carb vacuum, or these days, using electronics. Why complicate things, it’s just an oil dripper? Do you really need a £240 piece of kit including a digital read-out on ambient temps and G-force (left), when you can make your own crude manual oiler with a squeezy bottle and a tube? Fit-and-forget automation is great of course, but I prefer an autonomous set up which, should it pack up up the Khyber, will be independent of other bike systems. It’s one less thing to eliminate when fault finding.
At Hyperpro one time I saw an 650Xcountry with the Dutch Osco system. It’s a stand-alone unit but turned out to be a manual, ‘actuate-the-plunger-once-in-a-while’ operation (see instructions below right) . Way too much faffing to remember at the end of a long ride. At less than 20 quid, the Loobman is another manually actuated dispenser of chain oil which, for that price, is probably less hassle than making your own. But the word seems to be that Loobs don’t survive rugged riding and there’s the problem with all manual oilers: remembering to use them regularly or forgetting they’re on and losing all the oil/making a mess.
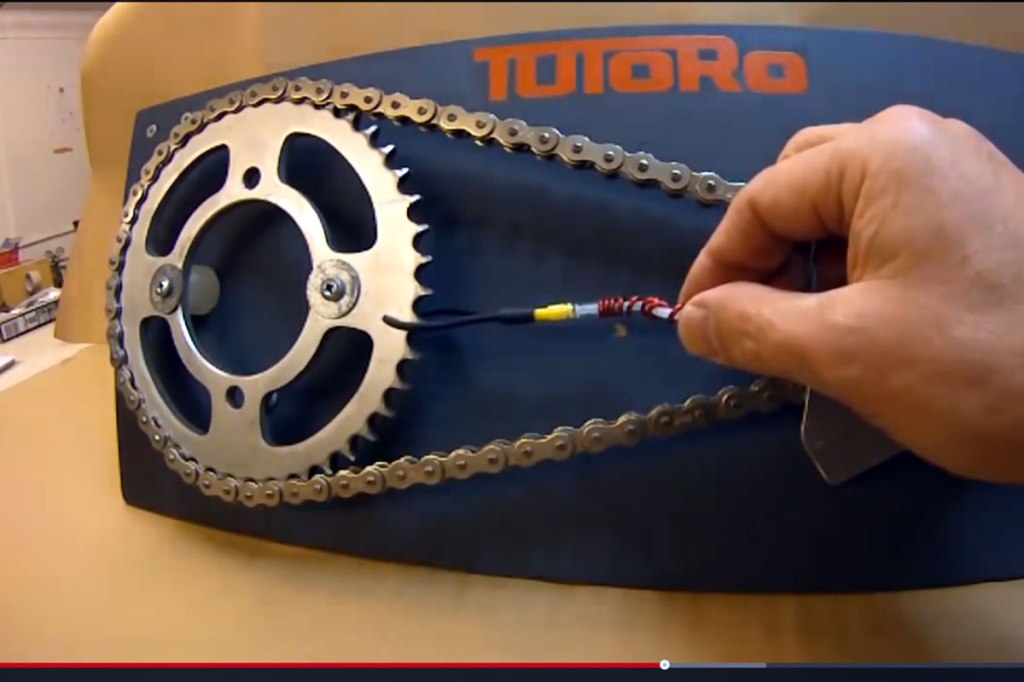
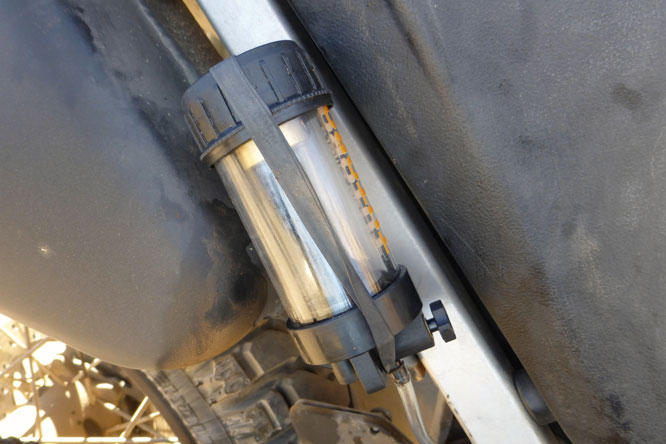
A bit of research led me to Tutoro oilers who’ve come up with the best solution to motion-actuated and adjustable chain oiling at a reasonable price, as well as offering manual drippers costing little more than a Loobman. The auto Tutoro (left) uses a finely balanced weight which moves up and down a stem, reacting to the movement of the bike and pumping or releasing oil as it goes. It might well resemble the ‘triple-axis accelerometer’ that Scott mention on their e-oilers, but without all the electronics. The Tutoro uses the free kinetic energy of your moving bike. Set the reservoir’s drip dial (reachable on the move) at whatever level is needed to oil the chain. If it starts raining maybe turn the wick up. Heading for the desert sands? Shut off the drip valve. Other than that, you don’t have to remember to do anything: when the bike’s at rest the plunger weight blocks flow – no drips. Once on the move again the bike’s motion and road irregularities will set it off. Simple and ingenious.
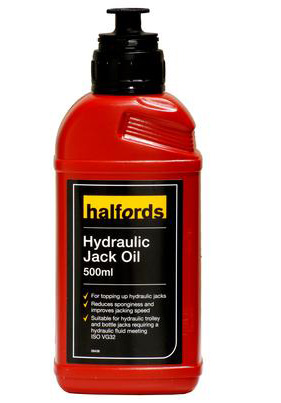
The Auto Delux edition I was sent came with a 100mm x 45mm reservoir (above left), delivery hose, a variety of reservoir mounting brackets, a forked nozzle, zip ties and cable guides, the helix flexible tube, a small top up can and 500 mil of Tuturo oil. And this is not just any oil, this is a lushly blended, thick and sticky blue goo, just like you get from the best spray cans. They now offer two weights of oil, depending on ambient temperatures in your locality. And if you run out, Tutoro specifically advise mineral hydraulic oil (example right). I bet you’ll find that cheap anywhere where there are cars or machines. Other stuff like ATF, EP gearbox oil, or any oil with additives may degrade the unit’s plastic and acrylic parts (but are all fine for the chain, as is waste motor oil).
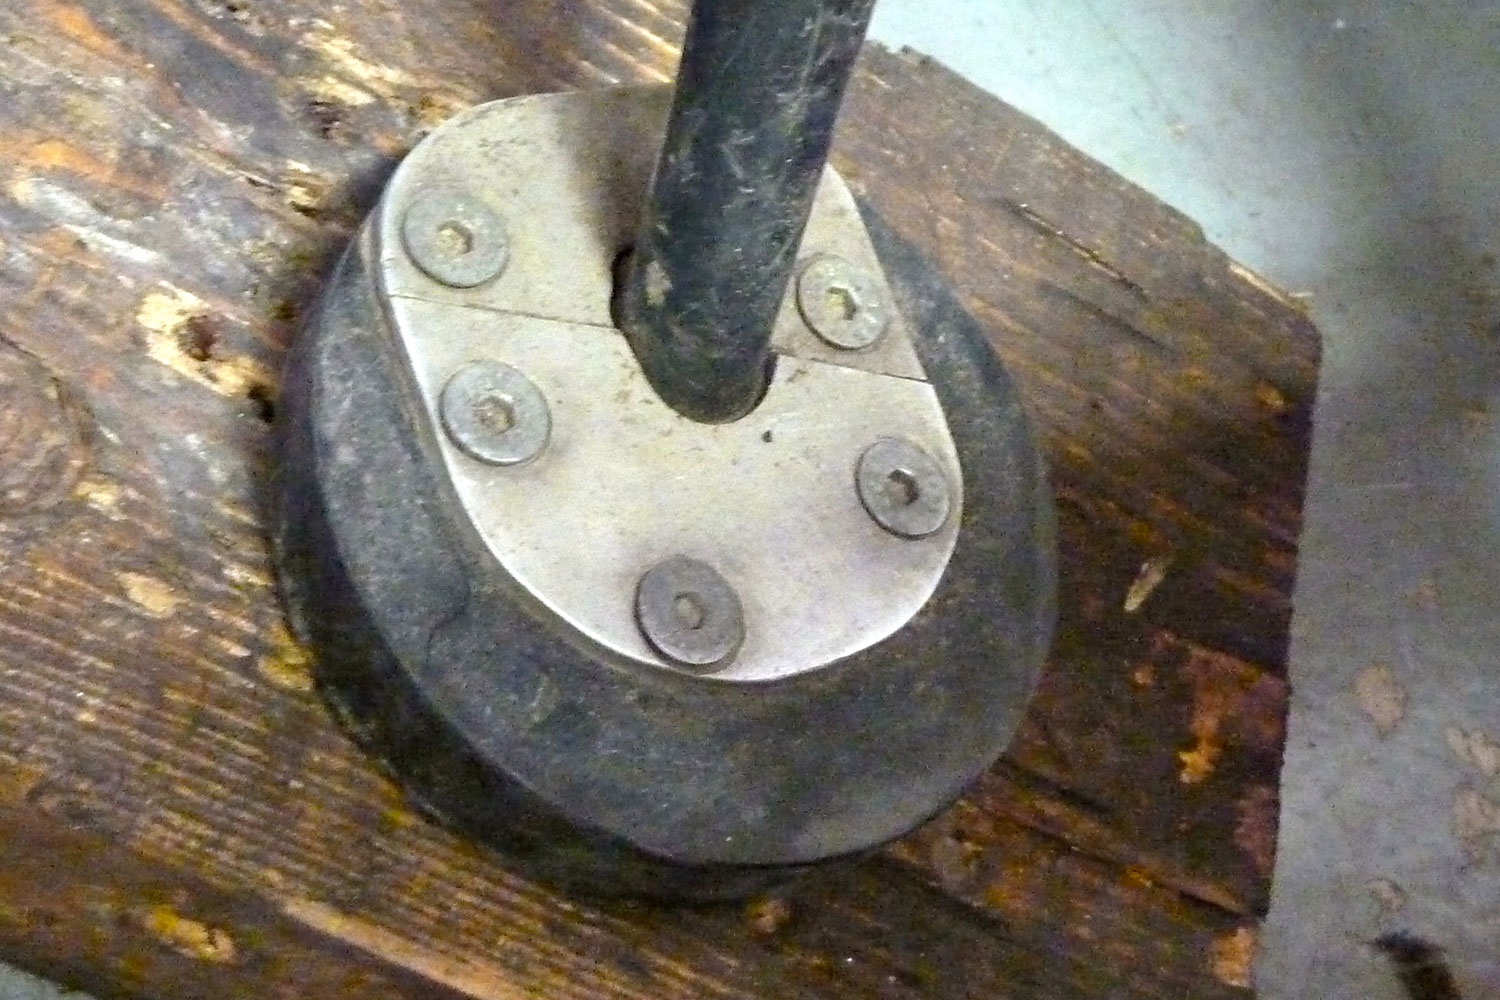
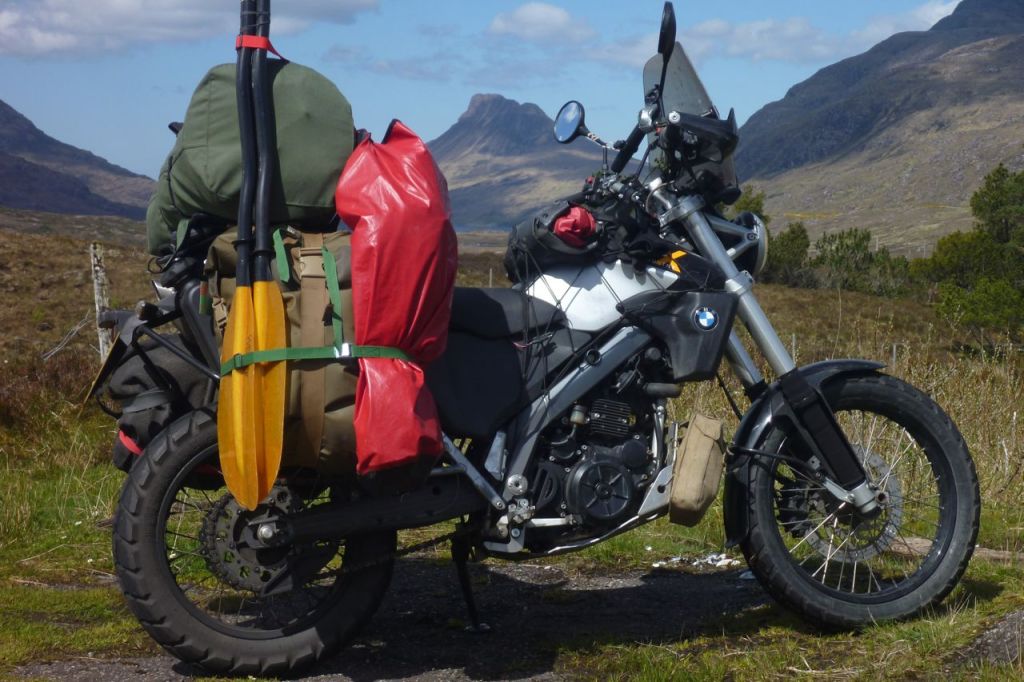
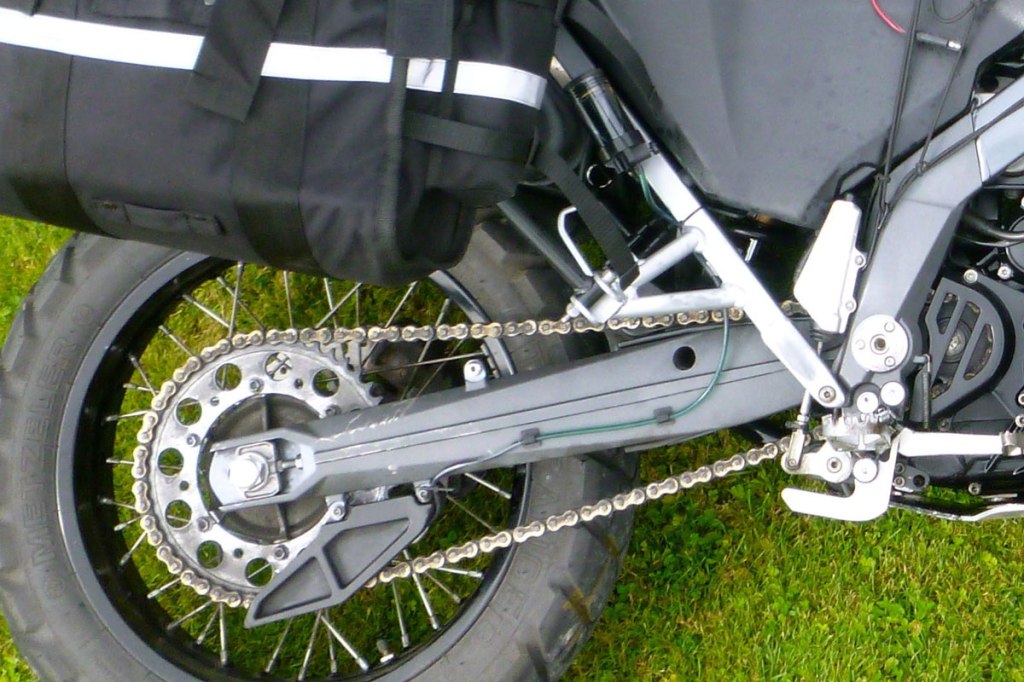
Fitting the oiler I fitted mine on the pavement in a bit of a rush, while at a Touratech travel event. On my GS650X there was a way of routing the hose neatly in and out of holes in the swing arm, but that looked a bit tricky to pull off in my situation. With just the zip ties, the reservoir was easily fitted to a bolt on the subframe down tube: out of the way but easy to reach and about 20° off vertical which is probably outside recommended operational limits, but worked OK for me. Vertical is best, even taking into account your typical 11-12° sidestand lean. The hose ran along the outside of the swingarm using stick-on hose clips (below). I thought they would be vulnerable off road (a slab of gorilla tape over the hose may help), but months of riding later, including Morocco and back and everything remained intact.
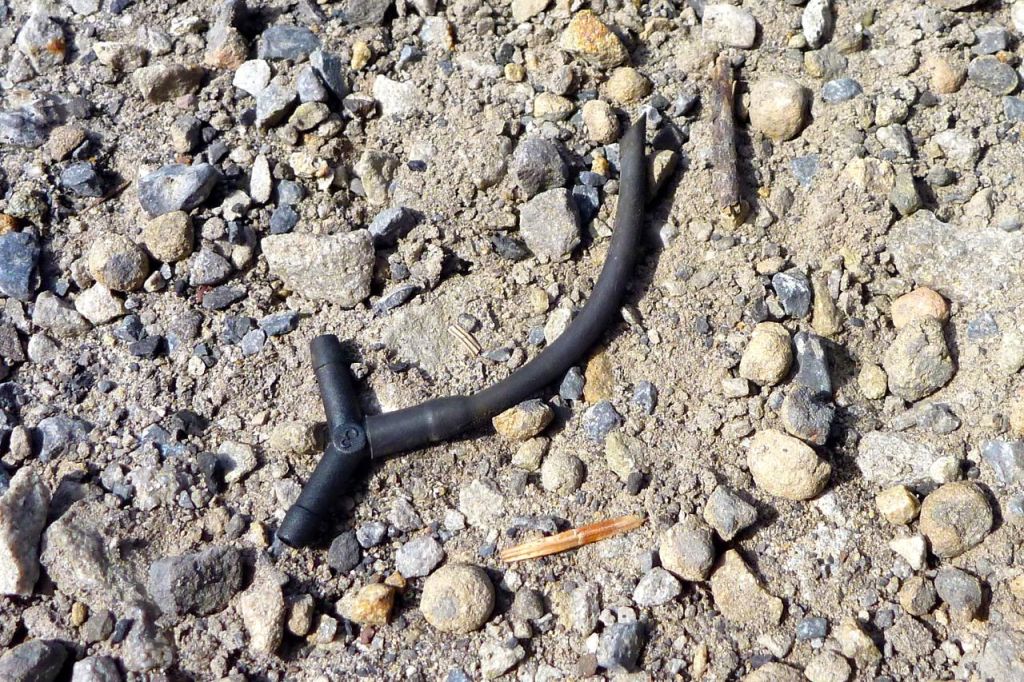
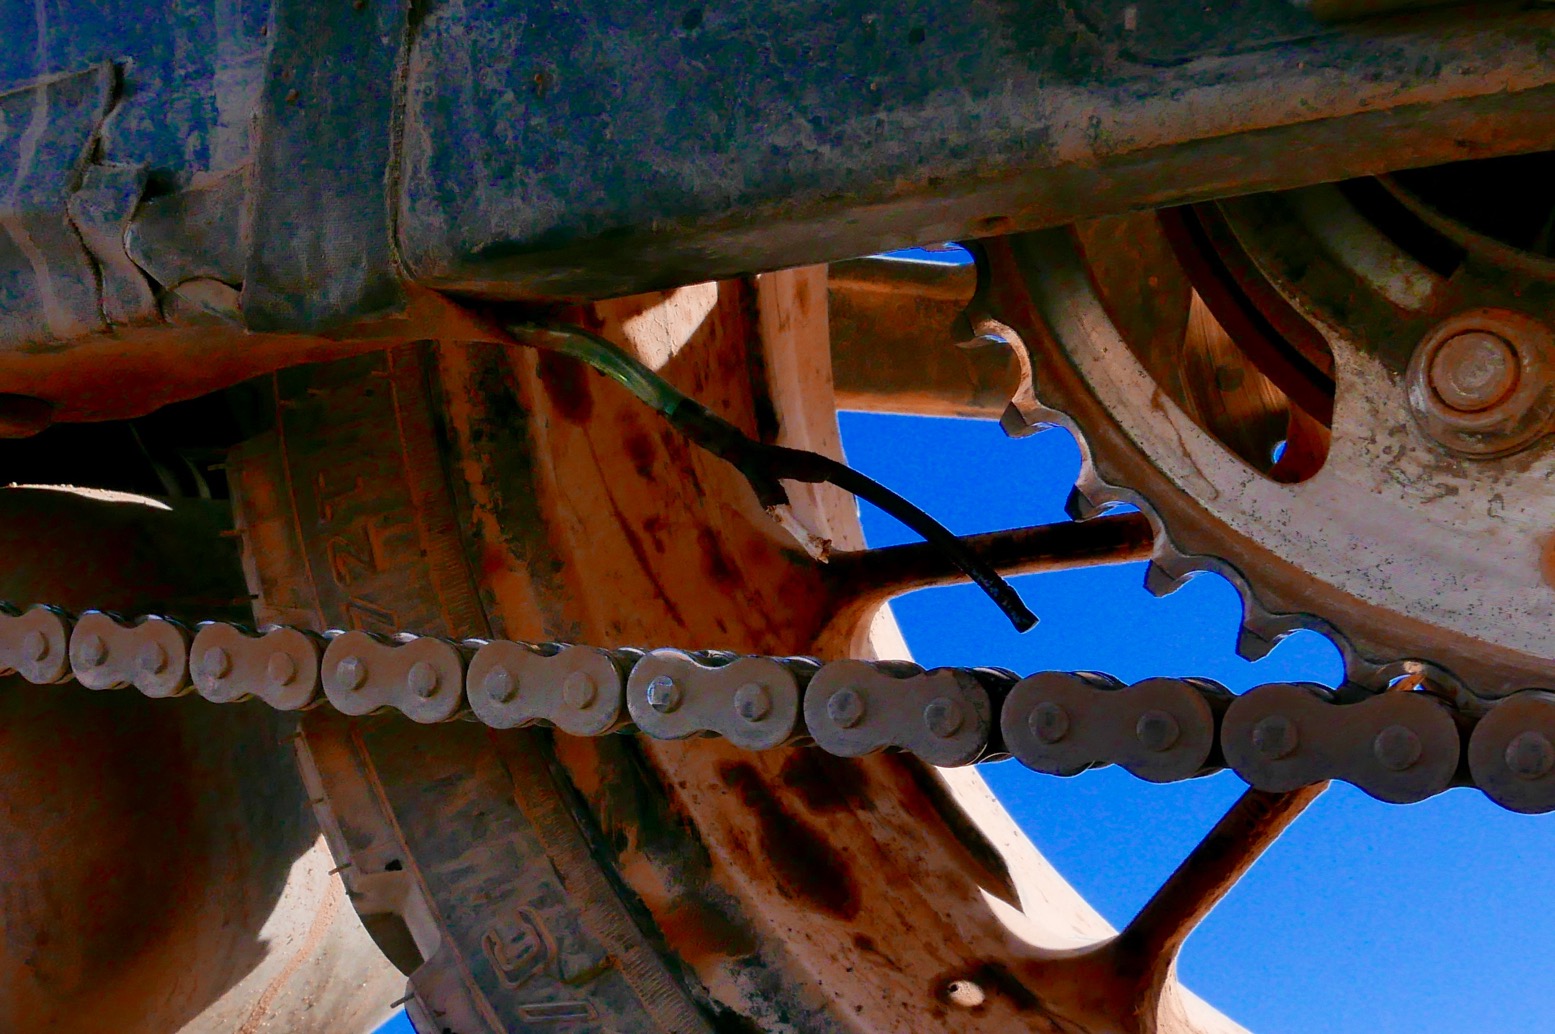
On the road Some Tuturos come with a rubber forked nozzle which I thought was to get the drips close to the o-rings on either side of the chain. I guessed wrong. Due to unavoidable chainslap, my nozzle got damaged almost straight away (right). Had I seen this later video, I’d have seen the forked nozzle is supposed to ‘bite’ either side of the sprocket at ‘3 o’clock’ (left) and well out of the way of the slapping chain. From here the oil gets thrown out onto the chain. No matter; it’s only a bit of hose dripping oil. Zip-tied to the chain guard, I repositioned my single hose feed at the back of the lower chain run, just as it goes onto the sprocket (the place they tell you to spray a chain). Tutoro say a single feed is as effective but a bit more wasteful at lubing the chain than forked, and there’s nothing to get damaged or pulled off.
Setting the feed dial positioned at the bottom of the reservoir took some experimenting, or it’s quite possible that again, I didn’t rtfm. I didn’t bother priming the unit and just left the valve wide open to let it happen on the road. From Touratech I set off north for a early morning ride through mid-Wales and forgot all about the oiler until fuelling up in north Wales. Here I noticed the reservoir was empty, oil was all over the back wheel and the chain glistened like an eel that had just stepped out of a steaming shower. With enough lube on the chain to last a few days, I shut it off then forgot all about it again as I rode up to northwest Scotland and then rode back home to London via the Outer Hebrides. Over the weeks and months, I’ve settled on about one turn out from fully closed; perhaps a bit more in chilly conditions.
Lately I came across Motobriiz (right; $92) which similarly uses motion-actuated automation: this time wind pressure off an intake tube pushing oil out of a reservoir down another tube and into a felt pad tucked under the chain on the slider. There are no moving parts at all. In the US one time I was offered a kit by a distributor, but wasn’t convinced the way they do it was that much better than Tutoro. The best thing is that, like some Scottoilers, the reservoir mounts on its side and out of the way and under the seat (but also where it’s easily forgotten about). Less good is the oil-soaked felt pad you glue to the chain slider needs regular replacement. Plus I have to say I’m not fully sold on the wind idea – won’t riding fast into a headwind prematurely empty the tank? I prefer the Tutoro’s adjustable valve. All the ideas gadgets on this page are better than no oiling and less faff that manual application, but for me Tutoro’s simplicity combined with mechanical fit-and-forget ‘autonomous motion-actuation’ works best. And compared to the other products mentioned above, I think they’re a bargain.
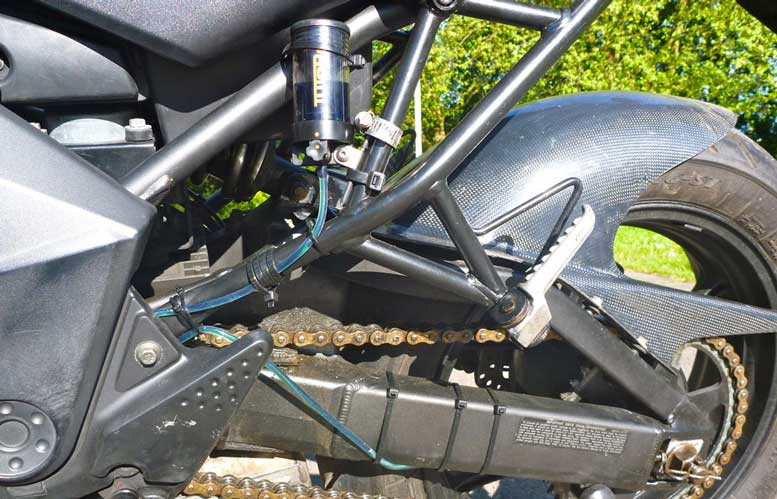
Update after Morocco with XSR The benefits of a chain oiler are greatest on a long trip covering big mileages. A bulky aerosol won’t last and you don’t have to prop up your bike and get on your knees every morning to give the chain a squirt. I topped up my Tutoro and left for Morocco with a 200ml bottle of oil. All went well until I had to give someone a lift off a mountain pass one evening when things turned a bit epic. Because there were no pillion footrests on my Xbike, her feet flailed around and knocked the reservoir about, losing its cap and contents. A flush out with petrol and an oil bottle cap with a bit of inner tube worked for the rest of the trip. That’s what I mean about simple, in-the-field repairability. I came back with Morocco with the reservoir half full. I adjusted the BMW chain twice in the 10,000 miles I had the bike (8000 miles with the oiler). The chain looked like is has 1000s of miles left in it. Pictured left is the same type of unit fitted with a little more know-how to my Kawasaki Versys. I then took the unit off that bike and put it on the CB500X (above left) and fitted what bits I had lying around to my XSR700 Scrambler.
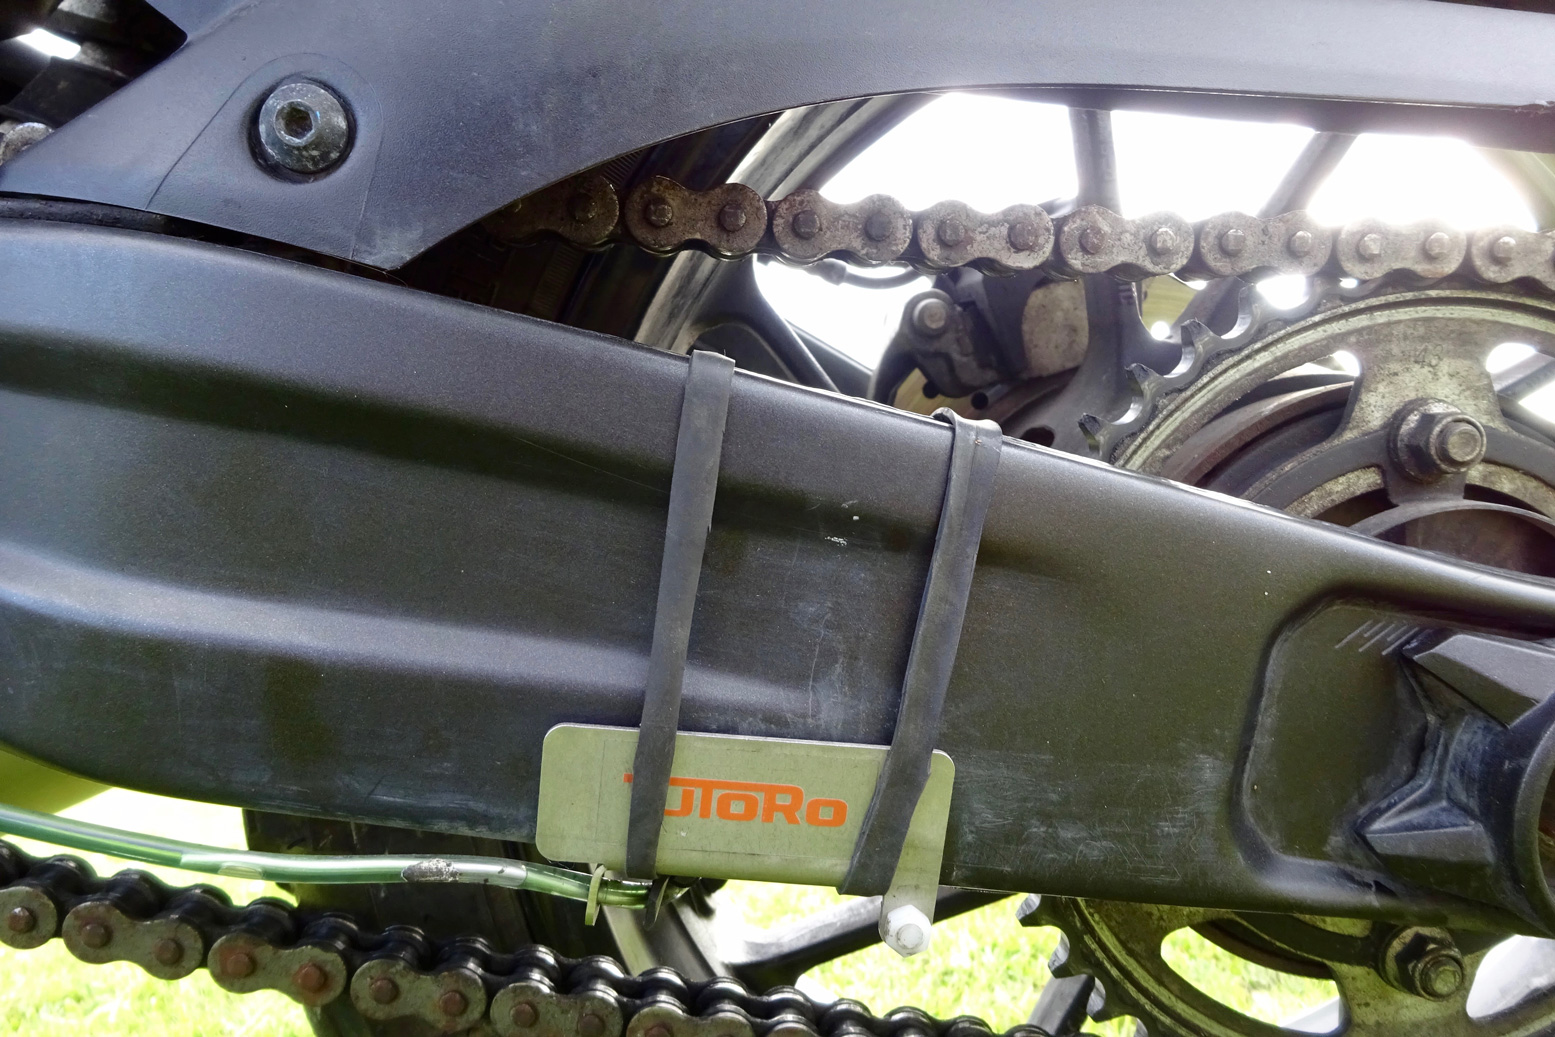
I should have remembered that the anchor plate or helix they offer are both useful devices to keep the forked nozzle in position, biting the sprocket at ‘7 o’clock’, especially on rough roads and tracks. Tbh, I expected a stone to knock off my nozzle much sooner than it did.
Instead, the hammering regularly twisted the nozzle arms out of position on their forked mount attached to the delivery hose, and by the end of my third lap one nozzle arm was MiA. I plugged it up with a twig and pointed the remaining ‘single feed’ nozzle arm onto the chain (below). If the forked nozzle was a single piece, this would not be a problem. I’ve since ordered the anchor plate which I used on my CB500X RR and fitted it in with a strip of inner tube (the supplied zip ties didn’t stay in place on my tapering swingarm). That’s about all there is to say on the subject.