During sunny spells over the last week or two the XCo has been slowly gaining weight on its way to becoming a functional desert bike.
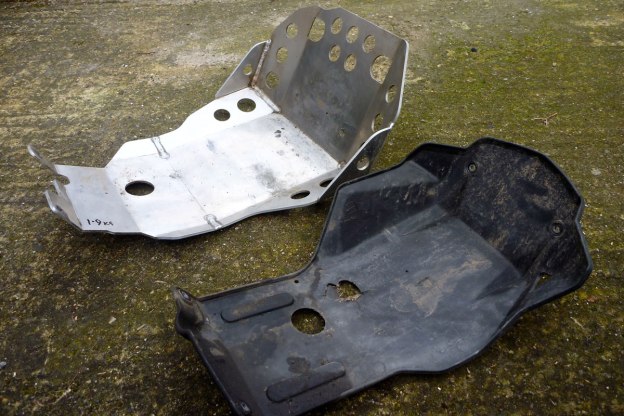
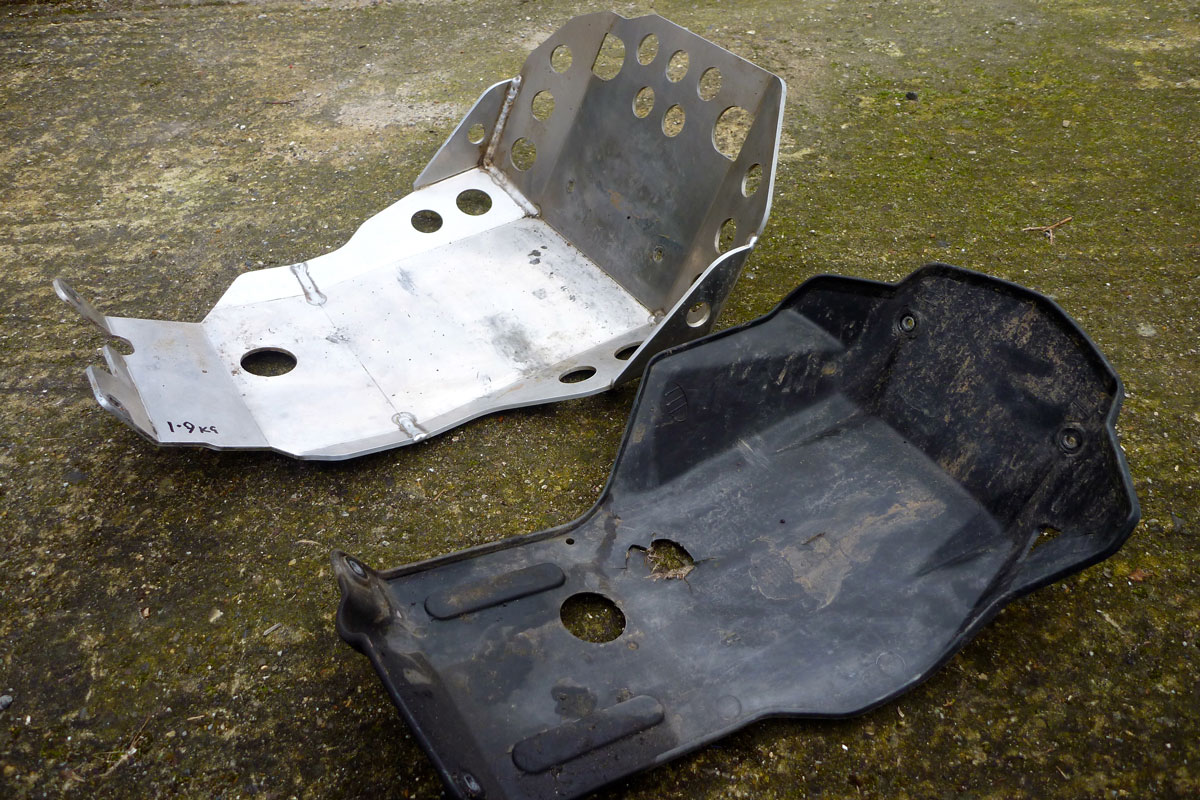
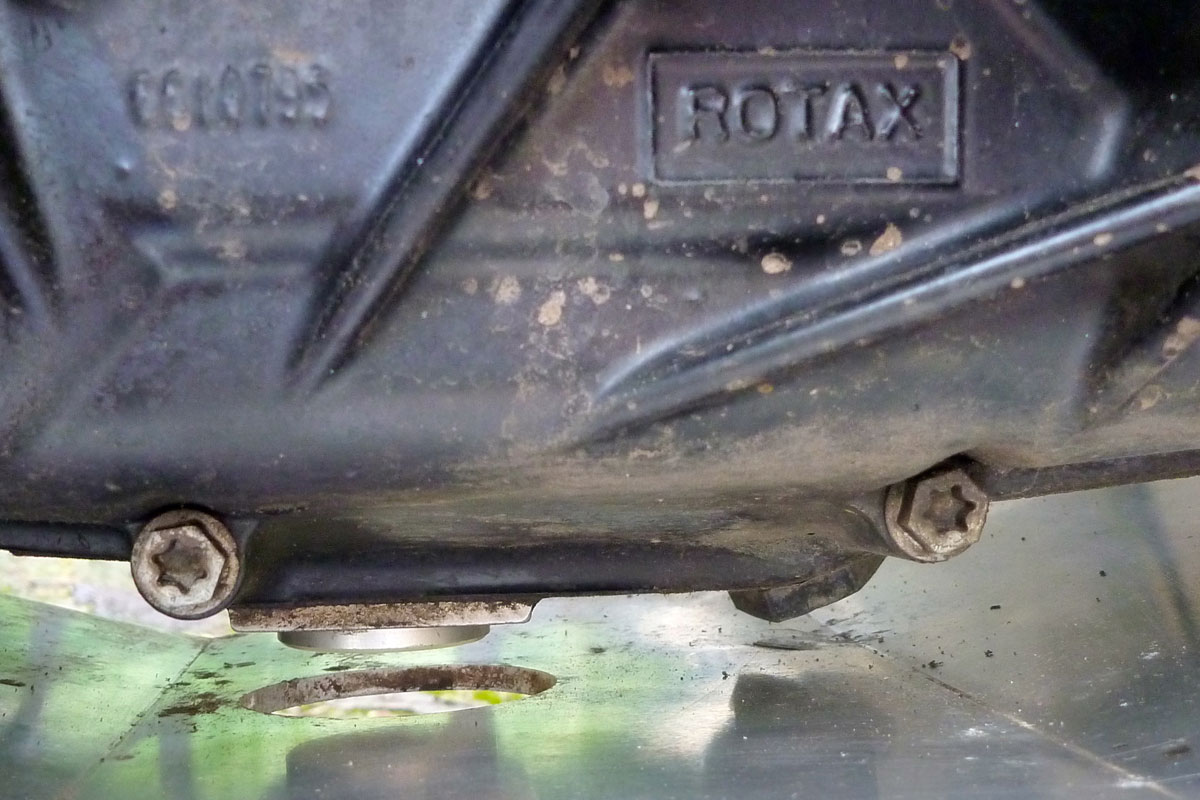
A mate running an XCh sold me his Touratech Rally bash plate(1.9kg vs 430g).Adding one of theseis a no brainer although surprisingly it’s about the same size as the OE unit except of course it’s made for the job not the look. As it was, removing the original unit revealed it had already been holed, not at the drain plug (which looks like a TT low profile replacement – £27 saved, hallelujah!) but at the adjacent oil line junction which is now the lowest point (right). It looks like the used TT plate also took a hit there in a previous life. With no frame rails under the engine to rest on, the plate is unsupported between the mounts at each end which may explain how it got dinged off the oil nut. I may stuff some dense closed-cell foam in there, especially around that oil nut, to help dampen a heavy smack on the middle of the plate.
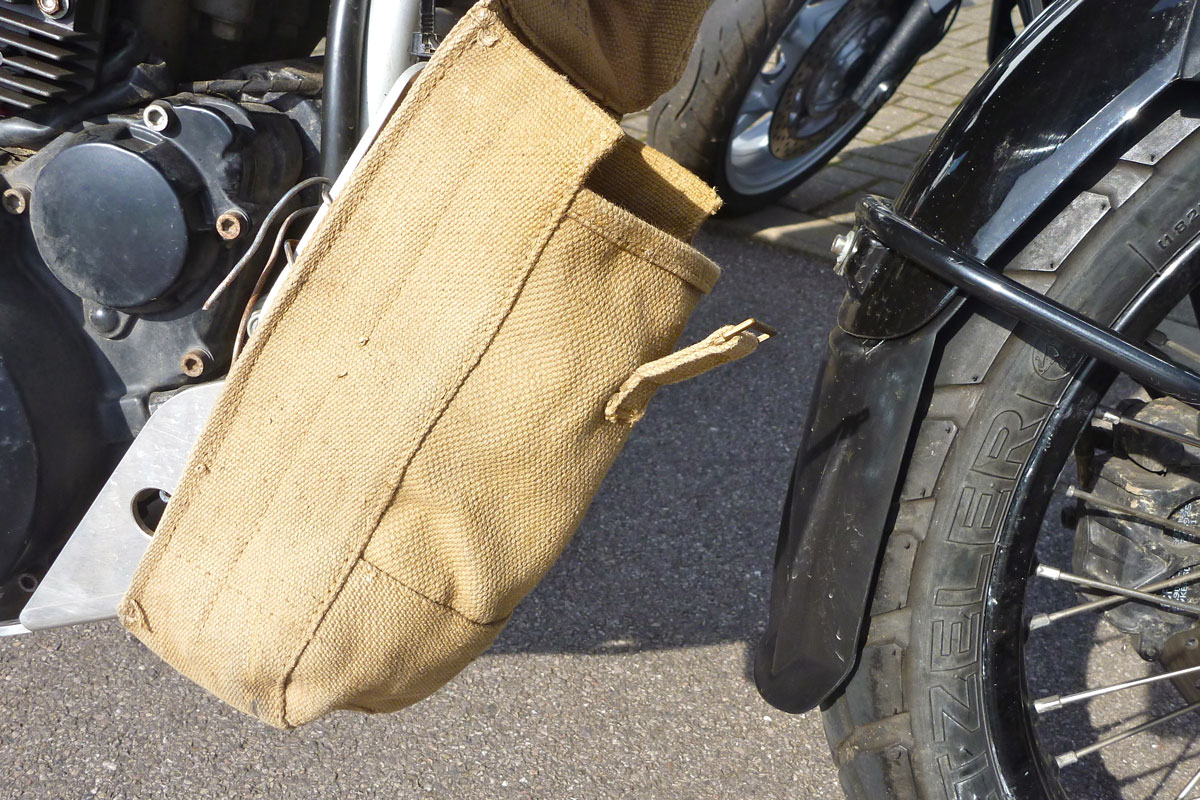
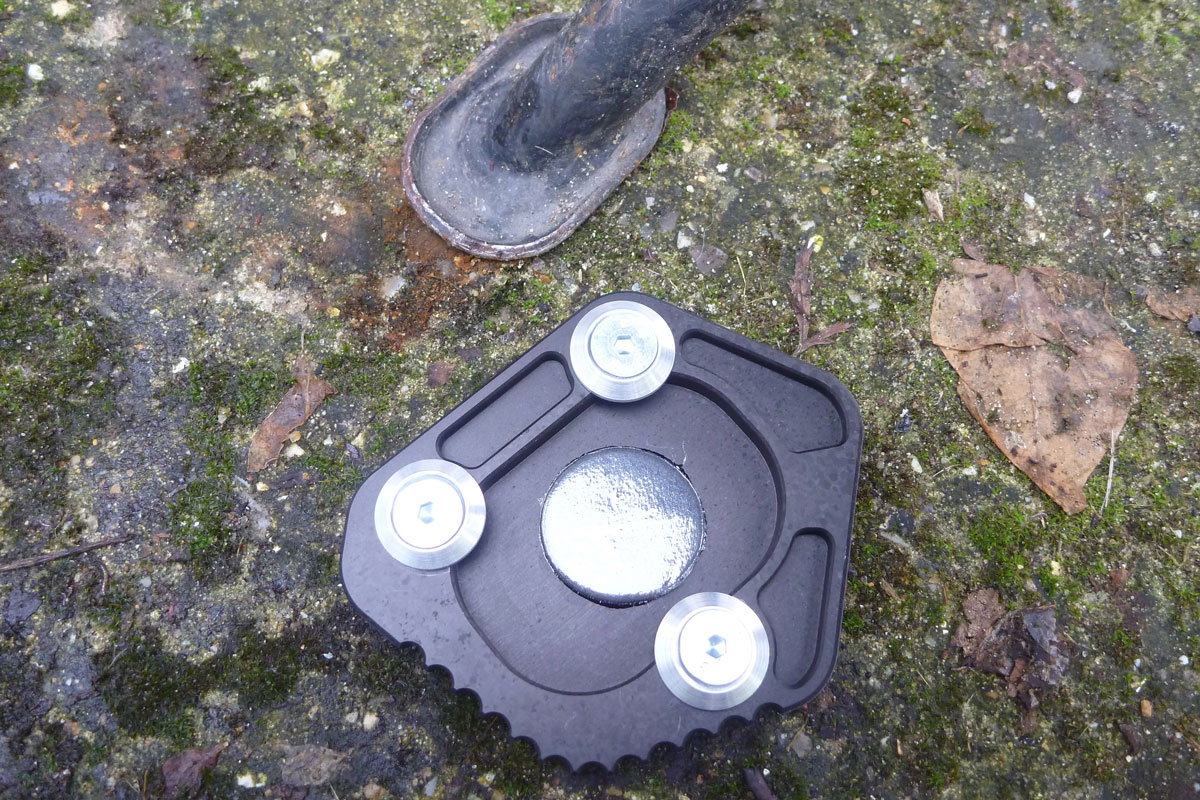
Normally I’d have made one out of plastic or rubber, but along with other stuff from Wunderlich (40% cheaper in Germany – where have you hear that before? So much for the EU), I treated myself to their fender extender(left; 100g?) to stop crap clogging up the radiator. It fits on in a jiffy but needs a longer replacement bolt which Wunderlich don’t supply, although they do supply you with a 3-kilo catalog. As you can see I’ve also fitted my ‘signature’ canvas tool pouch (left; 200g?). You read about adapting tractor tool tubes but I like the pouch; it’s bash proof, rugged, easy to close and takes a 1.5L water bottle, my tool roll or whatever’s needed. You’ll find them on ebay for around a fiver. Search: ’58 pattern canvas ammo pouch’. I am definitely getting old and lazy as I coughed up for a Wunderlich enlarged sidestand foot too (50g). It will be OK on soft ground but I know for sure it won’t be big enough on soft desert sand. Perhaps I’ll extend it when the need comes and anyway it saves welding permanently onto the bike.
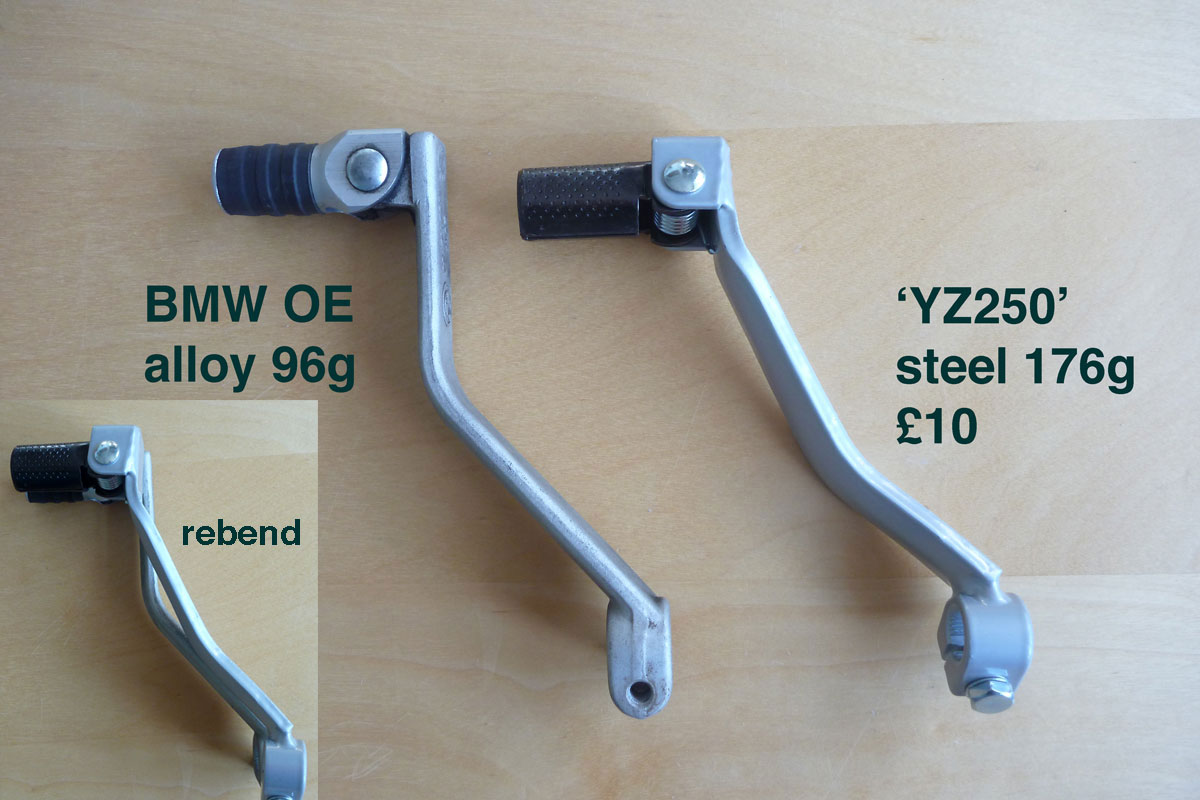
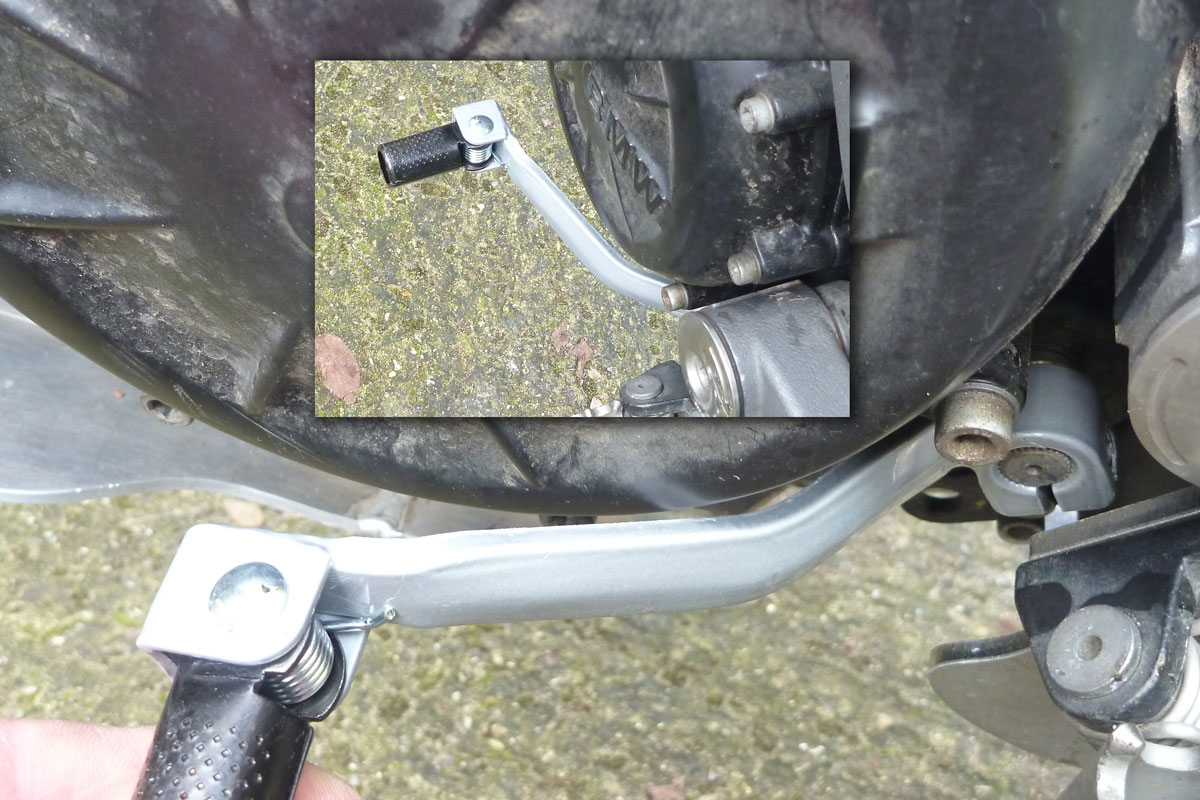
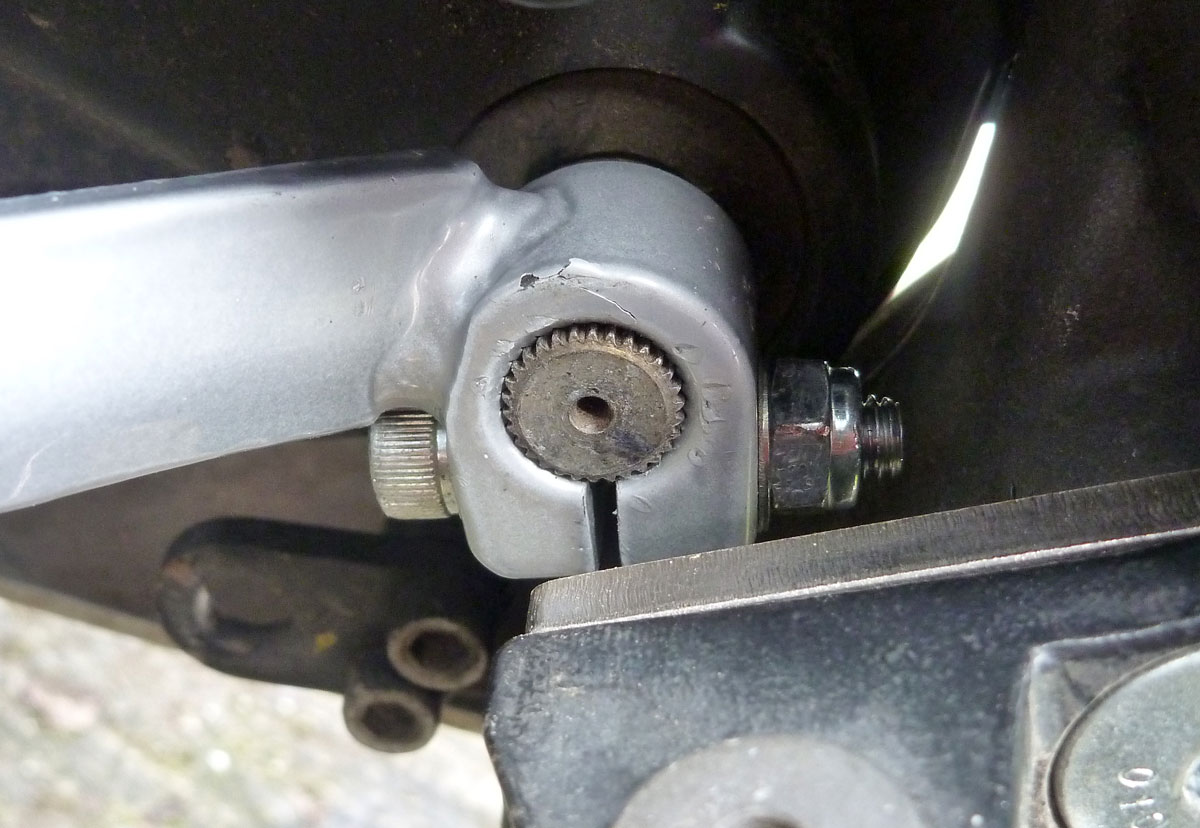
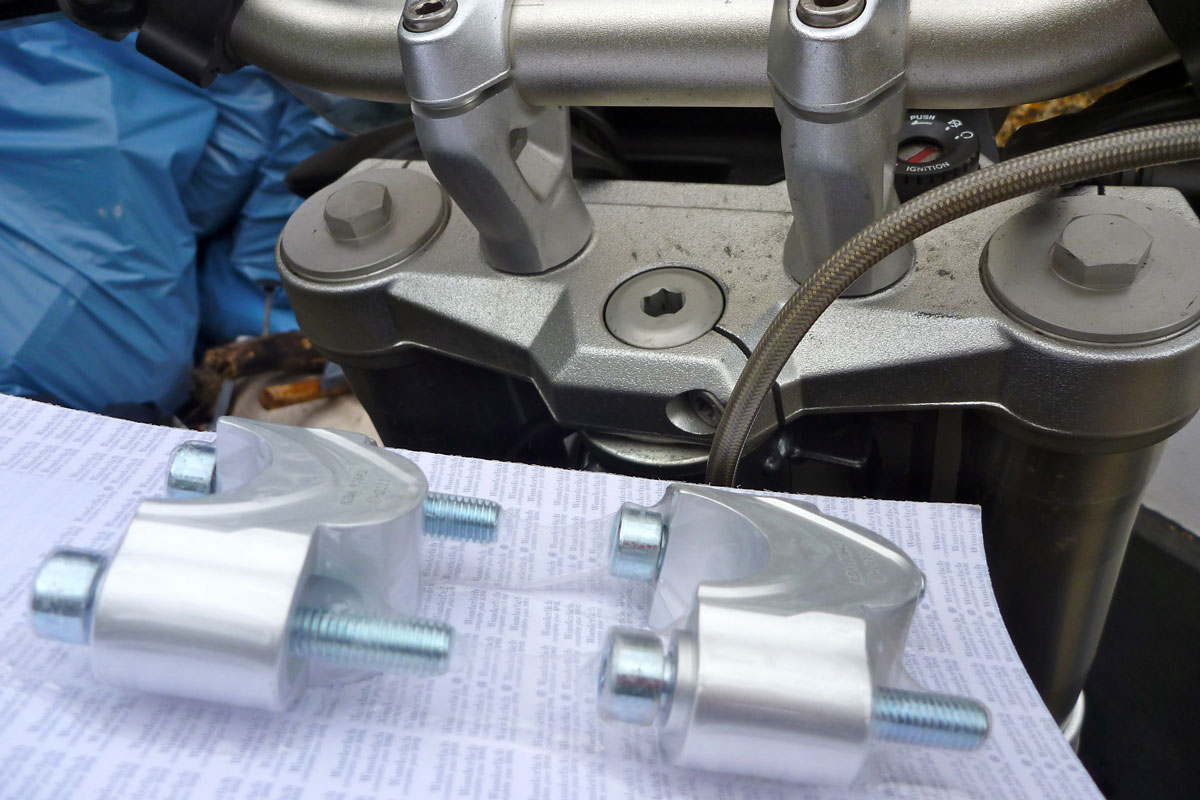
The alloy shifter on the X bikes sticks out vulnerably from the narrow engine and is said to be too rigid to the point where it can snap or damage the selector shaft. You don’t want that. They say old 650 Funduro steel ones fit or later F650 Dakar shifters, but the selection (so to speak) on ebay looked like they’ve all been over an IED and most didn’t have a folding tip which is as useful as bendy steel. New ones are £60 but on a tip I found a YZ250 cheapie from MD Racing posted for a tenner (176g vx 96g). It gets very close to the case so needs a little rebending to match the OE item which I’ll get round to with some Mole grips or a vice. I also found there’s no room to get the bolt in once on the splines, so I put a longer bolt in from other end with a nut (right).
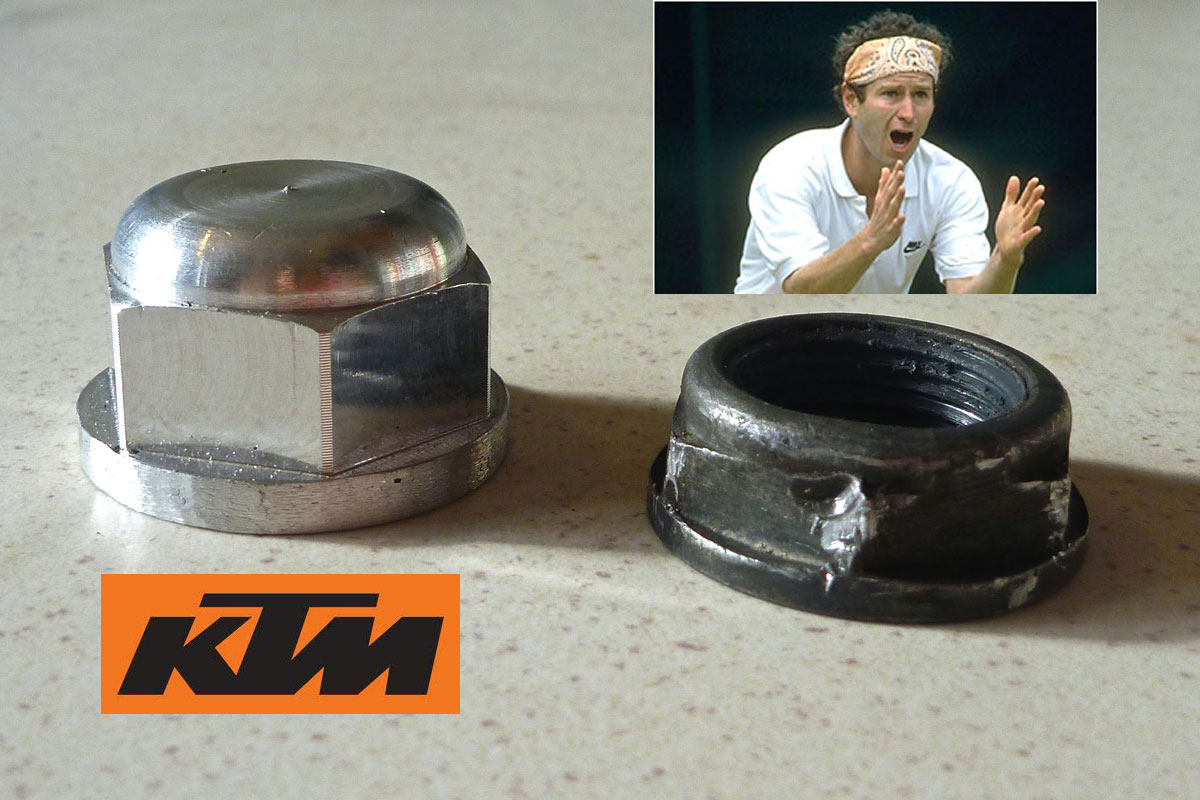
One of the less bright ideas to save weight on the X bikes was to use wheel spindle nuts with faces about 5mm wide. What chance has a commonly used nut like that got of not getting mashed? None at all I can confirm; the front one undid OK but the back nut soon turned into a fat washer and had to be chiselled until the bugger split right off the spindle. Luckily, Xbike gurus out there have found that lighter domed alloy 27mm KTM 450 nuts fit (p/n 50310099000; about £4). Sort of. Again, the front fits fine but for the back you have to trim a millimetre off the radius of the collar so it fits against the sunken chain adjuster (more details at the excellent mattsnook Xcountry resource). I don’t have access to a lathe to do a neat skim job but found that chamfering a bevel on the collar’s edge with a grinding stone on the end of a drill did the trick. Overall I’d have preferred a regular steel wheel nut – 27mm in M20 1.5mm is what you need – but gave up finding anything close to the price of new KTMs nuts so I’ve bought a third as a back up in case one gets mashed.
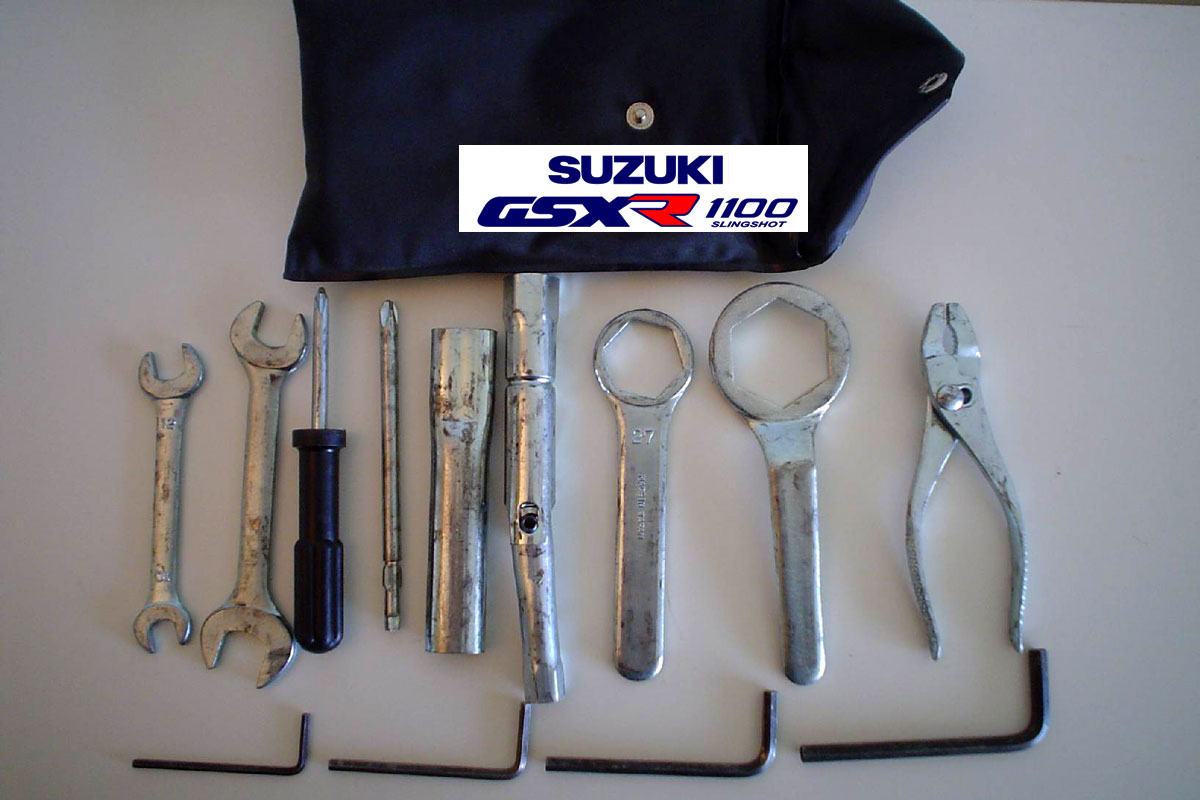
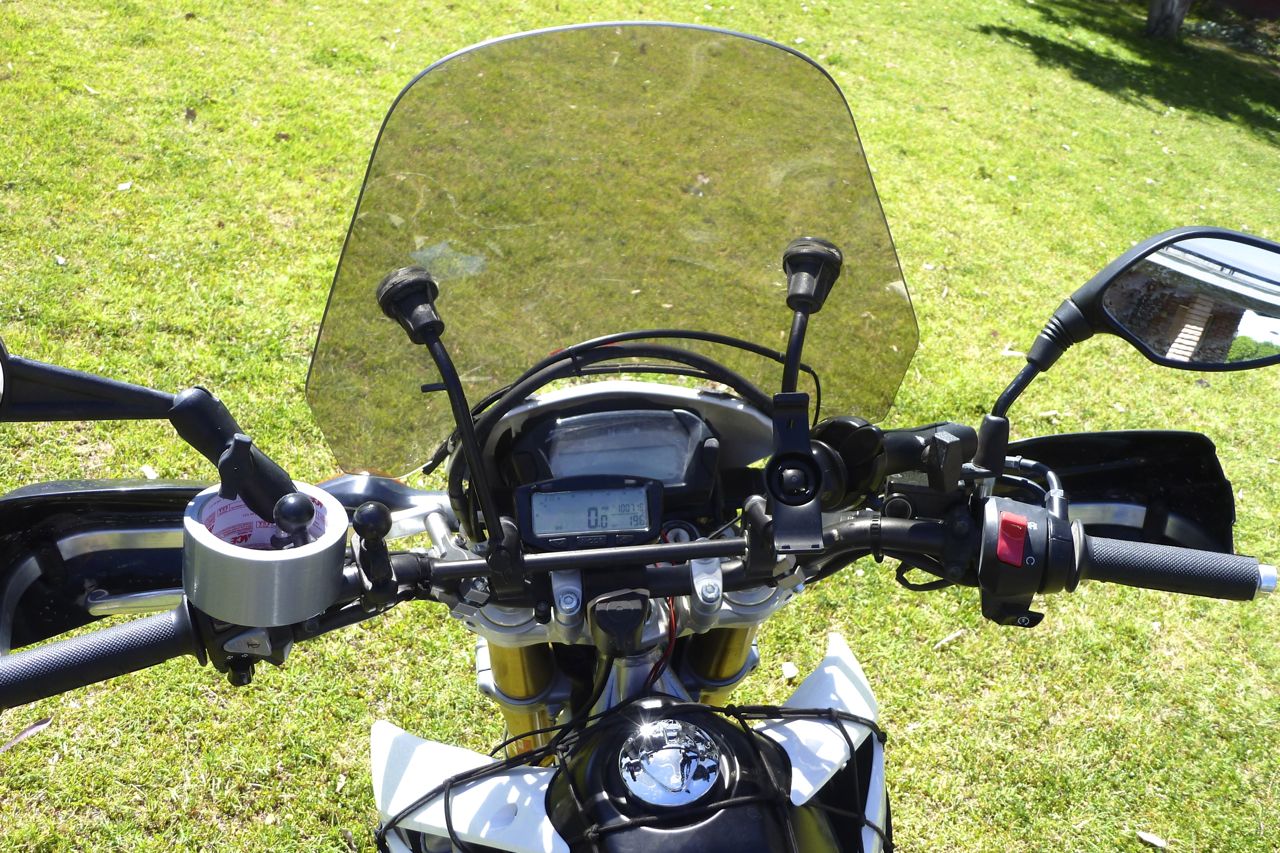
My bike was missing its BMW toolkit and guess what, a new one only costs £112 (though many other BMs share it; see link). Now I have the wheel nut size sorted at the more regular 27mm size, I started looking for one of those flat ring spanners you get with Jap bikes plus some mini pliers to add under the seat with a few spanners and hex keys. After hours on the web trying to save a fiver, the cheapest solution I found was something like a used toolkit off an early-ish GSXR1100. Plenty of them around once so plenty in the breakers. I got one as shown above for £15 posted. It comes with the vital flat ring 27mm with extension handle, pliers and all four hex keys match exactly what the BMW uses. With a 12mm for the chain tension and a combo 8/7mm ring I’ll be in business. If not hex, then the 650X uses a lot of 8mm head, plus a couple of 7s and 13/15 on the mirrors where I’ve fitted some RAM ball mounts (see windscreen image below; 50g) for GPS, cameras and so on.
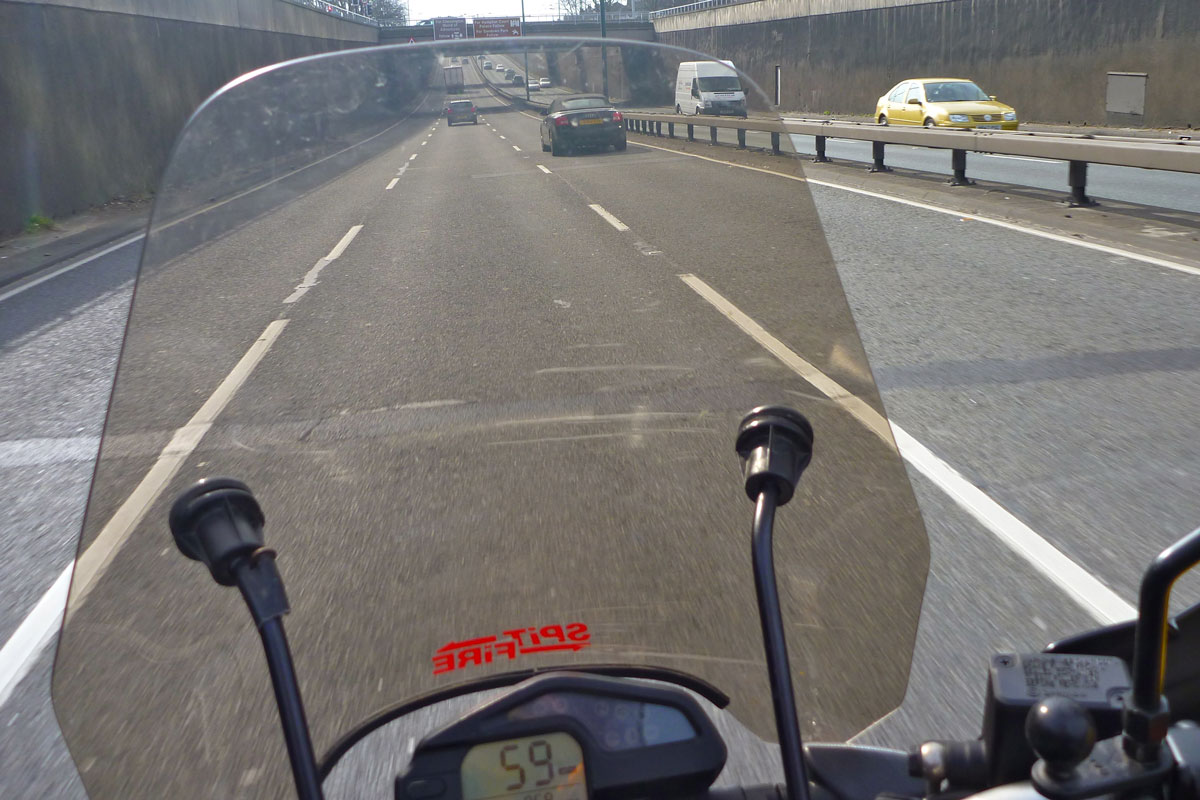
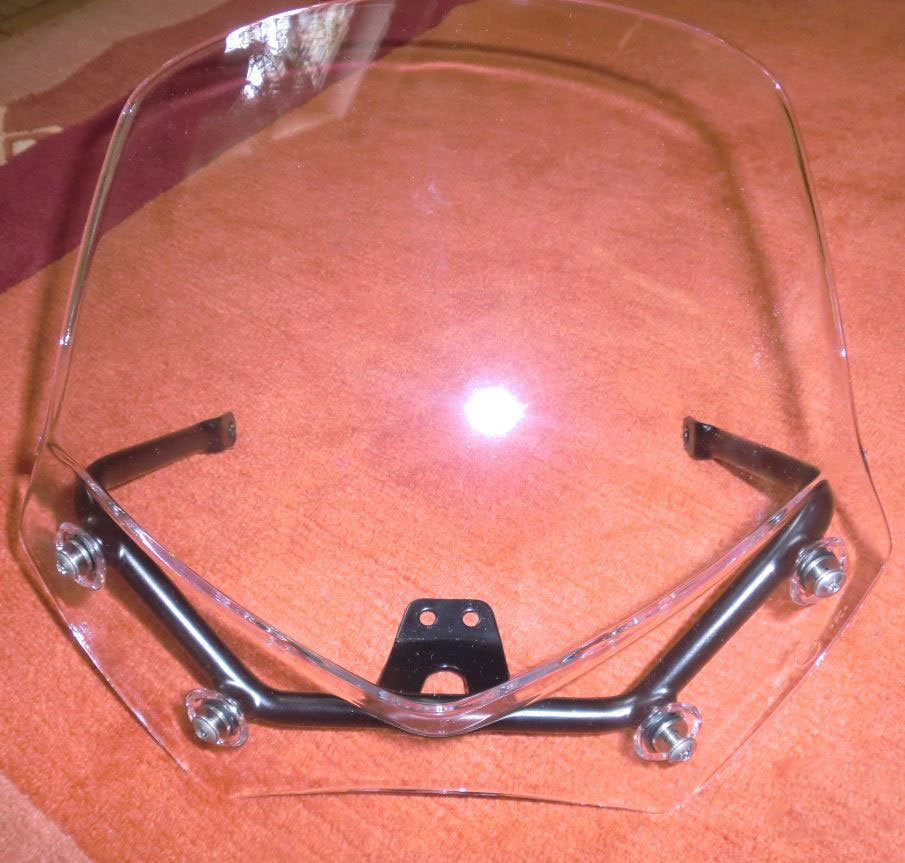
I’m not convinced it’ll be up to it, but seeing as it’s around, I re-fitted my US-made Slipsteam Spitfire windscreen (~1kg?) off last year’s CRF-L. There are plenty of windscreens to be had in the UK, but for just $20 for some larger 1 1/4 inch clamps to fit the BMW’s fat 1.125 (28.5mm) bars, it was worth the gamble. On the 30-mile run down to Vines in Guildford along on the A3 to get the subframe, I fully expected it to play up, but it held firm at 70mph, despite its single pair of mounting stalks. I can’t say sitting behind it was like being in the back of a Mercedes sedan in full repose, but it must lessen the wind pressure and didn’t seem to affect the handling. That may yet prove an issue as the BM is faster the old 250 CRF. The great thing with the Spitfire is it comes off in a jiffy if heading off road. Apparently a smaller screen off a BMW R1200R (right) fits right onto an Xcountry too – the price for the screen and frame new from BMW? – don’t ask – but I picked up a used one on ebay.de for around €100 in case the Spitfire proves to be a misfire.
In my Wunderlich shopping frenzy I bought some ~25mm bar risers but I’m not sure there’s an urgent need for them just yet, as I’ve found briefly standing was not too much of a stoop. Maybe one for later when the off roading begins in earnest.
So all up with these adaptions I’ve spent around £300 including the spare screen and added about 3.5kg.
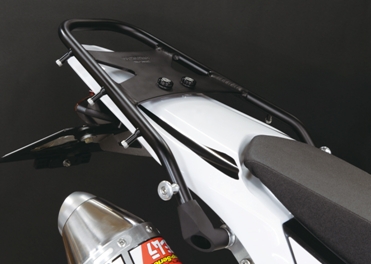
Still to come on Project X Fitting a tail rack and increasing the woeful 9-litre fuel capacity. Fit a 12-volt power socket. Fit my ex-CRF-L Barkbusters when the fatbar clamps turn up (current ones are all-plastic cheapies). I also noted with regret that the shock is on max pre-load so at the very least I’ll probably need a heavy duty spring from Hyperpro, if not the Wilbers stick they all rave about.
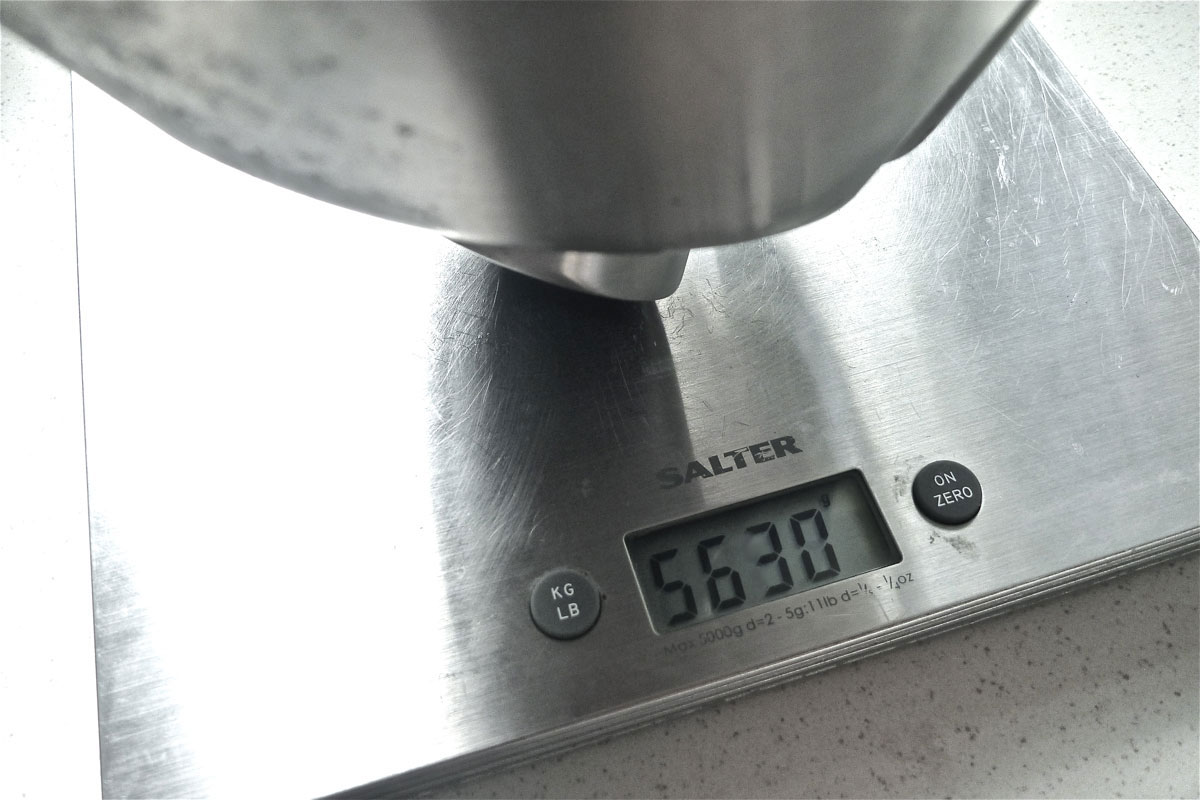
Looking into the huge silencer which weighs in at 5.6kg, the word seems to be that nothing else works as efficiently, despite the great noise they might make and the 2 kilos of weight they may save, so put your money into something else. It may be worth performing a catsectomy to cut out the cat converter in the silencer’s end cap. I’m told by Hot Rod Erik this only saves about 300g but it significantly reduces the heat built up (which cats need to work properly) at the front of the pipe. That may affect emissions for future roadworthy tests, but is probably a good idea for the desert if I can get hold of a bashed up X-silencer.
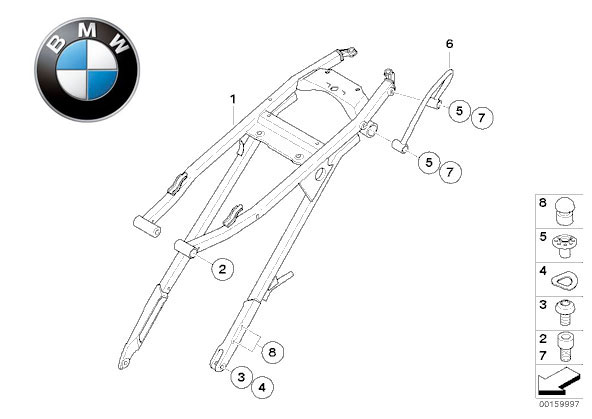
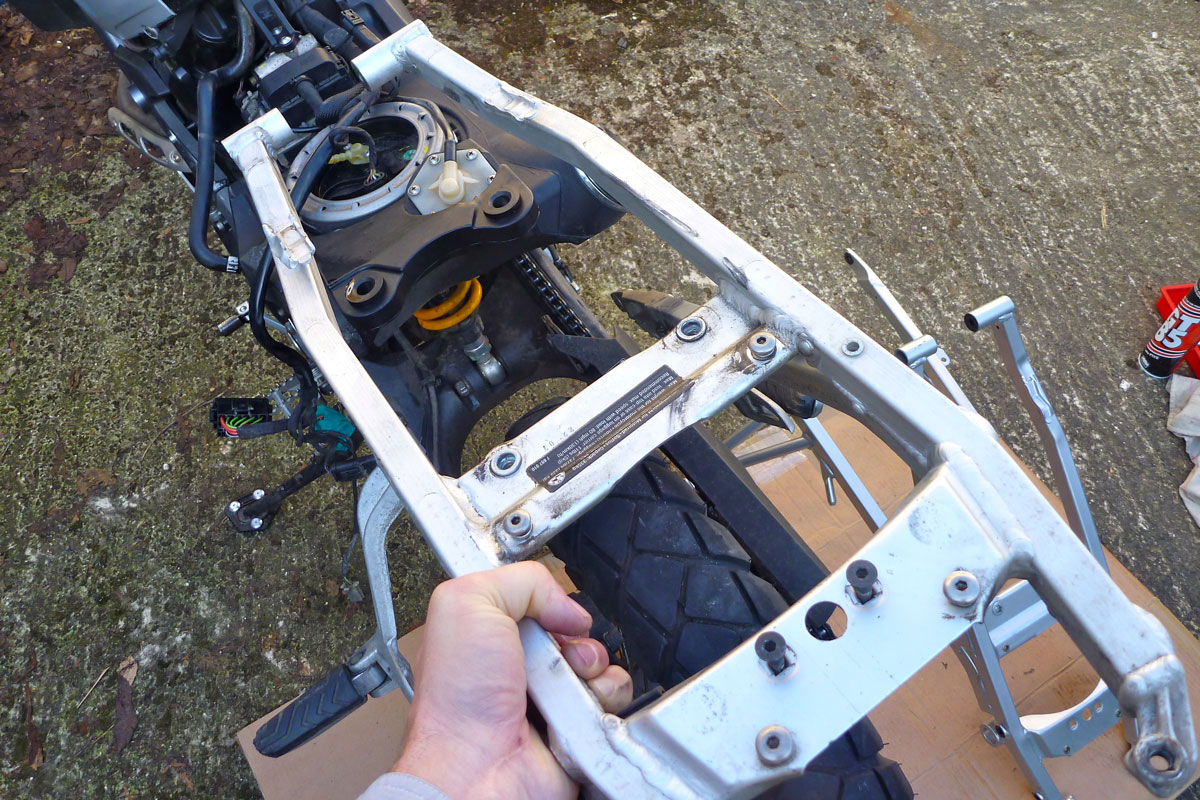
One of the flaws BMW addressed on the Mk II 650 Xcountry (right) was an overlight alloy rear subframe. Of the three models the Xco was especially prone to failures as it was was the only one in the Xrange with pillion footrests.
For solo bumbling around the alloy frame will doubtless be fine, but with a passenger on an XCo, let alone riding a loaded XCh off road, the subframe proved inadequate. Presumably enough warranty failures occurred for BMW to upgrade the yellow Xcountrys from 2009 with an identical unit in steel. About twice as heavy but much stronger. Only problem is yellow Xcos are considered a bit to low and under suspended for all-terrain travel biking duties.
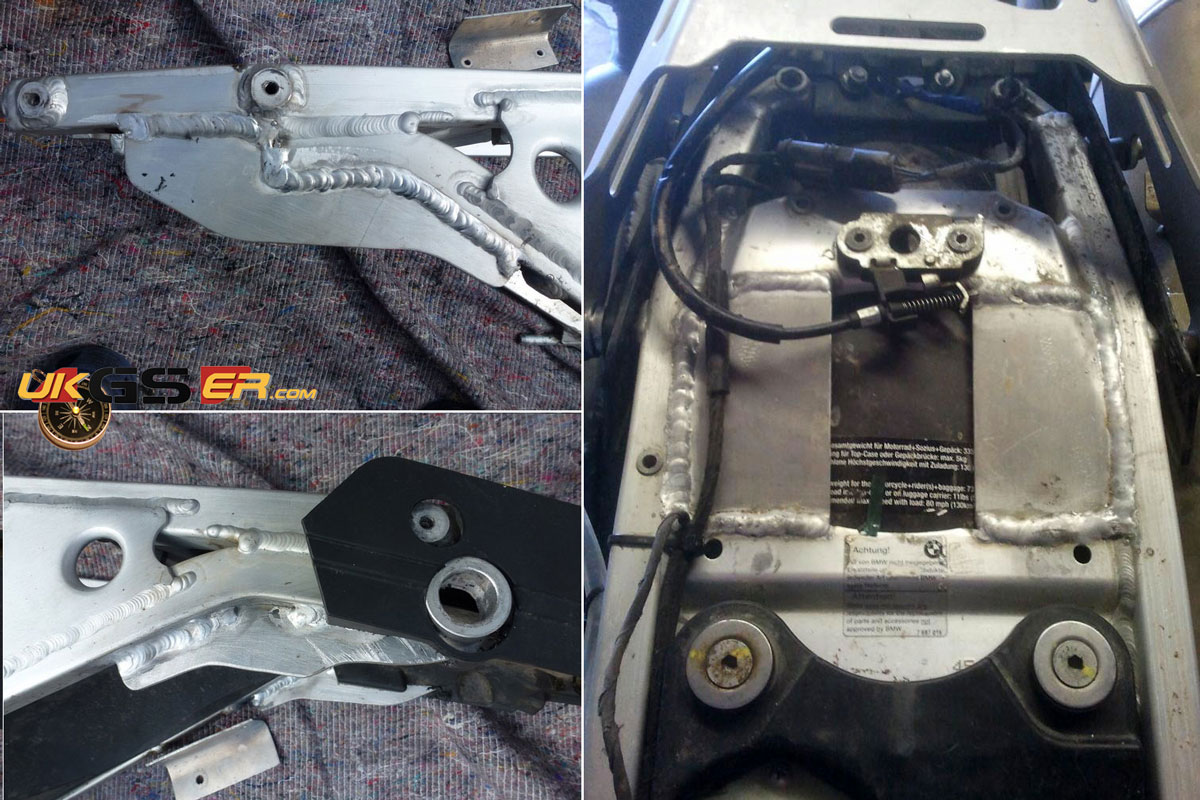
There are other options which work on all the X bikes, not least the popular XChs: strengthen your original alloy subframe around the back where it commonly cracks with horizontal and vertical plates (right). Easily done but long term the subframe needs more than that. With heavy loads, rough terrain and the passing of time the stressed alloy fabrication clamped to the steel main frame will flex and slowly wear at the four mounting bolts. It may also distort sideways when you fall heavily with bulky side luggage. Within reason skimpy steel subs can handle being bent back straight and many XR owners know. Alloy does not like that sort of abuse and
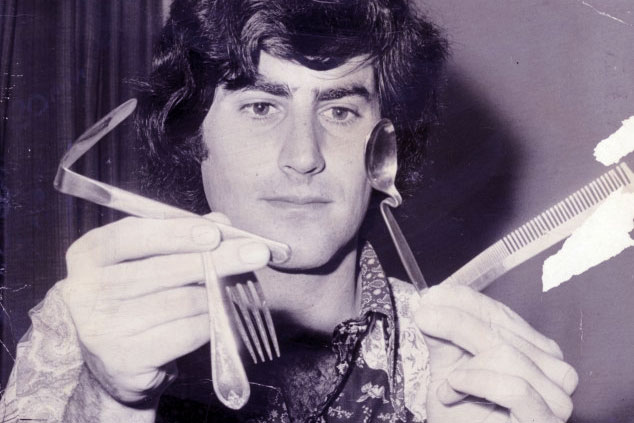
will eventually fail like Uri Geller’s spoon. Furthermore the bolt threads at the back of the alloy subs where steel racks get mounted are also prone to wear and although it may be a bit of an adv myth, out in the field it’s certainly easier to get steel welded than alloy.
Xman Erik in NL can upgrade your alloy subframe; beefing up the stressed-upon upper mounts (red arrows) and replacing the alloy threads with steel inserts (green arrows). That plus the bracing as shown above right will make your alloy Xbike subframe as good as it can be and may work for most overlanders.
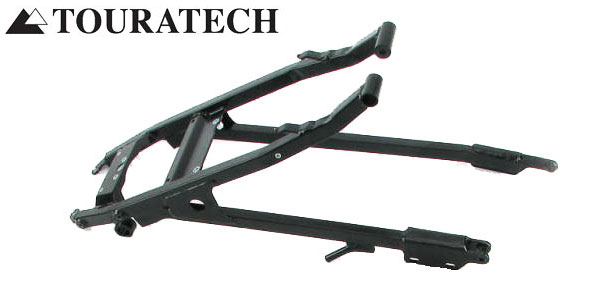
A better option: fit a Touratech steel subframe (left) which TT brought out early on for the XChallenge to carry their luggage frames and alloy boxes. The original alloy frame would never handle that sort of weight on rough ground, whatever you did to it. Those steel subframes (TT p/n: 05-049-0600-0; left) can be bought independently from the whole luggage kit for £420 in the UK, but I was told were unavailable for months. Hot Rod Erik often takes in TT steel subs and modifies them to suit his Xracks and Xtank.
Last option: fit a BMW steel subframe from the yellow Xcountry (p/n: 46517716439; right). Brace yourself for the price… only £480 inc. These were also said to be in short supply in the UK so I got wondering about getting one fabricated. A frame builder turned the job down while suggesting ~£450 was actually a good price. Then a weldy mate offered to make one for ‘about £300 – but it won’t be pretty’ but out of the blue BMW came through with a yellow steel frame.
Five hundred quid for a steel subframe – is that nuts? If you’re adapting an Xco into a travel bike I don’t think so. Whether from BMW or TT, I believe a steel unit is the single best solution to the Xbike subframe issue. A full Hot Rod upgrade on an alloy one (even done in the UK) might cost up to £200 and it will still be a torsionally weak alloy sub. I didn’t hesitate long before ordering a BMW steel unit and if money’s that tight, when my bike’s job is done I can swap the alloy back on and flog the steel on for a good price.
Subframe weights BMW alloy (with pillion mounts but pegs removed) 2.7kg (verified) TT steel (no pillion mounts) 4.7kg (unverified) BMW steel (with pillion mounts but no pegs) 5.6kg (verified)
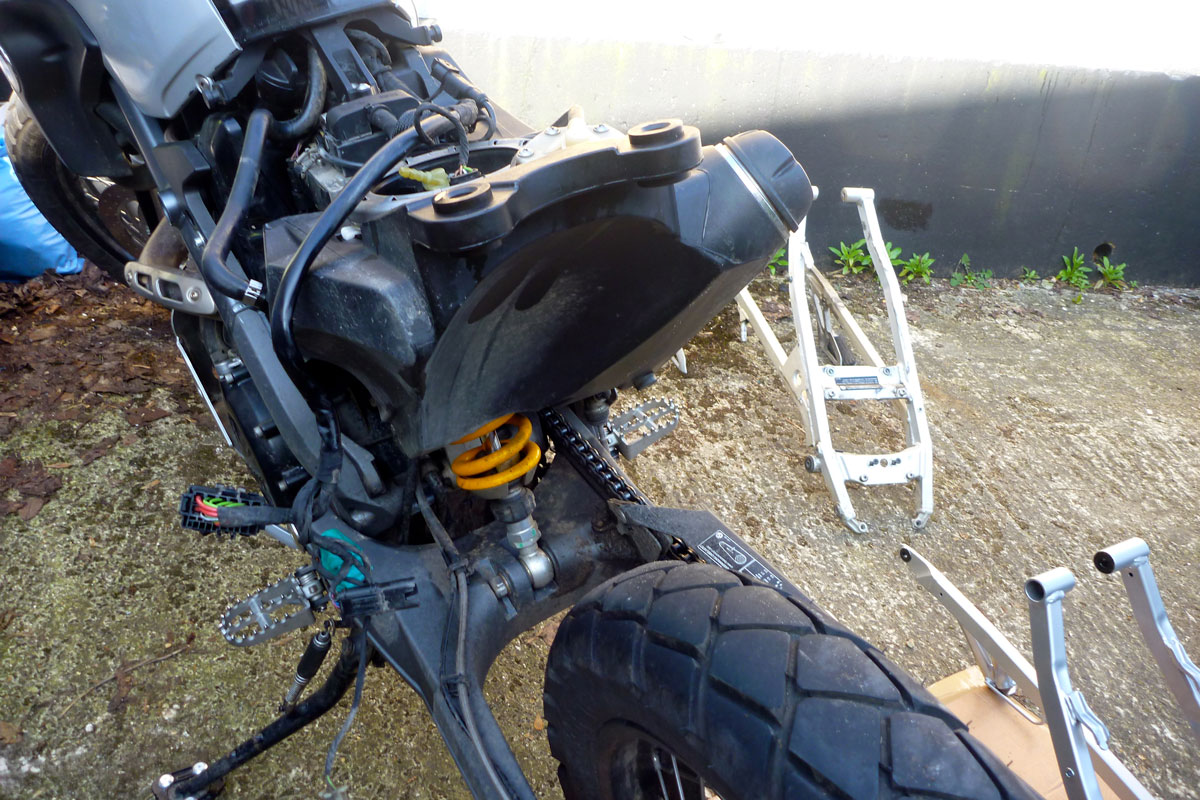
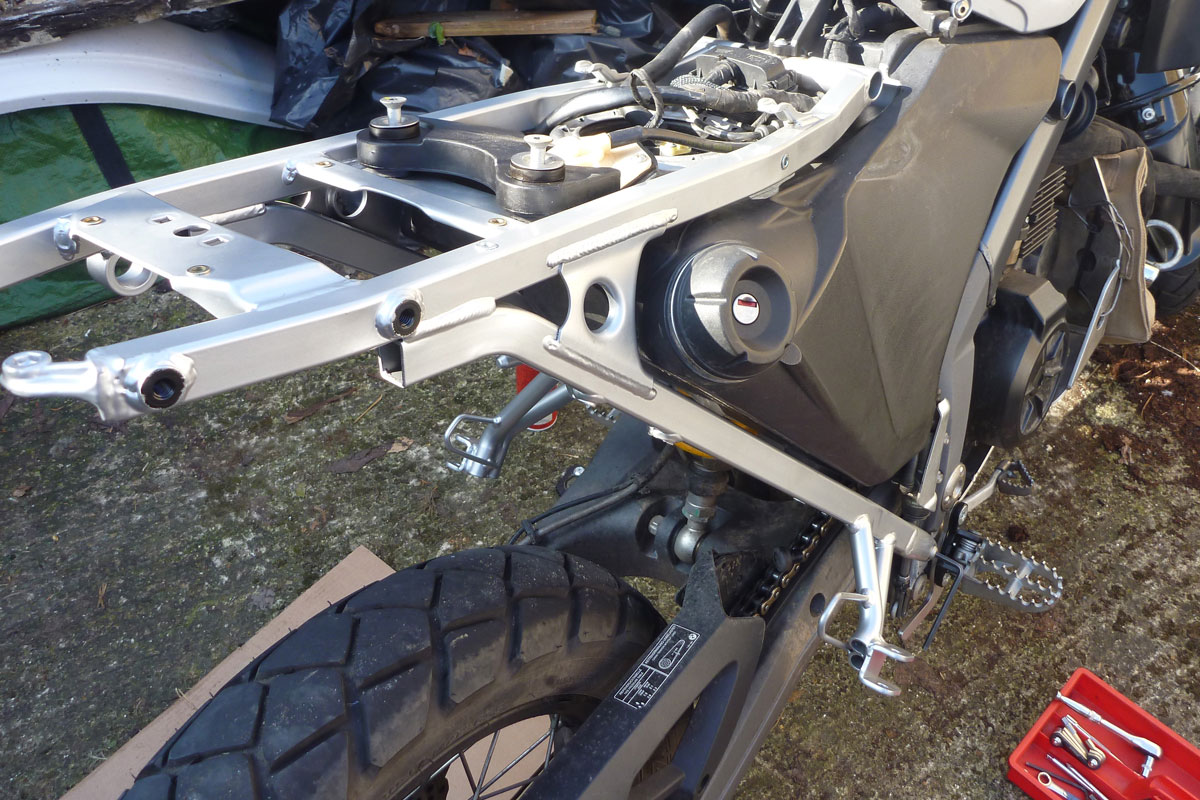
Fitting the subframe Knowing how it can get when you start working on old bikes in the street, I was all set for two days of teeth gnashing and knuckle skinning. As it was, the job was completed well before lunchtime which left me so stunned I had to take the rest of the day off. Plus now I know the minor blunders I made during reassembly, next time I could do the whole swap in two hours with just three hex keys, a 10mm ring for the silencer and the iPod on shuffle. Press ‘play’; Remove seat; silencer; rear light assembly; mudguard and undo associated wiring and the fuel breather. After about an hour you’re at the point where you can undo the four (pre sprayed) subframe bolts and the two rear fuel tank bolts. Then just tug the frame backwards (right). Away it comes and the tank stays in place. As simple as that. The new steel unit is an exact replica. Everything goes back on just like it came off. No gnashing of teeth. The only thing I missed was spotting the rubber bung which dropped out from between the tank and diagonal frame rail below the filler cap. That should slip back in later if I loosen the tank mounts. So all up the steel subframe has added an extra three kilos bringing the bike’s weight up to 161.5kg dry.
Like the CRF250L itself, I use longer rides to try out new stuff, new ways of doing things or whatever else catches my imagination. Below is the equipment roll call from the 2013 Honda ride around Southwest USA. What worked, what didn’t and why. The prices given in £ or $ are what I paid for the gear or what it cost. Some items like Kriega, Magadans, Trailtech and Aero stuff has been supplied to me over the years in exchange for adverts in the book.
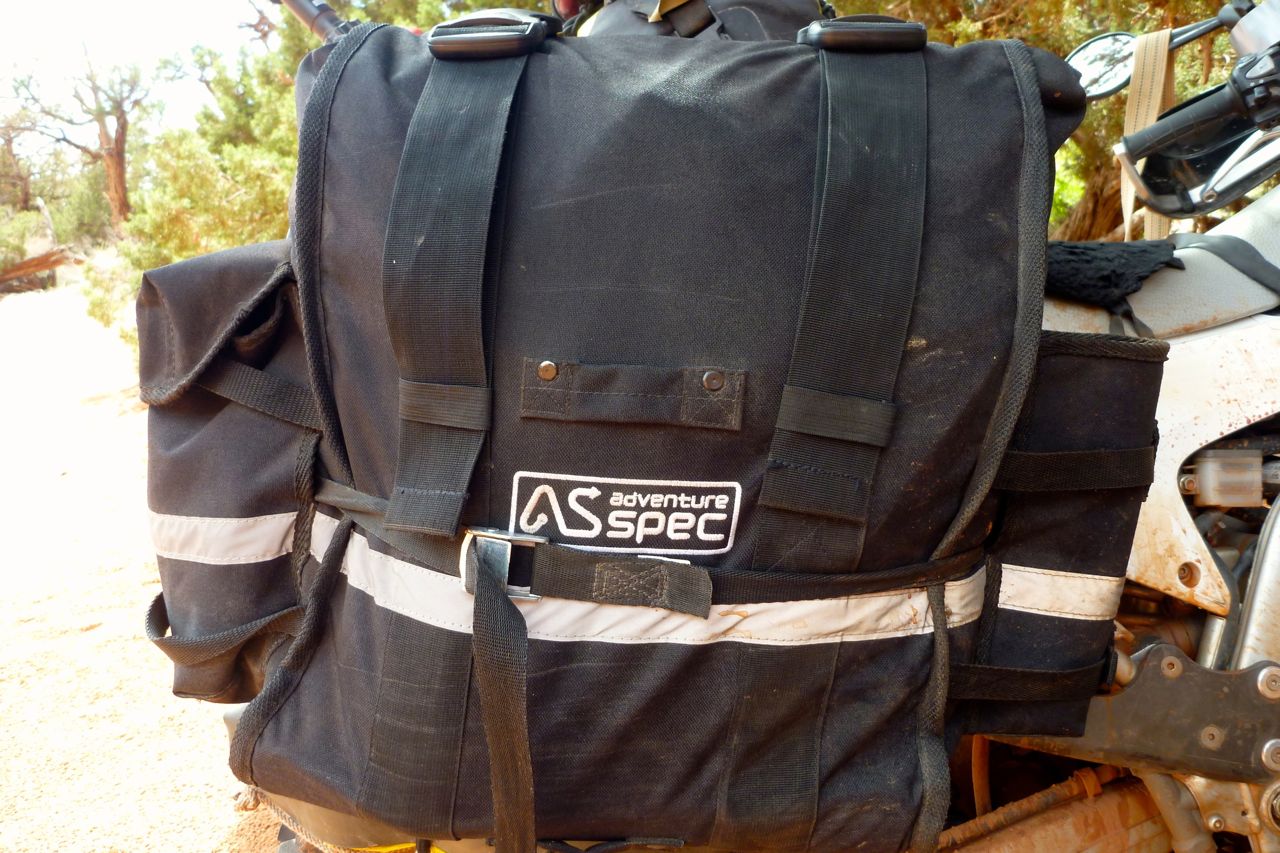
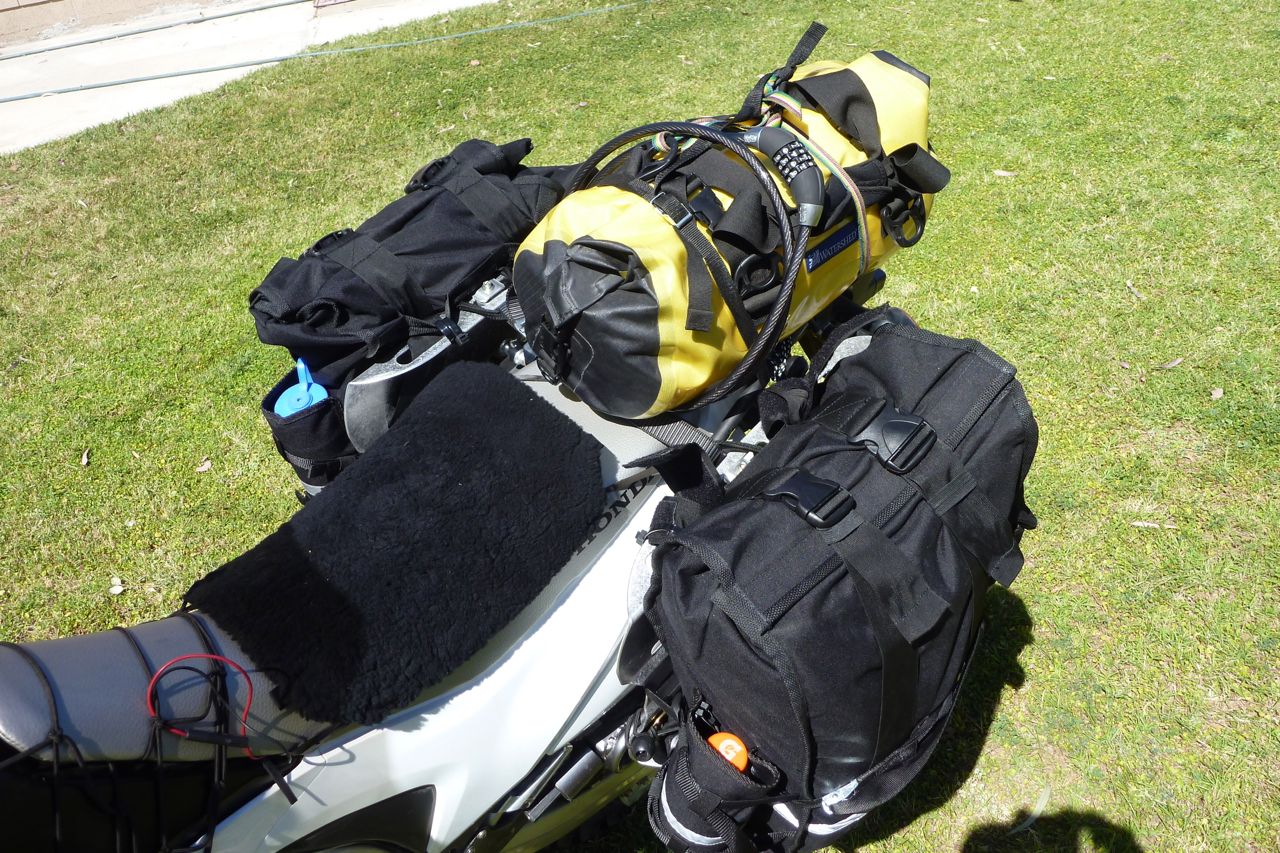
Adventure Spec Magadan bags – £330 No complains about my Magbags; the best soft bag out there for my sort of riding. Simple and functional, great capacity, big external pockets and tough fabric. It didn’t rain enough on this trip to test them, but it lashed down on previous UK rides with no leakage, even through the fabric outer, let alone the thick PVC liners. Requires a rack but that’s the way it should be for heavy loads in soft bags. More on the Mags here. Verdict: regret giving these away with the CRF.
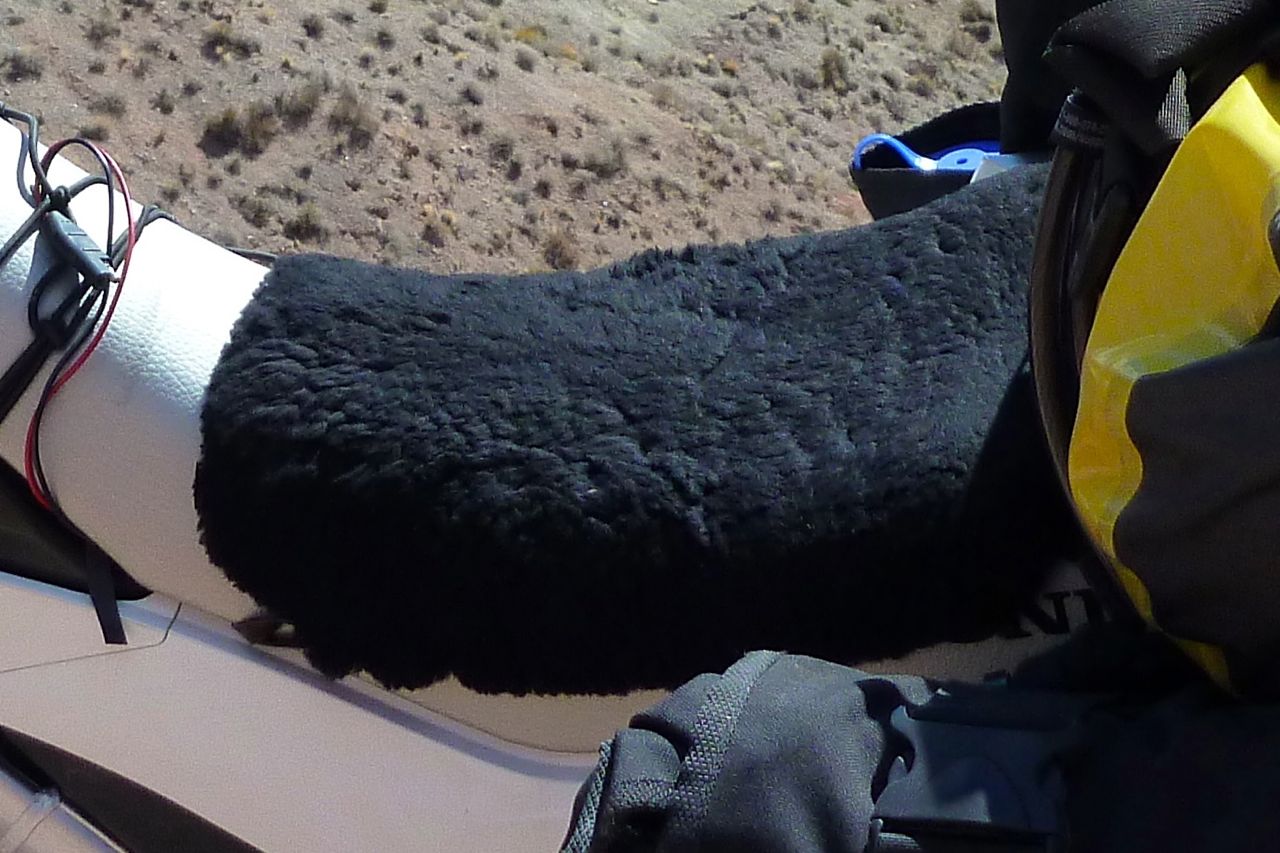
Aerostich wool seat pad – $67 I used this last year in Morocco on a BMW 650 twin which has a seat straight out of Enhanced Interrogation; sadly the Aeropad couldn’t save it – three inches of Moroccan mattress foam did. On the Honda the wool pad may have taken the edge off, giving another hour’s comfort but I actually found frequent dismounts were as effective to posterior durability. Another interesting thing: mostly I rode in my leather jeans but one hot day I wore thinner (slipperier?) synthetic 5-11 Tactical trousers (great gear btw, much tougher than ‘outdoor rec’ stuff). Result: sore arse arrived very soon. I also found the wool would pack down and lose its loft after a few long days, but could be easily washed and ruffled up. And after a night in the rain a vigorous rub dispersed most of the moisture. Verdict: seemingly minimal improvement but can’t do any harm.
Alpha Three tail rack – on bike Never heard of Alpha Three – could be Japanese rather than Chinese? – but this ‘Type A’ item was a neat little rack with downward pointing prongs incorporating hexhead bolts to securely attach stuff, should you wish. A tendency has developed towards racks cut out of flat metal sheets, either thick alloy or thin galvanized steel. Reason: cheaper manufacturing costs not necessarily reflected in the retail price as they’re the latest ‘thing’. Smaller ‘plate racks’ the size of the Alpha might be fine but some of the wider ones as tested in Overland Journal (Fall 2012) have nasty thin edges that I wouldn’t want to meet while tumbling down a slope, even though I’m all for wide ‘sheep racks’ in principle. Conventional tube racks are easier to use and grip, when needed. There are a few more CRF-L rack options listed here. Verdict: a slick and well-featured tail rack.
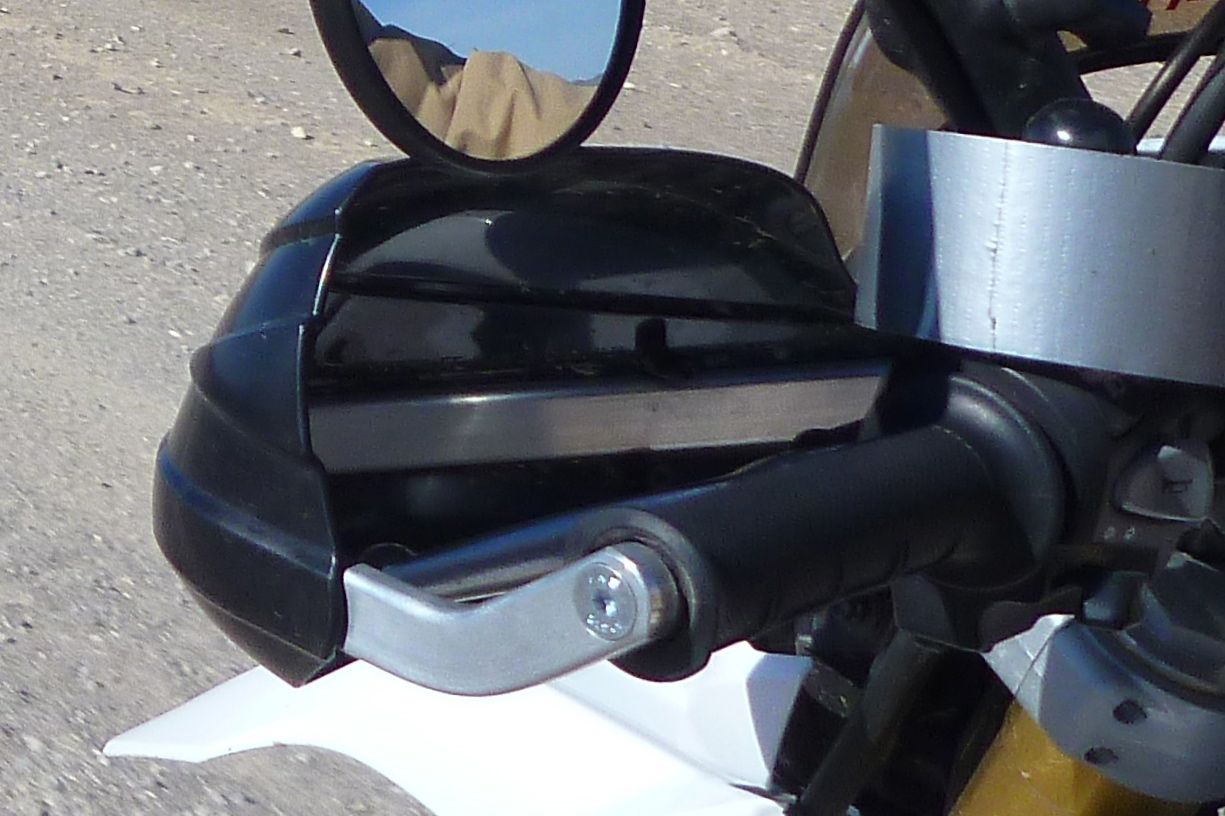
Barkbuster Storm handguards – $130 Always liked the Aussie-made BBs and even though cheaper versions are available I splashed out at more tolerable US prices US prices on some Barks with the biggest Storm handguards to keep for later. Cheapies often don’t fit so well; the key I believe is the articulated joint (available separately) at the inboard mounting end. Cheaper versions off ebay have no joint – less easy to position optimally. I like to think the Storm handguards kept my hands warmer and drier and so deferred the need for heavy gloves – I always prefer thin unlined gloves. The only time I fell off the Barks did their job, although one drawback with all lever guards is you can’t hang stuff, including a helmet, so easily off the bar ends. I’ve fitted bungy hooks on previous bikes. Verdict: worth paying out and keeping for the next bike.
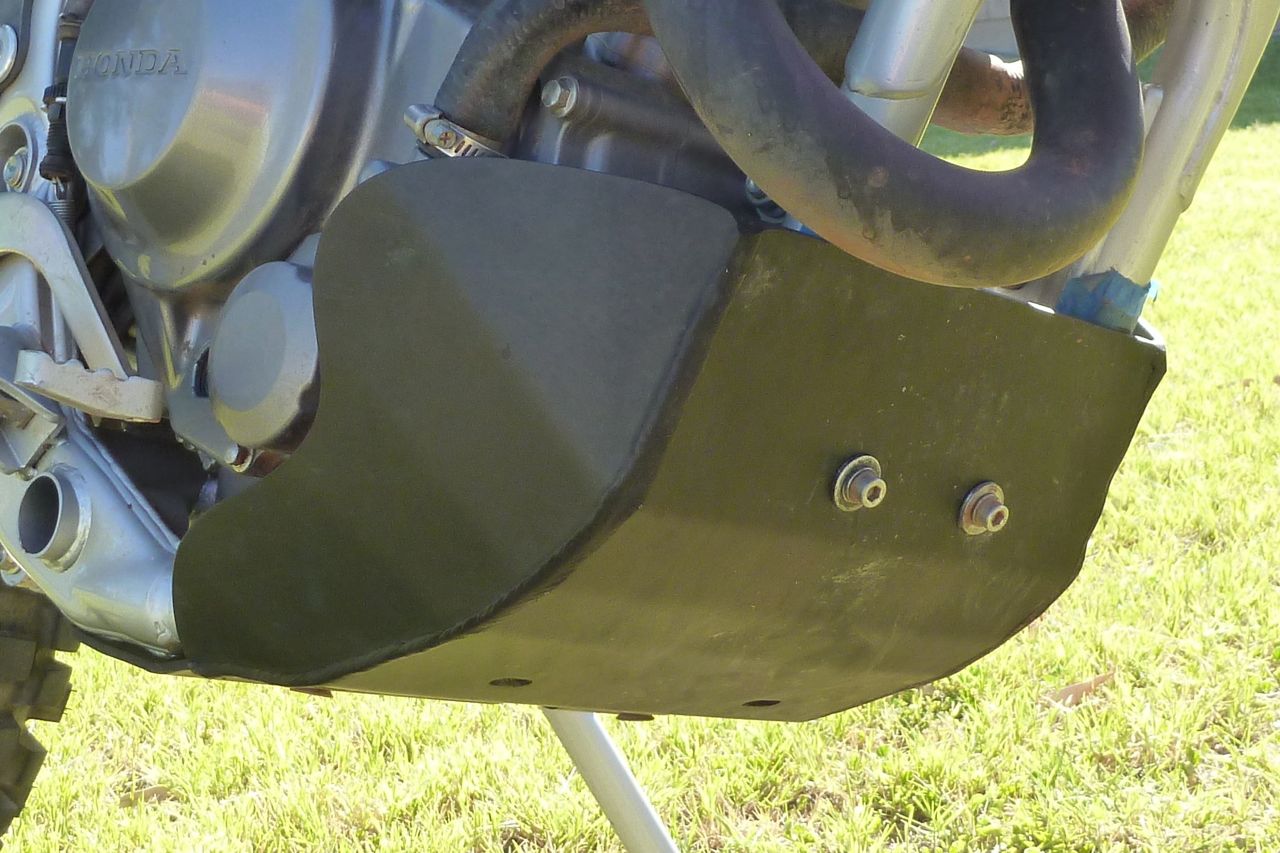
Bashplate – came on bike I omitted to note what brand it was – Ricochet is a name that bounces around the forums. Engine protection is a no brainer of course, even if I only dinged it once on the gnarly Lockhart Basin track. The fit was fine – no exposed bolts on the underside and a hole to enable drain plug access without removal. But clamped directly to the frame rails I found the resonance intrusive. I reduced that by refitting the plate with some strips of closed cell foam (karrimat) on the frame rails. Like others, I also think a bit more width to either side would improve protection of the filter housing and bottom hose. Verdict: As usual, the OE plastic plate is a joke. Essential for off highway riding.
Bell Mag 9 helmet – $70 Probably discontinued by now but great lid for the money. Full review here.
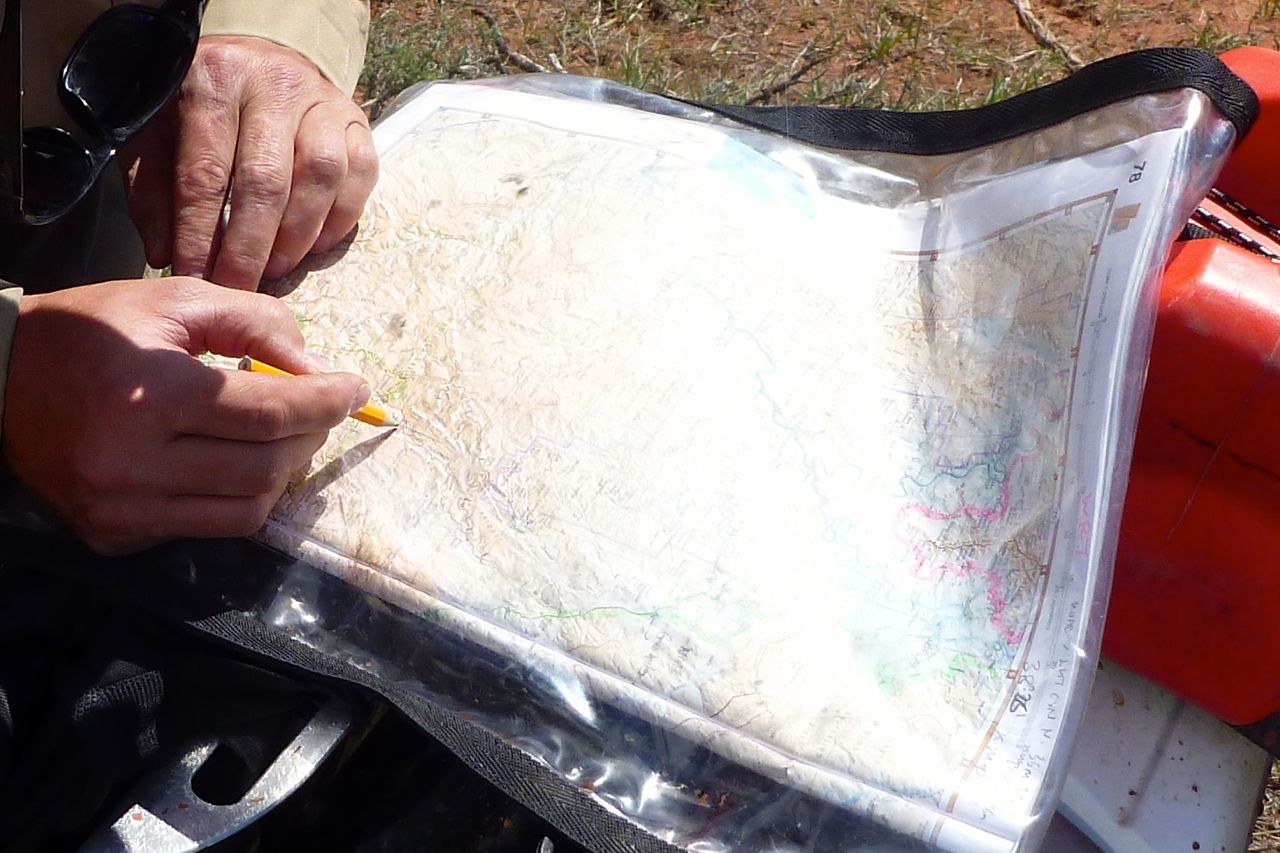
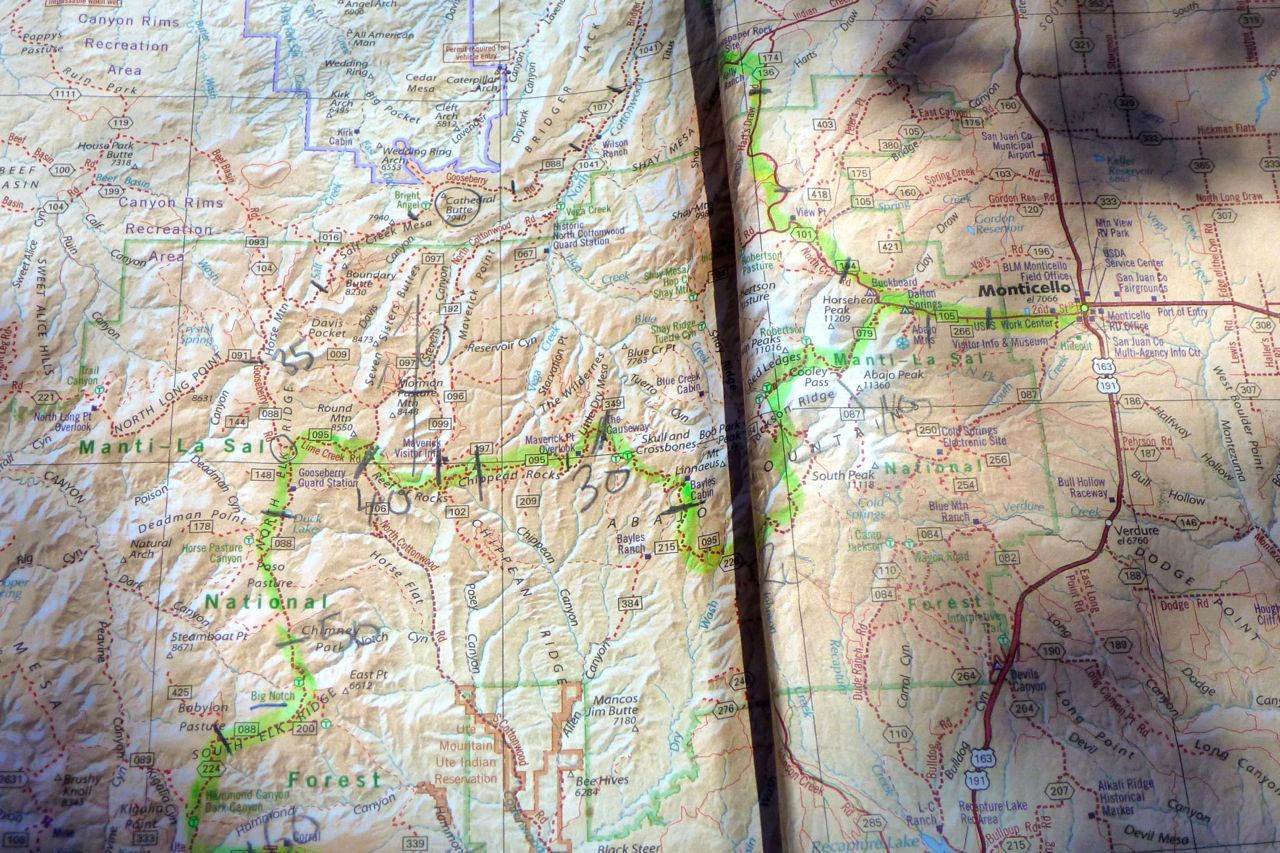
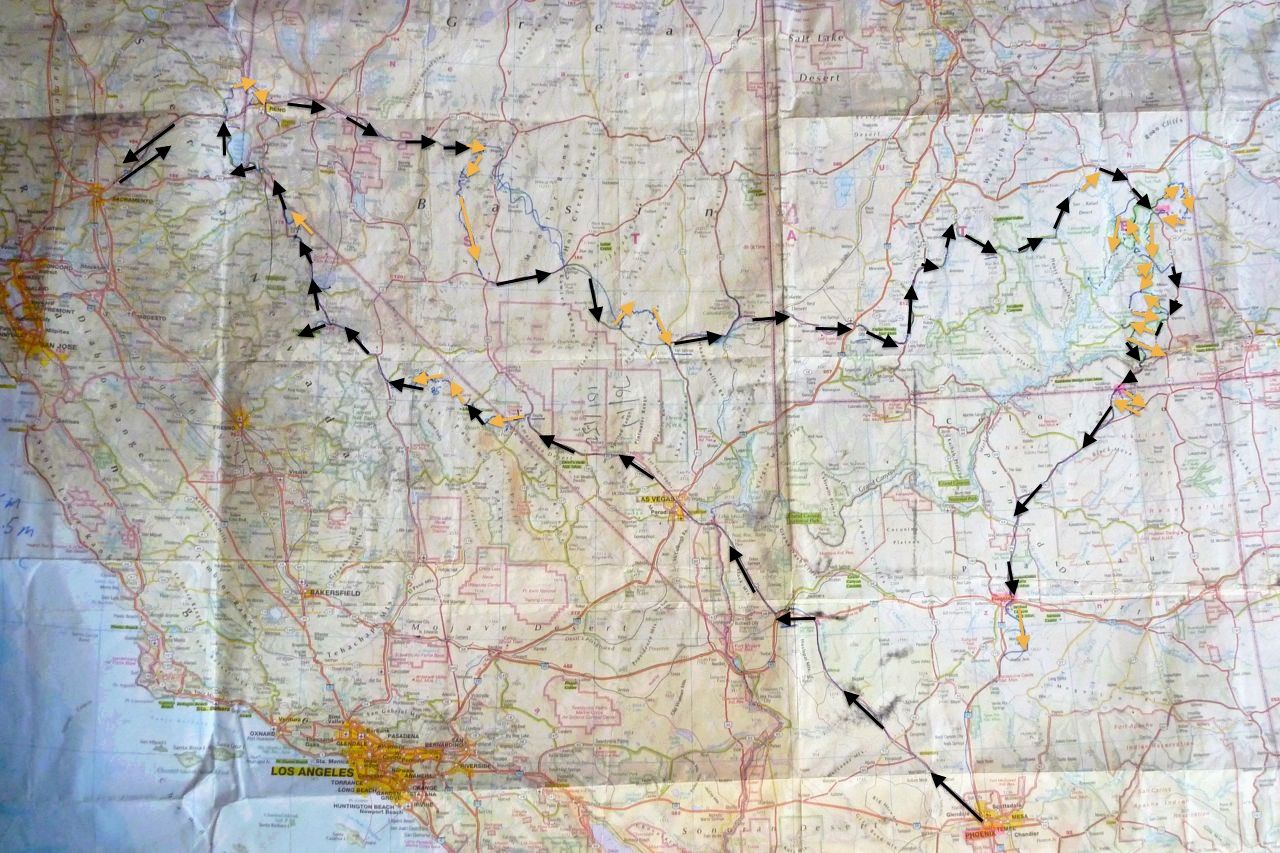
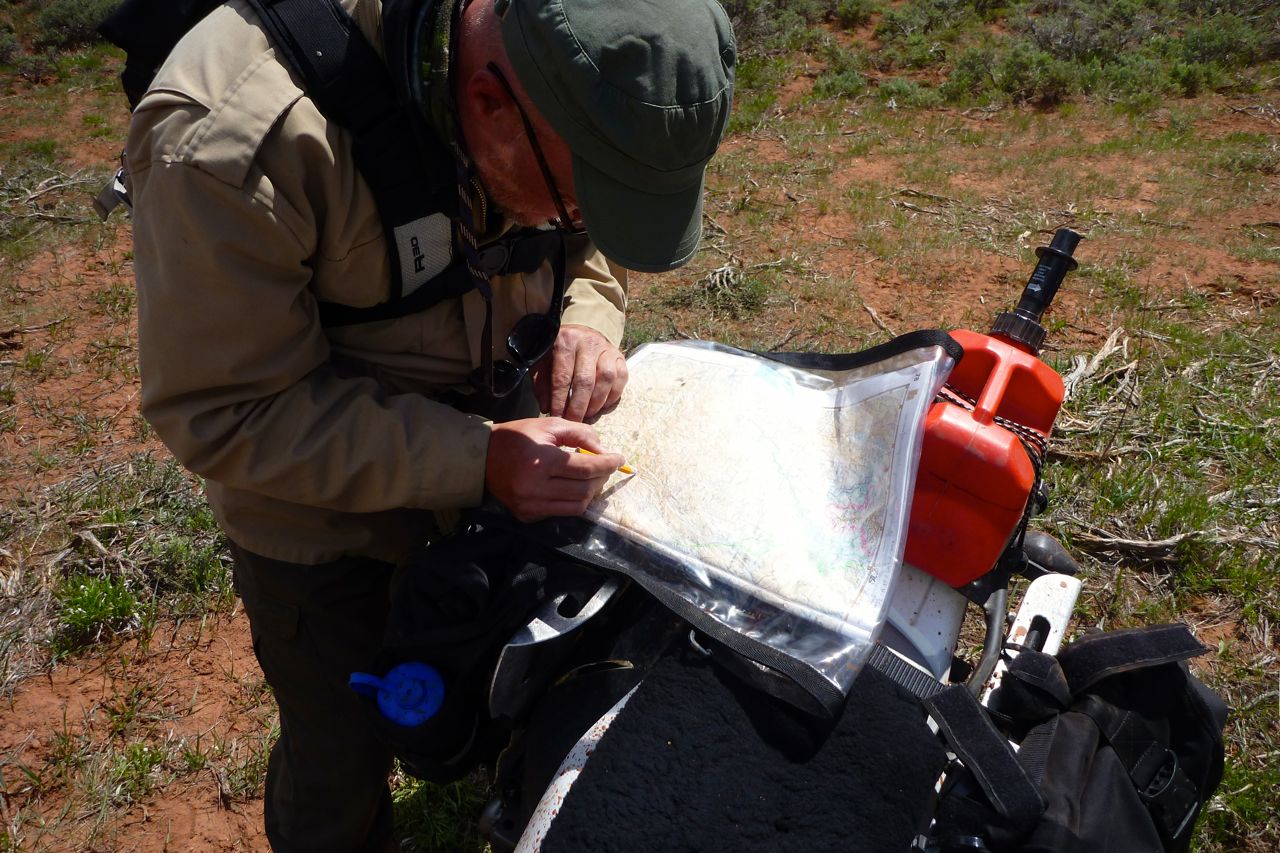
Benchmark atlases – $15 I’ve been using these for years in the US and on this trip they came into their own for riding off pavement across Nevada and Utah. Yes they’re big to carry on a bike and may well be available as a tablet app, but give me a paper map any day for getting the big picture. I barely use the additional guidebook-like recreational info you get in a Benchmark but it’s good to know it’s there. As with all paper maps, dirt road accuracy got a bit mushy at times, and here I found the US-sourced Garmin satnav filled in the gaps. And then when the satnav was wanting, just like a proper map I could read a long-lat easily off my Garmin 62 against the Benchmark’s incremental long-lat grid (above) to find exactly where I was. Verdict: I’ve tried Delormes but Benchmarks are to the US what OS maps are to the UK.
Double Take mirrors – $100 pair! A mate had these in Morocco last year and I admit I fell for the hype – or wanted to see if they lived up to it. At over $100 a pair (iirc) the RAM ball-mounted DT mirrors provided infinite positioning and crash-proof toughness. I took one and left the OE Honda mirror on the nearside (on the right side in the picture, left) but soon wished I’d either kept both Hondas or ran them the other way round. For seeing what’s behind you the OE Honda was a better mirror – bigger (wider), clearer and immune to vibration or movement. That was until my single, low-speed fall on the right side when the Honda glass shattered in the otherwise undamaged plastic housing. Honda dealers at the time only sold the whole mirror assembly which had to be ordered. Perhaps they’re suited to more aggressive off-roading where falls are more frequent, but where you probably want mirrors to get to your riding location. Here a Double Take or the like soon pays for itself, although I found at road speeds it blurred too much to be reliable and moved around on the dirt or in strong headwinds, no matter how hard I clamped it. And with that nifty mirror-base RAM mounts they are rather nickable; RAM’s theft-proof clamp is not the slickest design. Verdict: built for crashing, but on the Honda less good for seeing.
EJK fuel controller – on bike I’ve had 4×4 turbo-diesel engines ‘chipped’ through I never knew exactly what was being done – it seemed to be one unprogrammable map and the sort of performance chasing meddling that doesn’t interest me that much. For petrol engines EJK’s fuel controller is a bit more sophisticated: an ‘electronic jet kit’ enabling you to increase fuel delivery (richen the mixture) as you experiment with performance enhancement. Short version: at $200 a useful bit of kit to experiment with or optimise the mixture; long version here. Verdict: another good reason to bid adios to carbs.
FMF Q4 pipe + Megabomb header – on bike (sold for $350) The bike came with this set up the suitably calibrated EJK (above) and holes in the airbox, but one day’s dirt riding convinced me the Q was not at all Quiet and would have driven me nuts on the long road. Even at double the weight I was happy to refit the weighty OE cat silencer and flogged the FMF set up. Verdict: way too noisy and can’t say I noticed any significant power loss once removed.
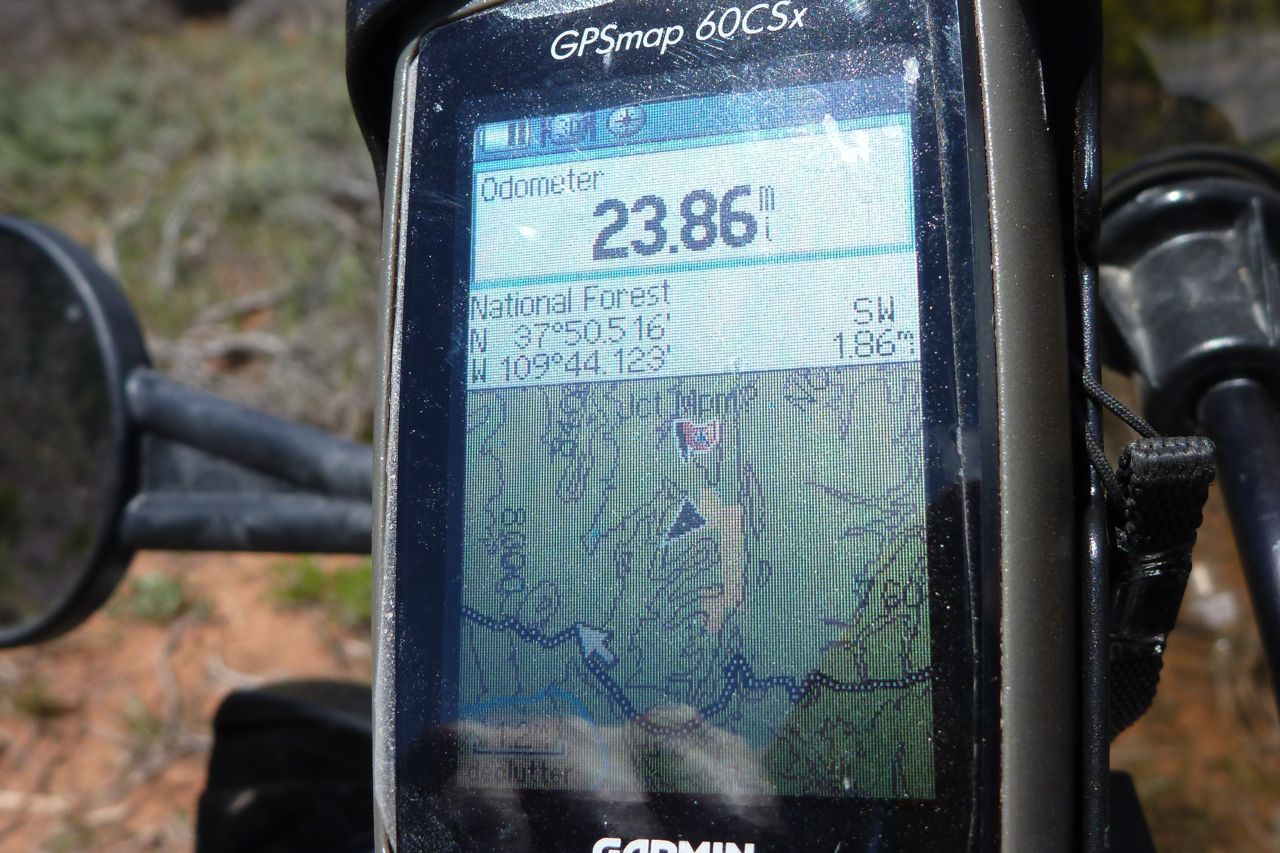
Garmin GPS 60CSx – £160 used I used the bulkier GPSMap 72 for years to log tracks for my off-roading guidebooks until it started playing up. I was happy to replace it with the more compact and popular 60 series using the similarly intuitive interface. This one had Utah topo maps on it and took the UTBDR tracklog without any undue gnashing of teeth. And a RAM cradle mount performed securely without vibration issues. Verdict: CSx not made any more but still preferable to touch screen Montana/Oregons.
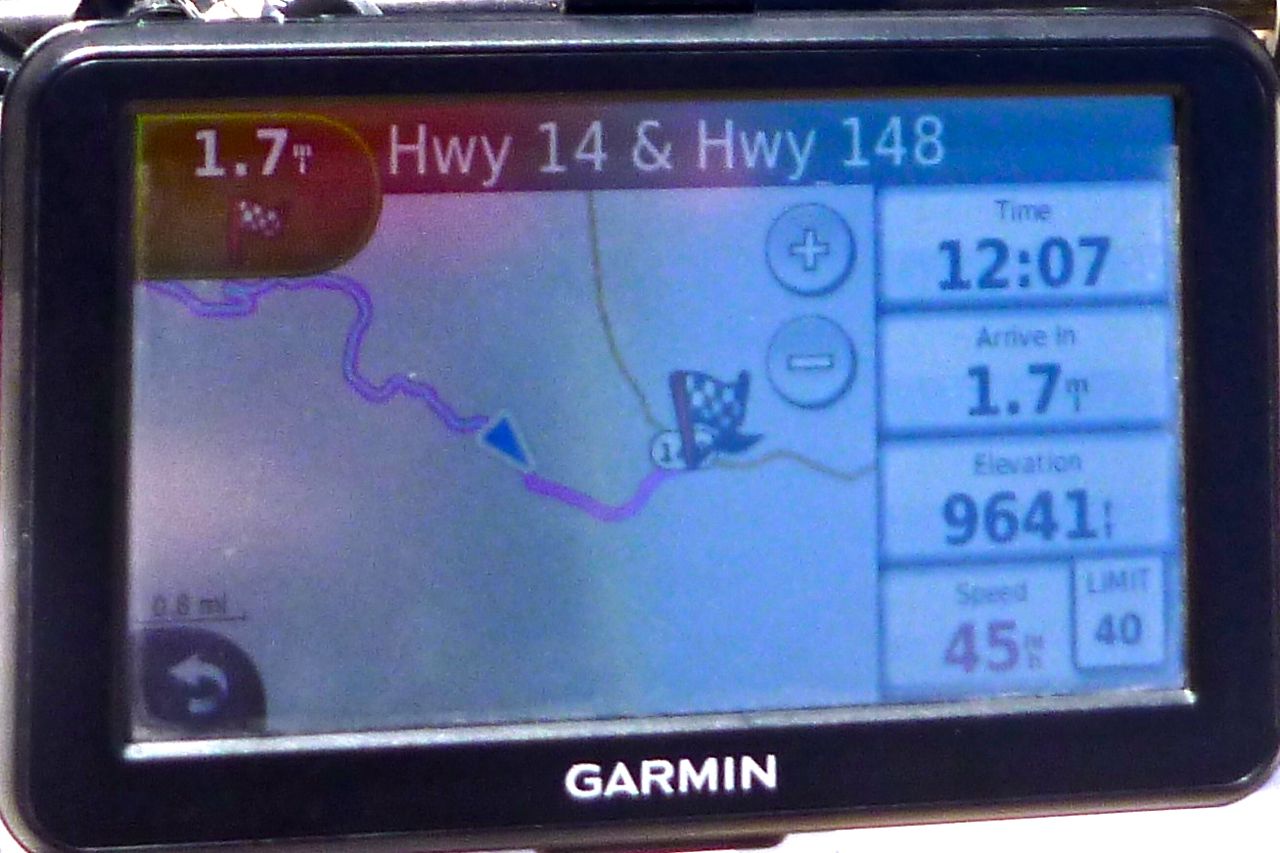
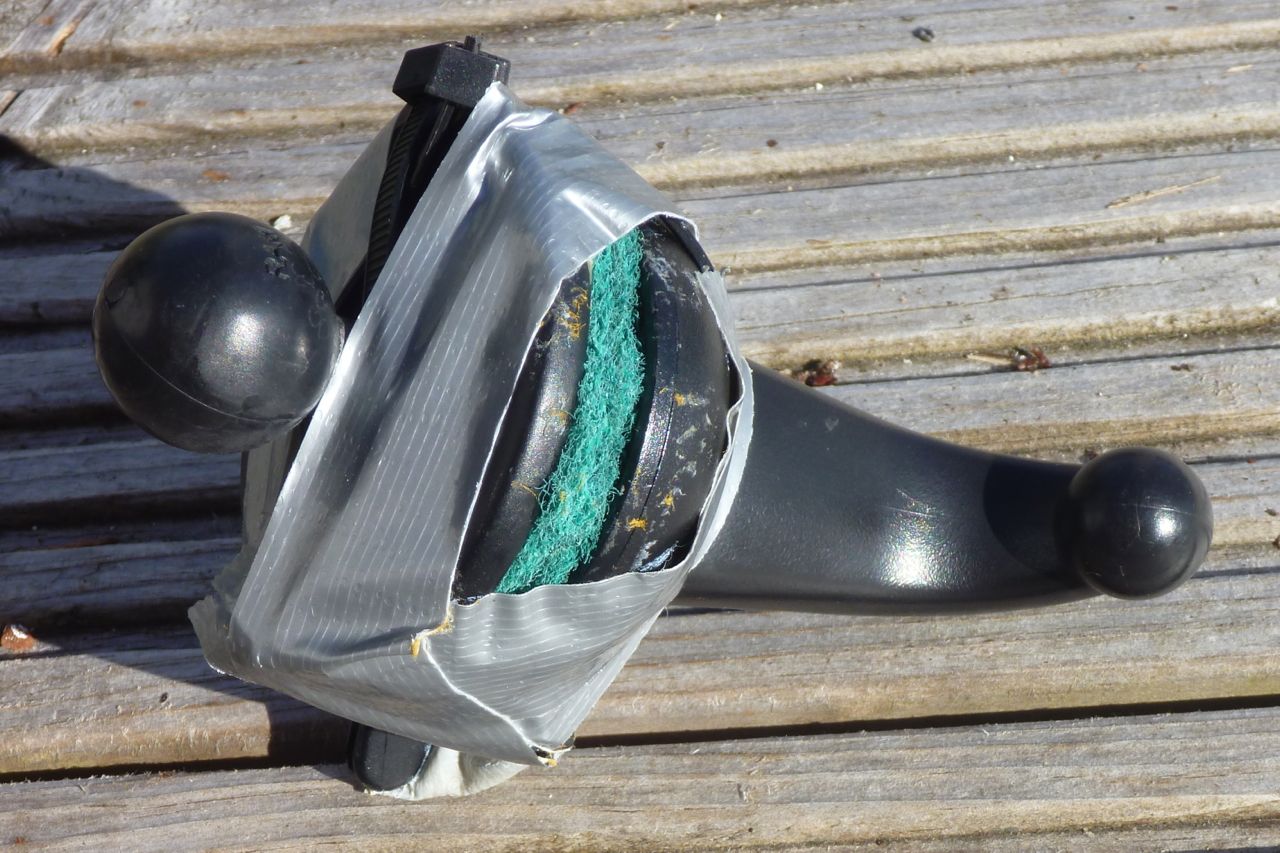
Garmin Nuvi LM50 – $80 used I hoped that a US-sourced Nuvi would have maps which featured the countless miles of unsealed roads in the western US, and so it did. When the Benchmark atlases got a bit vague the Nuvi led me out of the mountains, providing it was set up right and you took the suggested directions with a pinch of salt. Don’t know if it was my basic unit but I found that the full range of tracks around me would only display once a ‘Go to’ was set (a memory saving feature perhaps?). It meant I couldn’t scroll/zoom out to see the possibilities around me without a ‘go to’. Also, I was too lazy to address what I knew would be problem with vibration. Last year using a similar unit in Morocco I was smart enough to lay it on foam on the tank, this time with a cobbled together Garmin/RAM set up the vibration at higher revs caused it to cut out. I’ve since modified my home-made mount to incorporate a foam sandwich (above left) that may work better with future moto Nuvi-ing. Used Nuvis are cheap and easy to find on ebay; Garmin’s moto-focussed waterproof Zumo is not. You can buy waterproof pouches for a Nuvi to fit your bike. Verdict: as long as it has worthwhile mapping, a used Nuvi is a good value nav aid.
Old iPad $200 vs Macbook Air $600 I soon found that trying to update this website on the road from an iPad was frustrating, even with an accessory keyboard; WordPress have not got to the bottom of it. Luckily craigslist Phoenix had several used Macbook Airs within arm’s each. What a relief to get back to Mac’s laptop platform at about the same size and barely twice the weight of an iPad. Verdict: a tablet to read but a laptop to write and edit. Nearly six years, many trips and a couple of dents later, I’m writing this in New Zealand on the same well-used airbook. What a brilliant machine!
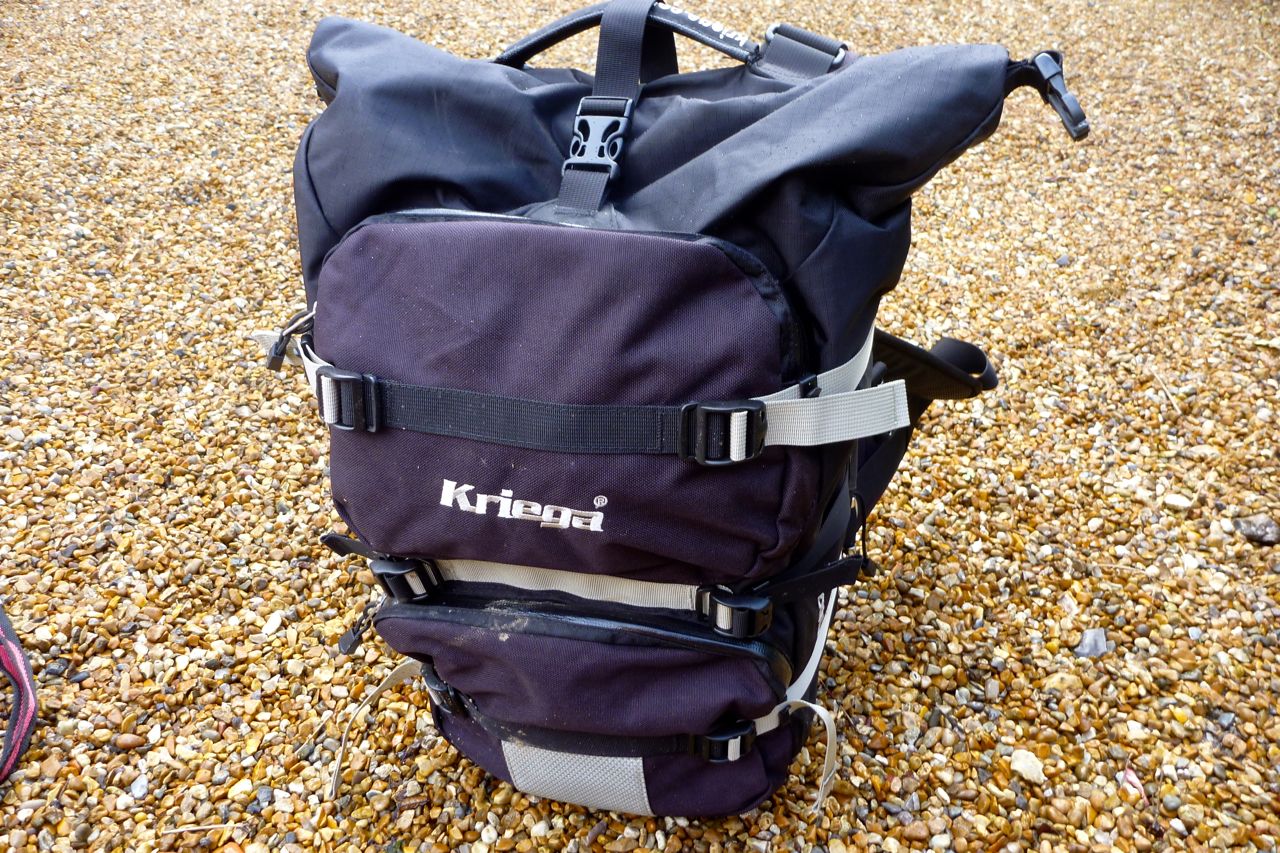
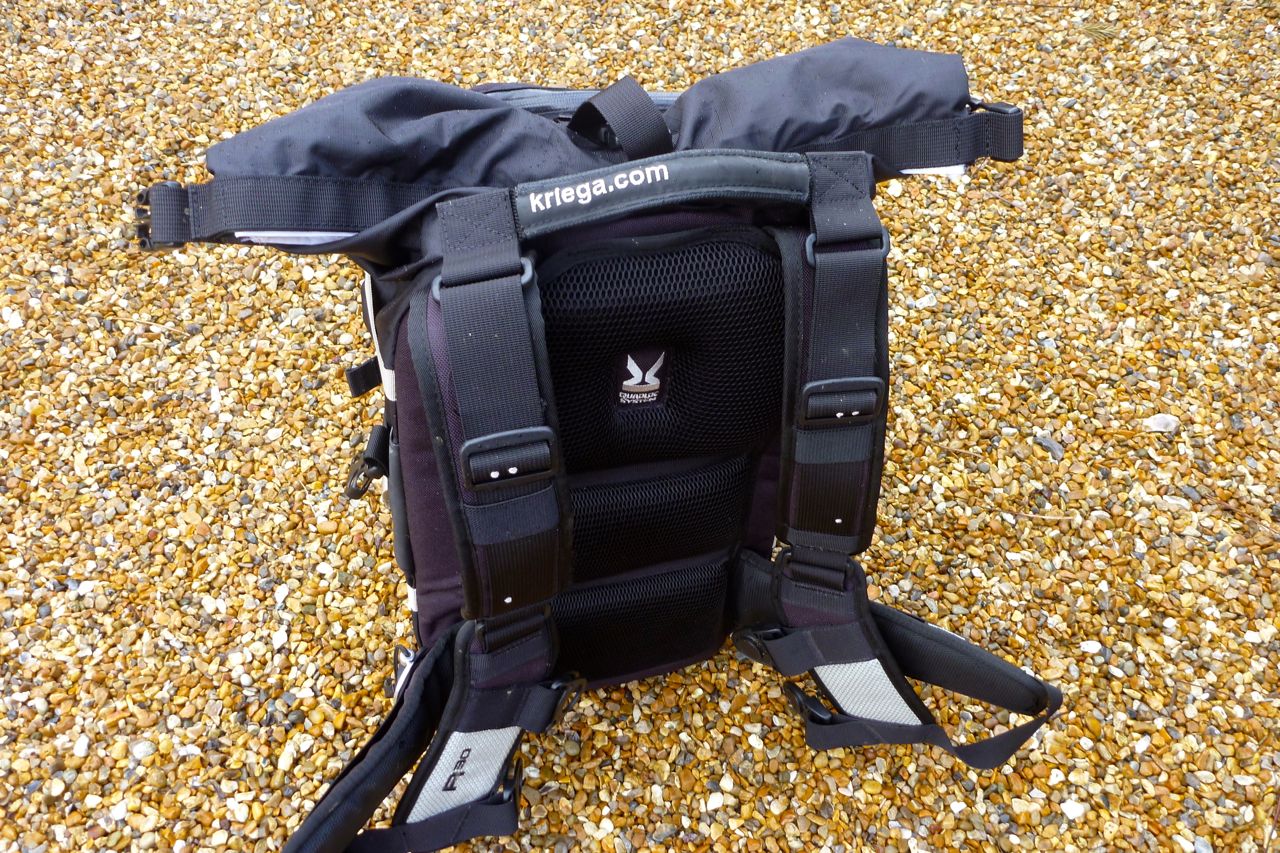
Kriega R30 backpack – £135 I’m not so keen on tank bags but can’t fit all my essentials in my jacket so a backpack like the R30 takes the laptop and other valuables, sandwiches and quick access day items. Too heavy a backpack accelerates backside pain but the R30 rested on the Watershed when seated so took the weight off my shoulders. Like a lot of Kriega stuff there’s some very clever but over-complex strap adjustment system that I never investigated; for me it fitted well enough out of the box. It includes a double clip joining the shoulder straps across the chest which along with the grippy mesh on the back helps keep it in place. On the back are cinch-down straps to stop a loose bag flapping. But when unclipped the chest clip arrangement doesn’t hang naturally off the shoulders when walking and who wants to walk around clipped in as if you’re ready to make a parachute jump. On the move I can’t say I ever noticed it which is the point and the capacity is expandable enough for all my needs; if not camping you could probably get a superlight touring load all in there.
Best thing about it was a simple, zip-free roll-top closure which, unlike around-the-top zips, won’t matter too much if you forget to do it up – opened zips see stuff fall out. The small outside pockets do feature water-resistant zips which are a bit stiff to use, but then zips do need cleaning from time to time. The R30 has a velcroed-in, removable waterproof liner which I hear is up to the job and easy to replace once it isn’t. Or just use your own dry bags. The chunky top handle is another good feature, the reflectives are probably useful and the quality of construction is what you’ve come to expect rom Kriega. Verdict: expensive for a backpack but actually designed for biking not hiking.
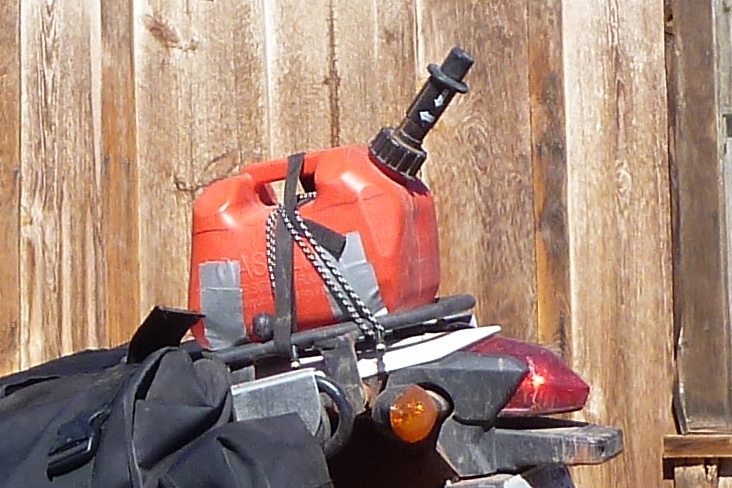
Liquid Containment 5L fuel bag – £60 I figured this was a compact way to inexpensively increase fuel range and rated fuel bags as such in the book: rolled up out of the way when not needed; handy when they are. That may be true for the odd occasion when you need extra fuel, but I found a fuel bag was less well suited to near daily use on a motorcycle. The rot set in when the o-ring cap seal fell out and blew away unnoticed at a fill up in Vegas – didn’t notice that until that evening when everything reeked of 85 octane. A day or two later I picked up a replacement o-ring for a backstreet garage, but had gone off the bag by then. The other pain on a bike is securing a wobbly bag of fuel reliably, securely and without faffing. Sure, the tough plastic LQ has holes on every corner but at a fuel stop you have to release the bag, prop it up, fill it up, cap it and then secure the load to the bike. If I had stuck with it I’d have found a good method, but these sorts of repetitive tasks need to be foolproof for the day you rush it and make a mistake. Like scores before me, I found a red plastic $10 one-gallon can strapped to the tail rack better for near daily use. To fill up simply undo the cap, like an auxiliary fuel tank; to decant into the bike tank undo the straps, pour in and refit. A bigger tank in a worthwhile size was not available for the CRF-L at the time. Note; the fuel bag I used was not the same as the 7L item which Zen sell in the UK. Theirs is an older, bigger and superior model with an integrated pouring spout inside the cap and a handle. Verdict: in practise not so convenient for regular use.
Maxxis IT Desert tyre – $110 Amazingly the CRF-L’s OE rear IRC tyre was finished in 3000 miles – a record for me, and on a 18-horse 250, too! I found the meaty-knobbed Maxxis (like an MT21 or D606) was easy to fit with short levers and some WD40 lube, didn’t play up on the highway (bike not heavy or powerful enough to stress and flex the knobs) while on the dry and rocky dirt I rode at road pressures it did the business and I’m sure would have outlasted the IRC. Verdict: performed as well as better known brands; a pair goes for <£100 on ebay.
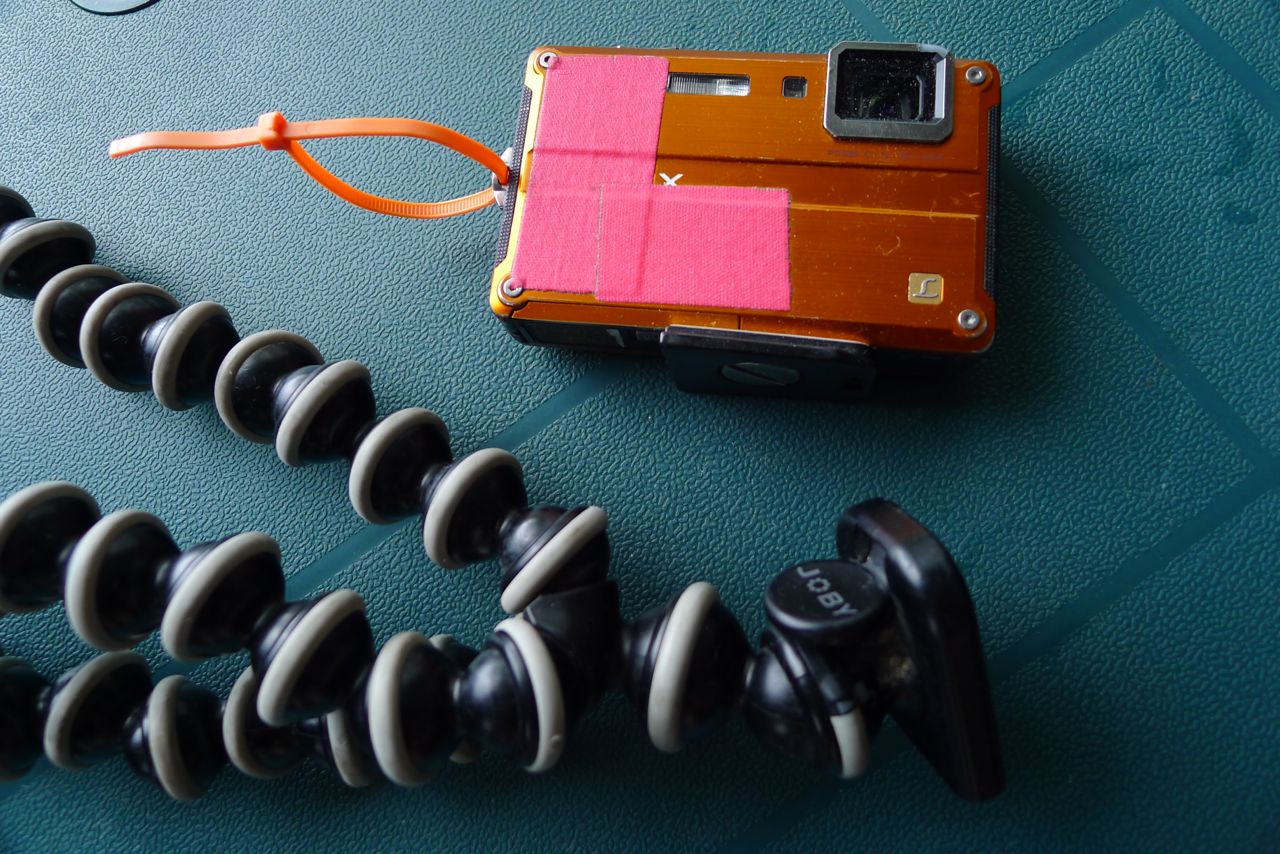
Panasonic Lumix FT2 – from £60 used I’ve had this camera for a couple of years now and use it almost every day. When it was playing up recently I looked around but newer models in the FT range all had compromises (smaller battery, less megapixels, unnecessary gimmicks like GPS, expensive) as did other brands. So I got another old FT2 off ebay for £60 but which time my original camera had fixed itself. What I like about Lumixes is they commonly feature wide-angle lenses (28mm or less) over excessive zooms. An FT2 camera is also shockproof and waterproof to a few metres so rain or sand won’t bother it and it’s robust enough to survive ‘carefree’ treatment. Yes, the enclosed lens is tiny and the zoom is limited, but slipped into my jacket’s chest pocket and hung around my neck on a cord, it’s easy to use while riding. And just occasionally the auto exposure captures the scene as well as any DSLR. At other times – especially on full optical zoom, the quality drops off; better to shoot wide at max resolution and crop later (I always disable digital zoom). With landscapes, a trick I use with these types of cameras all the time is half press the shutter and expose off the sky, then lower the camera, compose and click. The resultant ‘tricking’ into under exposure often gives a richer result (or one that can be more easily edited). I didn’t film on this trip, but have done a lot elsewhere and the results are up to youtubing. I even sold my annoying GoPro a while back and am now happy to use the FT2 for movie making. The tougher, DSLR-sized Gorillapod also works well as a steady tripod or clamp. Verdict: until it wears out or breaks up, can’t think of a better P&S camera.
Riding gear On this trip to save weight I bought a lid once in the US (see Bell), wore my heavy leather trousers and old Altberg boots on the plane and brought my Aerostich Kanetsu electric vest to make up for my regular ‘M65’ desert jacket; no armour, Gore-tex, mesh or reflectives – just light, quick drying and with enough big pockets to make up for not being a Darien. In the event of heavy rain I had my old Rukka one-piece suit, but never needed it. For gloves I has my similarly ancient unlined Aerostich Deerskins (sadly MIA) and a pair of Armr Moto WXP8 gloves for cold days. Apart from the Rukka, all got used all or some of the time. Temperature-wise this trip was quite extreme but I felt protected enough to be comfortable, while never feeling over-laden with clobber, as you can do with moto gear. Verdict: for the local conditions, the best set up I’ve ridden in.
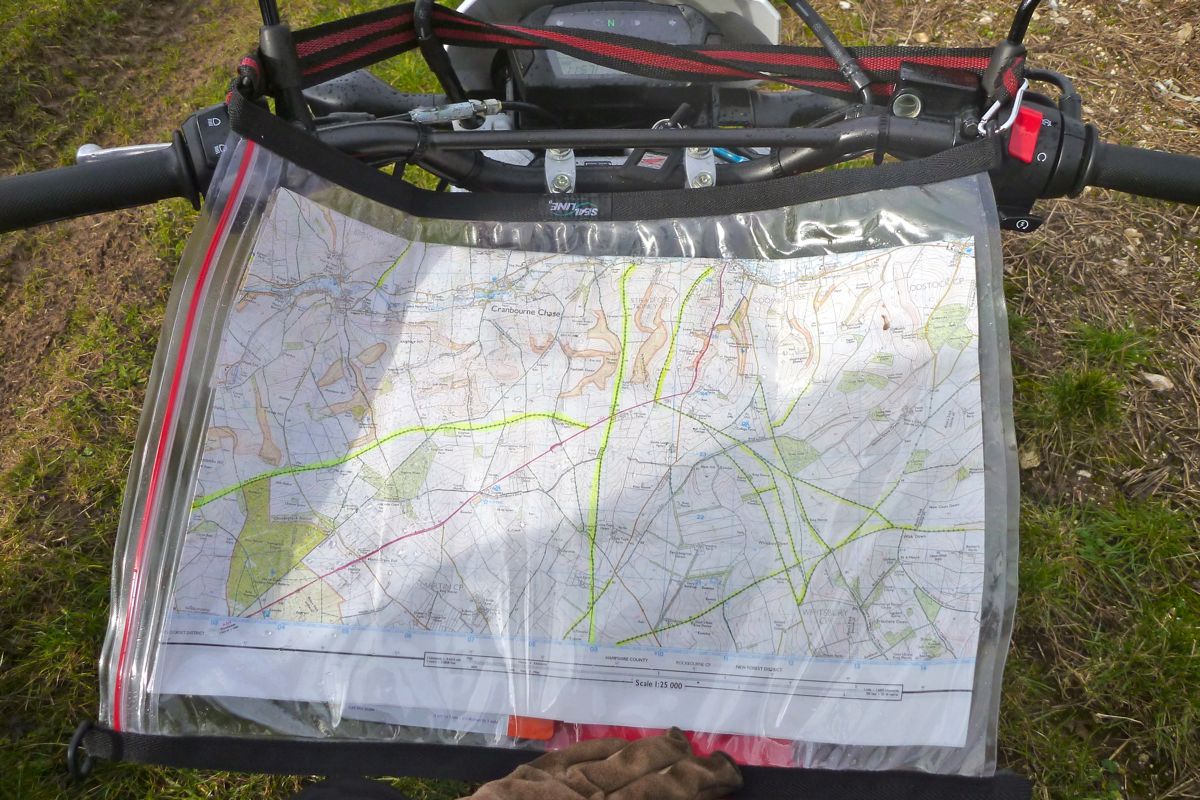
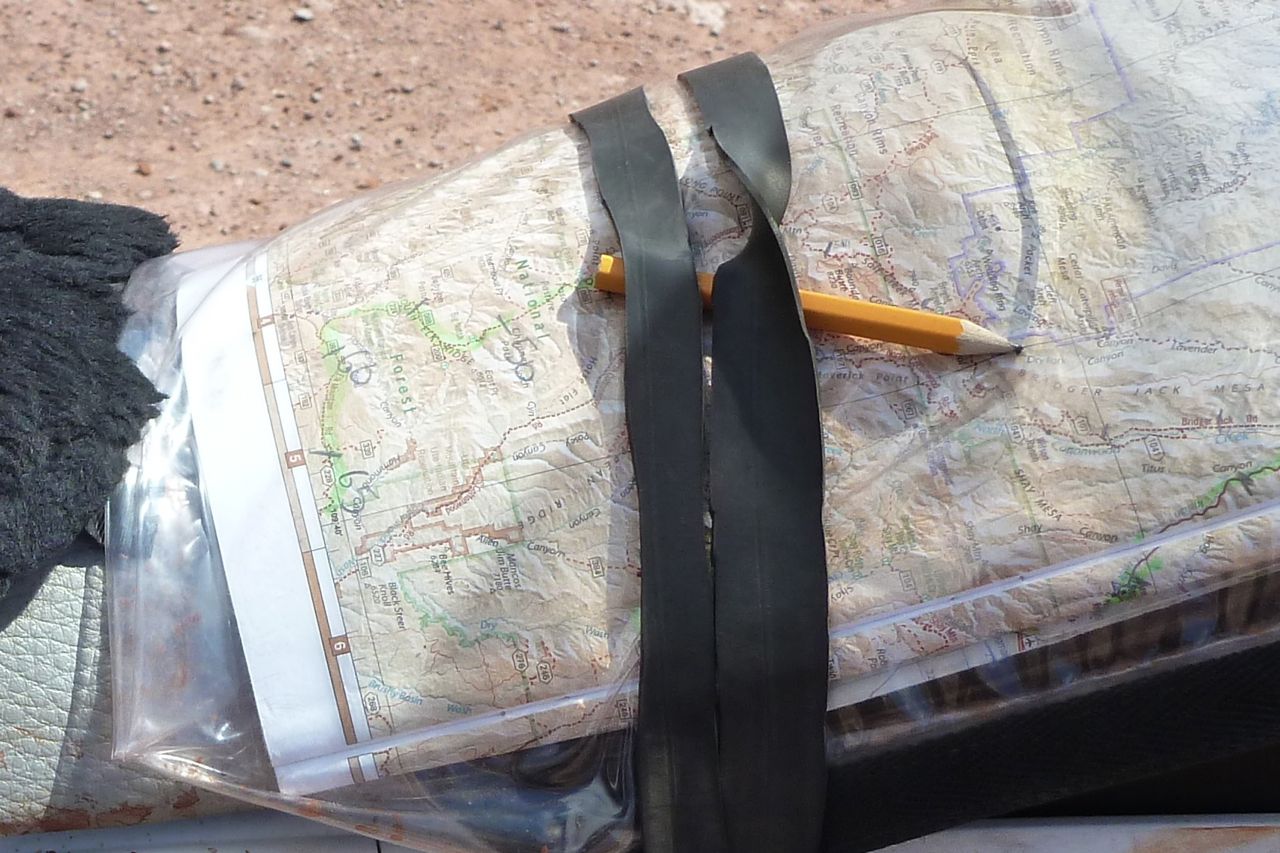
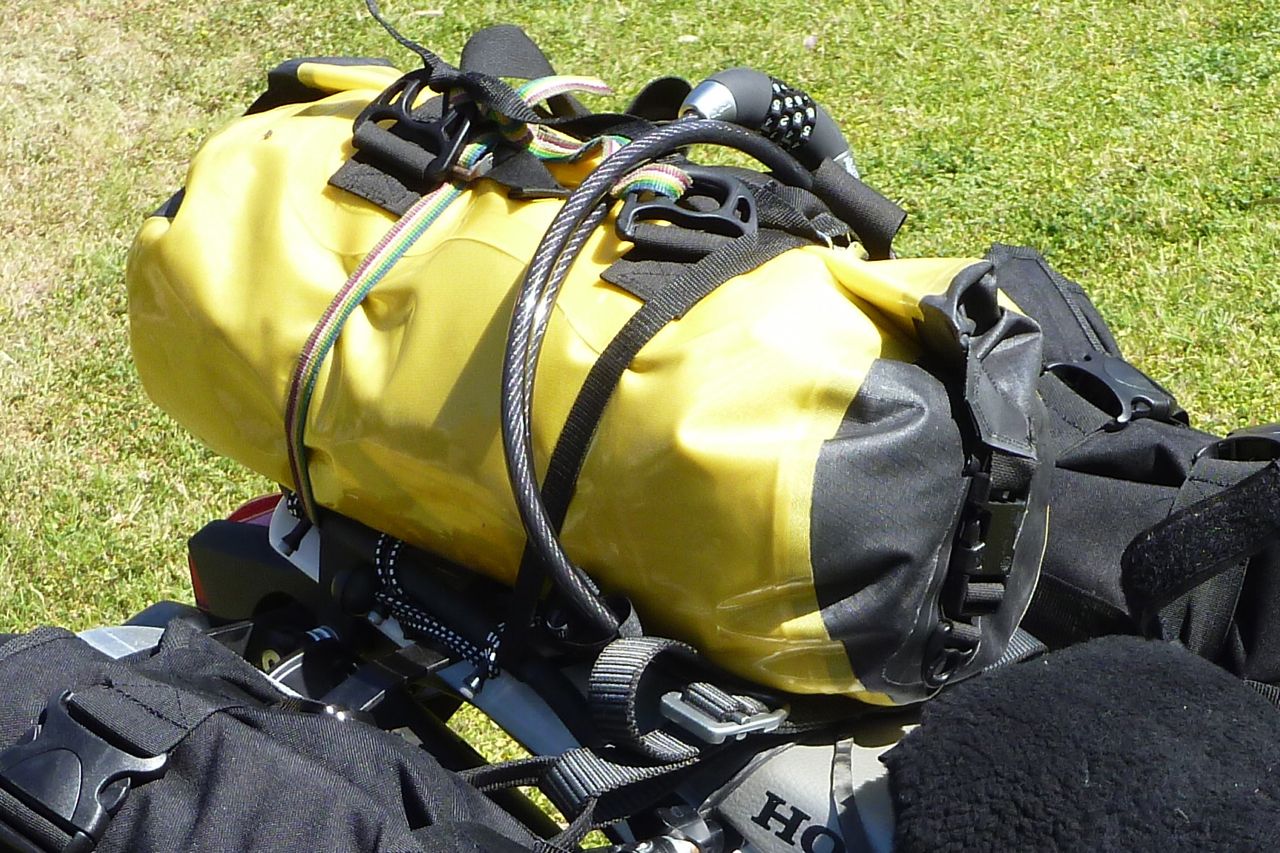
SealLine XL map case – £15 I normally use this for sea kayaking or packrafting, the zip-lock seal keeps maps and other bits dry and the big size gives you the all-important big picture without the need to open up and refold a map too often as the crashing surf closes in. In the Southwest the map case took a folded back Benchmark with room to spare and stopped the pages flapping in the wind. I found a neat way of holding the maps case down was stretching a thin loop on inner tube from one side of the engine to the other (right). Note: they also make roll-top map cases, not as reliably waterproof as the zip lock version. Verdict: moto or boto, great bit of kit.
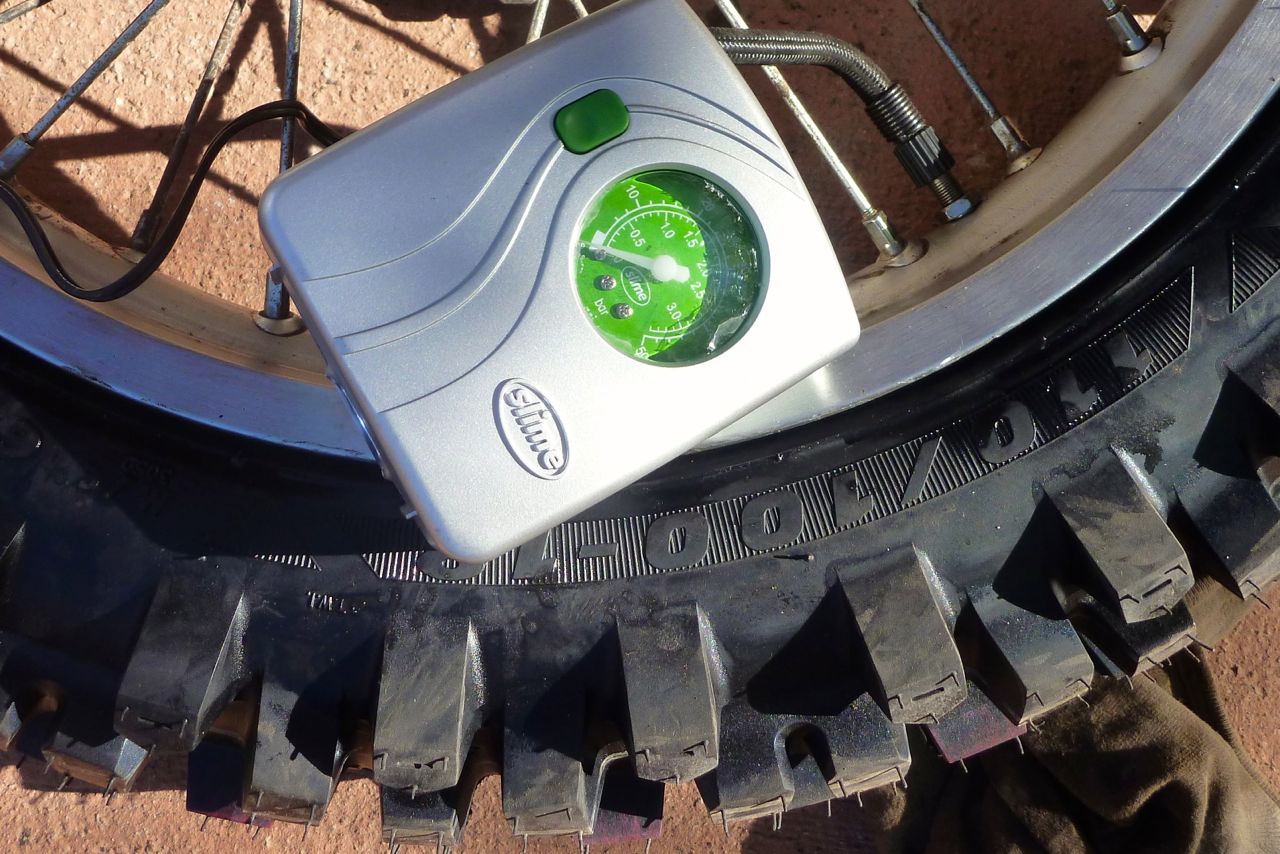
Slime anti-puncture fluid and compressor (both $10) Can’t say the luridly green Slime fluid stopped any punctures on my ride, but for ten bucks it was worth the squirt. Also on the shelf in Walmart was a Slime-branded 12-volt compressor (right) also for a tenner and with a pressure gauge too and the ever useful flashing light. More compact and lighter than my Cycle Pump, I actually used the Slimepump a few times and it performed fine. Verdict: well worth $20 for peace of mind.
Slipstreamer Spitfire windshield – $70 Just what was wanted for the CRF; a small, inexpensive, one-size-fits-most screen to keep the wind and rain off. Mounting is a bit rudimentary but adds up to a quick, tool-free way of temporarily removing the screen while leaving the bar mounts in place, something I was slow to catch on to for dirt day rides when the screen was not needed. With only two mounting rods (no triangulation) high-speed runs into headwinds or rough tracks caused the screen to inch back – this could have been fixed by anchoring the base of the screen to the headlamp cowling. It seemed hard to get a tight fit on the screw down screen mount lugs too, but meddling with spacers or rubber shims would fix this. Verdict: Great value, simple fitting and effective.
Trail Tech Vapor digital guage – $90 A great gadget for a travel bike like the CRF-: with limited instrumentation. Click the link for full review.
Watershed Chattooga dry bag – £65 Another kayaking item that works well on bikes. Watershed dry bags use a tough fabric, but unlike your average roll-top bag, they feature a chunky ziplock-like seal that makes the bag immersion proof. At about 20 litres the Chattooga model is compact but big enough to take my infrequently used tent, sleeping bag, sleeping mat and a spare pair of gloves. It didn’t happen on this trip but it’s good to know in heavy rain you need not worry at all about your camping gear getting wet until you take it out. For smooth closure the zip seal can use a bit of WD or 303 once in a while. Verdict: Watershed when it absolutely positively has to be kept dry.
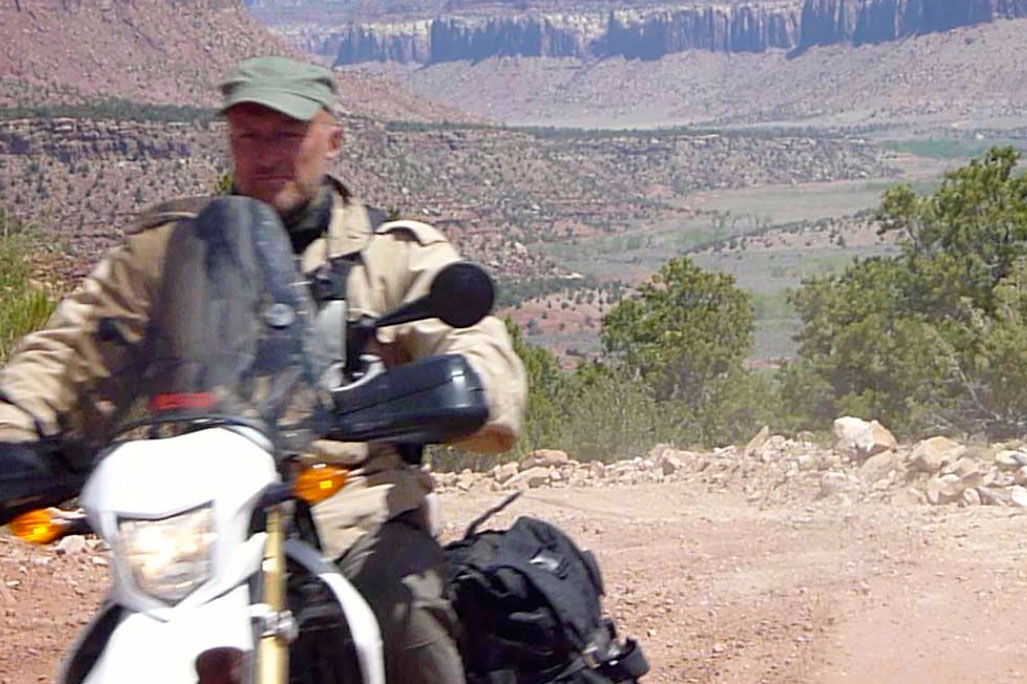
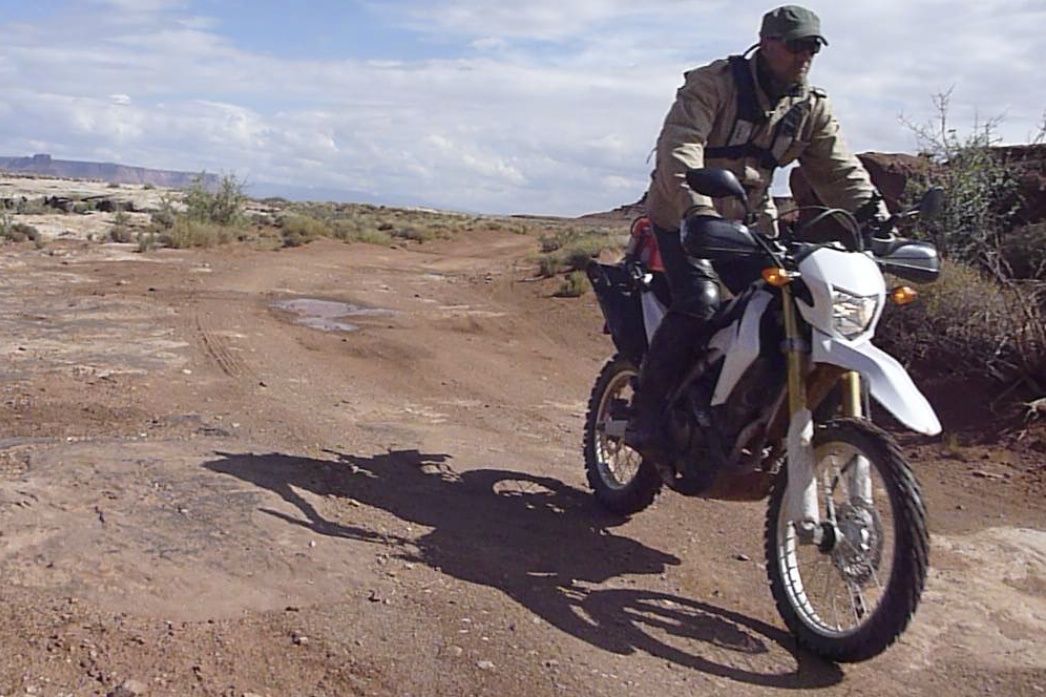
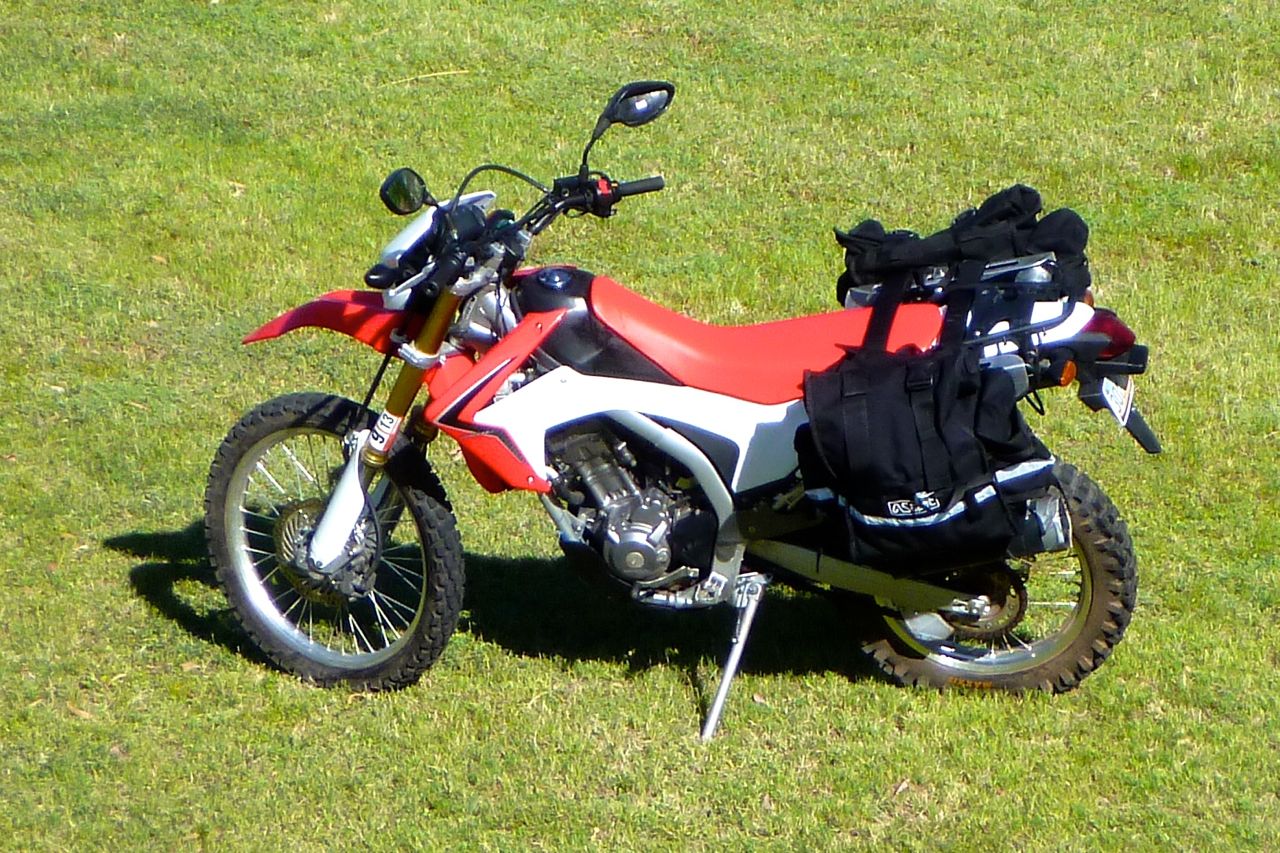
An invitation to a show in the US gave me a chance to arrive early, collect a CRF bought off Craig’s and pull off a long-planned tour of the fabulous Southwest (see map, right). My mission was to set forth and evaluate whether the CRF really could be the answer to the long-sought lightweight overland travel bike. America is not an ‘adventure motorcycling’ destination as I define it, but it sure is a great place to go ride around on a trail bike for a few weeks.
What makes the Honda special is that there seem to be so few bikes like it these days. Besides Kawasaki’s KLX250S (which in the UK comes with efi and can be as cheap as a CRF), other 250 dirt bikes seem to be high performance racers with maintenance schedules set in hours, while we’re told a typical ‘adventure’ bike weighs a quarter of a ton, puts put over 100hp and costs 10 grand. Where are the old XLs and XTs of my early biking years? Yes I know there are ageing DR-Z400s, but apart from that it’s all got too specialised and more particularly just too heavy, although in presumed response to the stagnating global economy there do seem to be signs of bikes fluttering back down to earth.
Most would assume an ordinary 250 dual-sporter is physically too small to carry a travel load in comfort, too fragile to hack the terrain and of course too slow to not get in the way. On this last point the US may not have not a great place to simulate riding through the AMZ where speeds are much slower, but the barren deserts and mountains of the American West didn’t put up much of a fight in terms of busy roads. Other factors, as you will read, did affect the Honda. Some might even say a 250 is just plain too boring, but that depends on your attitude to combining travel with motorcycling. There seems to be increasing chat about smaller bikes for overland travel, and not merely from an attention-seeking ‘Across the Andes by Frog’ novelty PoV, but simply because that’s all new riders can afford these days, not least when taking into account the cost of obtaining a full license to ride bigger capacity bikes.
What you can’t accuse a CRF-L of is being too expensive, too fuel inefficient or too heavy, despite people getting hung up on the fact it weighs some 144kg. For the record, mine was not a stock bike and came with 1000 miles on the clock as well as various performance and functional accessories. You can read about the rest of my set up here but in a nutshell they included:
Comfort When I first saw and sat on a test bike back in February I was gratified to find it wasn’t too small for my 6′ 1″ frame, nor was it uncomfortable to ride, though a shorter person may not have got on (literally) with my jacked-up US CRF. Over a full day my legs never felt cramped on the pegs, although the saddle was annoyingly high, especially when getting on and off wearing heavy leather trousers and back luggage in the way. It’s all good for the abs and quads, I suppose. Yes, saddle soreness set in at over 200 miles, or sooner on rough tracks (the Aero pad may have deferred this a bit), but the lack of vibration from the small engine as well as frequent stops of even a minute or two all helped relieve butt pain. In fact, frequent stops rather than burning down the highway like Gheghis Khan aboard a V-Max chariot was quite a revelation. I found it was easier to break the rhythm or momentum when you’re not going that fast in the first place. Standing up on the dirt to spare the bum didn’t really work for me; the risers weren’t high enough and I stooped.
The $70 Spitfire screen (or something like it) was a no brainer. It kept most bugs, occasional rain and what wind blast there was off me without affecting stability too much. The basic handlebar mounting system works surprisingly well and the screen can be removed in a minute for off-roading at where times I did feel it angled back rather too close to my face
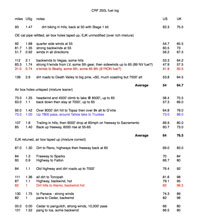
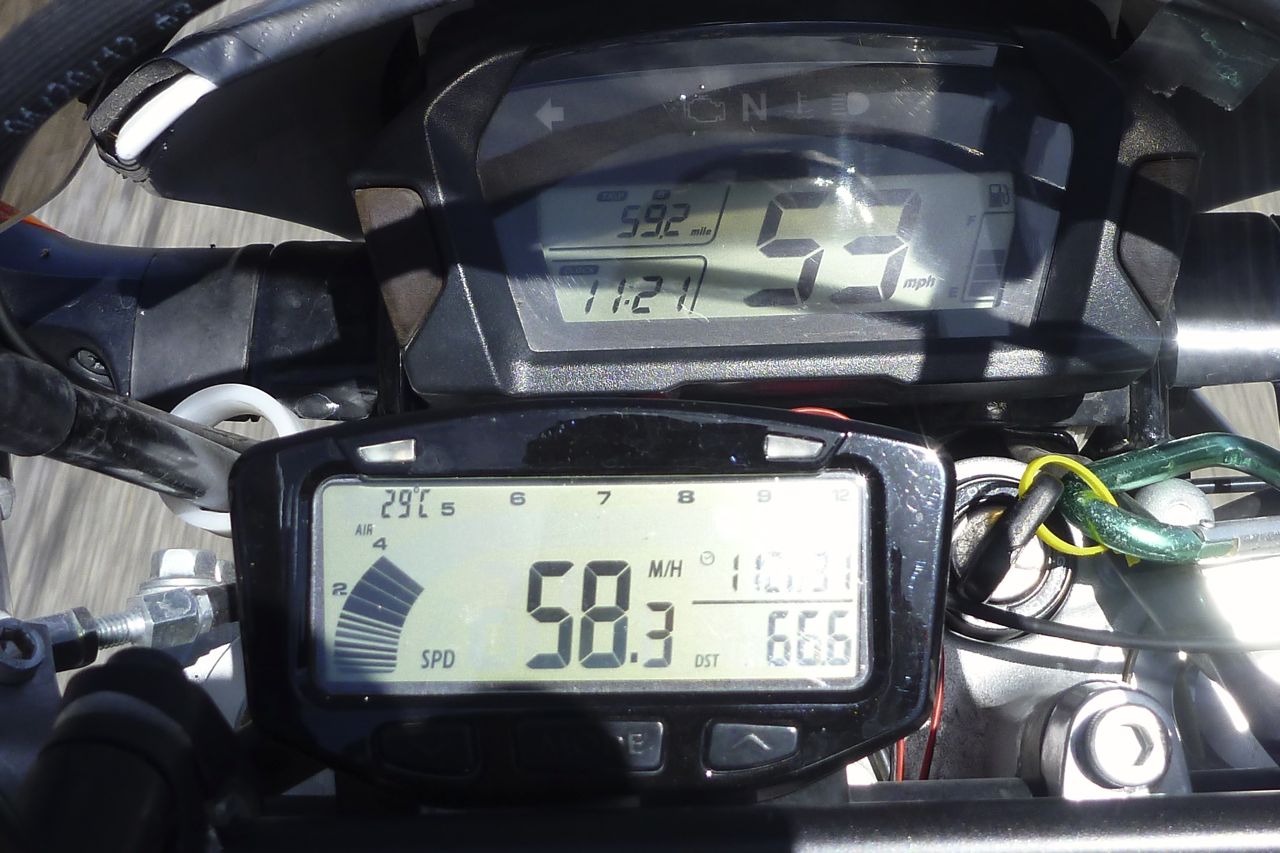
Economy Do you know what, I actually think the CRF’s mileage is not so exceptional. I bet if I rode a BMW 650 twin like I did the Honda I’d get to within 90% of the CRF’s readings. The fuel log is here. It’s divided into three stages: running inefficiently (power was not really affected), running a bit better (less rich) and with the EJK retuned, running correctly. The tank is 7.8 litres and without even trying, I got close to my 100mpg (Imp) goal a couple of times to know it was achievable. My last recorded fill was an annoying dash 70 miles back to a motel to retrieve something while averaging nearly 60mph. Returning to Flagstaff (climbing from 4000 to 7000′) a couple of times I noticed I was on the throttle stop so this ‘worst possible’ mpg added up to 56US or 67.5UK. Again, I suspect my recent BMW 650GS twin and 660 Tenere before that would have managed the same mileage at similar speeds, but then who rides 650s like a 250 except when you’re running on fumes? Talking of petrol fumes, filling up is a pain to master without splashback; the small tank and two bars blocking the filler mouth combined with high pressure gas pumps you seem to get in the US means there’s often a spurt of gasoline coming back at you. I discuss bigger tanks here. So, in the final ‘running correctly’ mode over some 2400 miles of dirt, highway and freeway the Honda averaged 72USmpg or 86.7UK. By comparison last year the BMW twin did 57/68 and the Tenere before it 59/72, so the Honda is a good 20% better while running on about 30-40% of the power.
Oil, water, drive chain, tyres In the first 1000 miles, when the fuelling was off the bike got through an oil-level window’s worth which was surprising. Once the fuelling was fixed it used no oil over the next 2000 miles, and may have even gained some. Maybe it was still running-in and it was nothing do with running rich? Who knows. No coolant was ever used and the chain, lubed most days, never needed tensioning.
Tyre wear was a bit of a shock – that’s some soft IRC rubber they’ve slung on the back, worn out and split just 3200 miles from new. For me that’s a record on any bike, and from the condition of the CRF it wasn’t like the original owner caned the Honda. Dirt or pavement I ran both tyres at about 30psi and by the time I sold it at 4200 miles the front had about 4-5mm left. They performed fine on road and trail – as did the replacement Maxxis Desert. I suppose hot days and the combined weight of 280kg on the two OE tyres was too much. It certainly wasn’t due to pulling ‘blackies’ out of gas station forecourts!
Performance Not having ridden the bike in totally stock form and spending most of my time at elevations greater than Ben Nevis, Britain’s highest peak (4406′, right), it’s a bit difficult to judge true performance. Then there was 10% ethanol fuel in AZ and maybe CA too, but regular fuel in Nevada? Does that make a difference? I experimented with various octanes but can’t say 91 RON was better than the usual 87 (Honda recommends 85 or more), though one time after a remote and expensive fill up the bike was noticeably down on power (‘stale’ fuel?) until the next fill a few hours later. Note: US Octane ratings are several points lower than Europe: 97 octane “super unleaded” in Britain is roughly equivalent to 91 octane premium in the United States. Tuning the EJK correctly in Truckee didn’t noticeably produce lots more power, just much better economy, though when I did return to Phoenix right at the end of the ride (1100′ elevation) I thought I did notice more acceleration, but perhaps that was just because I was frequently stopping and starting at traffic lights for the first time in over a month. At times above 6500′ I thought I could notice a drop in power, even though at nearly 10,000 feet I could still do 50mph on the level. They say air density drops 4.5% every 1000 feet or that at 10,000′ the air pressure is 70% of sea level, but I don’t know if that means proportional oxygen levels too or if it all gets exponential as altitude increases. I suppose a 30% loss of power at 10,000 feet is plausible – 12hp still being enough to propel the 250 at 50mph. High or low, the efi fuelling was perfect – never a stutter or a stall nor a surge when hot, as the BMW did last year in Morocco, With the Honda just some brief hunting as it warmed up in the mornings. Like all 250s, hills and headwindsare the killers of speed, though not necessarily economy, as the fuel log shows. With me and the full load on it (additional combined weight equalling about the same as the Honda) the L simply hasn’t got the power to punch effortlessly up hill at 6000′ or against a headwind. On a more powerful machine you can just wind it on and pay at the servo later (a guy on an 1150GS told me he got as little as 120 miles to a tank against severe headwinds in the mid-West). I don’t think the EJK running on the stock engine (apart from air filter backfire screen removed) added more than 1 or 2hp if anything at all, and I suppose a small engine is more affected by relatively small levels of power loss. If I’d stayed up there in the Great Basin I think I’d have experimented with upping (richening) the settings on the EJK, even if it cost a few mpgs. It might have cooled the motor too.
Overtaking on the highway was an extremely rare event and at high elevations I was sometimes down to 45mph in 5th gear, more commonly 50mph. That sounds a bit inconvenient or unnerving on a two-lane blacktop with a 65 limit, but in practise the traffic was so light and daylight visibility so good that it wasn’t unsafe. But it did mean you had nothing to spare.
What I did miss was the surge and the rush of acceleration – the fun factor that is elemental to biking and keeps tyre manufacturers as well as a few nurses in business. Loaded up, there is no real perception of acceleration on the Honda, the numbers simply crawl up the speedo. Exuberant antics like power sliding out of dirt turns (left) necessitated yanking the throttle or very poor traction which simply risked dumping it. They talk about 24hp with a full-noise pipe, drilled airbox, 1T less on the countershaft and EJK retuned to suit, but my one-day’s experience at that theoretical power level before setting off was merely an embarrassing and unsustainable racket. Teenagers take note: noise ≠ power.
Most of the time I chose to cruise at 55 and with no traffic around was very happy to do so. I could look around, take pictures easily and generally not need to cling on or concentrate too hard. Maybe I should get an H-D? Above 65 the CRF-L didn’t always feel so stable, both with and without the screen or the baggage on or off. It could be the front tyre, front mudguard or just the light weight. The wake of a big truck up ahead wasn’t a great place to ride, and in the very strong winds I experienced on some days the bike got blown about quite dramatically, though never felt dangerous. The highest true speed I saw was 72 briefly downhill though it wasn’t pinned yet. I had an rpm read-out on the Trail Tech Vapor and although it fluctuated quite a bit, rpm actually wasn’t as high as you’d think. Even with a piston the size of an egg cup the Honda only revs to 8000 and I don’t think I ever went over 5000 in normal riding.
Apart from high-speed stability the handling gave no surprises, but I wasn’t tearing about or intent on chamfering my boots soles. Obviously it’s easy to manoeuvre at low speed and the tyres and brakes were never overwhelmed by the weight or the power, nor the front forks by hard braking.
Note that on my bike the speedo read 8% under (ie: slower than true) and the odo was even worse, some 12% under. Other CRF-L owners have reported over-reading and some have it spot on. Establishing my error early on, I used the GPS or more commonly the Vapor (left) as accurate odometres to determine distance and so, accurate mpg.
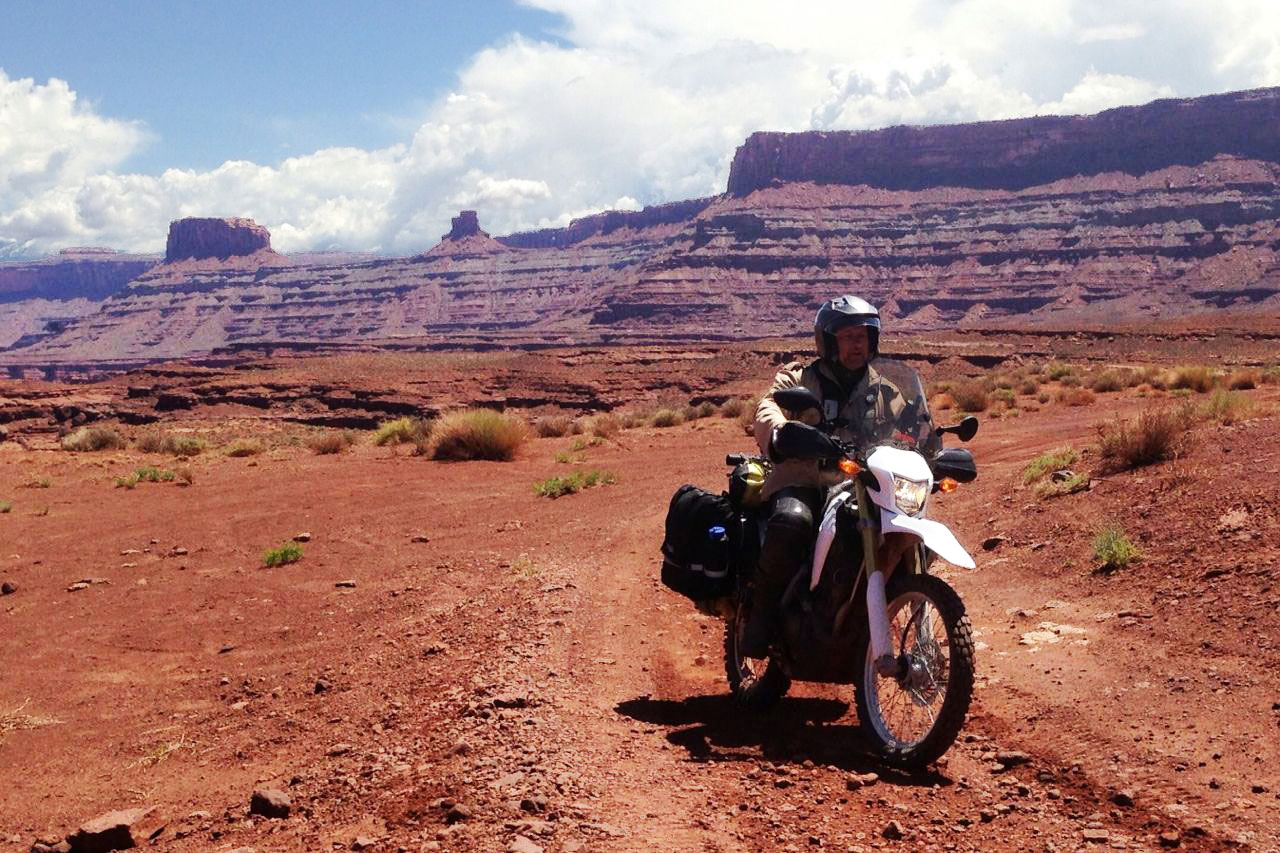
Off road riding On the 500+ miles of dry dirt I rode I never felt the need for more power, nor was the accumulated weight of the bike ever hard to handle. (I never had to haul it out of deep mud, sand or snow). The biggest limitation such as it was, was the tall- but more especially the widely spacedgearing which sometimes made slow, technical riding tricky without slipping and so stressing the clutch – something to be avoided. Also, what I believe they call a slipping ‘judder spring‘ in the clutch and the way I jacked up the OE shock (left) made the back-end harsh when riding unloaded on bumpy terrain (though it was just right when loaded). It may all have been exacerbated by the lack of a cush drive in the back wheel, too. On the same topic the gearbox was less slick than the Honda press bike I rode in February, but as mentioned that did seem a suspiciously well set-up machine. The forks felt fine and neither end ever bottomed out, despite my 205lb weight, which just shows you how slow I ride!
Riding by myself, loaded up in the hills with no comms and at times helmet-free, I didn’t push my luck and in turn, didn’t push the Honda either, but it was good to know the bike was as light as practicable. U-turns on narrow trails were easily knocked out where a bigger bike would have involved much heaving and shoving. The bar risers I fitted were actually still not high enough to sustain standing on the pegs in a natural posture, but then I tend to sit down unless absolutely necessary or my arse is in meltdown (‘Stand up when you must, sit down when you can’). My theory is sitting keeps you more in touch with the hammering and stresses the luggage rack and tyres are receiving, these being the two most common causes of problems on the long road. How’s that for an explanation! (One guy on the WRT gently told me off for not standing up on a big climb).
Durability Here you have to wonder whether an inexpensively produced 250, even a Honda, is up to the task of long-range, fully loaded travel. It’s best to avoid long spells where you’d need to cane the engine, as well as change the 1.5L of oil much more frequently than the suggested 8000 miles. On a hot day running slow with a backwind it does run close to 100°C for hours (102°C max recorded) at which point the fan kicks in, but although it never boiled over, nor showed a warning light on the dash (if there is one), I tend to regard the fan coming on when not at a standstill as a warning. (Having a water temperature read-out on the Vapor was a great feature). I took it easy so the subframe took the hefty vertical load without any signs of stress, but like all bikes it’s more prone to side swipes. The only fall I had at some 15-20mph was harmless to me, but bent the bars a little, twisted the forks in the yokes and even tweaked the subframe – all this without a full load in the panniers which can exacerbate stresses. Apart from the bars, that was all set back with some loosening and retightening, but it did make me wonder about the subframe which is any light monoshock travel bike’s traditional weak spot.
With the high mileages that overlanding obviously involves, you also wonder if you’d be running the motor, if not the whole bike, closer to the limit than a 500cc+ with more in reserve when ridden moderately. Sparing the revs and the gear change as well as frequent oil changes is the best you can do there, but months of bad fuel or unavoidable neglect might take their toll sooner than on a bigger bike. This is all speculation of course, though Lois Pryce did admit her TTR250 was shagged out by the time it got to Cape Town (or maybe it was her Serow 225 on arriving at Ushiaia?). If given a good start to life though, you’d hope a 250 like mine will last better than a clapped-out KLR 650 running on 40 a day. And since then many have ridden CRF RTW with few issues, as AMH trip reports below prove. The CRF has become a modern classic and the new 300 in 2021 only entrenches that fact.
Summary Passing over ag bikes and posties, something like a CRF is at the extreme bottom end for a practical overlanding bike; at least for someone my size. But for my sort of riding (let alone budget) it’s still far less extreme and much more practical than a Triumph Explorer, Super Tenere, ‘Waterboxer’ or any other of the quarter-ton 12s that seem to exemplify ‘adventure bikes’ to ill-informed entities led by most of the moto media. Perhaps ‘adv bikes’ and what you can see I now deliberately now call ‘overlanders’ or ‘travel bikes’ are beginning to take on different meanings.
In the end I think I was right all along when building up my never tested GS500R: a 500-650 single or twin delivers the optimal level of performance, weight and – with efi- economy for a real-world overlander. Unfortunately these days the price you pay is at least 20 kilos more weight than you want which may simply be down to manufacturing economics. As MTBers will know, a little less weight costs a lot of $$$. One guy I met in Flagstaff said he liked his big Harley as ‘it sure gets windy around here’, but when I sum it all up, it’s the lightness that makes the Honda such fun, easy to live with, manoeuvre and ride. (The winds I experienced were never unnerving.) Bikes now have masses of power, and at long last also have creditable fuel economy too, but light weight is the element many bikes are lack and why for example we’re right to be potentially excited by the forthcoming 450 CCM and why guys put up with things like a KTM690 (above left – same weight as the Honda but nearly four times the power at nearly double the price). Loaded up with a realistic kerbside weight of some 180kg (+ me), the L was about as heavy as I would wish a bike, but light enough to be unloaded and pulled out of any ditch or manhandled onto a boat, pickup or plane. The economy was impressive, but then so it should be. But when you think of the typical 30-kilos of payload and accessories that most of us carry on a big ride, for someone of my build the ability to hold 60mph (100kph) on any road is what is wanted to make the ride relaxing. People are using the CRF250L for all sorts of applications so ymmv, but I see now that for me that requires a bit more than 250cc.
I’ve since got myself a BMW 650Xcountry back in the UK and other Project bikes have followed – see the menu above.
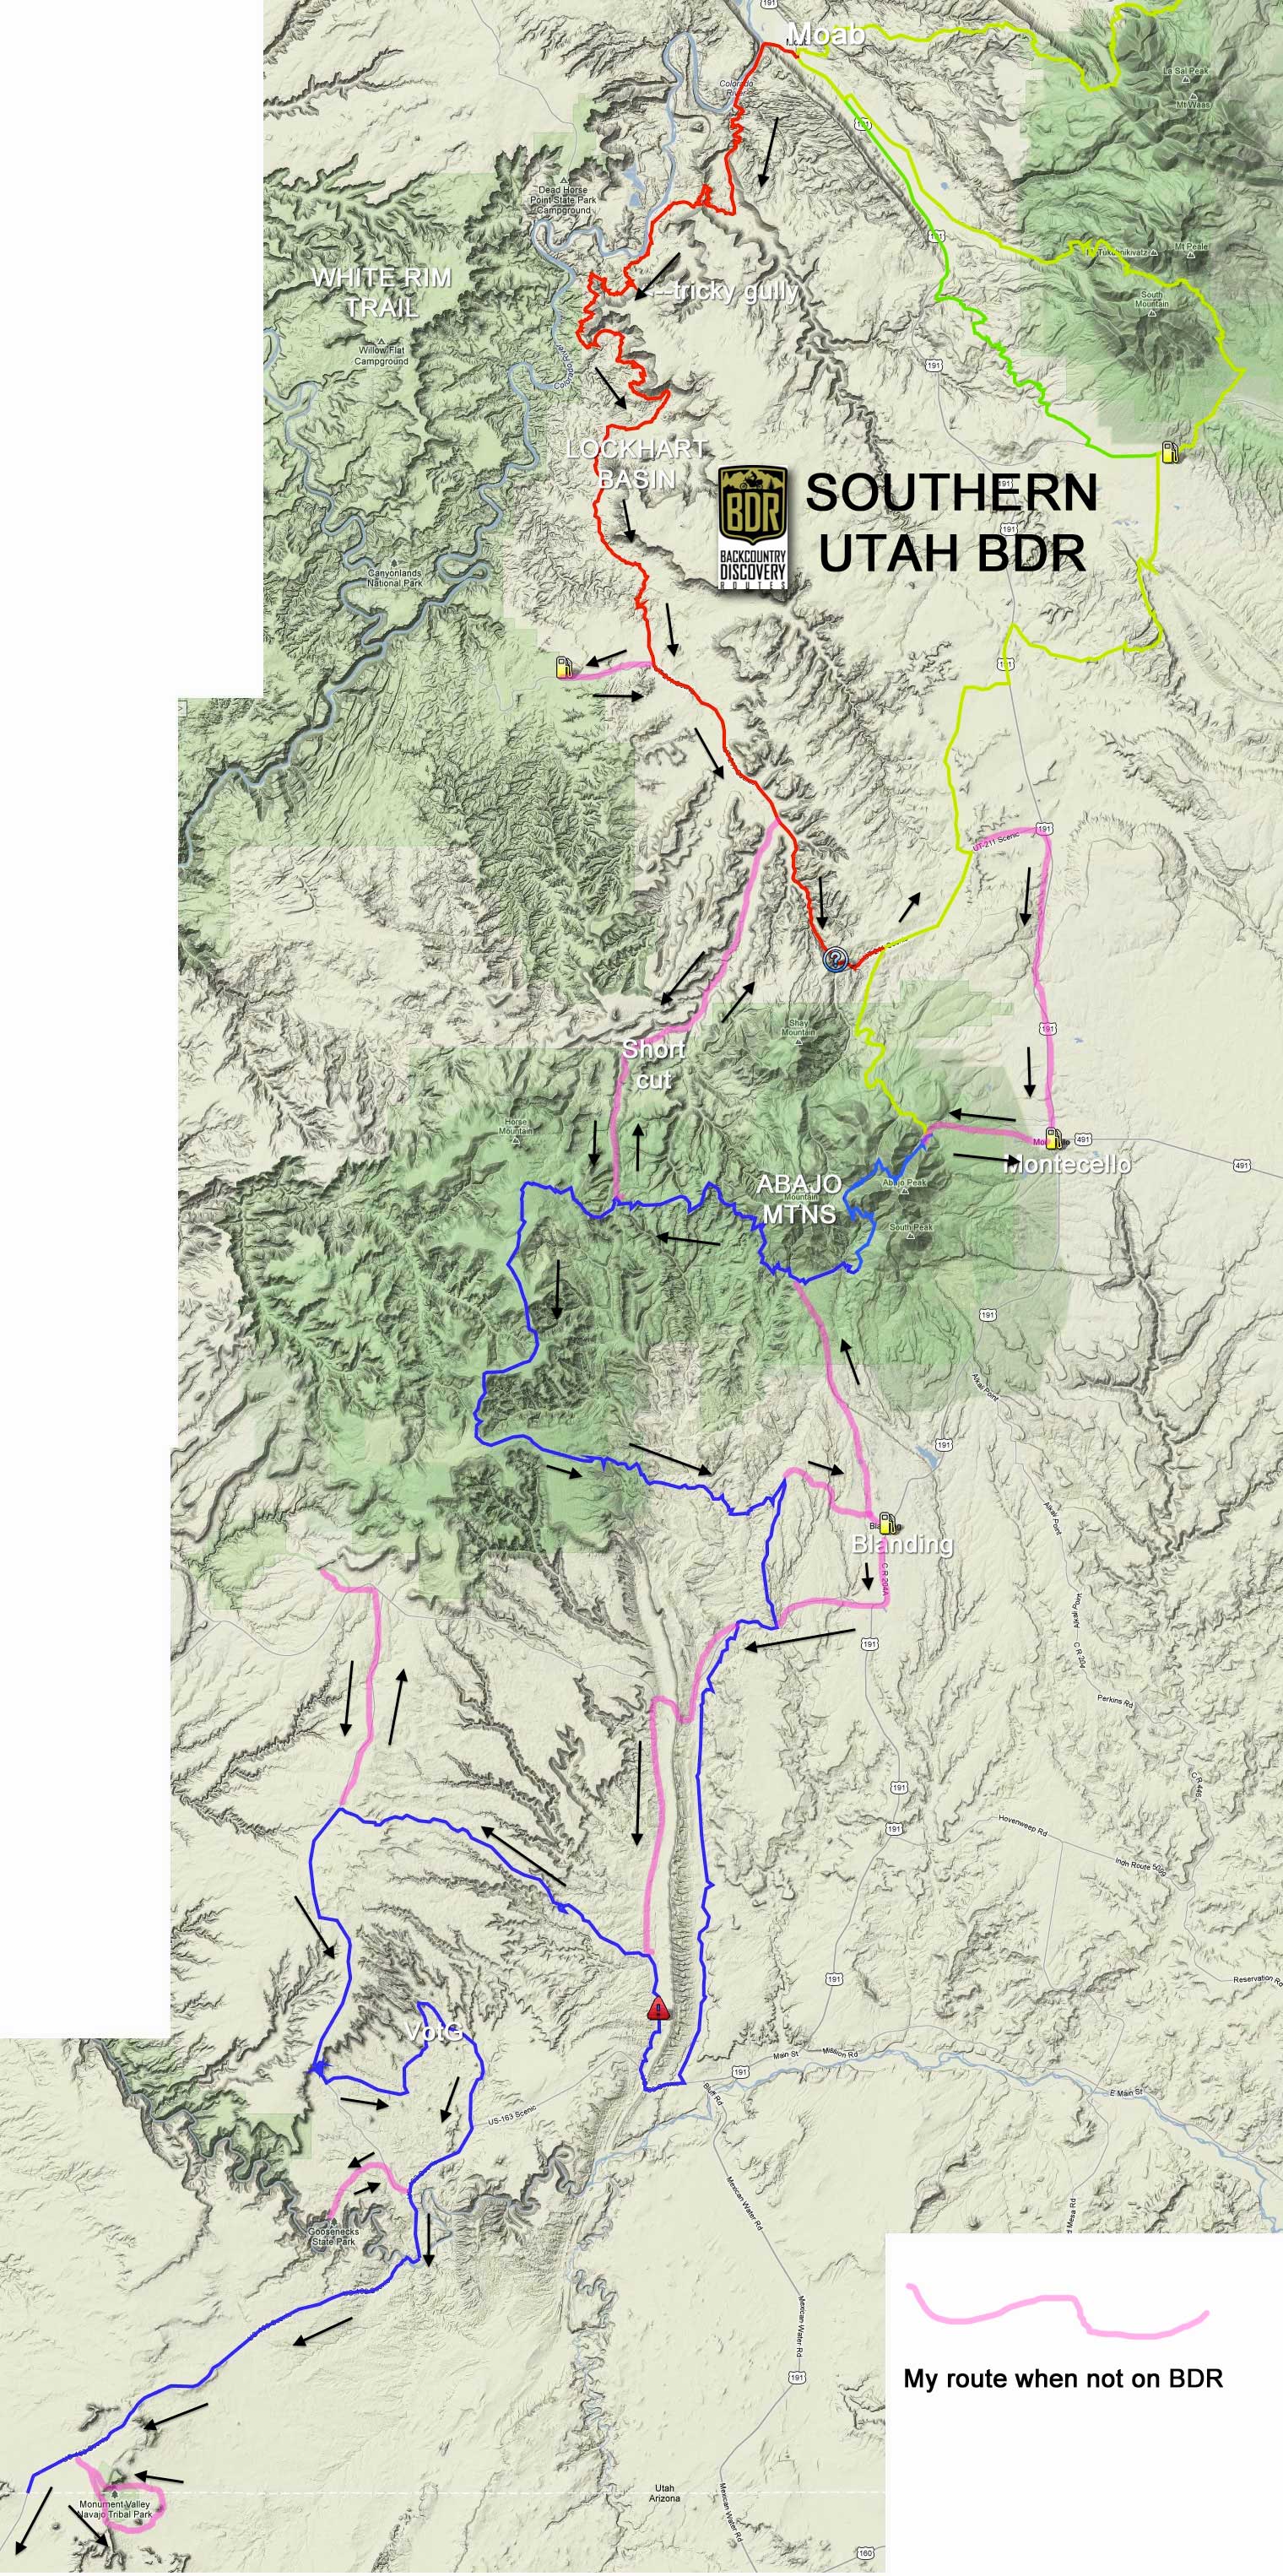
The last leg of my Southwest tour followed the southern UTBDR down to the Arizona border (map, right or here) to arrive in time for the Overland Expo near Flagstaff in a few days time.
In late 2020 a few miles south of the Lockhart Trail, the mysterious Utah Monolithmade global news but within a week of its discovery it was removed by the ‘Leave No Tracers’.
The remains of the BDR could be broken up into three stages:
• The Lockhart Basin alternative route for experts only.
• From Montecello over the Abajo mountains, around Elk Ridge and back down to Blanding on the highway.
• Then over Snow Flats Road towards the Valley of the Gods scenic loop and the Arizona border near Monument Valley.
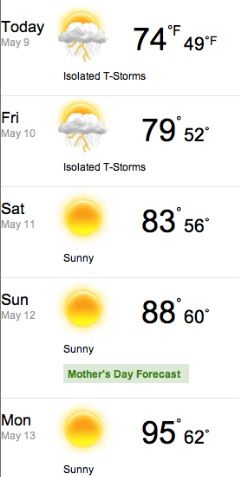
After a few days of rain in Moab, temperatures were set to soar again.
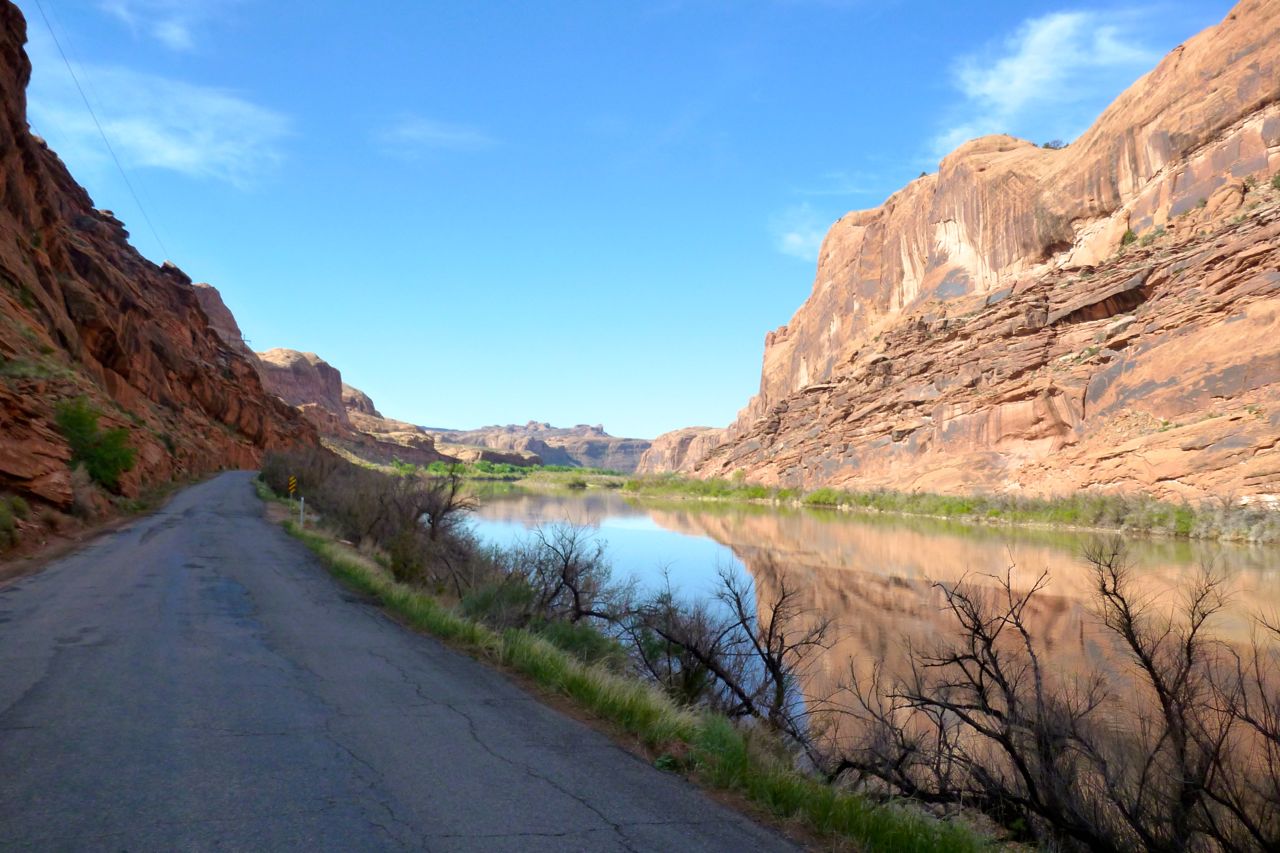
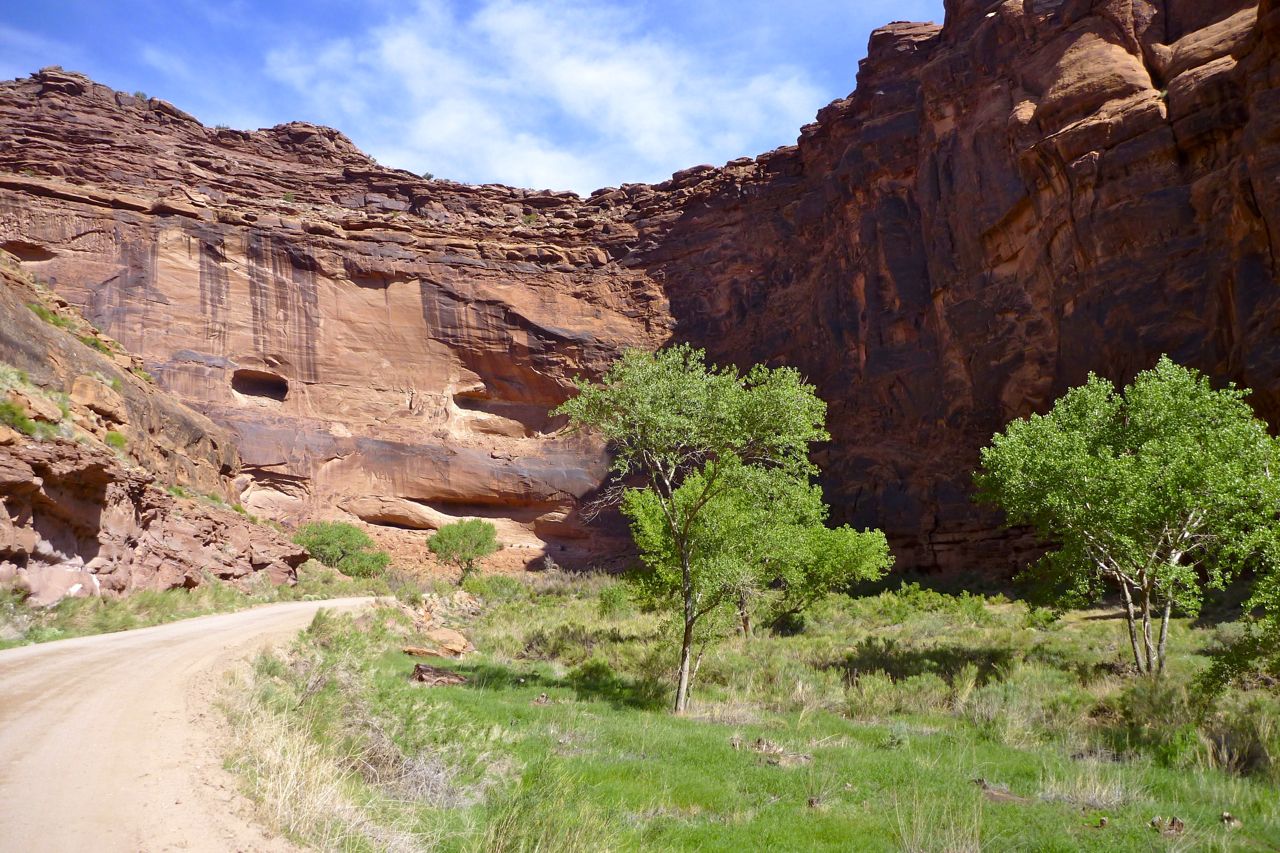
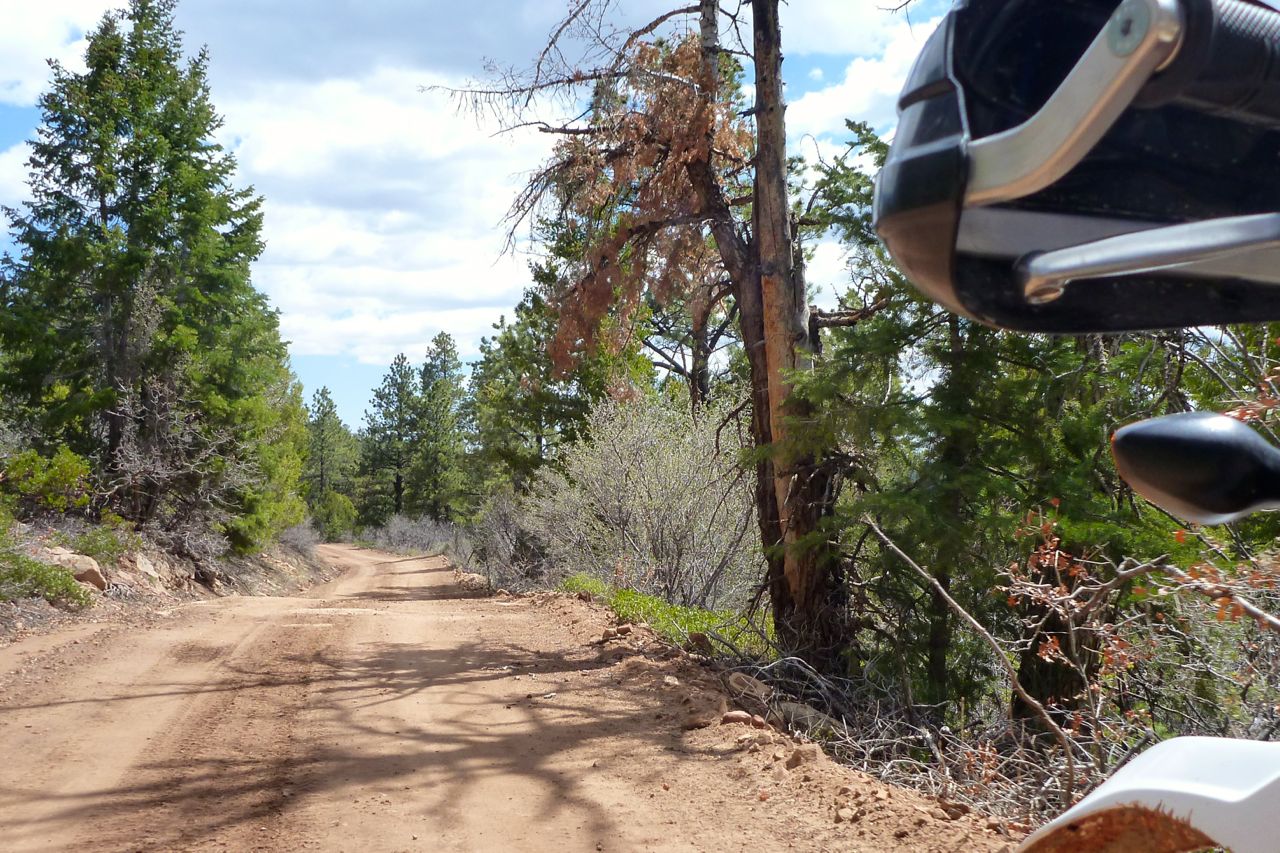
I set off along a road following the placid Colorado River.
Lots of relatively lush camping spots up here in the first few miles.
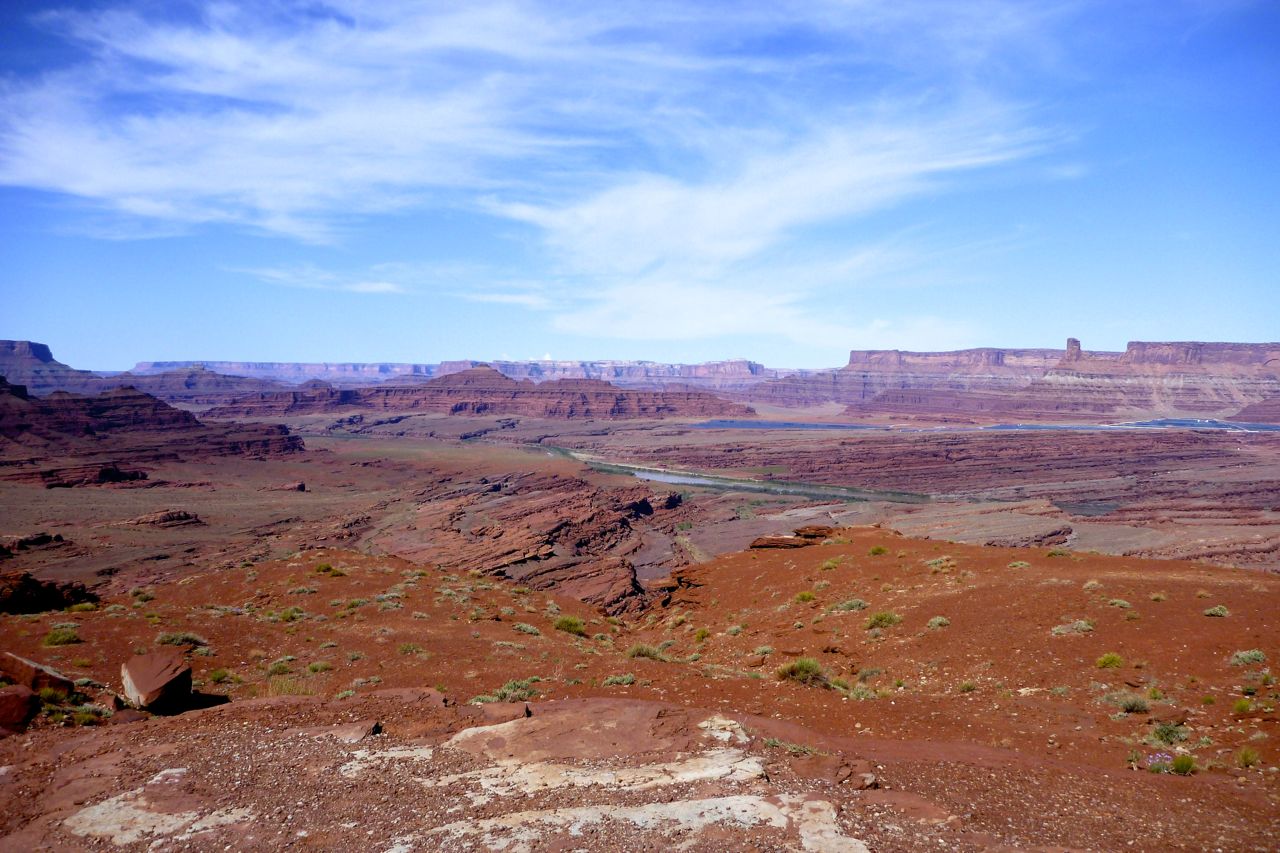
I rise to a pass and see the WRT and Island in the Sky on the far side of the river, with the blue Potash mine ponds below.
I’d waited in Moab for the rain to clear; it made the soft sand approaches no worse than this.
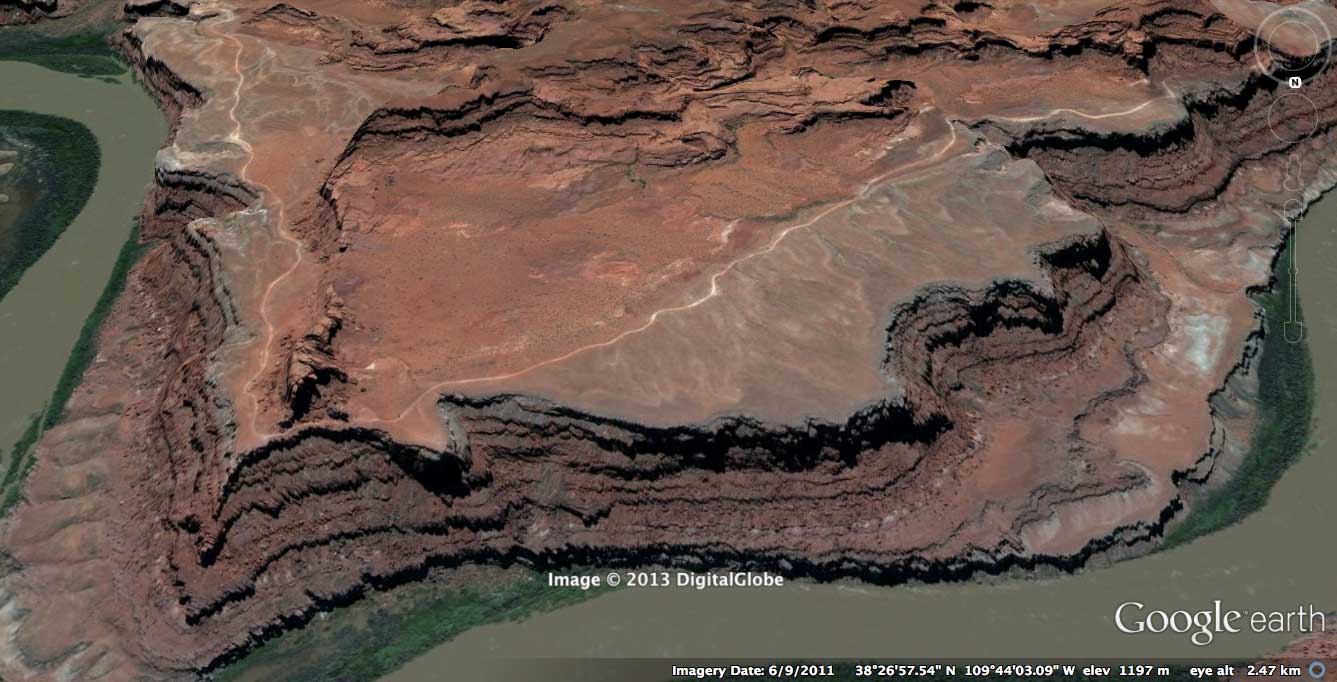
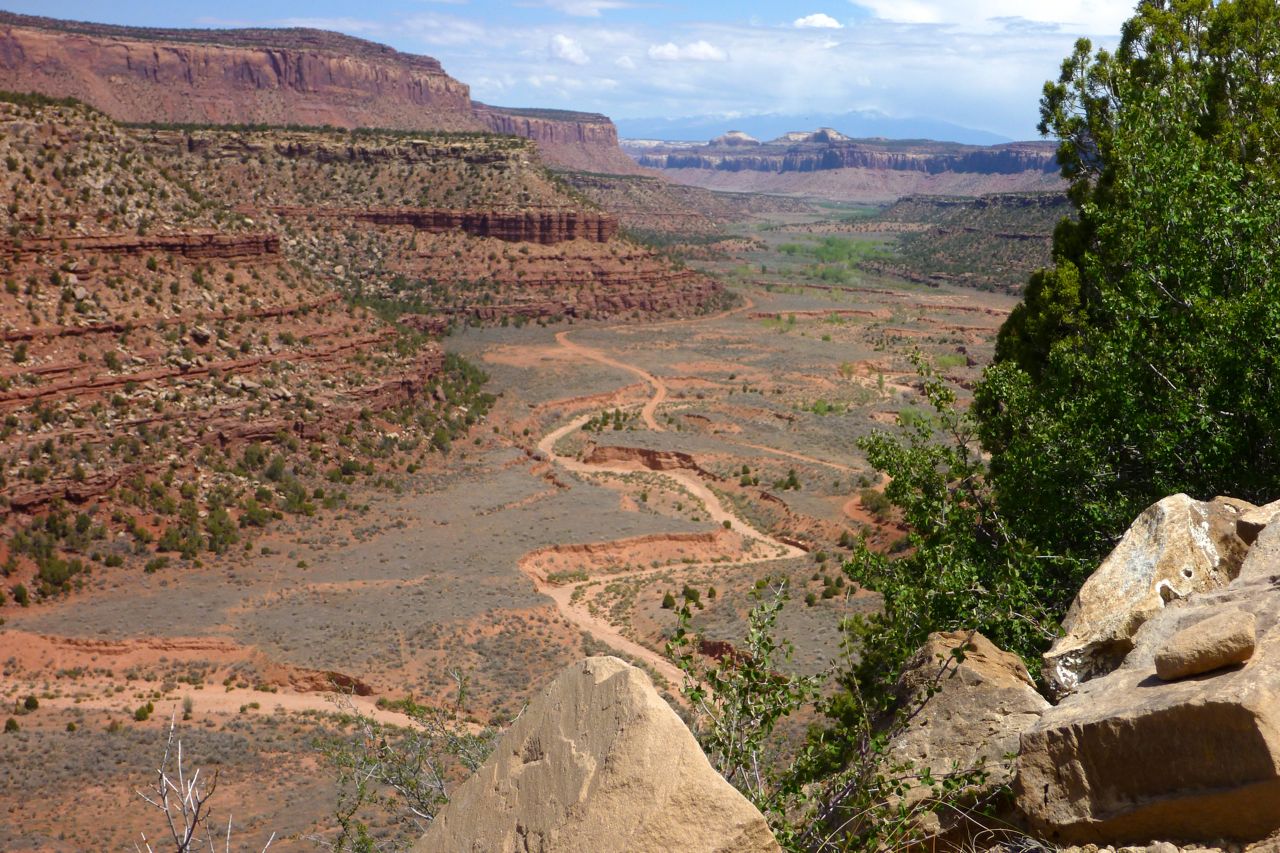
The Lockhart track looks great on Google Earth.
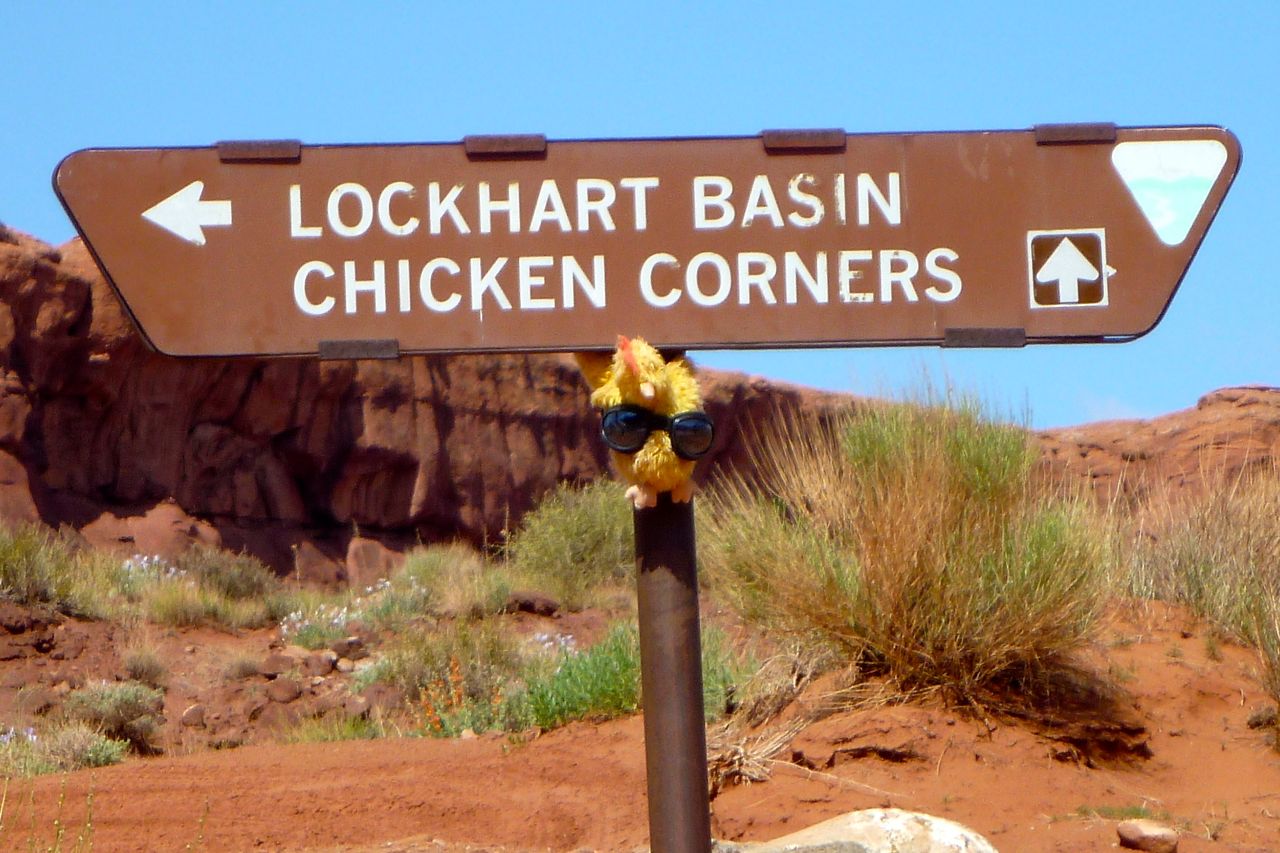
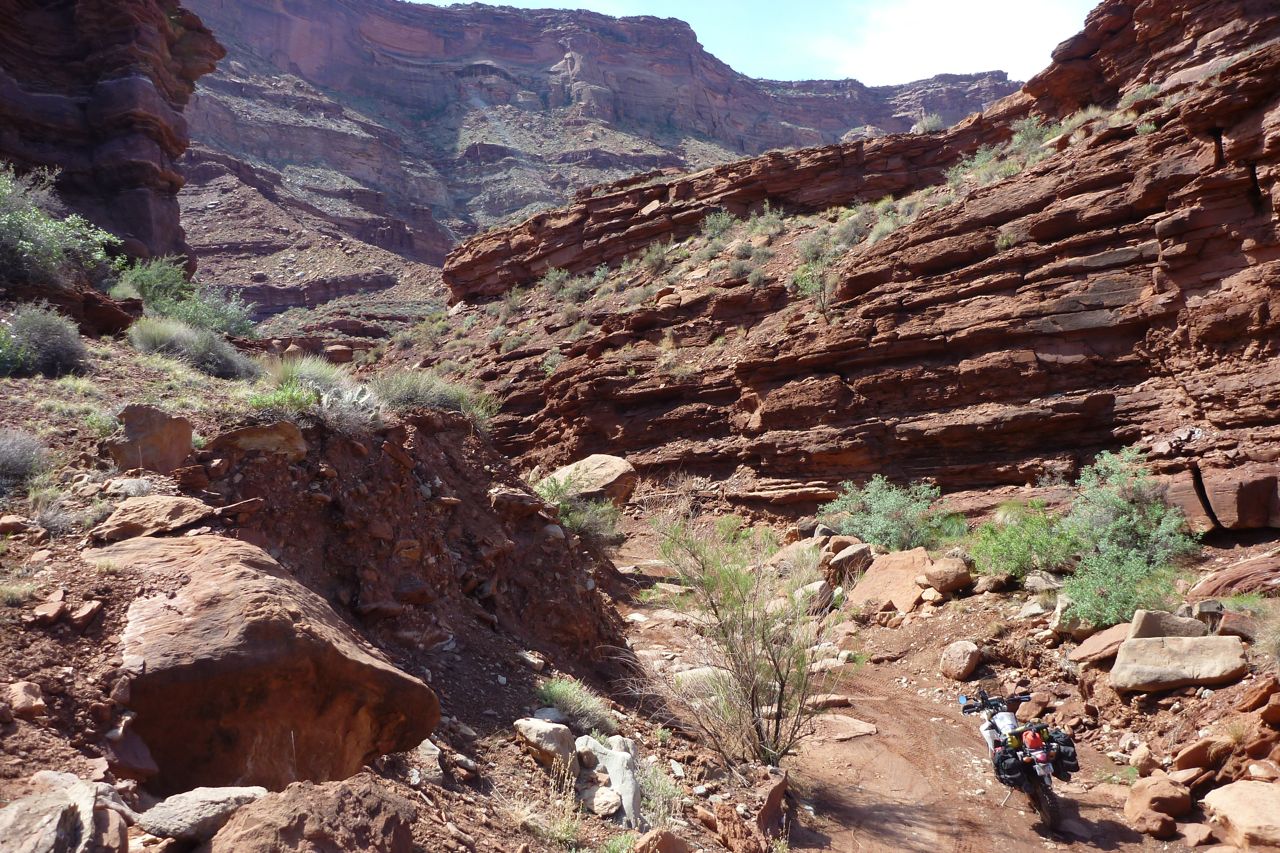
At this point, about 24 miles and an hour 15 out of Moab, you turn left and things get tougher.
I didn’t know where to go, or should I say I didn’t believe where the tracklog was leading me, up to the left and into the cliff.
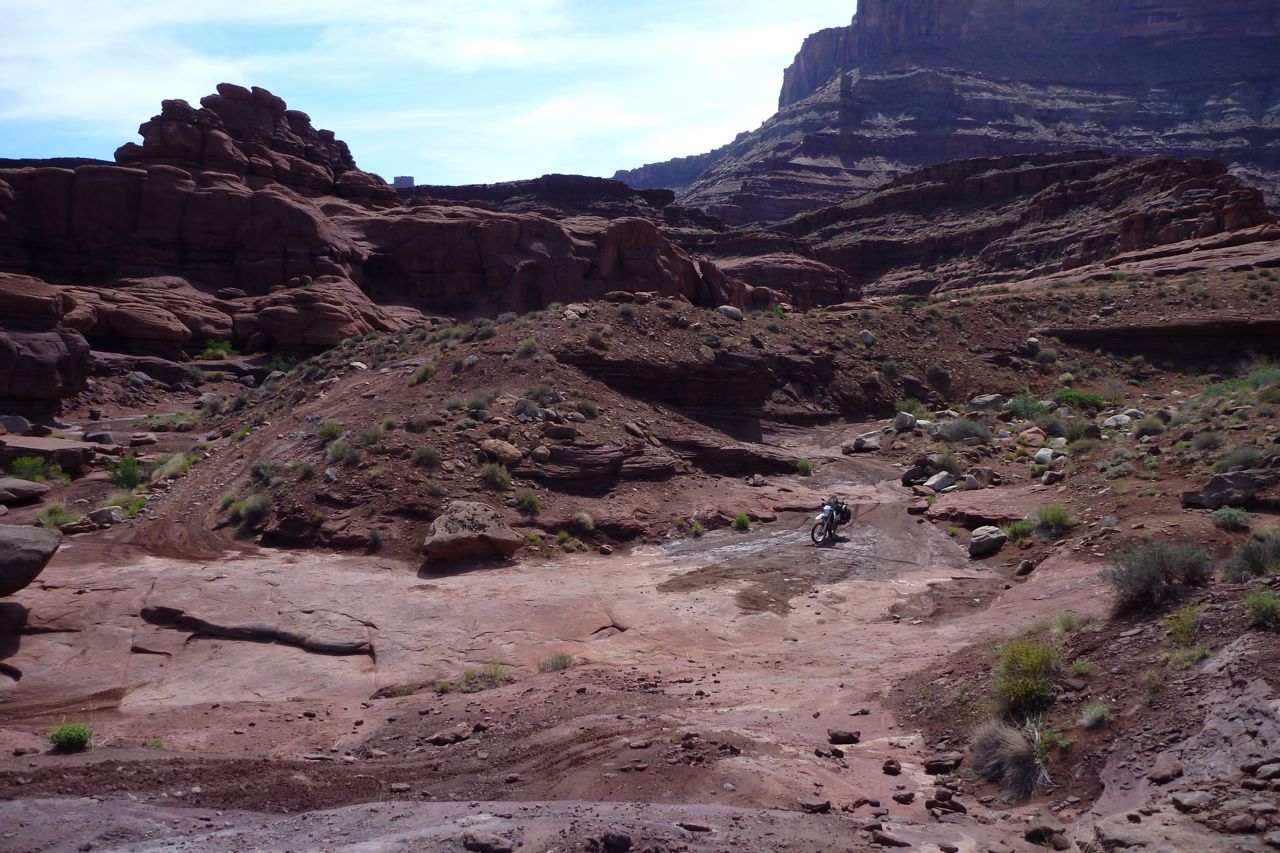
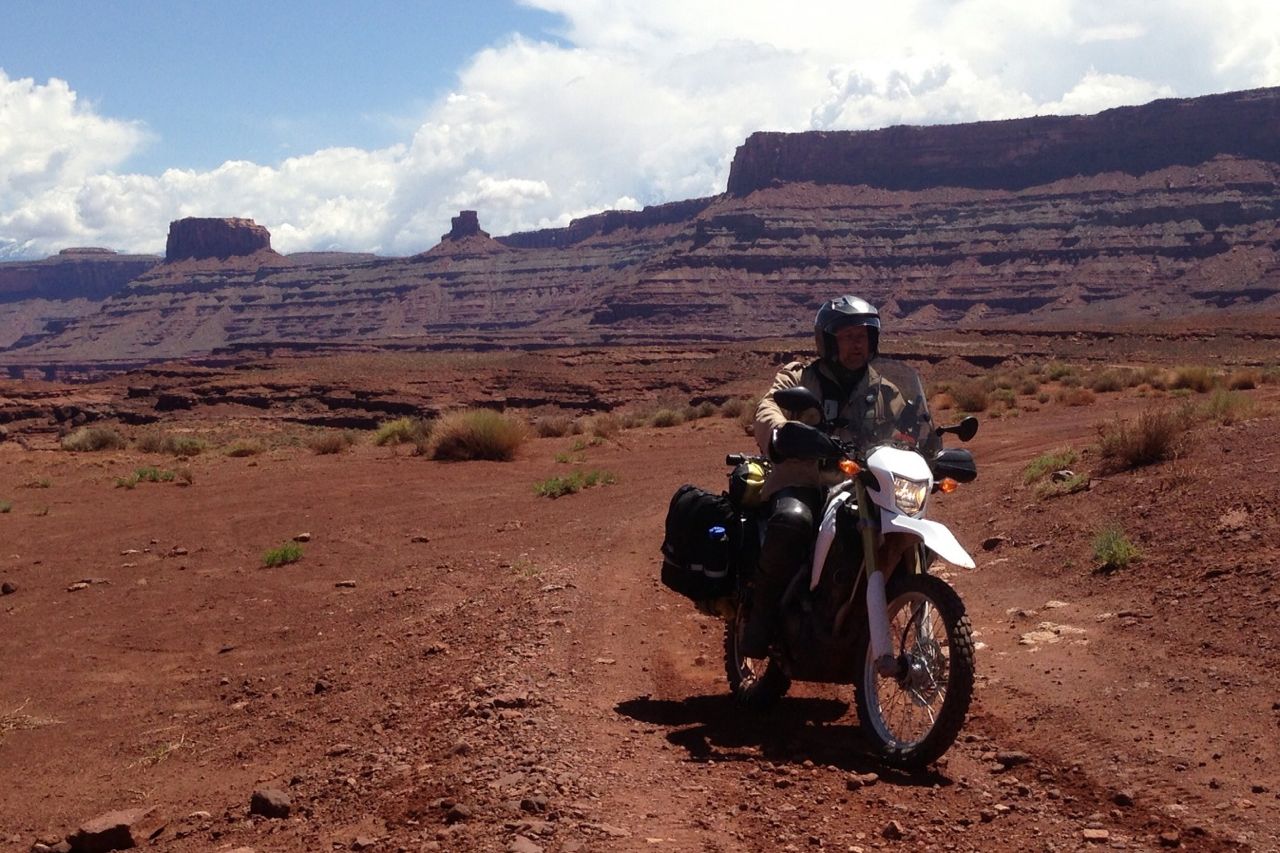
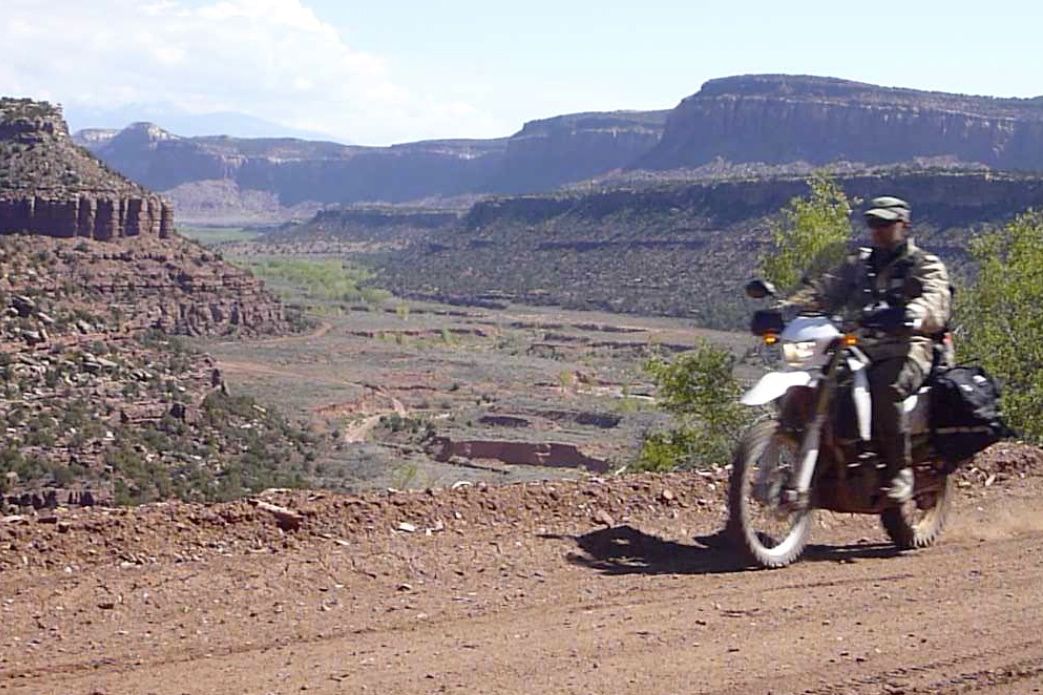
Along this narrowing gully with plenty of rock steps to the bench up on the right; a GS12 would struggle here; an F800 with good protection might make it. High gearing is hard on the clutch and side baggage limits options.
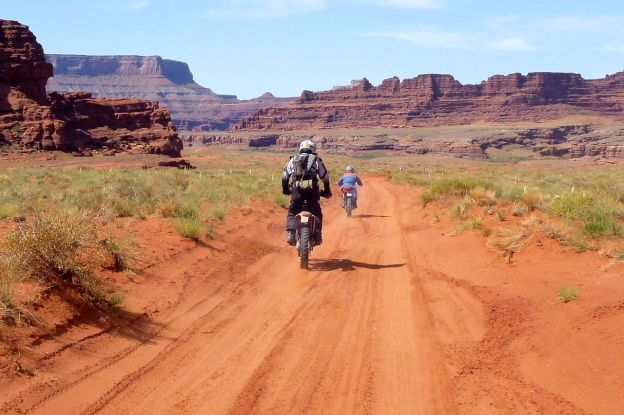
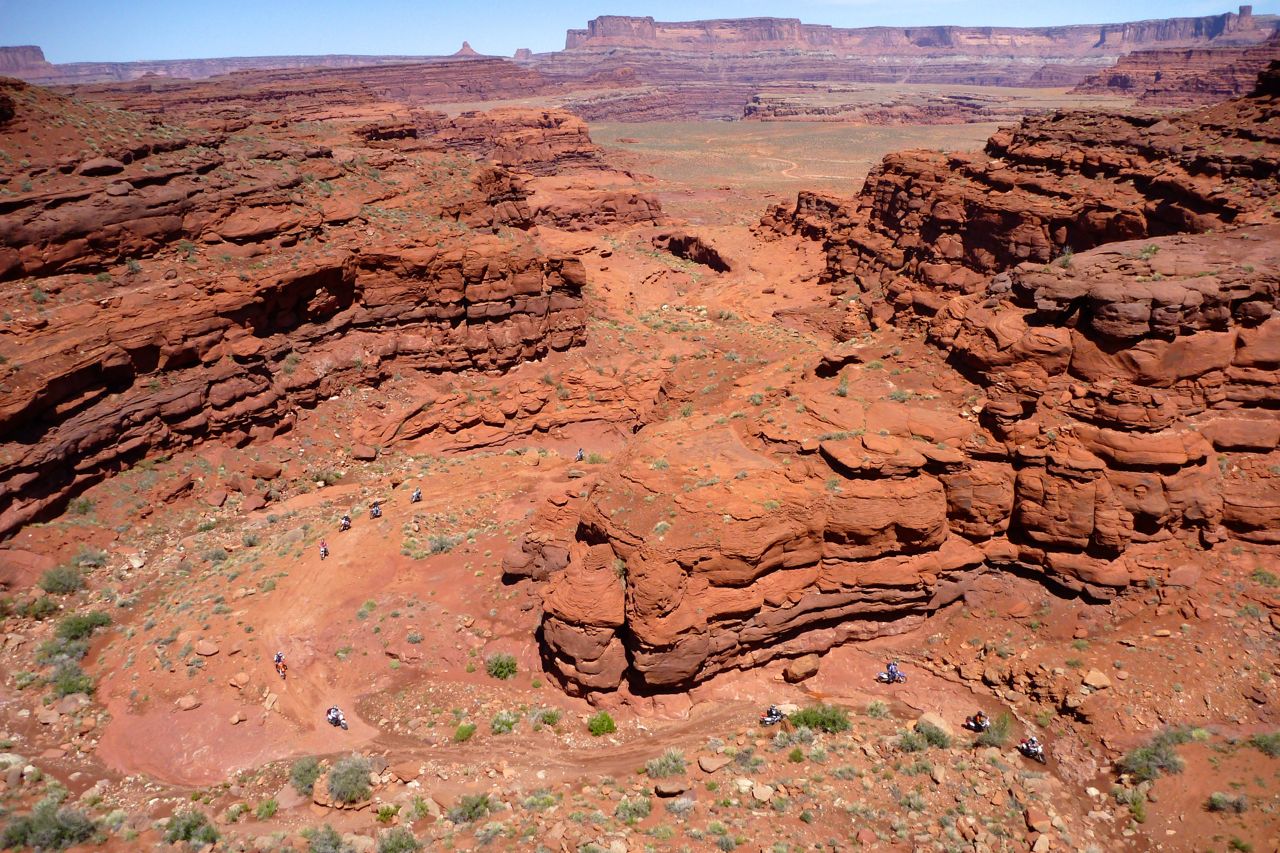
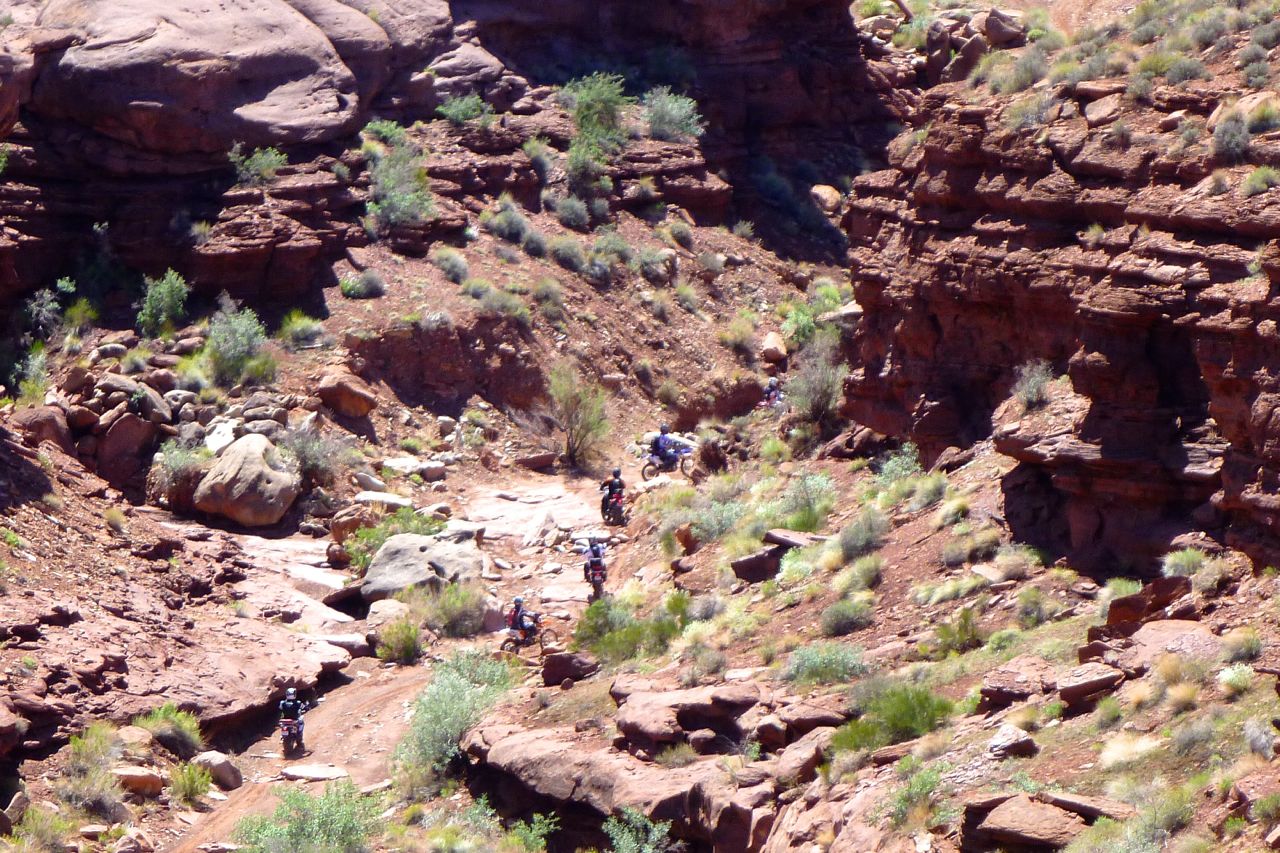
Up on top I watched these dirt bikers from SLC also struggle to work out the right way. After some 30 mins they head in.
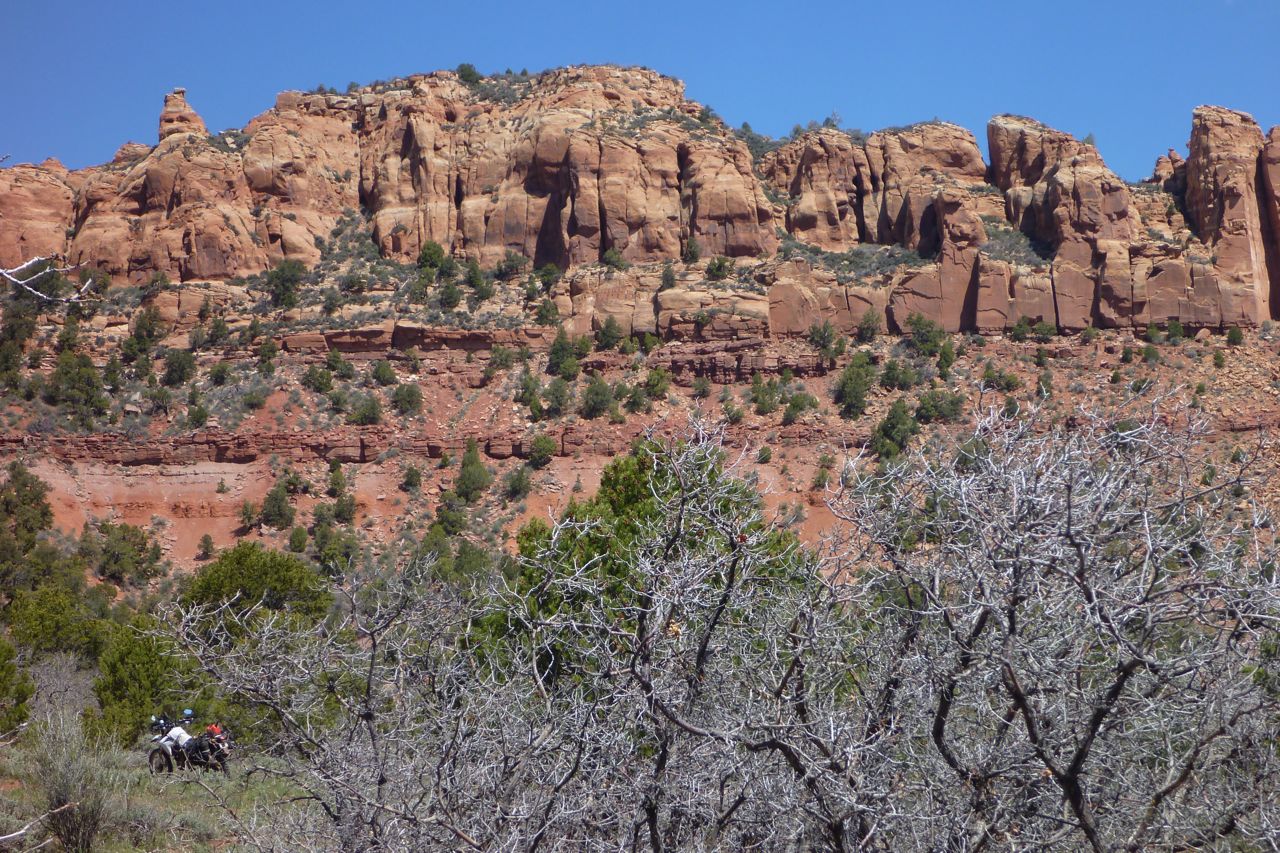
They ride up the narrow creek bed…
… up to the apex
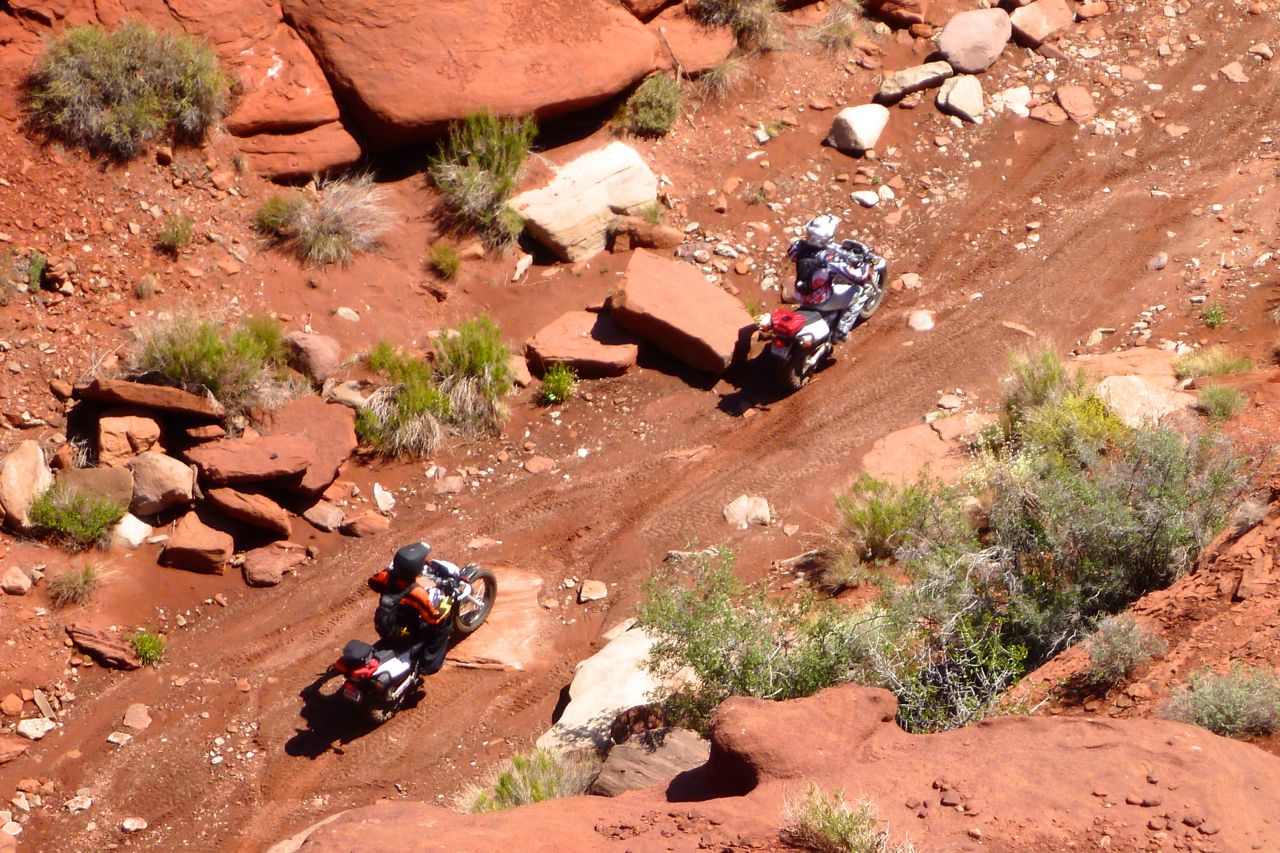
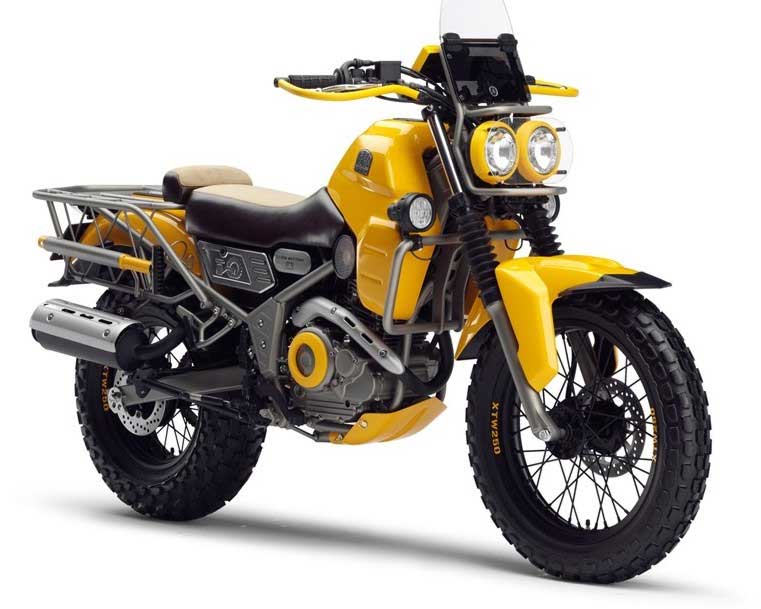
About half were on TW 200s; never heard of these being used as desert bikes but why not: low, light and easy to handle.
With a bit of yellow paint you could make yourself a Ryoku from a TW.
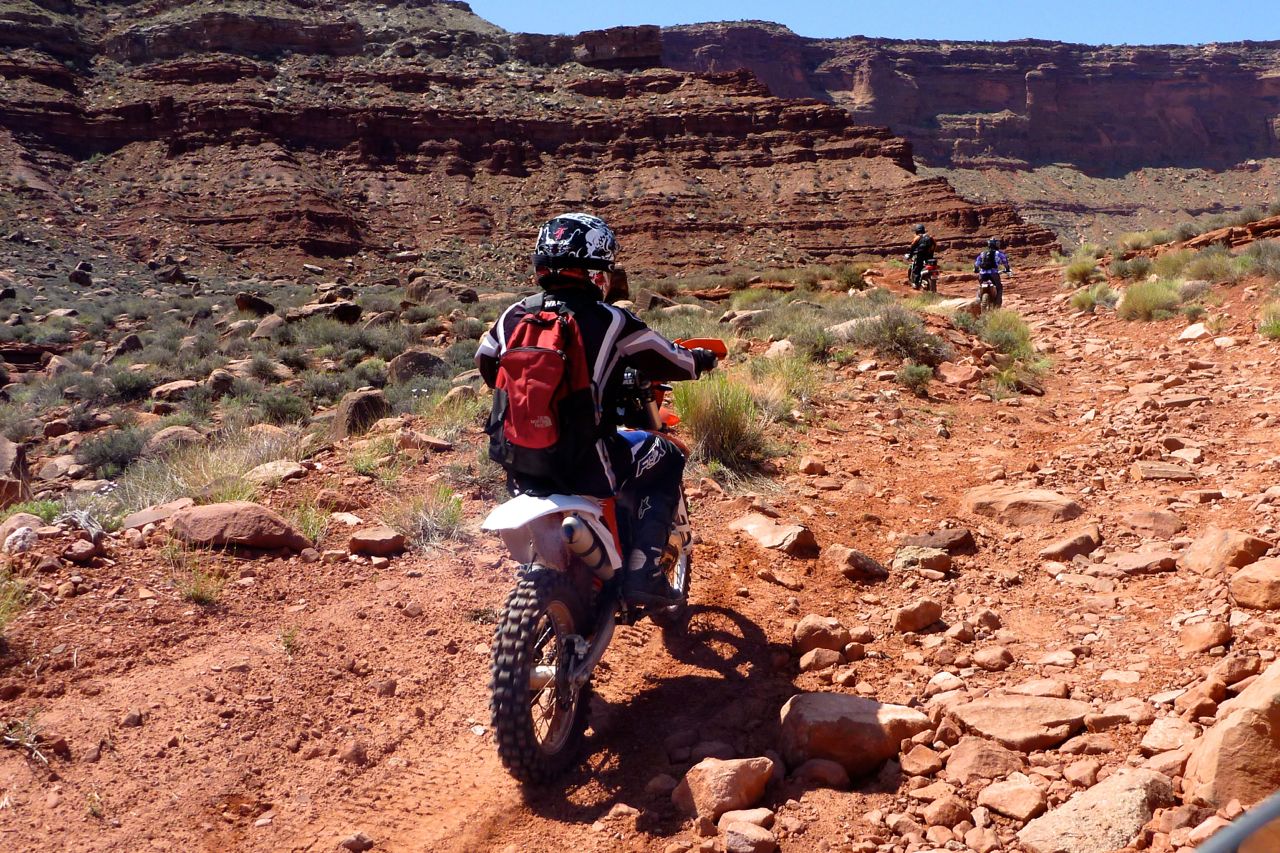
The rough terrain continues for 2 hours and 14 miles to Lockhart Canyon northside, with quite a few ‘one chance only’ launches up rocky steps and climbs. A regular, unlifted 4×4 would not manage here.
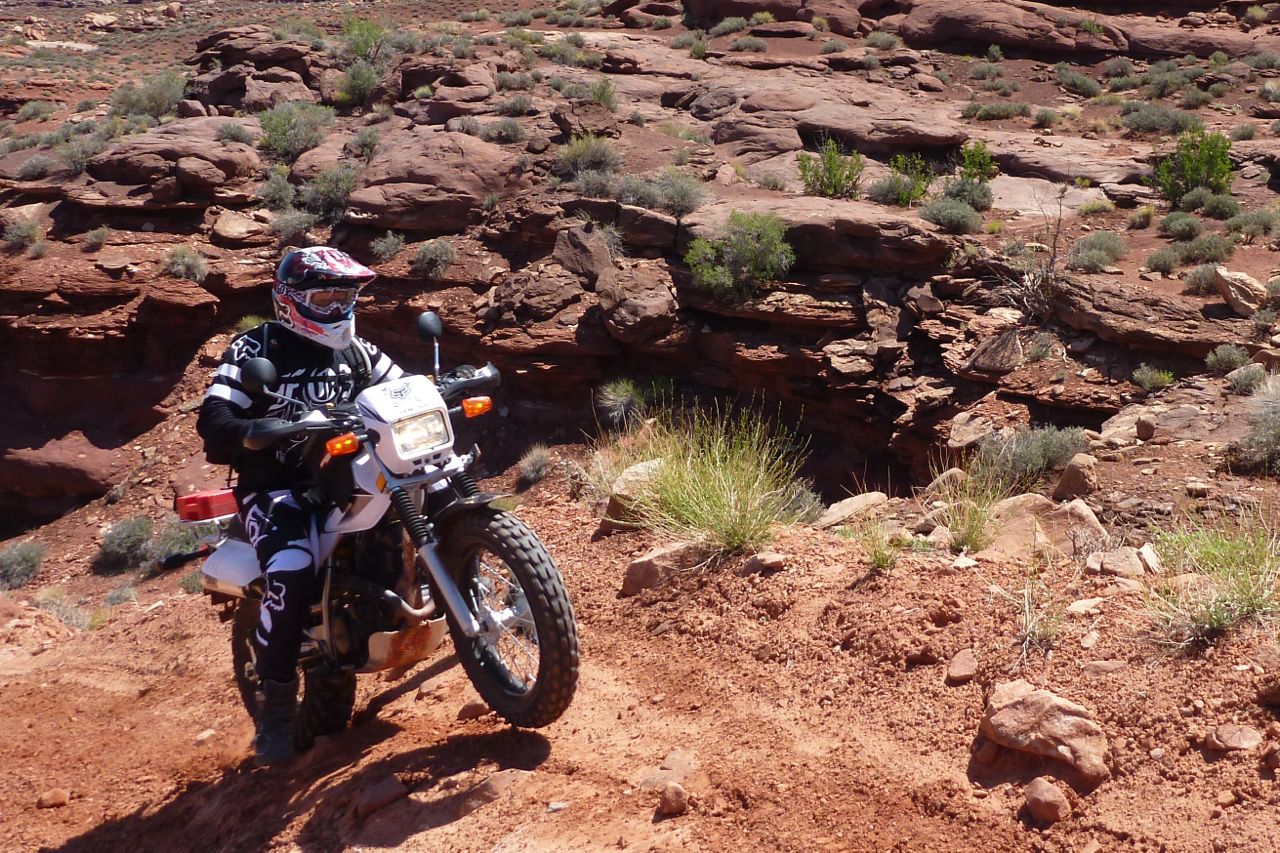
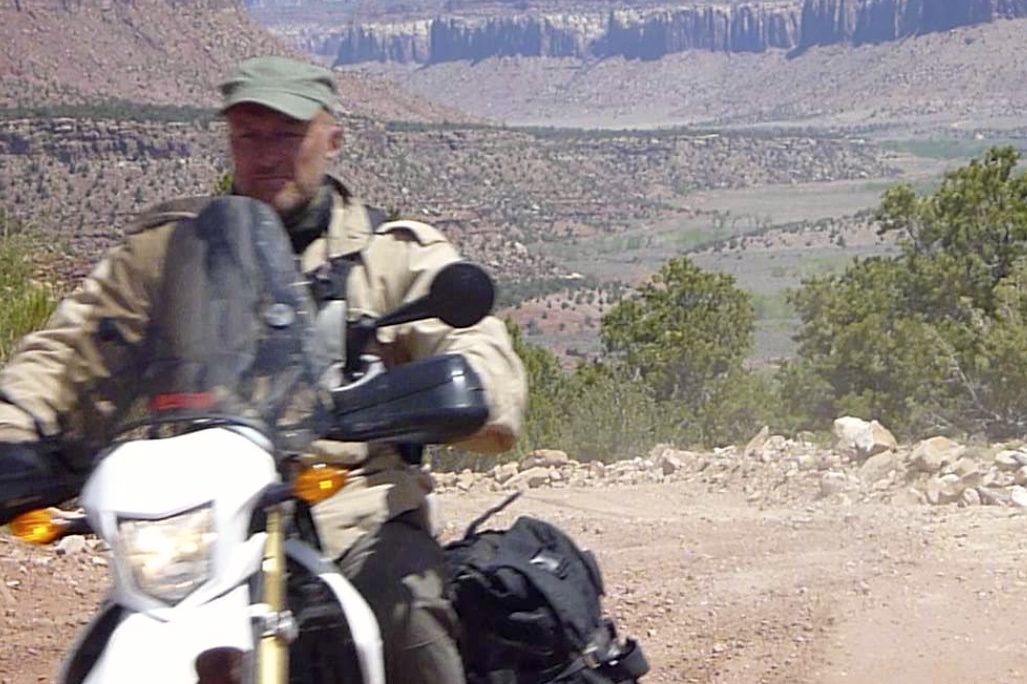
Martin, one of the SLC guys shoots me.
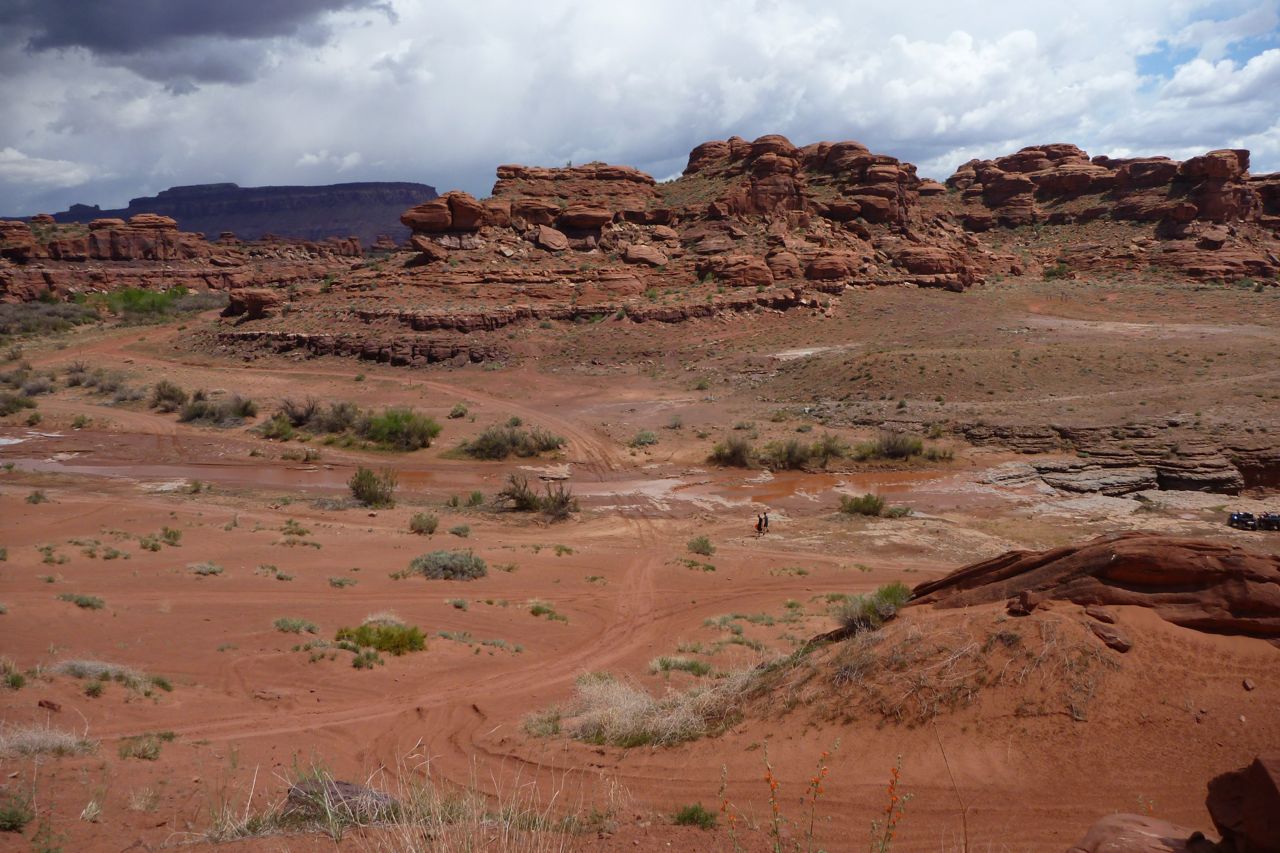
The north rim of Lockhart canyon is where things ease up. Another 24 miles and an hour 15 to the Canyonlands road.
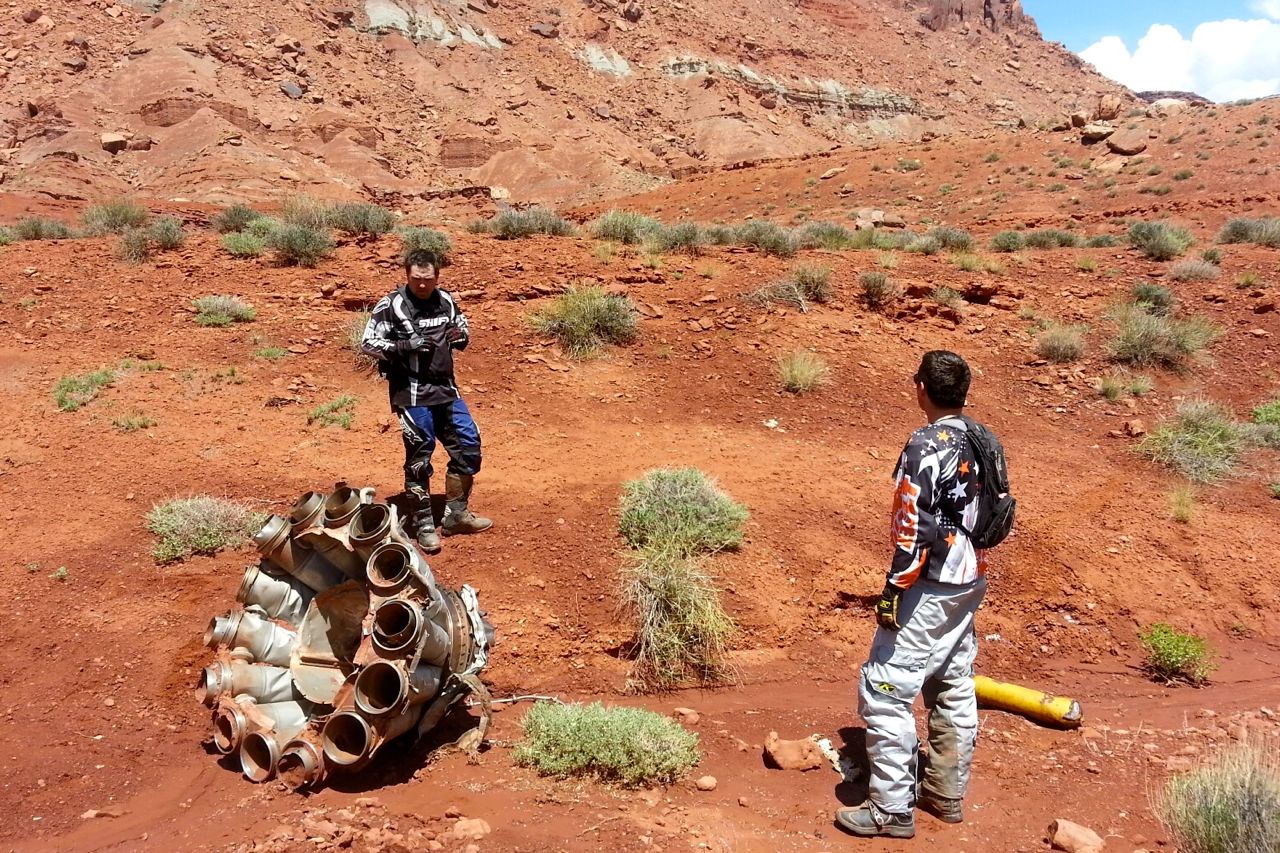
The SLC guys were looking for a T33 plane wreck from the early 1950s. They found it.
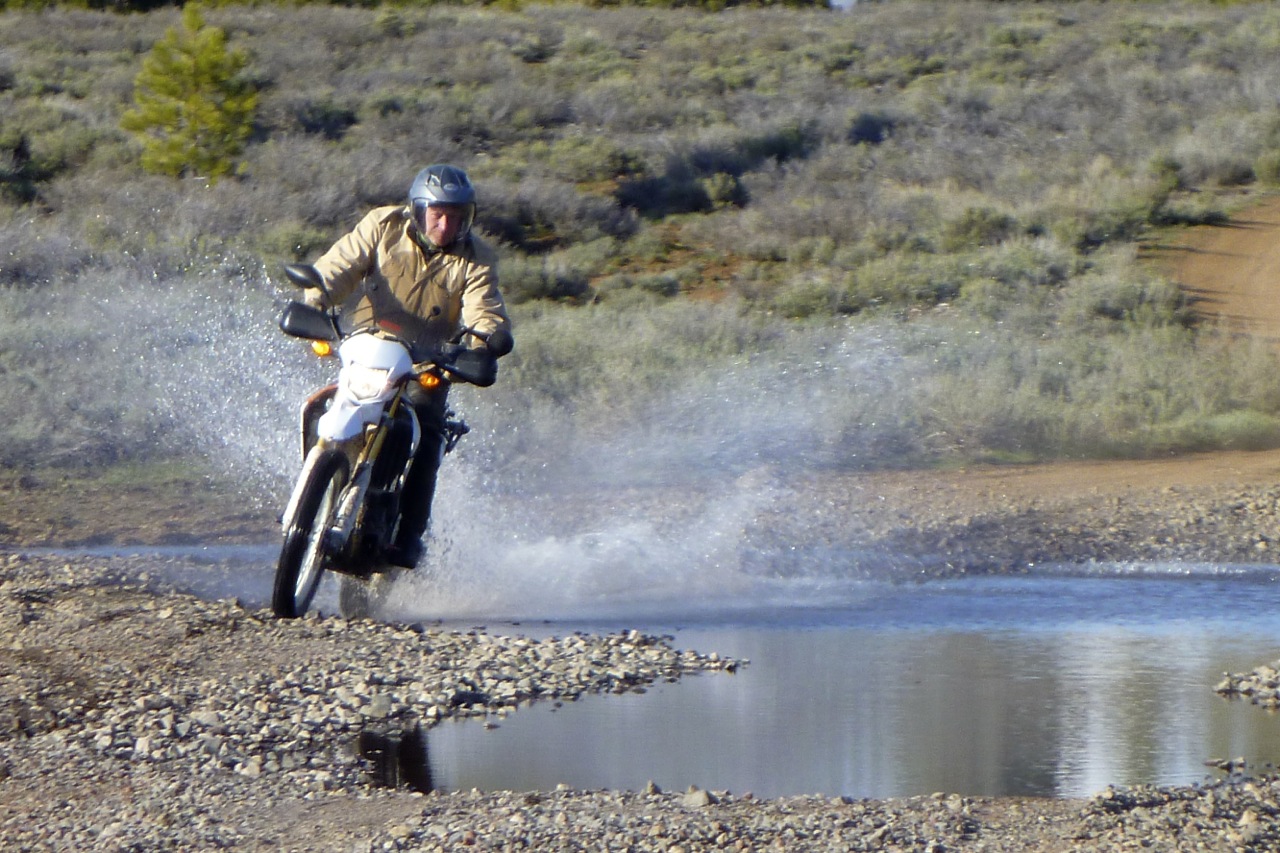
Despite the recent rains, crossing Indian Creek was easy.
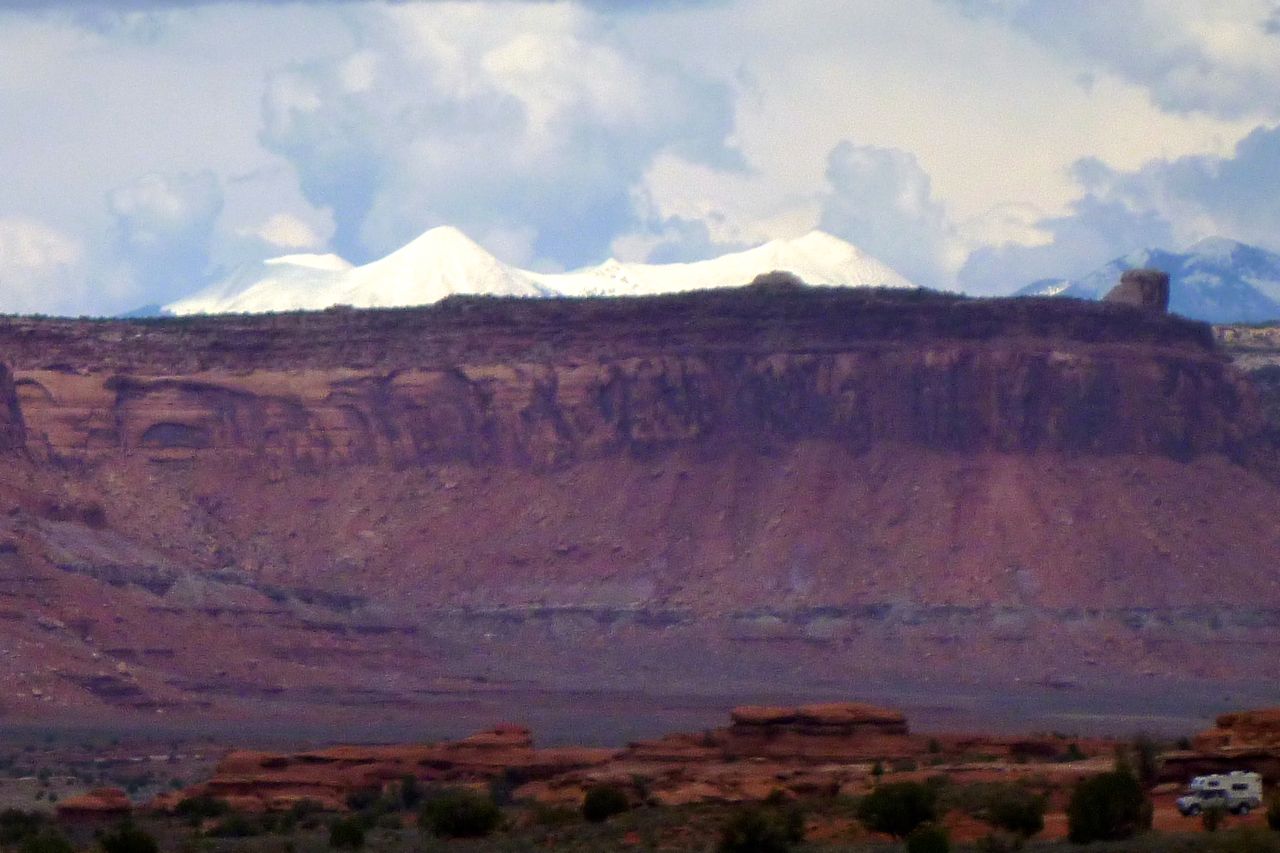
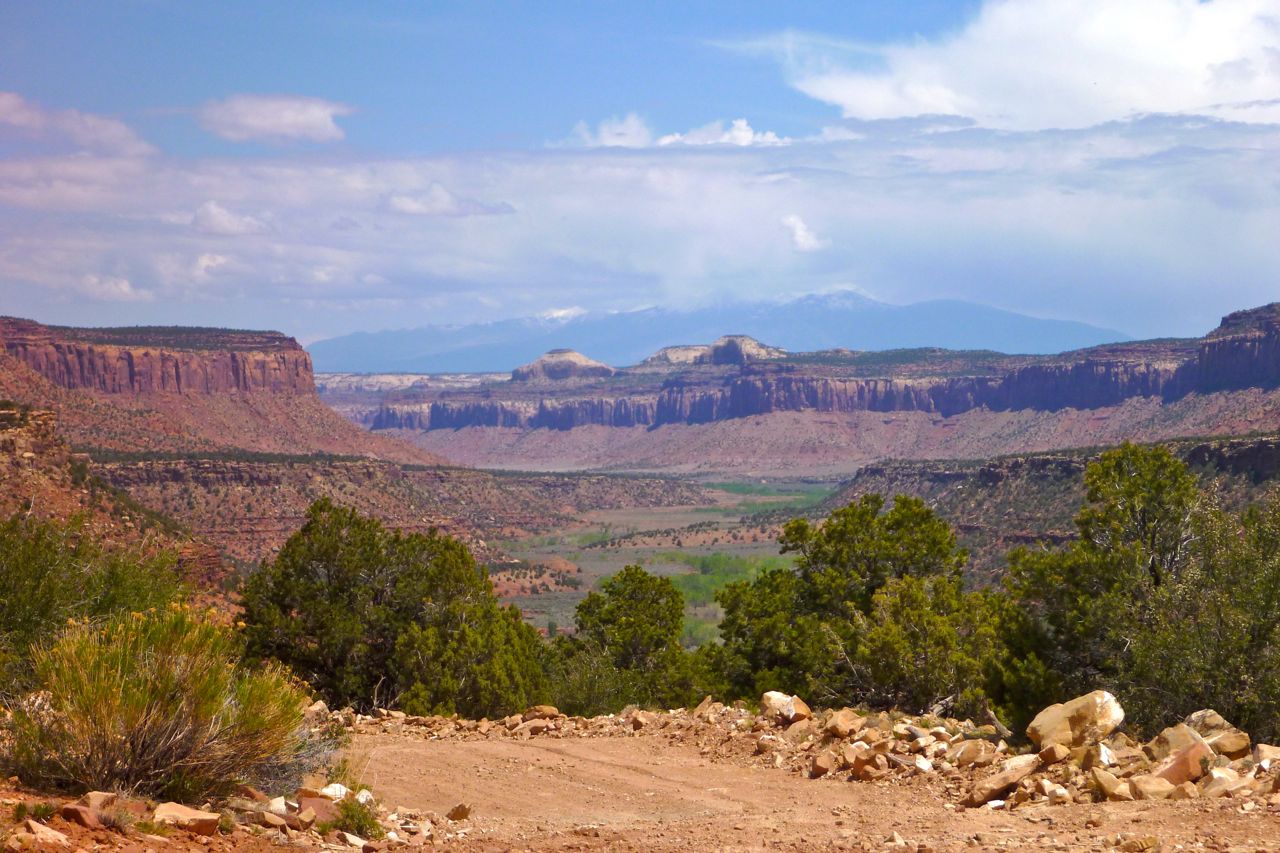
On the way west to the Outpost I’m surprised to look back and see what appears to be fresh snow on the La Sals.
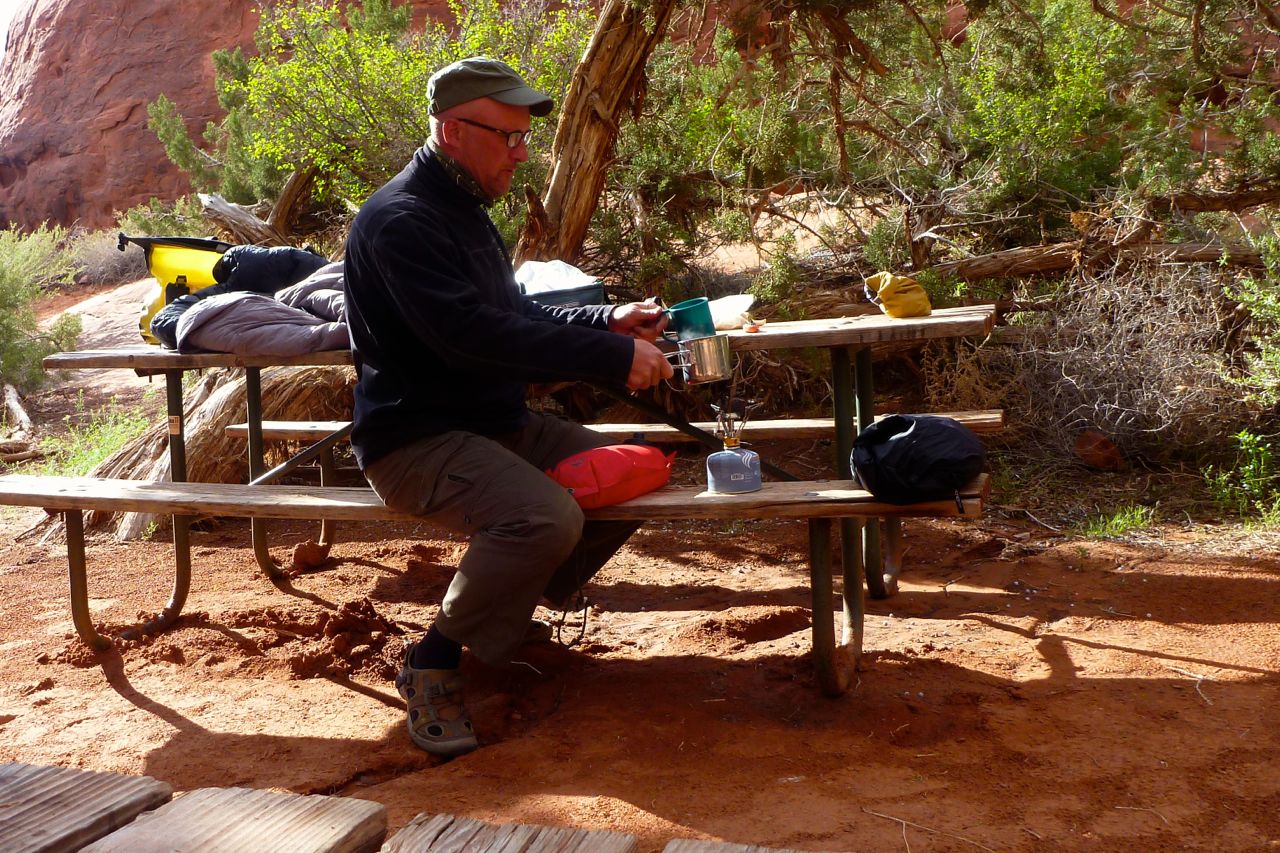
Time for a cup of tea at Canyonlands Outpost. A bench and table make things so much easier.
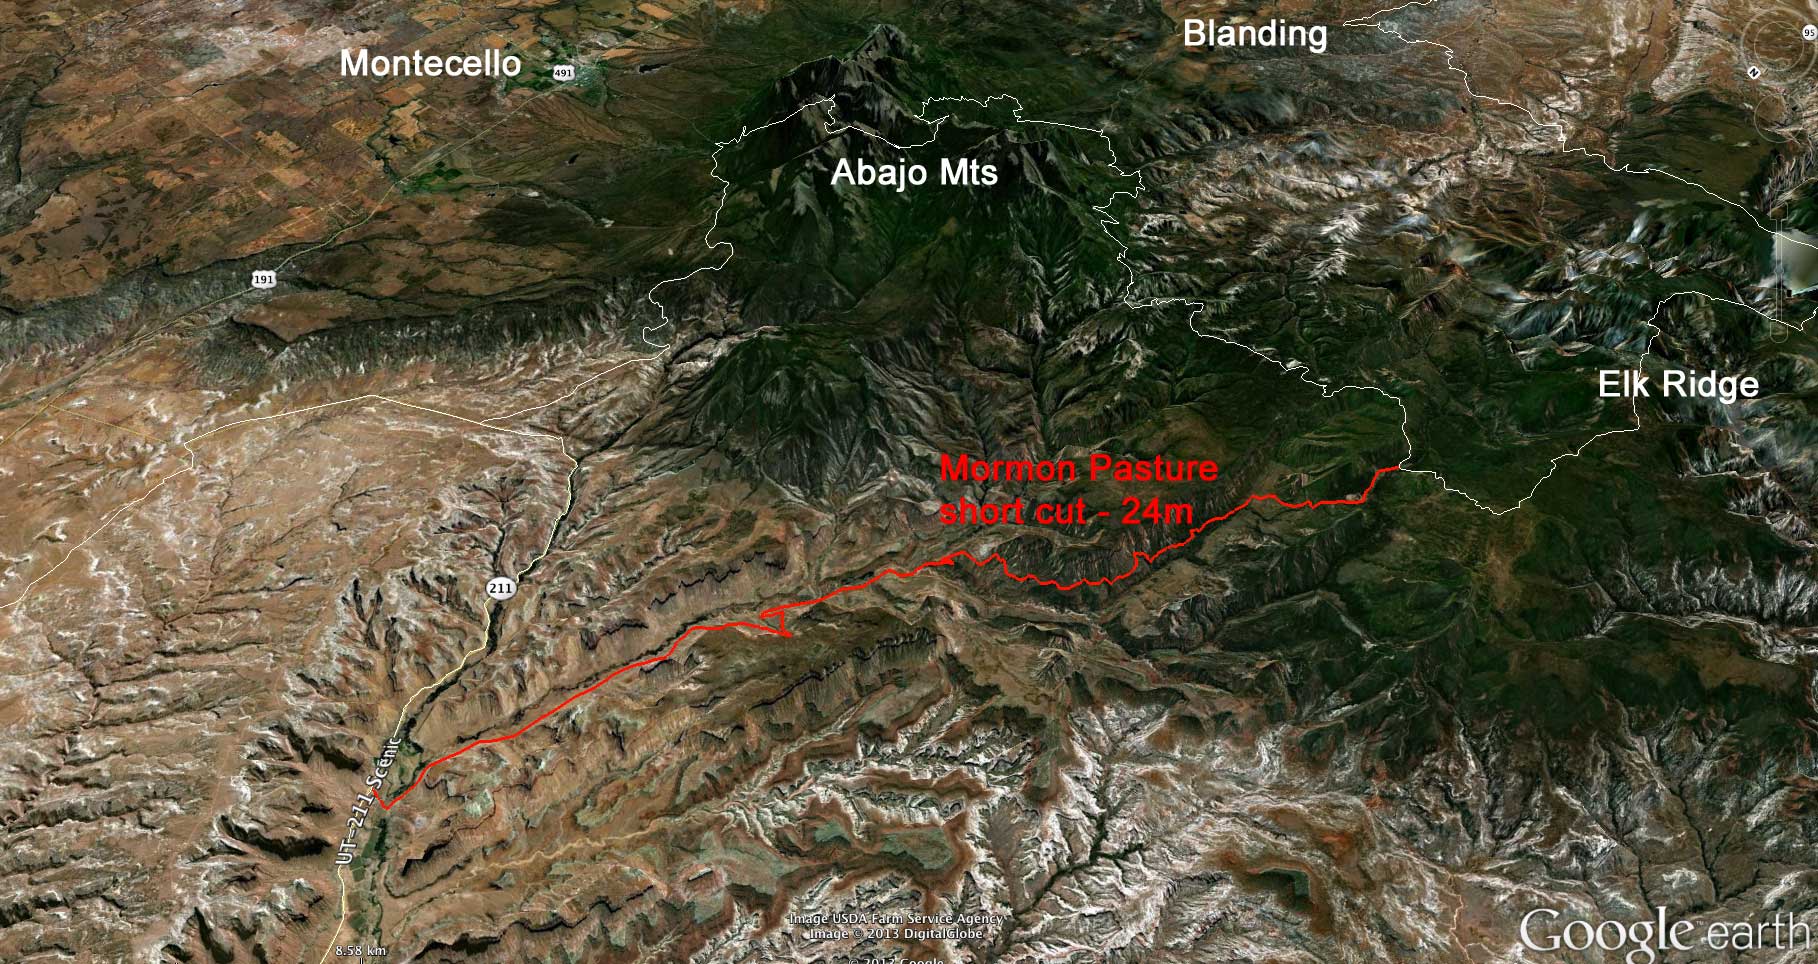
Canyonlands to Mormon Pastures short cut The Benchmark Utah Atlas showed a possible direct route towards the UTBDR as it ran west of the Abajo mountains round to Elk Ridge. It avoided the road section to Montecello where fuel may not be needed and was also a way around the Abajos, should they be snowed under or too muddy. I took a day off at Canyonlands Outpost, and rode up North Cottonwood Creek to see if I could connect with the BDR. (If you want a GPS .kml tracklog for this route, it’s in this post).
My planned route; one side of a triangle avoiding Montecello.
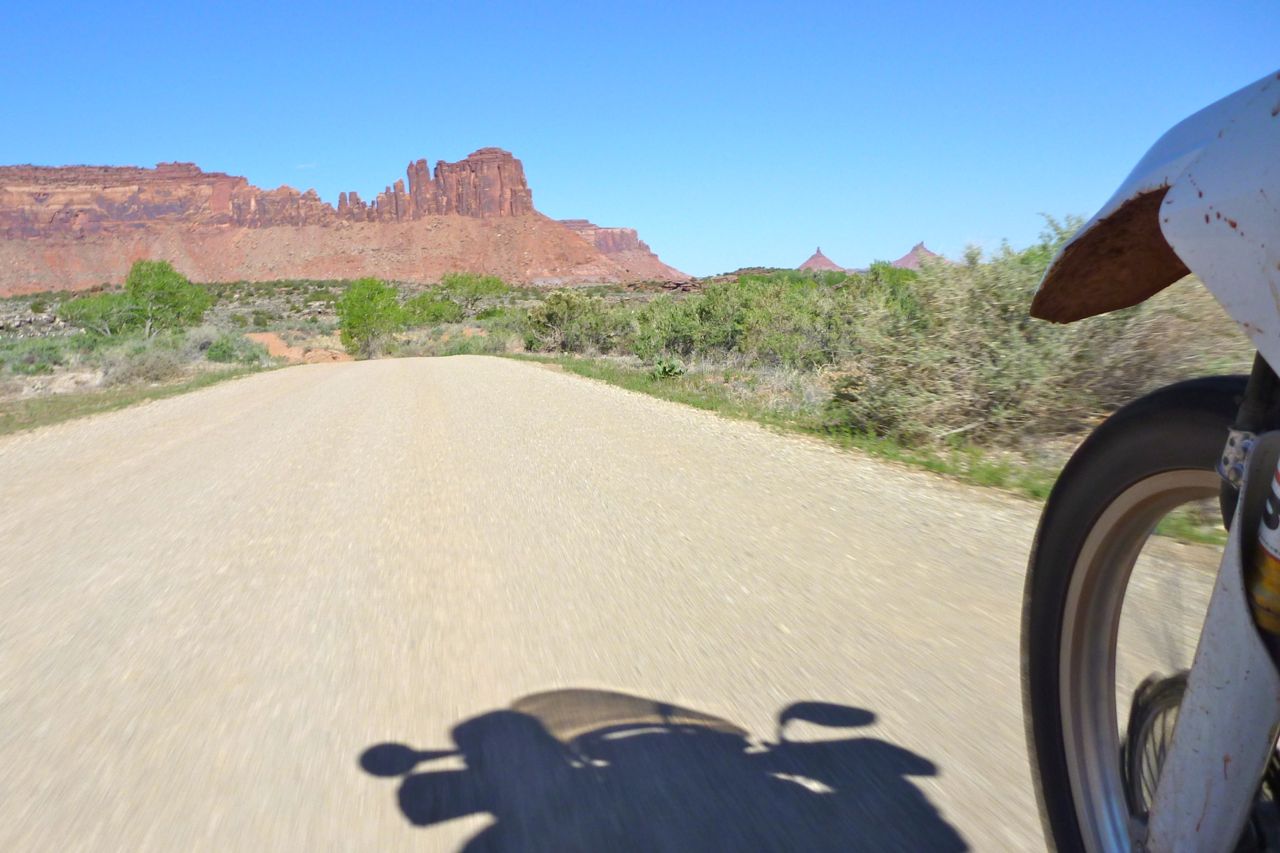
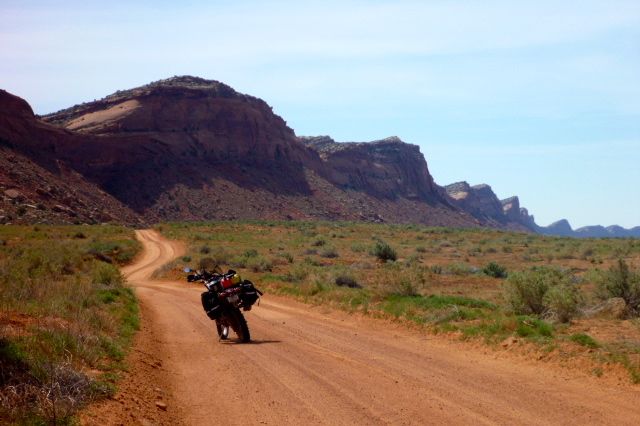
Initially the track was wide but occasionally corrugated.
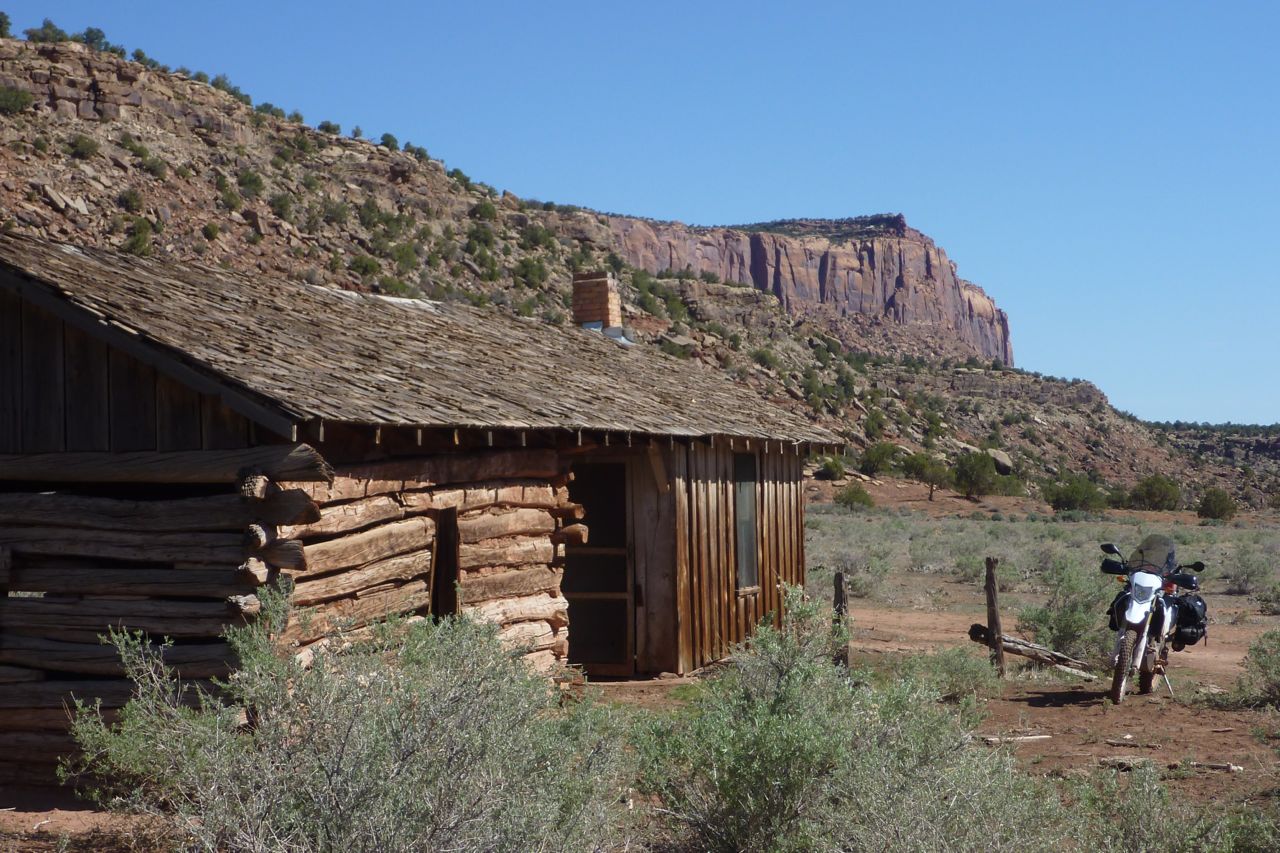
After 10 miles in you split left steeply down to the river and at the bottom keep right – soon you pass an old ranch house.
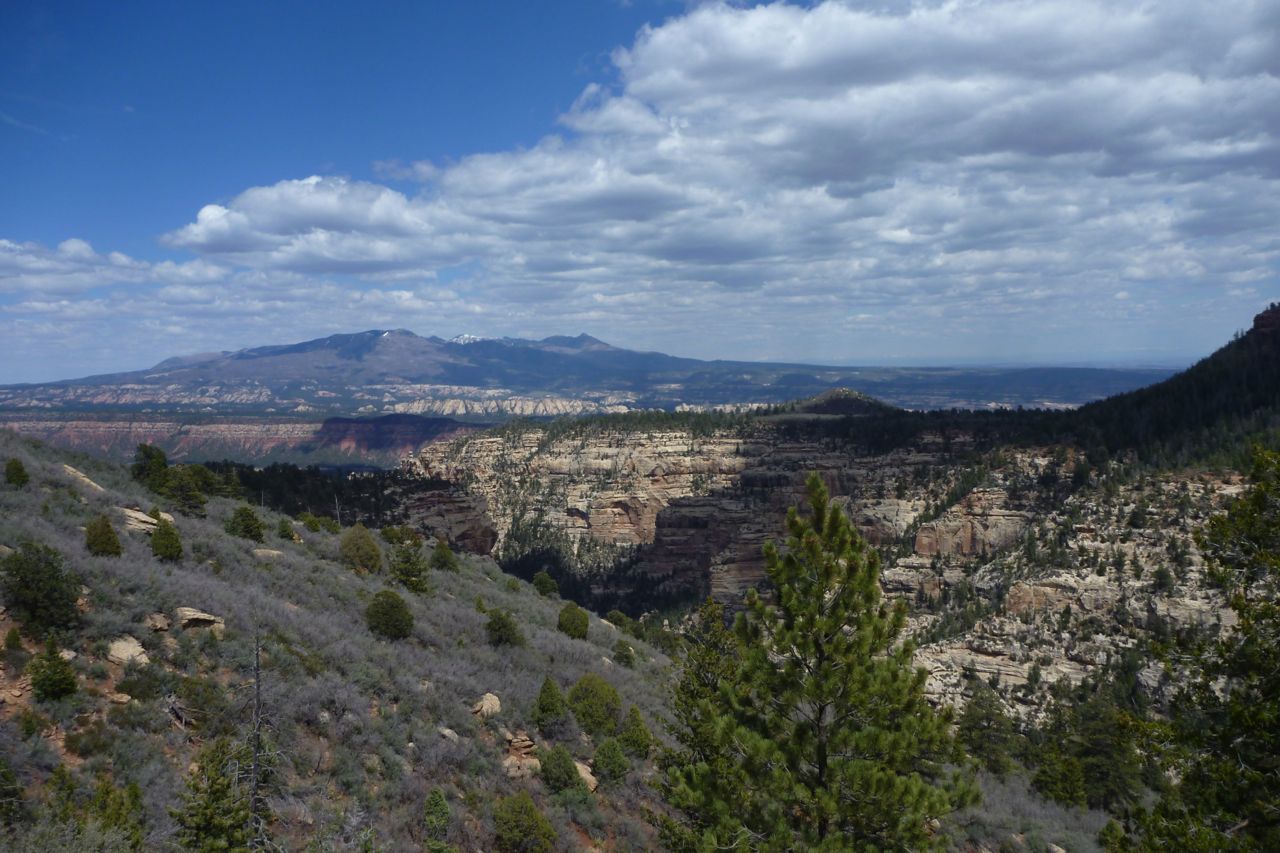
Then up the side of Stevens Canyon, looking back on North Cottonwood Creek.
Great views back down North Cottonwood and the La Sals beyond.
The track gets a little rougher, but in the dry nothing a 12 couldn’t handle.
Was this Mormon Pasture Mountain – or maybe Round Mountain?
Wherever I was, it was less than 2 miles from the BDR at the white arrow.
I’d ridden to a dead-end at a dry cattle tank below a high ridge. The good thing with Benchmarks is they have a lat/long grid with which you can plot your exact position off a GPS and work it out from there.
I backtracked to a junction and took the other turn which led to the BDR at Mormon Pasture. Lots of flat grassy camping up here at around 7000′
Abajo Mountains and Elk Ridge Pleased my recce to Mormon Pastures had panned out, next day I headed down to Montecello. The L was a bit more underpowered than normal; old fuel at the Outpost? You never know.
First stop, the Peace Tree Cafe on the north side for a breakfast or two.
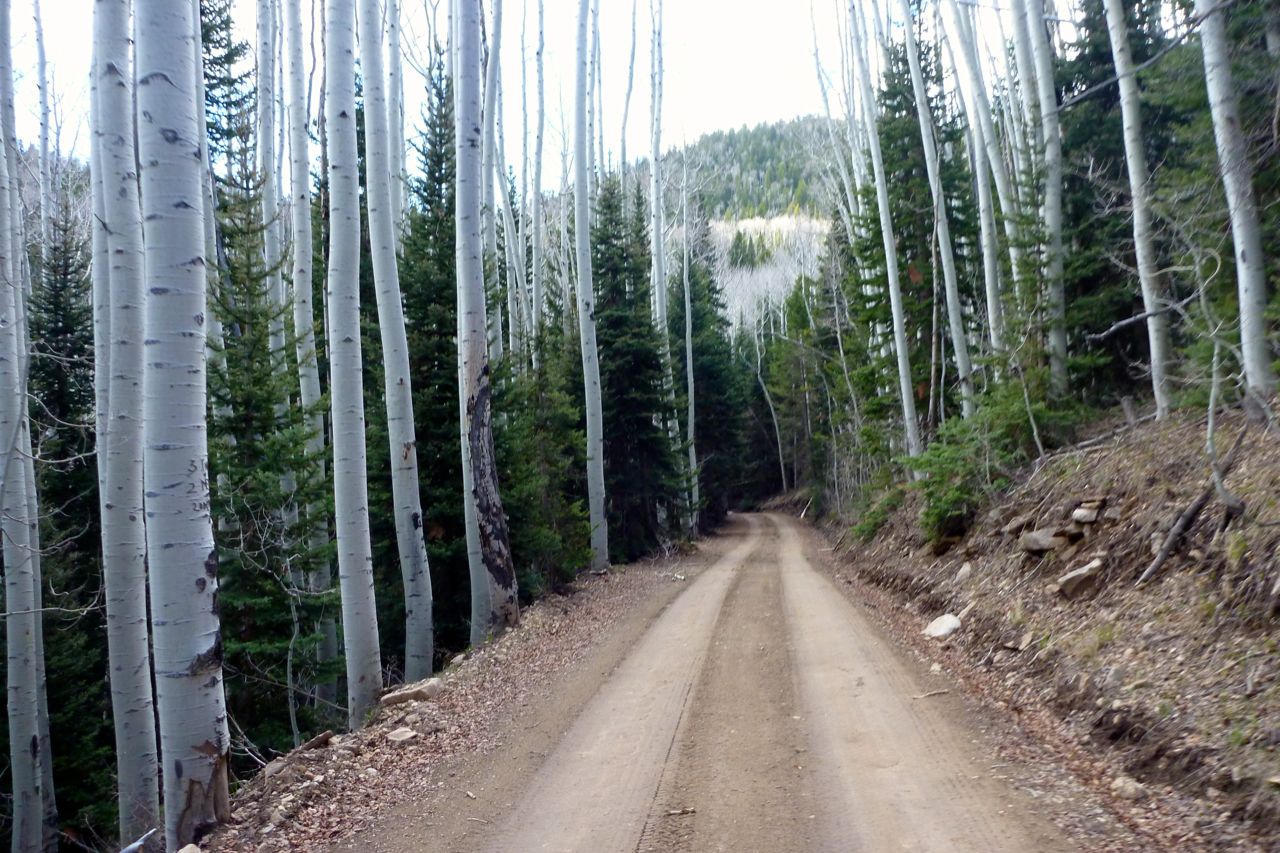
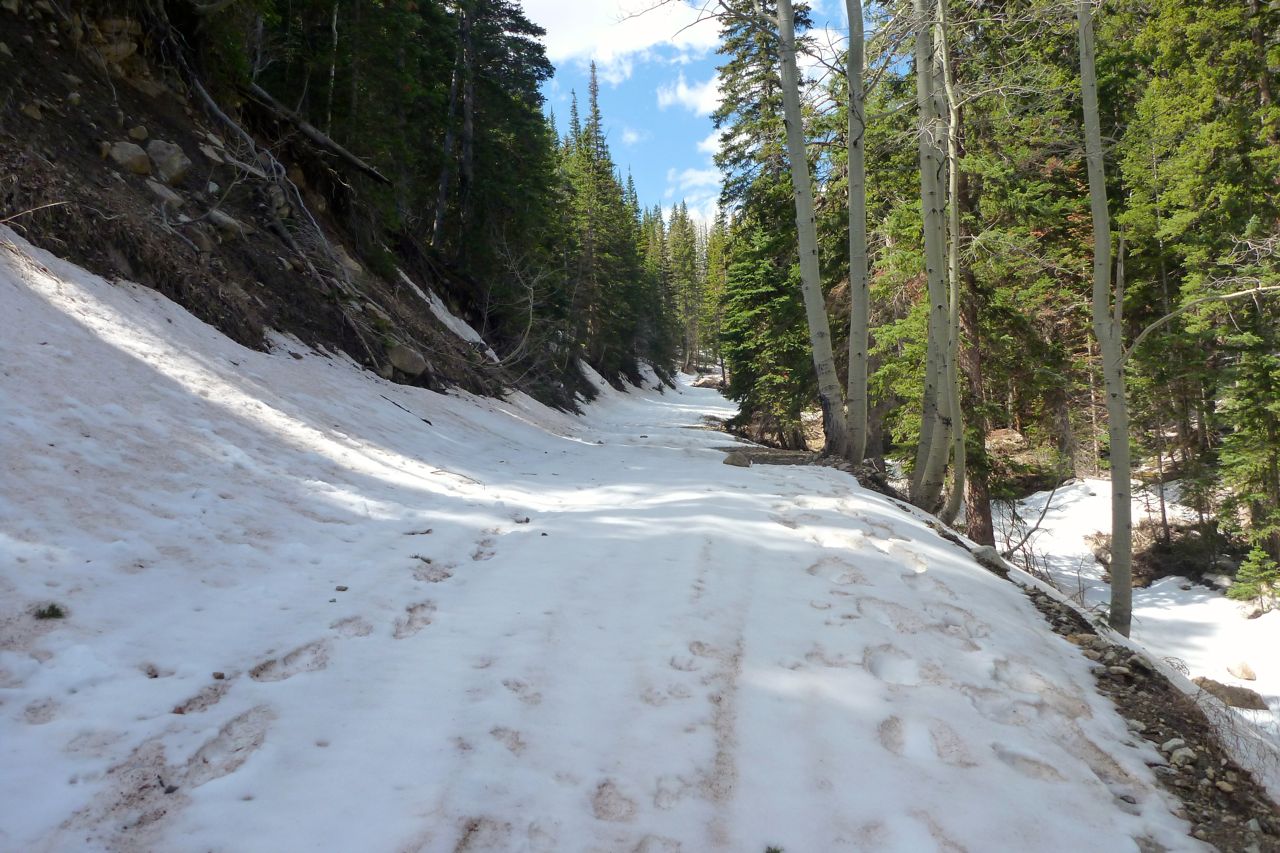
Out of town I turn onto the BDR and am soon up in the birches. The smell reminds me of Alaska and Yukon: rain, mud, insects.
At 9300′ and only 8 miles from town a snow bank lay across a steep slope. I walk on, panting; it clears but the Cooley Pass is another couple of miles at 10,000 or more. There’d be more snow for sure.
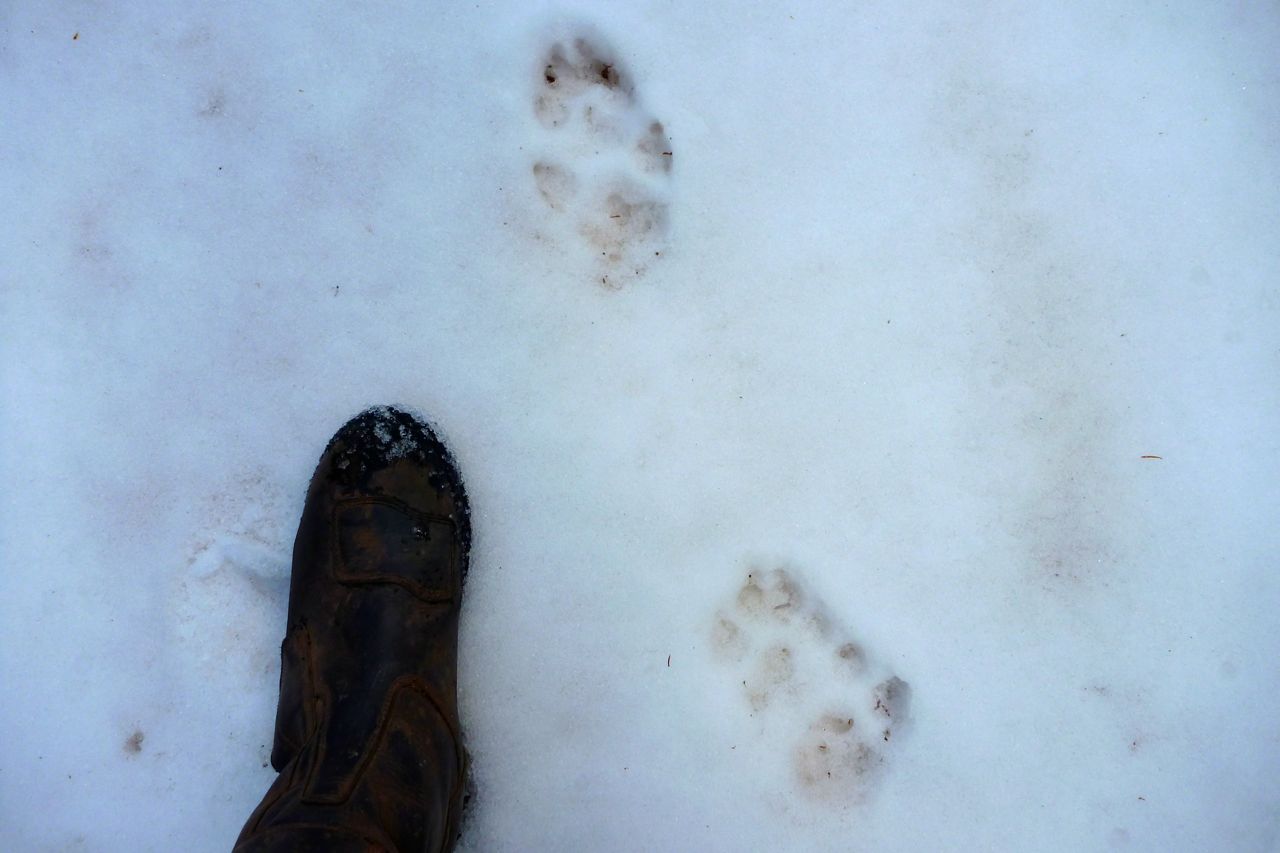
What I thought were small bear tracks. Apparently it’s something else – a big dog?
I decide to turn back. The thought of pushing the revving bike through the snow crust for who knew how long was too much like hard work.
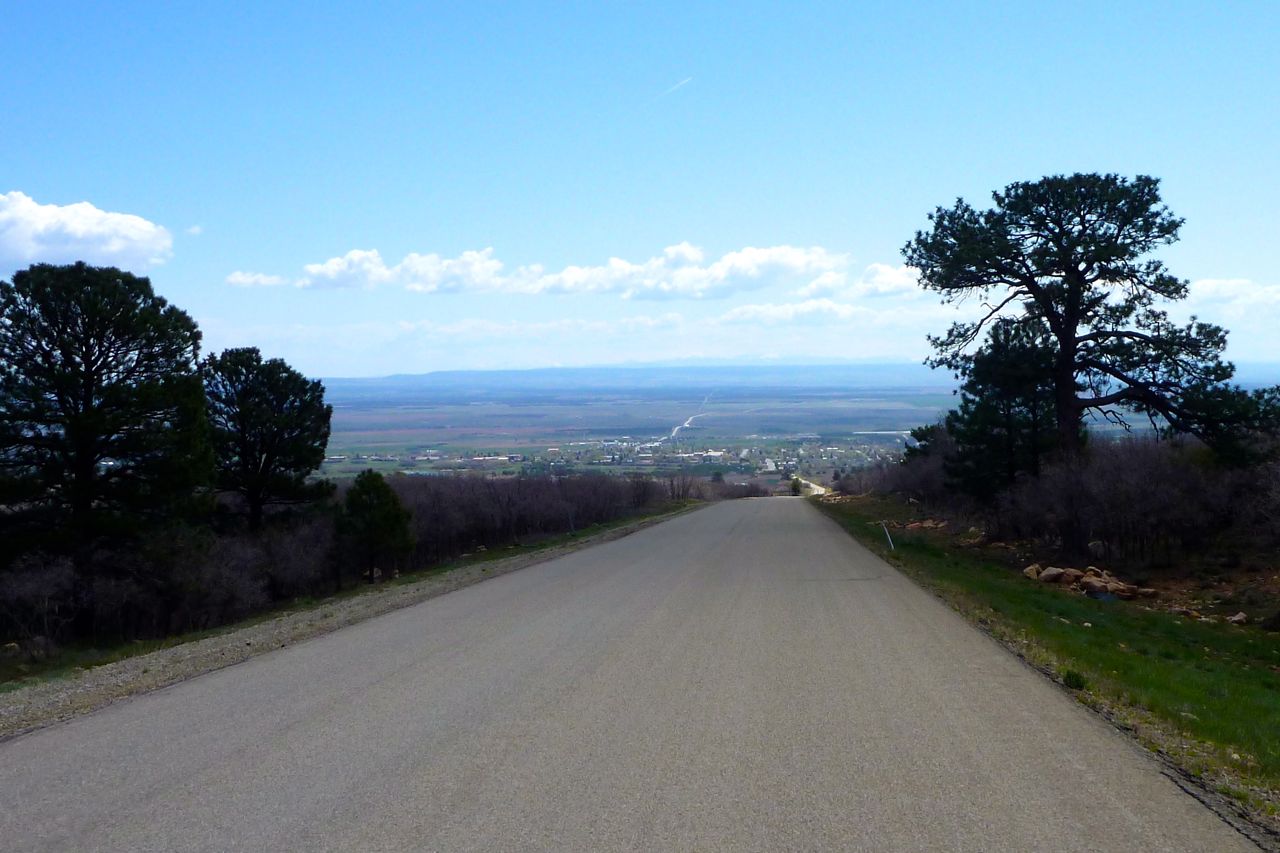
But there was no lower track around the Abajos, so I coast all the way back down to Montecello, take the highway to Blanding, dump the gear at a motel and after some trial and error find the way up to the sunny south side of the mountains to hook up with the BDR again.
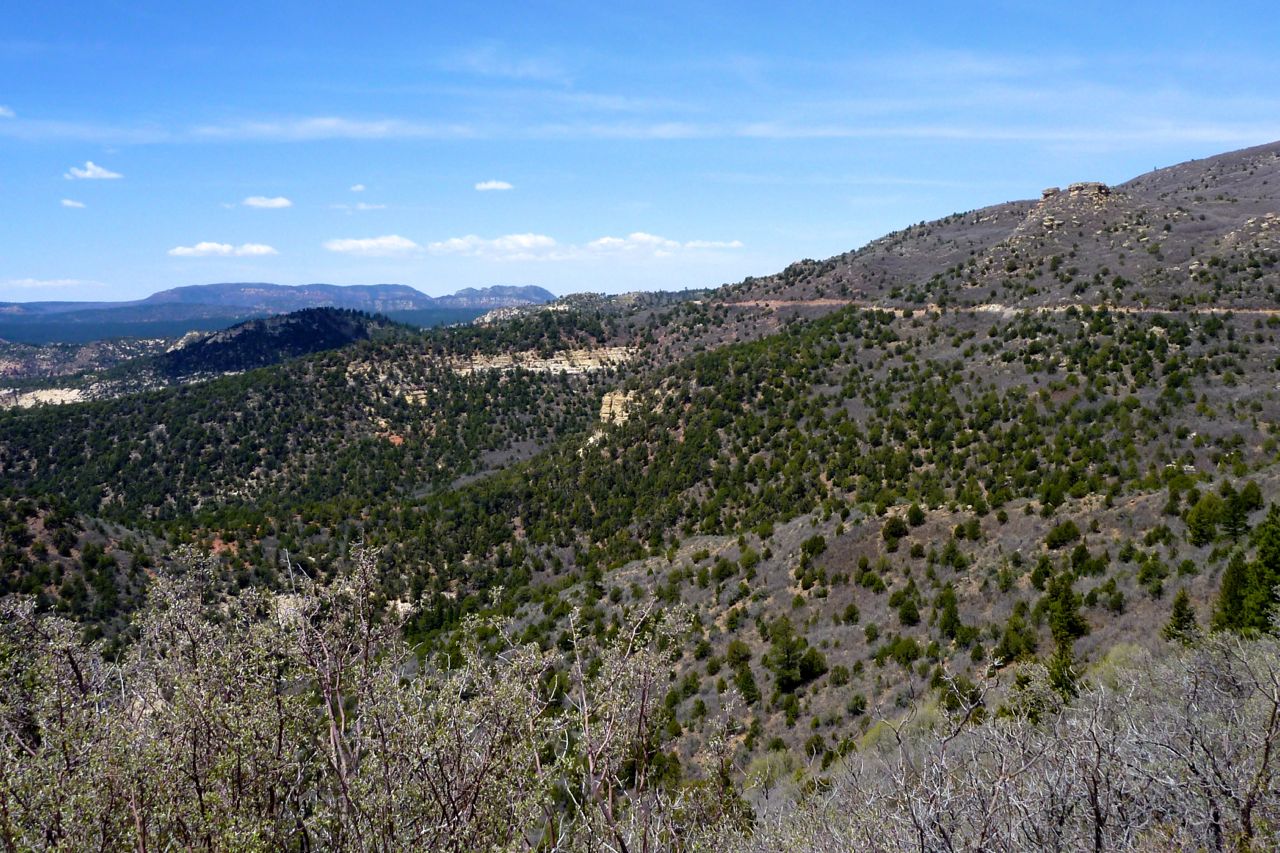
The track curves round a basin towards Elk Ridge in the background, a big loop out of Blanding populated by friendly Utes.
An easy dirt road was drying out, but annoyingly I fall off on some hard ruts, break a mirror and scratch the plastics. There goes the resale value!
I pass the Mormon Pasture junction from yesterday’s ride and here am looking northeast at the Abajeros from Elk Ridge.
After an hour I’ve got over the annoying fall and am back in the groove.
Coming back off Elk Ridge towards Blanding, with the snowy San Juan mountains 120 miles away, behind Durango.
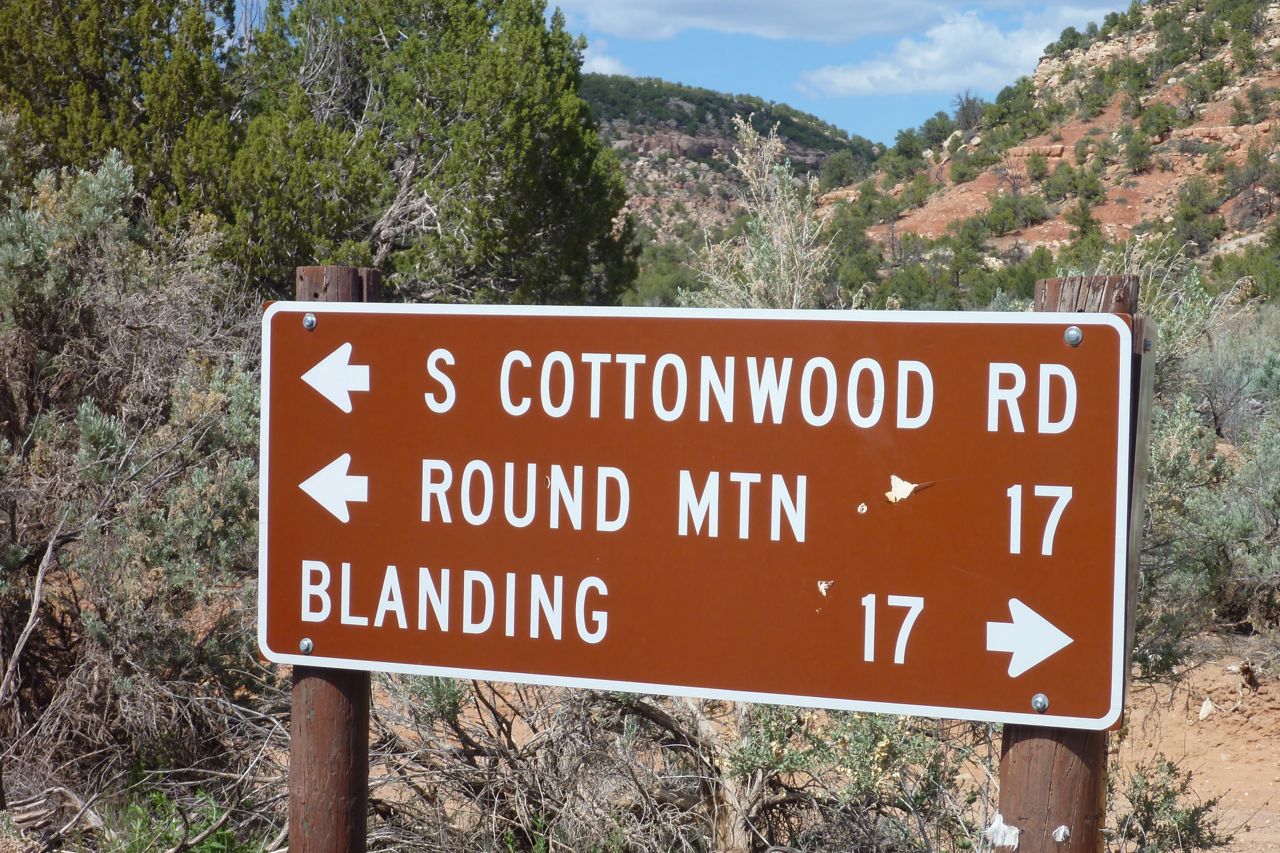
This sign shows that South Cottonwood connects across the basin up to Round Mountain and the Canyonlands turn off.
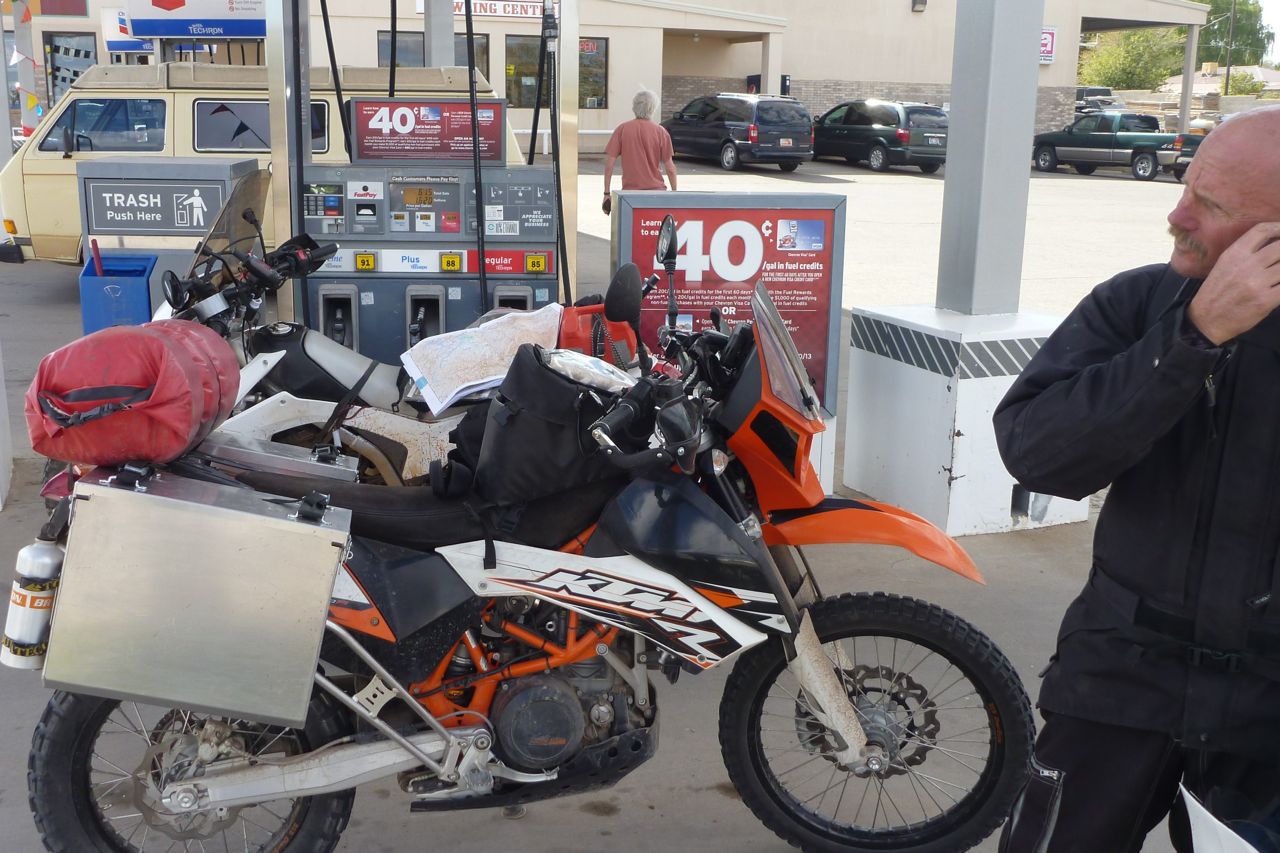
Back at the gas station I am staggered at the range of drinks – thee must be over 100 different types. And there are several gas stations in Blanding. This one also has a bowling alley. I don’t think there are any normal shops, the servo sells it all.
Fuelling up I meet this guy from Reno on a 690. He tried a lot harder than me to cross the Abajeritos that same morning from the south side but gave up too. So I did the right thing. He’s just cramming his earplugs back in as I start to drone on about how marvellously economical the 250 is.
Snow Flat Road to Monument Valley The last section of the BDR was set to be a hot day, with soft sand and bull dust on the menu, but spectacle right up to the AZ finishing line.
I take a parallel route to the BDR along Comb Ridge Road – easy enough, but the sand- and then the rocky rodeo over Snow Flat Road wears me out.
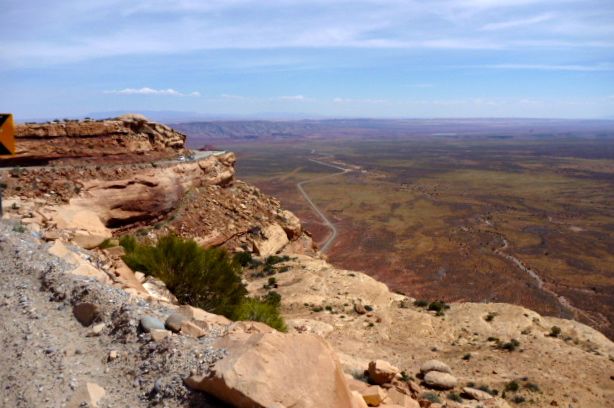
Coasting down Moki Dugway to the baking desert floor below.
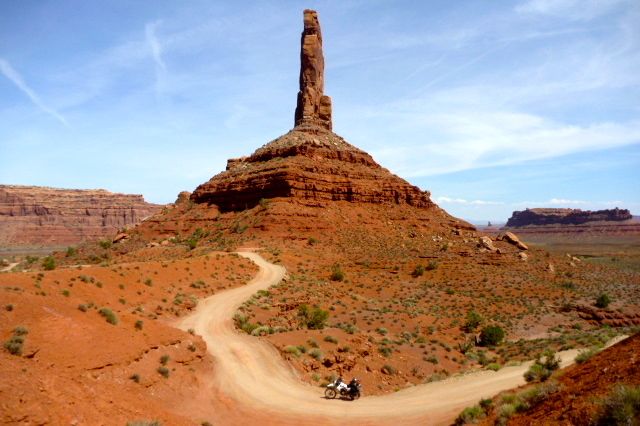
The famous pinnacle bend in the Valley of the Gods. As I leave I recall it featured in an earlier edition of AMH by Tom Grenon.
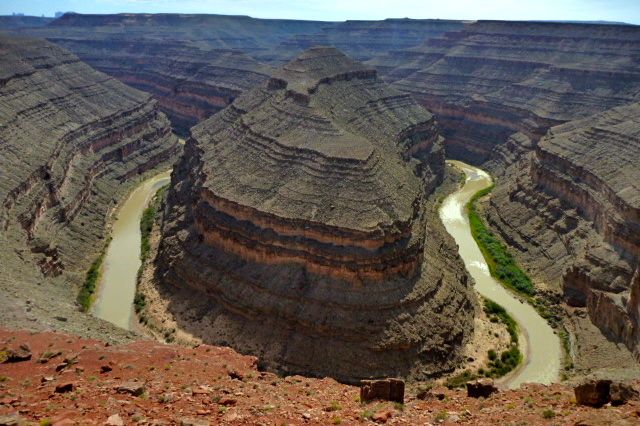
Checking in at Goosenecks – the awe-inspiring sites just keeps on coming.
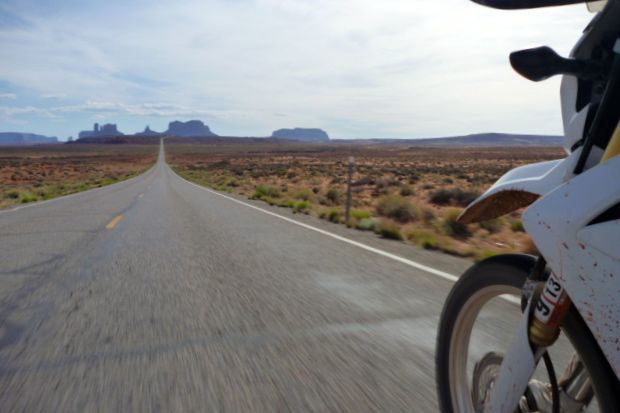
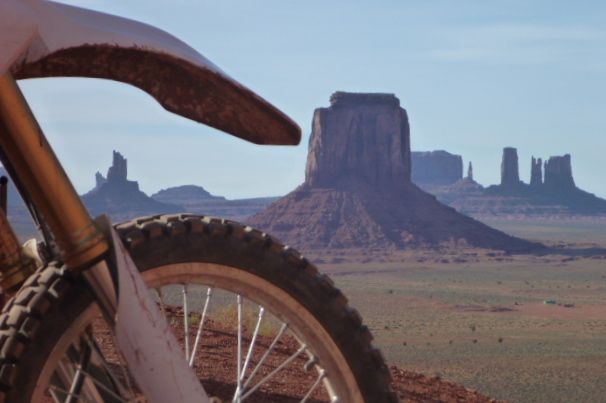
I head on towards the start and my finale of the UTBDR.
One final dirt ride around Monument Valley. At just $5 it’s a bargain and a great way to kick off your UTBDR if heading north
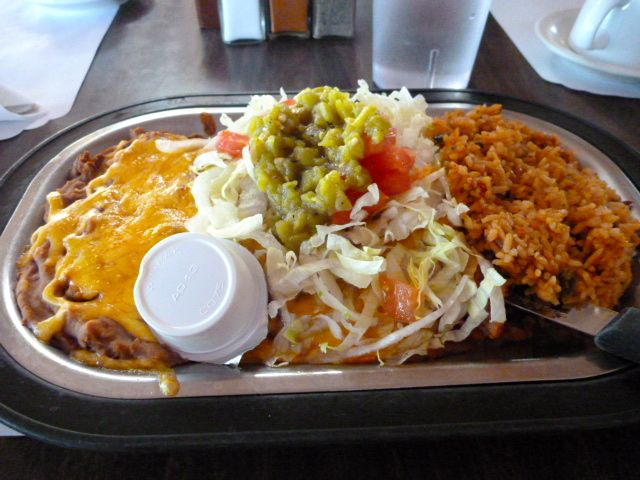
In Kayenta a rare sit down meal at a Navajo resto – but the motel prices here are nuts.
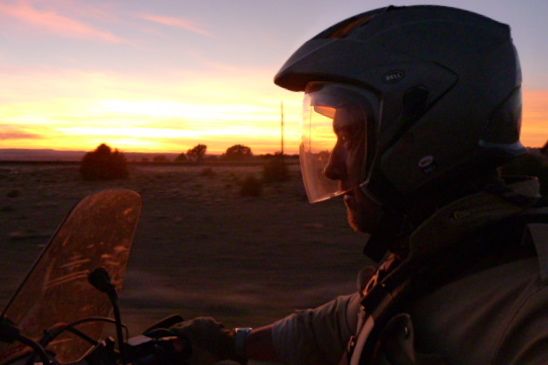
So I ride on and as the sun sets pass through a violent bug storm. I am caked in insect entrails as they splat against me like gravel, but keep riding to Tuba City where I give in and settle on $125 for a motel. Occasionally you get caught out.
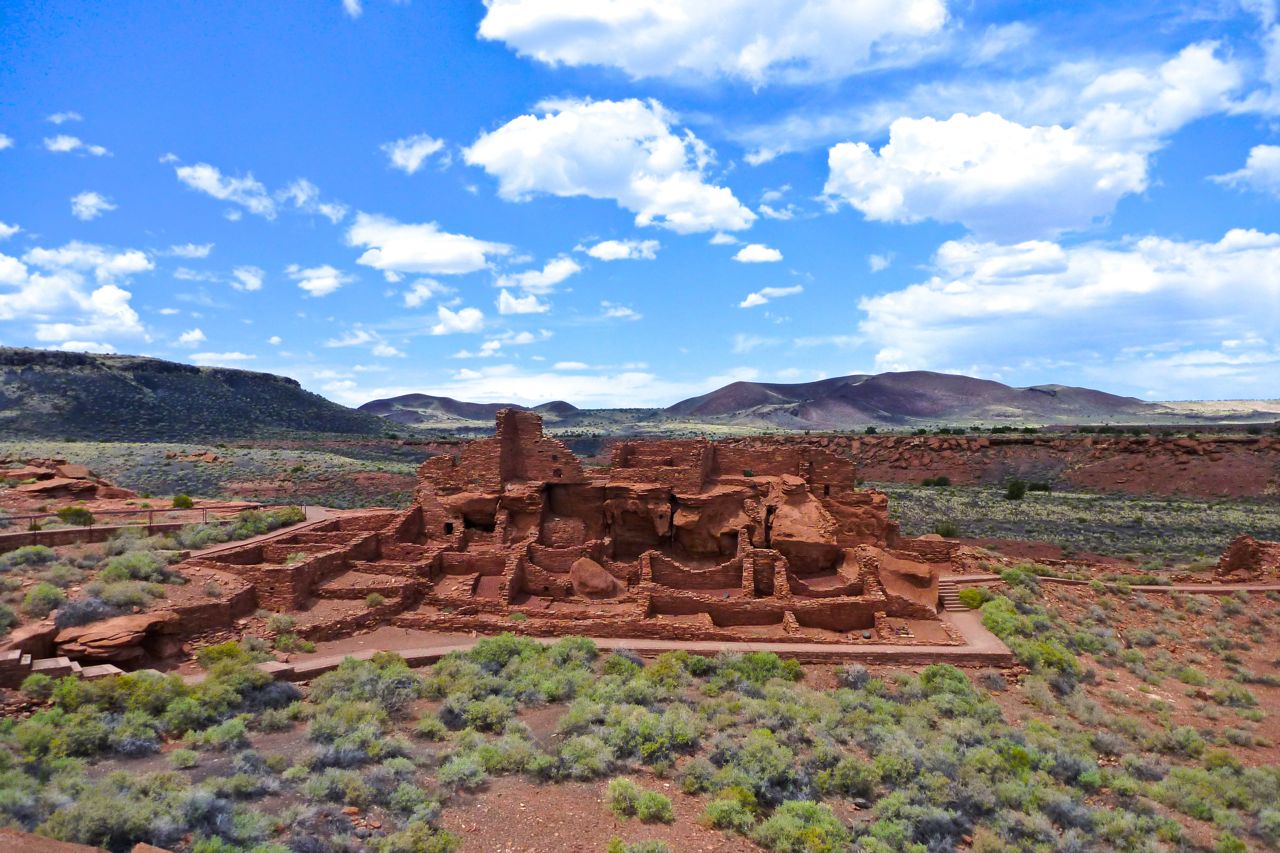
Next day is a short, 70-mile ride to Flag. To string it out I detour via Wupatki ruins and Sunset Crater.
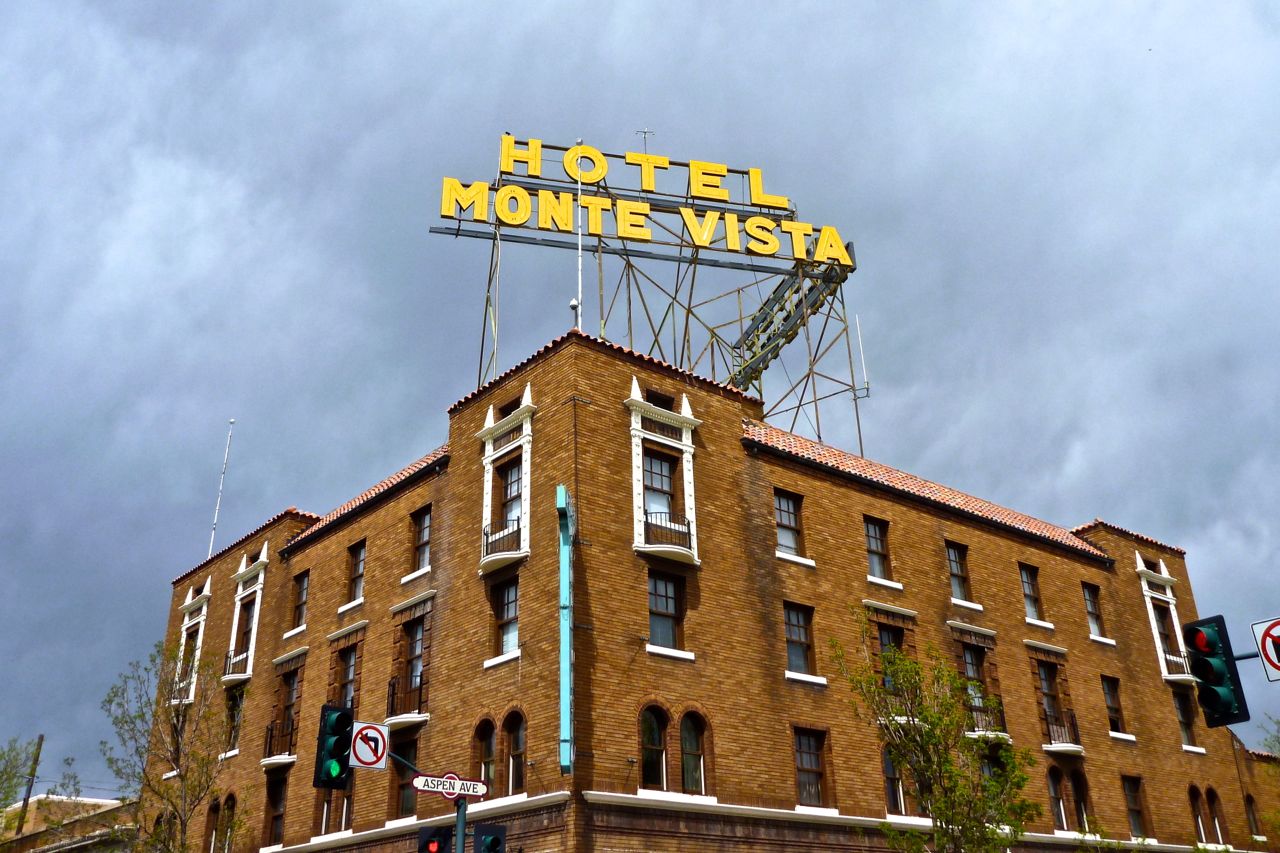
I arrive in Flag but that evening resign myself to dashing back to Tuba to retrieve my laptop’s power lead. I forgot a lot of things in motels. The old brain is going… ‘Day-zee, day-zee… give me your ans er, do…’
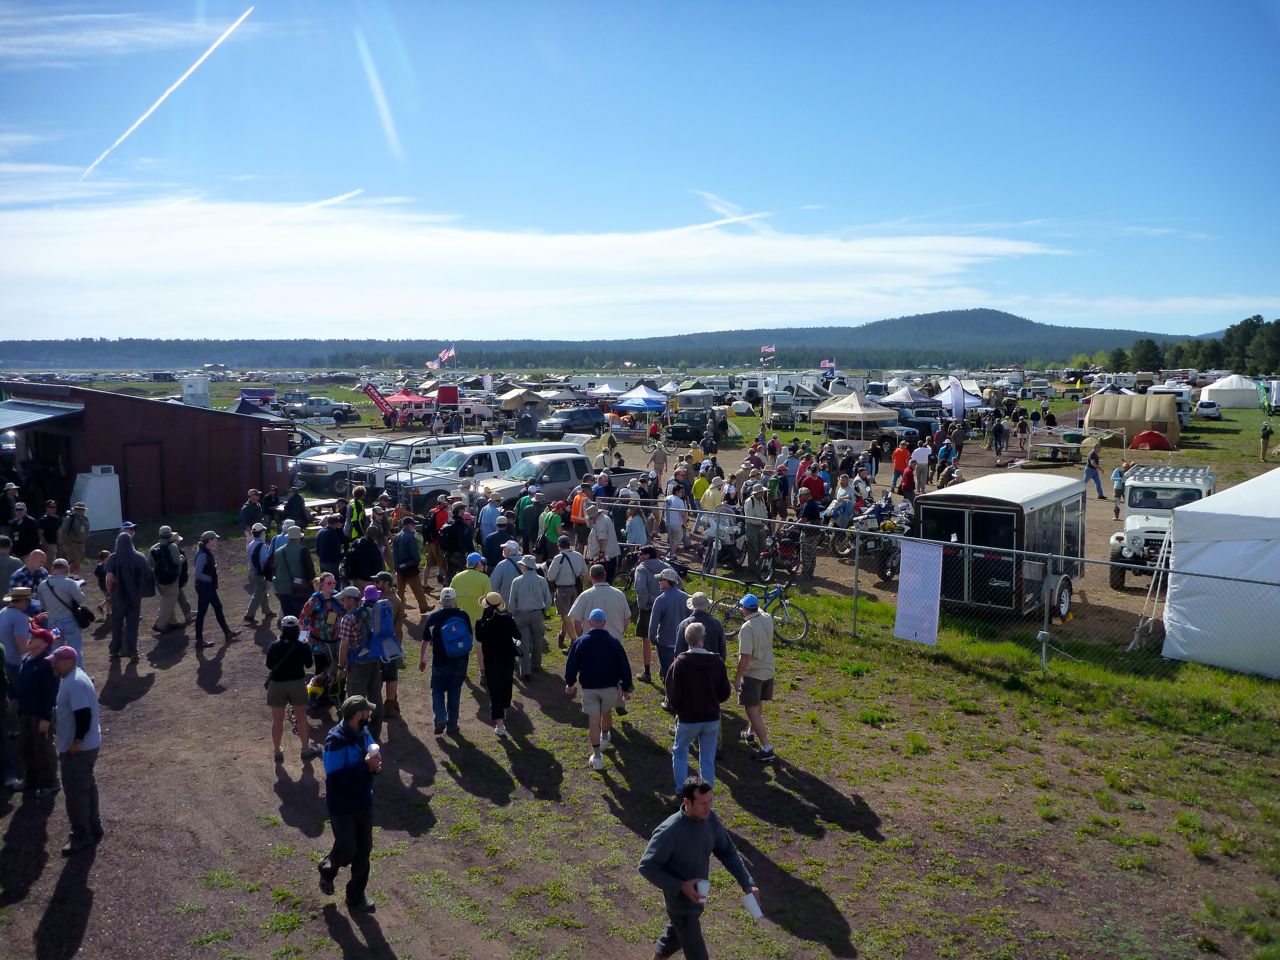
A couple of days later the crowds pour into the Overland Expo near Flagstaff.
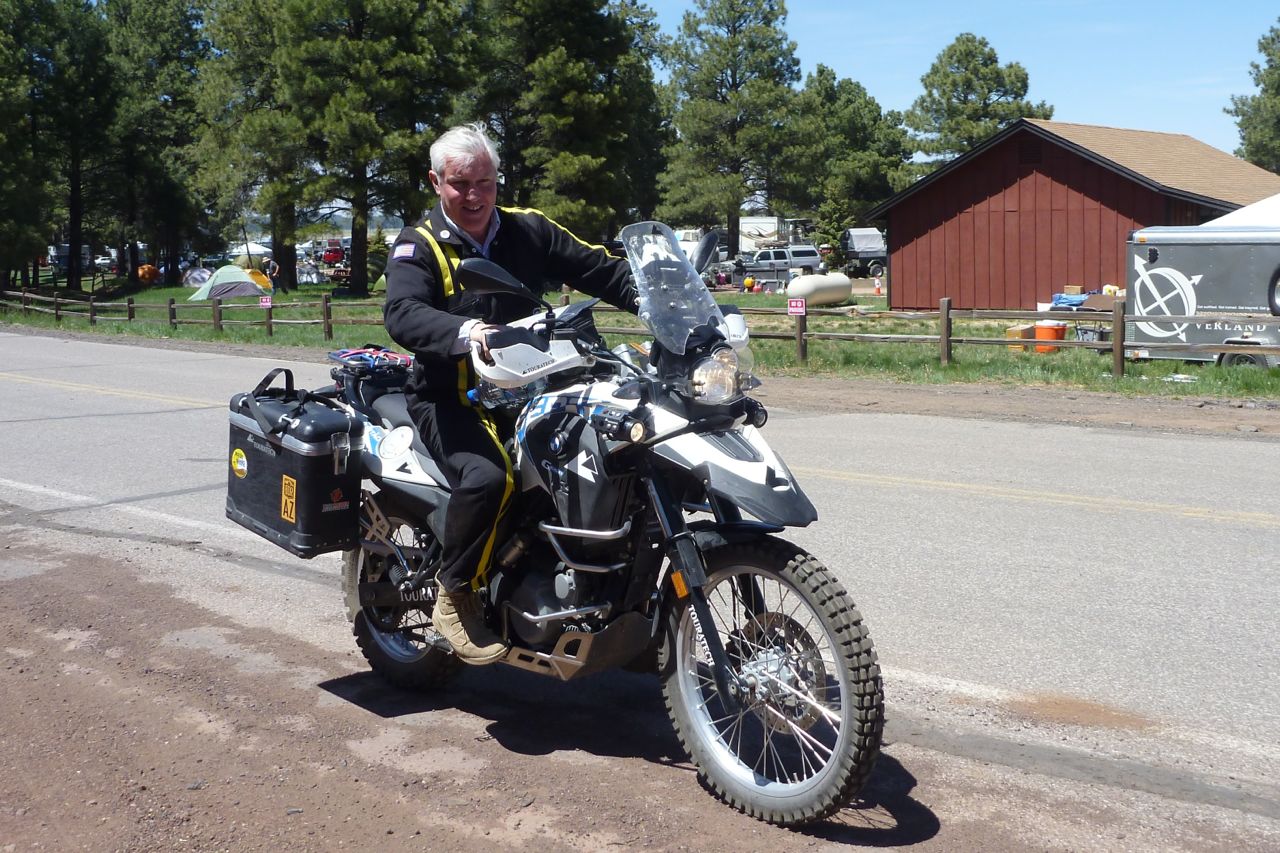
Austin Vince rocks up on a Touratech Sertao. He’d just been recce’ing the forthcoming AZBDR until he did his knee in.
Show shown, talks talked and books sold. Back in Phoenix it’s 99F. After a month of trying I manage to sell the Honda with a total of 4200 miles on the clock for a good price just 12 hours and 22 minutes before my plane departs for London.
My 3200-mile ride through AZ, CA, NV and UT barely scratched the surface. Tons more to see in all directions out here in the fabulous American West.