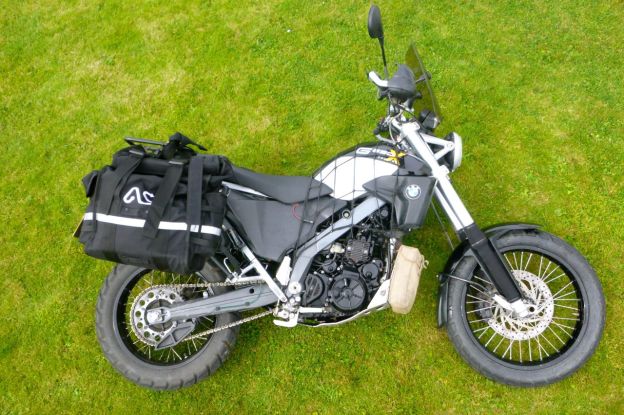
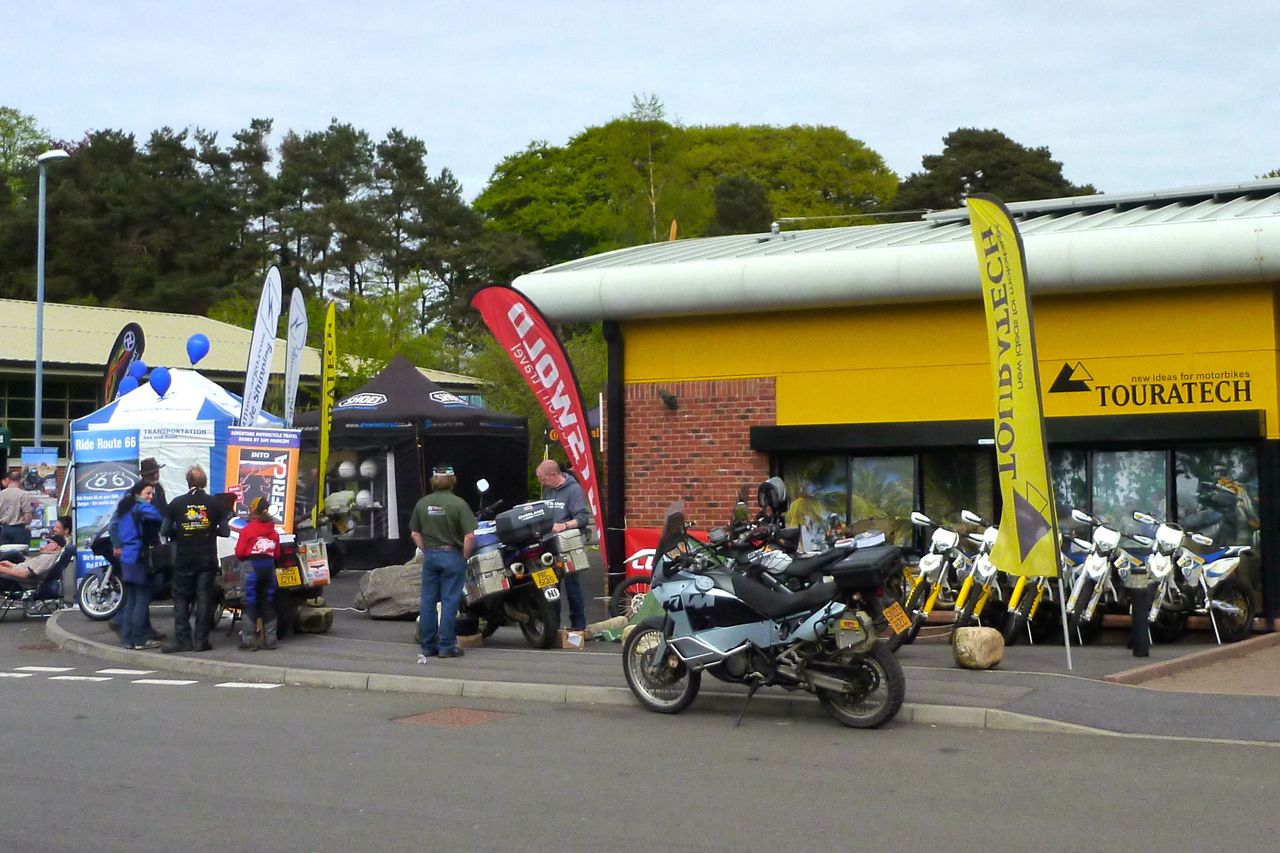
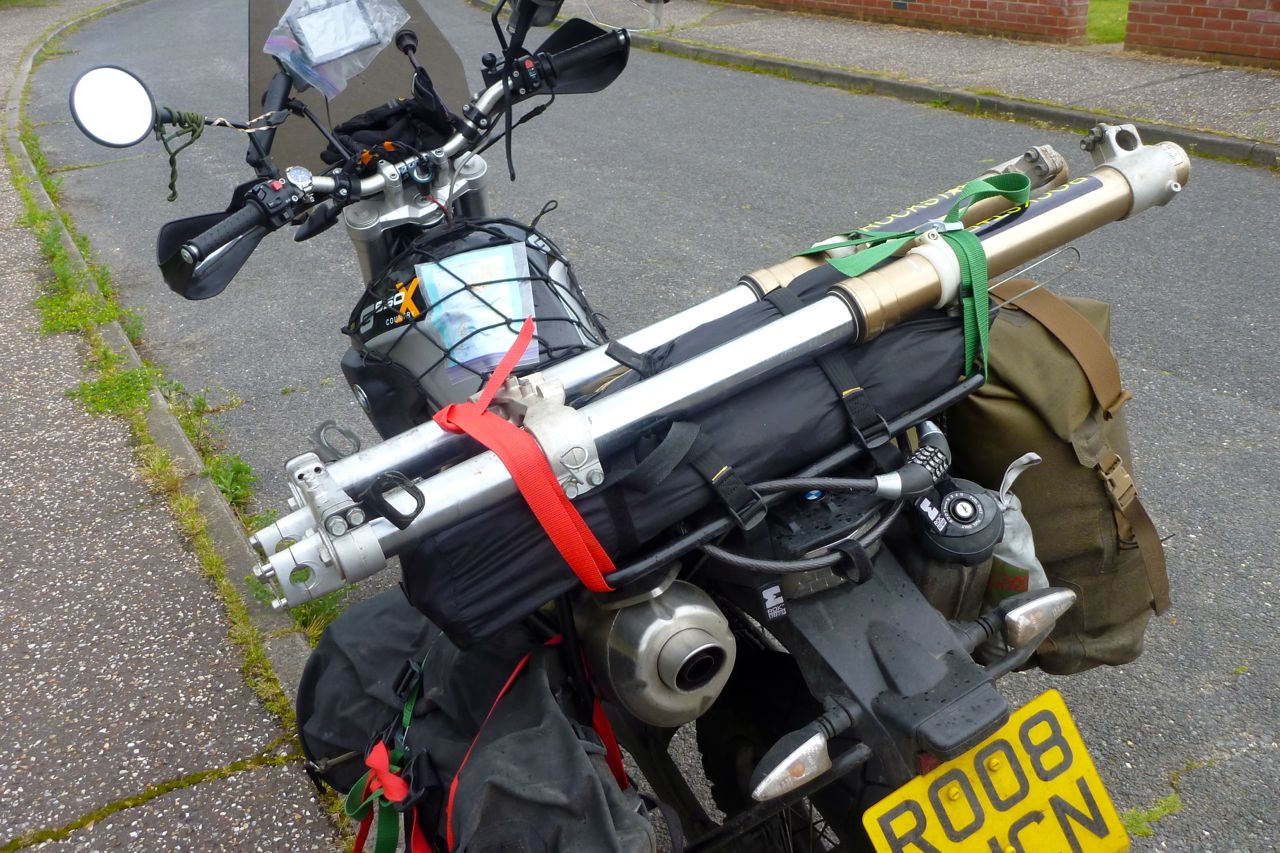
In the last couple of months I’ve racked up a few more thousand miles in the X bike. In May I had a chance to test the new suspension on a heavily loaded ride to the Touratech event in south Wales. A twist on the pre-load knob on the Hyperpro shock dealt with 20kg of books with all the rest. The Adv Spec Magadan IIs I’d bought weren’t in yet so I lashed up some all-weather luggage using Watershed kayak bags of which I’m a big fan.
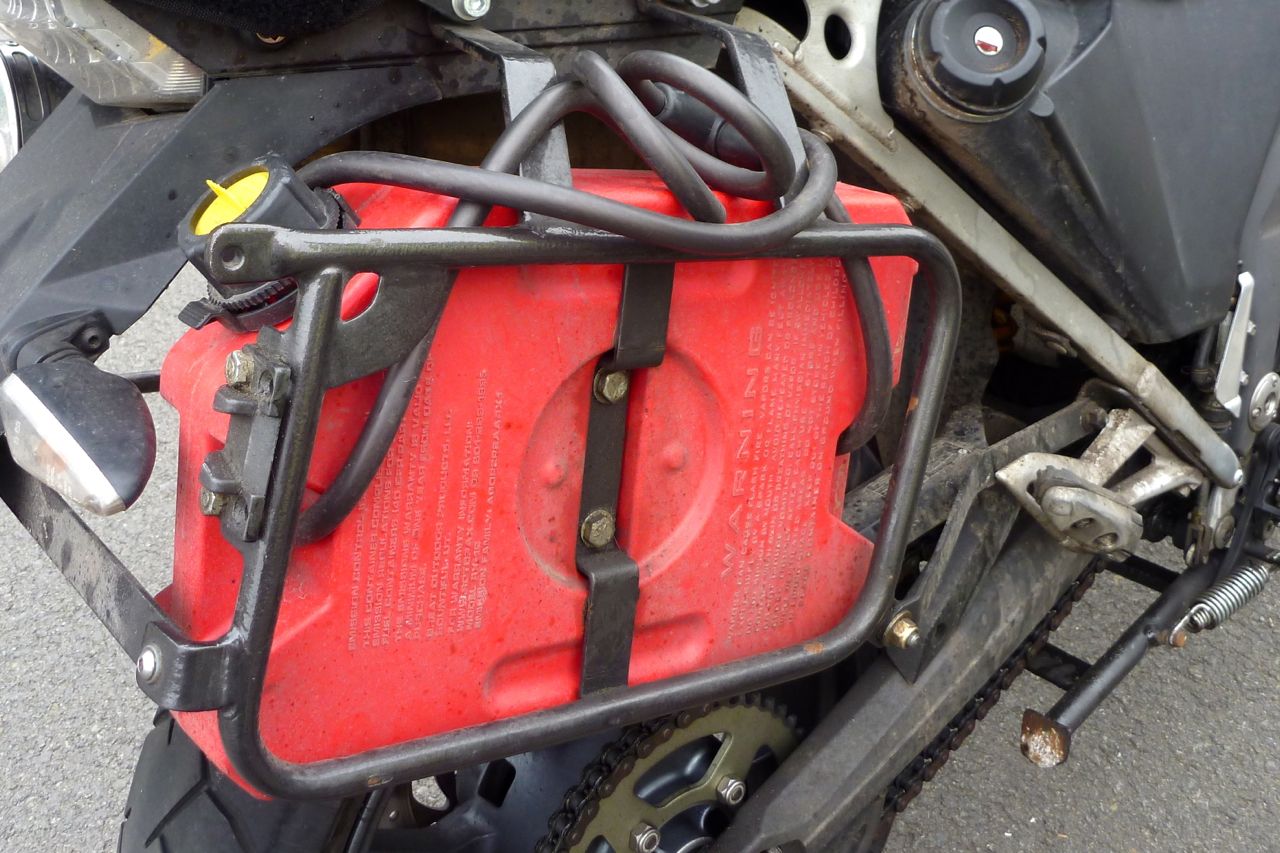
At the rally I met another bloke with an XCo who’d made a neat job of slotting in a Rotopax can. With a siphon, it’s not as handy set up as my Xtank, but it could easily be adapted to work just as seamlessly. This guy also gave me a tip about fitting a Booster plug to richen up the mixture and smooth out the engine a bit. Some days I think it’s something the bike could use.
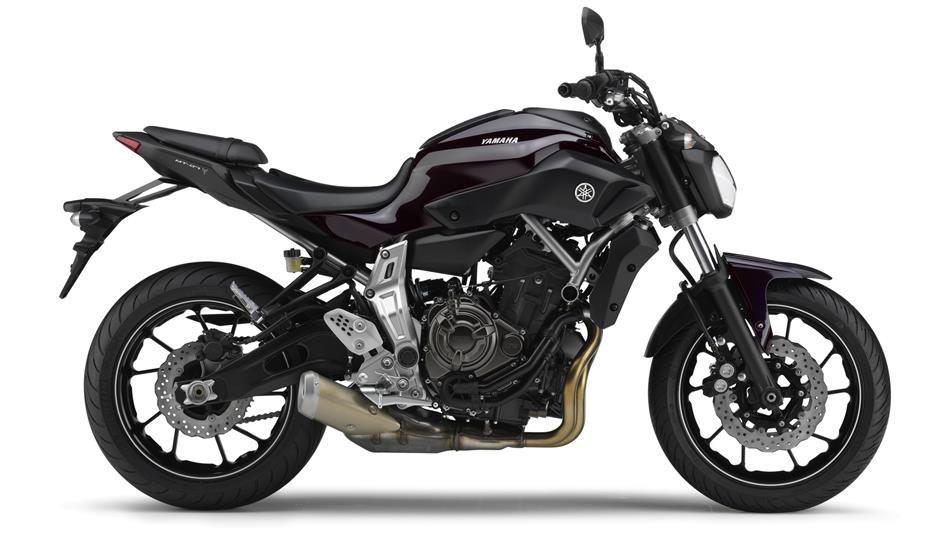
I also had a ride on Nick Plumb’s Super Tenere (left) which had been blinged to within an inch of its life. What a stonking motor that is! The secret: 270° cranks for that lovely V-twin feel. They say the new Tenere may be based on the current Yamaha MT-07, 700cc, 270° twin (right). The MT seems to be going down well with the testers as a return to simple and cheap fun biking. new Tenere or something else, my next bike is going to be a 270.
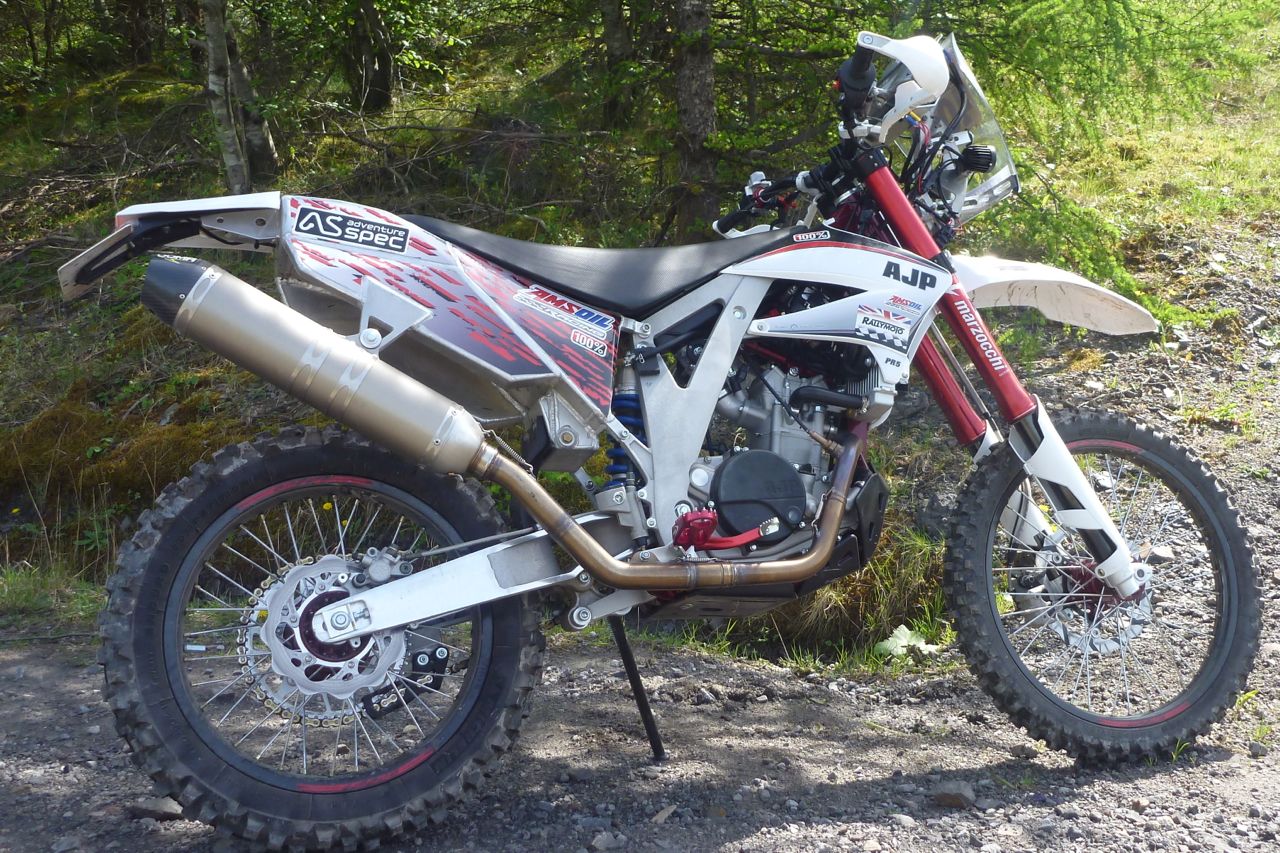
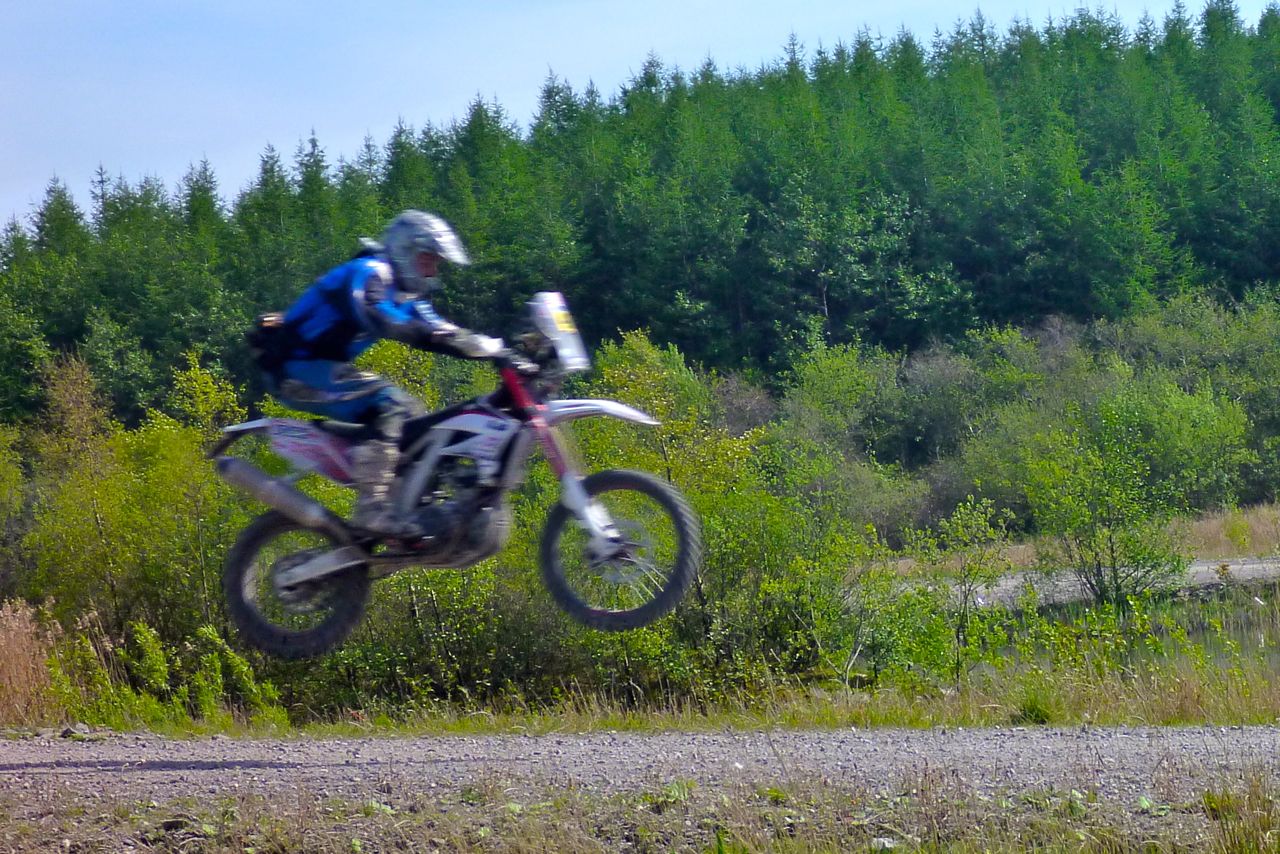
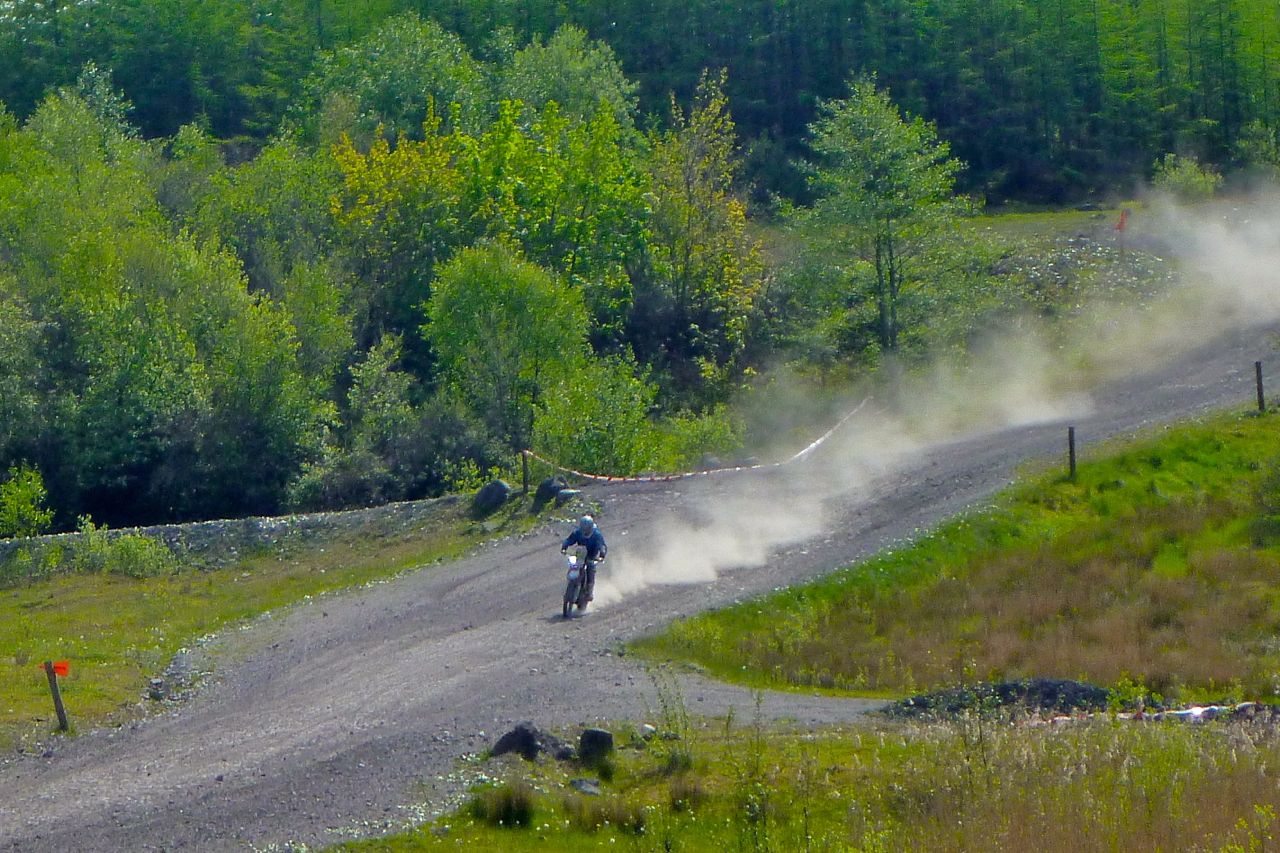
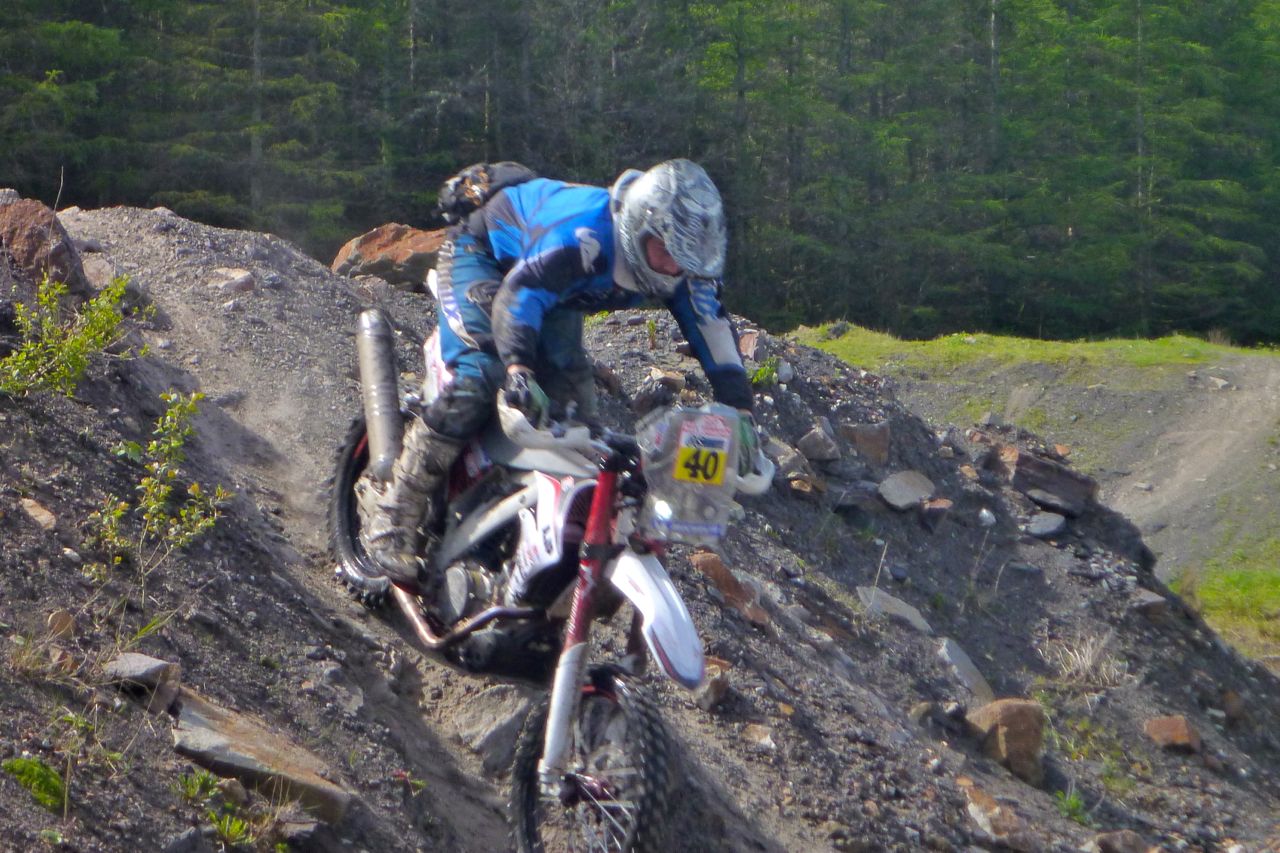
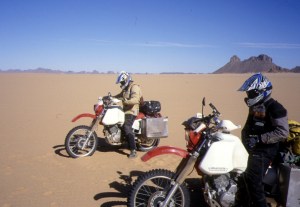
The other bike I tried was some sort of AJP 250 enduro racer (right) with a bloke who interviewed me for TBM. We were up at the BMW off-road course, a brilliant venue with excellent traction and all sots of levels of challenge. That’s not me hooning about in the other pictures, but one of the BMW testers in full neck brace.
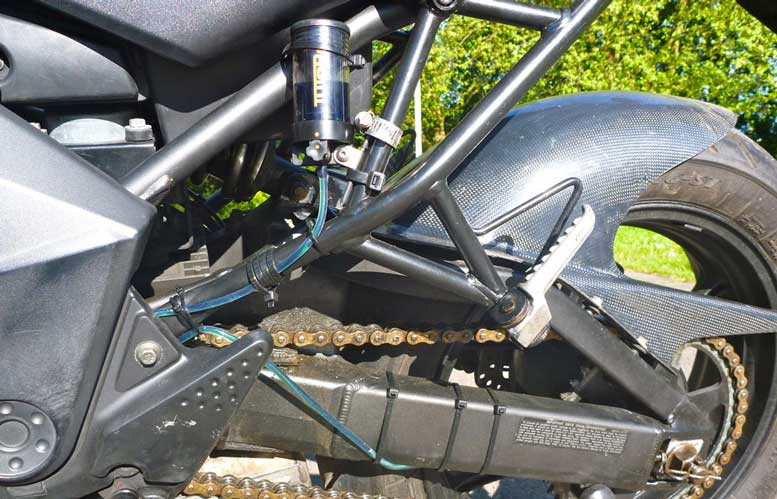
While at Touratech I fitted a Tuturo automatic chain oiler (left). For the full review click the link, short version: for me it the best solution to that necessary task.
After the event I sped off north through Wales trying to give my new springs a work out. The back ends works well, as you’d expect, but the refined front end (new Hyperpro springs and oil, seals and gaiters) has the effect of making the front tyre more sensitive to road irregularities. More information is good I suppose.
Crossing the border and filling up south of Glasgow a day or two later, I pulled away on a lovely smooth engine. I often get this with big singles and can only put it down to varying fuel quality, or perhaps a long motorway blast then cooling off? Either way, I knew the annoying big-single lumpiness would return after more docile riding. Maybe the ECU resets following in town riding? I have a hope that Booster plug will make a difference as this as, along with the horrible 1st to 2nd gear change, it spoils this bike.
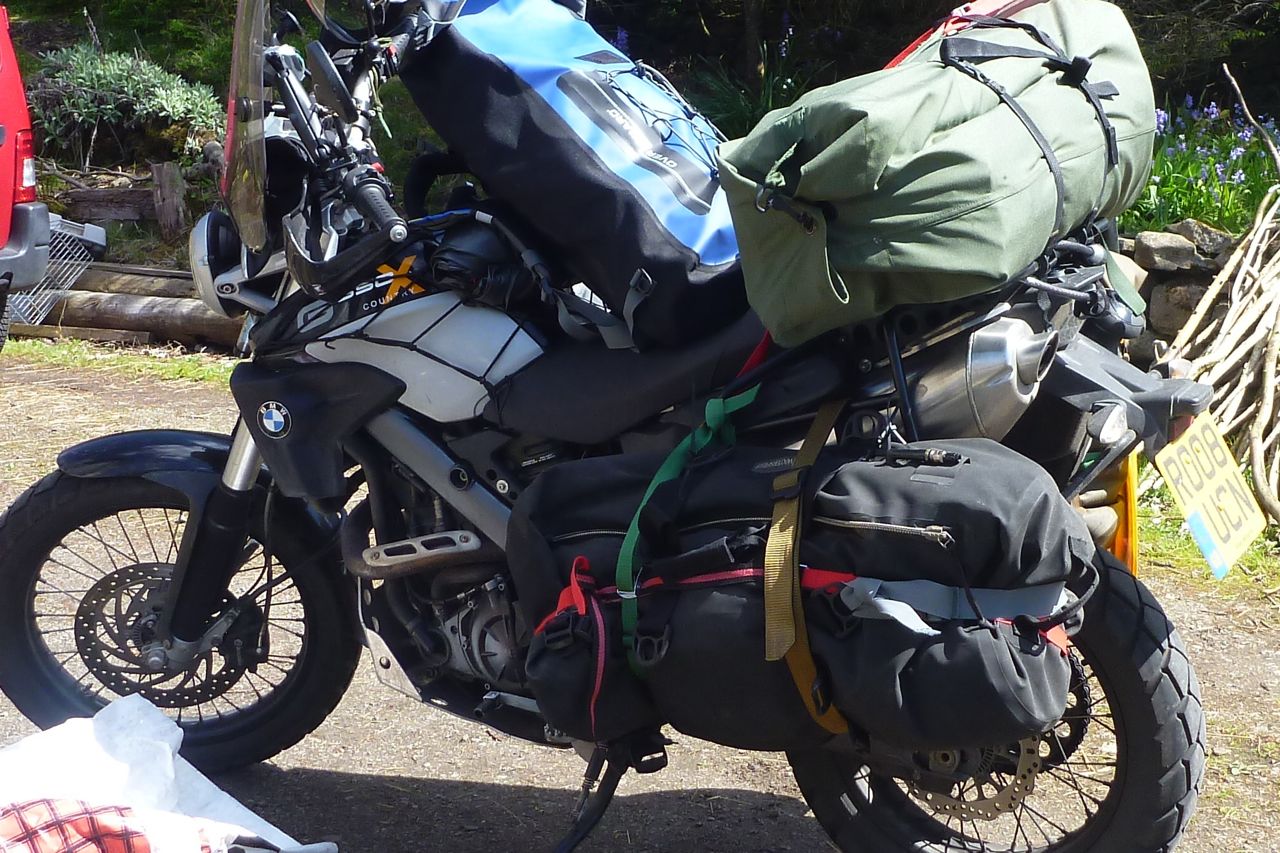
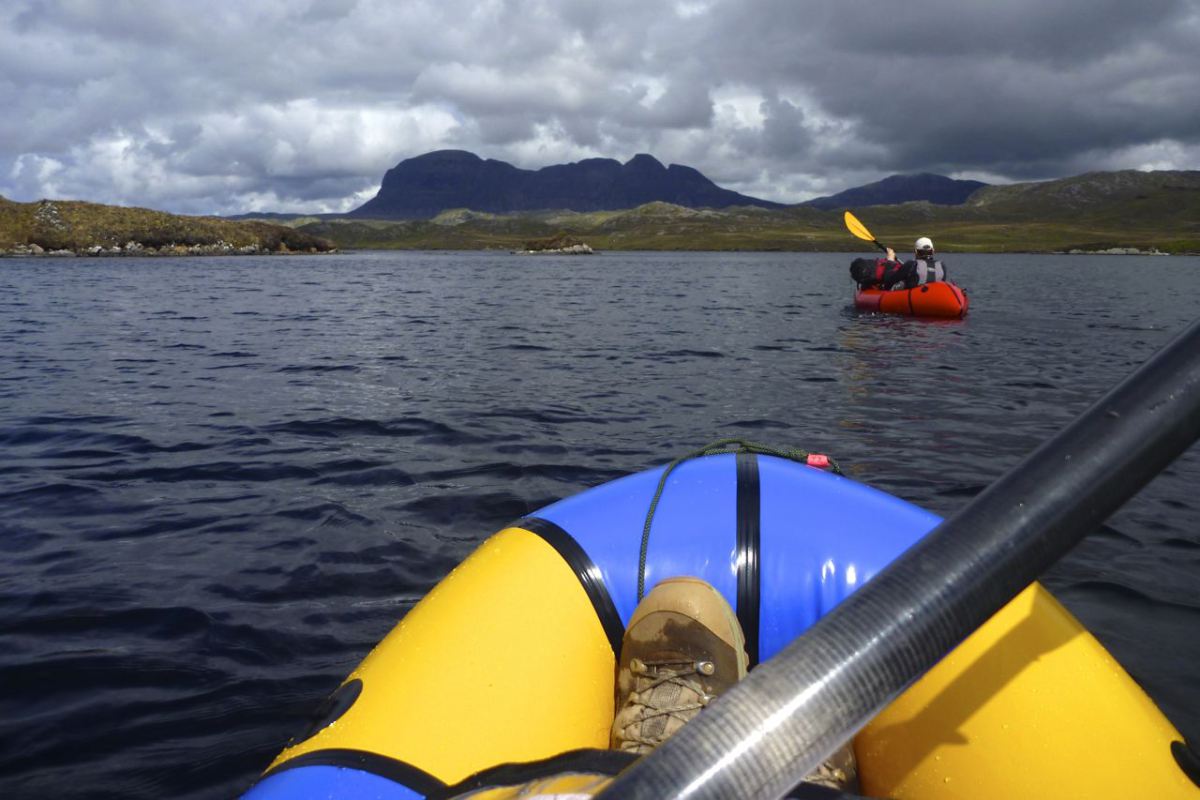
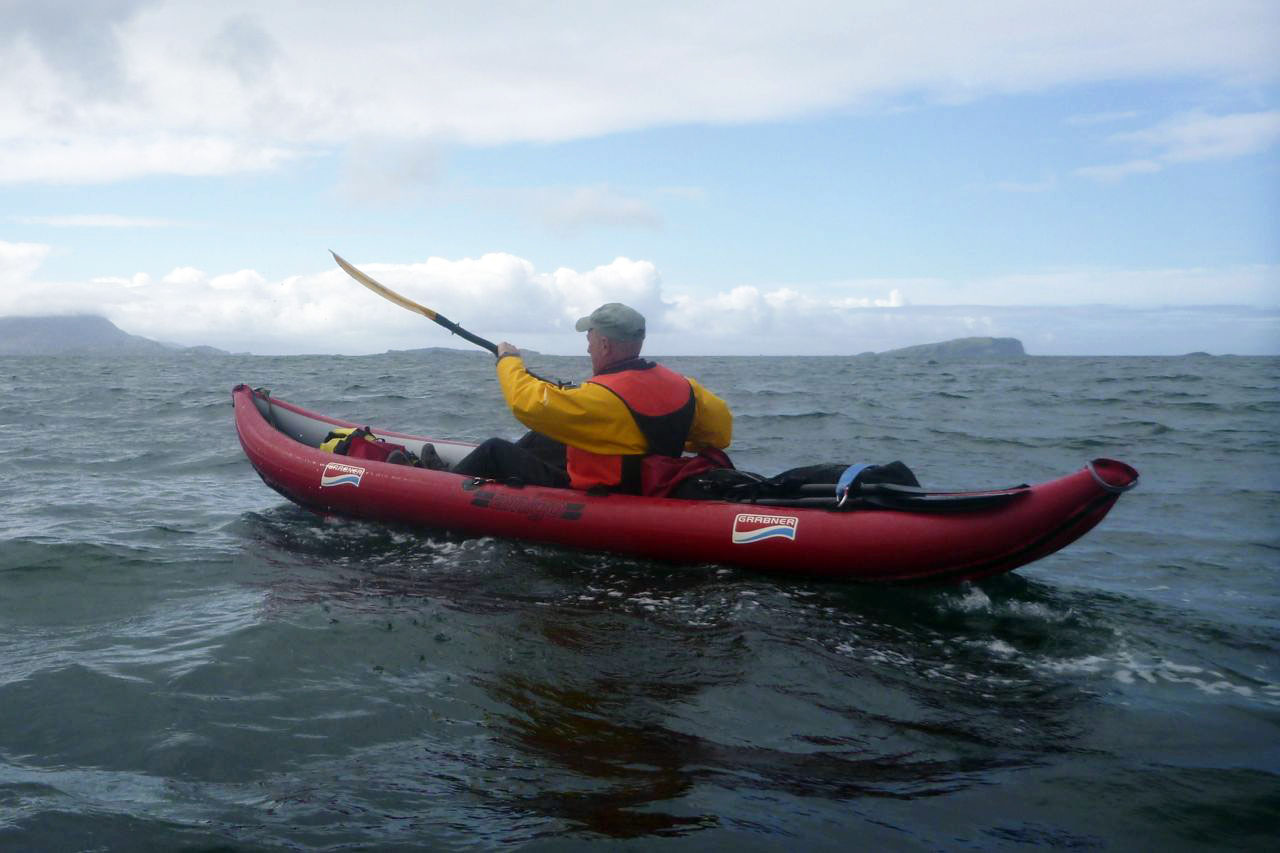
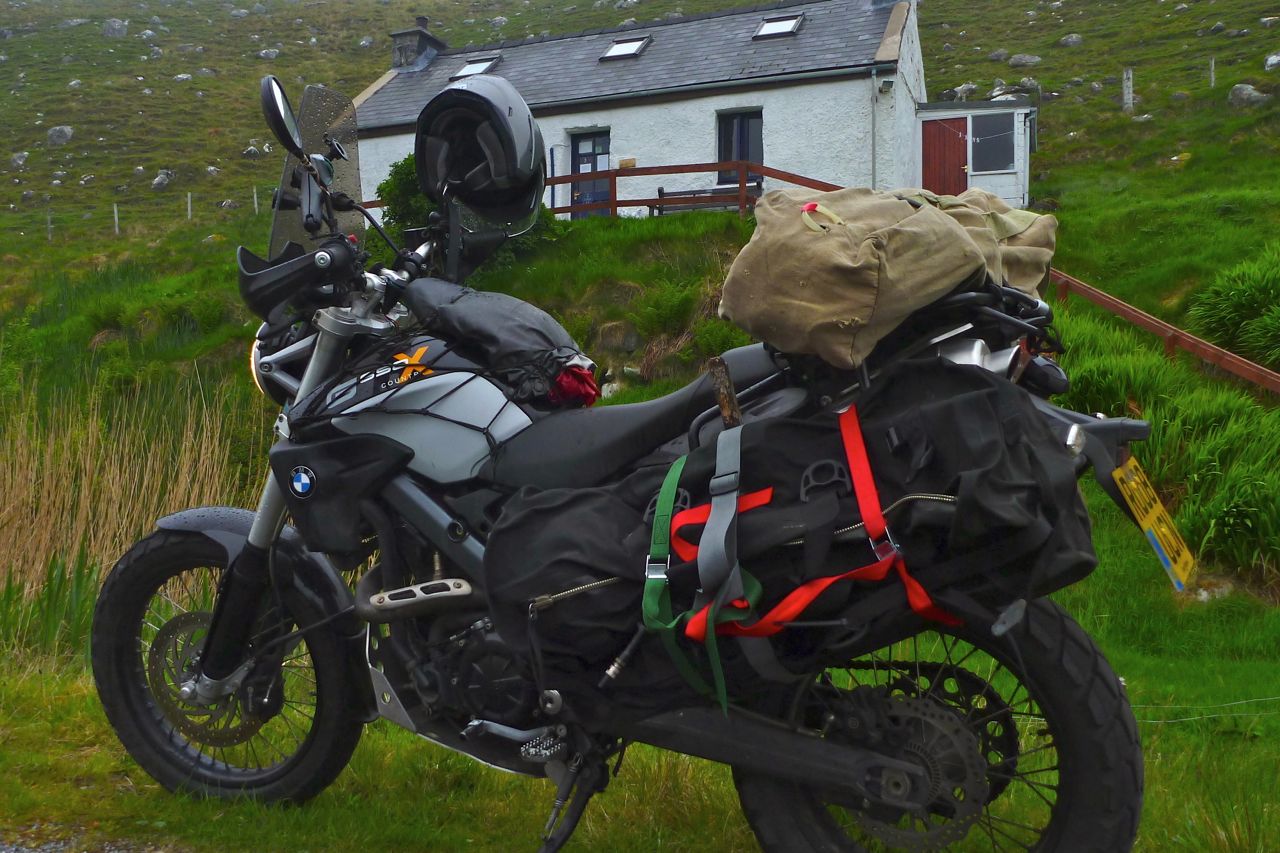
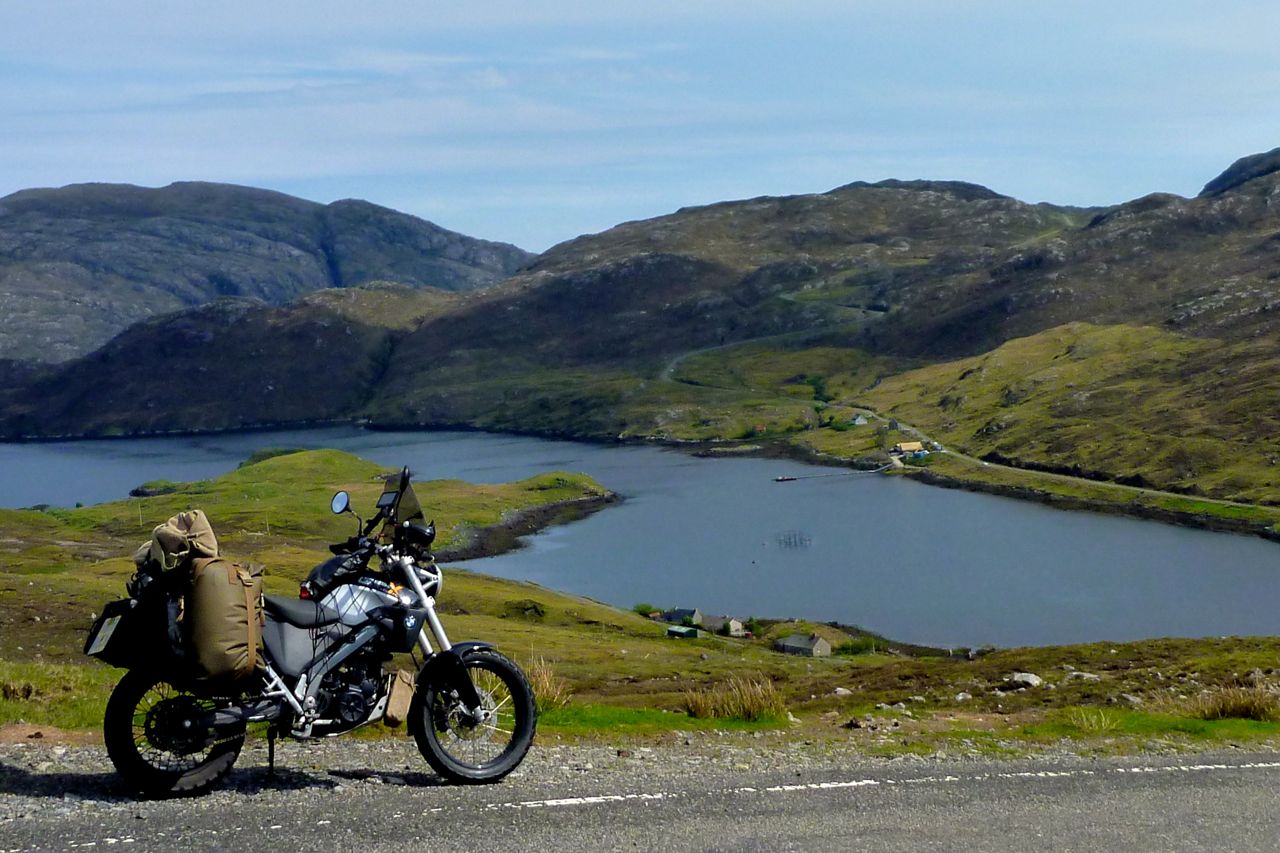
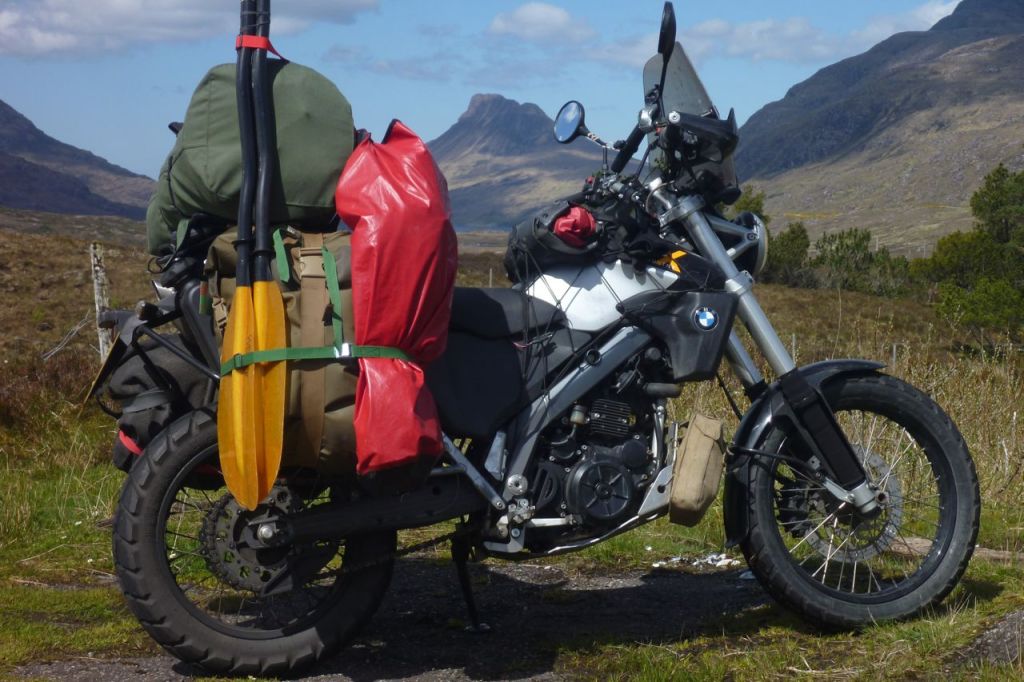
I rode into Oban, parked the bike in a hostel and spent four days kayaking round the Slate Islands with a French mate who’d brought my boat and kit up in his car. When that was done, I piled my 14-foot kayak, packraft, and a whole lot of other stuff (left) on the X machine for a cautious ride up beyond Ullapool. Here I hooked up with Desert Riders Jon for an overnight packraft trek across the lochs of the Assynt. Very nice indeed.
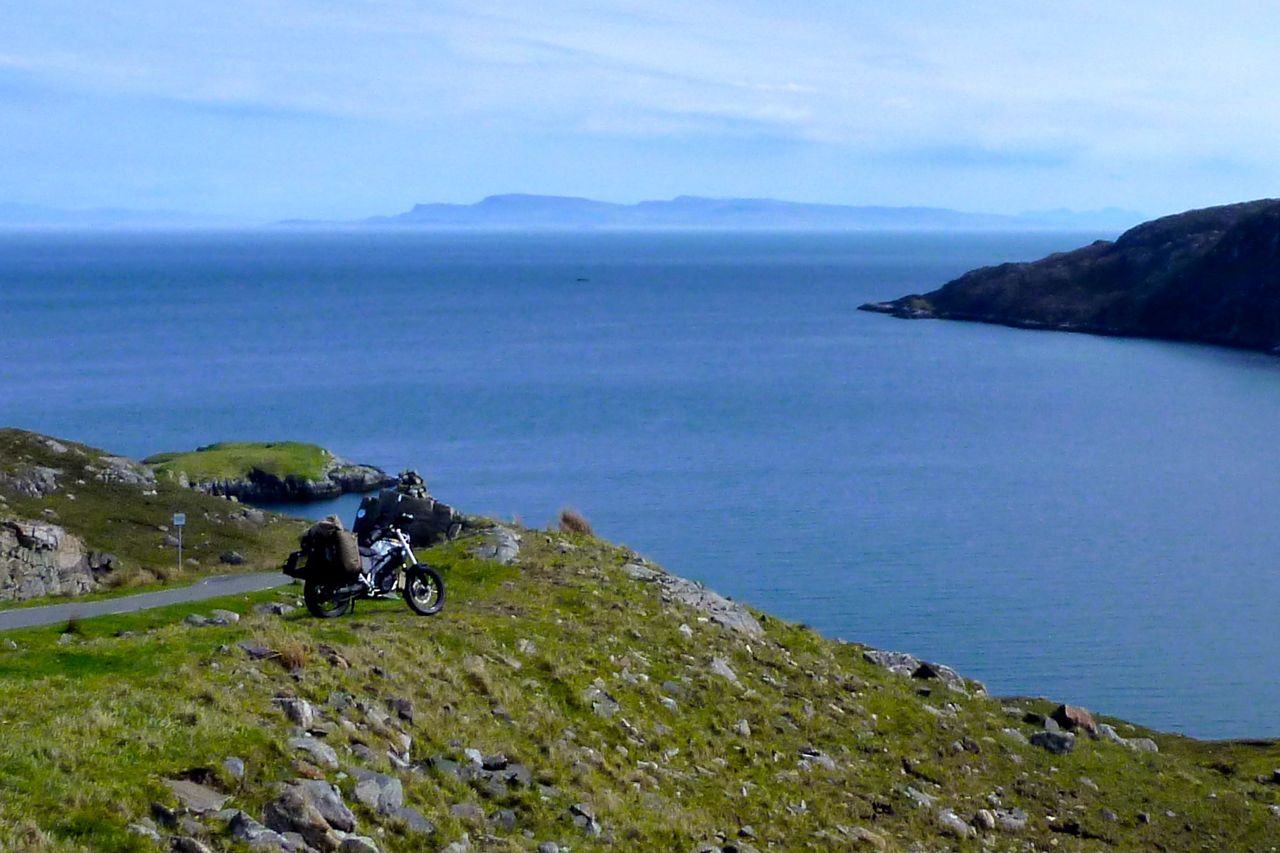
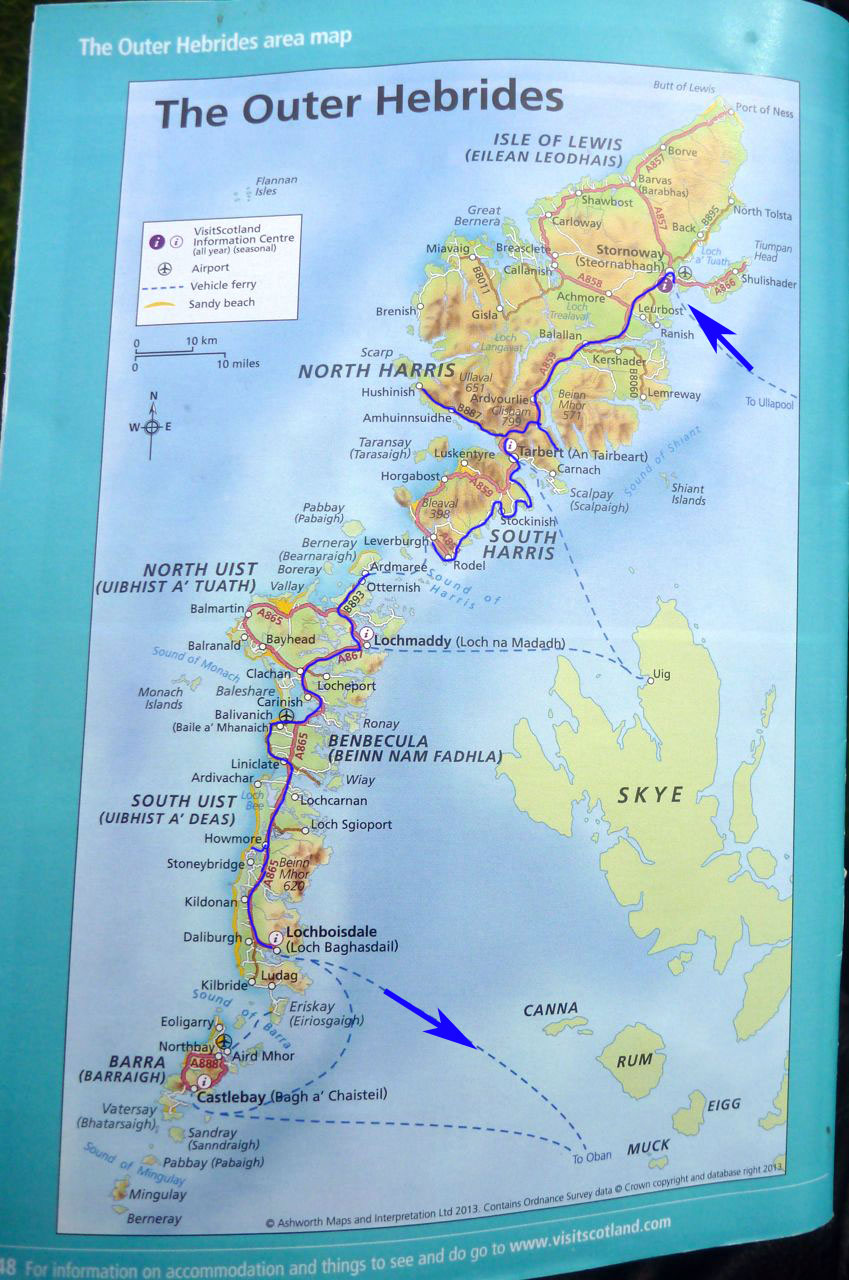
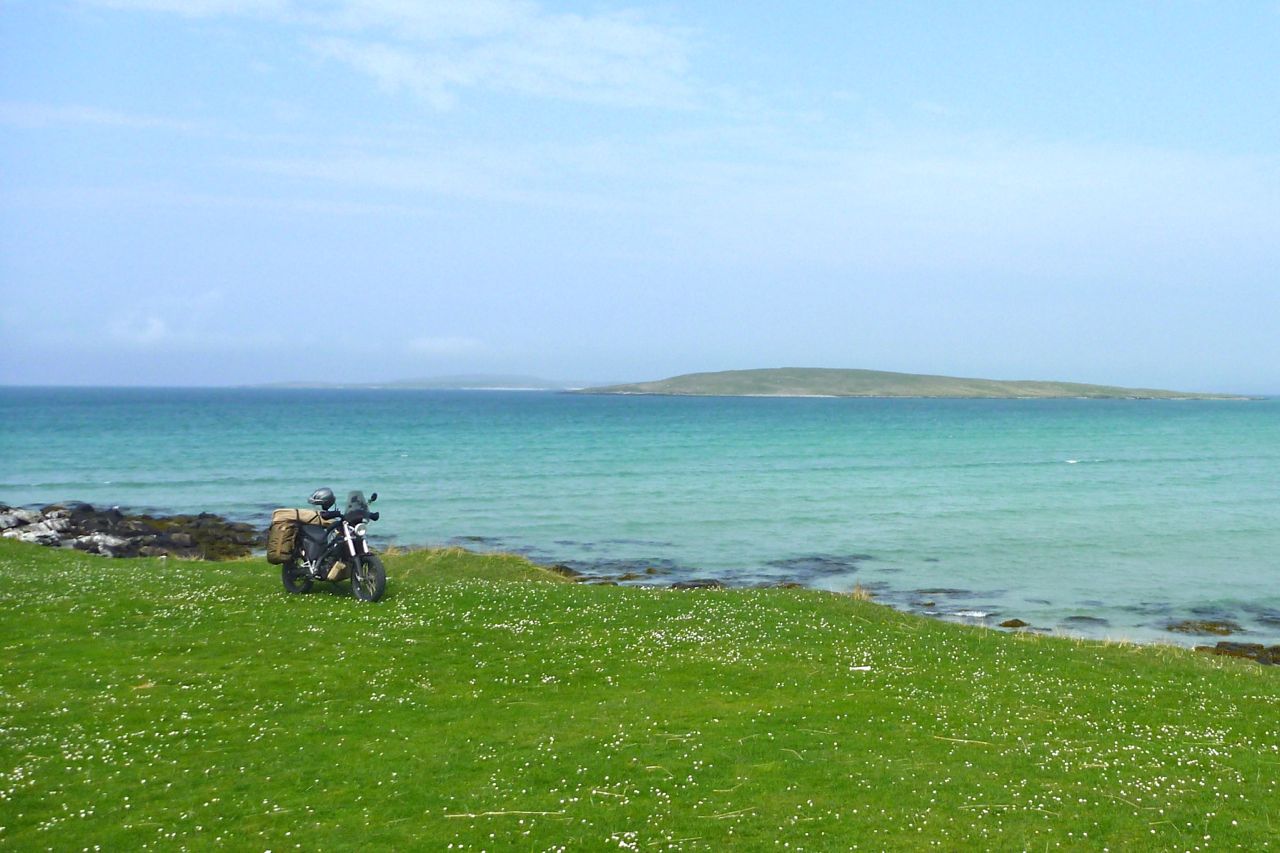
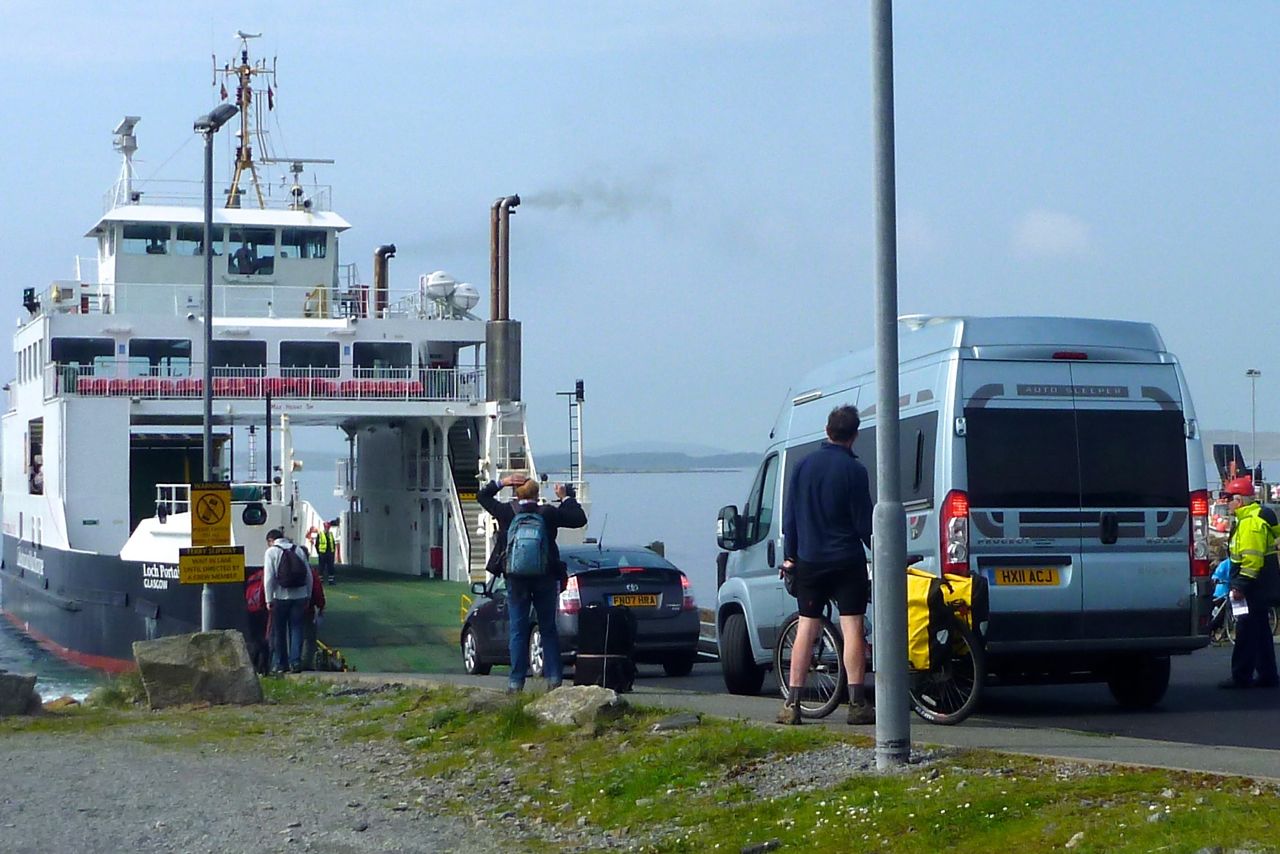
I left my boats up there for later, then ferried from Ullapool to Stornoway for a run down through the Outer Hebrides; one of Britain’s must-do rides. The CalMac ferry network gives you all sorts of options to return to the mainland or visit the other islands.
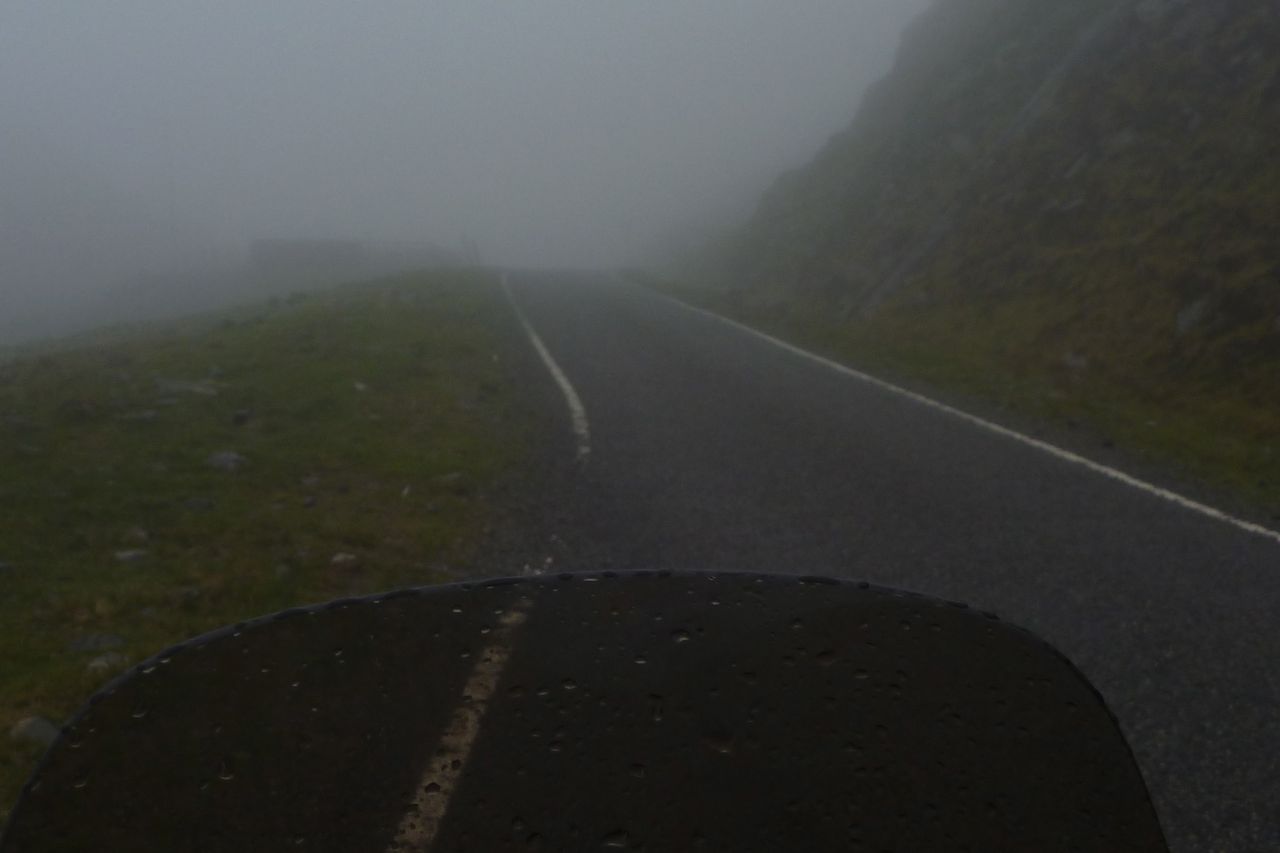
On Harris (left) I spent the night at the lovely Rhenigidale hostel, before riding back through the mist to the remote Hushnish beach (below right) which includes the odd experience of riding through the grounds of a baronial mansion. I then followed the single width roads on the west side of South Harris to the ferry at Leverburgh, but have to confess it’s had to get a rhythm going on such winding roads, even on a small 650.
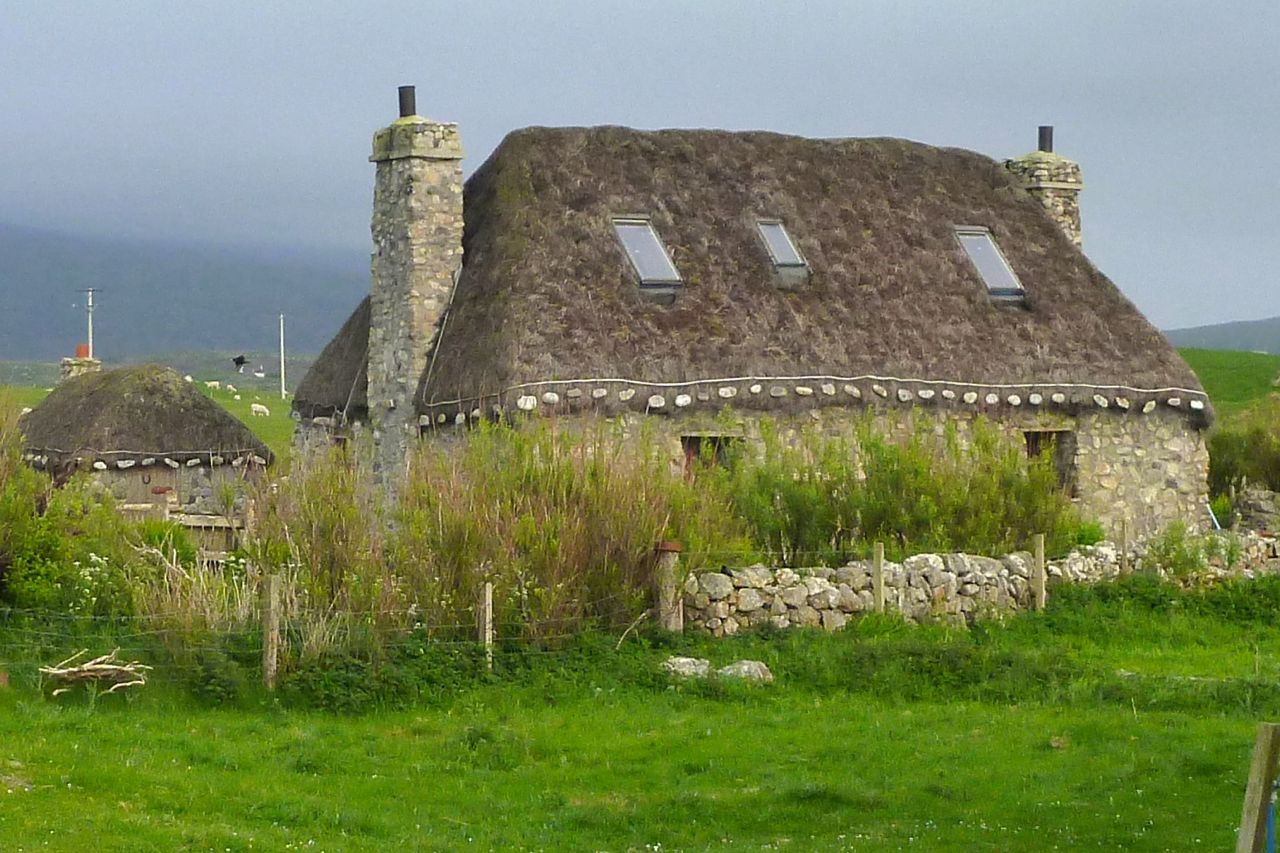
North Uist’s lovely beaches led to Benbecula and causeways to South Uist and another cute thatched Gatliff hostel at Howmore. The weather was closing in now and next day’s ferry back to Oban beat through a Force 5 chop. Incredibly, from Oban I then rode all the way to Scarborough, a fabulous ride across northern England and the North York Moors.
Next day I diverted via David Lambeth’s neat Boston to make an flash inspection, then over to Norwich to pick up some cheap DRZ forks to consider fitting to the Xcountry or just keep for a rainy day. It was around here, tooling through the showers, that I recorded a phenomenal 108mpg. By the end of this cross-country ride there was a noticeable step in the seat where the foam had become compressed. But I’ve since found the wide seat remains comfortable for 400-mle days.
More recently I fitted the Booster Plug but can’t say the difference is huge for £90. Tick over feels a big less harsh, but overall I’m not as amazed as the bloke at TTech promised. The unit is dead easy to fit: remove the left side ‘tank’ cover, unplug a lead to the air box, then splice in the booster box while running the air sensor cable out to hang behind the headlamp. The black box works by reading a lower air temp than in the air box, and richening the mixture at low rpm and on acceleration, as most modern bikes run very lean. I would hope it might also cool the bike a bit (had a mysterious drop in the expansion tank level but seems to have stabilised now). Next longish ride I may unplug then replug to compare.
I’m now back in far north Scotland and after a great southern summer it seems autumn is here already, but I can say the mpg doesn’t seem to be affected. Got a pretty poor 61.5 leaving London with loaded Magadans, but next two fill were low 70s, same as usual. Talking of which, finally got to use my Magadan IIs – as good as the old ones but better with the lower attachment rings.
Pre-Booster plug mpg (26 fill ups) Best 108 – Worst 53 (both may have been miscalculations)
After Booster plug mpg (4 fill ups) Best 73 – Worst 61.5
Now I have 11,111 miles on the Xco I’ve changed for fully synthetic oil. Next things will be a pair of tyres for Morocco in November and hopefully the VisionX 5-inch Narrow Beam LED.
I have to say I’m not really into the Xco. My feeling is in squeezing every last ounce of power out of it, they’ve made a sometimes harsh engine. And sadly all the necessary travel junk I’ve fitted to it has robbed it of its original lightness. Plus that gear change is awful at times the looks haven’t grown on me and I realise that matters more than I used to think. Still, rufty-tufty tyres may cure that, and for the Morocco tours it’s well equipped for the job.
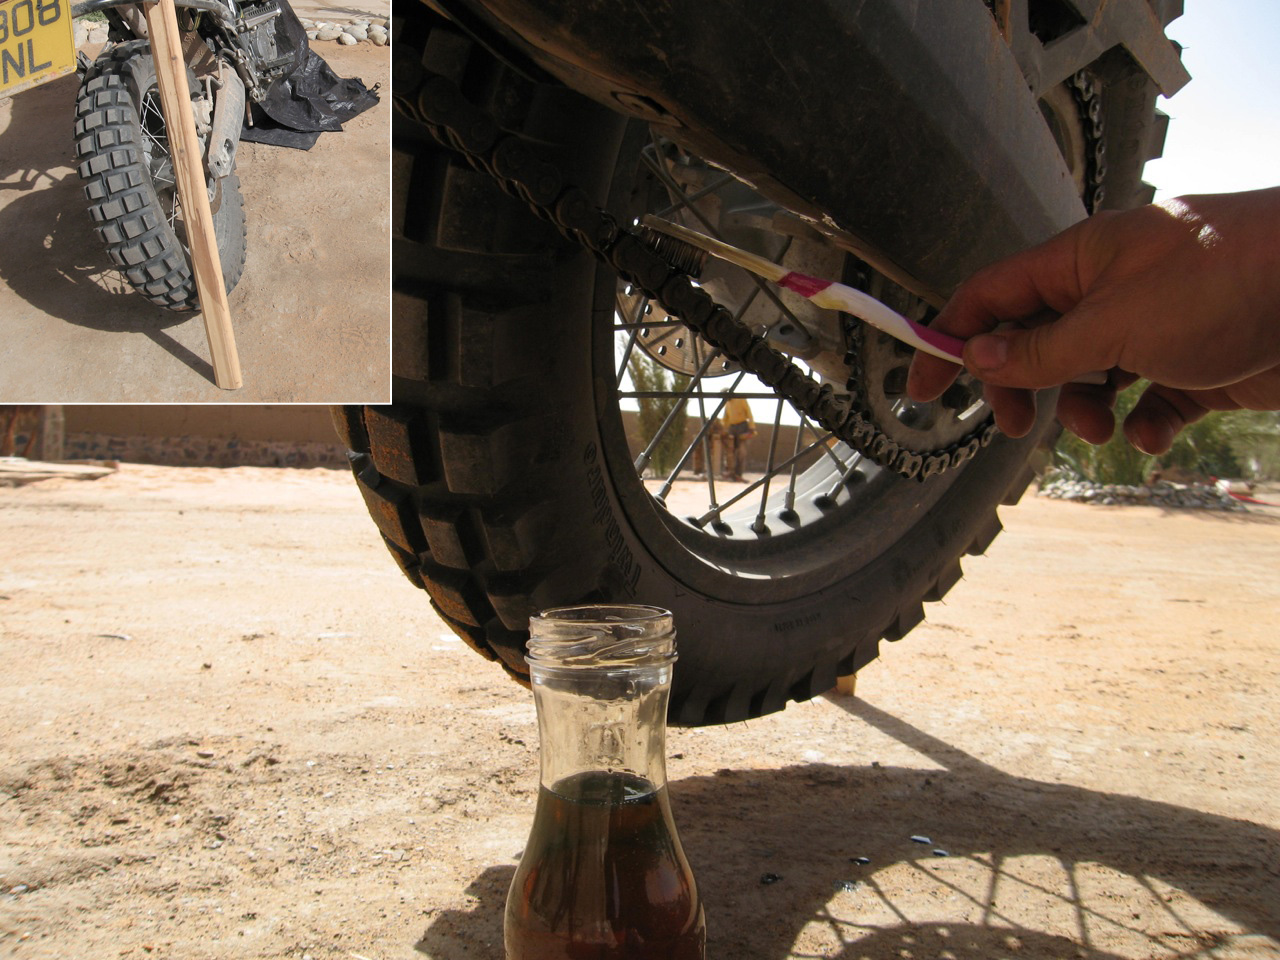
Although I haven’t scoured the internet to establish every possible alternative, to me the Tutoro auto luber is all you need to get the job done at a reasonable priceand without unnecessary complications. But because nozzles get knocked off and lost off-road, in 2023 I have reverted to simply brushing the chain with good (Tutoro) oil, as shown below left (2008)
Brush on – but now I use proper chain lube oil.
It’s not sprocket science Even if your bike has a centre stand, some sort of automatic chain oiler is the best way to keep you chain lightly lubed all the time if you do a lot or riding. On the long road a bulky aerosol will eventually run out and while brushing on manually (left), is as good if not better, it’s a faff to do regularly. Sealed-ring chains are amazingly durable, but that range can easily be doubled if they’re coated in a near-constant film of oil, and cleaned once in a while.
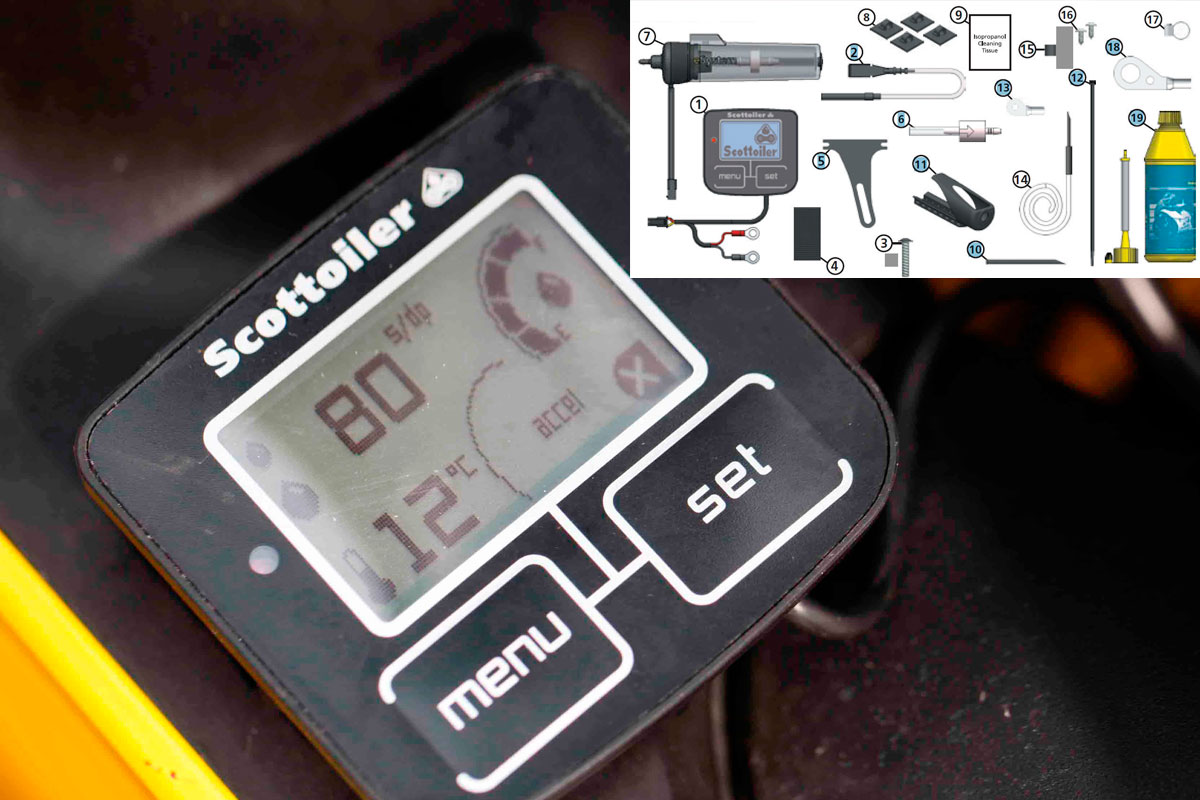
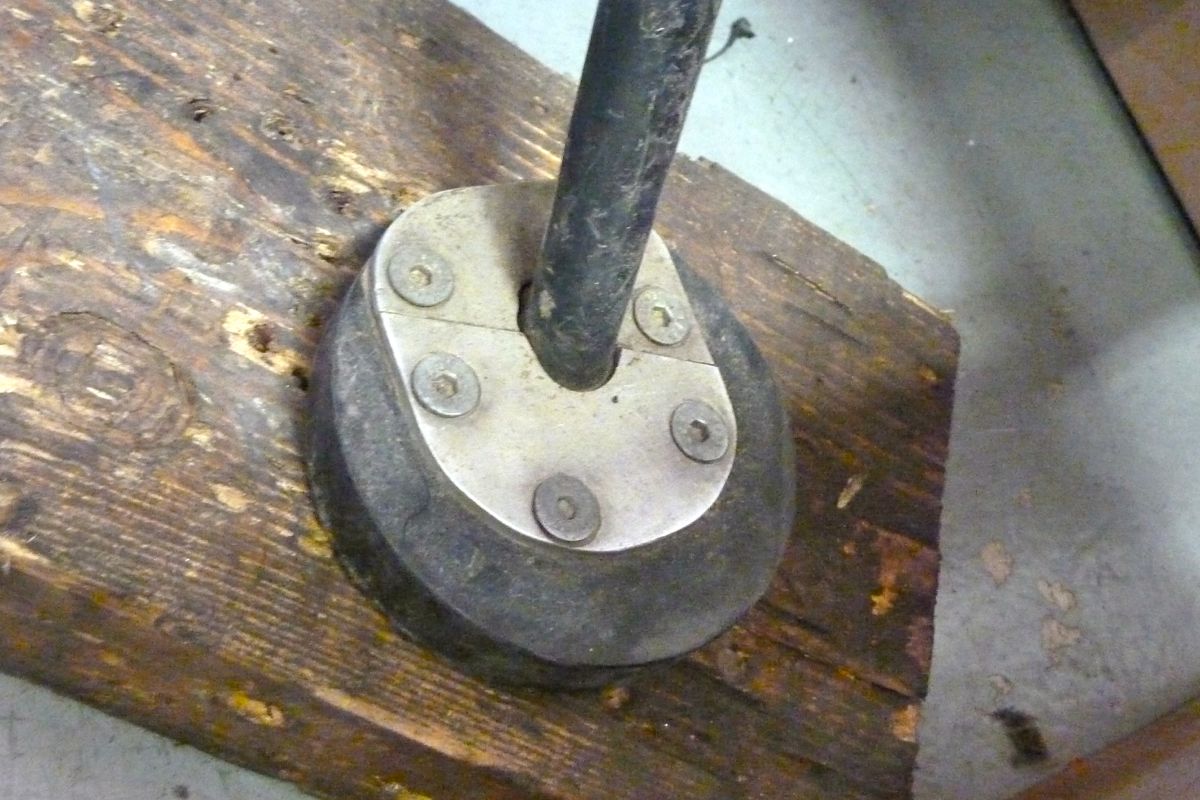
Scottoilers have been around since I started biking – or so it feels – but I never bought into their idea of plumbing the unit into the carb vacuum, or these days, using electronics. Why complicate things, it’s just an oil dripper? Do you really need a £240 piece of kit including a digital read-out on ambient temps and G-force (left), when you can make your own crude manual oiler with a squeezy bottle and a tube? Fit-and-forget automation is great of course, but I prefer an autonomous set up which, should it pack up up the Khyber, will be independent of other bike systems. It’s one less thing to eliminate when fault finding.
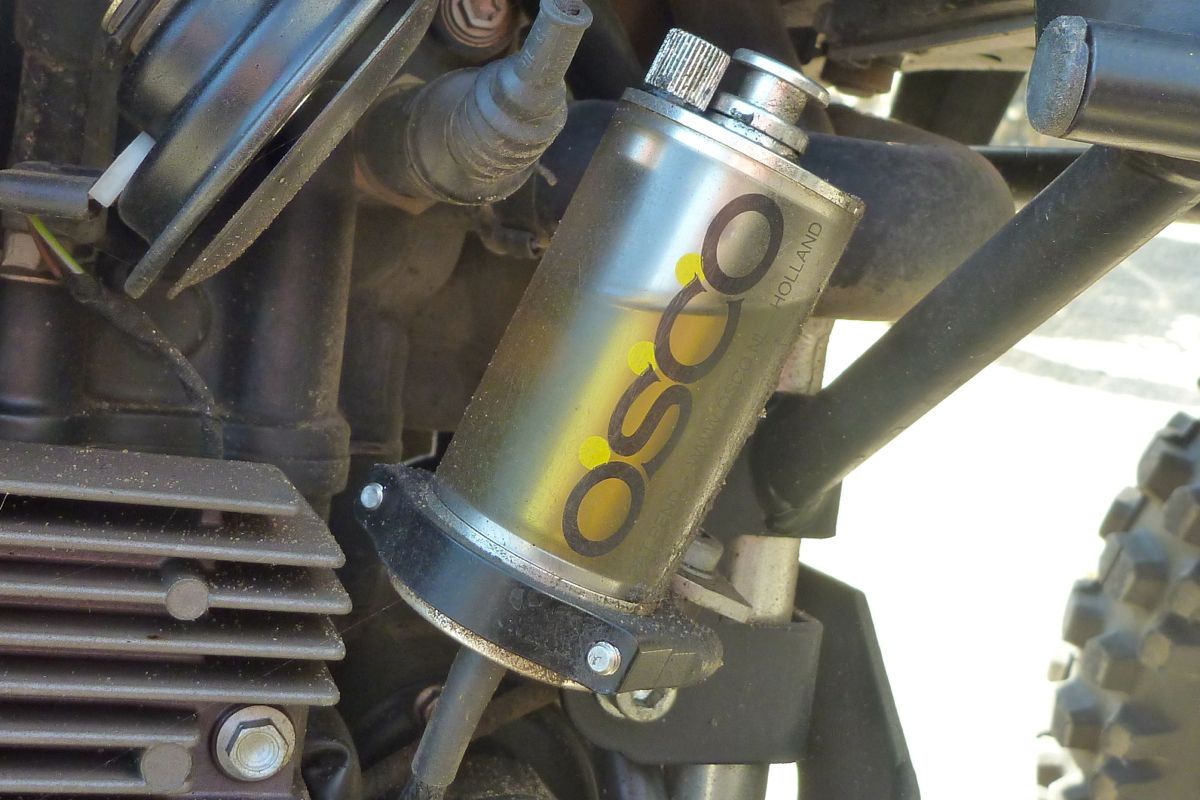
At Hyperpro one time I saw an 650Xcountry with the Dutch Osco system. It’s a stand-alone unit but turned out to be a manual, ‘actuate-the-plunger-once-in-a-while’ operation (see instructions below right) . Way too much faffing to remember at the end of a long ride. At less than 20 quid, the Loobman is another manually actuated dispenser of chain oil which, for that price, is probably less hassle than making your own. But the word seems to be that Loobs don’t survive rugged riding and there’s the problem with all manual oilers: remembering to use them regularly or forgetting they’re on and losing all the oil/making a mess.
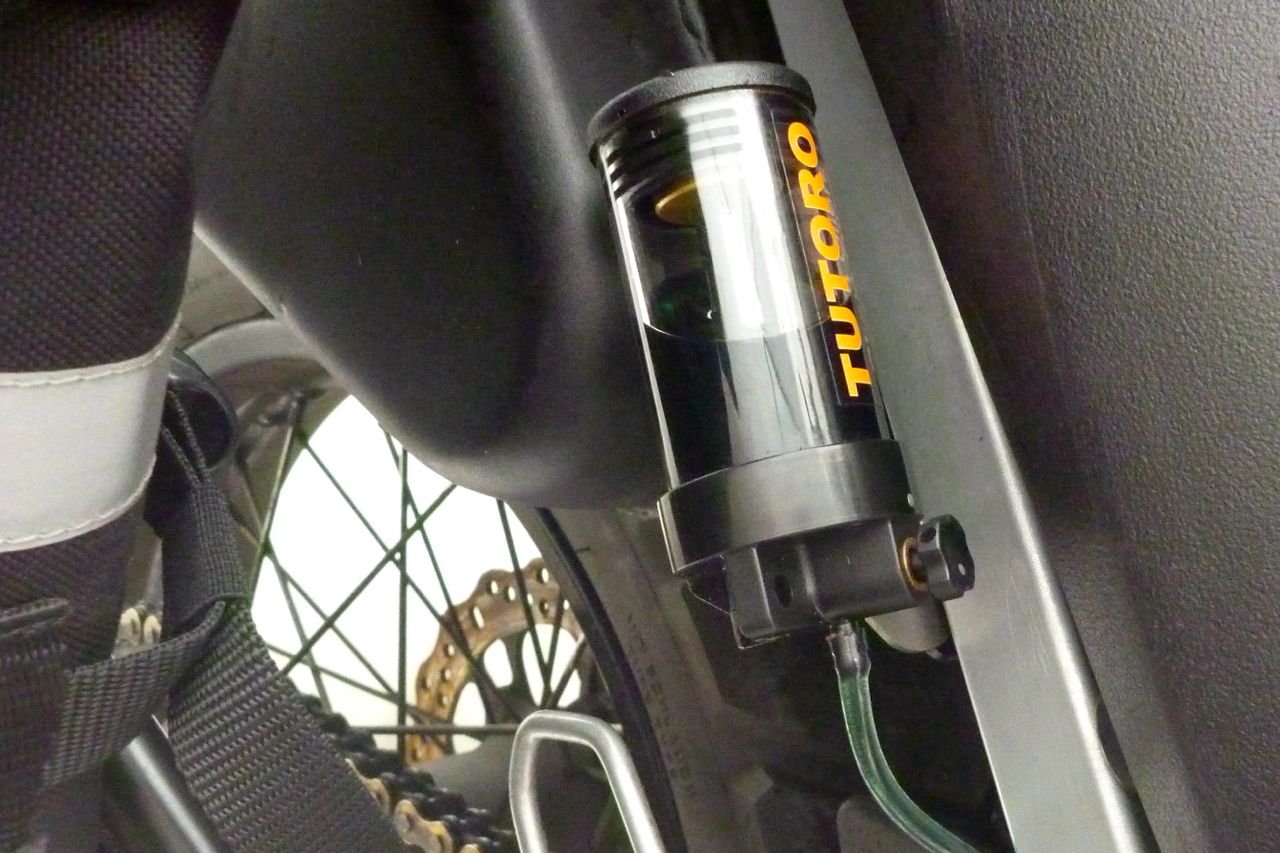
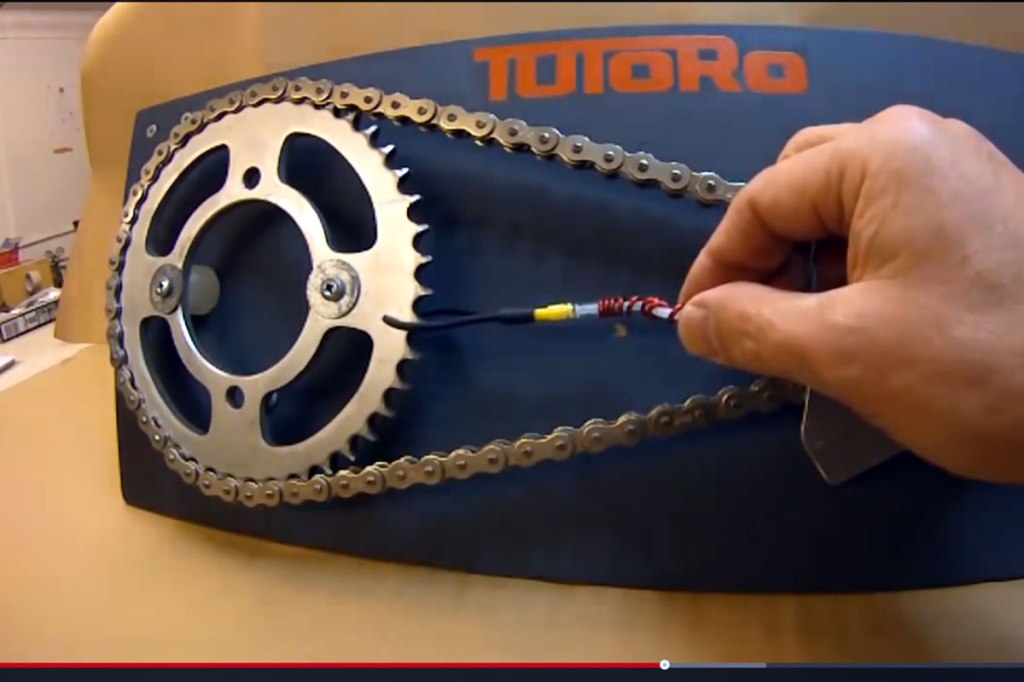
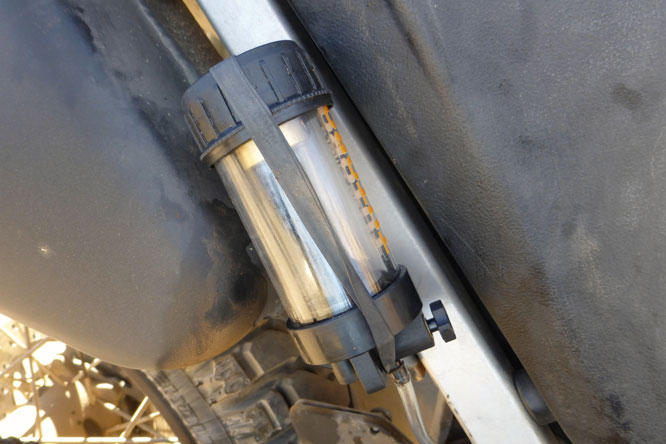
A bit of research led me to Tutoro oilers who’ve come up with the best solution to motion-actuated and adjustable chain oiling at a reasonable price, as well as offering manual drippers costing little more than a Loobman. The auto Tutoro (left) uses a finely balanced weight which moves up and down a stem, reacting to the movement of the bike and pumping or releasing oil as it goes. It might well resemble the ‘triple-axis accelerometer’ that Scott mention on their e-oilers, but without all the electronics. The Tutoro uses the free kinetic energy of your moving bike. Set the reservoir’s drip dial (reachable on the move) at whatever level is needed to oil the chain. If it starts raining maybe turn the wick up. Heading for the desert sands? Shut off the drip valve. Other than that, you don’t have to remember to do anything: when the bike’s at rest the plunger weight blocks flow – no drips. Once on the move again the bike’s motion and road irregularities will set it off. Simple and ingenious.
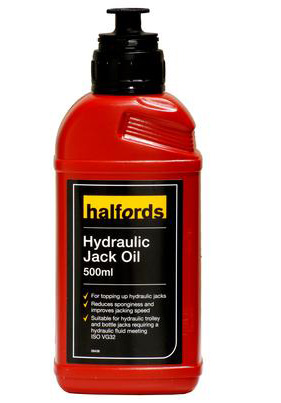
The Auto Delux edition I was sent came with a 100mm x 45mm reservoir (above left), delivery hose, a variety of reservoir mounting brackets, a forked nozzle, zip ties and cable guides, the helix flexible tube, a small top up can and 500 mil of Tuturo oil. And this is not just any oil, this is a lushly blended, thick and sticky blue goo, just like you get from the best spray cans. They now offer two weights of oil, depending on ambient temperatures in your locality. And if you run out, Tutoro specifically advise mineral hydraulic oil (example right). I bet you’ll find that cheap anywhere where there are cars or machines. Other stuff like ATF, EP gearbox oil, or any oil with additives may degrade the unit’s plastic and acrylic parts (but are all fine for the chain, as is waste motor oil).
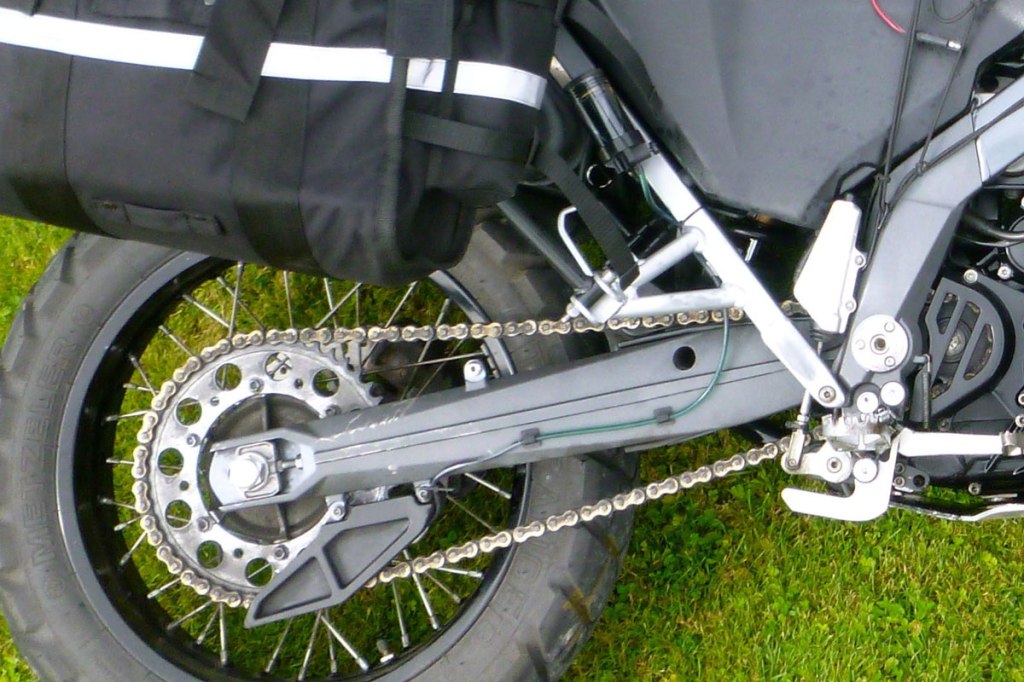
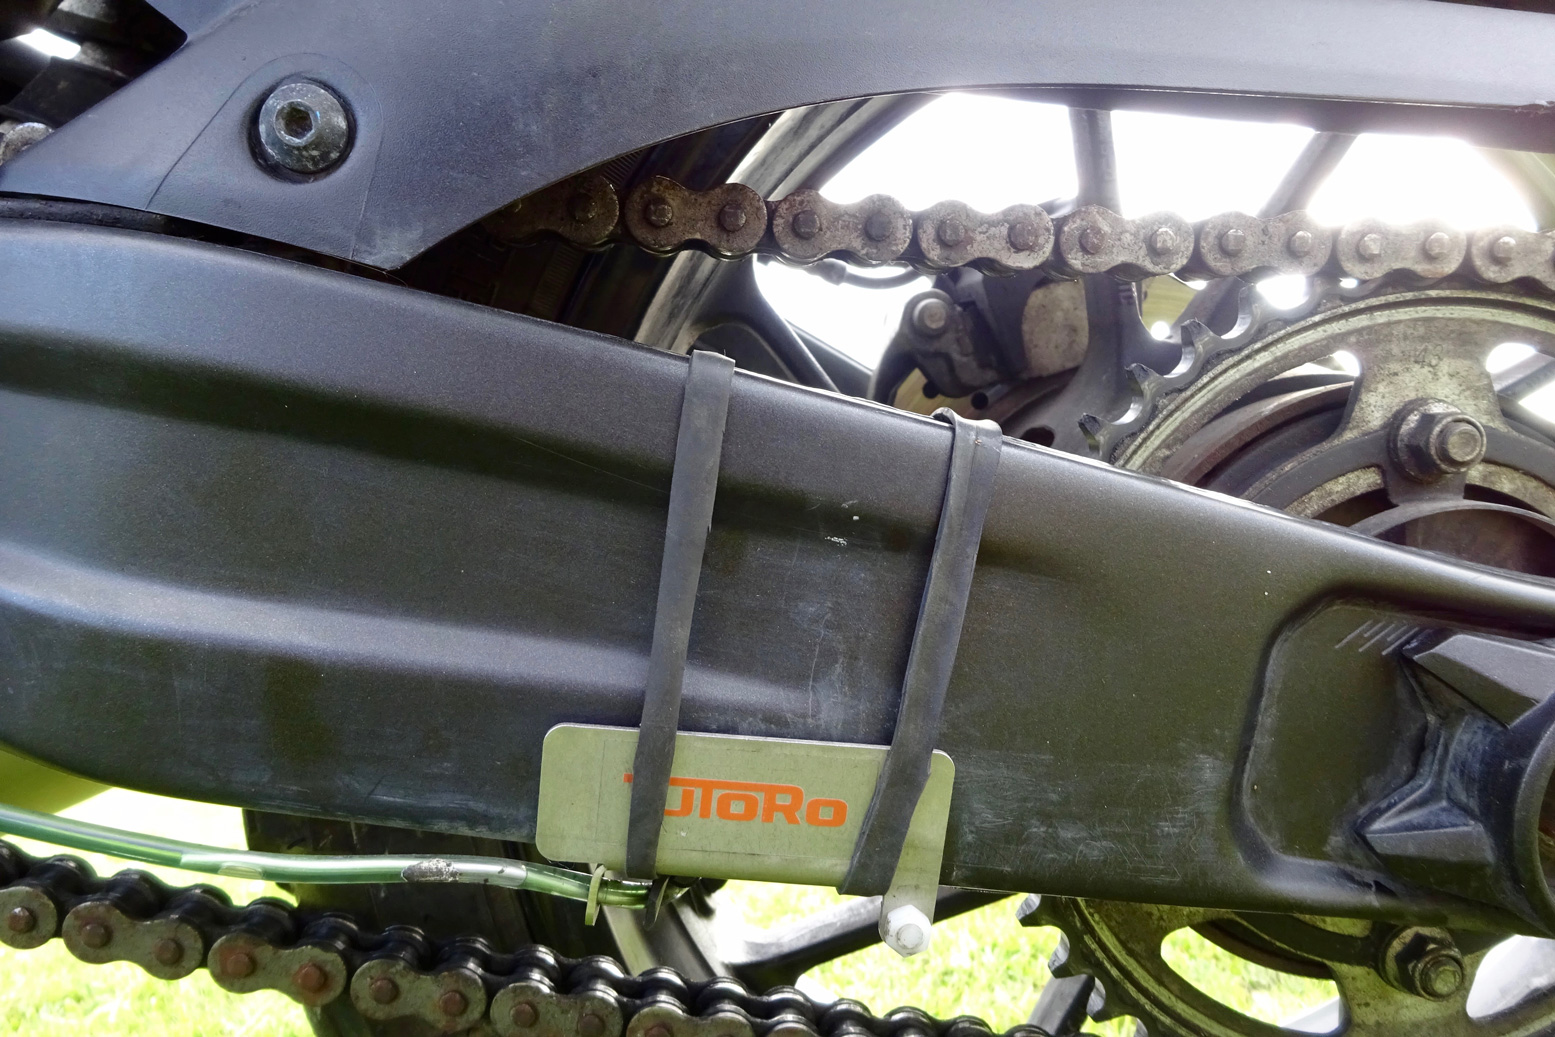
Fitting the oiler I fitted mine on the pavement in a bit of a rush, while at a Touratech travel event. On my GS650X there was a way of routing the hose neatly in and out of holes in the swing arm, but that looked a bit tricky to pull off in my situation. With just the zip ties, the reservoir was easily fitted to a bolt on the subframe down tube: out of the way but easy to reach and about 20° off vertical which is probably outside recommended operational limits, but worked OK for me. Vertical is best, even taking into account your typical 11-12° sidestand lean. The hose ran along the outside of the swingarm using stick-on hose clips (below). I thought they would be vulnerable off road (a slab of gorilla tape over the hose may help), but months of riding later, including Morocco and back and everything remained intact.
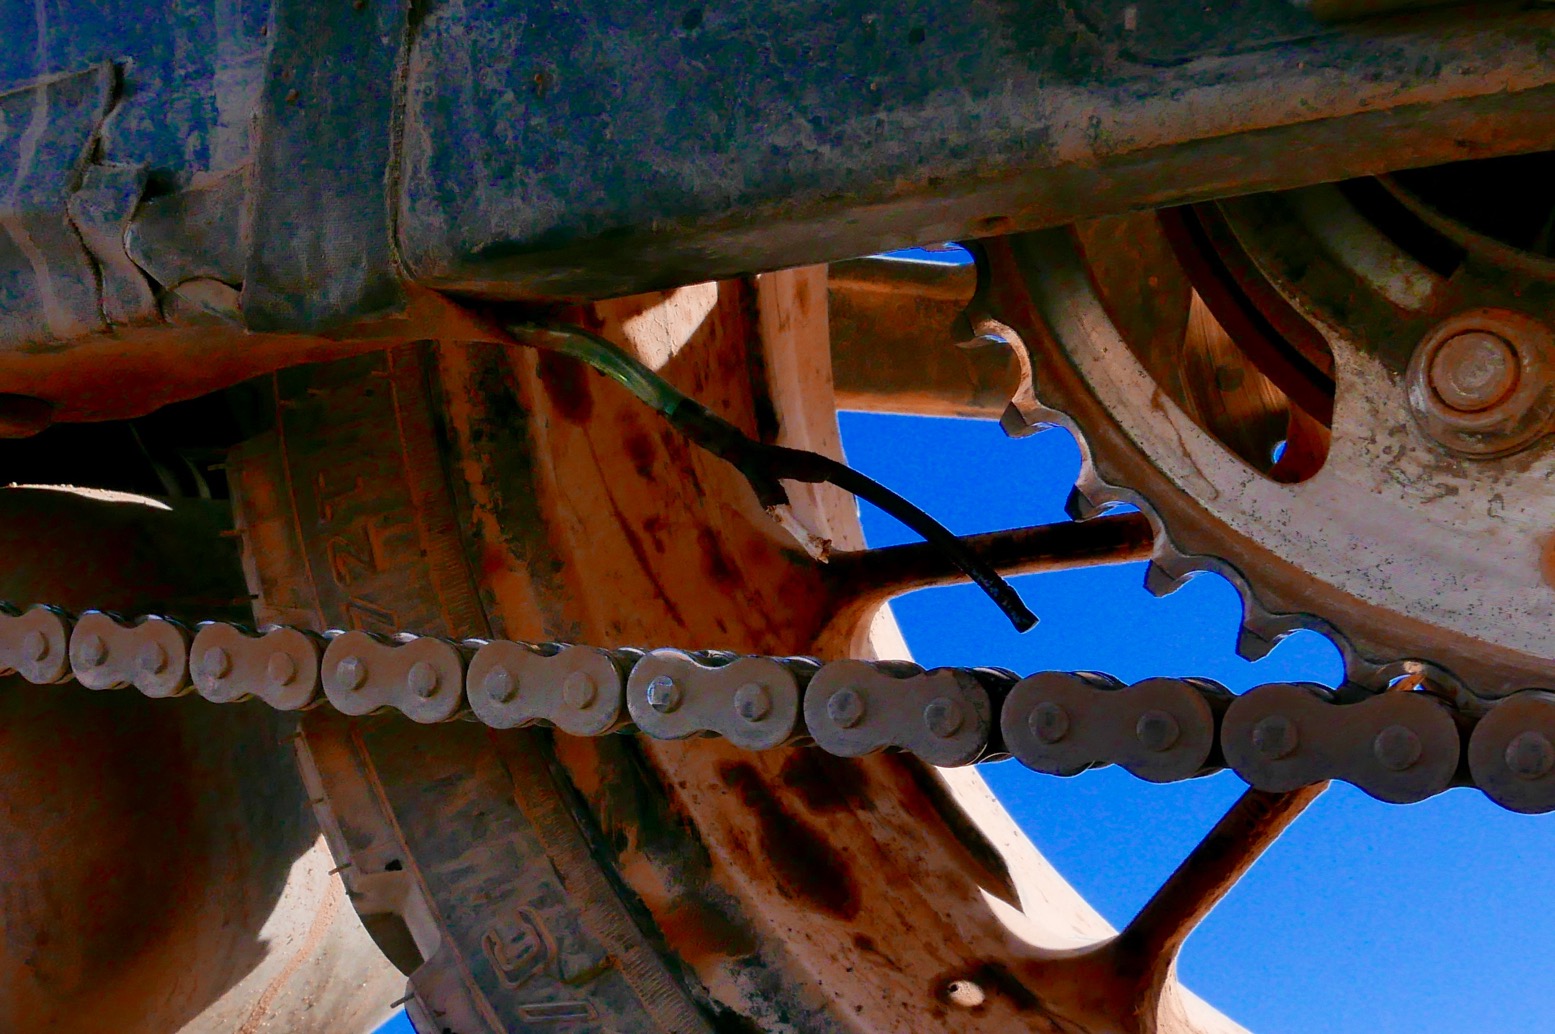
On the road Some Tuturos come with a rubber forked nozzle which I thought was to get the drips close to the o-rings on either side of the chain. I guessed wrong. Due to unavoidable chainslap, my nozzle got damaged almost straight away (right). Had I seen this later video, I’d have seen the forked nozzle is supposed to ‘bite’ either side of the sprocket at ‘3 o’clock’ (left) and well out of the way of the slapping chain. From here the oil gets thrown out onto the chain. No matter; it’s only a bit of hose dripping oil. Zip-tied to the chain guard, I repositioned my single hose feed at the back of the lower chain run, just as it goes onto the sprocket (the place they tell you to spray a chain). Tutoro say a single feed is as effective but a bit more wasteful at lubing the chain than forked, and there’s nothing to get damaged or pulled off.
Setting the feed dial positioned at the bottom of the reservoir took some experimenting, or it’s quite possible that again, I didn’t rtfm. I didn’t bother priming the unit and just left the valve wide open to let it happen on the road. From Touratech I set off north for a early morning ride through mid-Wales and forgot all about the oiler until fuelling up in north Wales. Here I noticed the reservoir was empty, oil was all over the back wheel and the chain glistened like an eel that had just stepped out of a steaming shower. With enough lube on the chain to last a few days, I shut it off then forgot all about it again as I rode up to northwest Scotland and then rode back home to London via the Outer Hebrides. Over the weeks and months, I’ve settled on about one turn out from fully closed; perhaps a bit more in chilly conditions.
Lately I came across Motobriiz (right; $92) which similarly uses motion-actuated automation: this time wind pressure off an intake tube pushing oil out of a reservoir down another tube and into a felt pad tucked under the chain on the slider. There are no moving parts at all. In the US one time I was offered a kit by a distributor, but wasn’t convinced the way they do it was that much better than Tutoro. The best thing is that, like some Scottoilers, the reservoir mounts on its side and out of the way and under the seat (but also where it’s easily forgotten about). Less good is the oil-soaked felt pad you glue to the chain slider needs regular replacement. Plus I have to say I’m not fully sold on the wind idea – won’t riding fast into a headwind prematurely empty the tank? I prefer the Tutoro’s adjustable valve. All the ideas gadgets on this page are better than no oiling and less faff that manual application, but for me Tutoro’s simplicity combined with mechanical fit-and-forget ‘autonomous motion-actuation’ works best. And compared to the other products mentioned above, I think they’re a bargain.
Update after Morocco with XSR The benefits of a chain oiler are greatest on a long trip covering big mileages. A bulky aerosol won’t last and you don’t have to prop up your bike and get on your knees every morning to give the chain a squirt. I topped up my Tutoro and left for Morocco with a 200ml bottle of oil. All went well until I had to give someone a lift off a mountain pass one evening when things turned a bit epic. Because there were no pillion footrests on my Xbike, her feet flailed around and knocked the reservoir about, losing its cap and contents. A flush out with petrol and an oil bottle cap with a bit of inner tube worked for the rest of the trip. That’s what I mean about simple, in-the-field repairability. I came back with Morocco with the reservoir half full. I adjusted the BMW chain twice in the 10,000 miles I had the bike (8000 miles with the oiler). The chain looked like is has 1000s of miles left in it. Pictured left is the same type of unit fitted with a little more know-how to my Kawasaki Versys. I then took the unit off that bike and put it on the CB500X (above left) and fitted what bits I had lying around to my XSR700 Scrambler.
I should have remembered that the anchor plate or helix they offer are both useful devices to keep the forked nozzle in position, biting the sprocket at ‘7 o’clock’, especially on rough roads and tracks. Tbh, I expected a stone to knock off my nozzle much sooner than it did.
Instead, the hammering regularly twisted the nozzle arms out of position on their forked mount attached to the delivery hose, and by the end of my third lap one nozzle arm was MiA. I plugged it up with a twig and pointed the remaining ‘single feed’ nozzle arm onto the chain (below). If the forked nozzle was a single piece, this would not be a problem. I’ve since ordered the anchor plate which I used on my CB500X RR and fitted it in with a strip of inner tube (the supplied zip ties didn’t stay in place on my tapering swingarm). That’s about all there is to say on the subject.
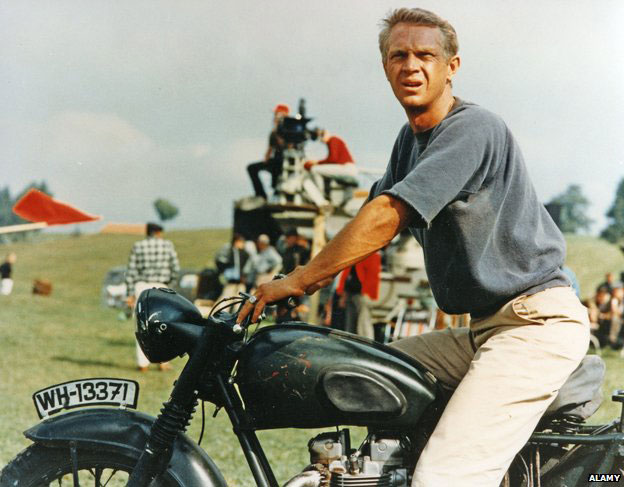
When I imagine a good handling bike I often visualise Steve McQueen in The Great Escape. Not the famous barbed wire jump which was actually done by a mate of his, but the riding he does beforehand while trying to outrun the jerries along the lanes and across the fields. The way he chucks that 170-kilo TR6 around on ordinary tyres and suspension, skid-turning with the back brake and sliding around but in control, always struck me as optimal moto/rider interaction. With a hefty old dog like the Triumph it must be down to skilful riding too, as well as a low slung machine, but if a bike can bring out that sort of confidence I’d be pleased with it.
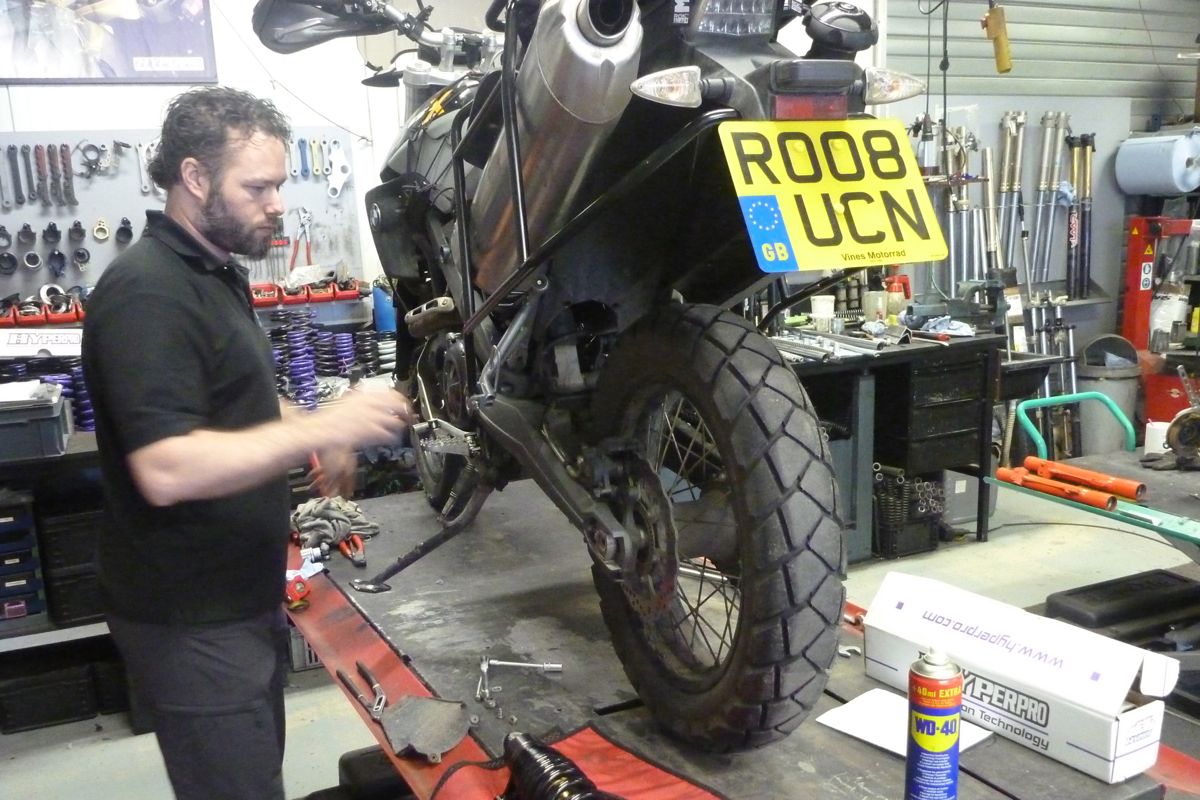
My 650X wasn’t in such good shape when I rocked up at Hyperpro’s workshop, halfway between Erik’s Hot Rod Bar and the Hook van Holland ferry port. It felt like the head bearings were notching, and in the last 1000 miles the shock felt shot too. I didn’t feel like the Cooler King throwing it into roundabouts while in fact heading for the kerb. I thought oh well, I’ve finally lost much touch but at least the Xco is jolly economical and the switches fall easily to hand. Bas at Hyperpro suggested I came over for a custom suspension fitment. In his experience, being there with your bike makes all the difference. Everyone told me I’d spend the whole day at his workshop watching him work and they weren’t wrong.
For weeks I’d suspected the head bearings were gone, something most noticeable at low speed. But lifting the front wheel I couldn’t detect anything and thought it might just be tension from the brake hose arrangement. Erik suggested cupping from the Tourance which was down to 2-3mm. With the bike yanked over, it took Bas a couple of seconds to diagnose the notch in the bars’ arc and which now felt obvious. During suspension transplants he told me they get through a lot of headsets at the HP workshop. The Xco’s relatively elastic alloy stem doesn’t help in this regard, though Bas admitted his hard running BMW G/S (see below) eats a set every 5000km or so.
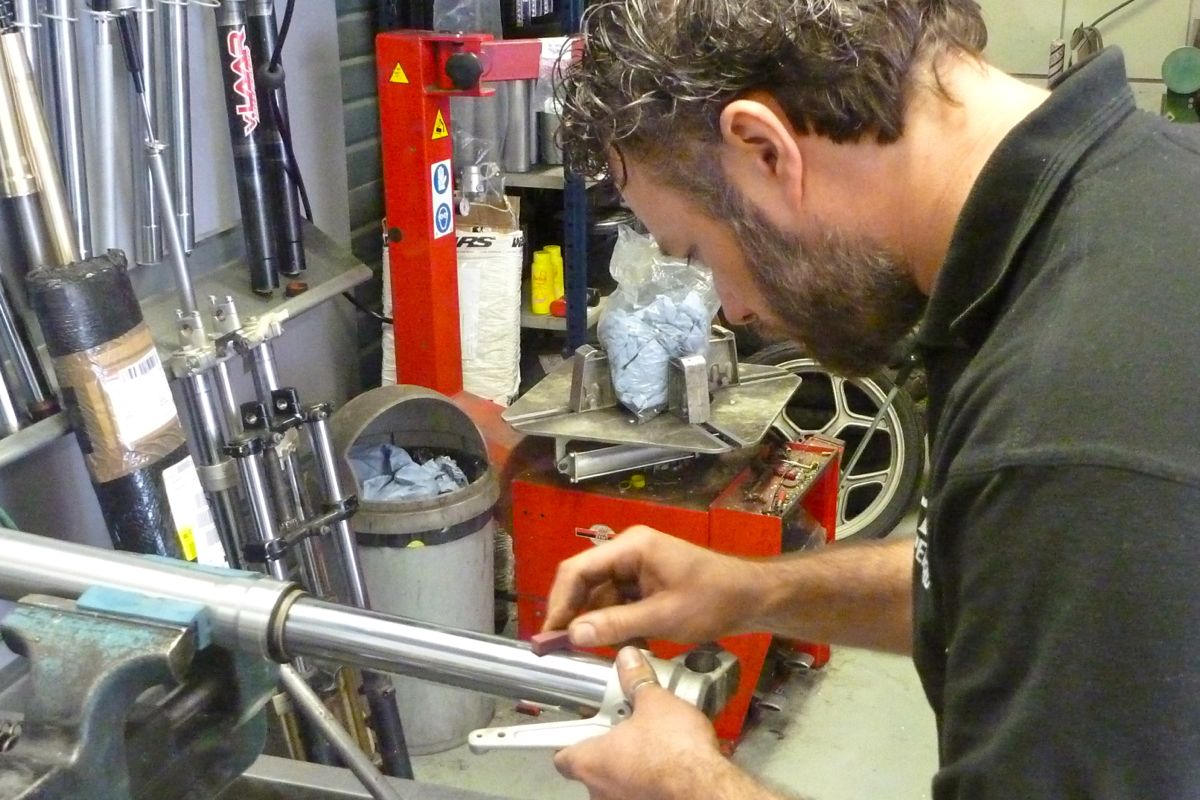
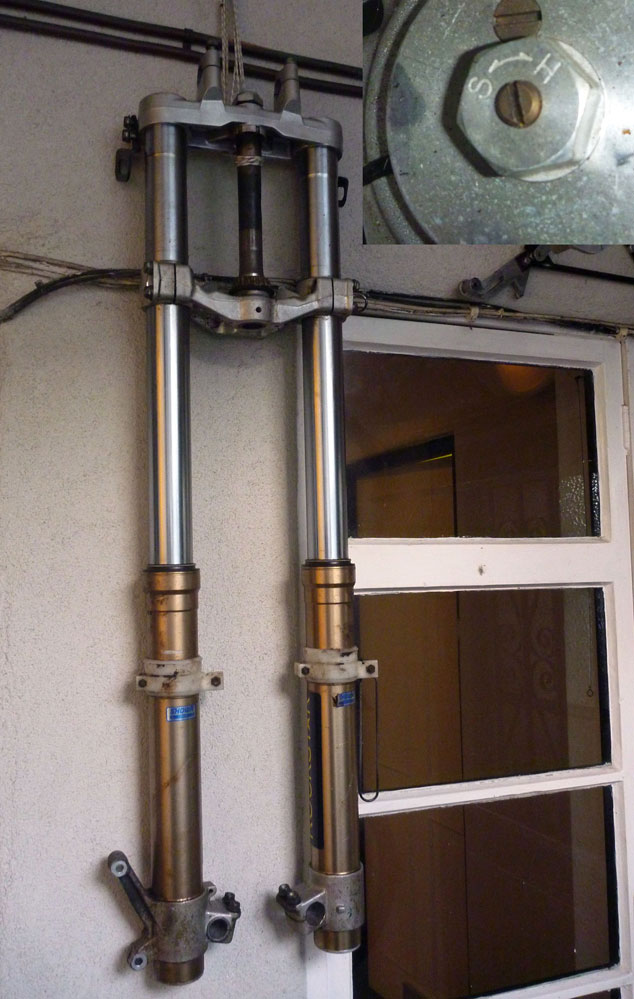
I wasn’t expecting it, but Bas got stuck in and replaced my worn bearings. I still don’t get how this notching occurs; fork impact + wear + lack of care and grease I guess. Once fitted, he pointed out the noticeable change in resistance when tightening the 10mm hex headstock adjustment nut (left) by just a couple of degrees. That’ll need doing in 1000 miles as the bearings bed in.
He then got to work on my forks, identifying barely visible scratches on the chrome sliders which he buffed out with a strop and a file (right). I’ve always doubted the genuine advantage of USD forks. The best explanation I recall reading is that the heavy steel slider element sits lower for lower CoG, but then the alloy needs to be thicker to withstand the triple clamps and the steel is undesirable unsprung weight. I’ve also since been told it was a way to get more travel. To me they just look ‘upside down’ with a vulnerable slider out in the stone-strewn breeze. It’s well know that telescopic forks are a regretable compromise on a bike: neat and cheap to make but with drawbacks that we all learn to ride around. In fact I’m convinced a huge part of a GS12’s appeal is the poise it gains from its Telelever front end. To paraphrase something I read recently on adv ‘For a two-story building a GS handles pretty well’.
There’s only so much you can do to Xforks unless you replace them with something else. It doesn’t have to be anything flash either, Bas recommends a 48mm right-way-up 48mm DRZ400 forks (right) which are easily found on ebay for around 100 quid plus clamps. I bought a set and plan to get them Hyperpro’d and fitted to the X. [In the end kept them for another project].
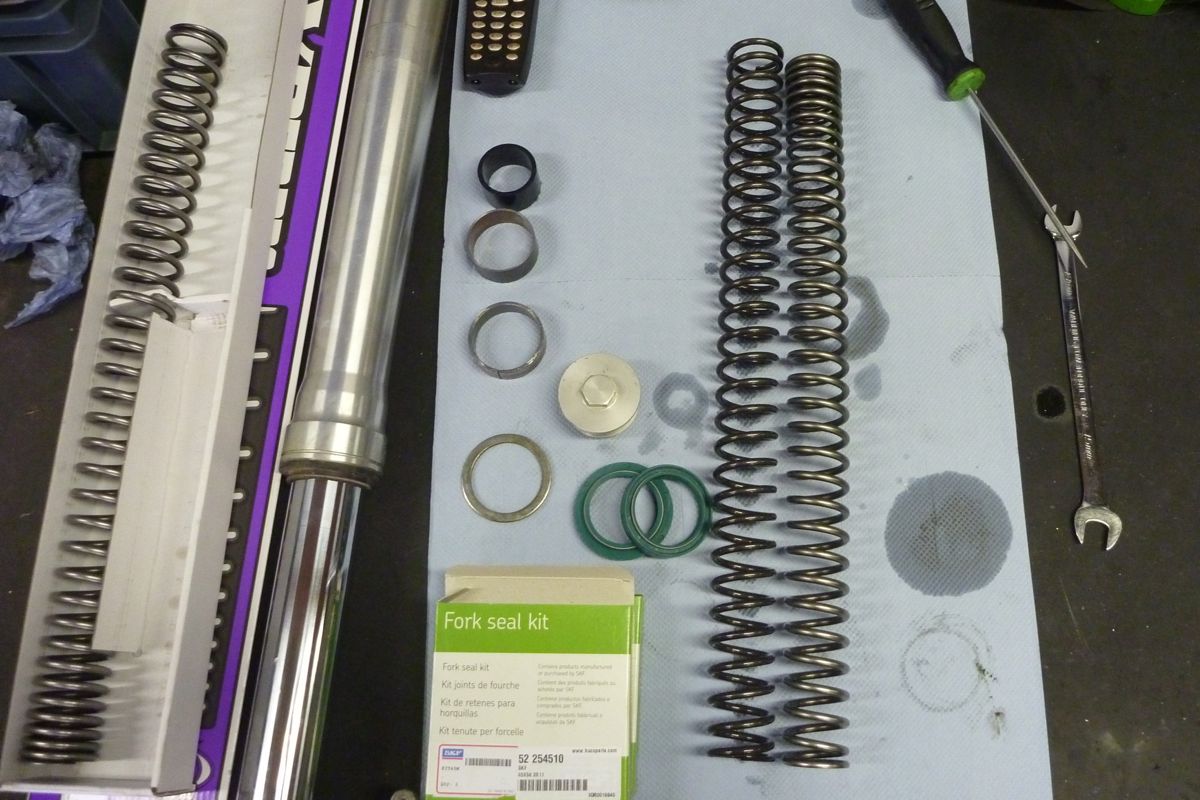
Once the sliders were as clean as they could be, Bas renewed the seals and cleaned up the bushes which run between the telescoping sections. He then slotted in the appropriate Hyperpro forks springs (left) and slipped in a lesser quantity of lighter oil (heavy oil is used to disguise soft forks). Bas explained why fork oil should be changed; not so much because it breaks down like motor oil but because it collects contaminants and humidity so needs flushing if you’re to avoid tedious seal failure. To stop that happening too soon, before remounting the forks Bas slipped on a pair of neoprene socks to protect the sliders.
A quick word on progressive springs. Most bike springs are linear; wound at a consistent rate end to end. While some riding applications are said to benefit from linear springs (road racing on smooth tracks, for example), the main reason we get linear is cost, as with so much in bike suspension. Up to a point, the pivot on a mono rear ends adds a progressive element, and in the 70s twin-shock era it was thought laid over shocks had a similar effect.
Also from the twin shock era, you may recall dual rate springs which at a glance look progressive, but merely have a more dense section at one end. Only progressive springs have a constantly variable spring rate right across their length. Because of this the spring can react to small surface irregularities, full-on hits and everything in between. Linear springs can be factory wound by the mile and then chopped up like salami, but each progressive spring has to be made individually; it’s a more sophisticated and higher end solution and Bas had a good trick to demonstrate their efficacy: two little finger springs (above), one linear, one progressive. The purple progressive spring is easier to compress initially but, unlike the yellow linear one, is impossible to compress fully. Progressive compression in a nutshell. Looking into suspension earlier I noticed the ‘P’ word bandied around disingenuously. Hagon’s aftermarket monoshocks claim ‘fully progressive spring pre-load adjustment’. Examine that phrase closely and you’ll see it means not much at all, but I bet a few have been caught out.
According to Bas, stiction is the nemesis of smooth suspension response and the reason many riders misdiagnose ‘harshness’. Of course ensuring friction-free operation while hammering your telescoping tubes over corrugations or flexing them under hard braking is all asking a bit much, but with careful assembly and maintenance, stiction can be minimised. Only then can the full effects of a finely tuned shock be appreciated.
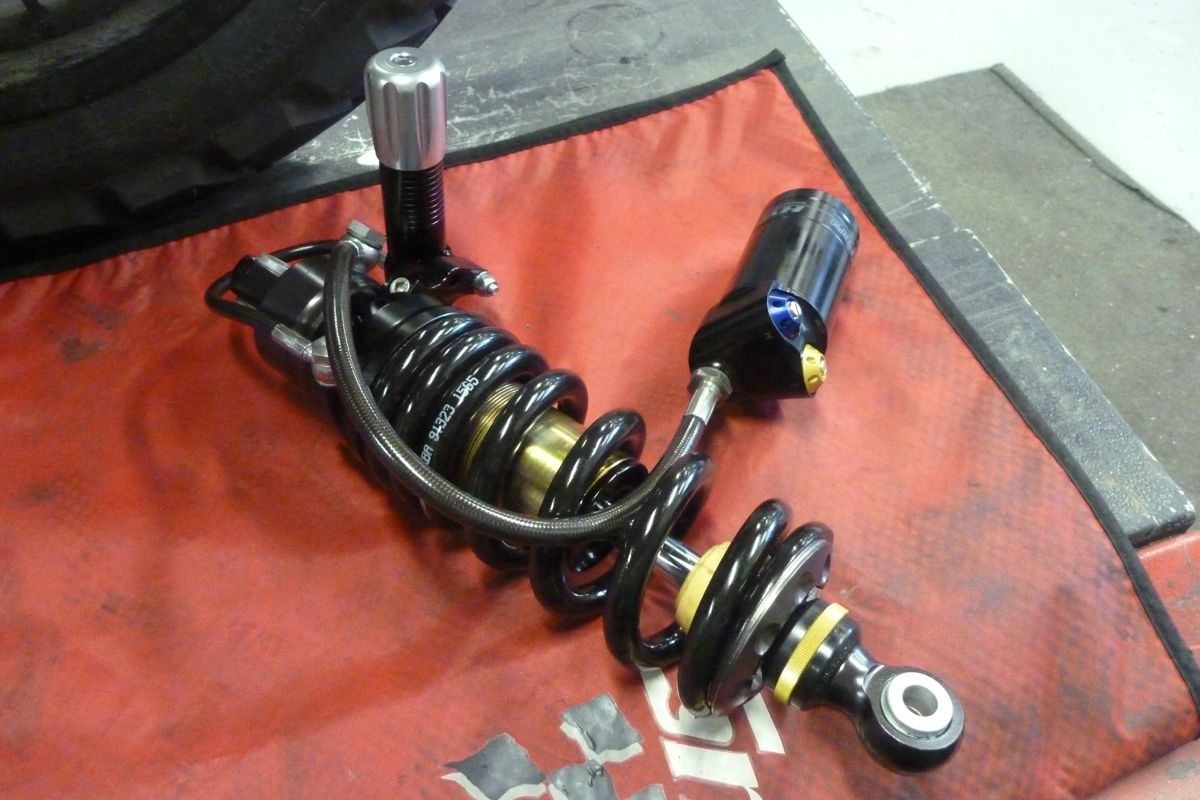
Now for the shock. I’d felt the Sachs unit go on a recent ride up to Scotland. Perhaps the bike’s early life at the BMW Off Road School had included more than the usual amount of play jumping. It certainly had when I’d visited. The headlight beam now shone higher than it used to, but when I tried to adjust the shock, the preload was maxed out and I didn’t even notice the rebound damping which was ineffective anyway. I’d originally planned to just whack on a Hyperpro spring on the shock body, but that would have been a mistake. It’s not the spring that wears out (though the original may be too soft for your needs, especially when loaded), it’s the seals and gas and ill-specified valving inside.
Most bikes run what they now call emulsion shocks, as that’s what happens to the oil and gas once it all froths up following a series of bumps. Once the oil is aerated much of the damping effect gets the lost until it all settles down and the gas and oil separate. An emulsion shock will be fine for regular road riding, but soon reaches its limits when you add heavy and variable loads and rough terrain.
All these years I managed fine on my Teneres and whatnot, just jacking them up at the back and stuffing a bit of sawn off bar end under the fork caps for some pre-load. The one bike I had with good OE suspension – the XRL650 for Desert Riders – was notably better than the previous XTs. Many times I’d get out of shape and expect to be going over the bars, only to have the superior front forks save the day. On that trip we all fitted K-Tech progressive springs.
The problem had always been on the back where nothing short of several hundred quid’s worth of WP or Ohlins seemed a lot of money for an uncertain result. As long as it didn’t bottom out, that was fine with me. The fatigue and boat-like handling just came with territory when riding heavily laden travel bikes in the desert.
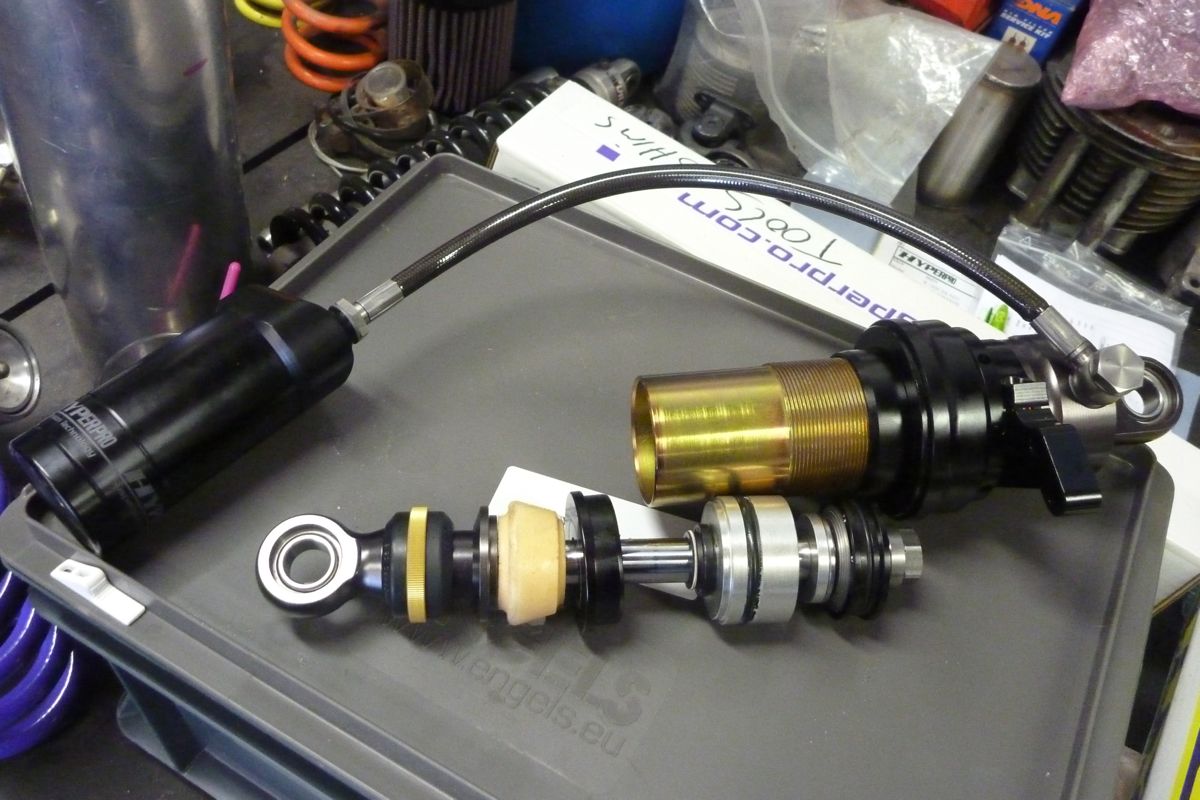
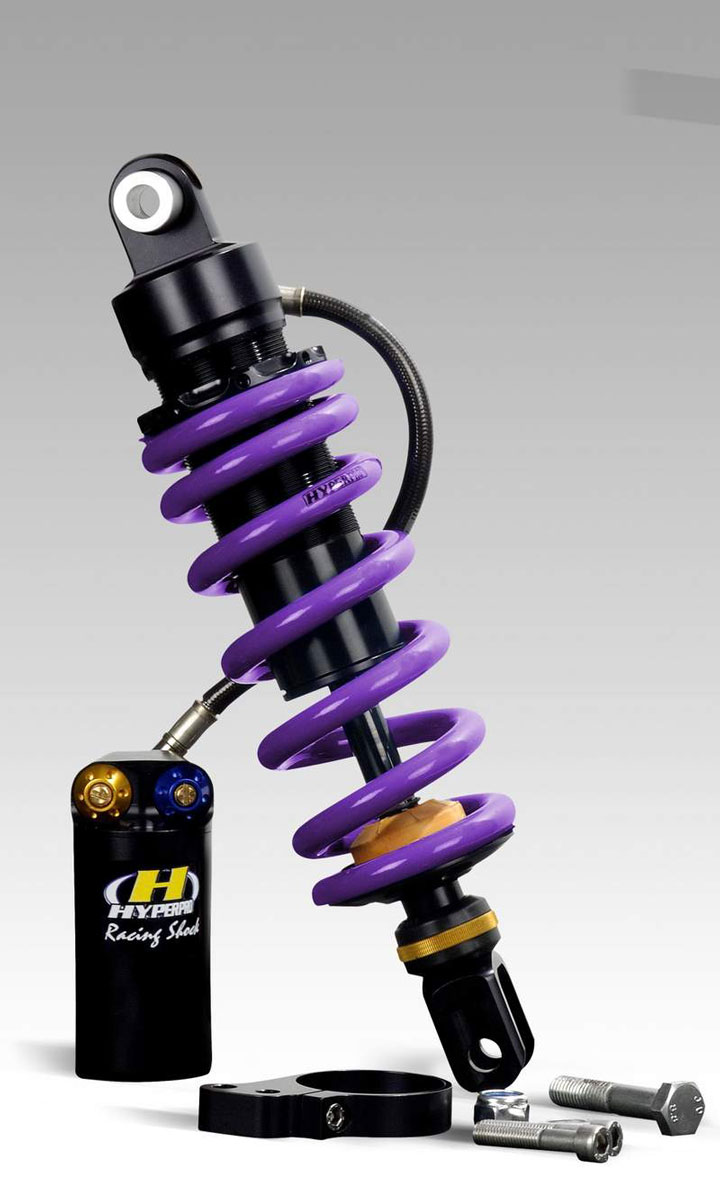
Bas doesn’t just invite you to lounge by the coffee machine while he whips a shock off the shelf and pops it on your bike. He builds the unit up from scratch, adding in shims across the damping apertures to suit your bike, weight, riding style and anticipated loads. I was getting Hyperpro’s top end 461 model (similar to left) with hydraulically adjusted preload (like the OE Sachs unit), 45 clicks of rebound damping at the base, and two settings covering low-speed plus high-speed compression damping on the remote reservoir. This latter feature is what’s missing from most average shocks but adds to the spring’s downward resistance and is what makes a big difference to fine tuning with changing loads.
The hydraulic preload adjuster at the top
Once the insides were assembled, the unit was charged with oil and the remote reservoir attached. In here there’s a bladder of nitrogen gas separated from the shock’s oil which feeds into the reservoir via the hose. A separate gas bladder can just as easily be located in the body of the shock if there’s room, though it runs cooler outside. Nitrogen is used as it’s dense and so less prone to leaking away, compared to regular air (which is 78% nitrogen anyway). Once a location was fixed for the remote reservoir with its high/low-speed comp damping dials, the static sag was assessed; about 3cm felt at the tail rack. Sag is important as it sits you midway (more or less) in the shock’s stroke so it can extend fully before settling down. The whole point of suspension is to allow the wheels to move up and down as much and as responsively as necessary while the sprung weight (bike and rider) remains isolated and level.
After at least ten hours of methodical work, my Xco had been resprung. It sat maybe half an inch higher, though I could still get both feet flat on the floor. A quick blast round the block wasn’t night and day but revealed improved steering on the first bend; it went where I wanted in a predictable manner. Then a few dried mud bumps along the edge of a field got both ends pumping smoothly. All well there. A 461 shock for the Xco costs about €950 with the optional hydraulic preload adjuster (miles better than using the supplied C spanner). A set of fork springs is €150 plus €50 for a pair of fork seals. Custom fitment is well under €200 for both ends (not including head bearings). If you’re planning a day visit to Hyperpro you may like to know that the overnight ferry from Harwich arrives around 8am local time and returns at 10.30pm, so you can get Hyperpro’d in a day. I paid £220 for the boat with cabin.
Having no less than four adjustments on the shock is going to take some experimentation to see the best results, and they’ll vary with load and terrain. That will be something I’ll get to grips with in North Africa later in the year.
XCountry in Morocco. Hyperpro made all the difference.
In return for the work and suspension Hyperpro have been offered an advert in the future 6.2 reprint of AMH.
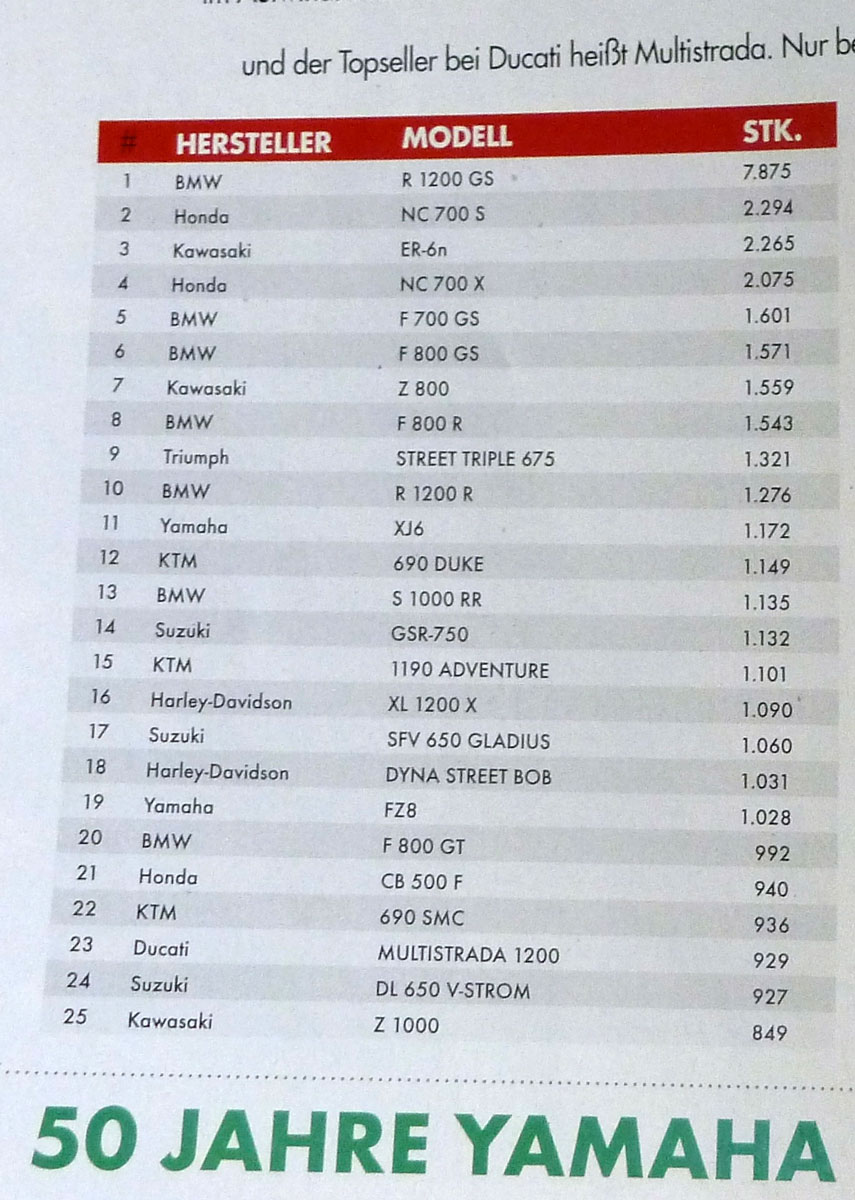
Other stuff I saw at the Hyperpro workshop Though he’s a big fan of the early 90s R80 Monolever (the post 7 series Boxers), one of Bas’ bikes is a cool 800 G/S from the previous decade. Alongside a parked up GS12 you can see the different paths that ‘adventure motorcycling’ has taken over the intervening years. Actual adventure and the other type. Where did BMW go so wrong? Well, look at the table on the right and you’ll see that perhaps they’ve got it very right. The 12 is by far the most popular big bike in Germany and many other places too, including the UK. But the Kawa ER-6 third? Perhaps they were on special in 2013.
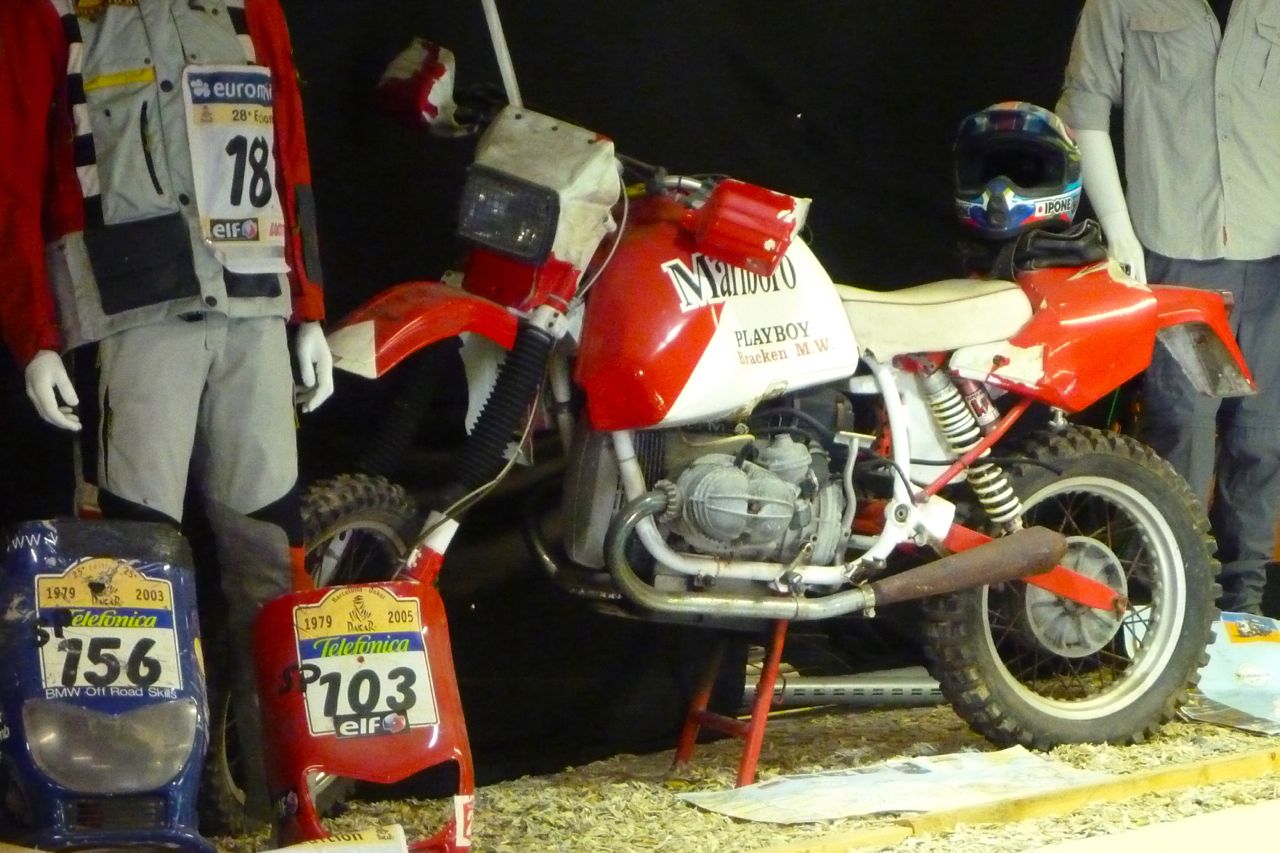
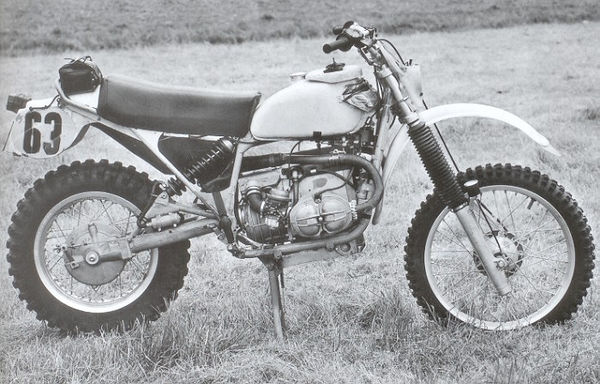
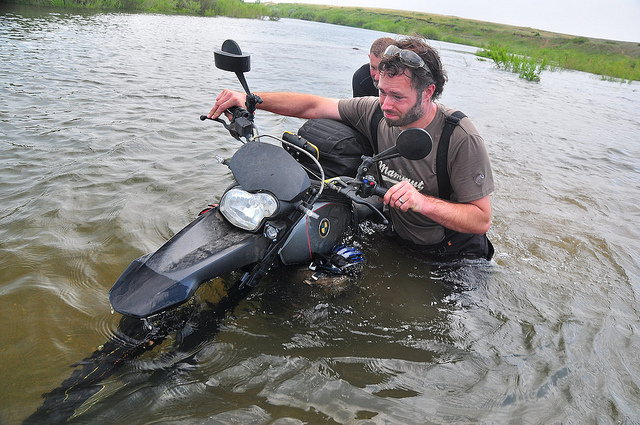
Bas’ 180-kilo G/S reminded me of those ISDT enduro racers from the 1970s (left) from which the Dakar desert racers took their lead. His G/S has a longer swing arm, possibly a one-litre motor, forks from a dirt bike, Excel rims and a mini tank behind the battery in the space opened out by the longer swing arm. Best of all, it just looked like you could take it anywhere you can manage with an XChallenge. In 2012 he did just that, riding with Walter in Mongolia and Far Eastern Russia for five weeks. Walter’s pics and report start here. Bas is currently rebuilding Walter’s tired old Xch around an Xco donor bike.
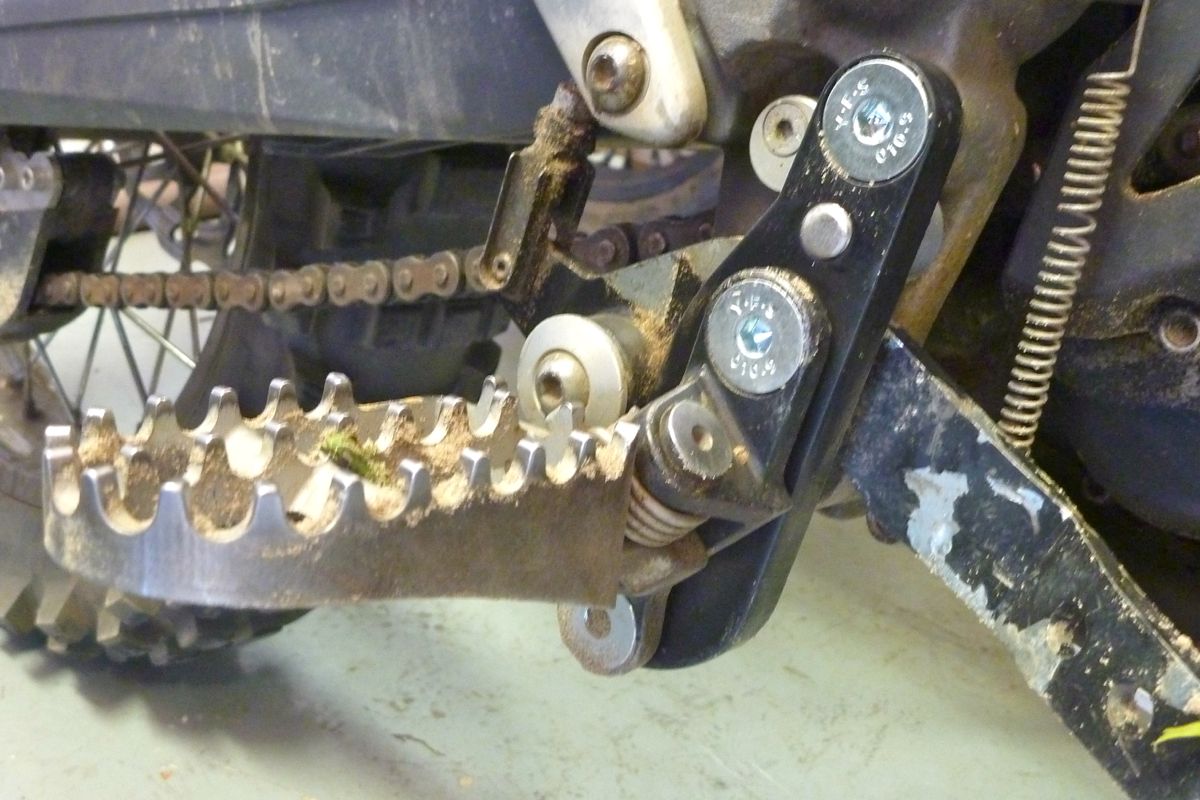
Bas’ g-friend Linda was also on that Russian ride with her Xco and when she turned up at the shop I took a close look at her set up. All the Xs in the shop seem to be running lowered footrest plates, (left), either DIY jobbies or made by Erik. Seems to improve comfort despite the greater chance of rut bashing. I may look into a set myself, as it’s easy to do.
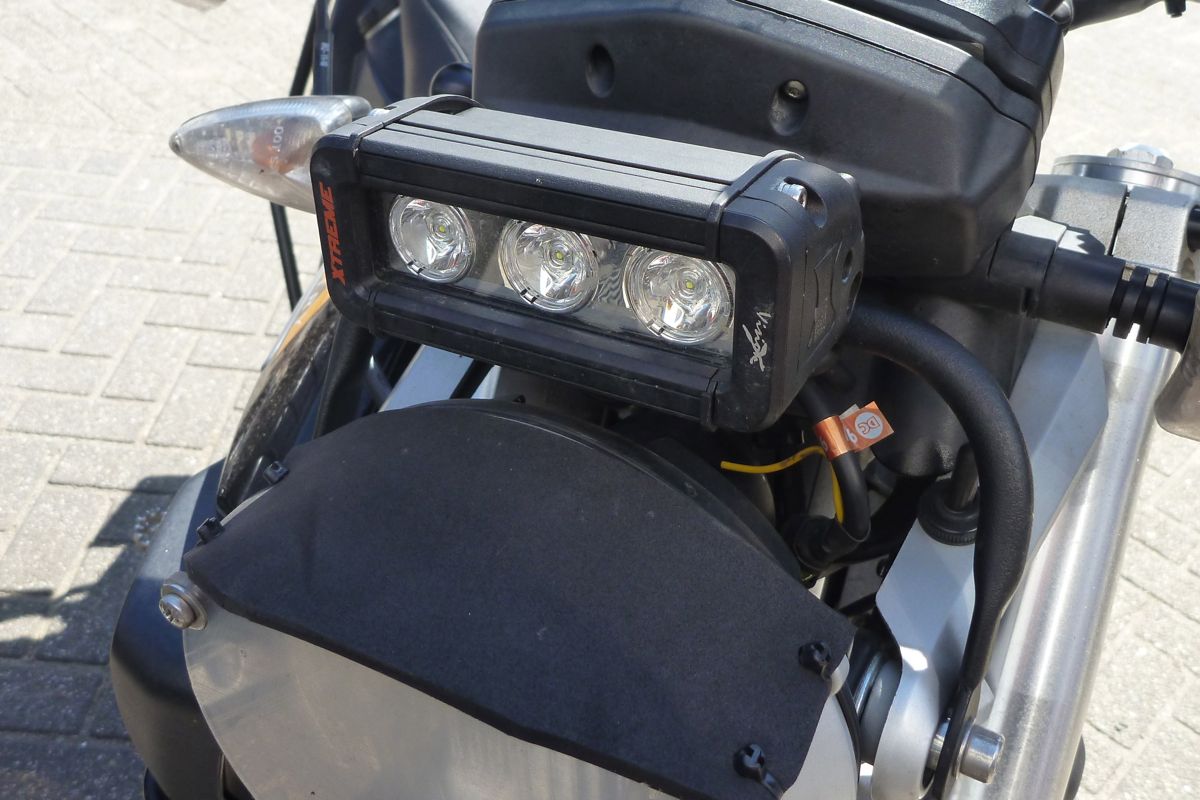
Both their bikes were also running a 5-inch VisionX Xtreme 3 x 5w LED light bar as sold by Adv Spec. Narrow beam is the one to go for according to Bas; it still puts out plenty of light to the sides and is what I feel my bike needs. I haven’t been so inspired to refit the Rigid SR-M light from my GS-R, bright though it was.
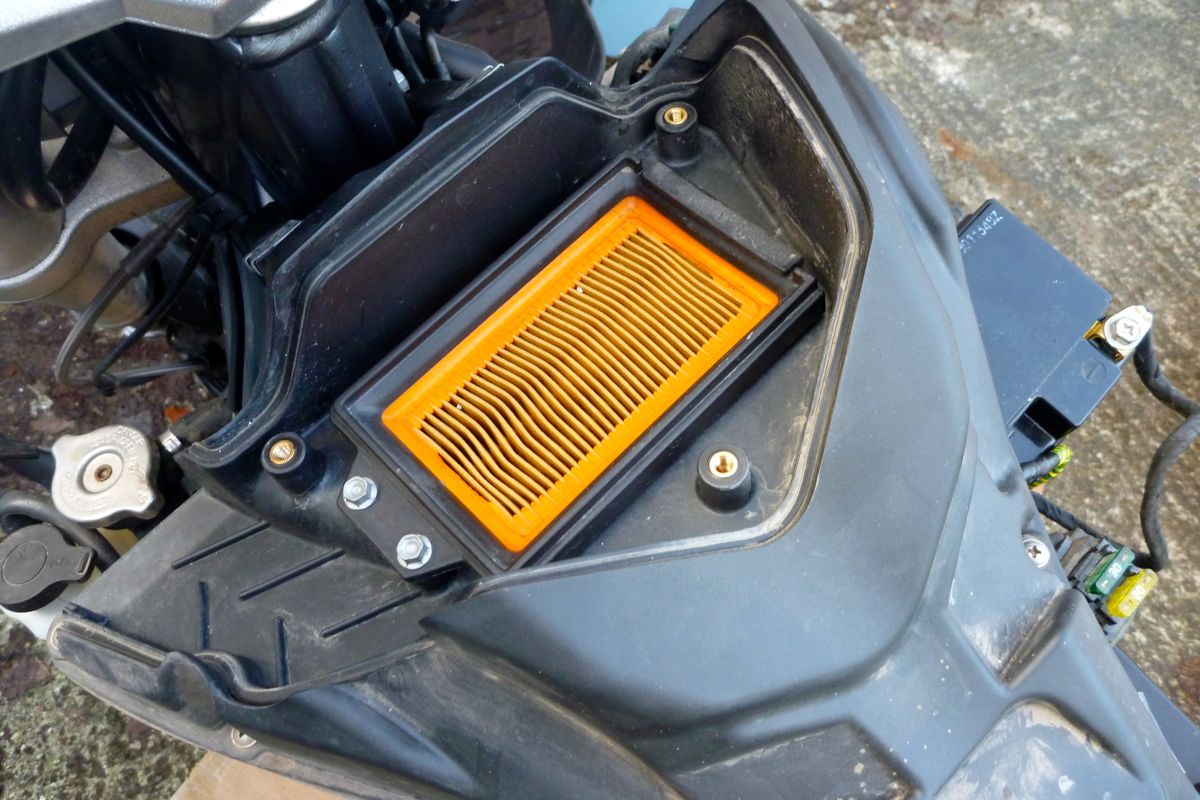
One thing Erik mentioned the day earlier was that the flat upper face of the OE paper air filter tends to shake and sieve desert dust in desert areas. So even though paper works well, oiled foam cleaned regularly is a better way to go on this bike.
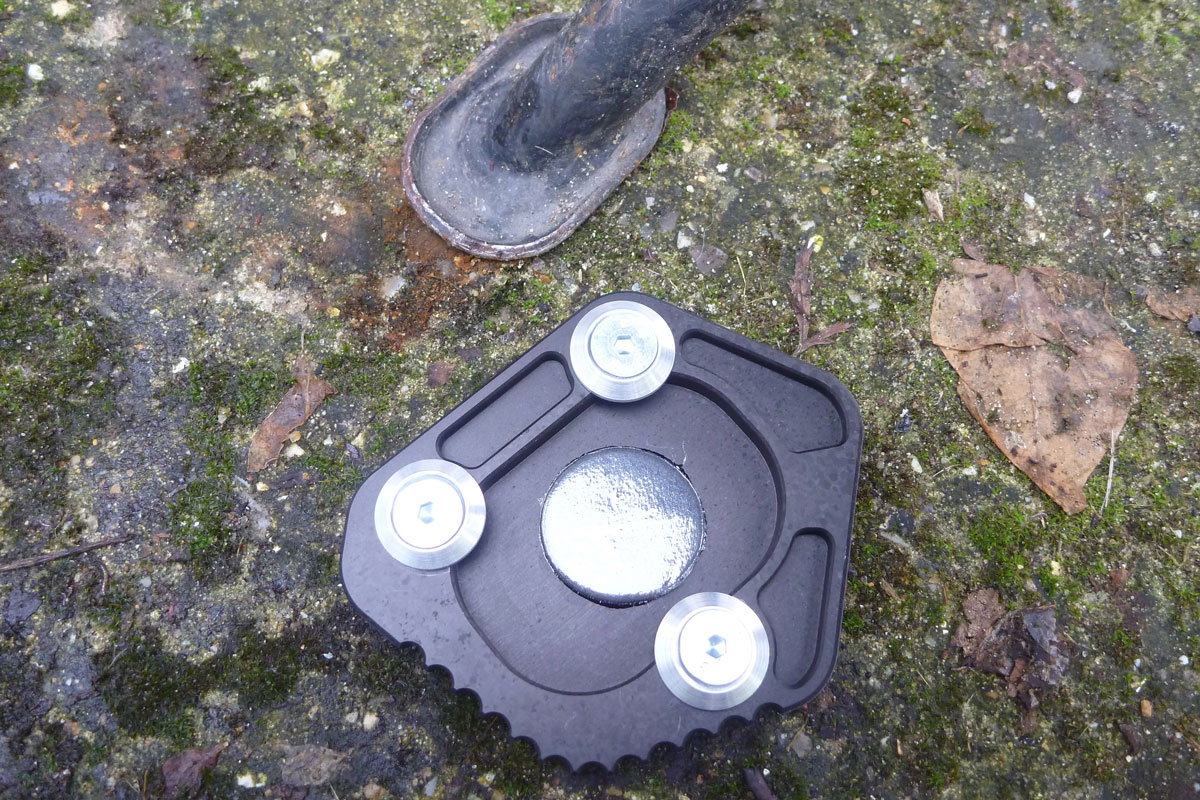
Though my screw on side stand foot plate was just a temporary measure added to a Wunderlich order, Bas was not such a fan of these as they come loose and fall off. I noticed one of the bikes had done a clever DIY job (right) giving the stand extra height to cope with the taller suspension, but it seems welding, just like I did in the old days, is the best way to do it. I now need to position a new plate carefully so as not to foul the shock’s reservoir.
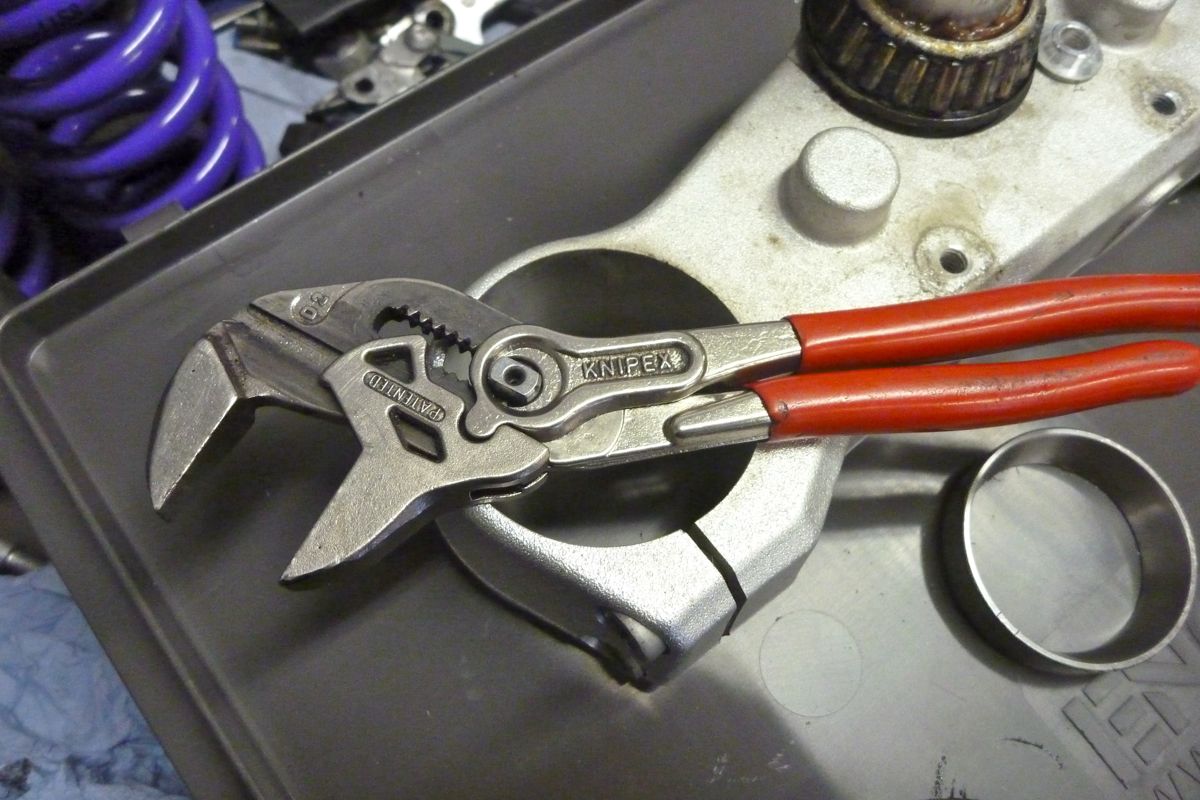
All the chain bikes in the shop were running chain oil drippers and I finally concede this is a way to go and plan to fit one in the near future. For a job that needs doing daily on the road, a can of Wurth Dry lube is just too bulky to carry around and anyway, without a centre stand, hand oiling is a pain. Among the array of fine tools in the Hyperpro shop was this Knipex adjustable spanner that uses grooves and a push button location to eliminate play, unlike those old knurled screw types. It looks like a very nifty general purpose too; I just ordered me the 86 05 180mm model off amazon for £34.
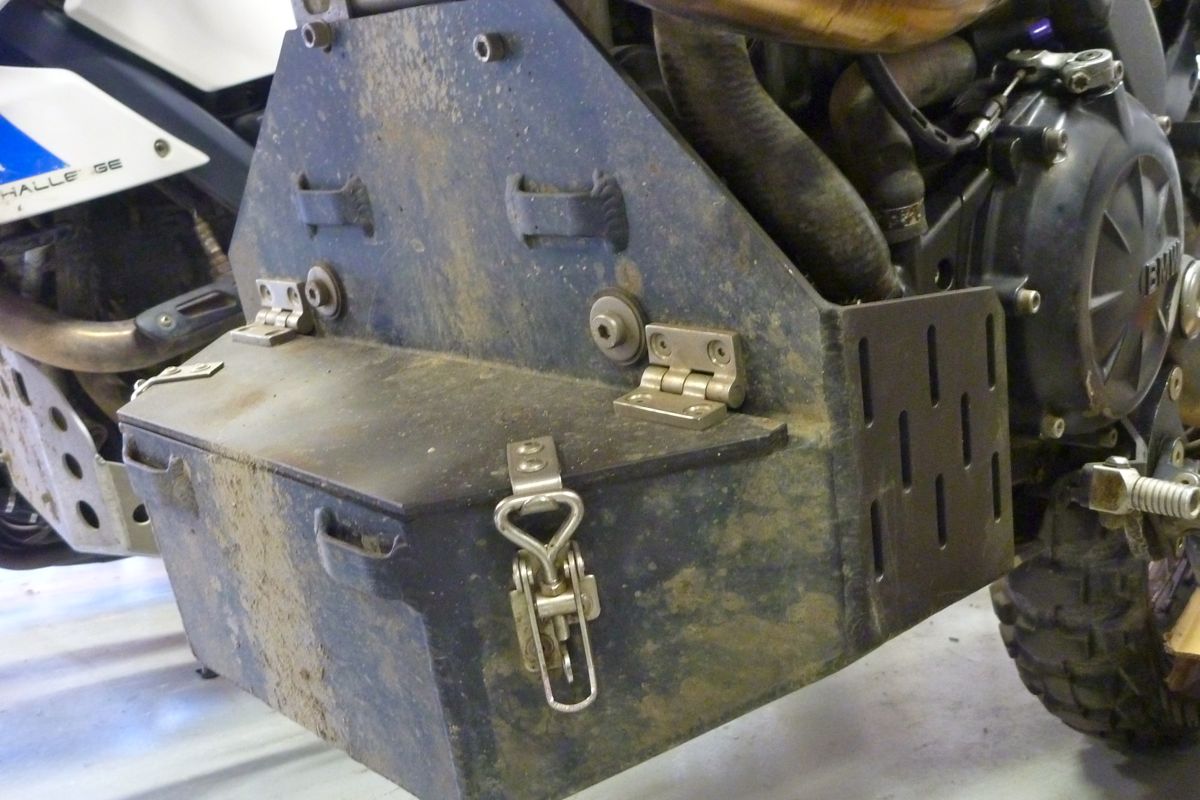
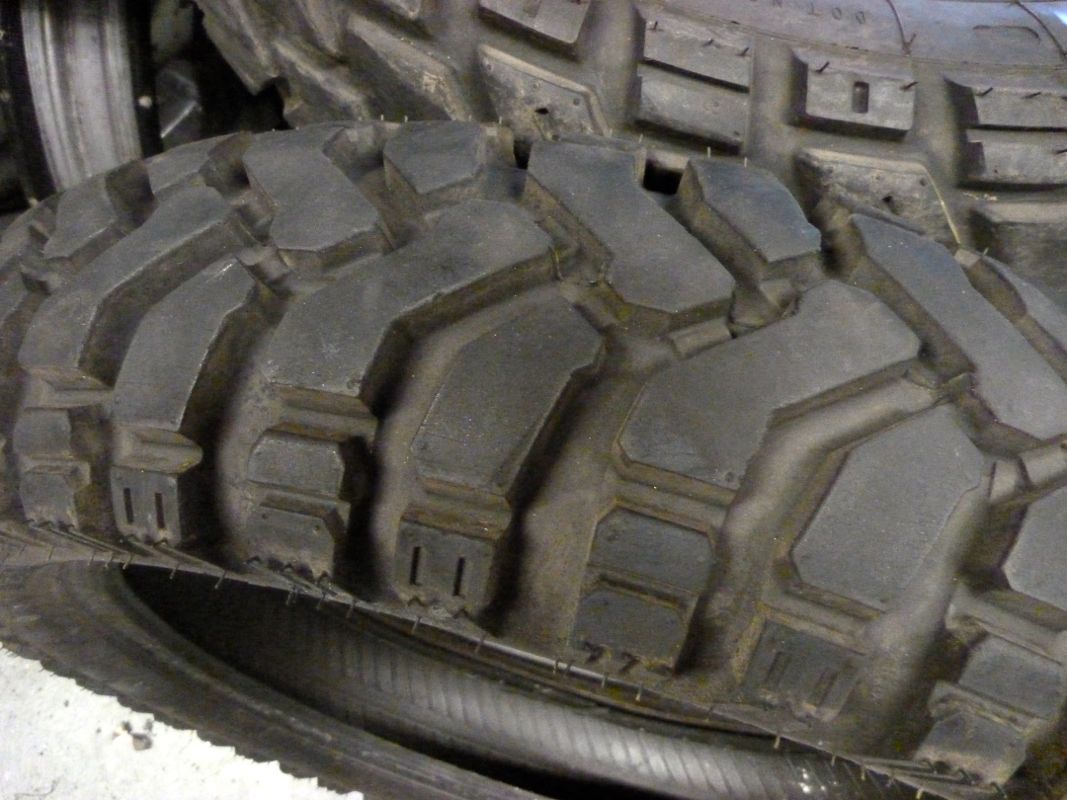
Talking tools, nice case on this XCh’s bash plate (right), though now I’m not putting a tank there my tool pouches are as good I’ve decided. And I had a closer look at a Mitas E07 tyre which is what I’ll try for the next trip, at least for the back. Same properties as the Heidi K60, but possibly better.
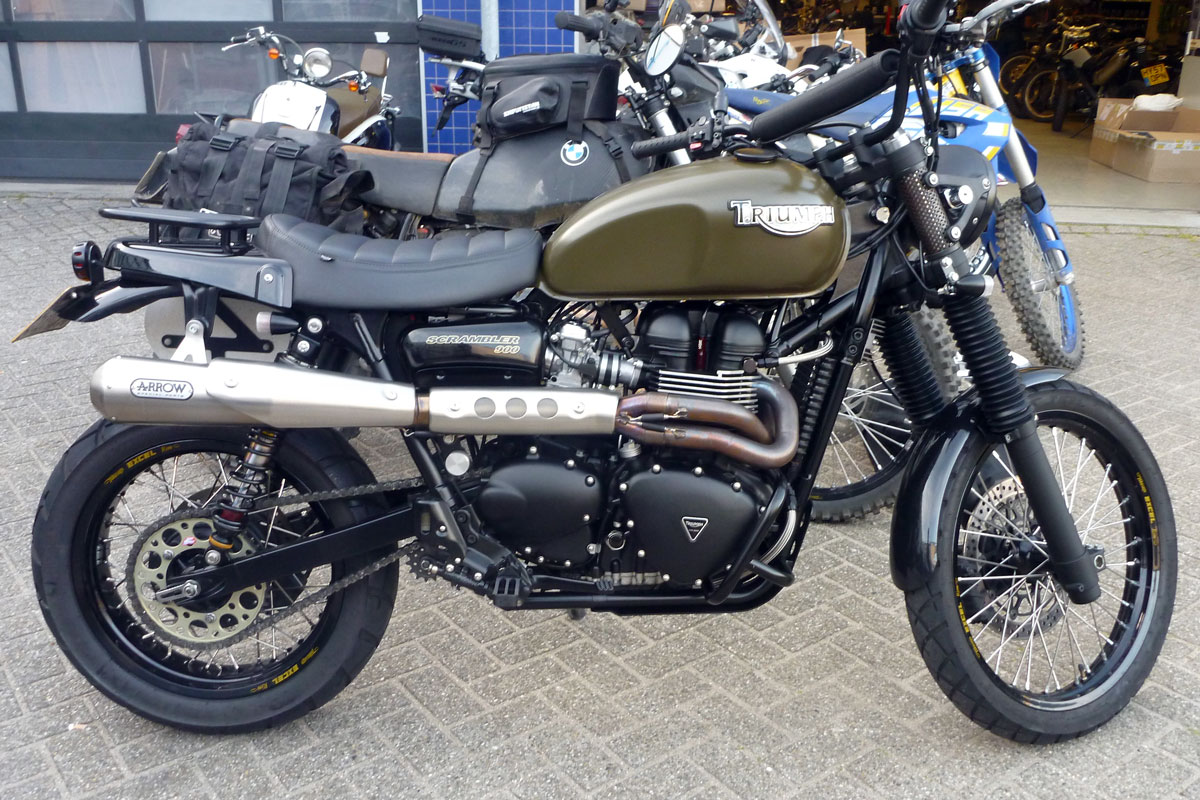
Finally, talking of Steve McQueen, a customer turned up on a Triumph Scrambler 900 similar to the McQueen Special produced last year to commemorate the film’s half-centenary. Great looking machine, like most Triumph twins, but heavy and when I briefly sat on it it didn’t feel right; seat way too wide. Couldn’t see me sliding confidentially around alpine meadows on that one. I’ll take a regular Bonneville or Bas’ elongated G/S.
During sunny spells over the last week or two the XCo has been slowly gaining weight on its way to becoming a functional desert bike.
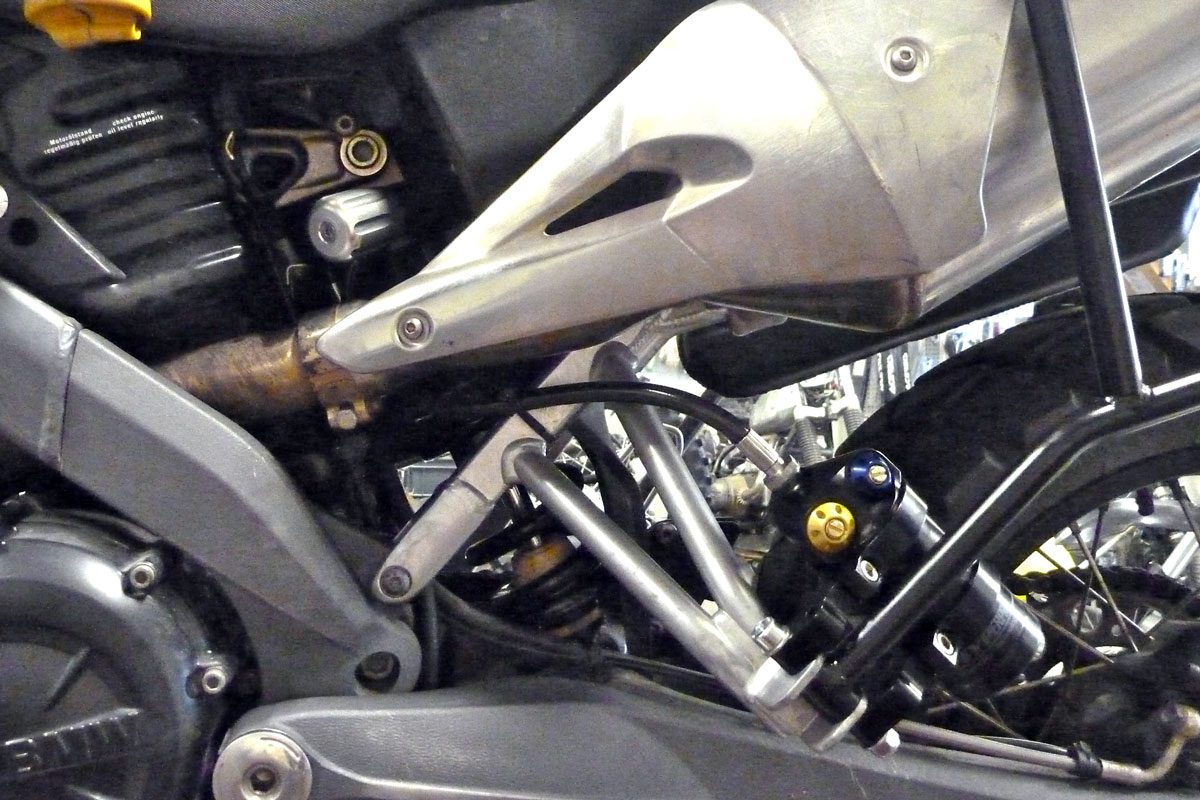
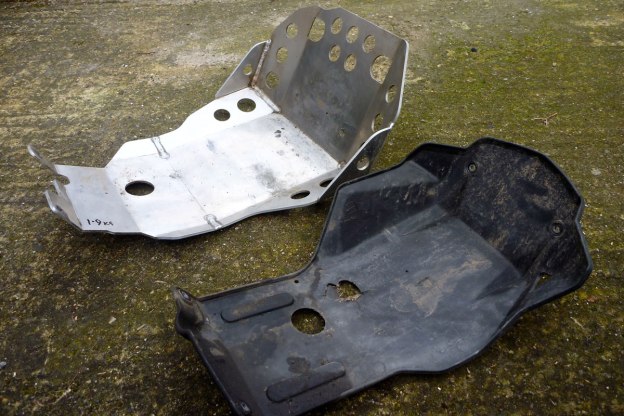
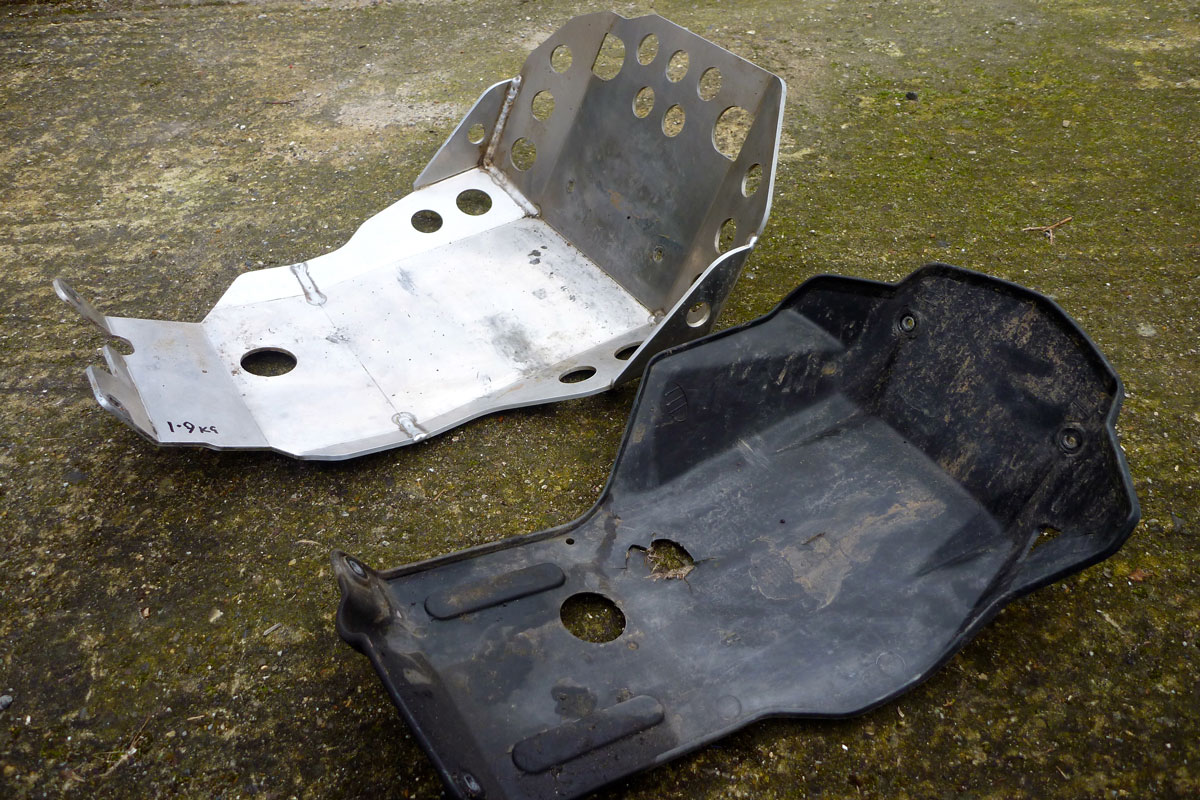
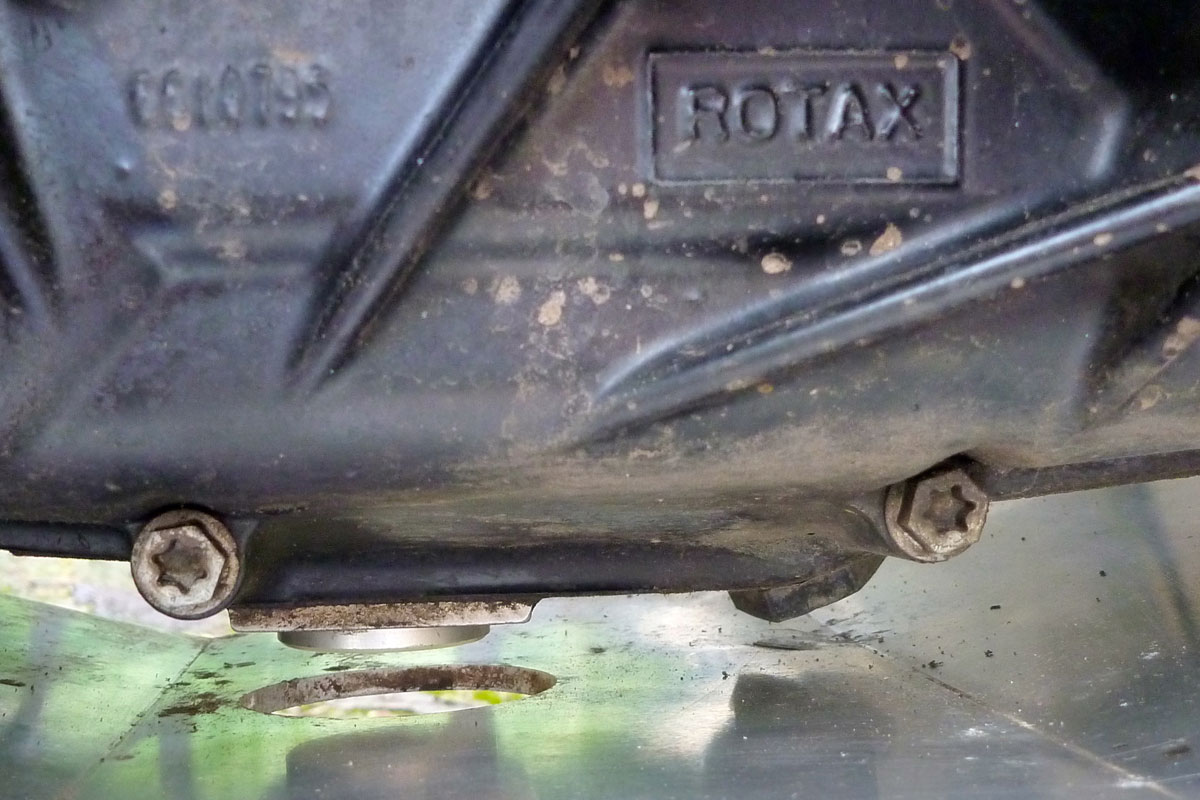
A mate running an XCh sold me his Touratech Rally bash plate(1.9kg vs 430g).Adding one of theseis a no brainer although surprisingly it’s about the same size as the OE unit except of course it’s made for the job not the look. As it was, removing the original unit revealed it had already been holed, not at the drain plug (which looks like a TT low profile replacement – £27 saved, hallelujah!) but at the adjacent oil line junction which is now the lowest point (right). It looks like the used TT plate also took a hit there in a previous life. With no frame rails under the engine to rest on, the plate is unsupported between the mounts at each end which may explain how it got dinged off the oil nut. I may stuff some dense closed-cell foam in there, especially around that oil nut, to help dampen a heavy smack on the middle of the plate.
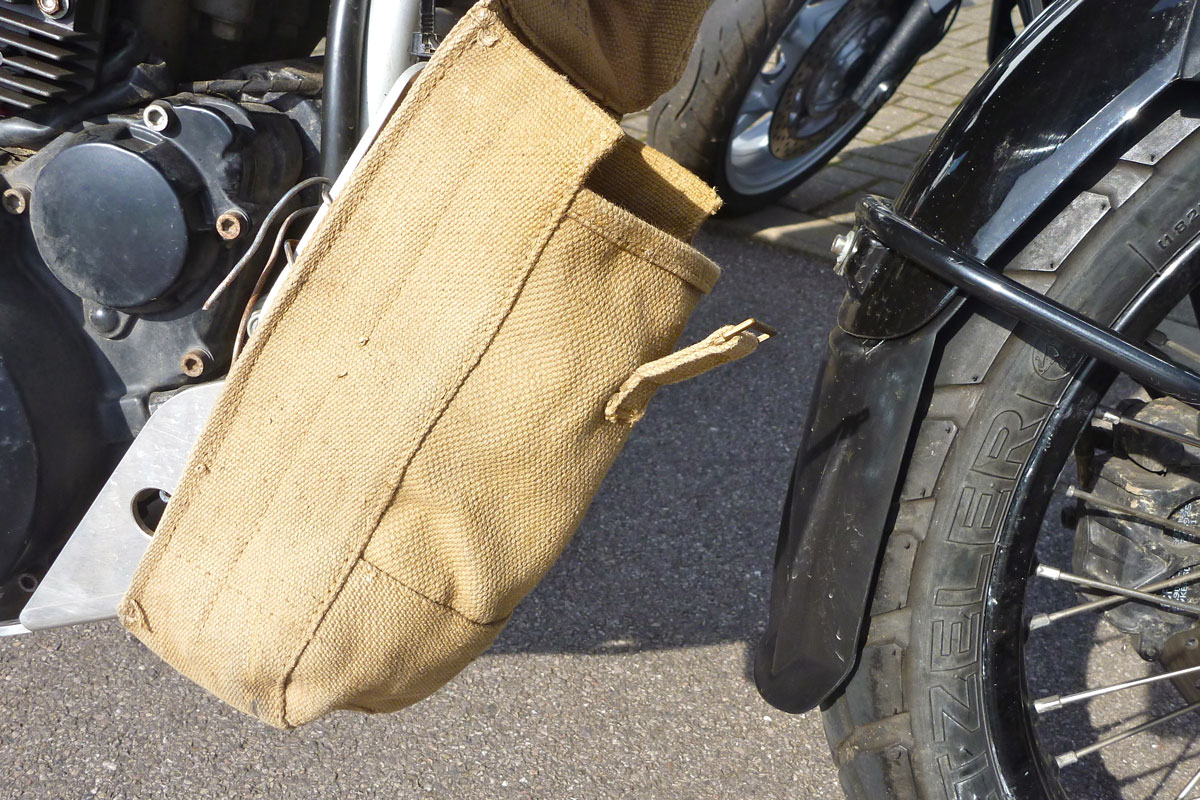
Normally I’d have made one out of plastic or rubber, but along with other stuff from Wunderlich (40% cheaper in Germany – where have you hear that before? So much for the EU), I treated myself to their fender extender(left; 100g?) to stop crap clogging up the radiator. It fits on in a jiffy but needs a longer replacement bolt which Wunderlich don’t supply, although they do supply you with a 3-kilo catalog. As you can see I’ve also fitted my ‘signature’ canvas tool pouch (left; 200g?). You read about adapting tractor tool tubes but I like the pouch; it’s bash proof, rugged, easy to close and takes a 1.5L water bottle, my tool roll or whatever’s needed. You’ll find them on ebay for around a fiver. Search: ’58 pattern canvas ammo pouch’. I am definitely getting old and lazy as I coughed up for a Wunderlich enlarged sidestand foot too (50g). It will be OK on soft ground but I know for sure it won’t be big enough on soft desert sand. Perhaps I’ll extend it when the need comes and anyway it saves welding permanently onto the bike.
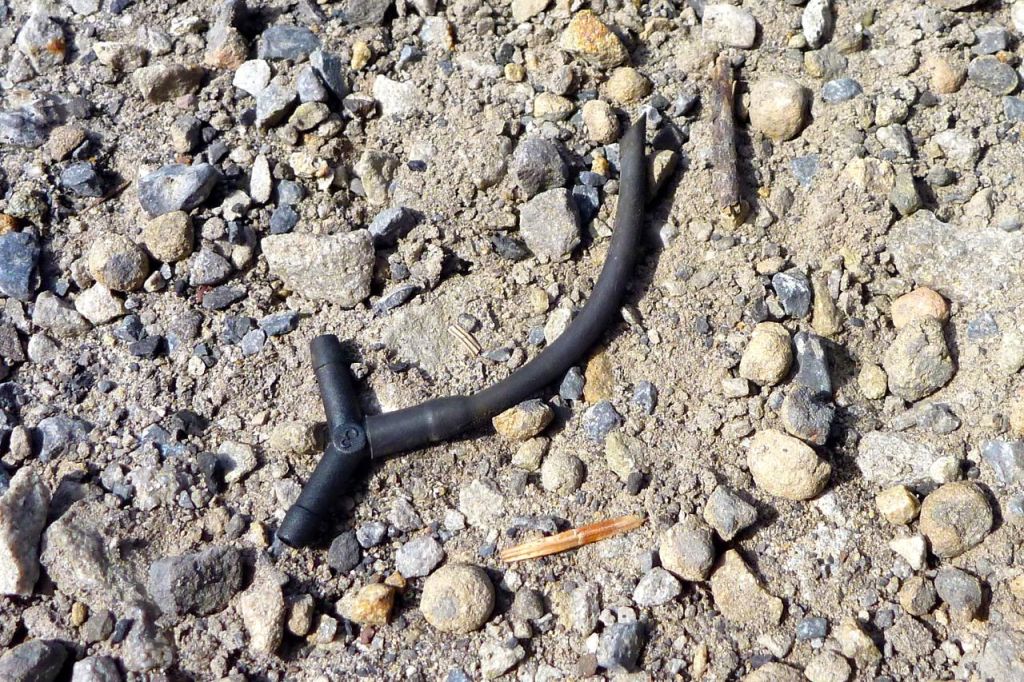
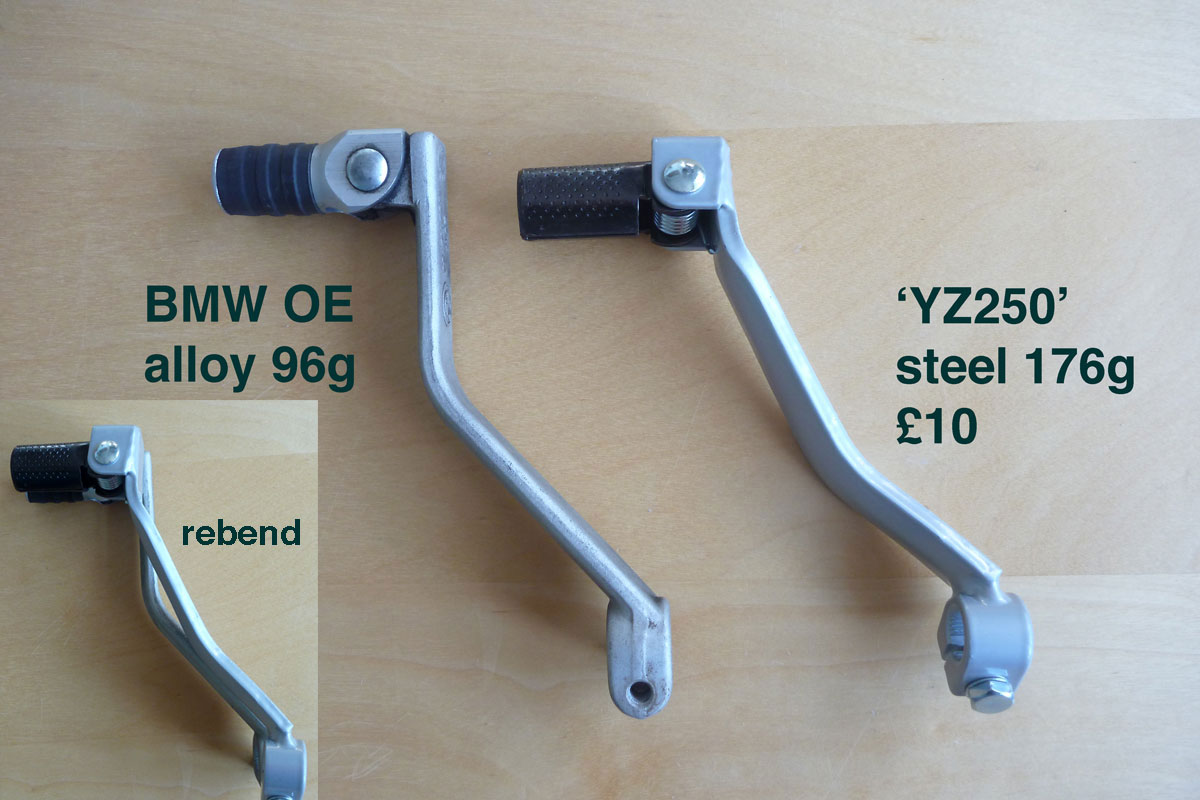
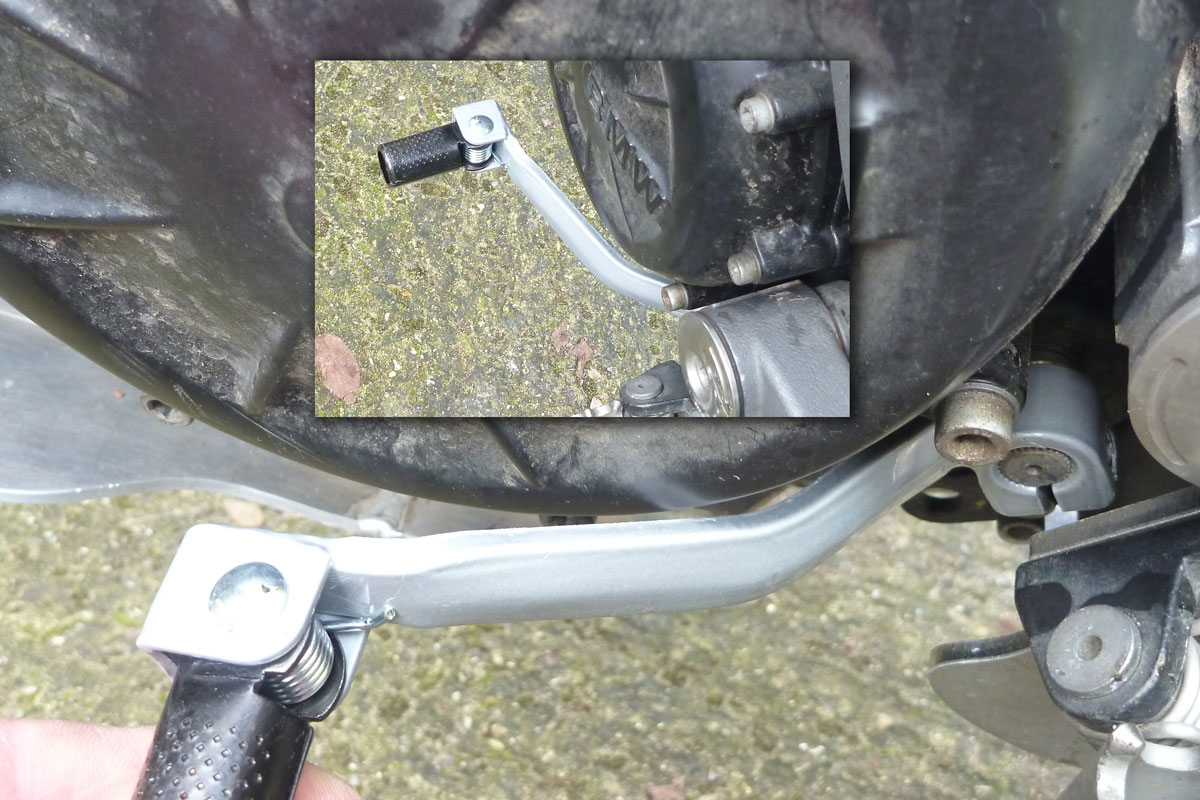
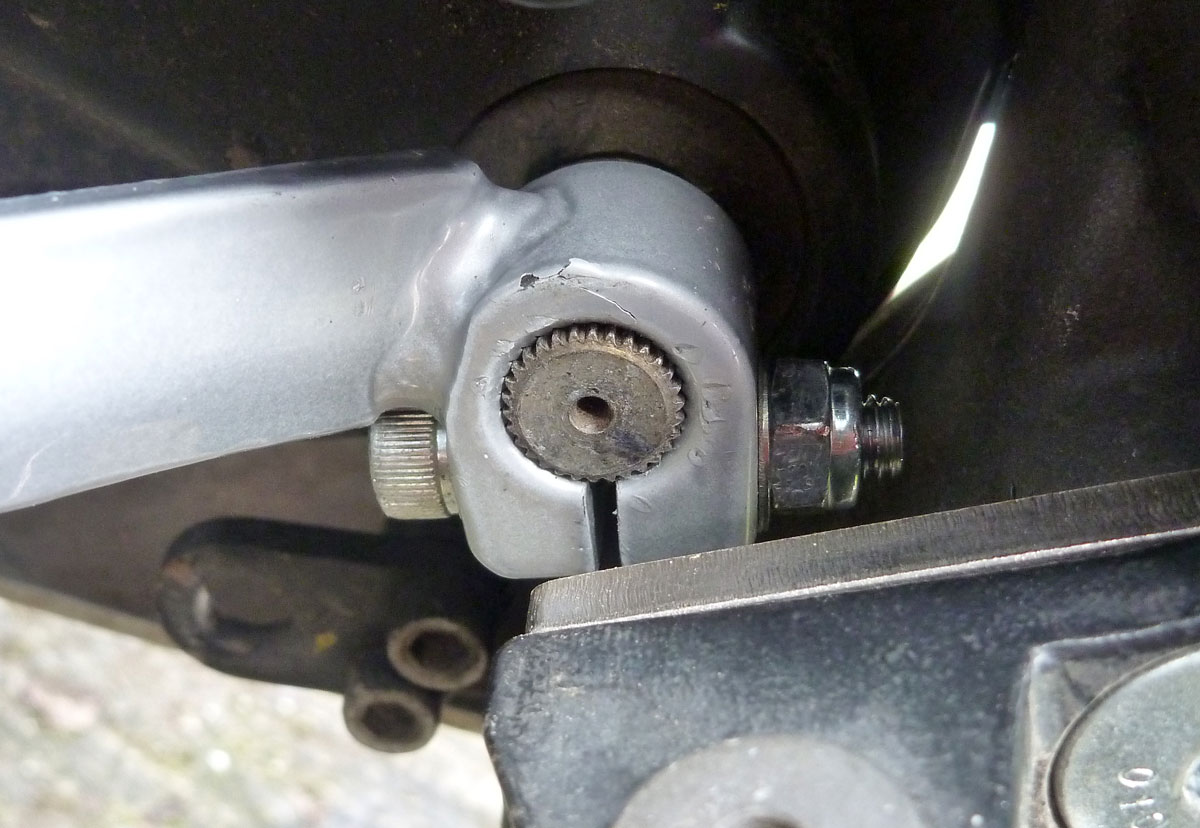
The alloy shifter on the X bikes sticks out vulnerably from the narrow engine and is said to be too rigid to the point where it can snap or damage the selector shaft. You don’t want that. They say old 650 Funduro steel ones fit or later F650 Dakar shifters, but the selection (so to speak) on ebay looked like they’ve all been over an IED and most didn’t have a folding tip which is as useful as bendy steel. New ones are £60 but on a tip I found a YZ250 cheapie from MD Racing posted for a tenner (176g vx 96g). It gets very close to the case so needs a little rebending to match the OE item which I’ll get round to with some Mole grips or a vice. I also found there’s no room to get the bolt in once on the splines, so I put a longer bolt in from other end with a nut (right).
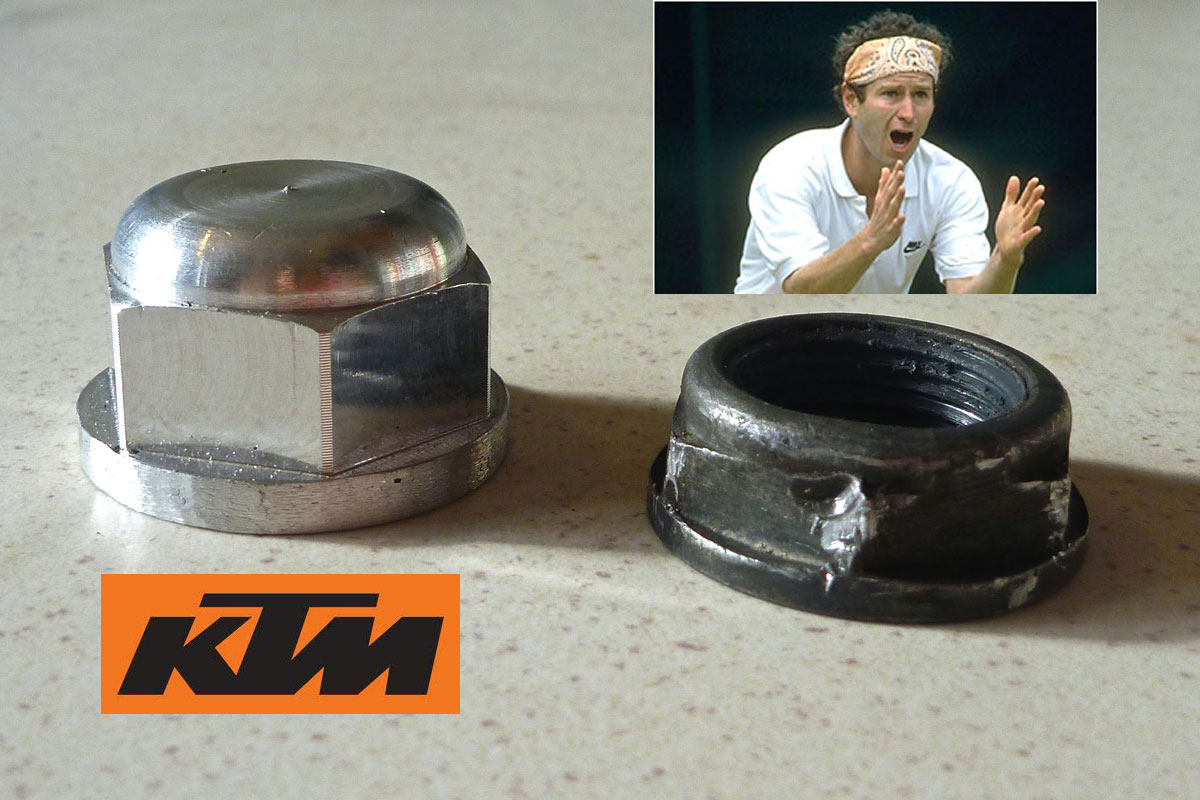
One of the less bright ideas to save weight on the X bikes was to use wheel spindle nuts with faces about 5mm wide. What chance has a commonly used nut like that got of not getting mashed? None at all I can confirm; the front one undid OK but the back nut soon turned into a fat washer and had to be chiselled until the bugger split right off the spindle. Luckily, Xbike gurus out there have found that lighter domed alloy 27mm KTM 450 nuts fit (p/n 50310099000; about £4). Sort of. Again, the front fits fine but for the back you have to trim a millimetre off the radius of the collar so it fits against the sunken chain adjuster (more details at the excellent mattsnook Xcountry resource). I don’t have access to a lathe to do a neat skim job but found that chamfering a bevel on the collar’s edge with a grinding stone on the end of a drill did the trick. Overall I’d have preferred a regular steel wheel nut – 27mm in M20 1.5mm is what you need – but gave up finding anything close to the price of new KTMs nuts so I’ve bought a third as a back up in case one gets mashed.
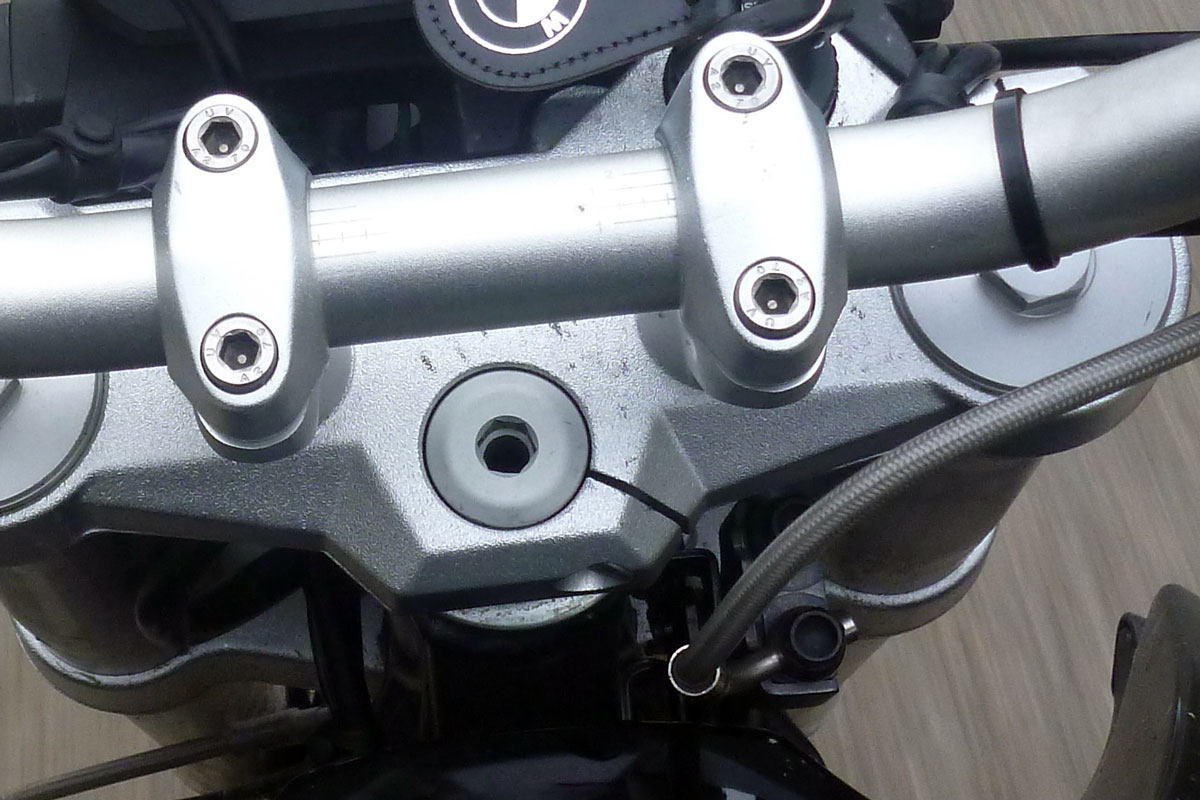
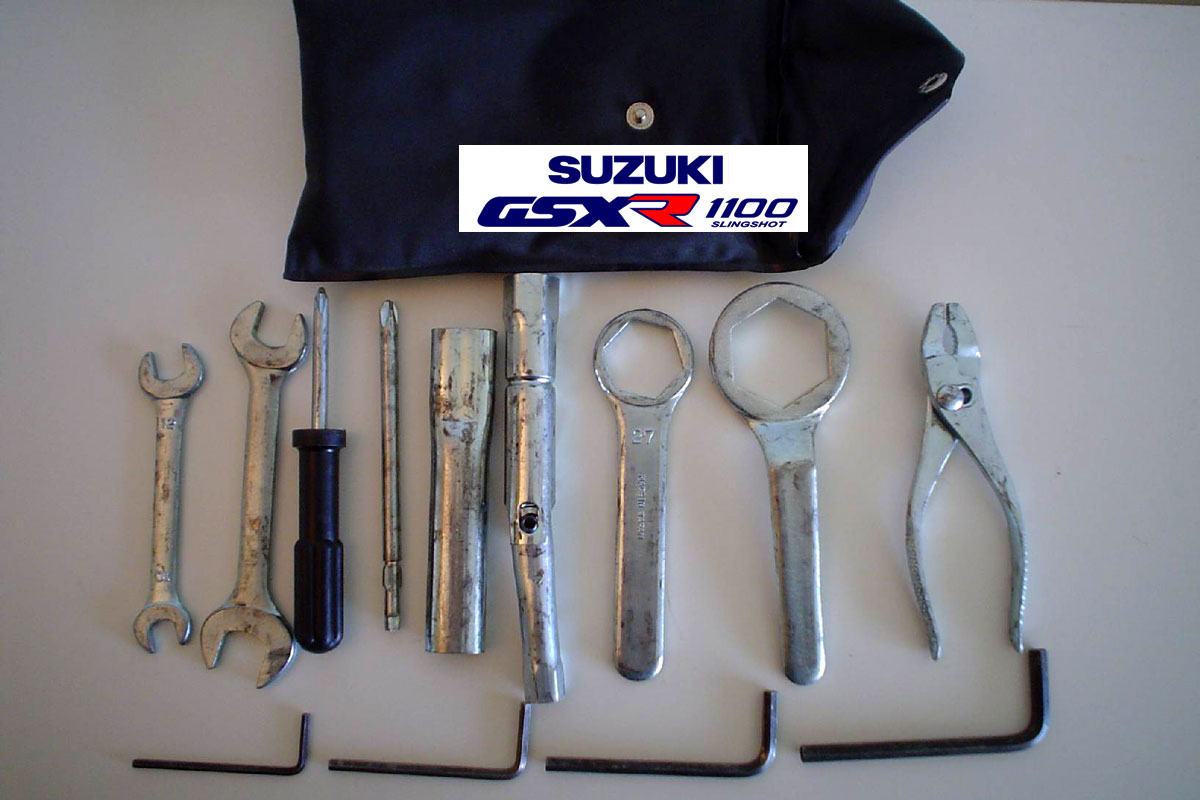
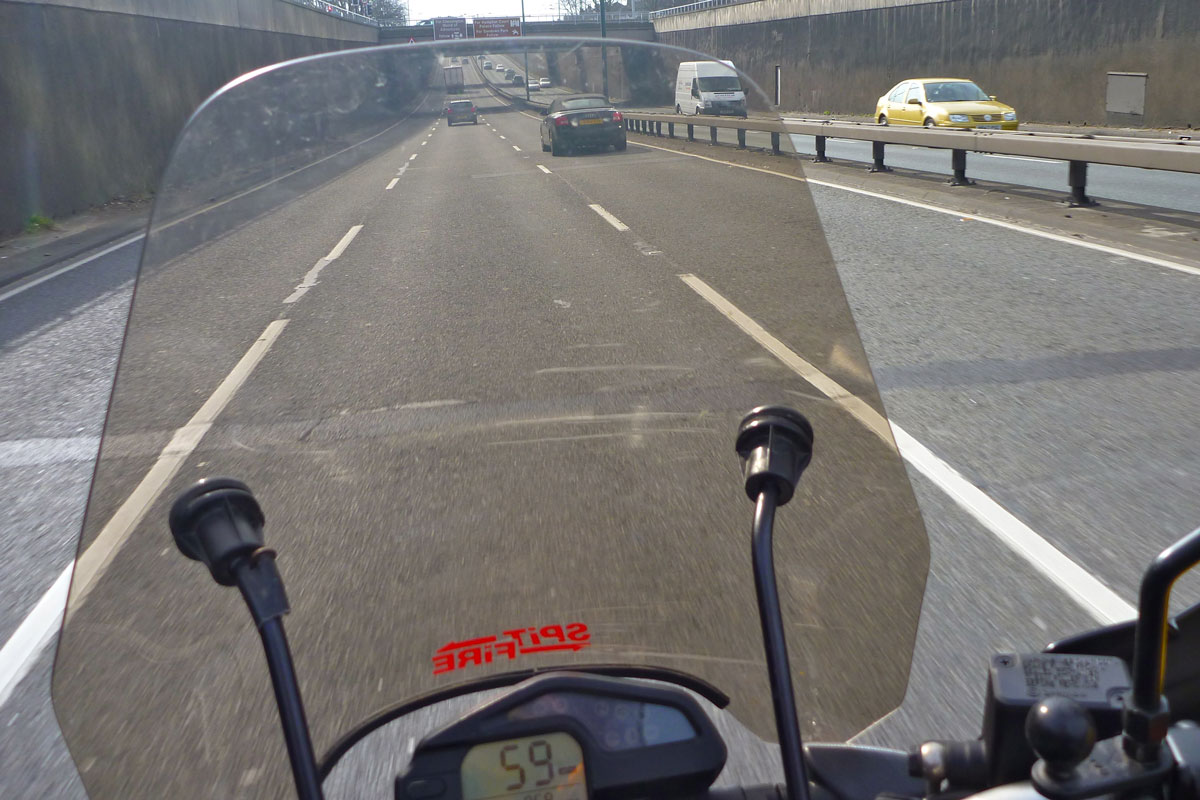
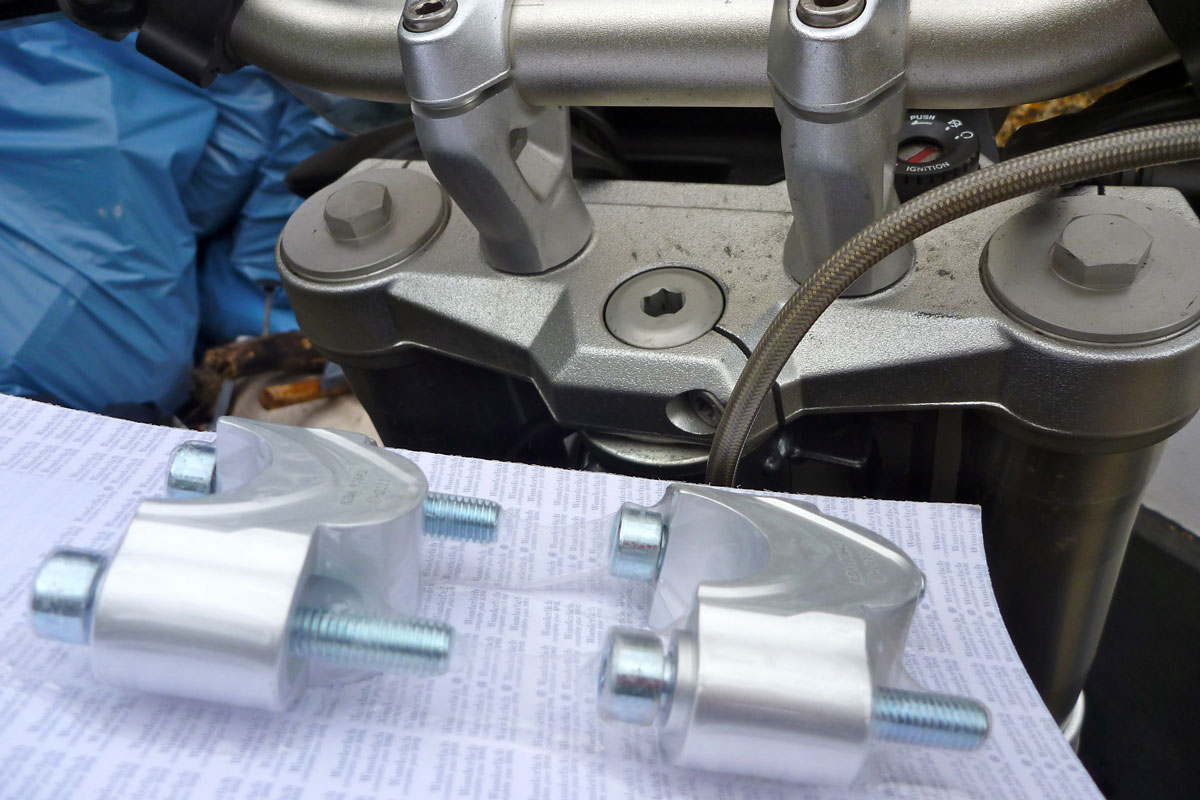
My bike was missing its BMW toolkit and guess what, a new one only costs £112 (though many other BMs share it; see link). Now I have the wheel nut size sorted at the more regular 27mm size, I started looking for one of those flat ring spanners you get with Jap bikes plus some mini pliers to add under the seat with a few spanners and hex keys. After hours on the web trying to save a fiver, the cheapest solution I found was something like a used toolkit off an early-ish GSXR1100. Plenty of them around once so plenty in the breakers. I got one as shown above for £15 posted. It comes with the vital flat ring 27mm with extension handle, pliers and all four hex keys match exactly what the BMW uses. With a 12mm for the chain tension and a combo 8/7mm ring I’ll be in business. If not hex, then the 650X uses a lot of 8mm head, plus a couple of 7s and 13/15 on the mirrors where I’ve fitted some RAM ball mounts (see windscreen image below; 50g) for GPS, cameras and so on.
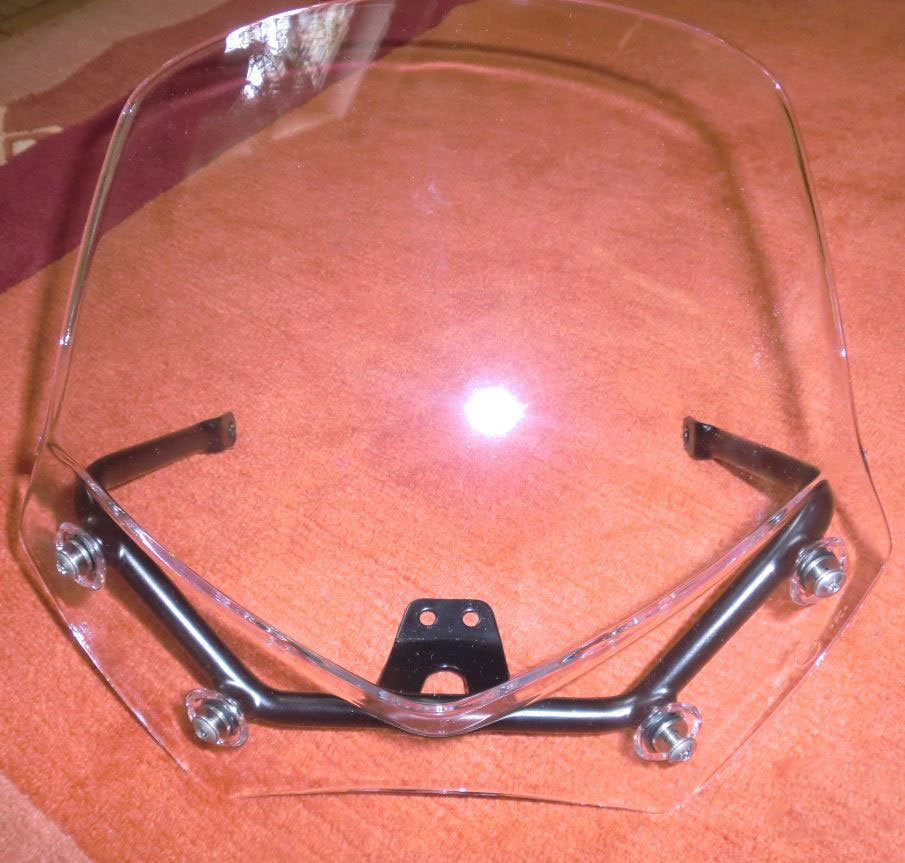
I’m not convinced it’ll be up to it, but seeing as it’s around, I re-fitted my US-made Slipsteam Spitfire windscreen (~1kg?) off last year’s CRF-L. There are plenty of windscreens to be had in the UK, but for just $20 for some larger 1 1/4 inch clamps to fit the BMW’s fat 1.125 (28.5mm) bars, it was worth the gamble. On the 30-mile run down to Vines in Guildford along on the A3 to get the subframe, I fully expected it to play up, but it held firm at 70mph, despite its single pair of mounting stalks. I can’t say sitting behind it was like being in the back of a Mercedes sedan in full repose, but it must lessen the wind pressure and didn’t seem to affect the handling. That may yet prove an issue as the BM is faster the old 250 CRF. The great thing with the Spitfire is it comes off in a jiffy if heading off road. Apparently a smaller screen off a BMW R1200R (right) fits right onto an Xcountry too – the price for the screen and frame new from BMW? – don’t ask – but I picked up a used one on ebay.de for around €100 in case the Spitfire proves to be a misfire.
In my Wunderlich shopping frenzy I bought some ~25mm bar risers but I’m not sure there’s an urgent need for them just yet, as I’ve found briefly standing was not too much of a stoop. Maybe one for later when the off roading begins in earnest.
So all up with these adaptions I’ve spent around £300 including the spare screen and added about 3.5kg.
Still to come on Project X Fitting a tail rack and increasing the woeful 9-litre fuel capacity. Fit a 12-volt power socket. Fit my ex-CRF-L Barkbusters when the fatbar clamps turn up (current ones are all-plastic cheapies). I also noted with regret that the shock is on max pre-load so at the very least I’ll probably need a heavy duty spring from Hyperpro, if not the Wilbers stick they all rave about.
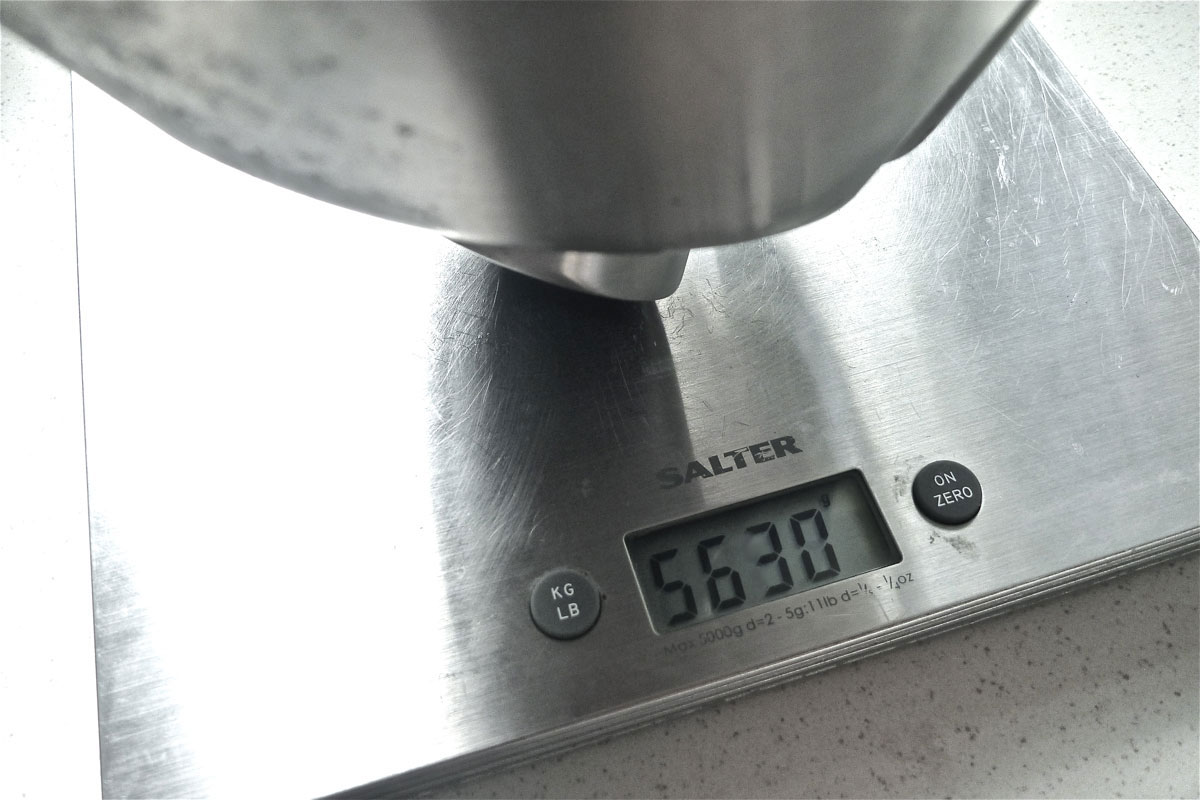
Looking into the huge silencer which weighs in at 5.6kg, the word seems to be that nothing else works as efficiently, despite the great noise they might make and the 2 kilos of weight they may save, so put your money into something else. It may be worth performing a catsectomy to cut out the cat converter in the silencer’s end cap. I’m told by Hot Rod Erik this only saves about 300g but it significantly reduces the heat built up (which cats need to work properly) at the front of the pipe. That may affect emissions for future roadworthy tests, but is probably a good idea for the desert if I can get hold of a bashed up X-silencer.
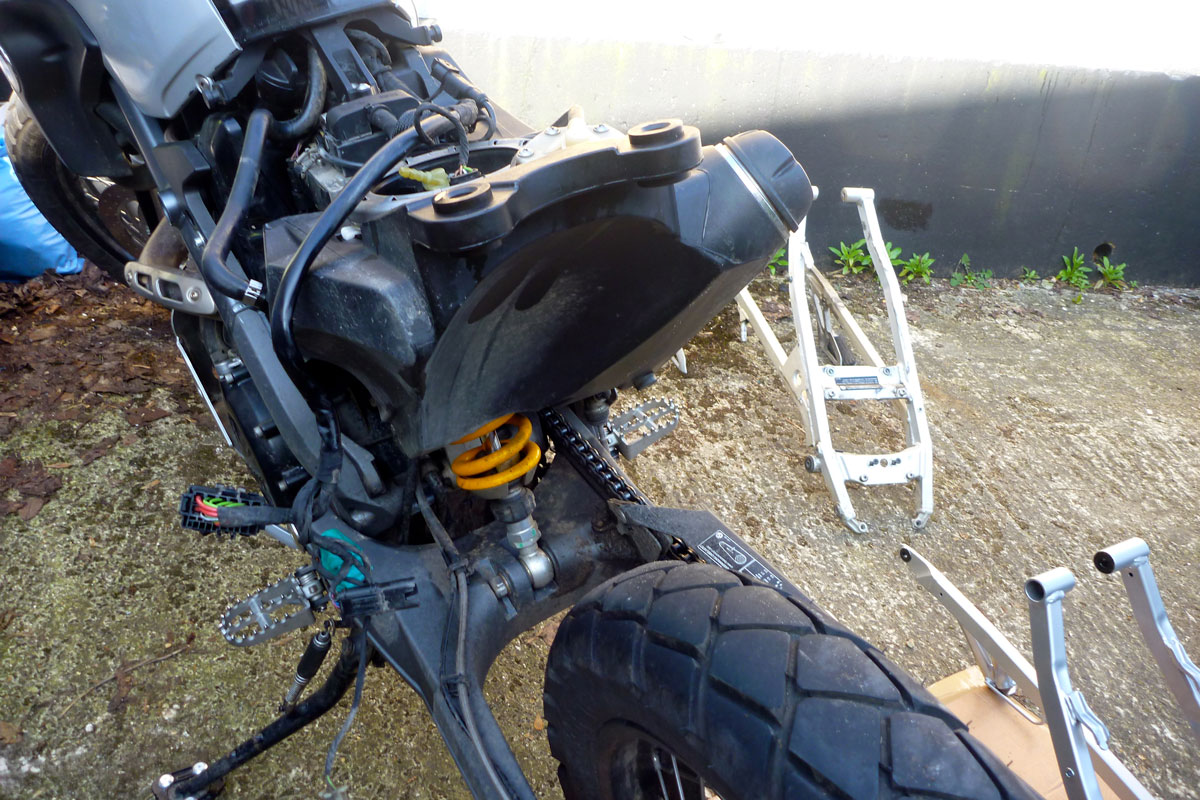
One of the flaws BMW addressed on the Mk II 650 Xcountry (right) was an overlight alloy rear subframe. Of the three models the Xco was especially prone to failures as it was was the only one in the Xrange with pillion footrests.
For solo bumbling around the alloy frame will doubtless be fine, but with a passenger on an XCo, let alone riding a loaded XCh off road, the subframe proved inadequate. Presumably enough warranty failures occurred for BMW to upgrade the yellow Xcountrys from 2009 with an identical unit in steel. About twice as heavy but much stronger. Only problem is yellow Xcos are considered a bit to low and under suspended for all-terrain travel biking duties.
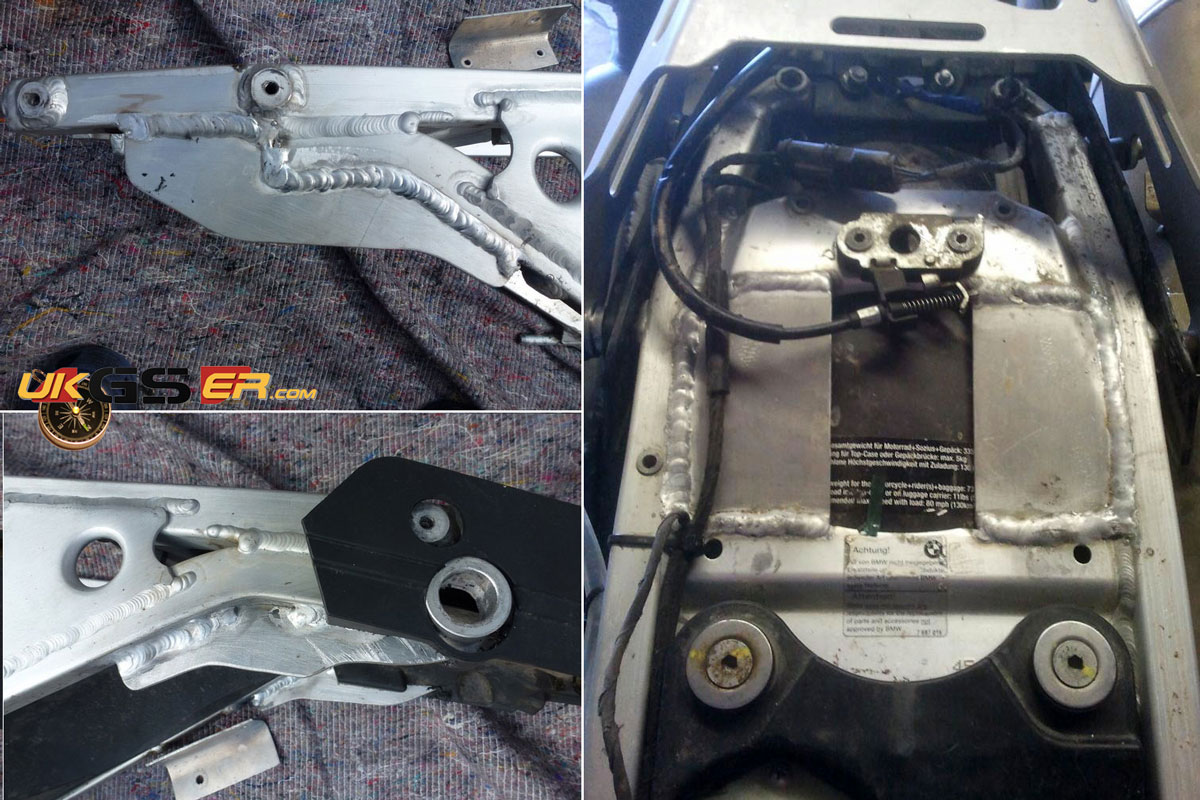
There are other options which work on all the X bikes, not least the popular XChs: strengthen your original alloy subframe around the back where it commonly cracks with horizontal and vertical plates (right). Easily done but long term the subframe needs more than that. With heavy loads, rough terrain and the passing of time the stressed alloy fabrication clamped to the steel main frame will flex and slowly wear at the four mounting bolts. It may also distort sideways when you fall heavily with bulky side luggage. Within reason skimpy steel subs can handle being bent back straight and many XR owners know. Alloy does not like that sort of abuse and
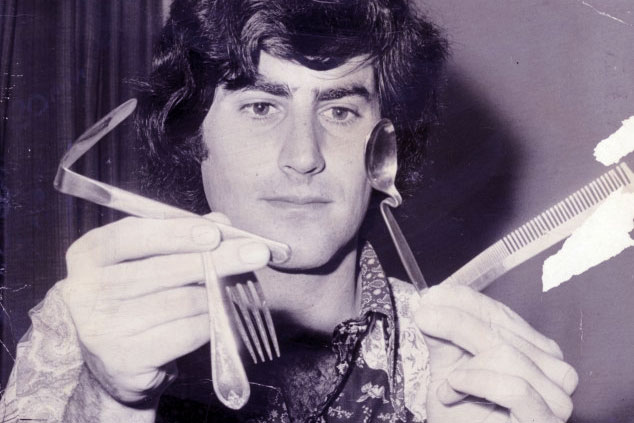
will eventually fail like Uri Geller’s spoon. Furthermore the bolt threads at the back of the alloy subs where steel racks get mounted are also prone to wear and although it may be a bit of an adv myth, out in the field it’s certainly easier to get steel welded than alloy.
Xman Erik in NL can upgrade your alloy subframe; beefing up the stressed-upon upper mounts (red arrows) and replacing the alloy threads with steel inserts (green arrows). That plus the bracing as shown above right will make your alloy Xbike subframe as good as it can be and may work for most overlanders.
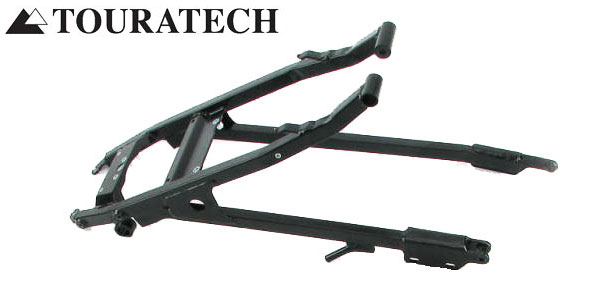
A better option: fit a Touratech steel subframe (left) which TT brought out early on for the XChallenge to carry their luggage frames and alloy boxes. The original alloy frame would never handle that sort of weight on rough ground, whatever you did to it. Those steel subframes (TT p/n: 05-049-0600-0; left) can be bought independently from the whole luggage kit for £420 in the UK, but I was told were unavailable for months. Hot Rod Erik often takes in TT steel subs and modifies them to suit his Xracks and Xtank.
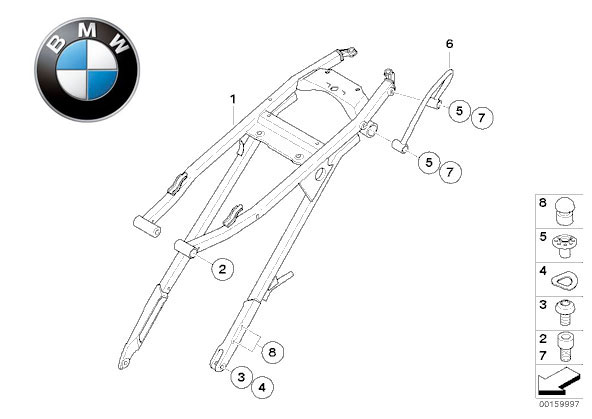
Last option: fit a BMW steel subframe from the yellow Xcountry (p/n: 46517716439; right). Brace yourself for the price… only £480 inc. These were also said to be in short supply in the UK so I got wondering about getting one fabricated. A frame builder turned the job down while suggesting ~£450 was actually a good price. Then a weldy mate offered to make one for ‘about £300 – but it won’t be pretty’ but out of the blue BMW came through with a yellow steel frame.
Five hundred quid for a steel subframe – is that nuts? If you’re adapting an Xco into a travel bike I don’t think so. Whether from BMW or TT, I believe a steel unit is the single best solution to the Xbike subframe issue. A full Hot Rod upgrade on an alloy one (even done in the UK) might cost up to £200 and it will still be a torsionally weak alloy sub. I didn’t hesitate long before ordering a BMW steel unit and if money’s that tight, when my bike’s job is done I can swap the alloy back on and flog the steel on for a good price.
Subframe weights BMW alloy (with pillion mounts but pegs removed) 2.7kg (verified) TT steel (no pillion mounts) 4.7kg (unverified) BMW steel (with pillion mounts but no pegs) 5.6kg (verified)
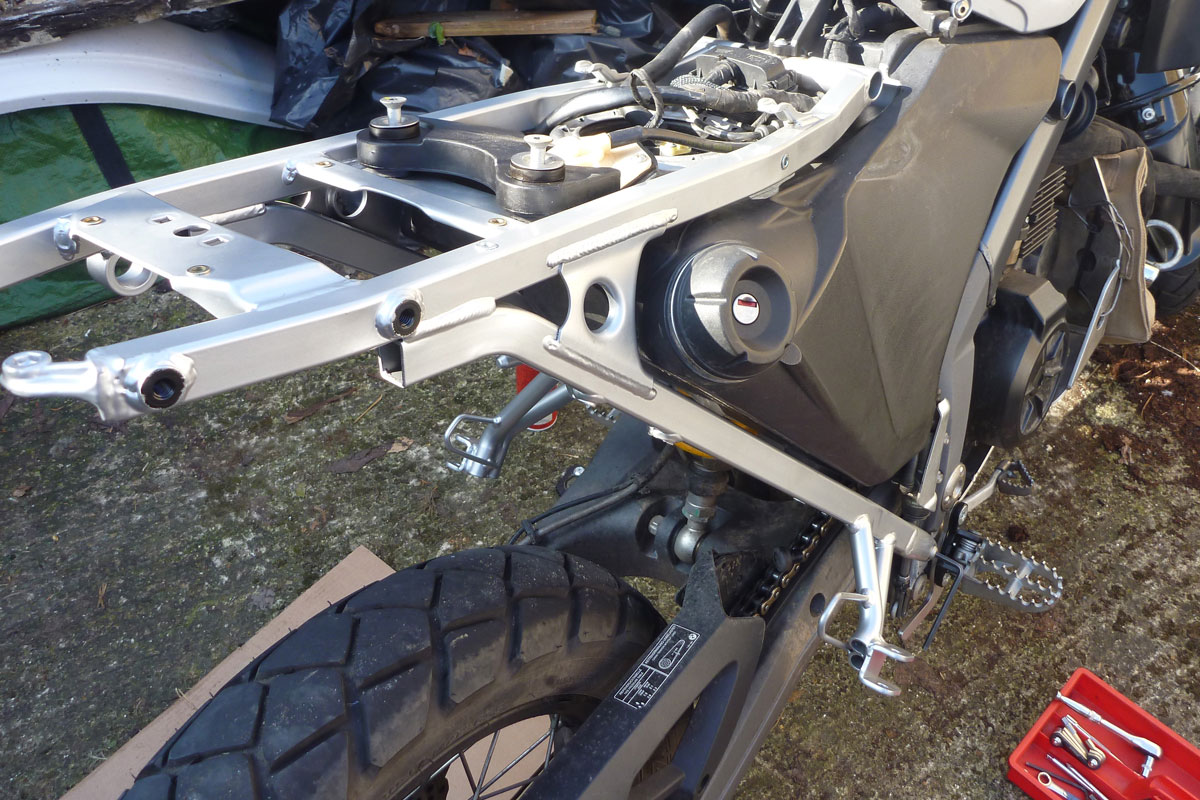
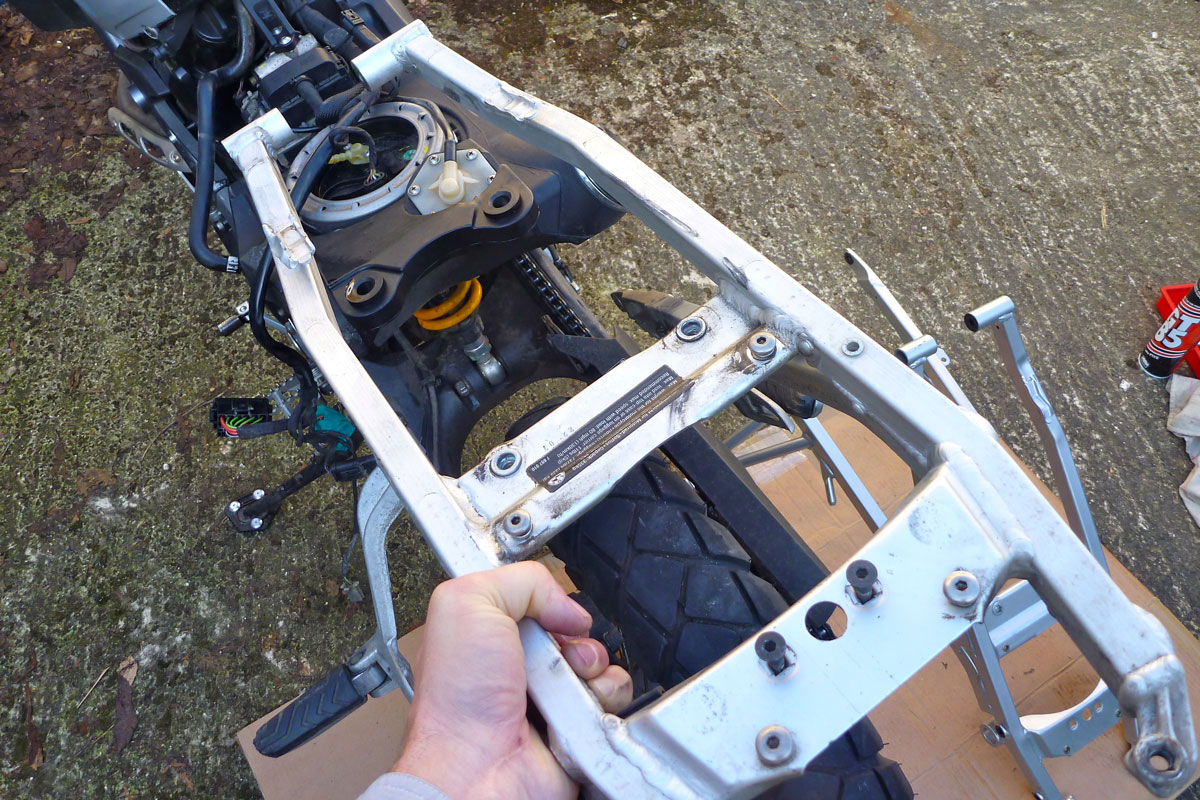
Fitting the subframe Knowing how it can get when you start working on old bikes in the street, I was all set for two days of teeth gnashing and knuckle skinning. As it was, the job was completed well before lunchtime which left me so stunned I had to take the rest of the day off. Plus now I know the minor blunders I made during reassembly, next time I could do the whole swap in two hours with just three hex keys, a 10mm ring for the silencer and the iPod on shuffle. Press ‘play’; Remove seat; silencer; rear light assembly; mudguard and undo associated wiring and the fuel breather. After about an hour you’re at the point where you can undo the four (pre sprayed) subframe bolts and the two rear fuel tank bolts. Then just tug the frame backwards (right). Away it comes and the tank stays in place. As simple as that. The new steel unit is an exact replica. Everything goes back on just like it came off. No gnashing of teeth. The only thing I missed was spotting the rubber bung which dropped out from between the tank and diagonal frame rail below the filler cap. That should slip back in later if I loosen the tank mounts. So all up the steel subframe has added an extra three kilos bringing the bike’s weight up to 161.5kg dry.