Like many two-wheel travellers, I enjoy coming up with creative ways of doing things or adapting gear to suit my specific riding needs. Over the last year I had what I thought were noteworthy innovations. There were a couple more, but clearly they did not survive the memory test.
Pillion Peg Panniers People ask: Where should panniers be positioned? ‘As Low and Forward as Possible’ (AL&FAP) comes the cry, because an all-terrain travel bike is more stable and responds more predictably when the loaded mass is centralised, especially when off road. I would also add ‘As Narrow’ to the acronym, but in the end we need the volume.
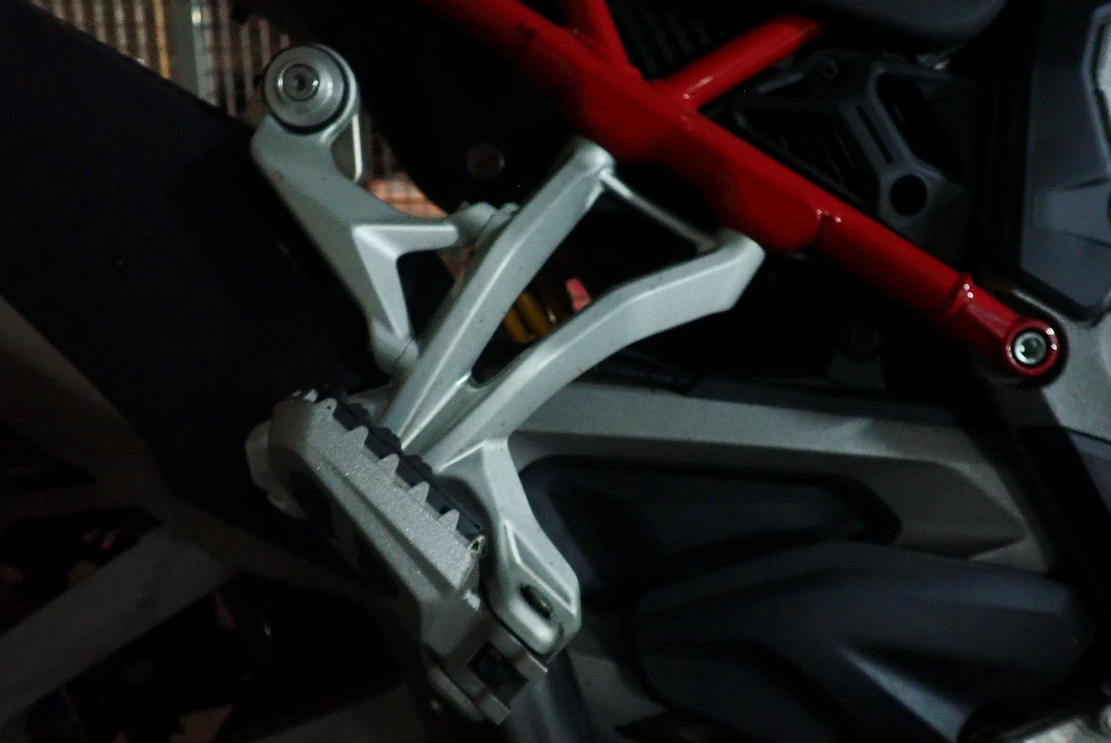
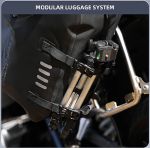
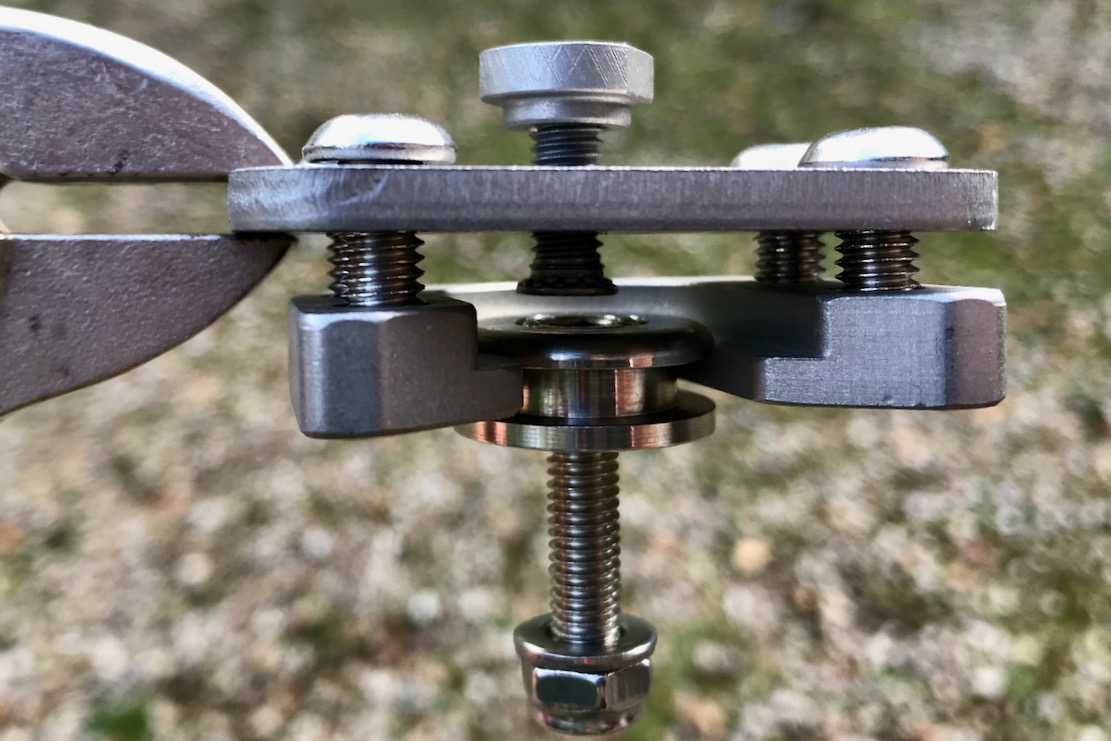
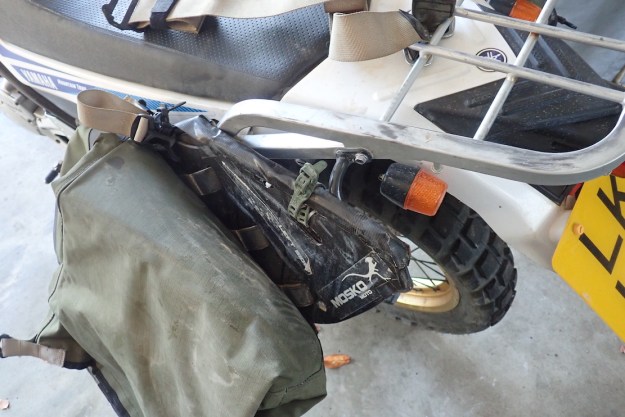
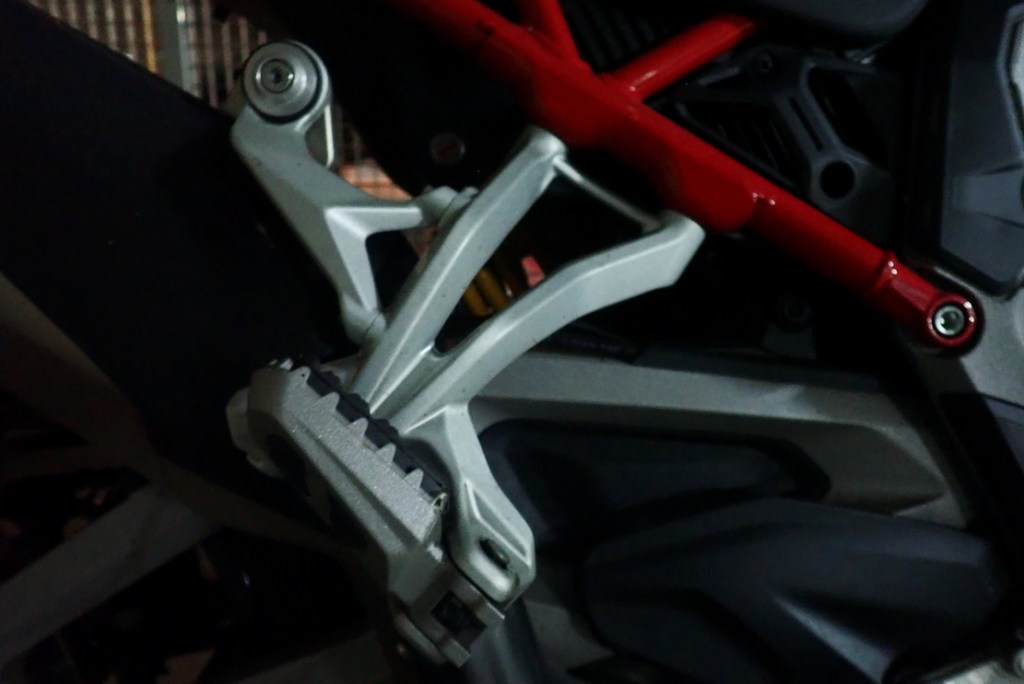
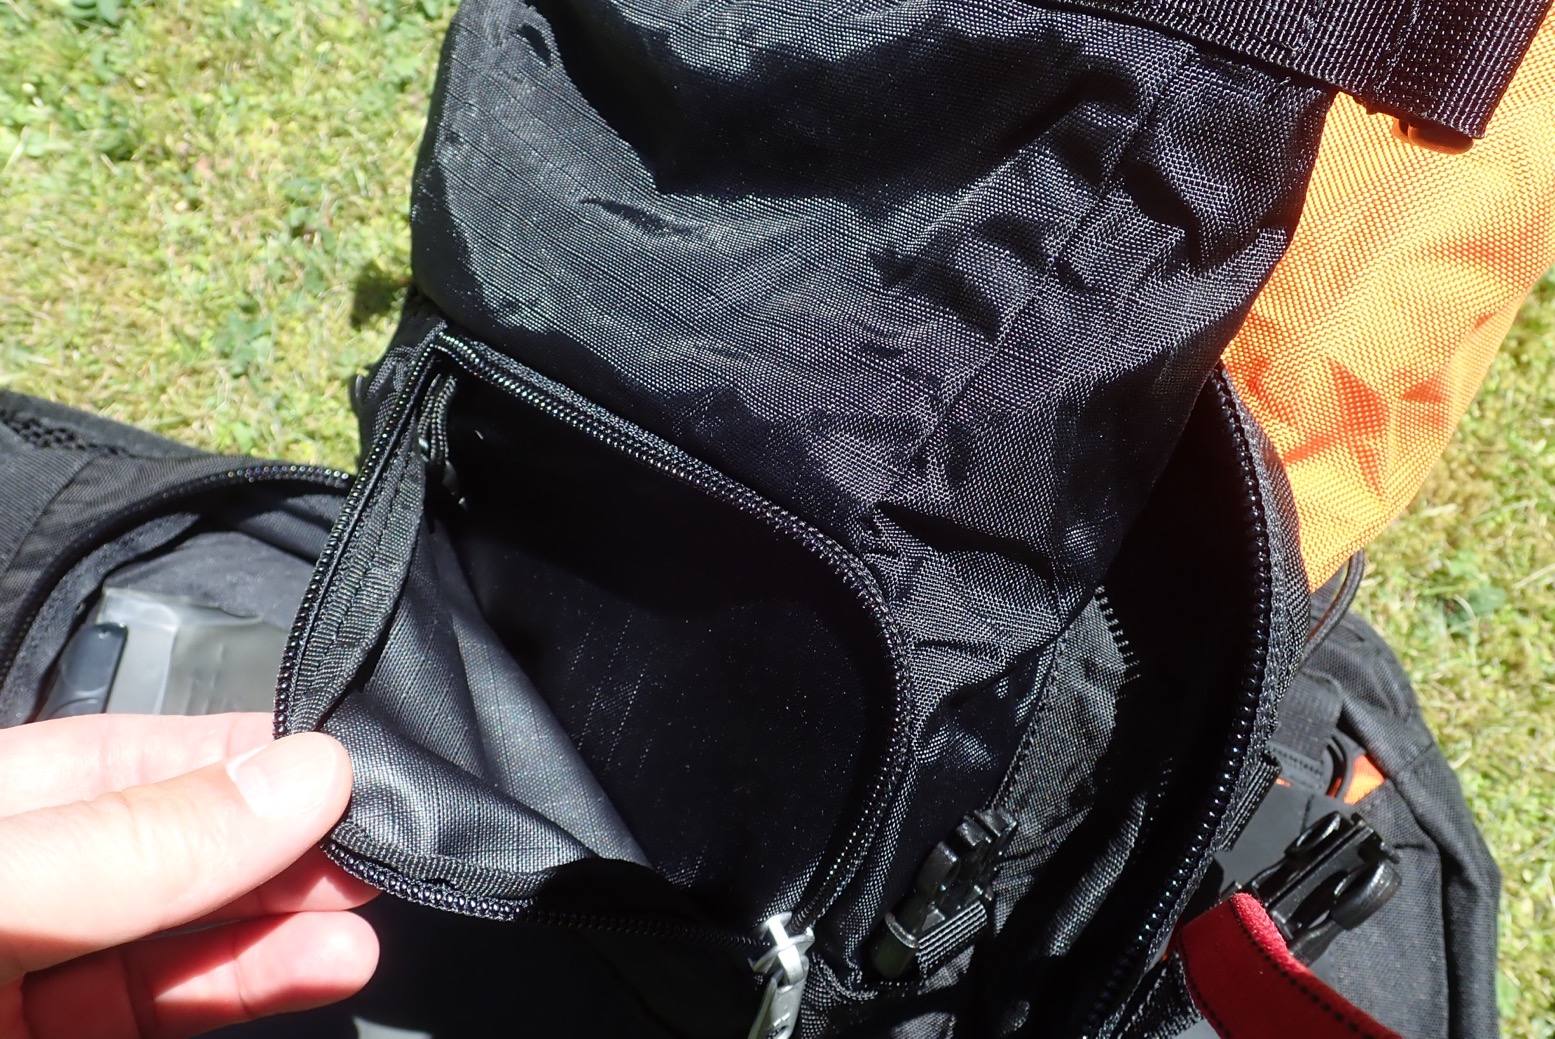
Behold the pillion peg mounting
The AL&FAP optimum can be hard to achieve given that most off-the-shelf racks are set too far back and panniers – soft or hard – are usually box shaped. (this combination is probably designed to accommodate pillions). The elephant on the subframe are the pillion pegs: a mounting point as strong as any rack. Support your mass on them (while ensuring room for paddling) achieves the AL&FAP ideal. I first experimented with this idea riding a massively heavy Africa Twin to the Mauritanian border during Covid, refined it on my 450MT in 2024, and stumbled on the best solution so far adapting Mosko Moto’s Alpine R60s on my skimpy Serow. The Alpine’s ‘sock’ shape is perhaps coincidentally ideal for the application of AL&FAP. Click the links for more.
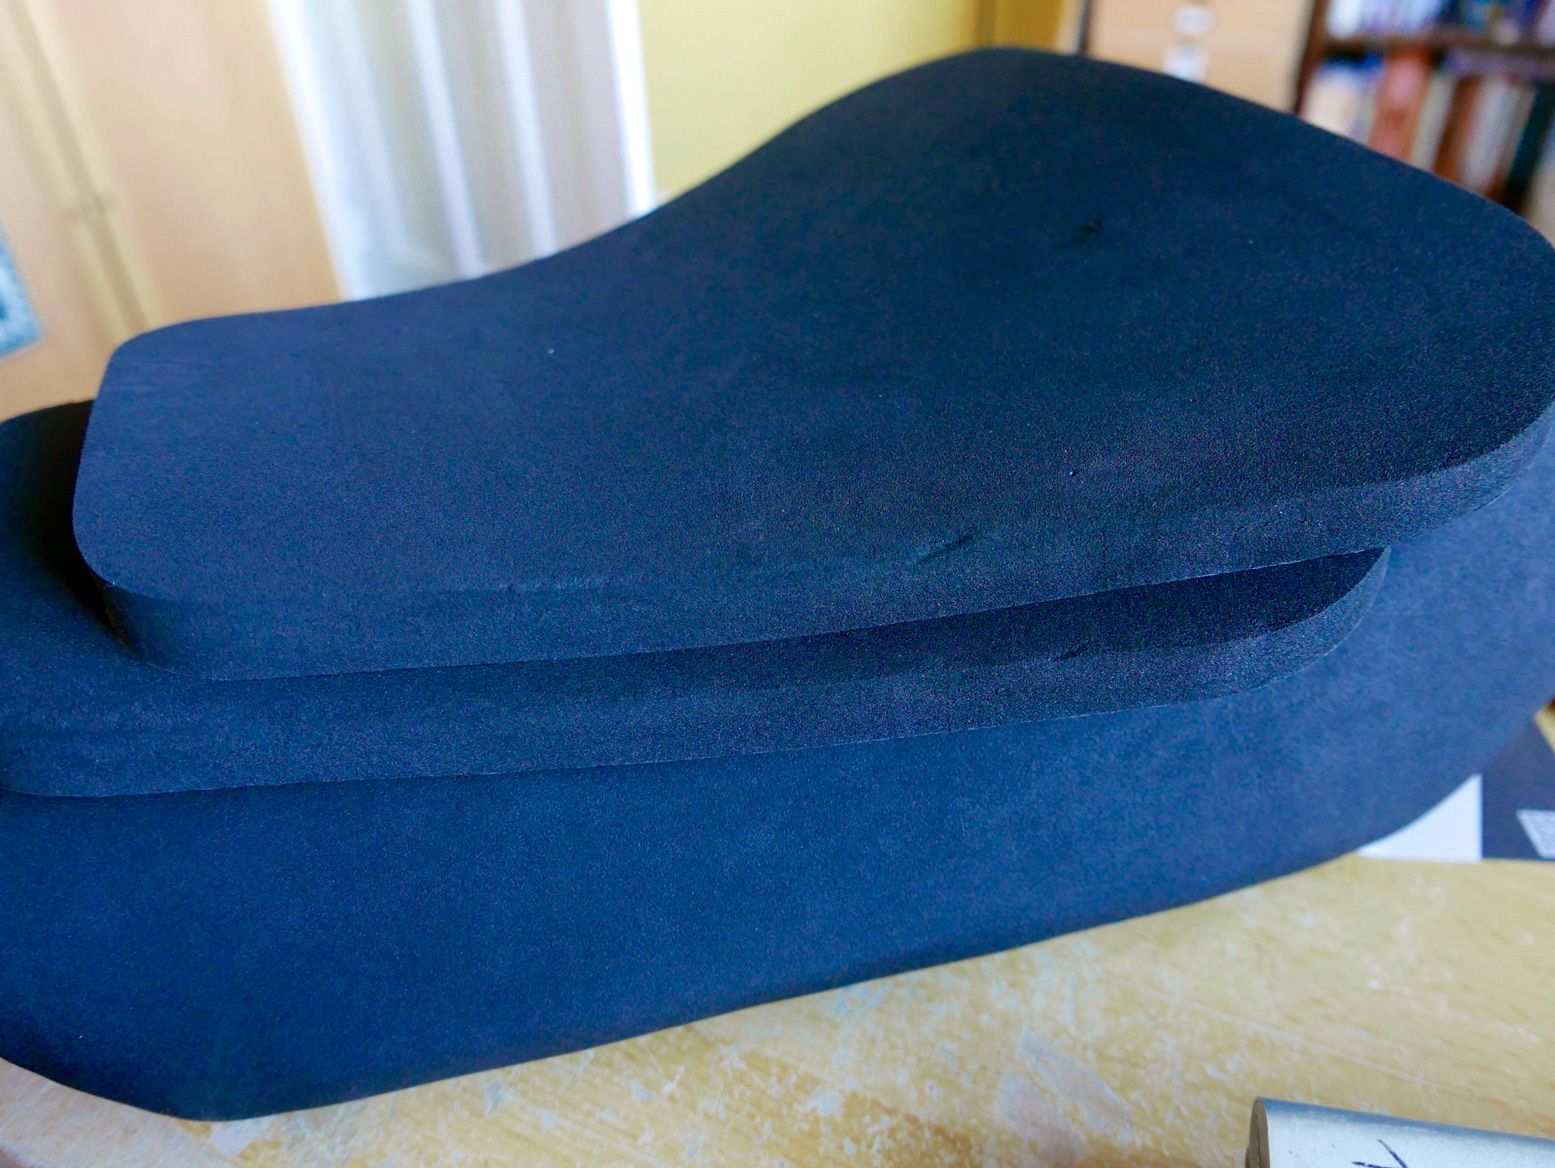
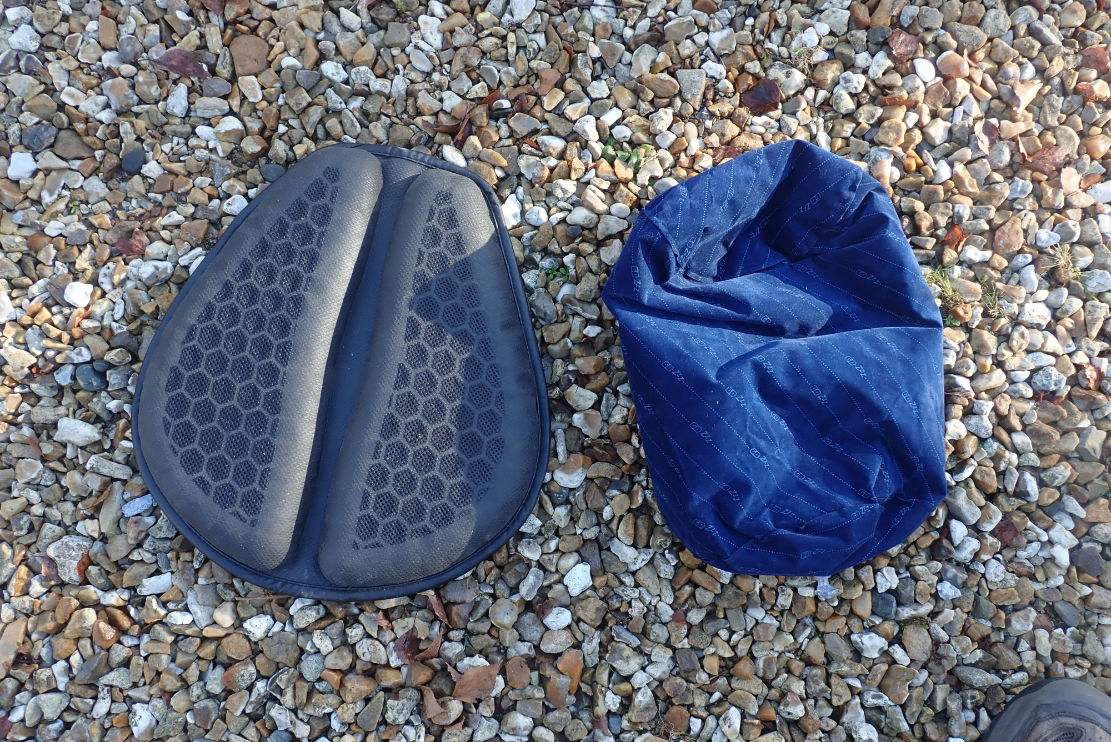
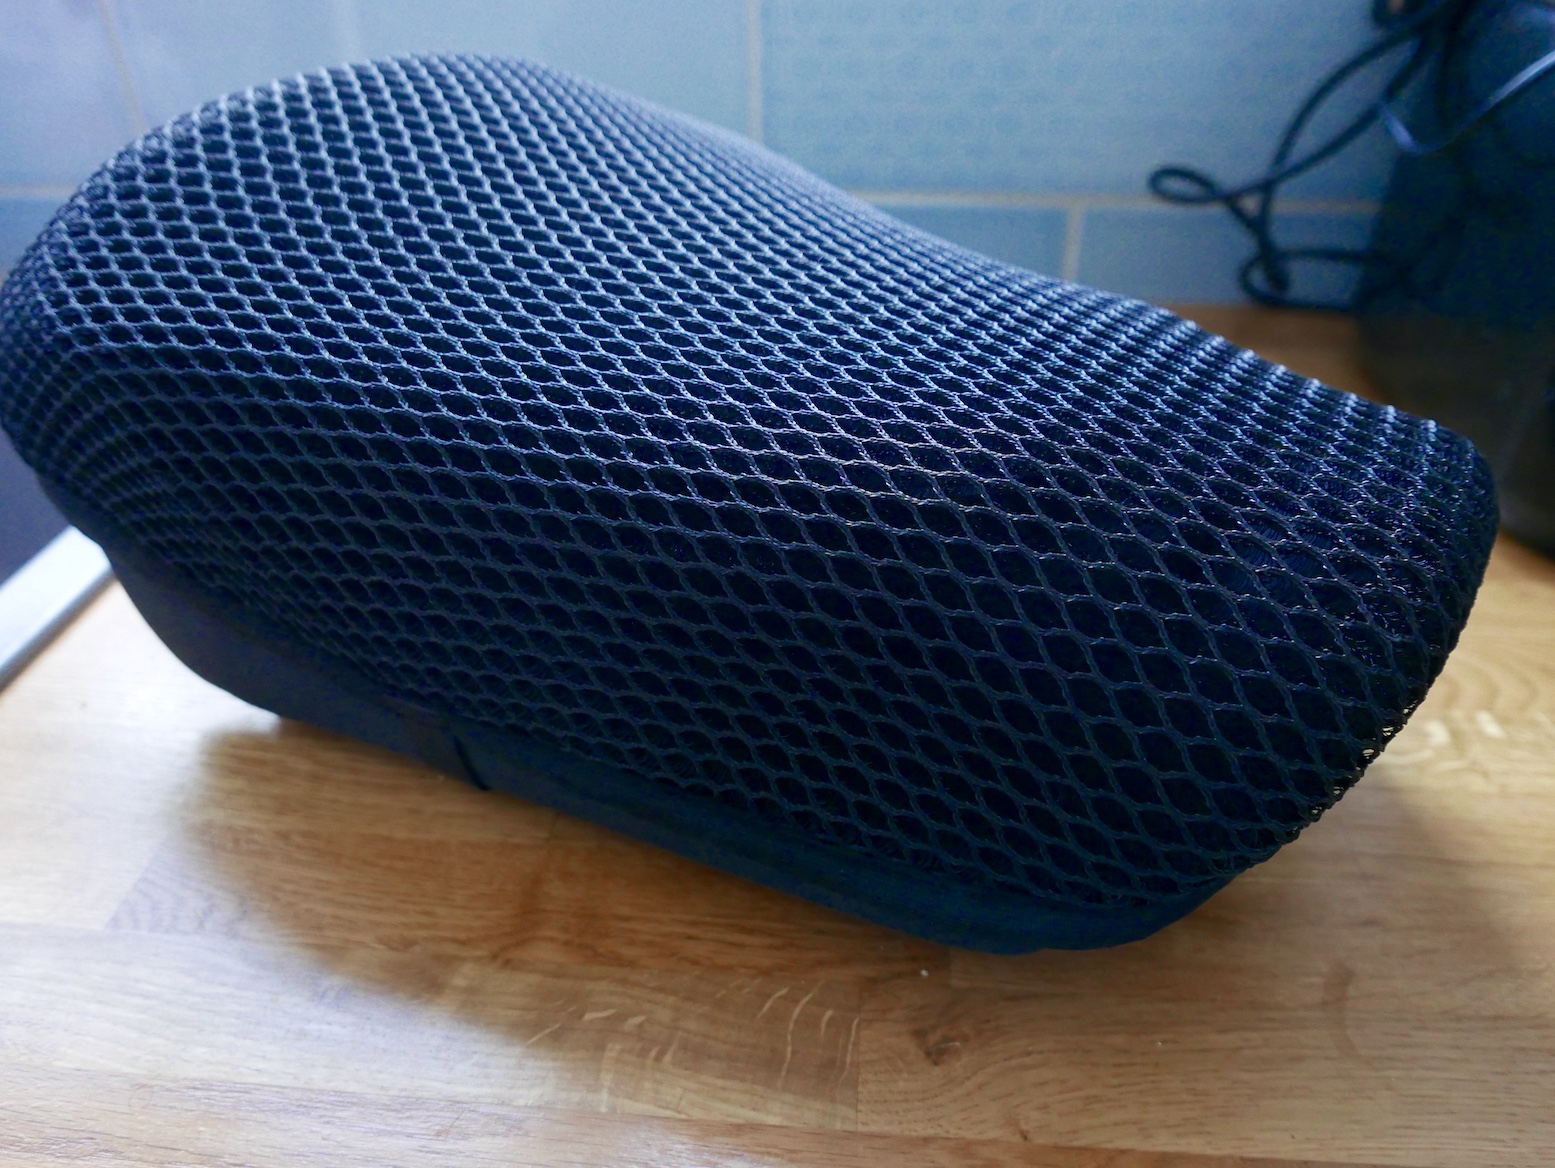
Seat pad inserts for riding pants Sore arses on narrow trail bike seats; What. Is. New? Apart from changing or reupholstering the seat (a bit of a black art, imo), there are all sort sorts of seat pad solutions: DIY neoprene foam slabs which worked well on my Himalayan 411, air cushions, sheep skins, ibuprofen, mesh seat covers,
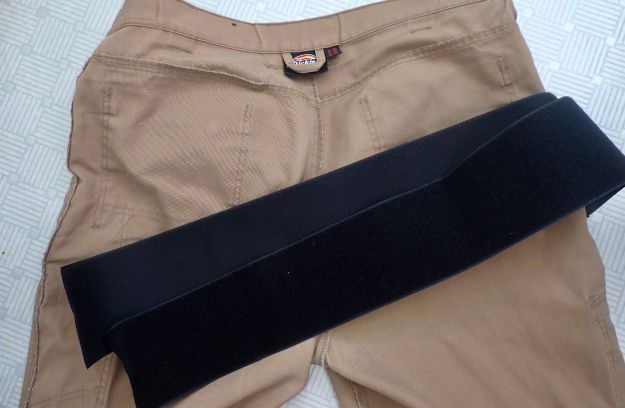
I’ve tried them all but one problem is they increase the seat height which – 411 excepted – may not be what you want, especially on a CRF300L. Then I moved the padding from the bike’s seat to my own seat with some Moto Skiveez padded pants, similar to cycling pants but not quite as close fitting. They worked well on the CRF, extending the comfort range, but as some reviewers have noted, it’s a bit like wearing a filled nappy, plus makes having an urgent roadside slash a bit awkward. Another thing I found was forgetting to put them on each morning until, just as I’m clamping up the boots I think scheisse, I need to go back three spaces and pull on my riding nappies or I’ll regret it in a few hours. With riding pants we have knee armour pockets or velcro, and even hip padding. Why not add something similar but obviously softer to the seat of the pants. No Skiveez needed which means no additional washing, dozy forgetfulness or desperate roadside fumbling – and no elevated seat heights. Slip on your riding trousers or over-trousers with the optional butt pads fitted and ride off into the sunrise.
If like me you prefer to wear normal cargo trousers like above, plus over trousers when needed, sewn-in velcro patches for quick removal won’t spoil your butt line when off the bike. On the bike attach the foam pads and hit the road.
Dynamically adjustable seat height I probably ride my MTB more than motos in the UK, and this is another pushbike derived idea that’s a bit left field. It gets its own post. Click this.
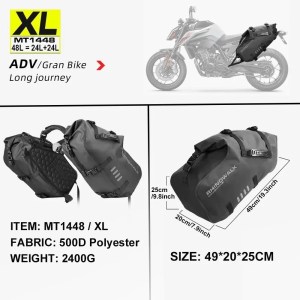
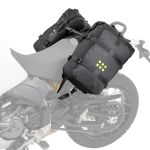
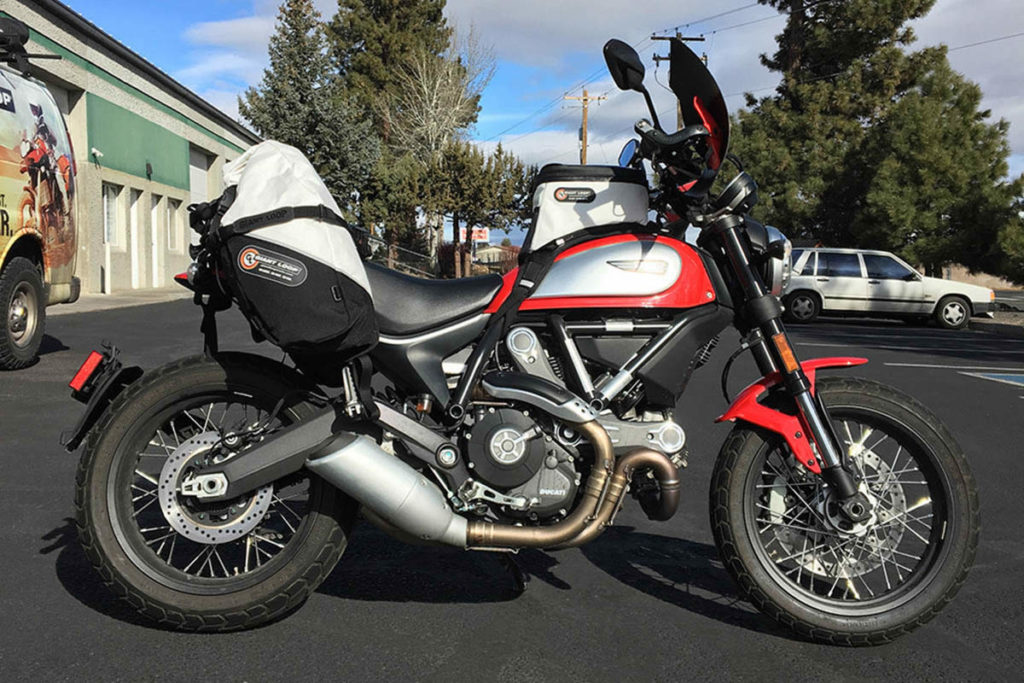
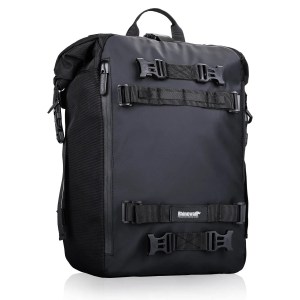
IN A LINE Inexpensive basic 500D PVC throwovers with more straps than the gimp in Pulp Fiction.
WHERE TESTED Nowhere really.
COST & WEIGHT £110 unused off ebay (from £140 new). 2900g est.
WHAT THEY SAY (shortened) ✔ EXCELLENT WATERPROOF: The motorcycle saddle bag is made of 500D PVC tarpaulin material, which is 100% waterproof and the most stand wear and tear motorcycle material. The roll-up design provides waterproof guarantee while supporting quick opening and closing. ✔ LARGE CAPACITY FOR DAILY NEEDS: Waterproof motorcycle bag is specially designed for those who like to travel by motorcycle, outdoor adventure. 2 side pockets with a total of 24L large capacity to meet your daily needs. ✔ STAND WEAR AND TEAR MATERIAL: Different from ordinary waterproof material, we use PVC tarpaulin as motorcycle bag shell material, which is stand wear and tear and suitable for daily use. High-density PVC resists dust and is easy to clean.
Cheap
Light
Simple
Loads of long strapping
Can mount low and forward with a rack
Inner padding may be OK without a rack
500D PVC is not particularly thick
May not survive heavy loads off road
Understraps for more external gear get in the way
Despite rackless claim, best with a rack in this XL size
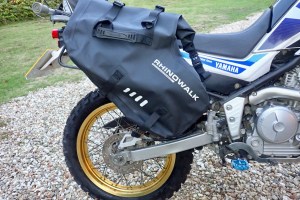
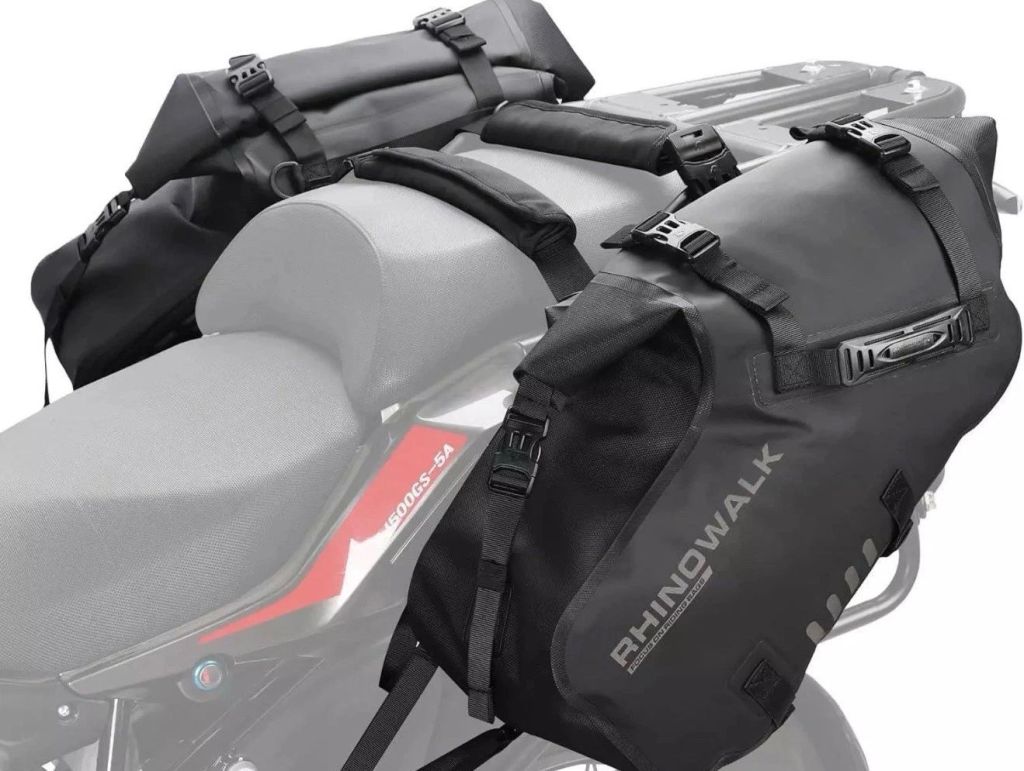
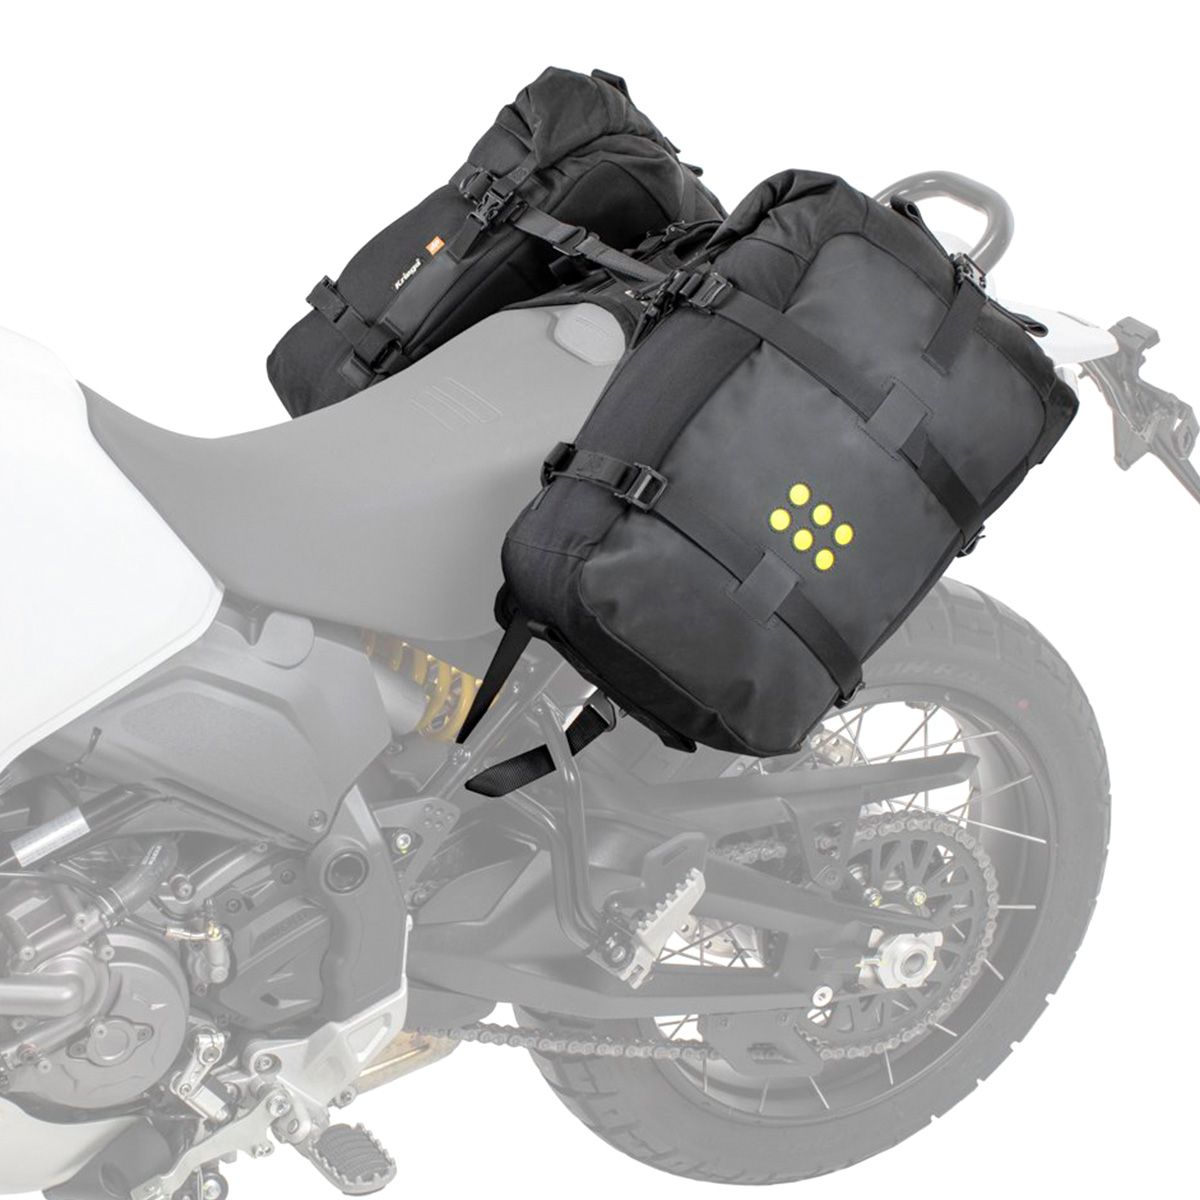
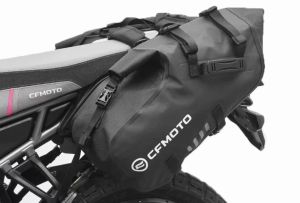
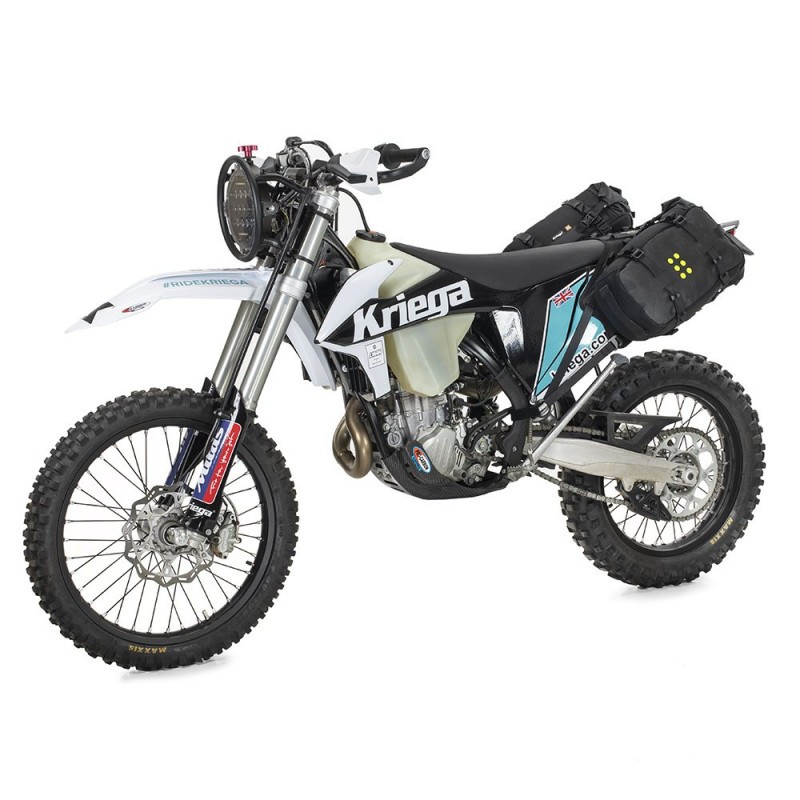
REVIEW Rackless side bags from the well-known soft luggage manufacturers have been a thing for years. It will vary from bike to bike, but without a rack they have to be mounted high, almost on the side of the seat (right), to stop them swinging about into the wheel or bouncing on the pipe. For better handling on the trail, low and forward is the way I like to do it, like the Kriega OS18 resting on the pillion footpeg on last year’s 450MT. Sadly this rackless innovation went unnoticed in the biking world.
Low and forward
My Serow Touring came stock with light side racks (left). They’re a bit far back (like so many racks) but are just the job to support throwovers which would otherwise swing into the wheel or melt on the pipe. Without a rack you’d need to hang them high on the side of the seat to avoid swinging, but that means a higher mass; less good for handling. I was eyeing up these Rhinos for a while and got a barely used XL set on ebay, at 24L a side. The rationale being I won’t need any other bags bar a tank bag (though I admit, many bags or pockets makes quick day-access easier). As one reviewer observed, they’re like a pair of giant socks, the upper part rolling down to clip down the sides and over the top
Lashing on was dead easy once you get your head round the mass of long straps. (Better too long than too short.) Over the seat, I removed the unnecessary padding sleeves and cinched them up through a loop in my tail rack with cam and clip plastic buckles I’ve not seen before. At the lower ‘toe’ end, another ridiculously long strap loops through the pillion peg mount, or is long enough to go round the main frame to connect back to a metal cam lock buckle. As said, at the back my over-seat straps went through the tail rack to stop them sliding forward. But there’s another metal buckle at the ‘back ‘heel’ of each bag to do the same job. Use a loose strap supplied to cross and loop over the tail rack (or whatever you got) from one rear bag’s rear cam buckle to the other. Instead, I used a knotted offcut from the front strap to lash this rear point to my rack to better support it all Once bouncing loaded up along the trail, the more weight you can take off the over-seat straps the better.
External lashing. Hmm
There are also some long straps for lashing more gear on the outside under the bags, like the tripod shown right. But unsupported, I can’t see anything staying there for long (or staying clean) on the trail. Molle webbing would be better, or a pocket. Or just lash on top where it’ll stay put.
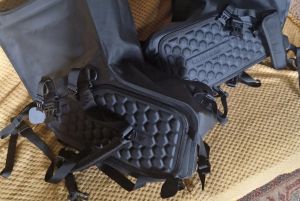
The honeycomb padding on the inner surface (left) claims to resist 160°C and looks OK but once splattered with gritty mud will rub on your plastics if you’ve no rack. On the trail I was not expecting to carry more than 10kg in each bag which ought to make them last. But in the end Mosko Moto sent me some of their new Alpine R60s to try so I went with them and resold the Rhinos.
In a line Mounted separately and semi-permanently to a light rack and without rear duffle – not as Mosko intended – but was exactly what I wanted.
Price and verified weights Bags £476. Right side 1350g; left 1530g; hardware 130g, Duffle 650g. Total: 3.7kg/8.1lbs Gnoblin q/d mount (optional; £39) 182g. As mounted (no duffle or Gnoblin): 2.5kg
Mounts low and forward, ideal shape for optimal load distribution
Well put together and clever design elements
Light: my adapted set-up just 2.5kg
Looks more than 22 litres per side
The outward flex of the CURV board (not used) limits pressure on sidepanels
With CURV board sits high on some bikes
If you want the q/d element make sure the CURV board suits your bike
OTT strap hard to cinch down with changing bag volumes
Alpine R60s supplied free by Mosko for testing and review
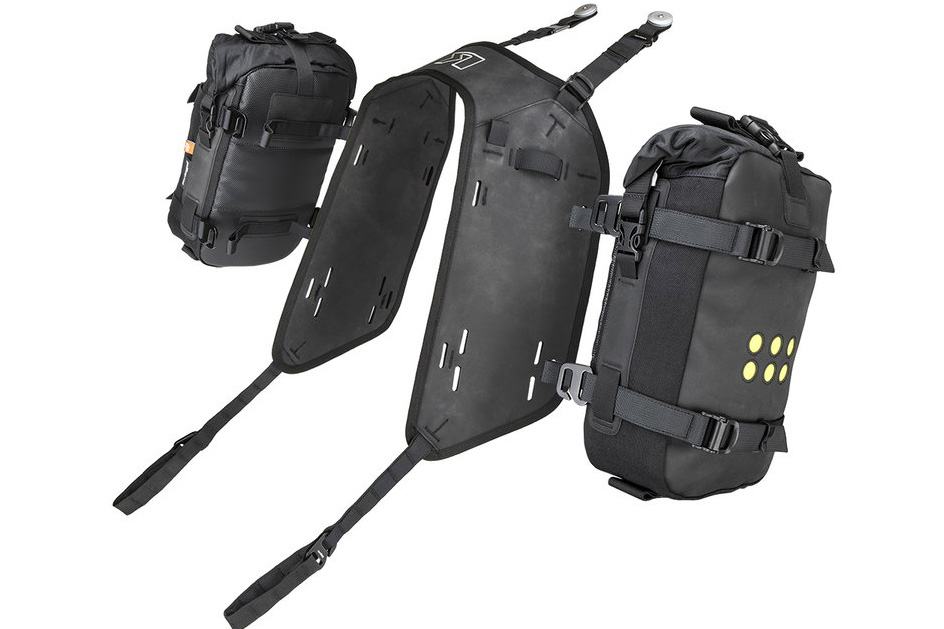
What they say The Alpine 60L Rackless is Mosko Moto’s lightest weight dual sport and ADV luggage setup with the capacity for multi-day trips. Designed for riders who seek minimalist, lightweight luggage, it provides the three-bag organization and packing system of a traditional pannier setup (two side panniers and a rear duffle) in a lightweight, waterproof, abrasion-resistant ripstop nylon rackless bag. Featuring our super durable CURV® chassis, the universally-mounting A60 can be easily swapped between multiple bikes, and can be packed and checked for fly-to-ride adventures.
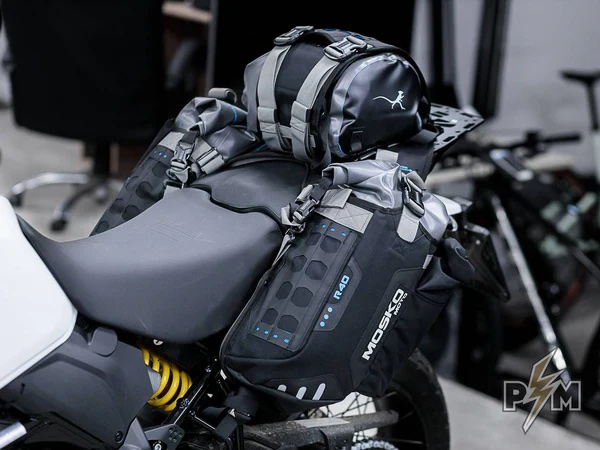
Alpine Style For this autumn’s recce of the High Atlas Traverse I wanted to try something different. Though never a fan of the one-piece Giant Loop Coyotes and the like, I’ve been interested in separate throwover side-bags which can manage without a full racktangle™ (right). I also like the idea of tough drybags sleeved in a holster, as on Mosko’s Rackless 40 and 80, although these look a bit heavy and over-designed for my little Yam 250 on this trip. ‘You should make something in between the 40 and 80, and simpler‘, I suggested to Roel as Mosko EU. ‘Give it a month or two and I’ll have our new Alpine 60L to show you‘, he replied.
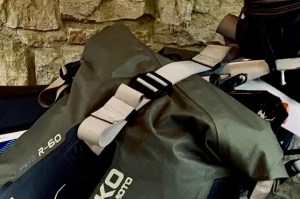
A week before wheels-up and Mosko’s Alpine R60 arrive in Woodland Green and Black. Two sidebags of 22 litres (but look bigger), plus a 15-litre top duffle which I didn’t plan to use. Each bag comes mounted on a bendy, two-piece U-shaped composite CURV® backplate which you bolt together with supplied hardware. That straps to the bike at the pillion pegs or rear downtube, to be tensioned from the tail rack, either with an optional and neat peg called a Gnoblin (below), or just a strap or two. Result: a quickly detachable 3-point fitting using the backplate to part-stabilise the load. Mosko are pitching the Alpine 60s at the harder-riding, ‘light-is-right’, crowd, but anyone who appreciates a minimalist, light throwover that’s easily removable will like the R60.
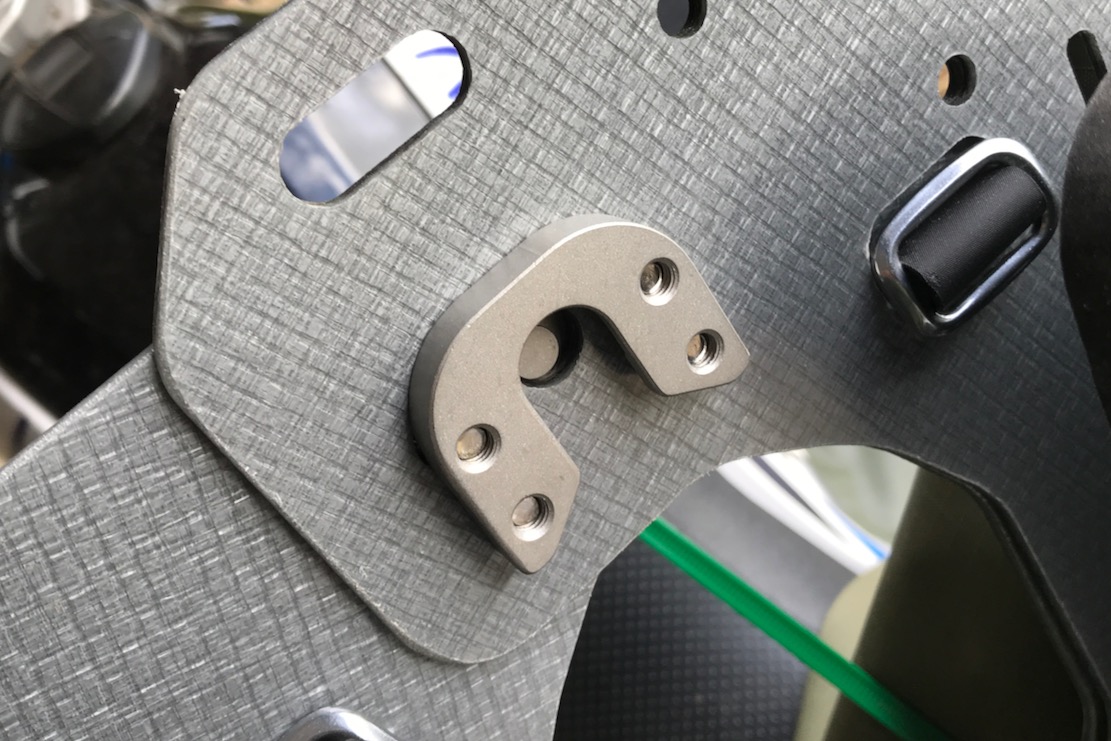
Gnoblin: peg on rack, U-clamp on panelU-clamp on the panel. Hook to peg and tension
The clever thing about the composite CURV® plate to which each bag is semi-permanently buckled, is that the flexible board naturally bows outwards to resist pressing on the sides of the bike causing rubbing; a quasi-rack. A replaceable, full-length, 8-mil EVA foam pad is velcro’d to the plate. The bags come securely anchor-buckled to the plate which is velcro’d to the EVA pad. To avoid pipeburn use the Mosko heatshield, at only £22 it’s cheaper and neater than a C-channel off-cut and clips. Set up this way, removing the whole rig is a 10-second job (discounting the duffle), while secure mounting in the morning might take as long as 30 seconds, so make sure to set the alarm. I’ll take q/d soft bags if they have a bombproof and foolproof attachment system which can be used daily without thinking too much. Otherwise, most nights in Morocco I leave partly loaded bags on the securely parked bike and bring what I need into the room.
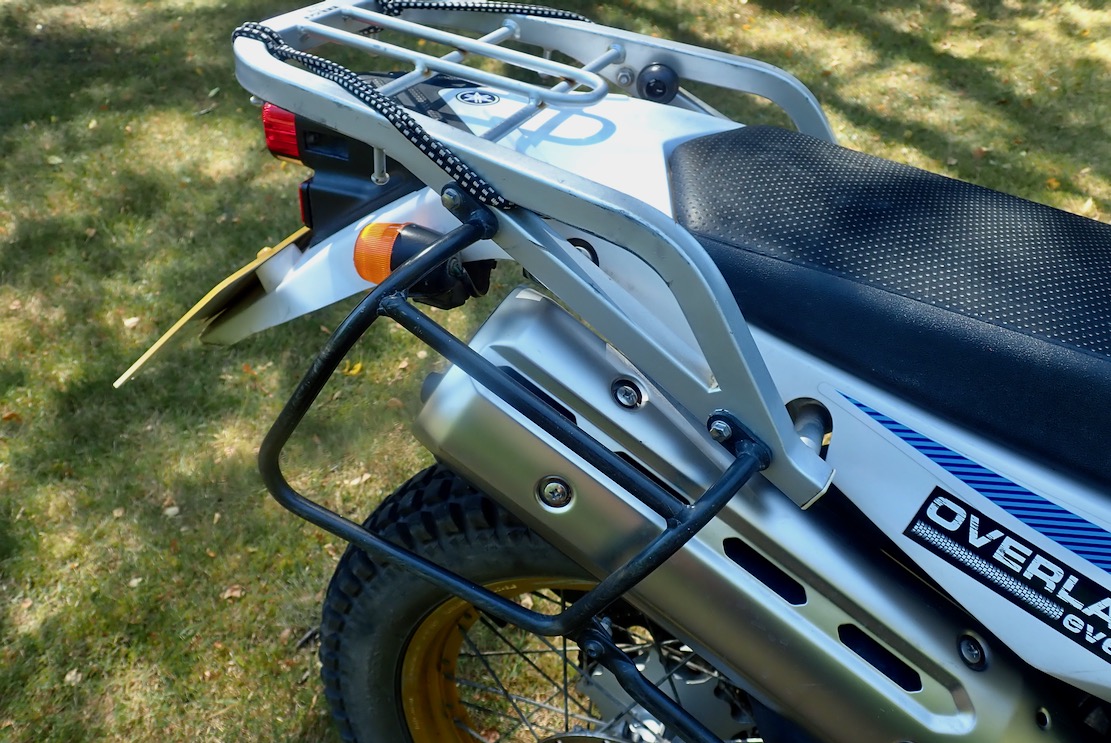
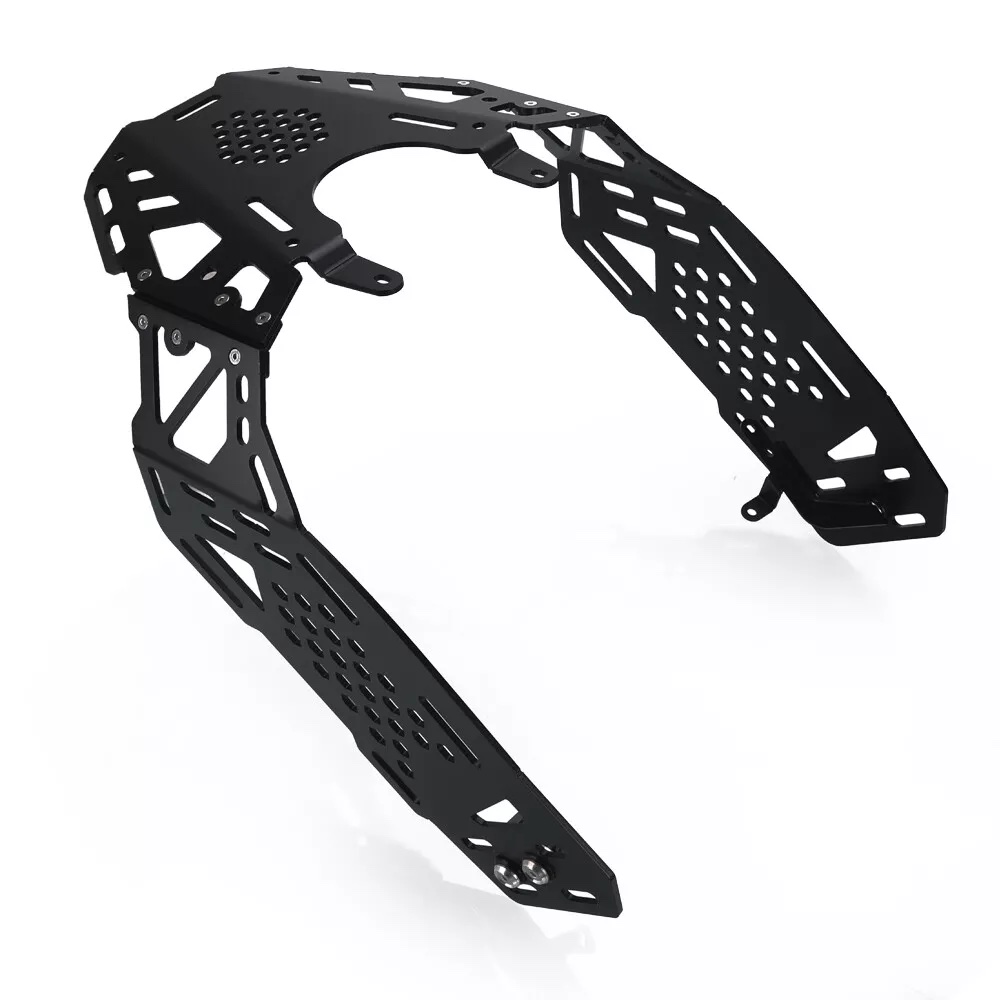
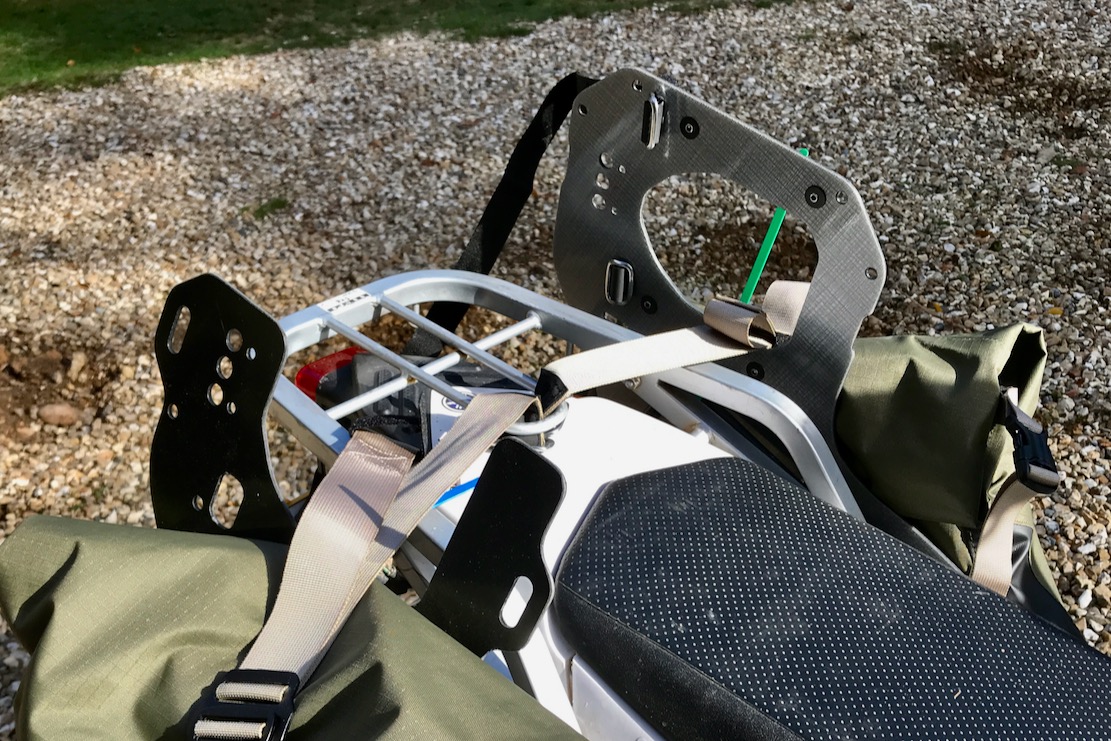
Too far back as usual… sigh
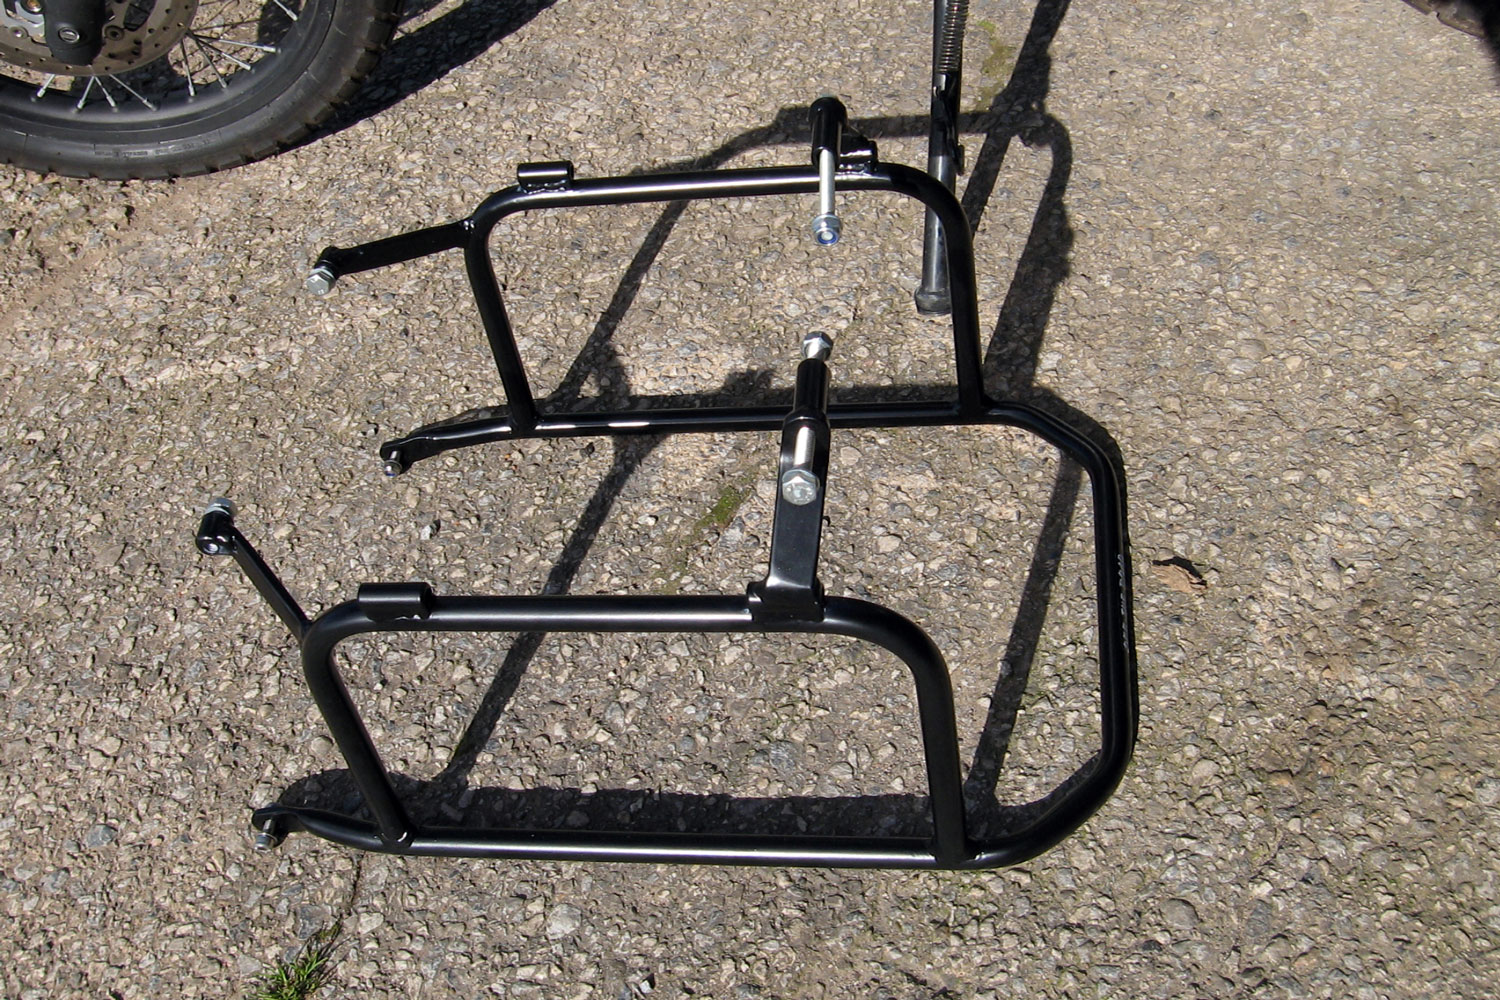
My Serow Touring came stock with an old-school alloy tube tailrack and light-gauge steel side frames (left) which are way too far back as usual, but otherwise ideal for stabilising the low weights I typically carry in Morocco, lodging each night, as I do. Out of the box I could see issues fitting the Alpine 60s onto my racking, but could also see a solution.
Looking at the vid above. Either those bags are full to overflowing, or the stiffness of the flexible backplate means they sit high on that Kove, even without the duffle which might be hidden from view. “The A60 is a rackless system” says our man Coleman at 0:52, but at that point you can see the Kove has been fitted with a CNC FishRacing integrated full rack system (right), or the 25-quid Ali-X knock-off. It’s much wider than my Serow set up which may explain why the bags sit so high. I’m not a fan of this current, easily cut (aka: cheap) CNC trend, when hand-formed and braised tubing uses less metal for half the weight (rant ends ;-). As said the R60 baggage appears to sit high on the racked Kove, but it also does in the Mosko video (below), fitted to a Moroccan T7 rental with only a tail rack. I think it’s a seat-width thing. As we know modern pipes are huge.
There are some long-winded R60 video reviewers out there. MoskoPete is not one of them. Job done in 3:29.
Last year I tried to fit the Kriega OS-Base Universal harness (below left) for my 450MT but the one-piece grab handles/tail rack got in the way. I could have swapped in an aftermarket CNC tail rack (and lost the handy handles), or cut a hole in the harness for the alloy handle to pass through, before rebolting. I liked the idea of being able to lash anything to the harness, not just Kriega’s OS bags, but again, their fitted bags seem to sit high, effectively resting on the side of the seat (below right) to limit swinging about in the rack-free void below. This is the weak spot of the rackless idea on monoshockers: the side panels become a necessary but over-high support point. For me the ethos has long been as low and forward as possible – or ‘AL&FAP if you’re in a hurry. These set ups may save rack weight, but are higher and further back than ideal. With minimal loads it’s not critical, but it’s not great for CoG and bike control, especially weaving around off road, picking up or when getting out of shape.
Kriega Universal fabric harness450MT grab handle/rack gets in the wayToo high
This is where panniers should sit when not two-up.
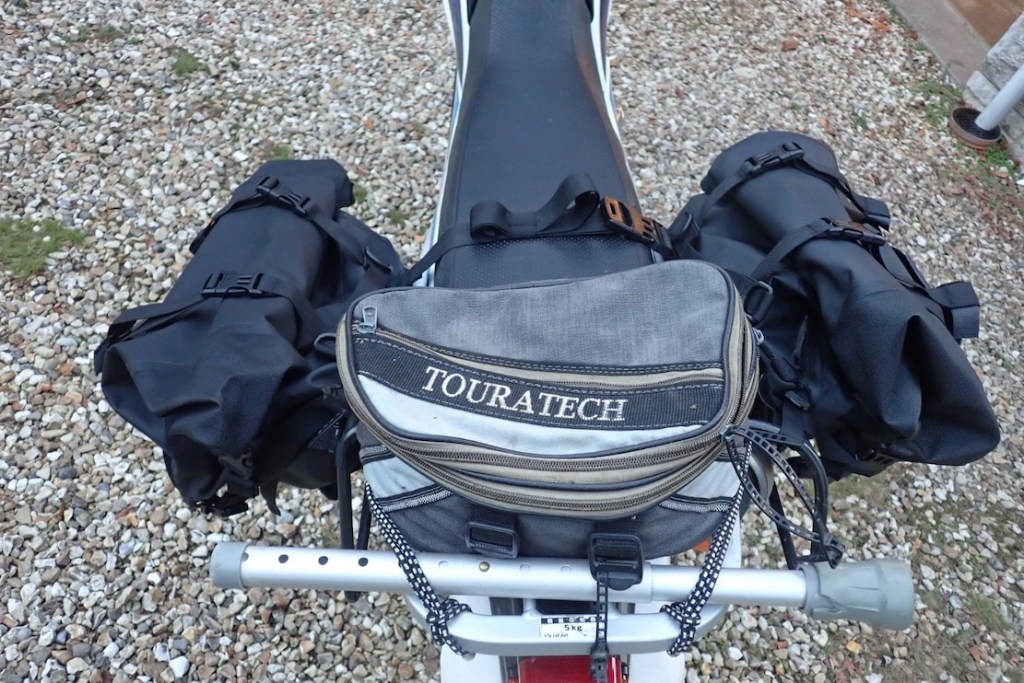
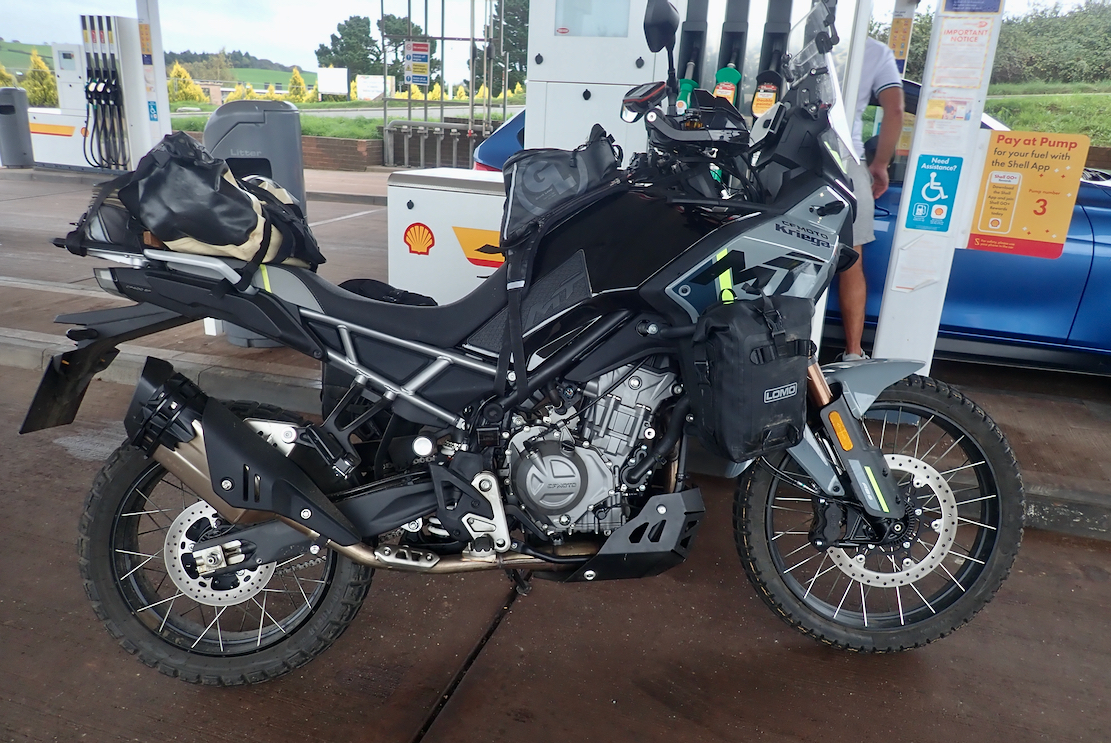
I returned the Kriega harness and went with the usual tailpack-sat-on-a-tailpack, plus my novel and as yet unrecognised 3P idea, as well as small tankside bags on radiator crash bars (left). Baggage ends up all over the bike which is handy for daytime access and organisation, but a bit of a faff to bring it all in overnight (if necessary), plus a messy look.
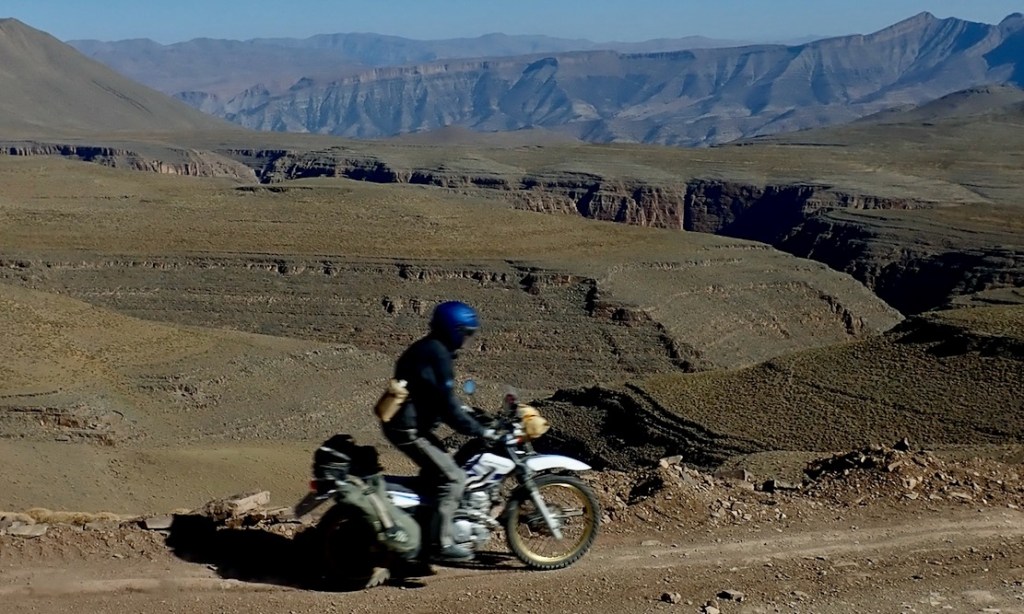
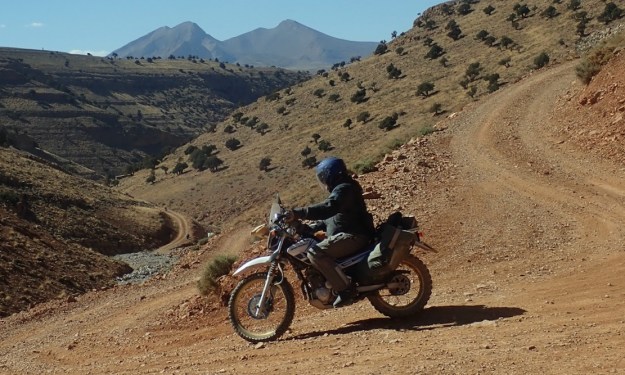
Up at 3200 metres on the High Atlas Traverse
This time I wanted to try everything in one place. I could see the R60s might not sit well on my bike but I liked the bag shape more than the q/d feature. The R60’s ‘short sock’ shape potentially puts loads in the right place. Heavy or rarely used Items like tools and tubes can go it the bag’s ‘toe’; light stuff up top with all the rest in between.
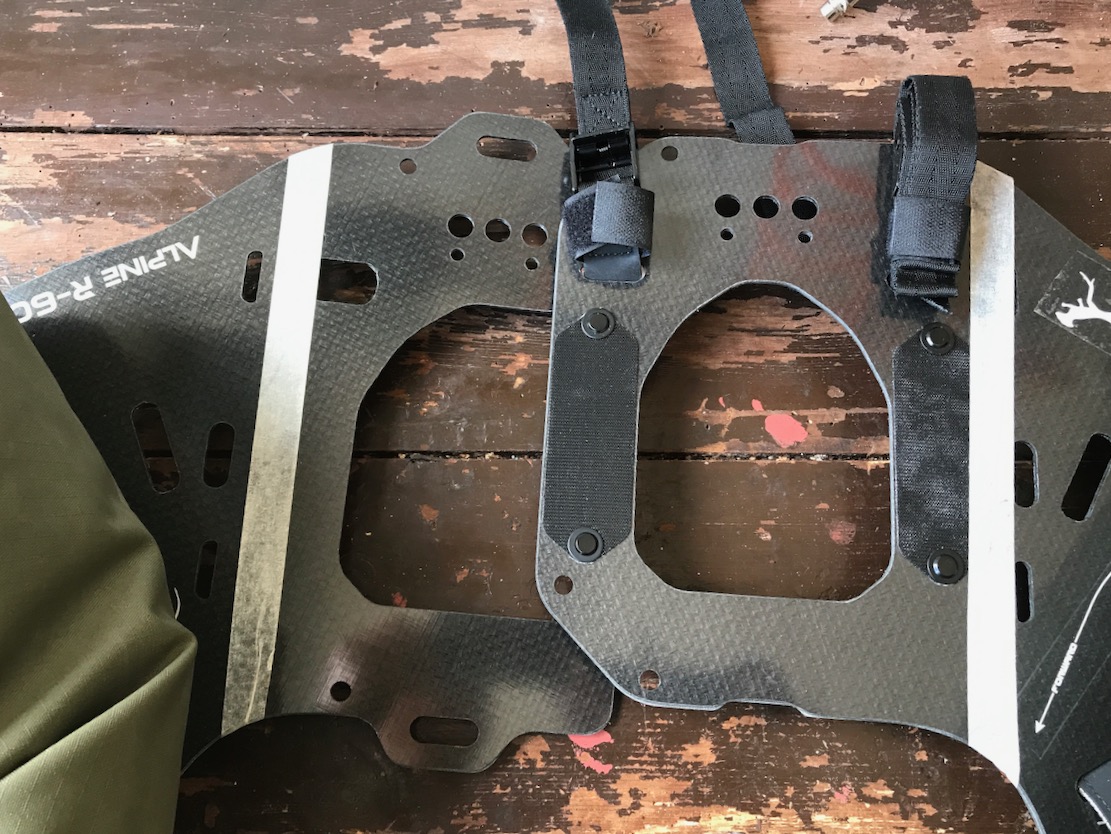
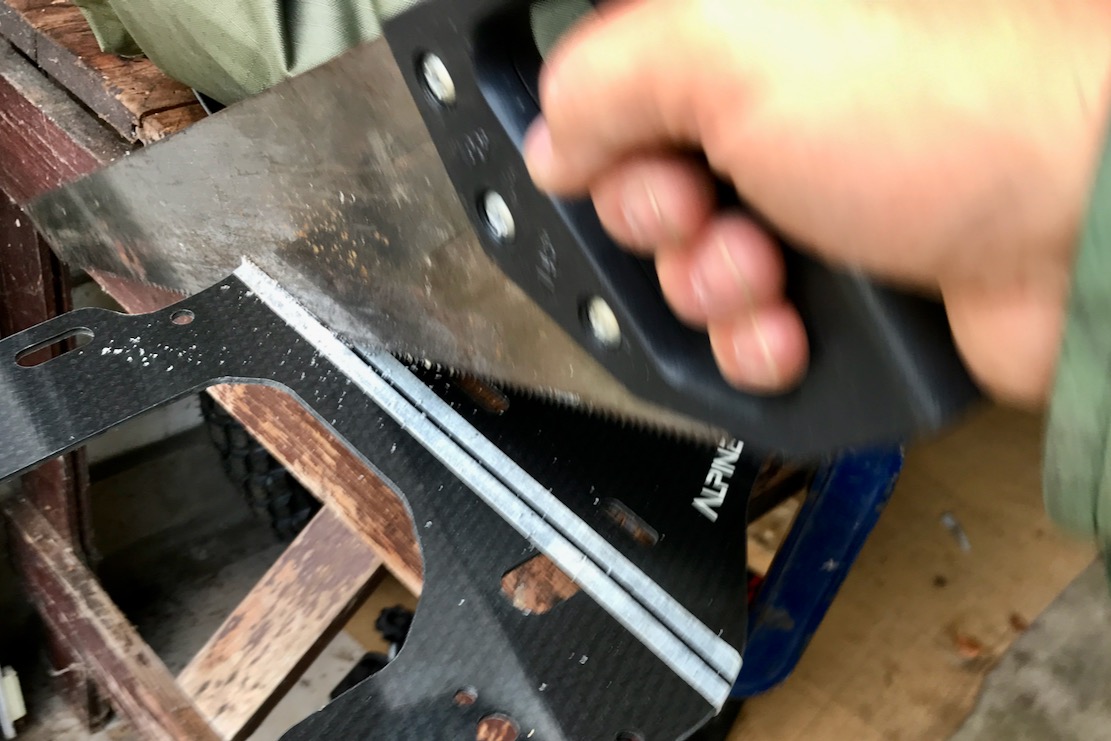
Unjoined CURVplatesCut along taped line
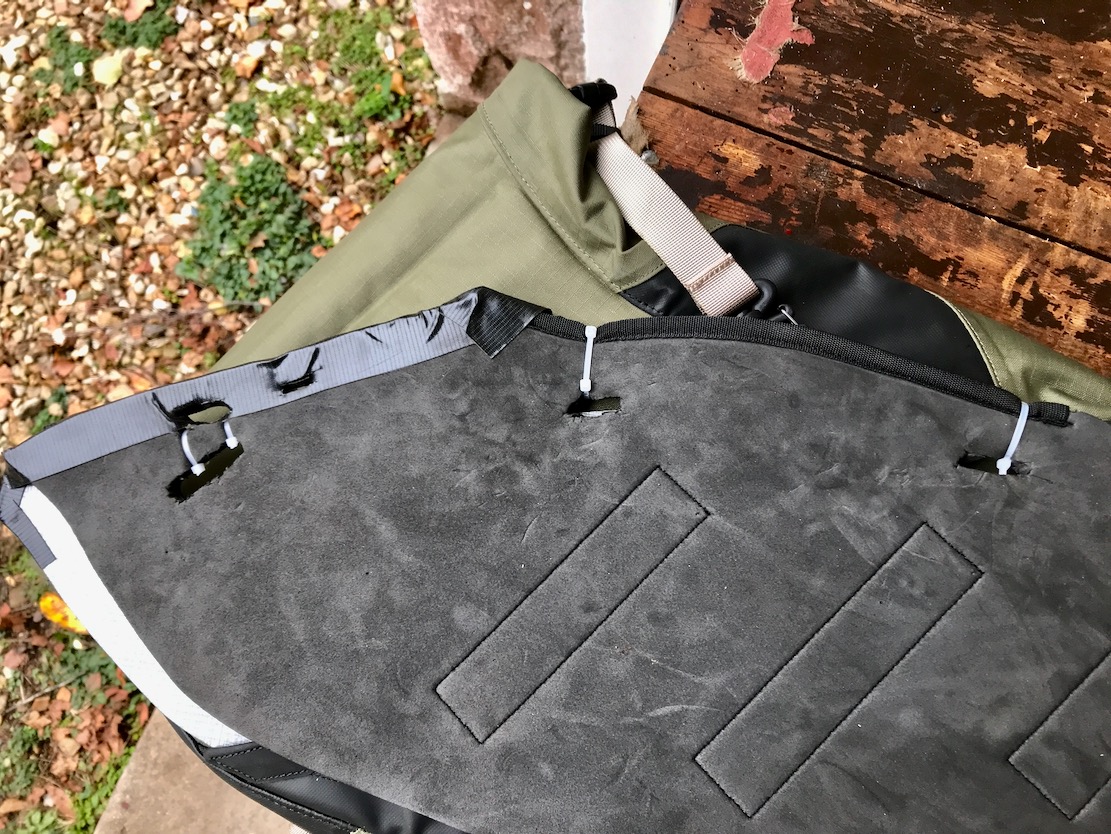
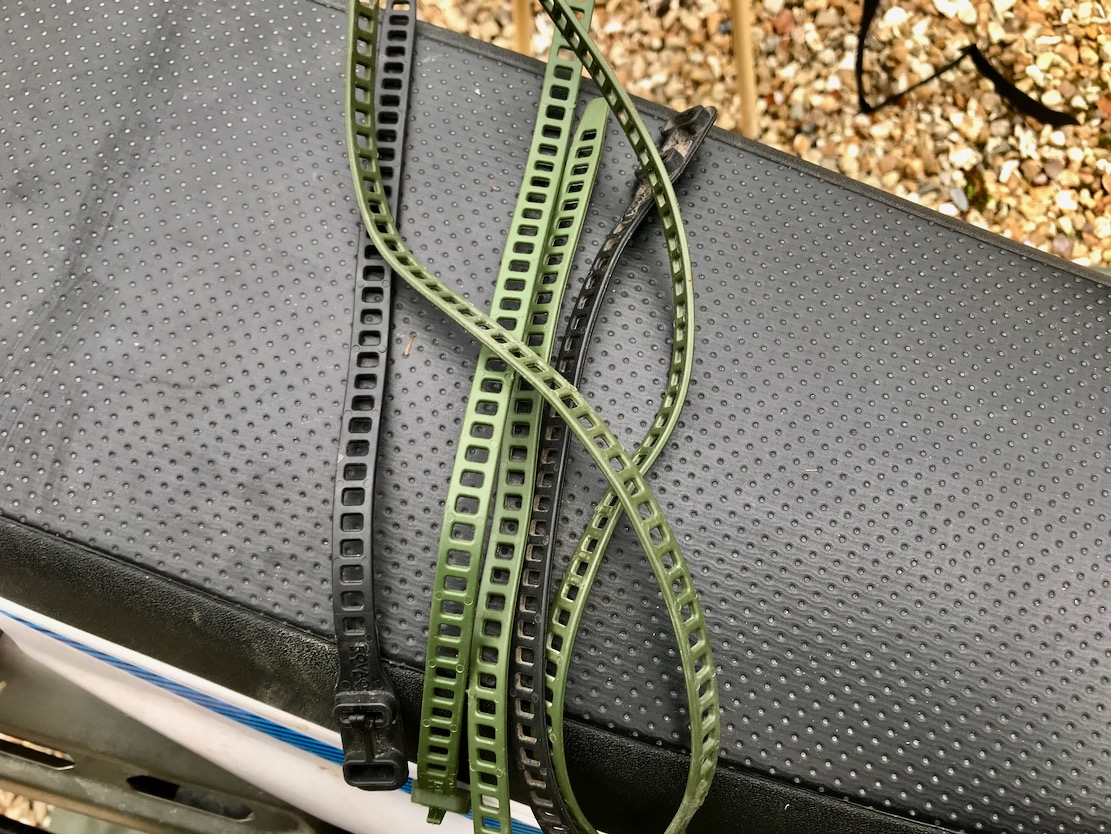
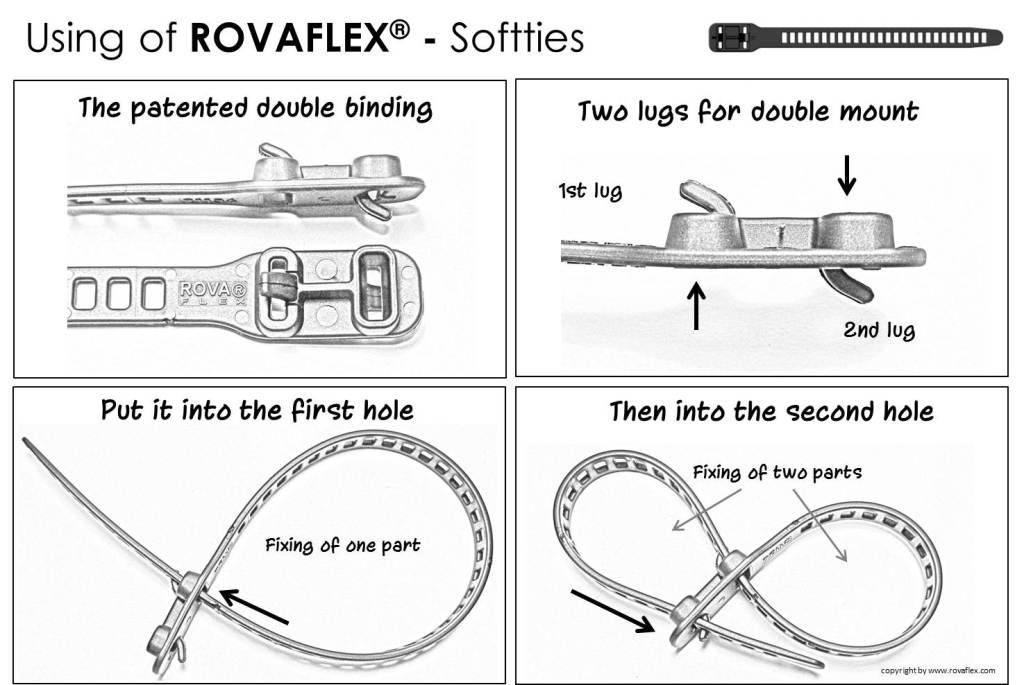
I test mounted the unjoined Alpines with zip ties; holes pre-cut into the CURV-plate make this easy. After seeing that it could all fit very well, I removed the bags and sawed off the rear parts of the plate and EVA pad, making two separate panniers. I then taped and zip-tied the trimmed board and foam (below left) and re-attached each 1.25-kilo bag using the much shortened strap to the front of the pillion peg hanger and at three more points along the upper edge of the board with reusable TPU RovaFlex SoftTies (below right) which adorn just about all of my outdoor gear.
Trimmed backplateI’m never far from RovaFlex SoftTies
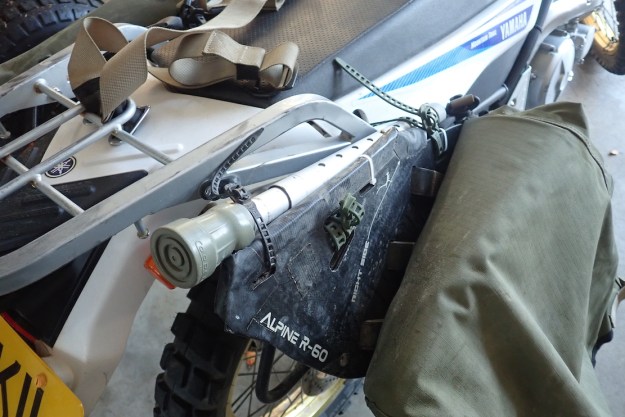
By chance, the bag’s lowest point also rested on the Serow’s unfolded pillion peg, additionally supporting heavy weights positioned in that area, reviving my unsung 3P idea mentioned above and effectively giving up to five contact points per side.
The 50-mil OTT-straps anchored themselves through a gap in my tail rack (left) to pull the bags close in against the rack. There was no need to run an additional strap around the whole bag and rack to hold it in, as Adv Spec suggest with their Magadans. As it’s set up now, the seat can be removed as normal, the side panel can be accessed by undoing the pillion strap and lifting each bag. For insecure overnight parkings, I just fill a light 70-litre sack with what I need for the night.
All in all, the trimmed R60s could not have fitted better: secure, low, forward and as light as you’ll get for the volume and durability. In Morocco a couple of tumbles didn’t affect the bags, though we didn’t have any pelting rain to test the waterproofing. On the road load volumes vary from day to day depending on what you’re wearing an so on. So the only complaint I have was that it was hard to cinch down the 50-mm male metal anchor buckle to pull the top down tightly. The strap was jammed too tight. It was more easily done on the upper part of the strap which is less intuitive for a good yank. Other than that, the OTT strap and two clips per side made things easily to access during the day. You soon learn to pack a day-access bag on one side so the other can be left till the evening. Everything in several pouches or bags shoved down inside easily, using all the space. Once I get the Serow sorted, I’m looking forward to taking out the R60 for another run.
Travel bikers rightly obsess over wet weights because on the road a bike will pile more weight on anyway. A well braced rear rack might add 4-5kg and when using soft baggage eliminates the chances of pipe melts. But these old school ‘racktangles’ are always too far back, probably to allow room for pillion riders’ legs. How often you you take a pillion on the trail?
Rackless designs mount directly on the bike, just like old-school throwovers derived from horse saddlebags. These days they can attach via a harness lashed to the pillion pegs and the tail rack. Where present, the melt/fire issue can be managed with heat guards on the pipe but depending on the bike, they can still be prone to swinging into the chain. The only way to ensure this doesn’t happen is to mount them high, effectively on the side of the seat like the Kriega below left. But this negates the ethos of as low and forward as possible or ‘ALAFAP if you’re in a hurry. They may save rack weight but are still higher and farther back than ideal. OK for minimal loads but still bad for CoG and bike control.
Kriega Giant LoopMosko Rackless
But just about every bike has a solid structure designed to take way more weight than a loaded pannier and which is in just the right spot. Have you guessed what it is yet? Correct:
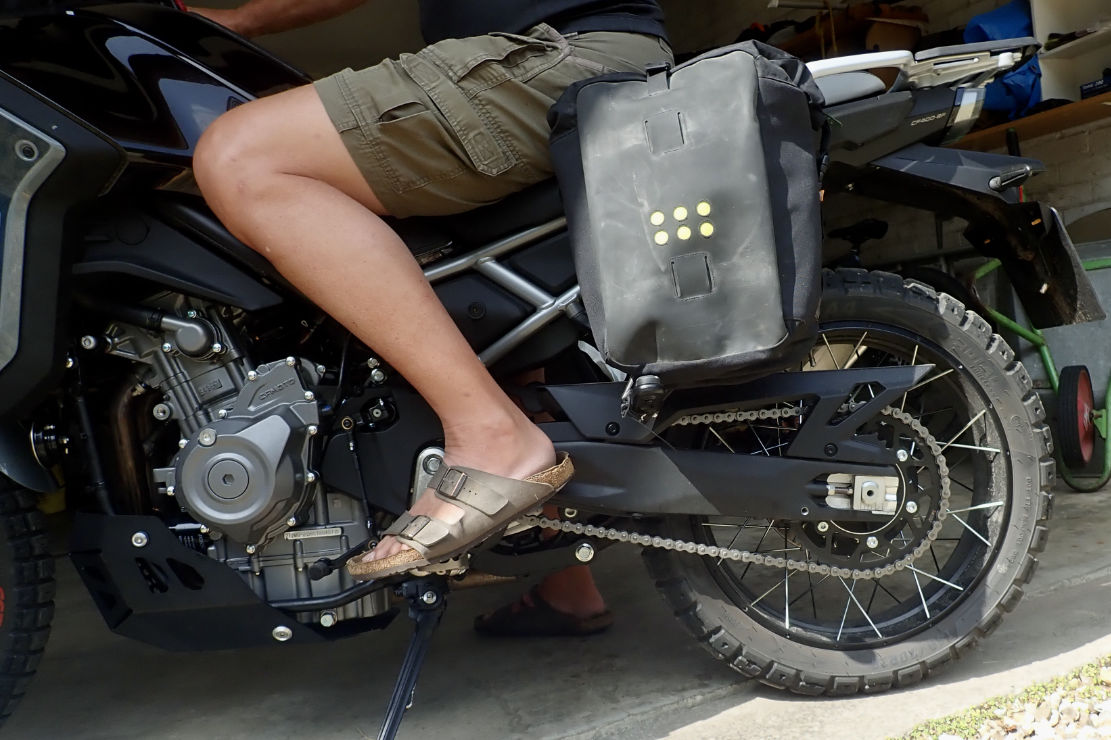
The pillion footrest!
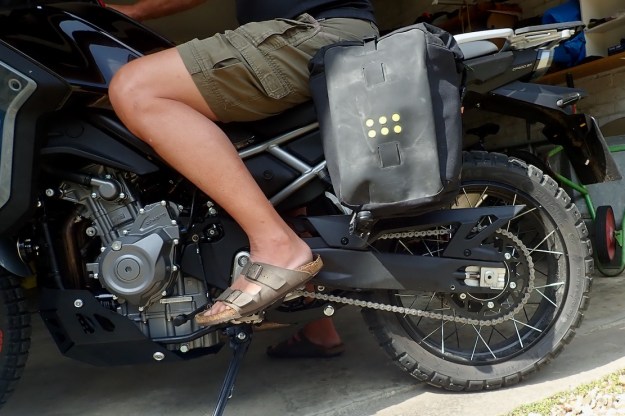
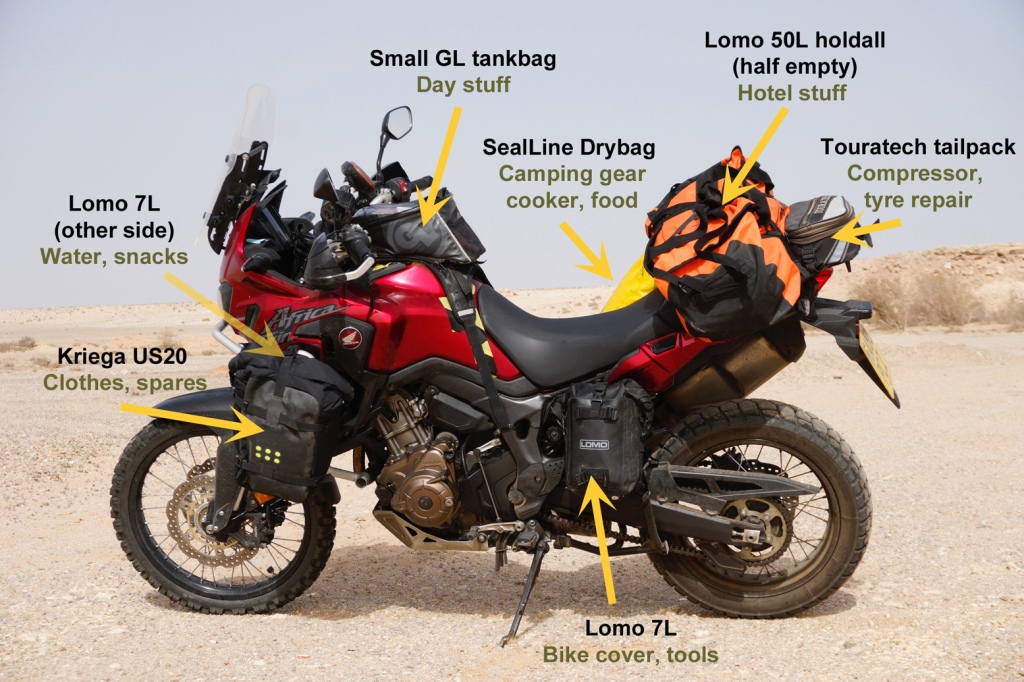
I first tried resting a bag on a footrest on my top-heavy Africa Twin trip a few years ago. I loaded a small Lomo bag with tools; probably the heaviest item in my gear. The bike was still a tank because a kilo of tools makes little difference on a 230-kilo machine. But the positioning worked well.
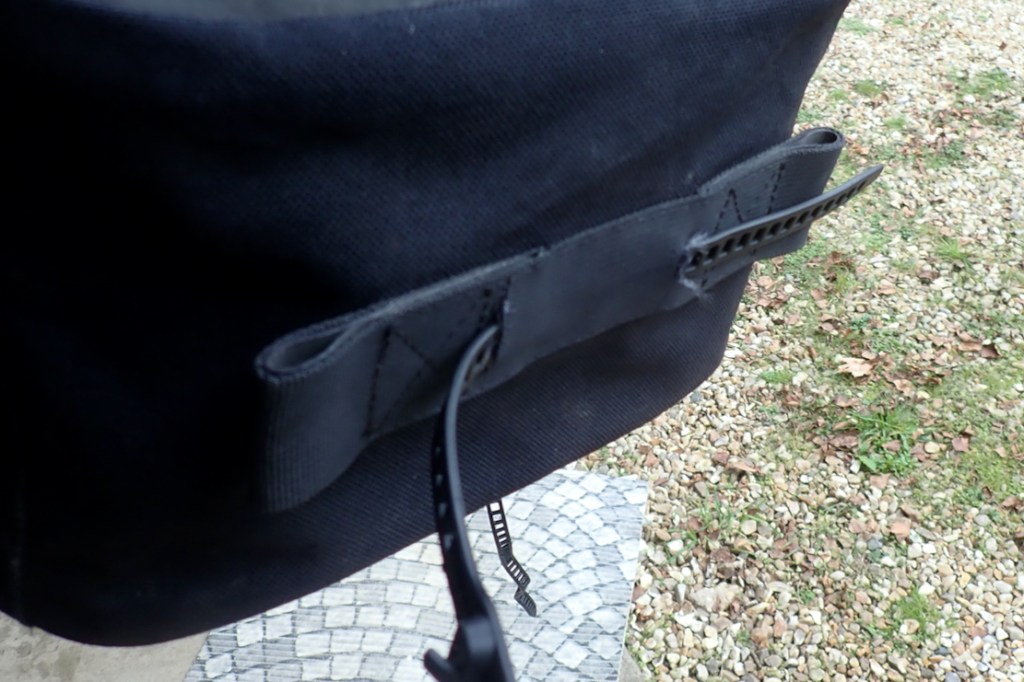
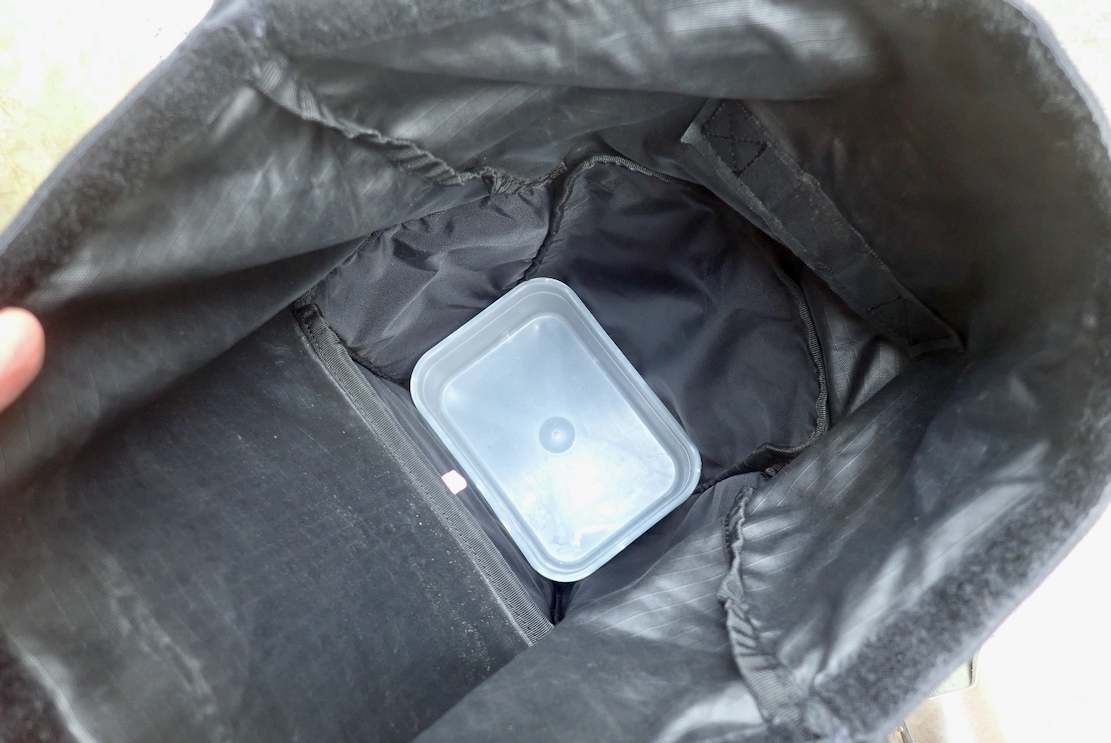
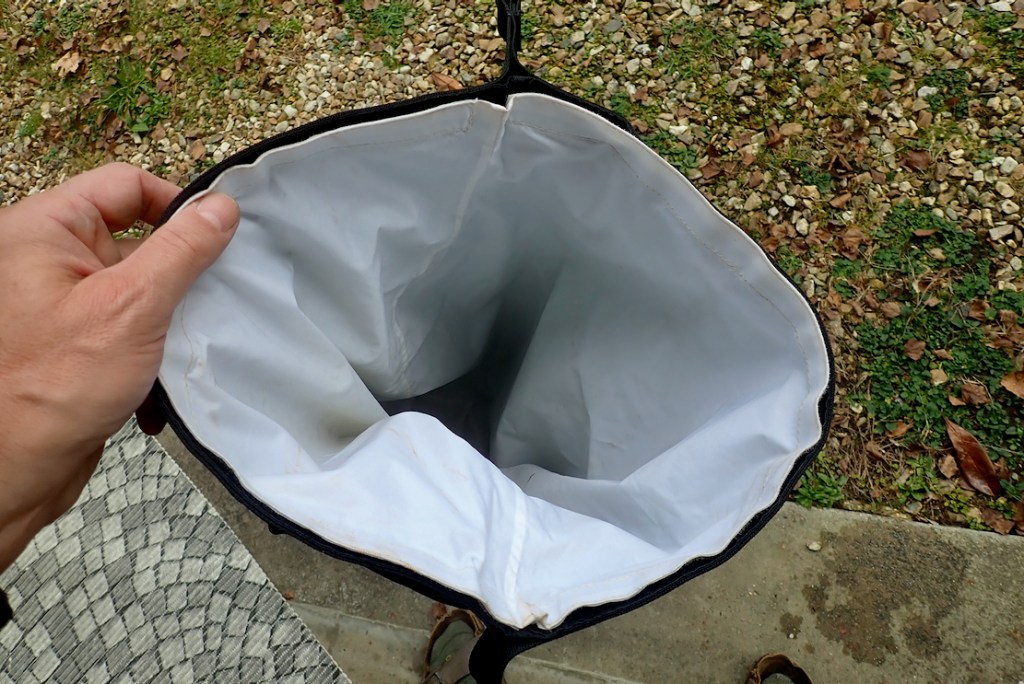
For my CF Moto ride to Morocco I went one better and fitted the old Kriega OS18 (‘US20’) from the AT’s LHS tank-side down on the 450 MT’s LHS pillion peg. Old OS18s have a tab on the bottom for a zip-tie – the new OSs don’t. To spread the load when perched on the peg a lunchbox neatly filled the bag’s base, then I refitted the waterproof liner (below).
3P I’ll call them for now: Pillion Peg Panniers. You really couldn’t get any lower or more forward, but the bag sits securely, is still easy to access and doesn’t get in the way. It would be handy if the velcro’d-in white liner had carry handles to take stuff into a hotel easily, but Kriega must have thought of that years ago and expect you to use another carrier bag or remove the whole bag every night – a buckling faff.
This is where panniers should sit when not two-up.
I’d have done the same set-up on the other side but tbh, a shoulder strap Ortlieb tail pack attached to the back of the seat with a couple of ROK Straps is just so easy to whip off in seconds when popping in for a coffee with valuables not in my day pack.
Rhinowalk 20
Depends on the bike but I think a 20-litre sized bag is optimal for this application, sitting centrally on the peg and not sticking out or up too much. You can get a Rhinowalk 20-L roll top (left) for 35 quid (it’s a lot more flimsy than a Kriega) and I used chunky TPU reusable RovaFlex Soft Ties. Like a London rat, I’m never more then 3 metres from a Rovaflex when on the road.
Assuming mounting soft bags on footrests with reusable zip ties is seen as a bodge, your rackless baggage makers ought to consider a redesigned harness that hooks to a pillion peg, has enough attachments to additionally strap to sub-frame rails, and is then counter tensioned in the usual way off the tail rack. Then make the bag q/d off that harness so there’s no faffing to fit/remove; just clip off and jog on. You’re welcome ;-).
Feedback 6000km later This pillion-peg mounted set up worked much better than expected. Despite the scoffing from naysayers, there was never a moment in five weeks when I had to adjust the loose bag or when it got in the way getting on the bike or paddling through soft sand. It would be nice if it just clipped on like the Bumot rack set up on the 1250GS I rode with, but the whole thing could not have been lighter, more secure, better positioned or cheaper.
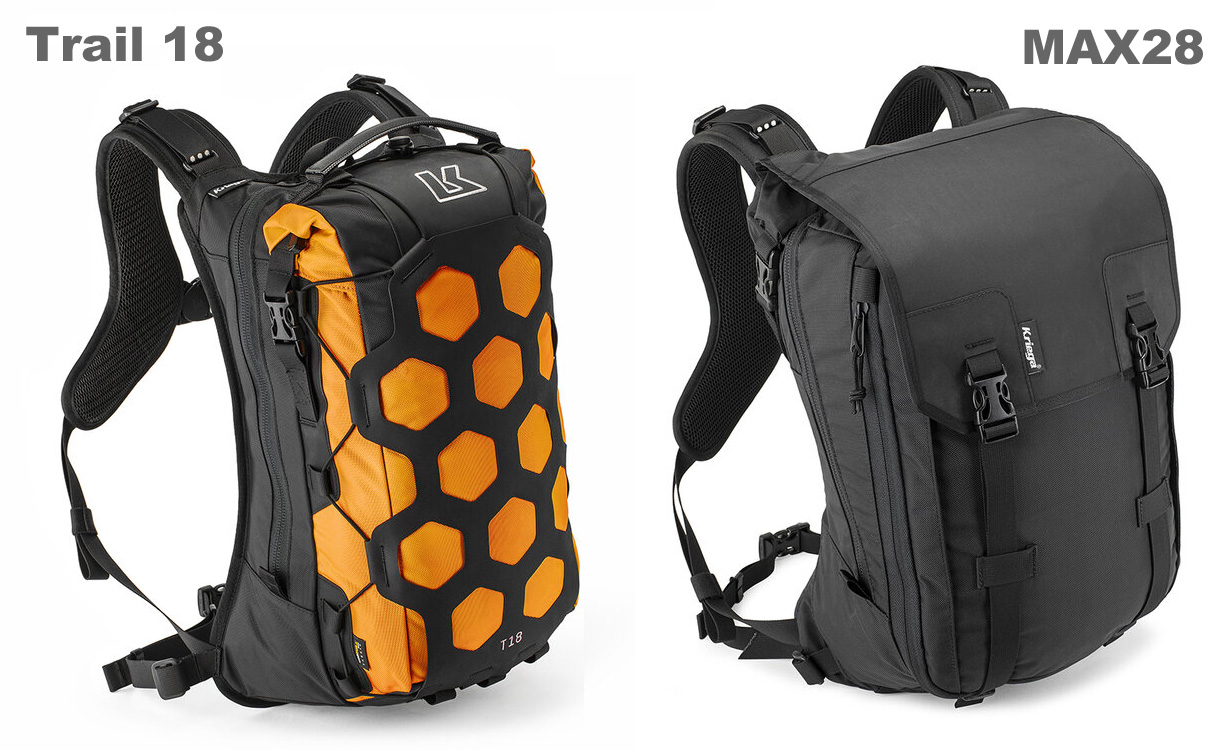
New daypacks join Kriega’s long-established five-strong R range from 15 to 35 litres. You got the snazzy colour-backed Trail in 9 and 18-litres and the bigger more urbanesque Max 28 which expands to take a helmet.
Supplied free for review and testing
What they say The TRAIL18 Adventure Backpack utilises Kriega’s groundbreaking Quadloc-Lite™ harness, combined with high-tech construction materials to meet the needs of the adventure rider. Composed of three sections: A heavy-duty zip access 7-litre rear compartment which is a perfect storage area for a Tool-Roll and water bottle or the optional 3.75L Hydration Reservoir. This area also has a small internal waterproof pocket for a phone and wallet, combined with the main roll-top body providing a total of 12-litres 100% waterproof storage. The innovative Hypalon net also provides more external storage for wet gear.
What I think:
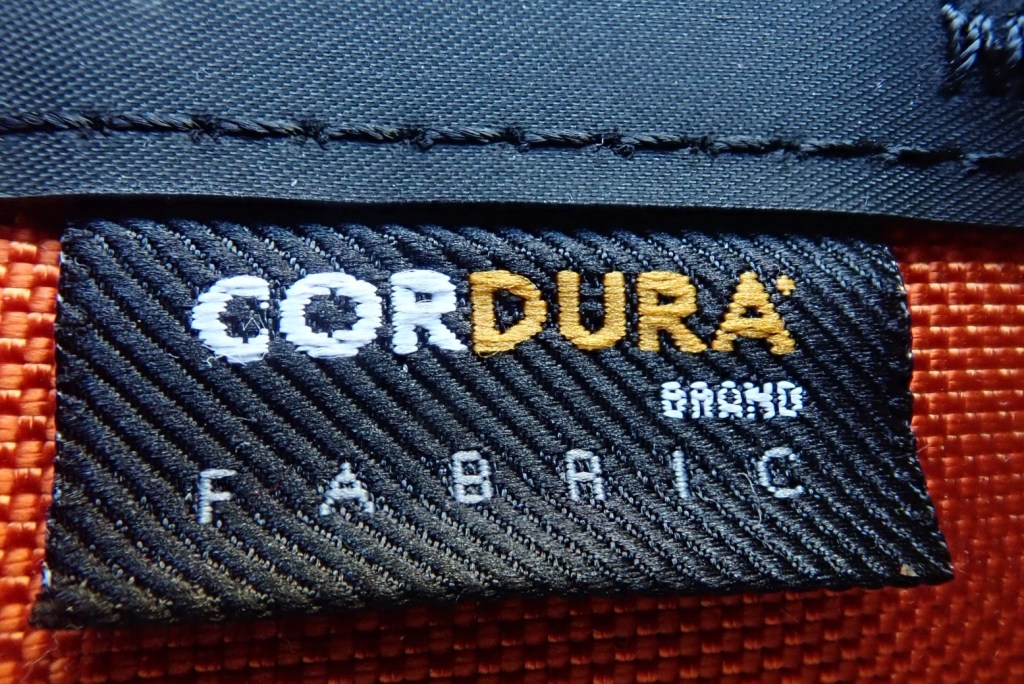
• Roll-top compartment • Comfortable to wear; sits well on the back • Removable waist straps (never used) • No compression straps • Durable 420D Cordura body • White waterproof liners in two compartments • Hydrator-ready • External hypalon net • Smooth-gliding main zipper • Colour-backed Trails aid visibility • 10-year guarantee
• Bulky roll-top small inner pouch • Expensive • Quadlock-Lite interferes with jacket pocket access • Weighs in at over 1.7 kilos with the hydrator
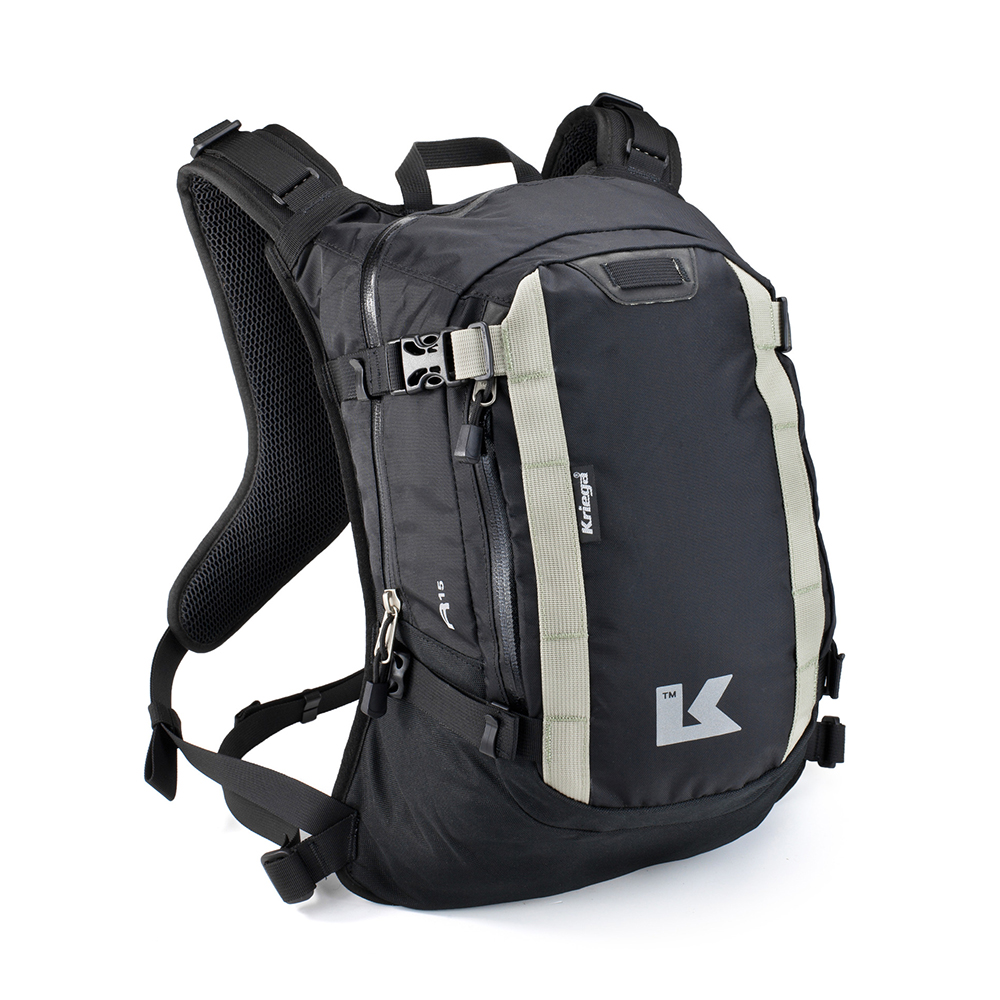
Review For years I’ve been happy enough with my dinky R15, once I cut off the unneeded compression straps and removed the unnecessary waist strap. I’ve used it for weekends in Wales, backroads and tracks in the Colorado Rockies and Baja, and of course on my Morocco tours and rides. The main compartment was big enough for my laptop in a dry bag plus the hydrator, with bits and pieces in the PVC mesh inside pocket and the bigger outer pocket.
The longer Trail18 will be a nifty replacement. Straight away I like the coloured back panel. Often on my tours I try to ID riders up ahead, and anything non-black makes it a whole lot easier. I dare say it will be for them to spot me with an orange pack too. You often get those thin bungy elastic laces across daypacks as a quick and easy place to stash stuff. Kriega have thought it through a bit further by using a distinctive hypalon net panel with the elastic strung along the edges and attached closely at the base. This way, whatever you stuff in there – mucky bottles, baguettes, wet cloths – won’t fall out the bottom. And if you want more colour or don’t like this arrangement, you can easily unlace the elastic and remove the hypalon panel.
I can see a use for this feature buying some food on the way to a night’s lodging, or securely stuffing a jacket or overpants in there on a hot day when you don’t want to dick about with the closures. It’s possible the excess elastic and cinch fittings above may flap about in the wind behind you, but tucking the end in is easy enough.
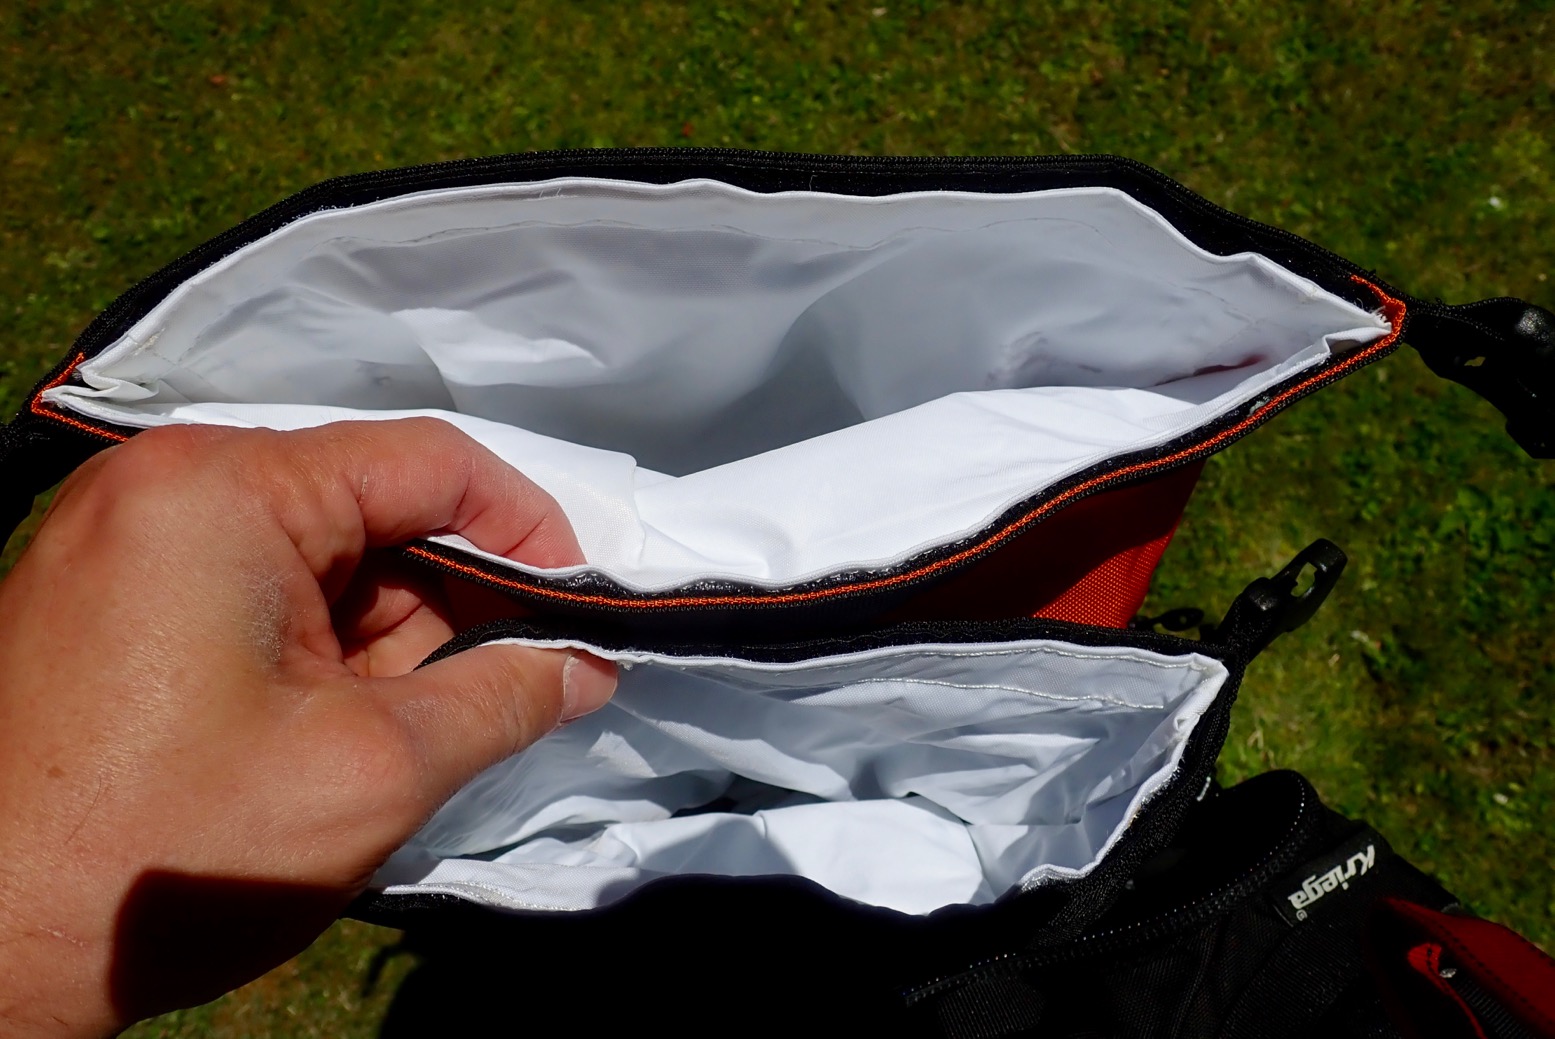
Behind this panel is a full-length 11-litre compartment with a removable white waterproof liner and a clip-down roll-top. The great thing with roll-tops is that even if you forget to do them up, stuff stays in. No more clattering laptops on leaving airport baggage scans with unzipped zips.
Removable linersInternal pocket: zip and roll
Behind that compartment against your back is a smaller 7-litre zipped compartment with no liner. Inside are a couple of tabs to hook up your hydrator (more below) and down below a couple of sleeves for drinks cans or 500ml water bottles. A smooth-running (non water-resistant) one-way zipper only comes right down on one side (below) so forgetting to do it up ought not see things fall out so readily. It includes a finger-hooking ring pull which can only be in one place when closed, but I always add a bit of bright tape to make this puller easier to locate.
My only mild gripe with the Trail is the bulkiness of the roll-top/clip-down waterproof liner’d 1-litre pouch with a phone-sized zip pocket attached in the inner compartment. I know it’s waterproof but the roll-up takes a lot of space and clipping it down would be a faff. I’d have preferred a bigger version of the plastic ripstop zip pocket from the R15. But then again, you can easily drop a big camera in here and be reasonably sure it will stay dry. After a year I chopped off that pocket’s roll-up sleeve, taped it up and cut a hole behind the zip to access the pocket without losing any volume.
The long mesh-padded back panel seems stiffer than my old R15 so the whole thing doesn’t rest quite so unobtrusively on your back, which may actually be a good thing. The waist strap can be removed and there’s also a door hook tab plus a chunky carry handle. On the front are loops to clip in mini karabiners for quickly attaching stuff like hats or Kriega accessory pouches. I zip tie a small camera case on there for quick access. My Trail18 weighed in at 1550g and costs £179.
The Trail is hydrator-ready with a slot for the hose to come over either shoulder and a velcro tab inside the back from which to hang the bladder. Kriega’s stubby new 3.75L (7.9 pint!) Hydrapak Shape-Shift reservoir is made to fit both Trail models by fully expanding to fill the space below that bulky top pocket. Nearly 4 kilos of water is a lot to carry on your back, but maybe that’s what some riders need. The rubbery TPU bladder has an easy-to-use and reliable fold-and-clamp closure with a big aperture which makes it easy to fill and clean/dry the inside, as well as the clip-on, insulated and UV-proof hose with hopefully a less-brittle bite-valve on the end. I tucked my nozzle end under a tab on the front of the strap, but Kriega offer a velcro attachment tab which may well work better if the hose is on the short side for you. It costs £45.