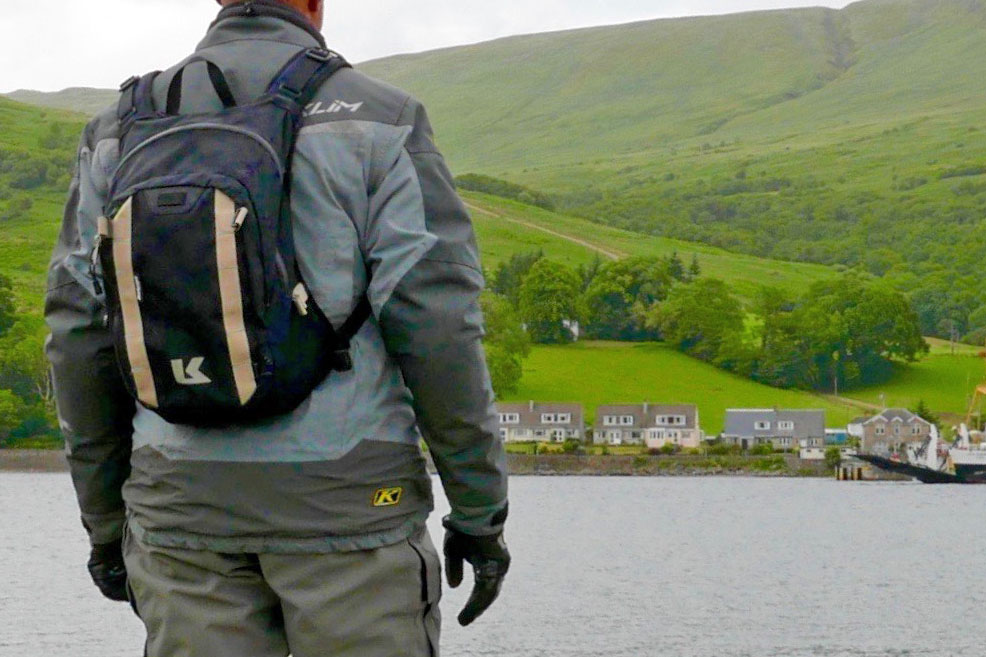
For my kind of riding I’ve not been a great fan of tankbags. When you get off the bike it’s another thing to unclip and lug around with you, along with your lid. For the stuff you can’t afford to lose I find a backpack like Kriega’s R15 more functional – it stays with you on or off the bike, but over nearly a decade I’ve reluctantly gelled with my ‘dango.
Fyi: I bought this Fandango Pro used off ebay for £35.
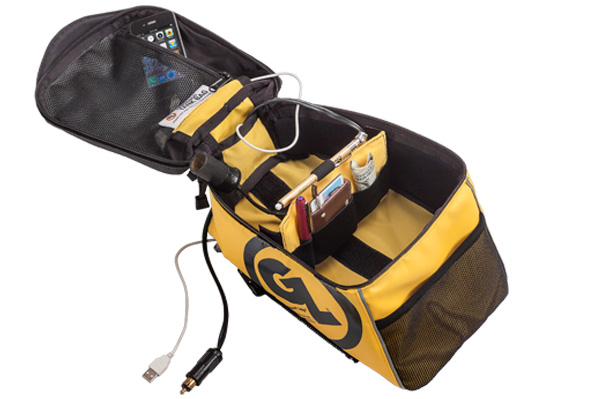
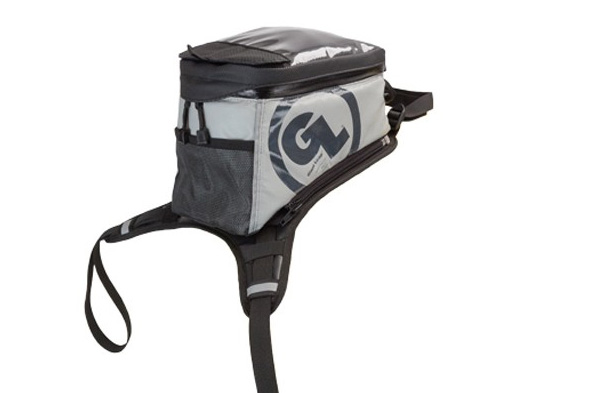
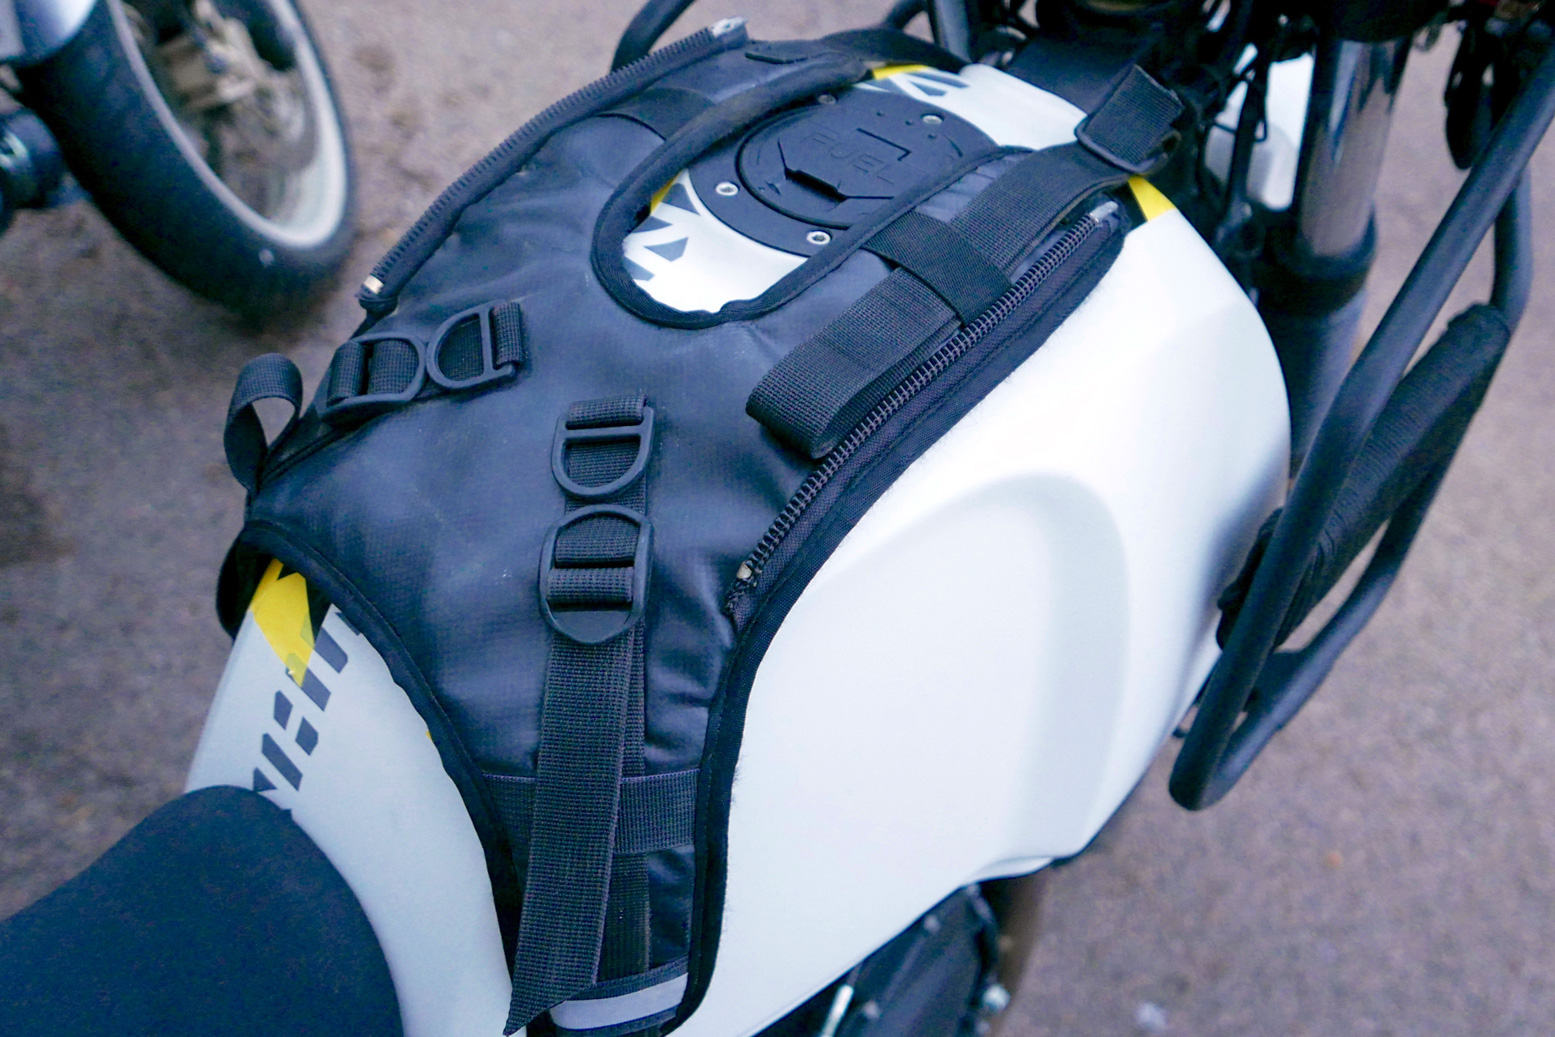
What they say: Fandango Tank Bag PRO™ (8 litres) represents a major upgrade of Giant Loop’s largest, most popular tank bag. Expandability, electronics compatibility, and features driven by rider feedback inspire this adventure-proof state-of-the-art design.
What I think:
• Solid and well made • Still using it on all sorts of bikes 5 years later • Perfect size for my needs – not too big • More handy compartments than Secret Squirrel
• A hundred and sixty quid for a PVC tank bag? Nope, now £220! • Mounting zips are a faff when filling up; would prefer clips or even velcro
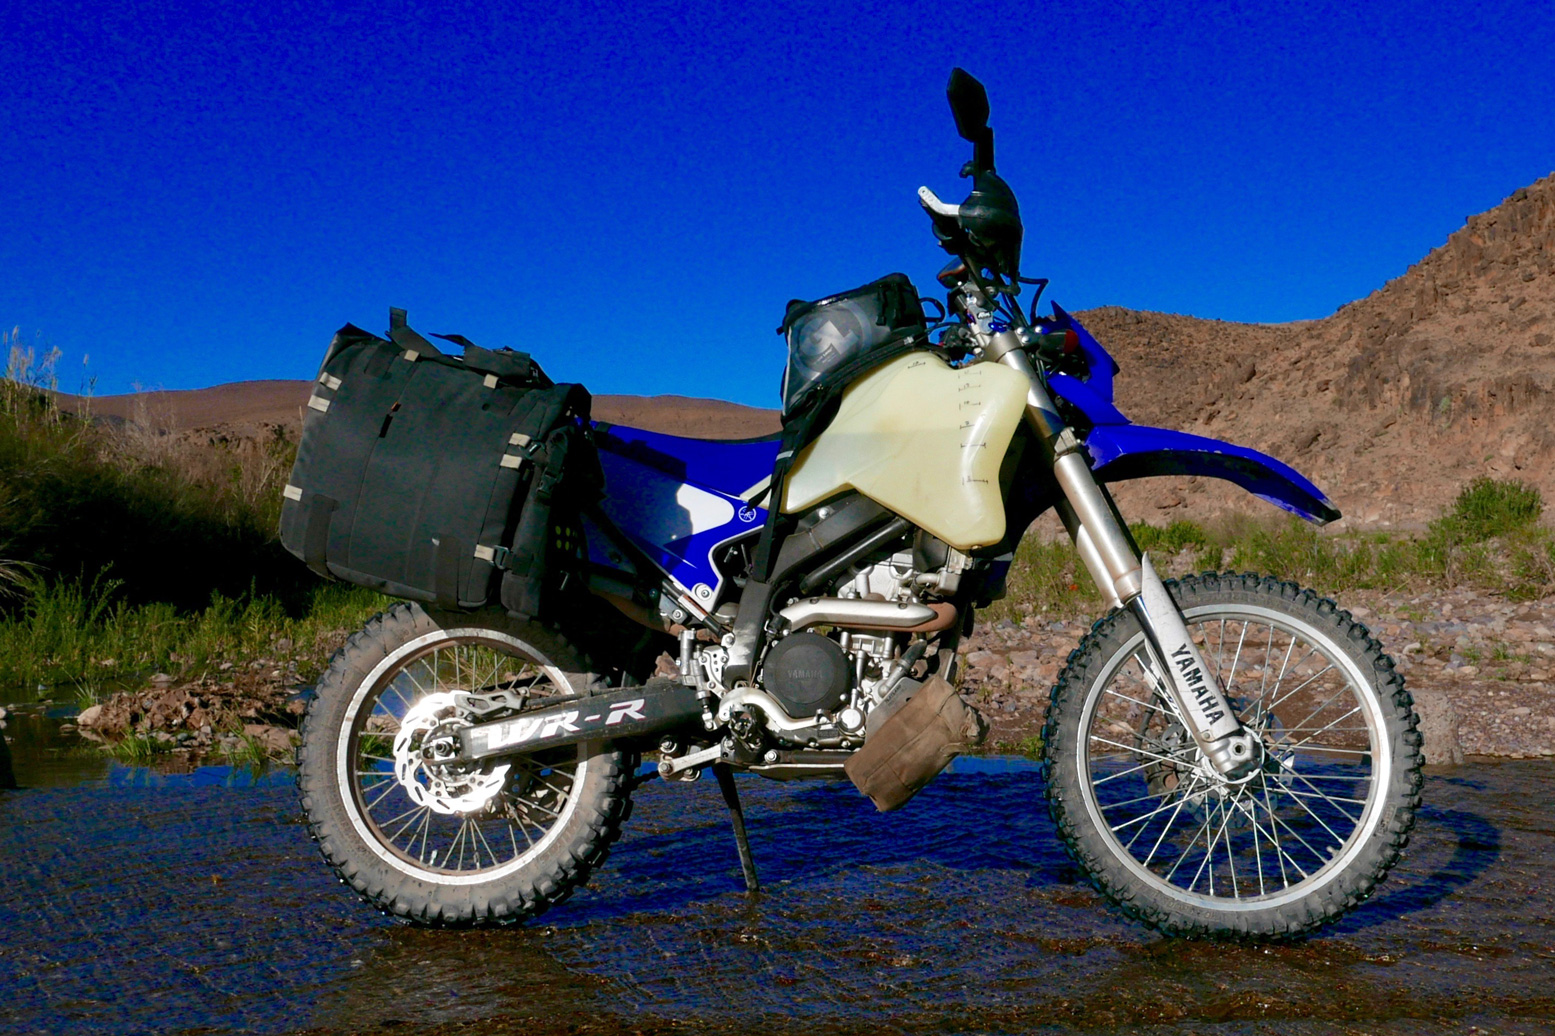
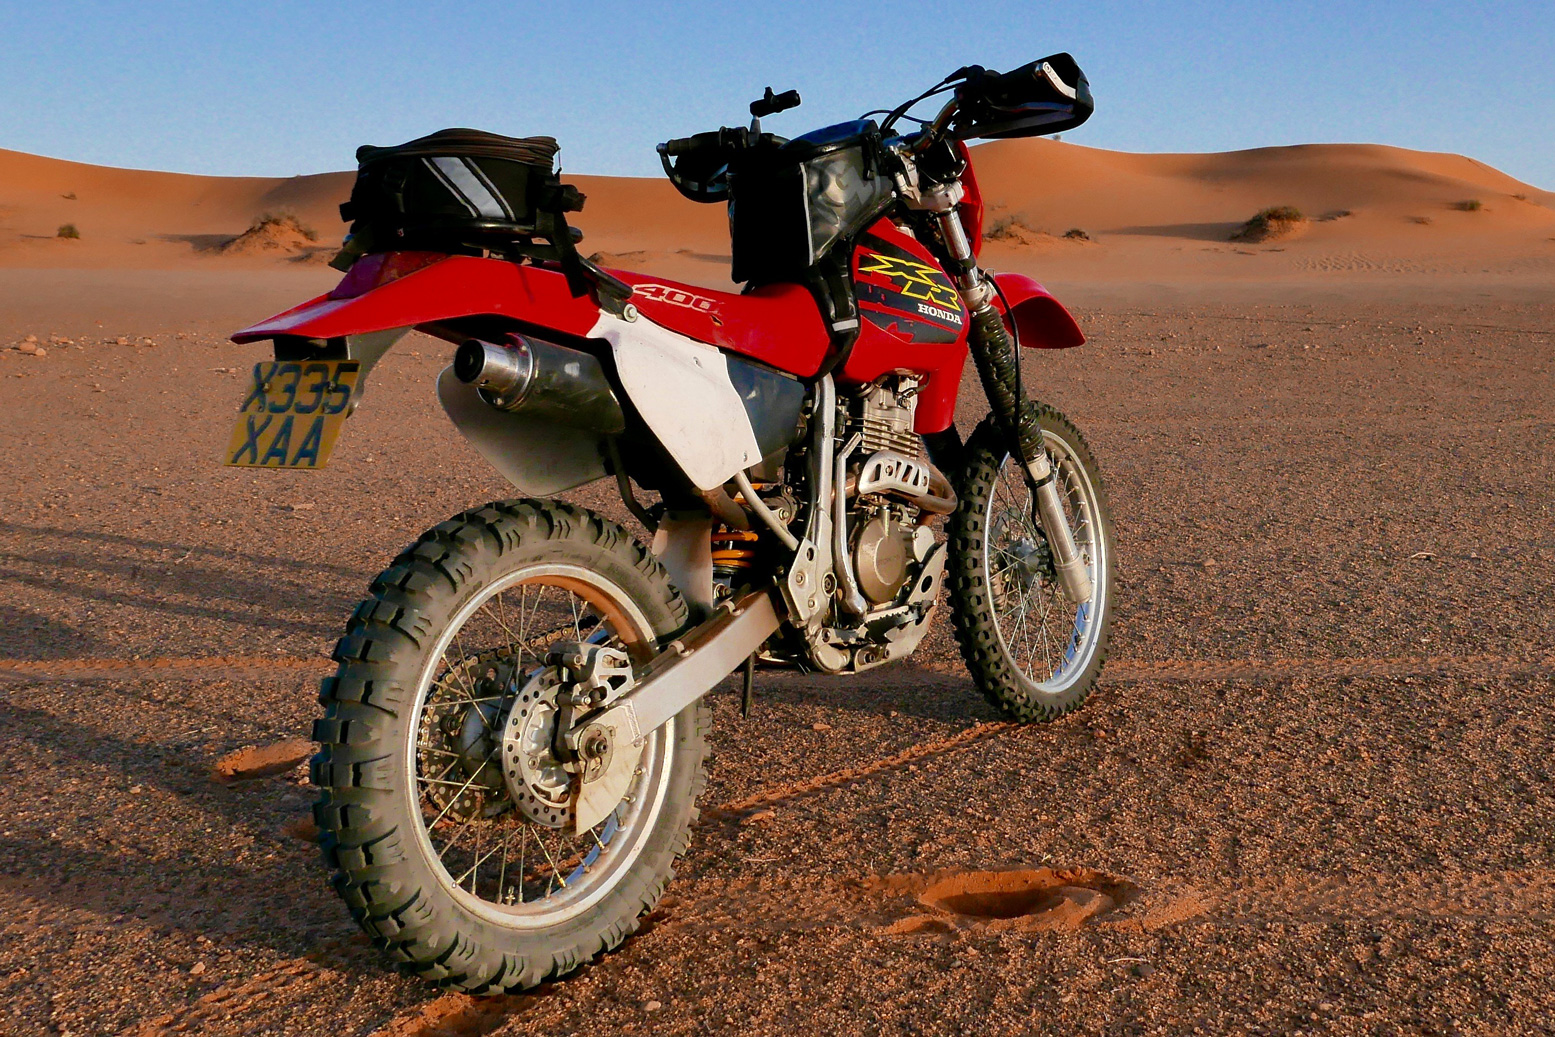
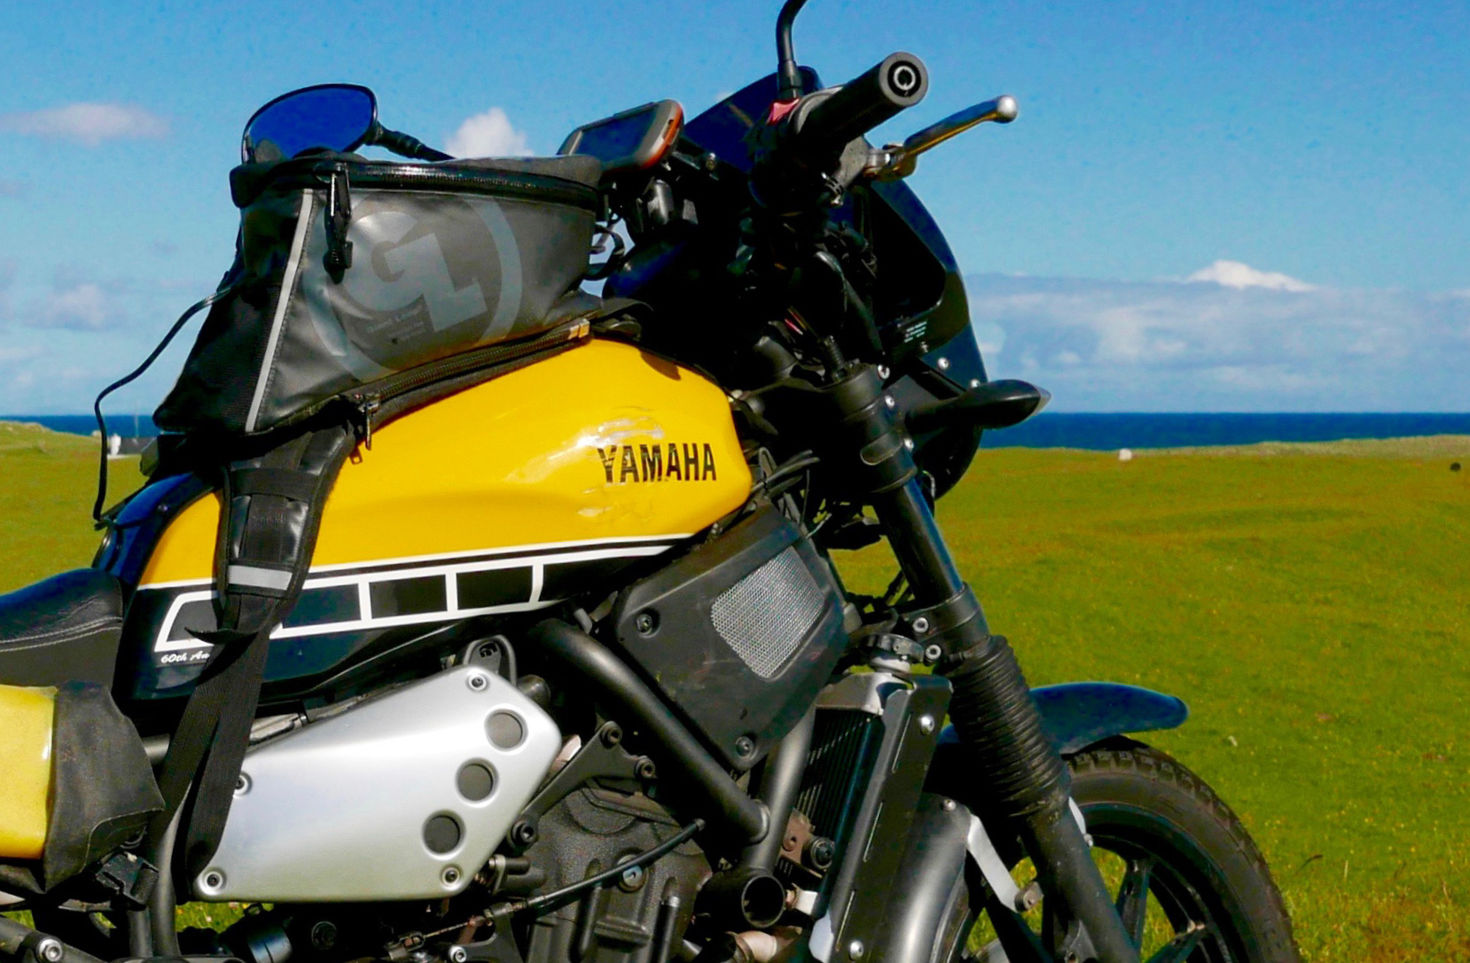
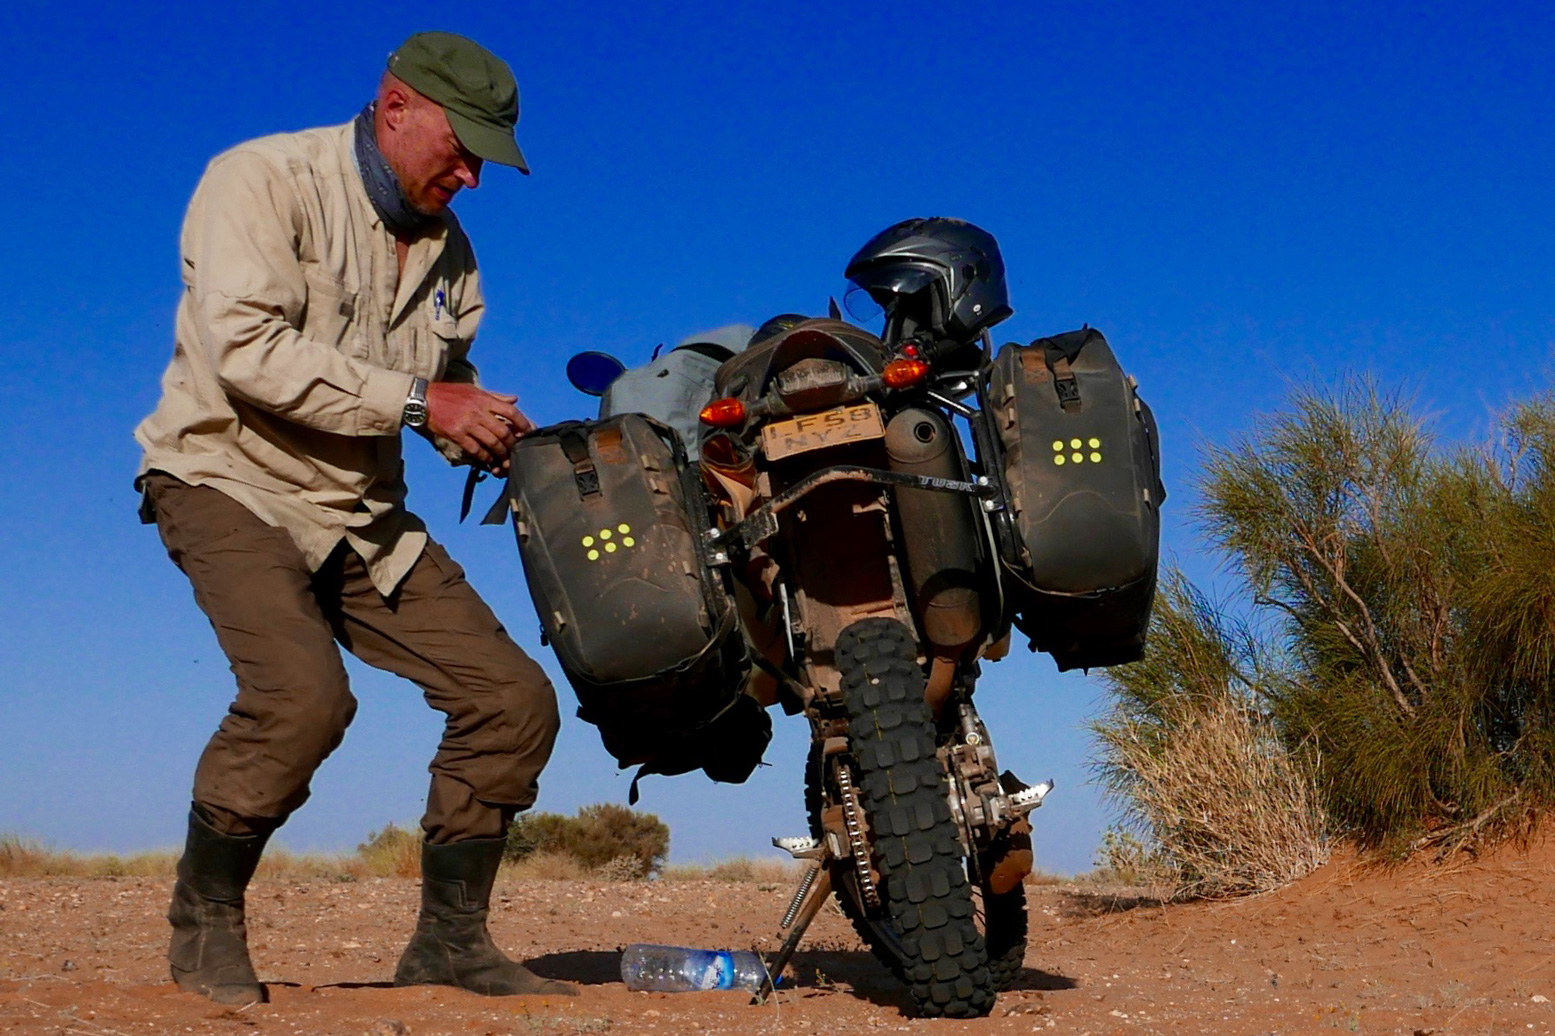
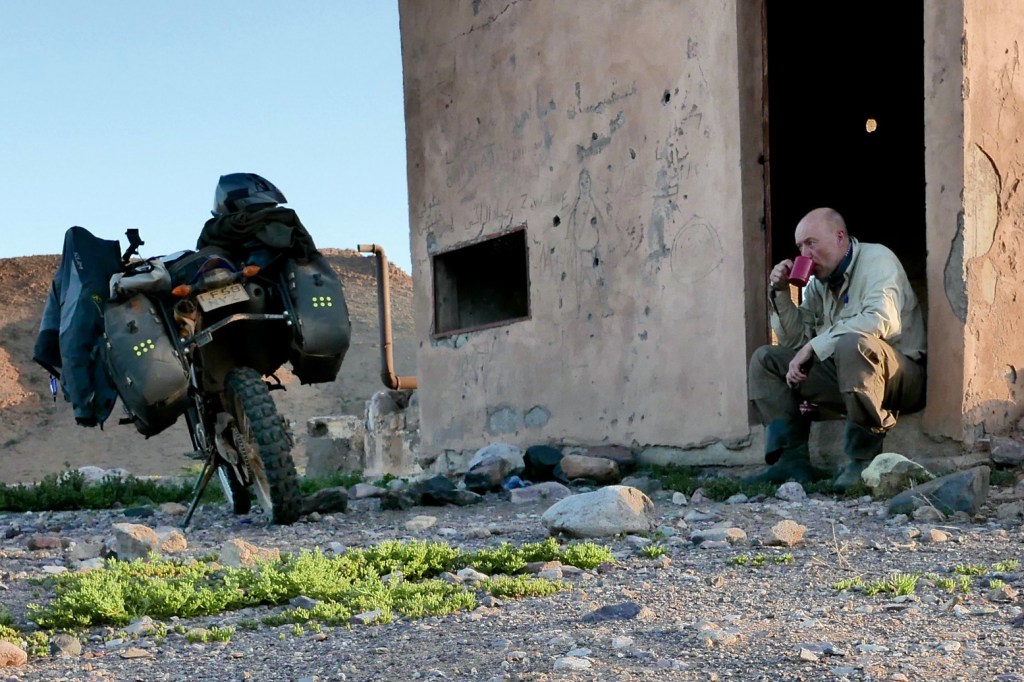
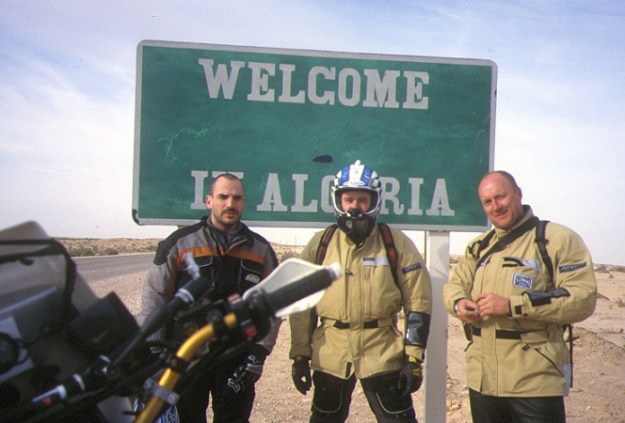
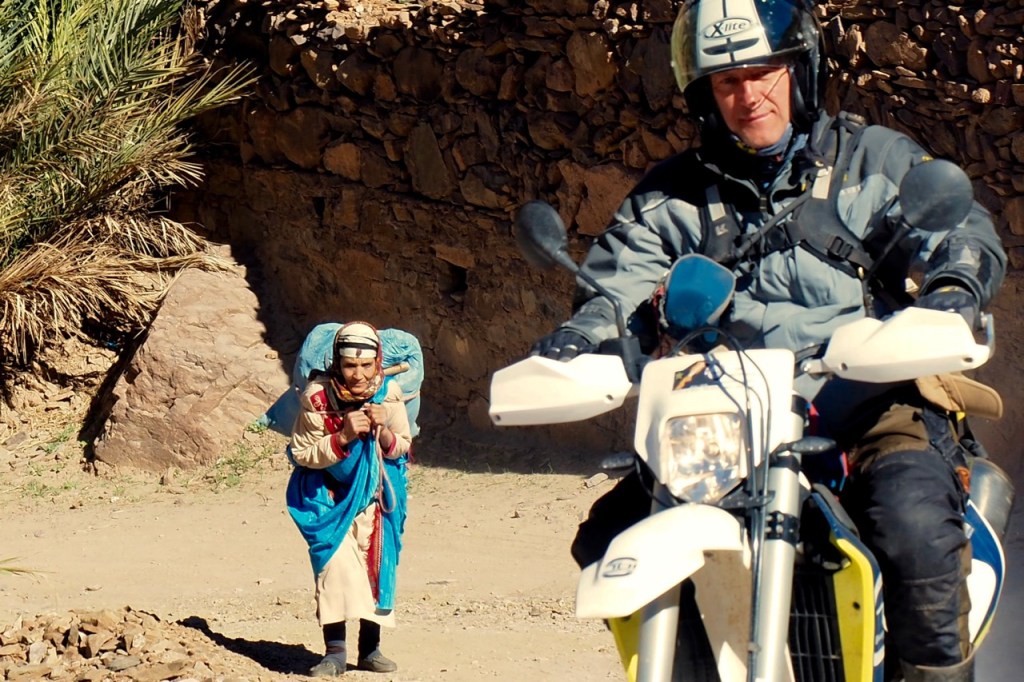
Review I like to try new stuff, or up to a point, retry ideas I’ve given up on. Once I strung some high-end Rova-Flex zip ties round the frame and headstock the Fandango perched securely on my WR’s big IMS tank. It stayed there for a month, zipped off every 4-500kms to refill the tank, or right off when overnighting in lodgings. Since then I used it on an XR400 in Algeria, on my XScrambleR 700 in Morocco and on my Himalayan.
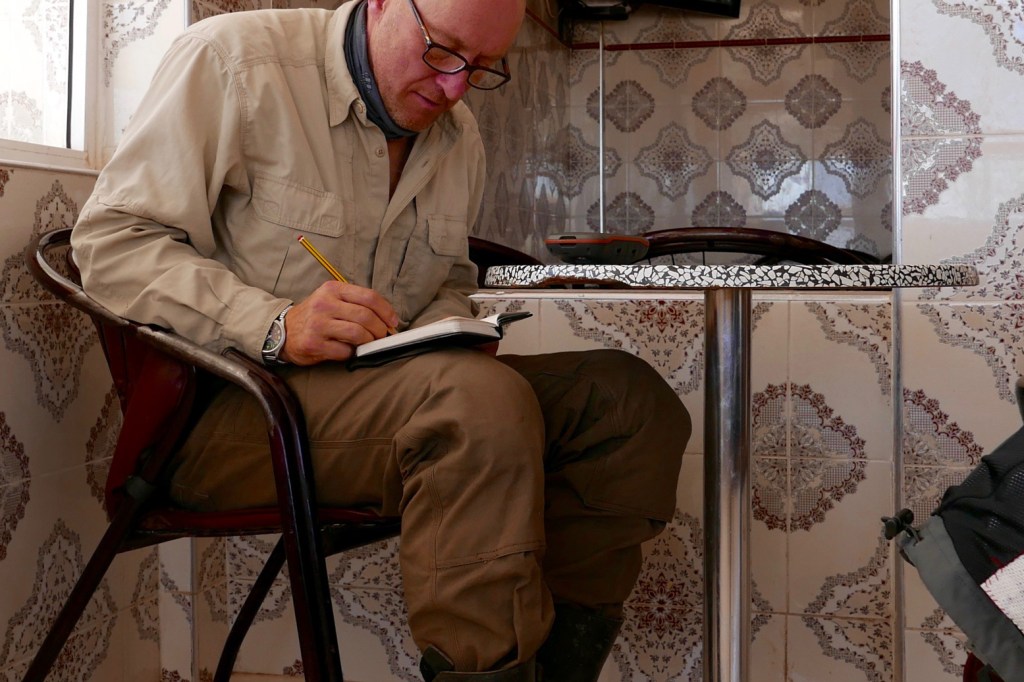
The volume is just right for me, though the map pocket’s surface area os a bit small. It closes with a velcro patch, but that wasn’t enough to stop my vital notebook falling out while battling through a oued on the Western Sahara border. Going back to look for it was just ‘too hot, too hard, too far’, to paraphrase GL’s motto. Make sure you velcro down well, especially with toll-highway tickets. The back mesh pocket was great to whip out my P&S camera on the move, and inside under the top is a nifty hidden zip pocket, but it’s starting to fray. There’s another under the base (may get wet) and inside the body is a velcro divider I have no use for as the bag is not that big. I just stuff in what’s needed.
XR4 in Algeria
There’s a port to let a cable out so your phone can recharge, and they’ve neatly addressed securing the loose ends of the harness to eliminate flapping. As expected, the zips can be a pain some days. It takes just a few seconds of fiddling to get them to hook up, but I got things to do and places to ride! I’d prefer clips. The breather hose from my WR’s fuel cap didn’t get affected by the bag pressing on it, and lightly loaded as it was, the sat stayed in place over rough terrain.
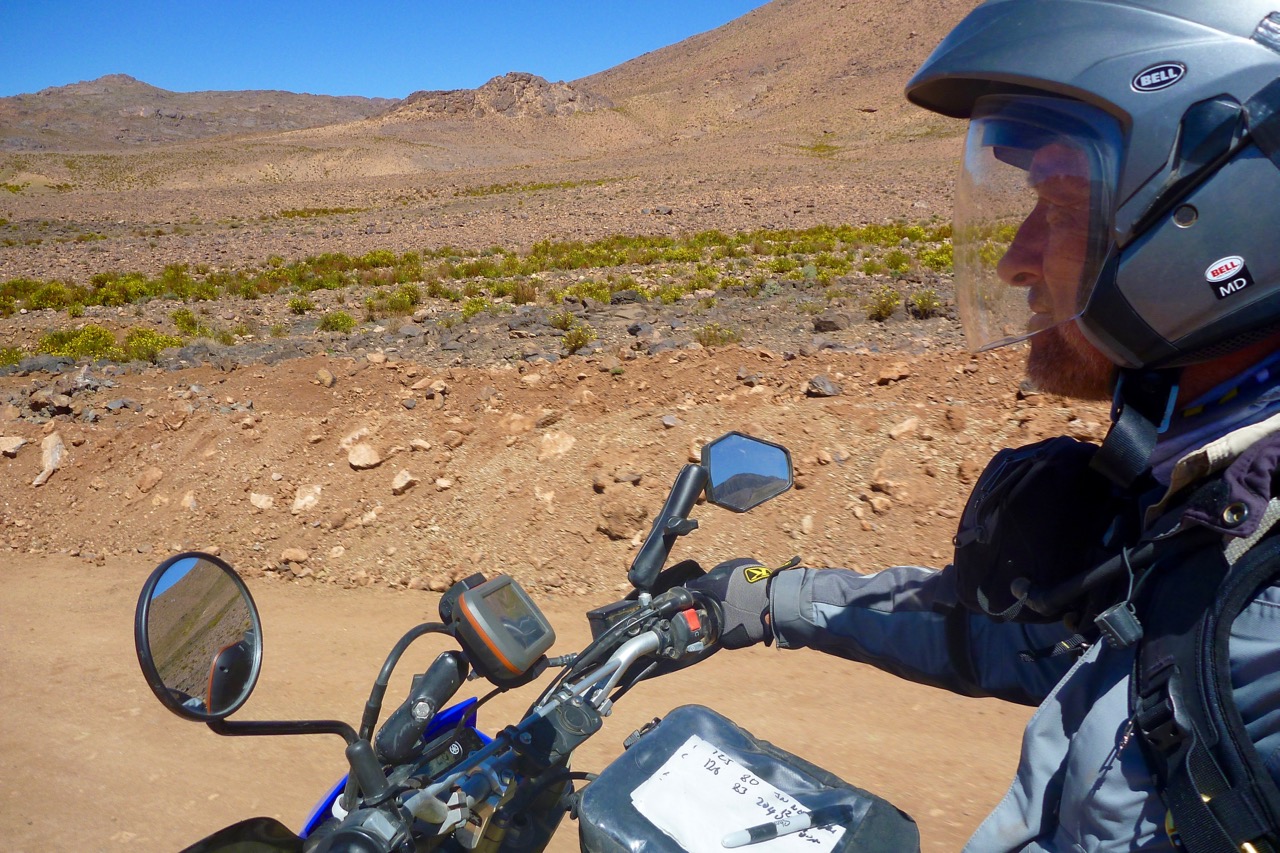
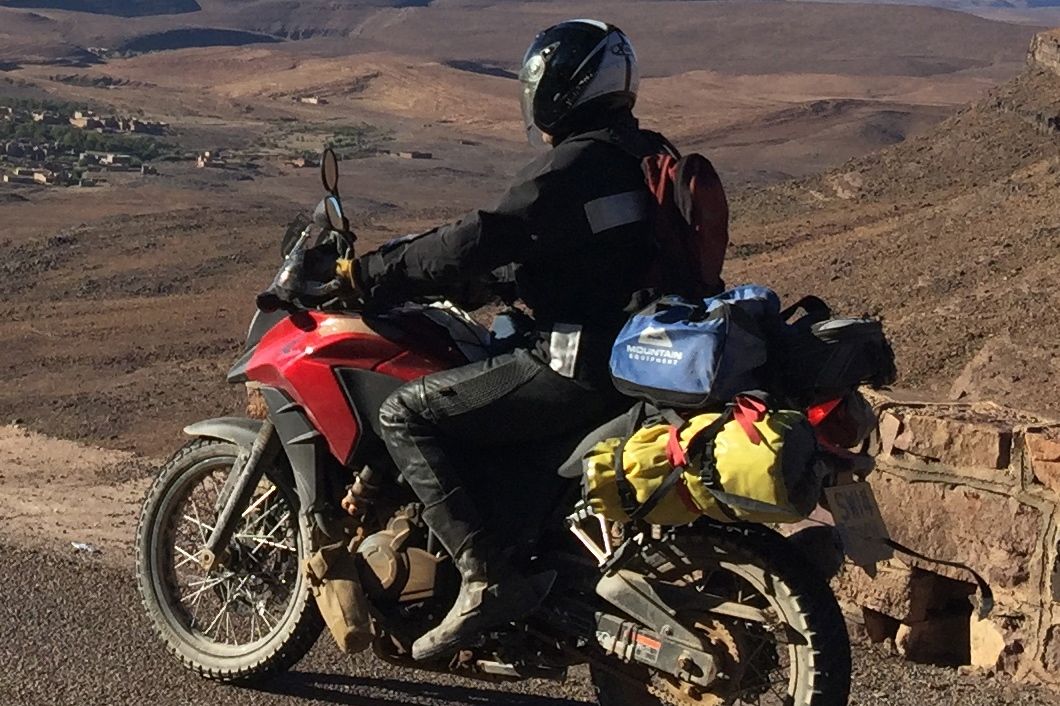
890R in Morocco
Once the harness is on the bike, it will be nice to ditch the backpack and just use the ‘dango like a small top box as it’s been a dead handy accessory on my trips. Lately I’ve fitted it to my Himalayan where it sits nicely with some more Rova-Flex zipped round the frame tubes. Only this time I’ve taped some tape to the tank top to stop the base vinyl from scuffing the pristine white paint. Just remember all this goodwill is based on the great price I paid for it used.
Where: 3000km over a month in southern Morocco. Then another 5000 in Morocco and Spain, another 1000km in Algeria in 2018 and for a few weeks every year in Morocco till late 2023.
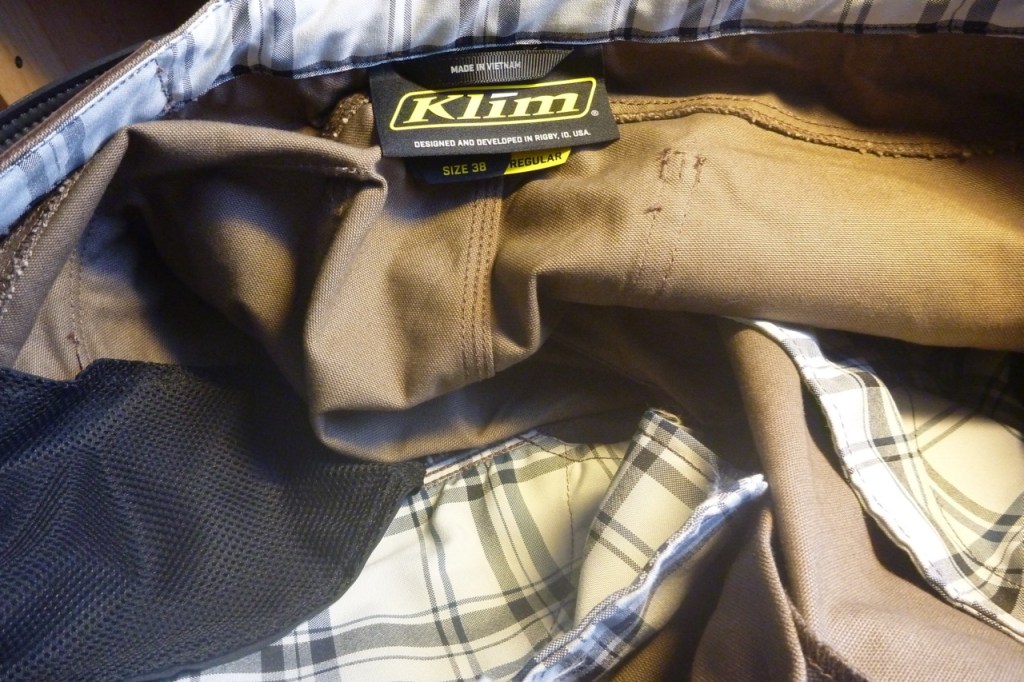
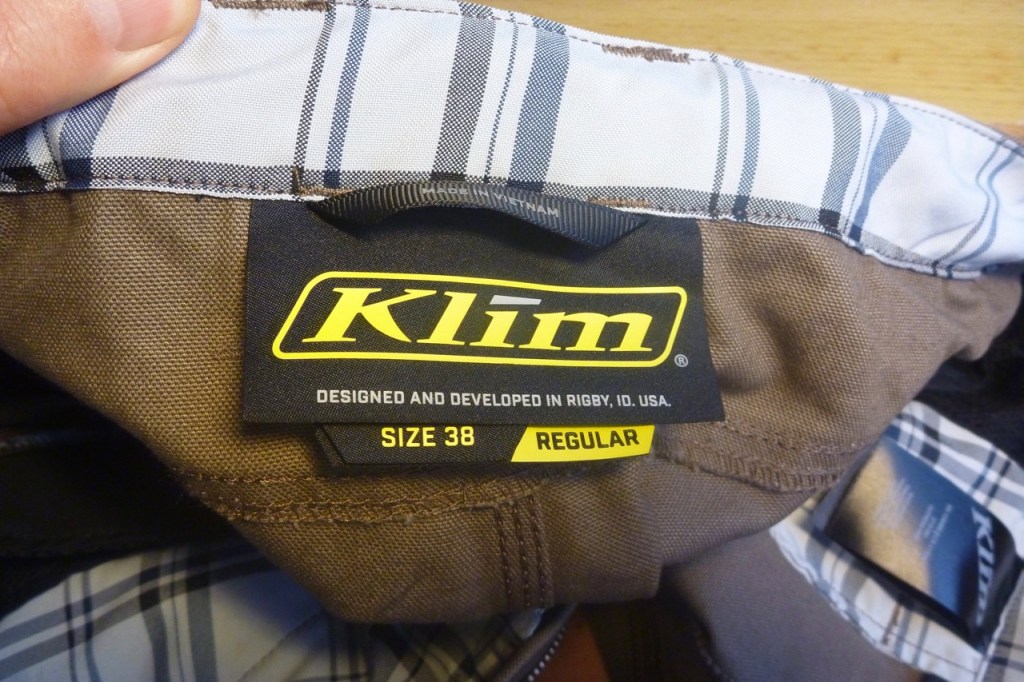
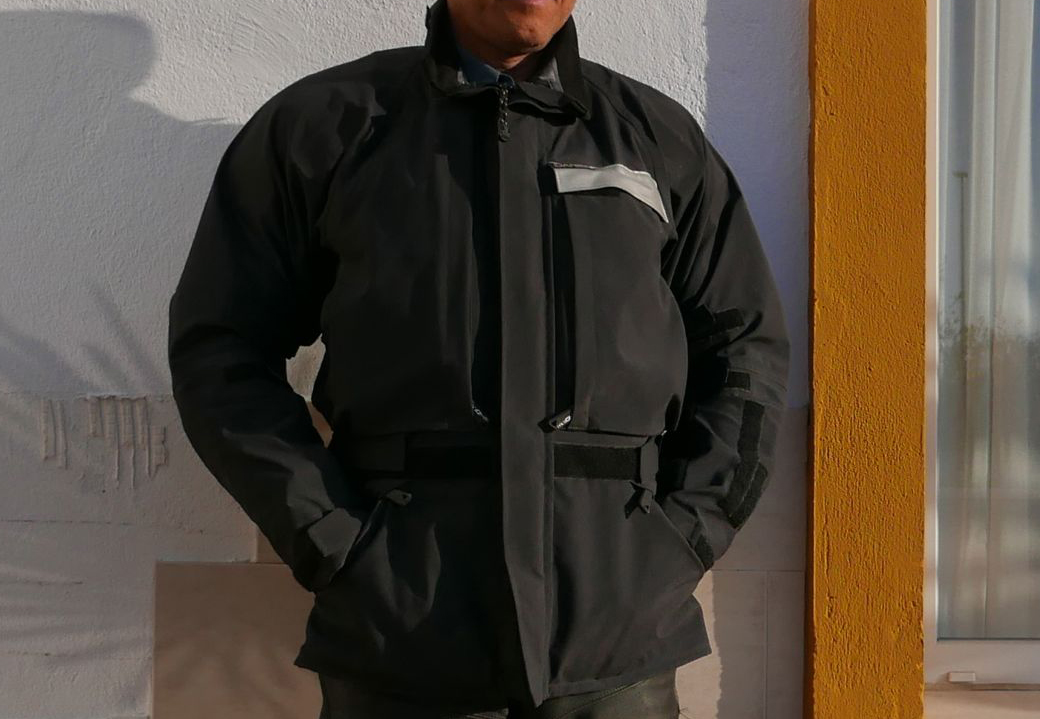
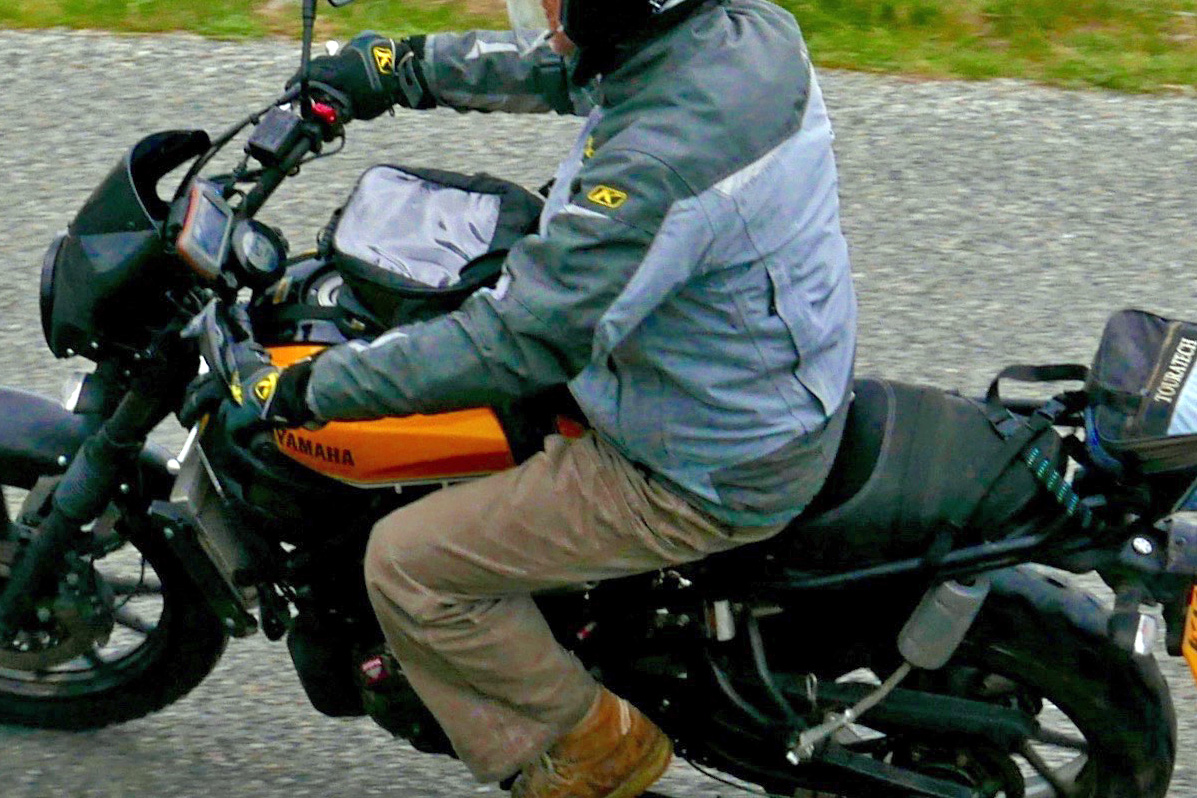
• Usual Klim quality • Not plastered in Klim branding • Exterior knee sleeves make armour easily removable • These also make handy stash pockets • Can pass as slightly unusual normal jeans • They didn’t go cargo-pocket-mad, as many do • Cotton-Cordura fabric feels tough, but breathes well • Dry fast
• Regular length was too long in the leg (shortened mine) • Way too baggy at the shins for riding bikes too, even OTB. I cut a wedge out and zip put in • Expensive, but lasted years
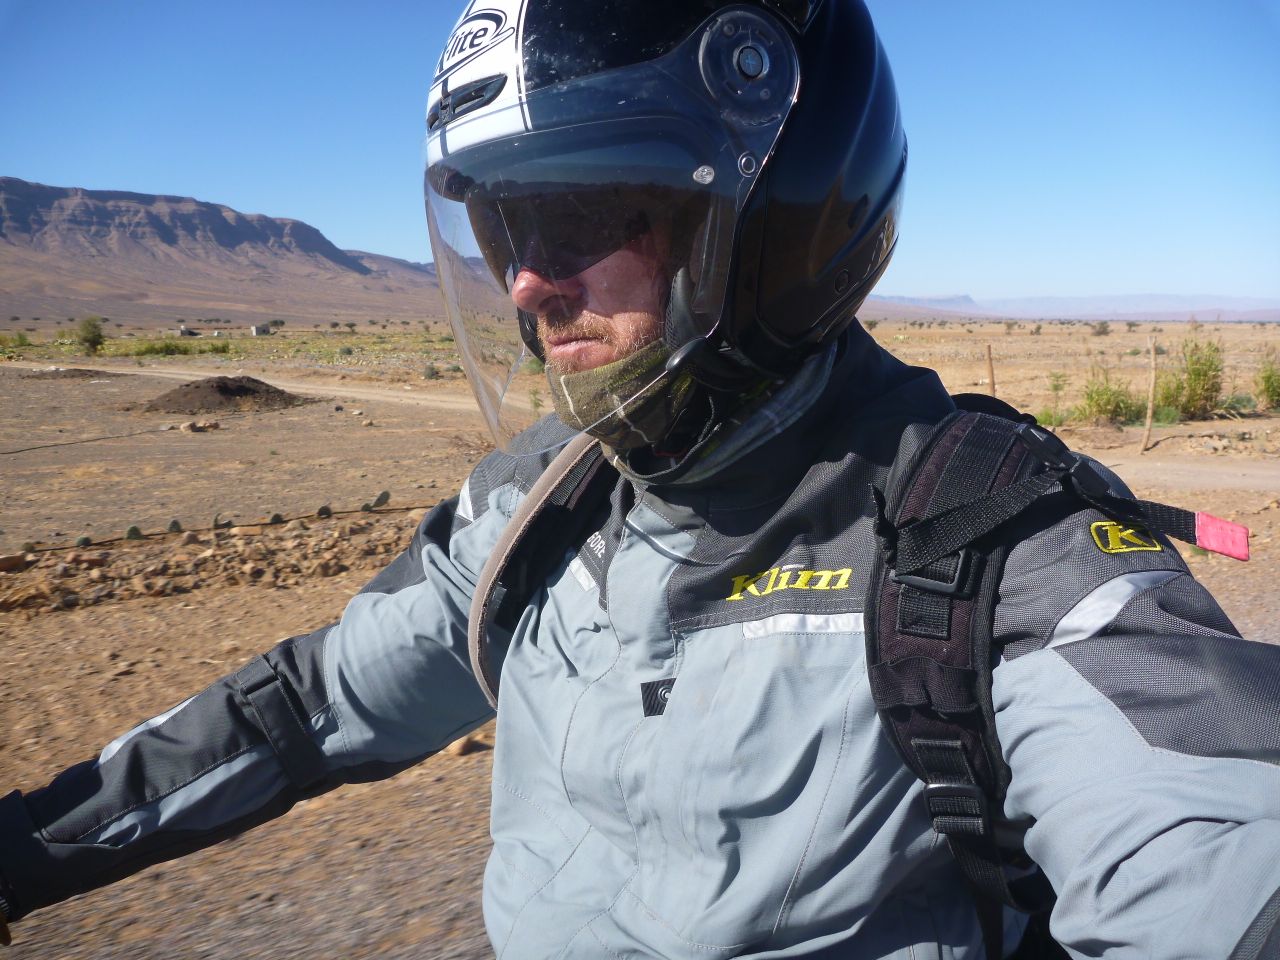
As I wrote, I’ve been looking for some riding pants that make me feel protected but don’t weigh a ton like my old leathers, and aren’t sweaty, bulky, membrane overpants. There are those kevlar-impregnated demin jeans, but who actually wears jeans these days? After a while I decided my Klim Dakar ITBs were just too race-focussed, under-pocketed and too nylony for my tame level of desert touring. At the 2016 NEC Adv Spec put me onto Klim’s forthcoming Outriders – normal looking, jean-like riding pants with well-thought-out armour. Something you can wear on or off the bike. In other words: ideal do-it-all travelling trousers. When they arrived my 38″ Regulars weigh1440g with the armour, or 1090g without. More than half that of my leathers and a bit less than the chunky Dakar ITBs.
Fyi: I bought these Outriders at a discount from Adventure Spec in return for advertising in my books
What they say: The Outrider is designed to traverse the environments and demands of the multi-sport enthusiast. Scrambling out to your favorite fishing spot, hiking from the trailhead to the lake at 9,000ft, or cruising the boulevard to the pier at sunset. Wherever your next odyssey takes you, the Outrider is ready for anything. Built with the quality you expect from KLIM®.
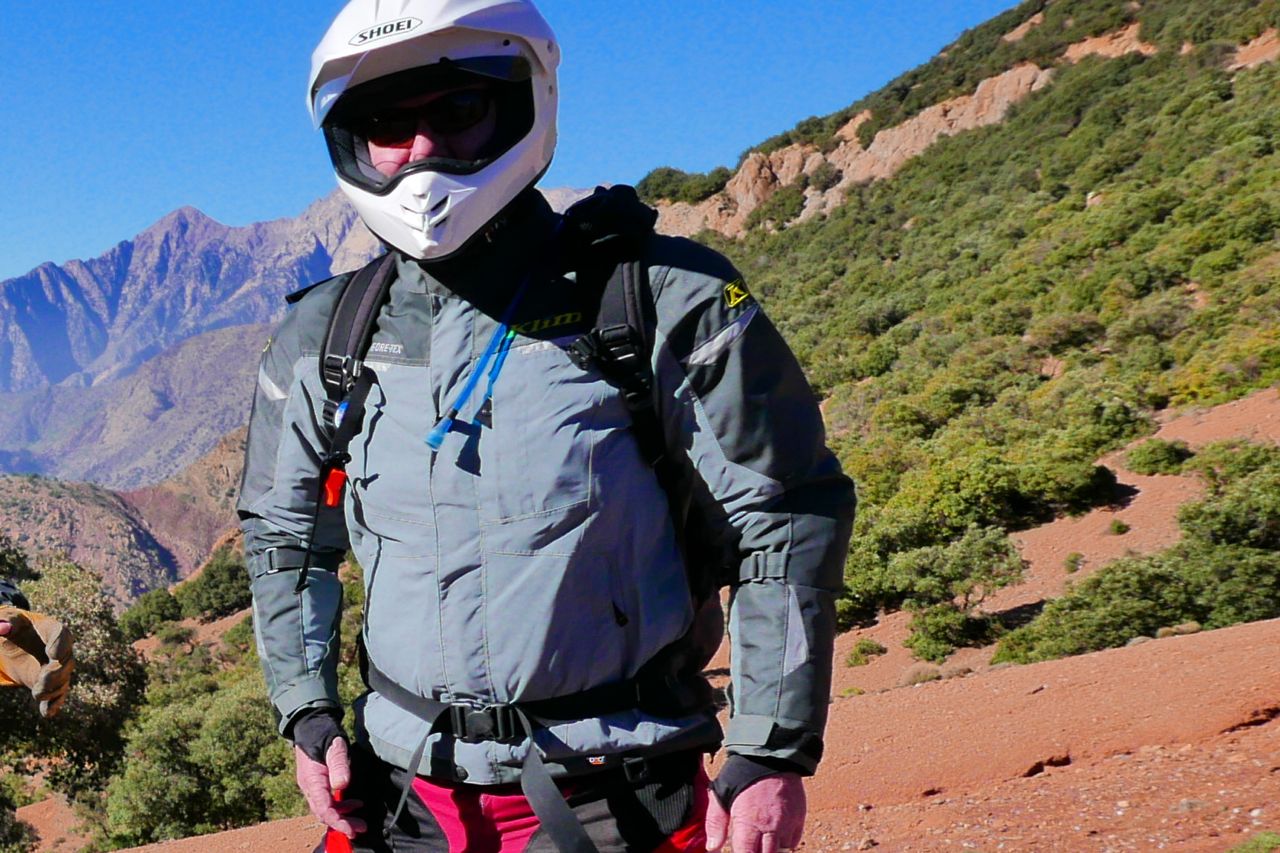
Review I was pretty sure I’d like the Klim Outriders and out of the box I wasn’t disappointed. I’m around 6′ 1″ and 94kg, 37″ waist (when I left for Morocco), and an inside leg of 32″ (unchanged). So ’38 x 32 Regular’ was my size.
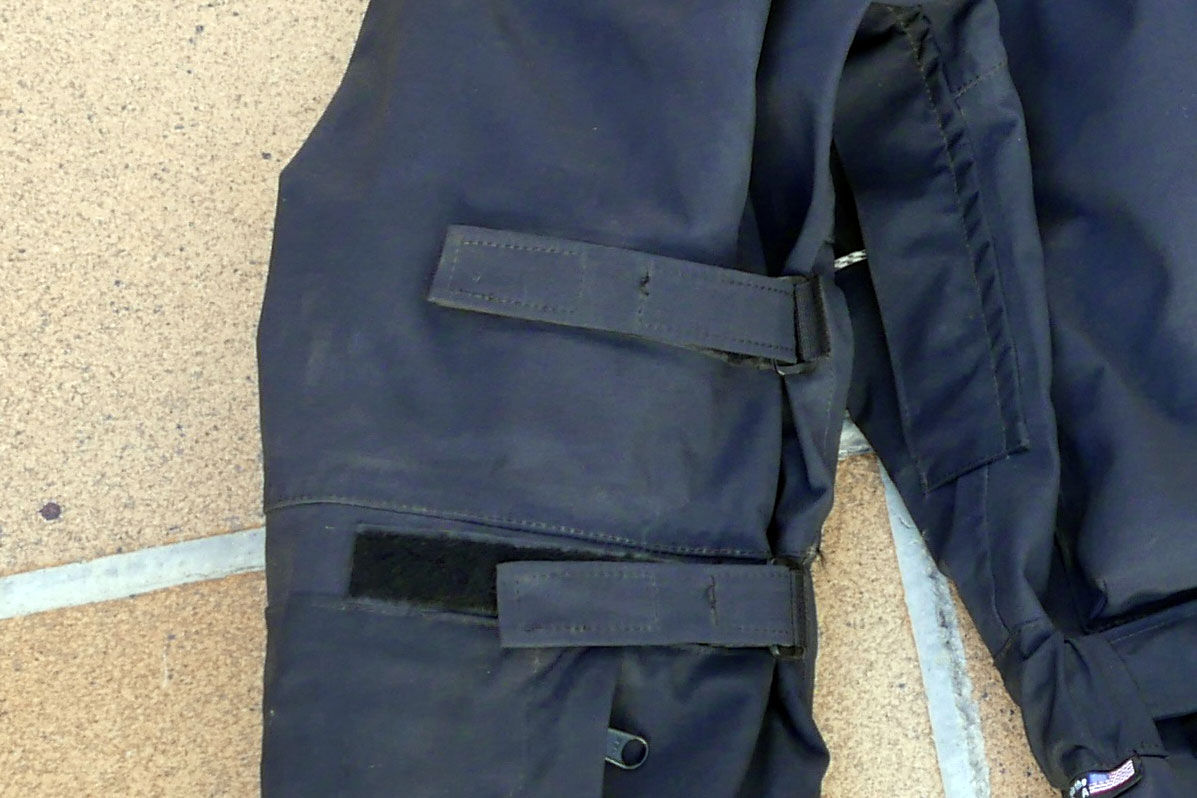
But these pants are actually a yard long in the leg and once worn standing up, sag at the heel, like the image right, but more. Once the armour’s in and with some riding up when sat on a bike, they actually look correct. And if you wear them ITB (in-the-boot) to eliminate snagging the baggy ends, it ought not matter (or so I hoped). Better too long than too short, I suppose.
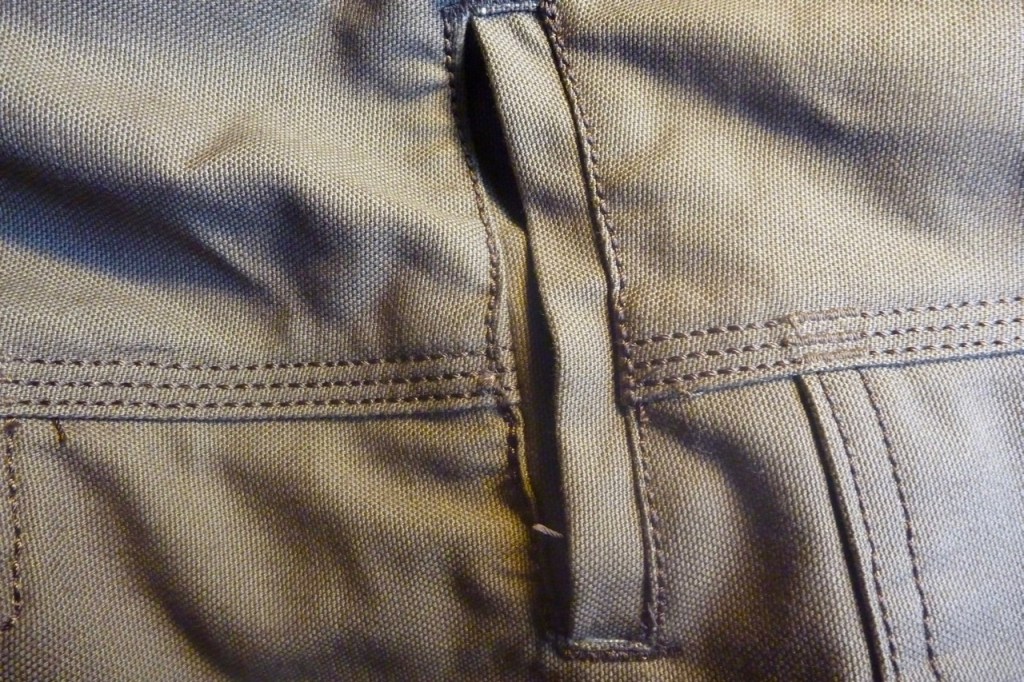
You get two front pockets with a jean-like coin slot inside one; two at the back, one with a flap and stud, and a smartphone slip-in on the left thigh so you can check in without taking your hand off the throttle.
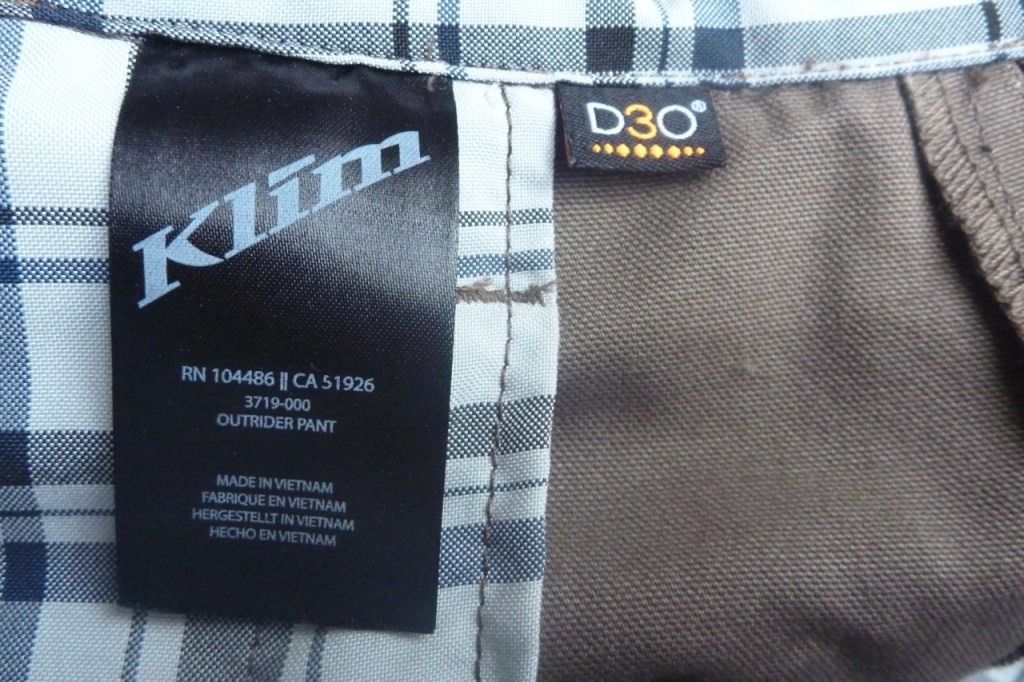
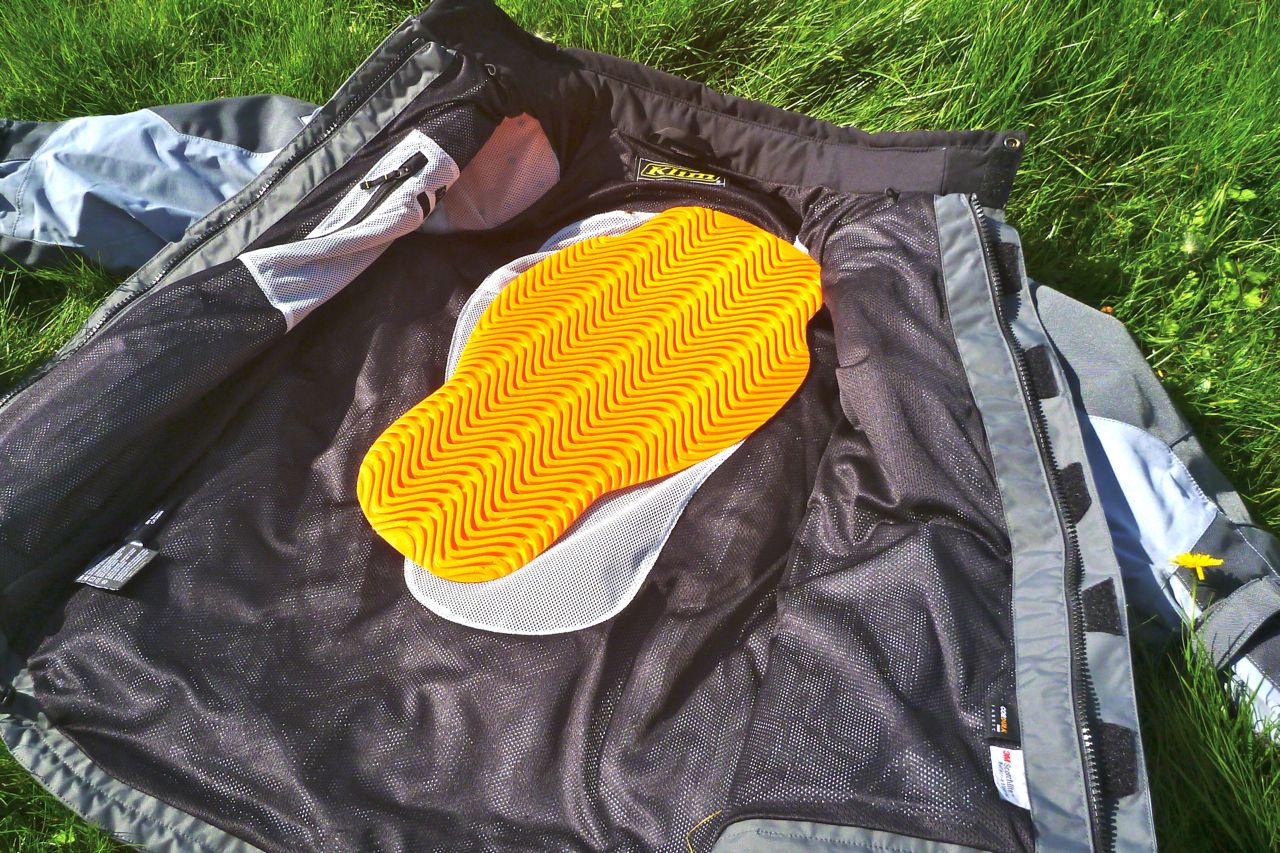
Inside, mesh takes the slim D3O hip armour pads (left; I didn’t use them on my trip), and at the knees you slip the armour in from the top, position with unobtrusive velcro and do up a stud. Even without the armour these long, double thickness knees will give some extra protection, and feature drain holes at the lower ends for those deep BAM crossings (right).
The 75% Cotton-Cordura fabric is hefty without feeling like scout tent fabric or being unduly sweaty. The attention to detail and triple-stitching is confidence-inspiring and the shade of dark brown works for me. Maybe it was all part of the grand business plan, but it’s good to see Klim getting away from the sporty racewear and into more mainstream riding gear which will have many more buyers.
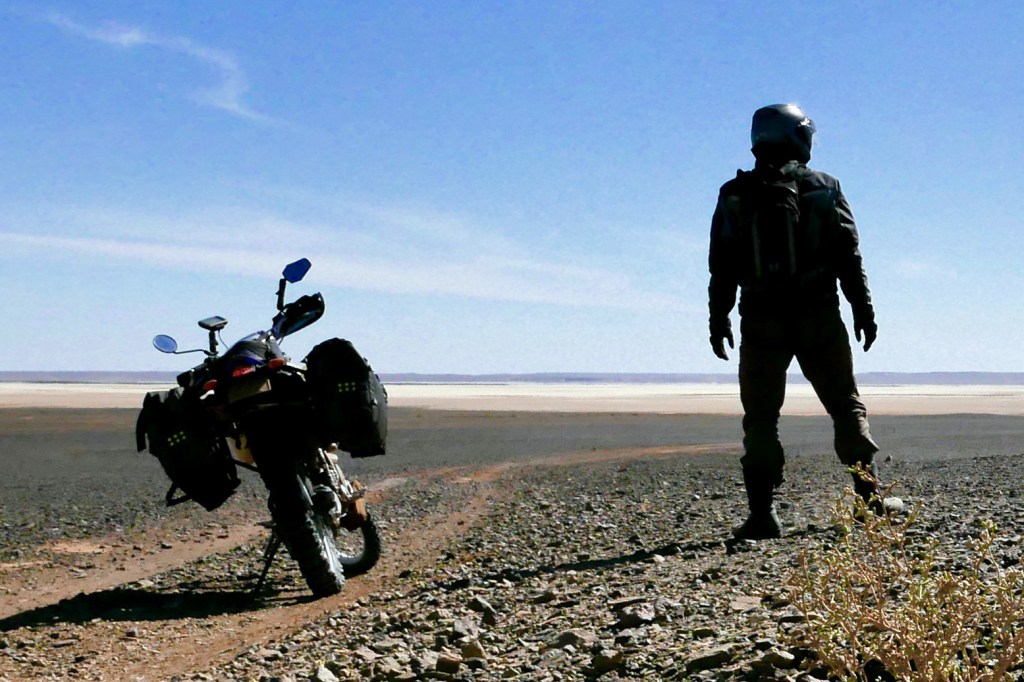
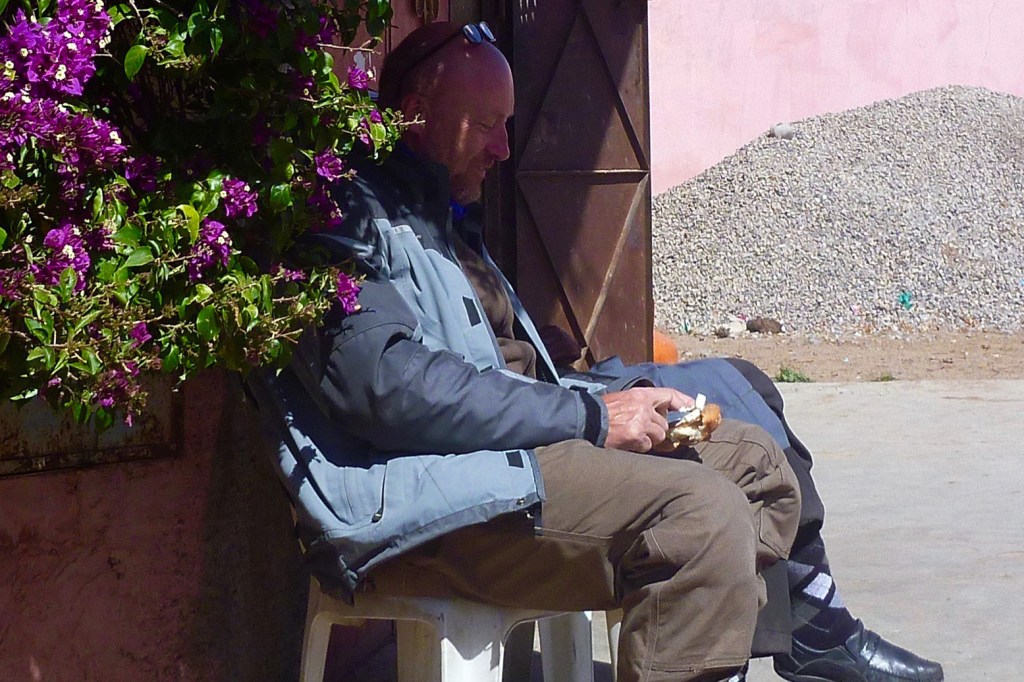
Before I even got to Morocco my Outriders got soaked while waiting in the rain to board the ferry at Algeciras. A good test to see if they’d dry on the hour’s crossing. They did. Over the next month, I rode in temperatures from 35°C in Western Sahara to close to freezing in the High Atlas (with runner’s leggings underneath). In all that time the Outriders never felt too hot and sweaty, nor chilled my legs out of proportion to the rest of me. On the very hot days, just stopping for a minute in my Overland jacket, with all vents and zips open, saw me start sweating; my legs in the Outriders remained stable.
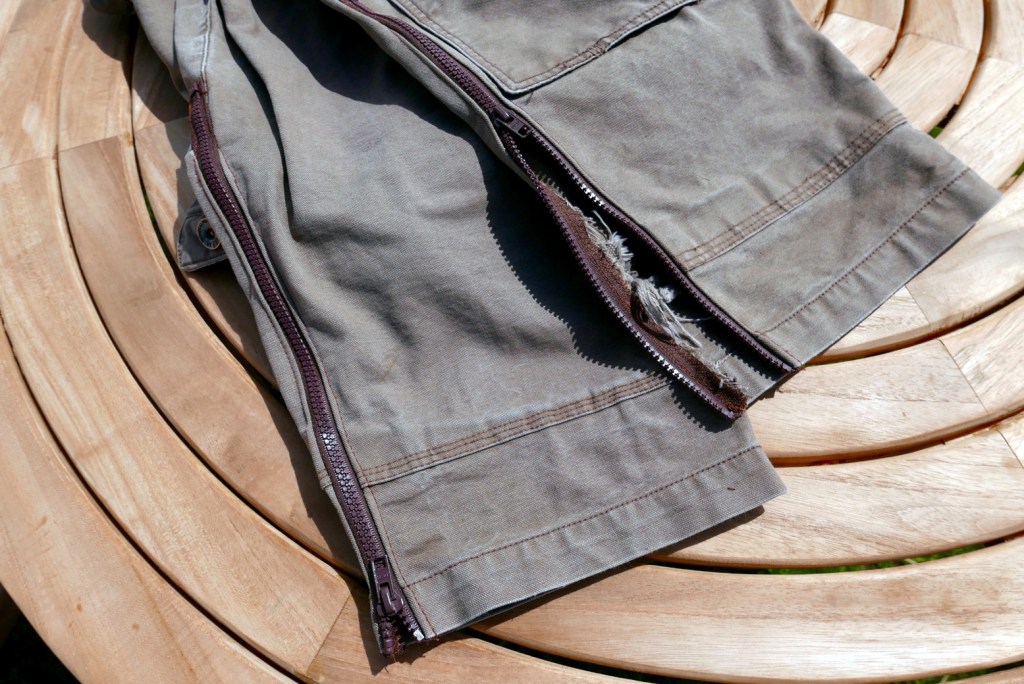
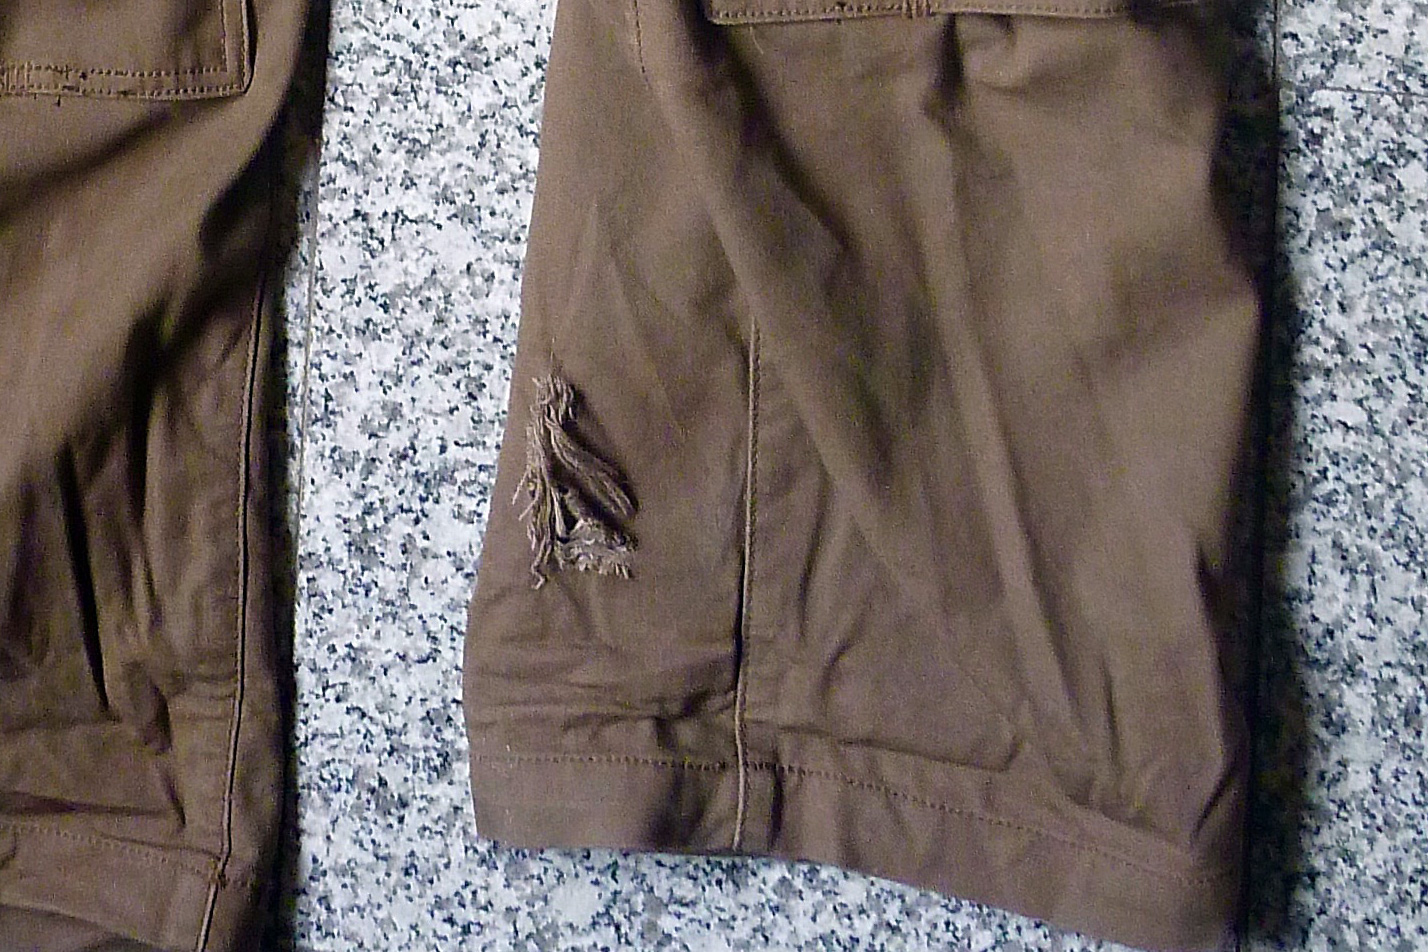
Because they’re so long, tucking the rolled-up ends into my boots and then doing the boots up became a chore on some days. And, perhaps because my boots aren’t full knee height and clamped to my leg, over the course of a day getting on and off the bike they’d work their way out and need stuffing back in. I could have worn them ‘OTB’ but I’m sure they’d have snagged on something and got oily or ripped. As it was, they got ripped anyway while paddling hard through a sandy oued – didn’t notice till later as I was slightly desperate at the time. I suppose they caught the footrest or gear level on a forward lunge.
I got them machine-washed once – probably high temp and not inside out, contrary to instructions. I can’t say I noticed any shrinkage, if that is the reason (in fact I would have welcomed a bit). I didn’t crash in them either, though I dare say something closer-fitting like the DakarITBs would keep the knee armour in place better.
Back home I got them shortened by 2 inches (using the off-cut to patch the tear), and a few months later cut a wedge out of the lowerleg to get a slimmer shin fit and installed a zip along the inside. A side-benefit of the zip makes them easy to pull- or roll up to the knee for wading or general airing-off. But all up that’s a lot of after-market sewing for an expensive pair of trousers. I know the American fit is typically larger than in Europe, but an inch is still an inch.
After another wash or three, the Klims are fading but are in good shape. For the moment they are my general riding trousers, quick-drying and without the weight of leathers, the sweatiness of the ITBs or synthetic-ness of membrane over-trousers.
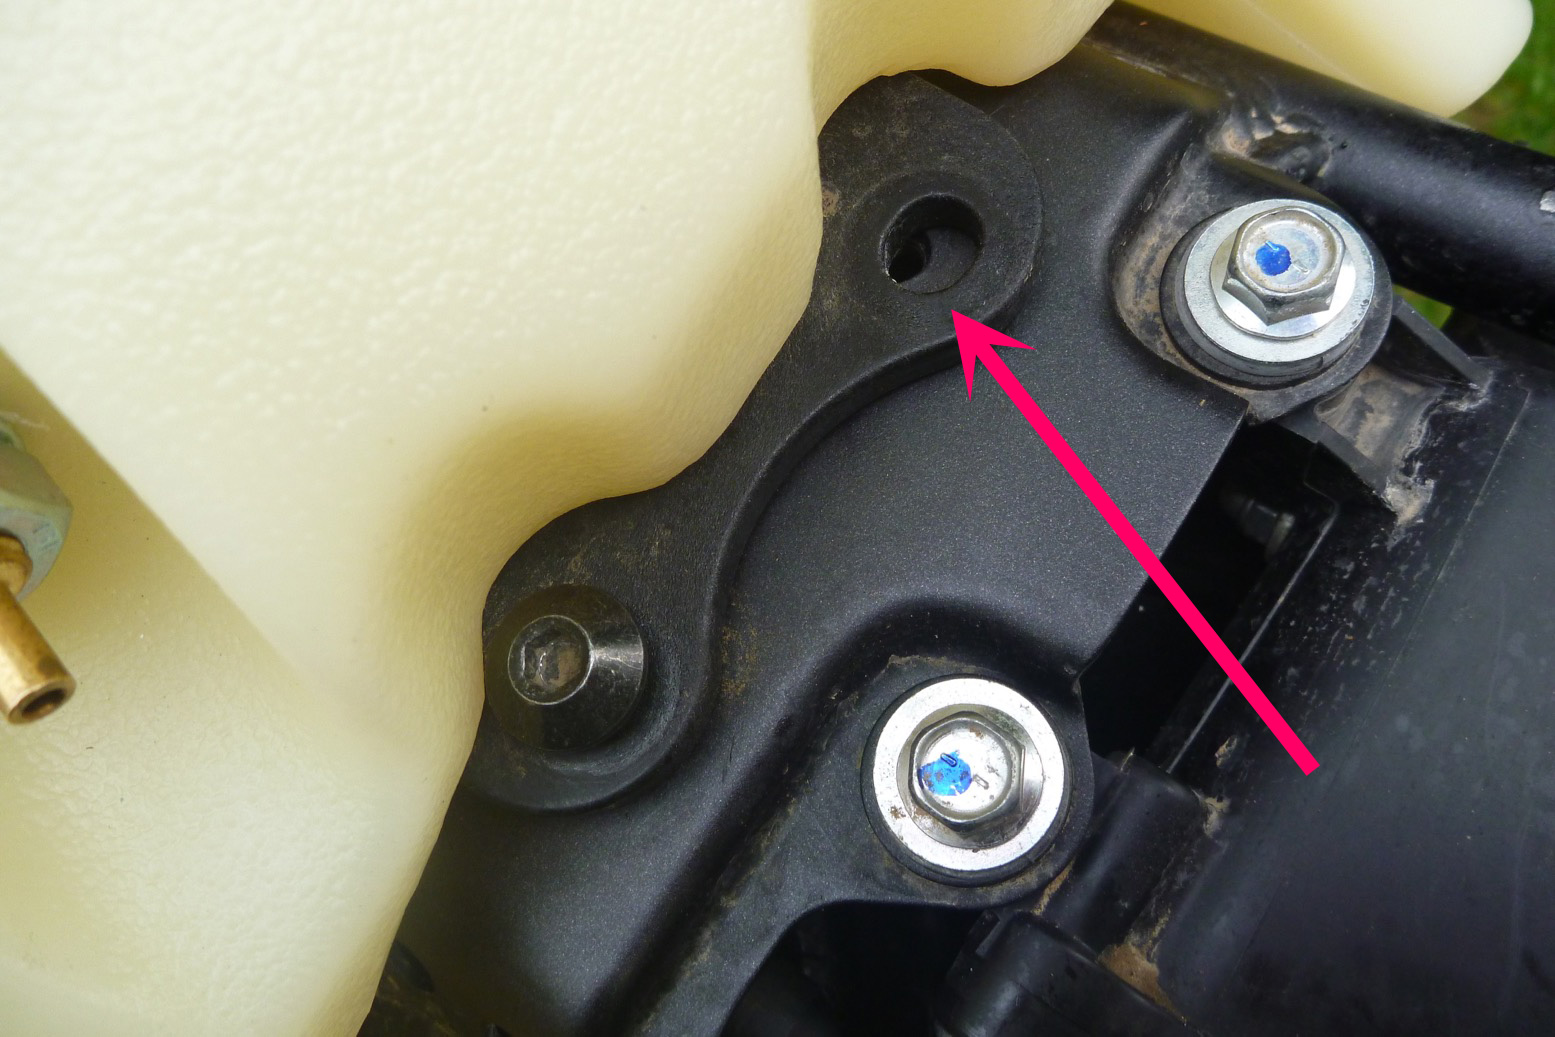
First up for the WR, an 18-litre IMS fuel tank that’s wider than it is long. And at the 31kpl I got on the way back from Holland, that should mean well over 500km, though 400 may be more realistic. On the forums you read various horror stories about the IMS tank: misalignment, poor fittings, plugs falling out and so on. I was expecting aggro but it all went without a hitch or too much head scratching. The fuel line unclips from the pump, the OE tank lifts off, once unscrewed the pump lifts out of that and the chunky Yamaha tank mounts swap onto the IMS just fine. At the back though, no amount of jiggling could line up the mounts (above left) with the frame if using the locating washers. Without washers it crammed in OK. I didn’t bother with the screw-in stud on the back of the tank to locate the seat front either. It stays on well enough with the seat tongue going under the frame tab.
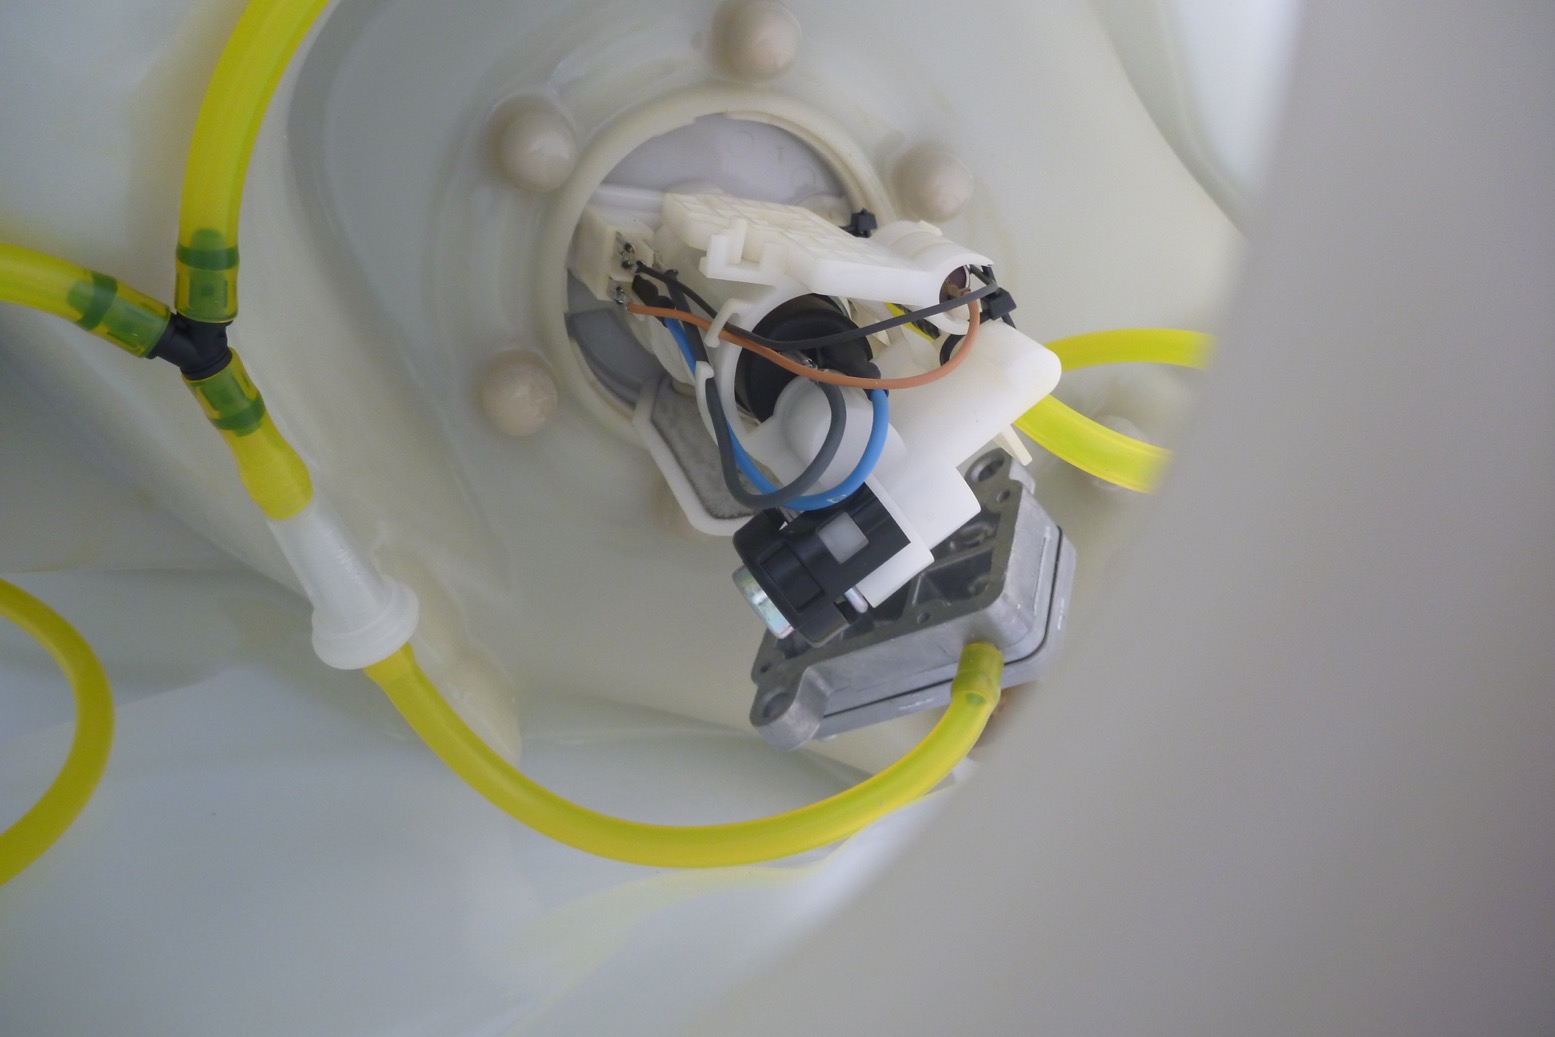
The IMS comes with a small low-pressure lift pump inside (the grey metal unit, left) to get to the fuel at the bottom. It’s powered by vacuum off some intake hose which you cut and tee into. Once all was plumbed up and bolted down, the bike started first press and ran normally. Hallelujah. The tank splays out quite widely and the outer edges will get knocked about on falls, but they also protect the radiator better than the OE shrouds so it’s a good use of volume. On the road full up, I can’t say I noticed any unbaffled sloshing as some sensitive riders have reported. Looks like a good, solid unit. The pic at the bottom of the page shows it with 3 litres in and room for 15 more.
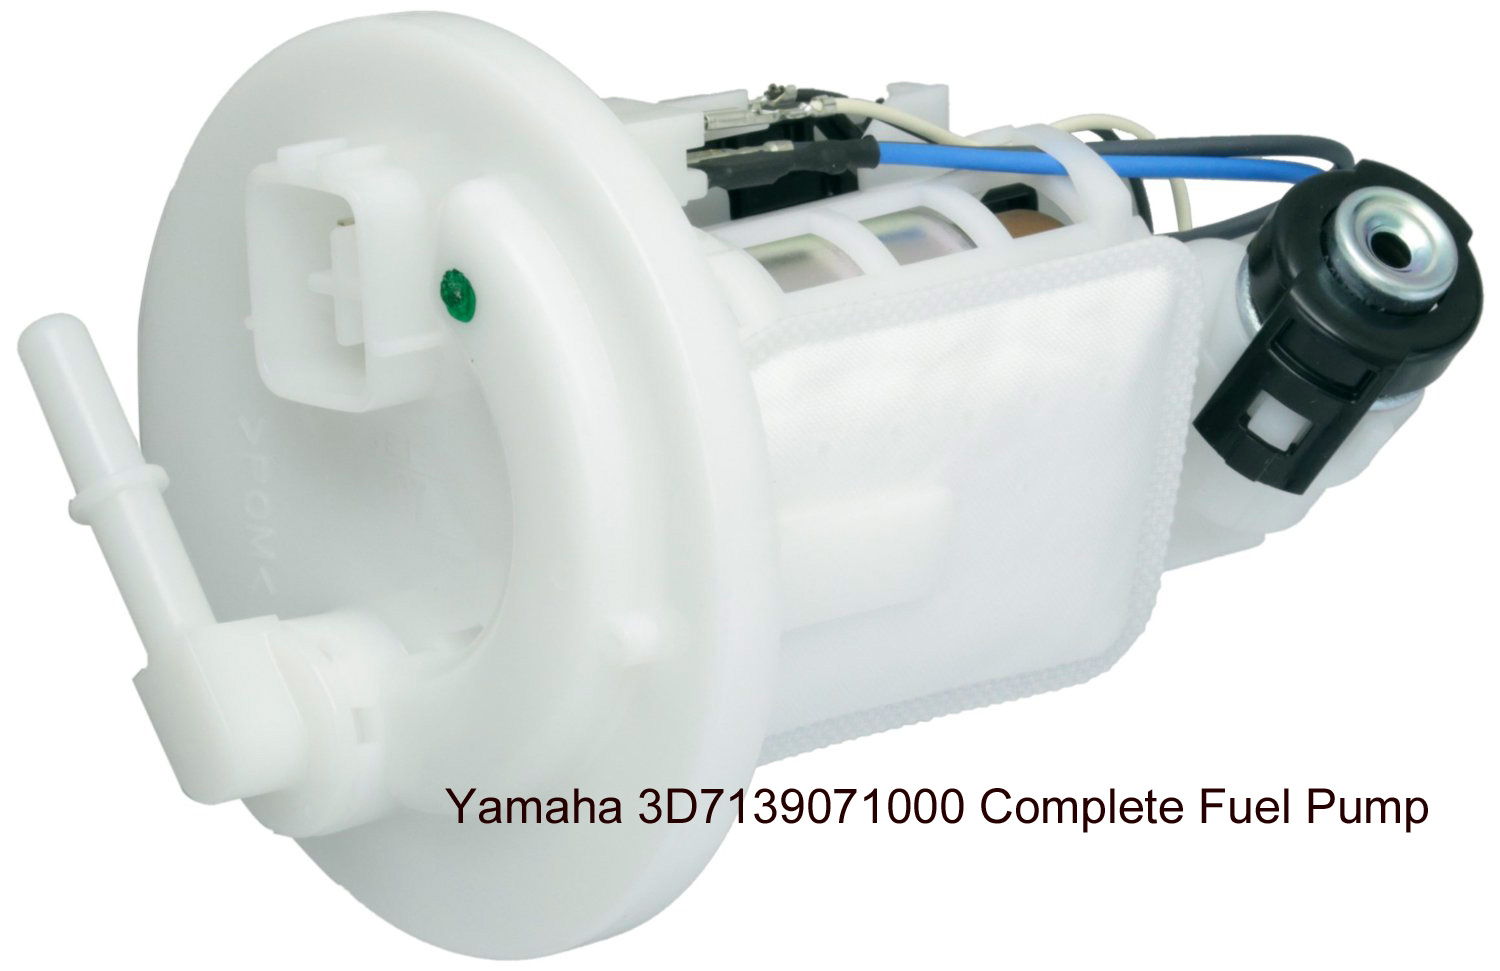
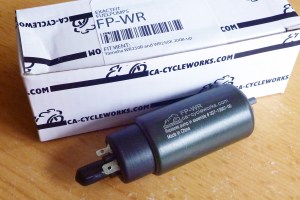
WR250Rs are known for having dodgy fuel pumps (more here) which can behave erratically in hot weather after a few thousand kms, failing to prime (no buzzing on key turn). They might recover once cooled down but eventually will pack up for good. No one really knows what the problem is. One suggestion is fuel varnish coating the inside seizes the turbine when hot. Early 2008s were very prone, although later WRs pack up too after a few thousand kms. It seems not living in Phoenix, AZ helps, and you do wonder if ropey US fuel has something to do with it or if it’s a case of the squeaky hinge getting all the oil? Don’t know but in the Sahara WR bike will get hot for sure. A complete Yamaha pump with housing goes discounted for about $300 on amazon, and although the part number changed (from 3D7-13907-00 for 2008-12, to 3D7-13907-10 from 2013-onwards) suggesting an updated pump, some people still report failures on the newer pumps. Being a popular bike in US and Au, there are various aftermarket pumps from just £20 cheapies on ebay to £105 for a California Cycleworks unit (left, also made in China). They all require carefully dismantling the white plastic housing as above, to replace the actual fuel pump unit. Not really a trailside job. Aftermarket ones fail too, especially the cheaper ones, which makes you think it’s modern fuel or an over-pressurised system, as I also read somewhere. I’ve not heard of other efi bikes having hot weather fuel pump issues, but anyway I cracked and bought a Cycleworks. I’ll will get round to fitting it and carry the OE unit as a spare.
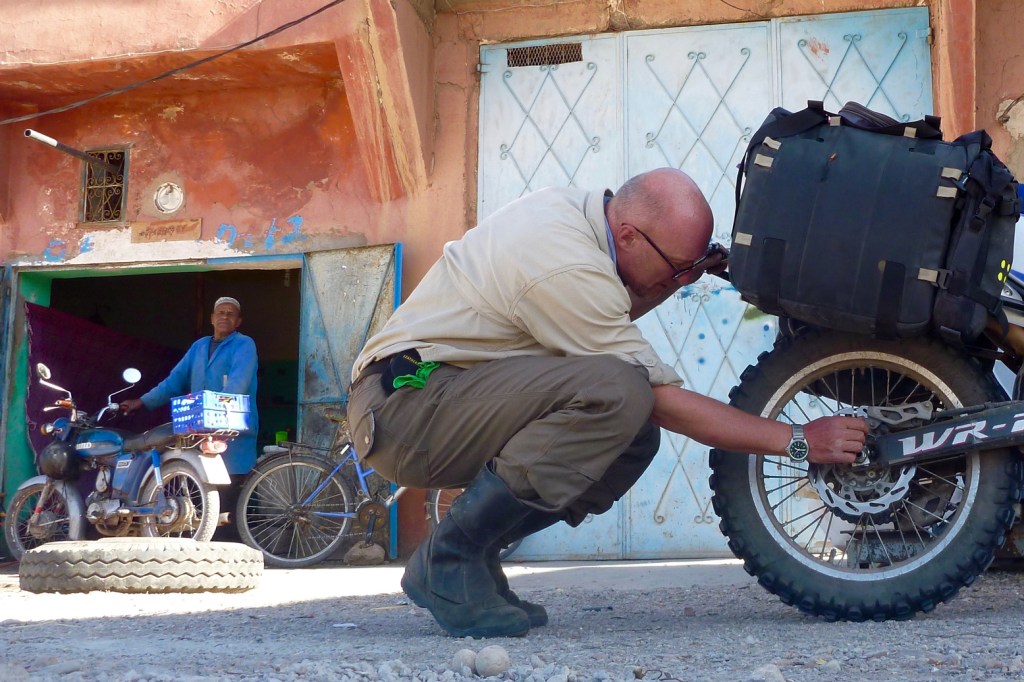
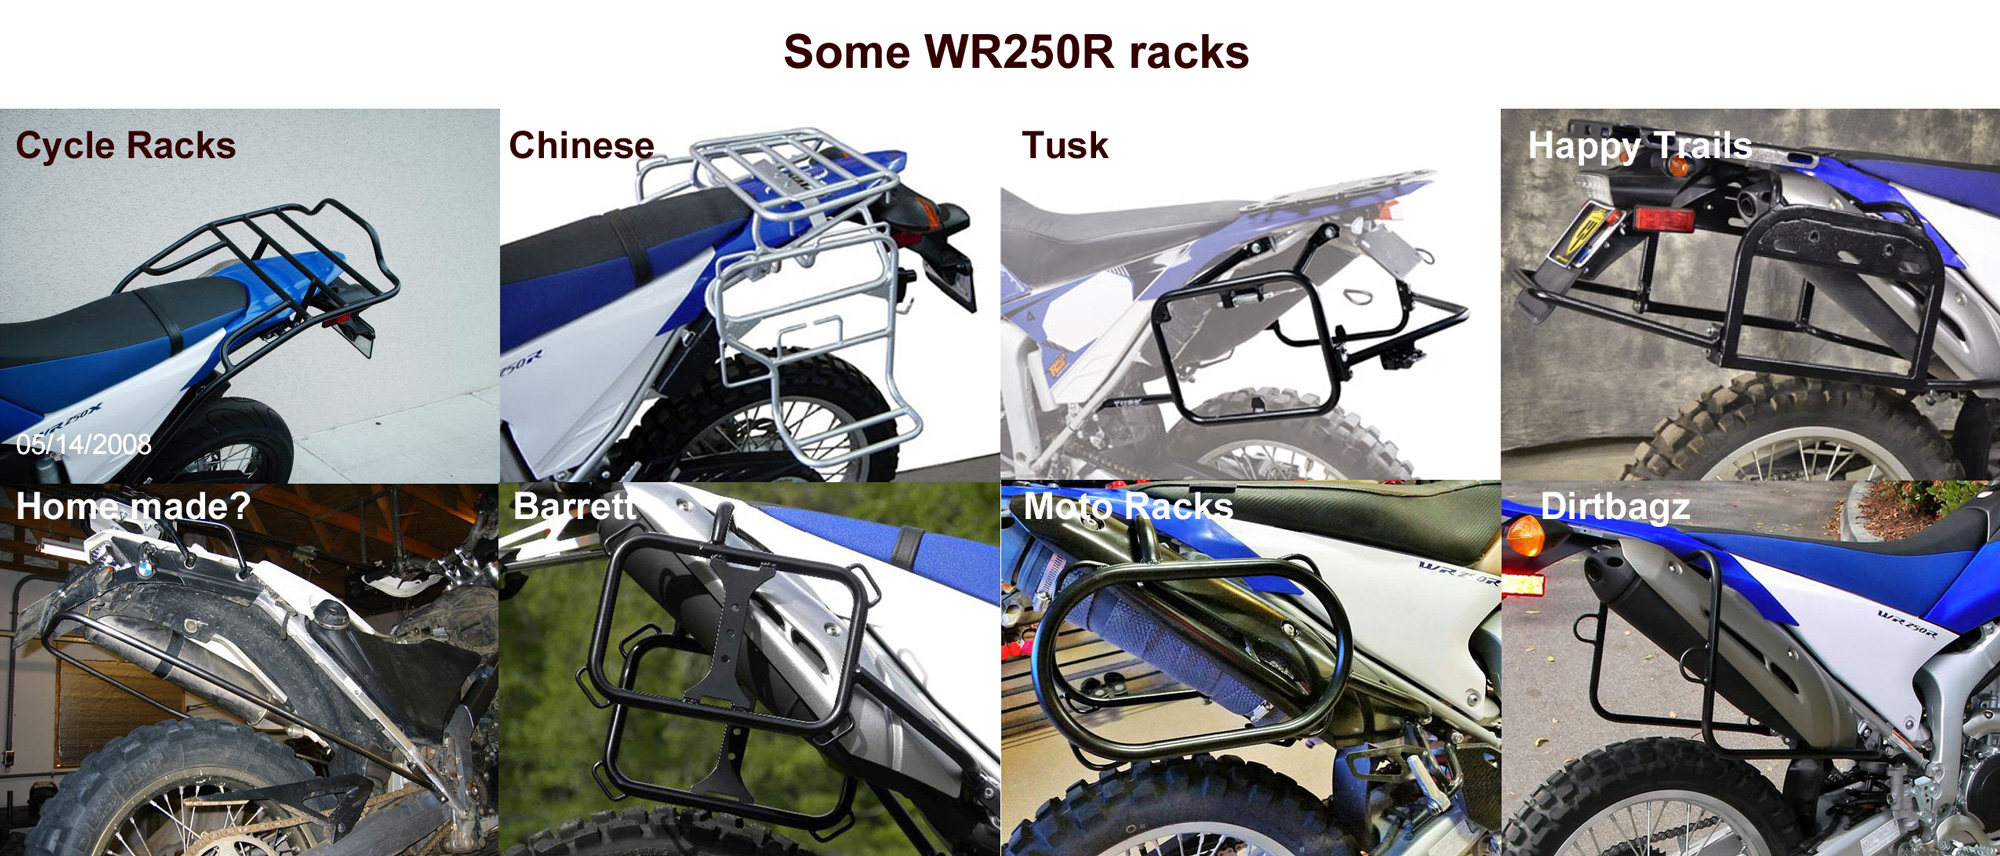
Next job: pannier racks. Long story short, choosing from the above selection, at $170 from Rocky Mtn Adv the US-made Tusk racks (a Rocky Mtn sub-brand, afaik) looked by far the best value for money, and when they turned up I was even more impressed – nice to see chunky ¾” and the all-important back brace to stop them folding in when heavily loaded on rough terrain. The unbraced Moto and Barrett may rely on heavier gauge tubing to not cave in. That looks neater but I found with the Rally Raid racks on the CB500X it didn’t really work out like that, to be bend-proof and light you need a back brace. Once I removed the unwanted bracketry for mounting Tusk hard boxes, the added weight was < 4kg.
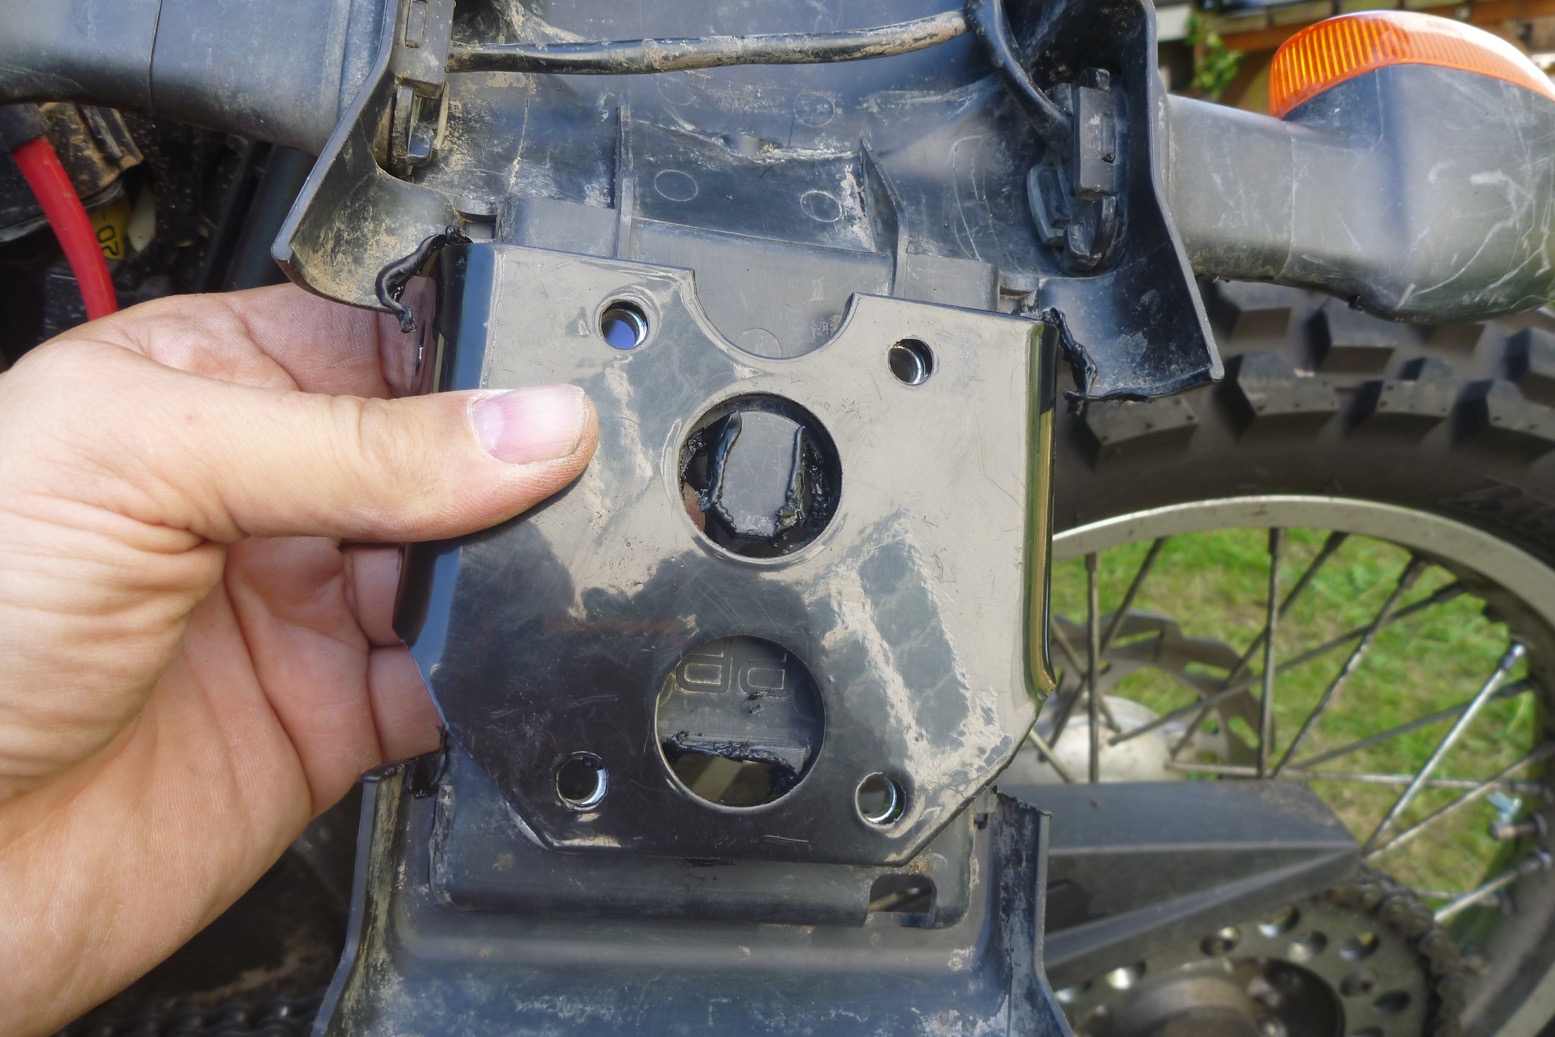
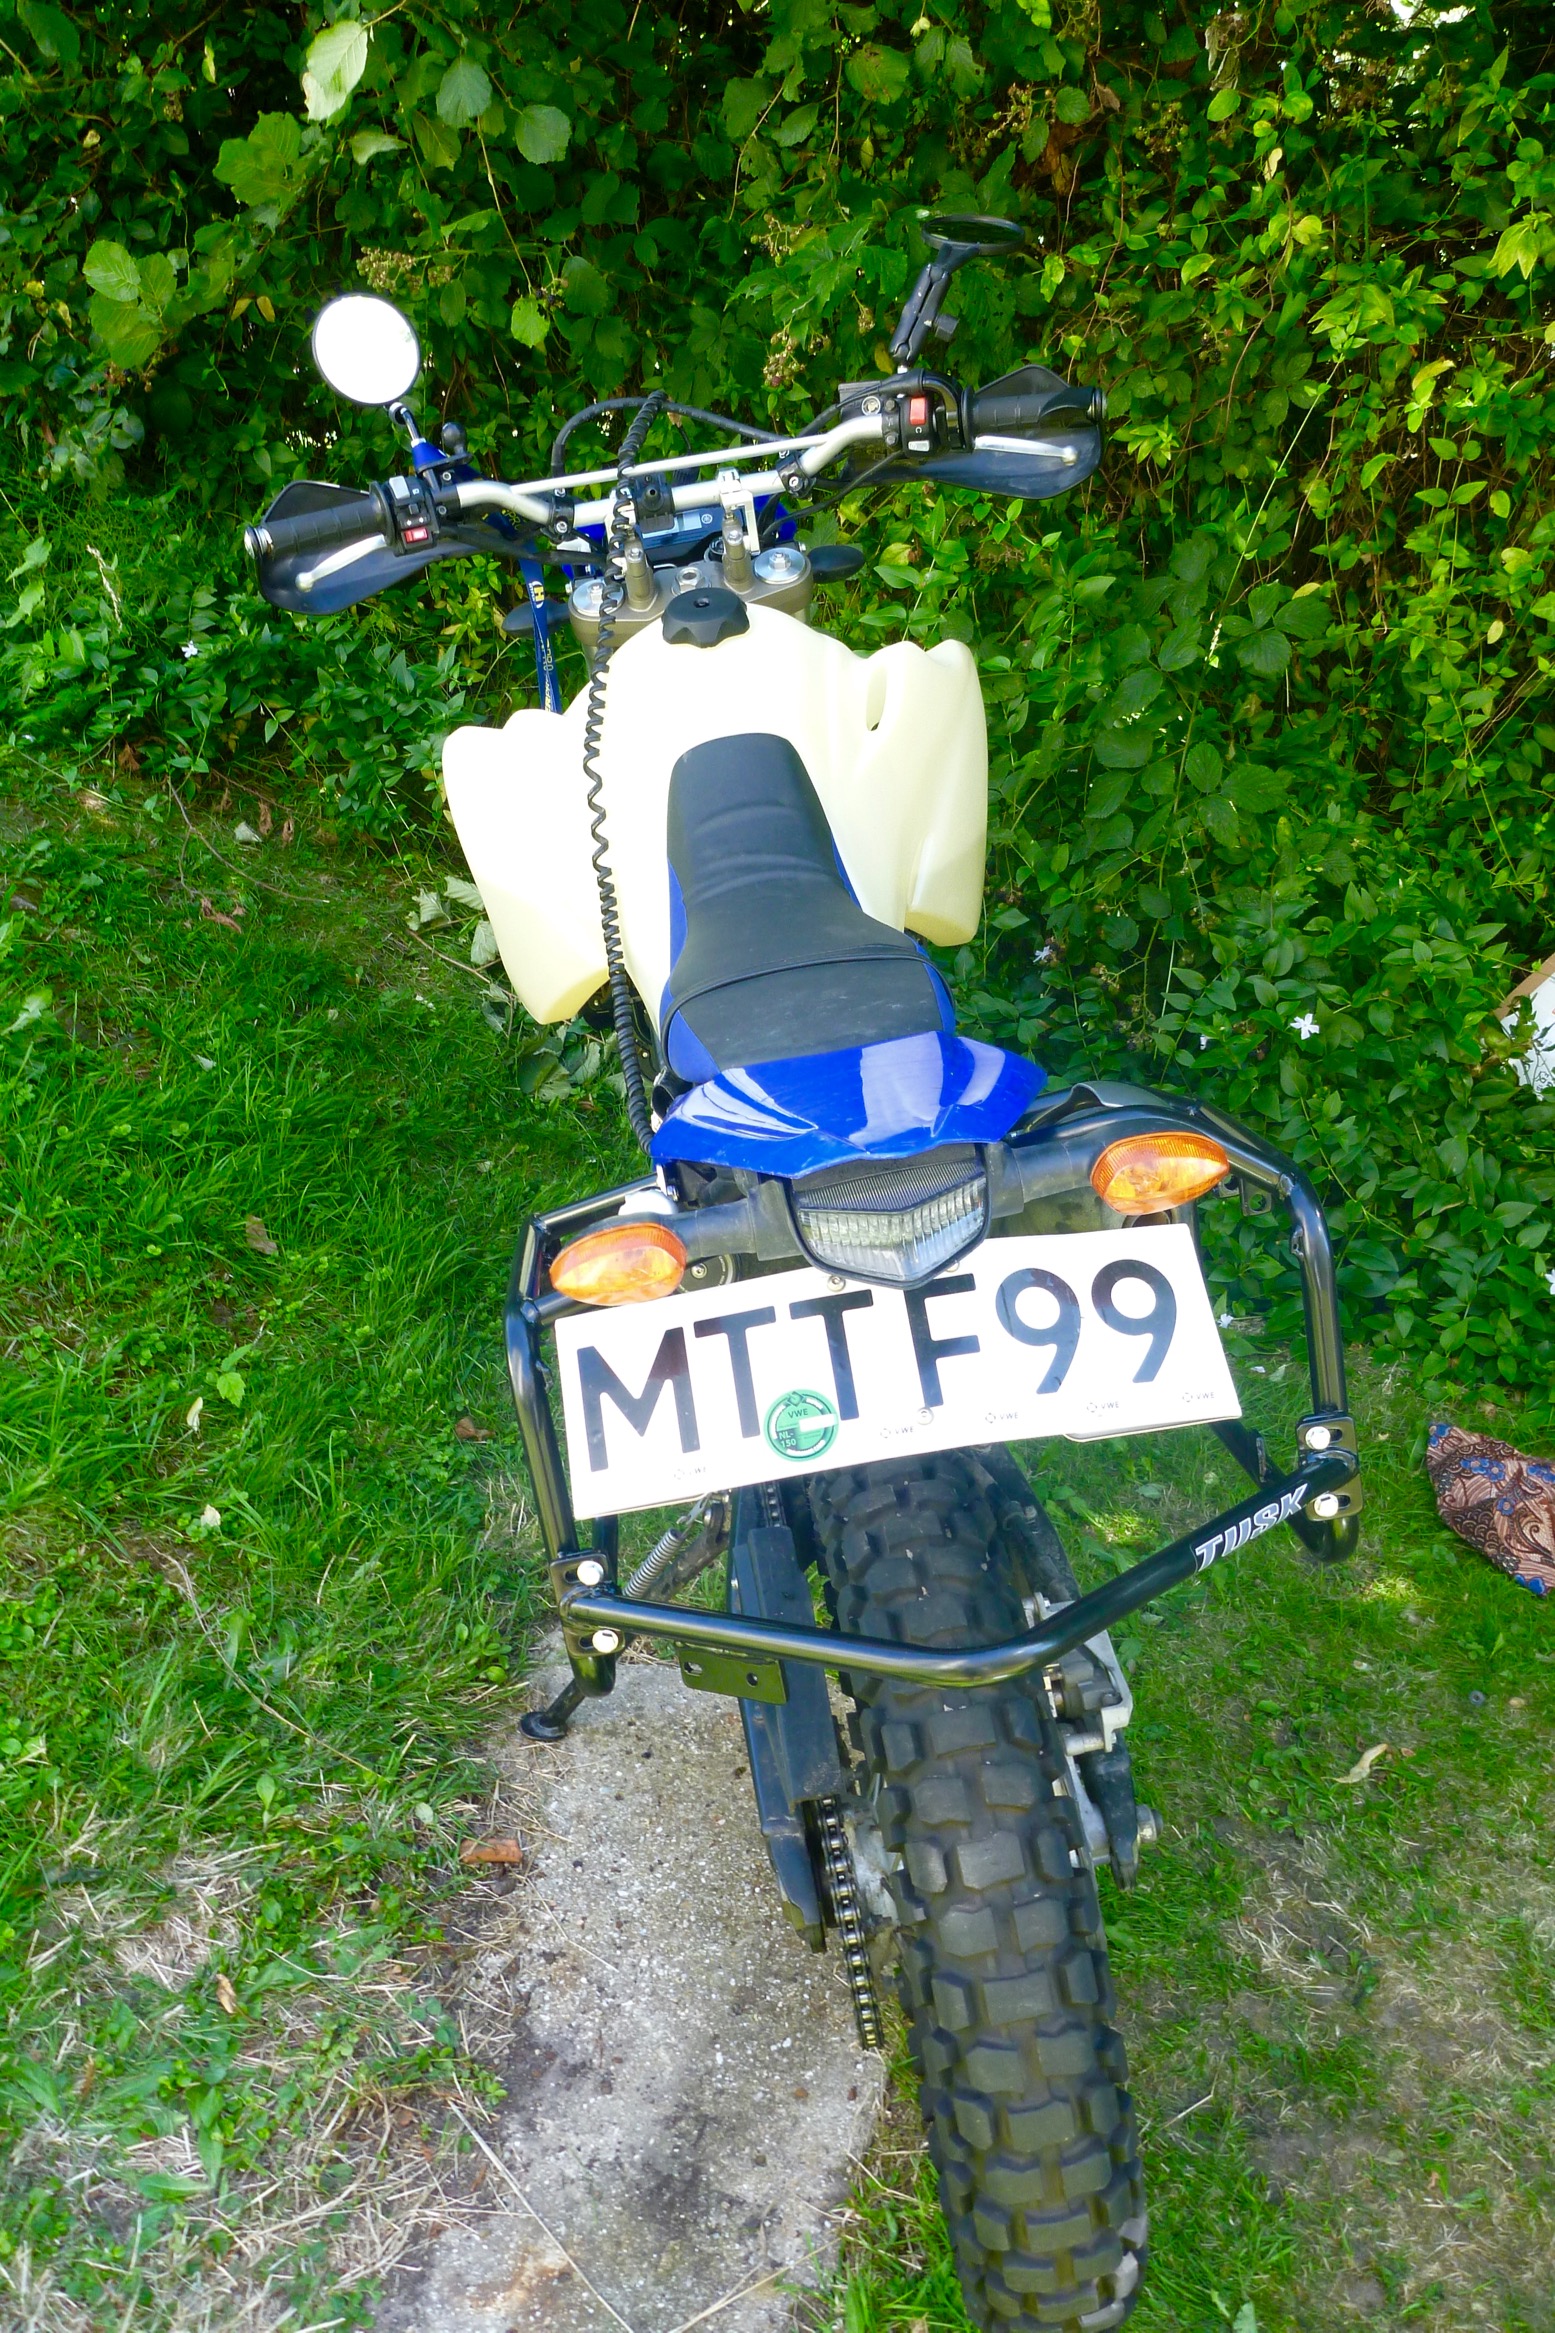
The fitting video on Rocky Mtn is especially helpful, but mounting the back underplate (right) could only be solved by cutting away with a red-hot knife. It’s possible my bike’s non-original plastic numberplate holder might have complicated things. That apart, the rack lined up just right elsewhere and will give something to grab when hauling the WR across a dune. There’s plenty of space behind the non-pipe side too, to stash stuff or mount a container.
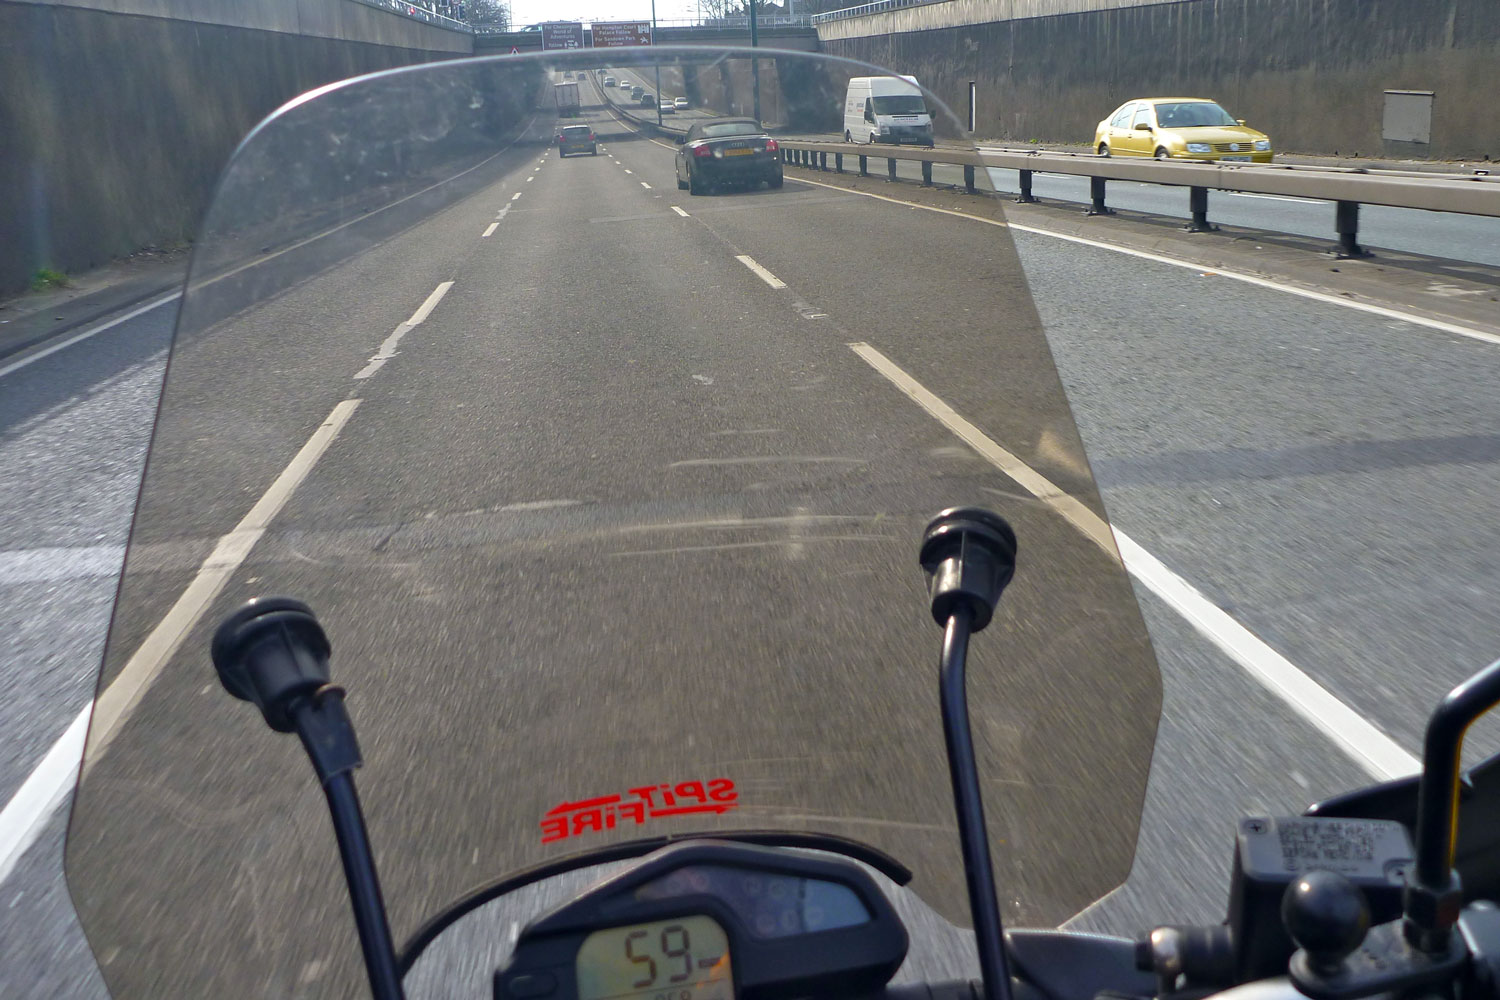
I splashed out on some Rox bar risers giving a 2-inch lift and a bit of fore and aft adjustment. Fat bar sized plus with adapters for ⅞s, they can carry over to later bikes, like my old Barkbuster Storms. Talking of which, the Barks can stay in the box as the handguards that came with the WR look OK. There’s just enough room left on the bars to add my Spitfire screen mounts (left).
I have a nice shiny Flatland bashplate waiting to clamp on, but the old hex bolts on the OE bashplate were not playing ball. Instead they wanted a game of rounders, and so rounded out they now are. One for the shop when they MoT it next week.
I put on my old round Double Take mirror; it helps where I park the bike. But a run to the Overland Event near Oxford proved it vibrates on the WR just like it blurred on other bikes I’ve tried them on. The new asymmetric Double Take Adventure model (right) has done away with the stalk to reduce vibration, but now means you have to buy a hefty 6-inch RAM arm for another 20 quid (plus a bar-ball mount for another tenner). As I have those bits I may give the new one a try as it is handy to have one bombproof mirror.
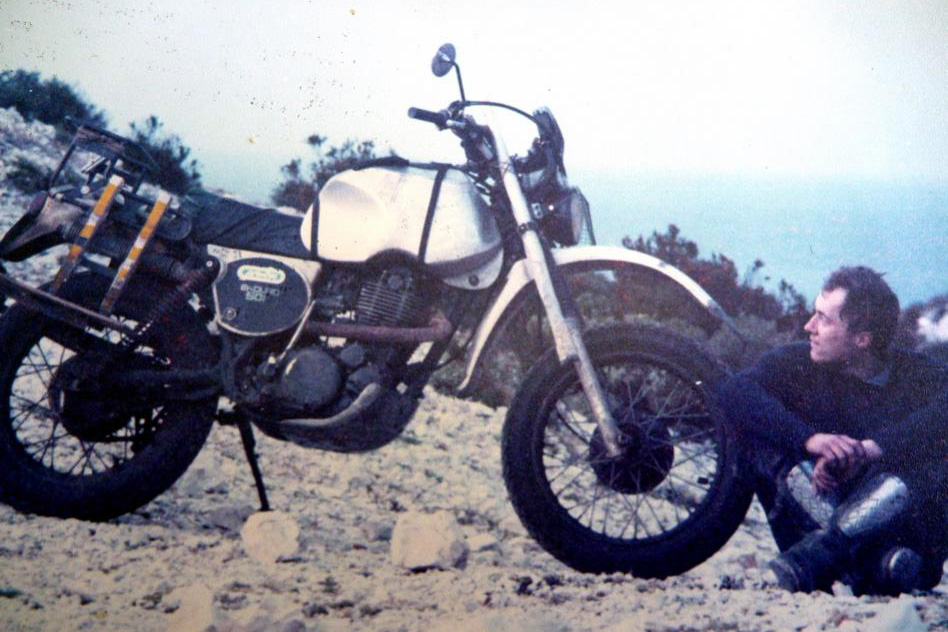
Picture right: my original desert bike, the ally-tanked ’76 XT500 I rode to Algeria in 1982. The WR is bike #57. For the first time since the 80s I’ve again had more bikes than birthdays.
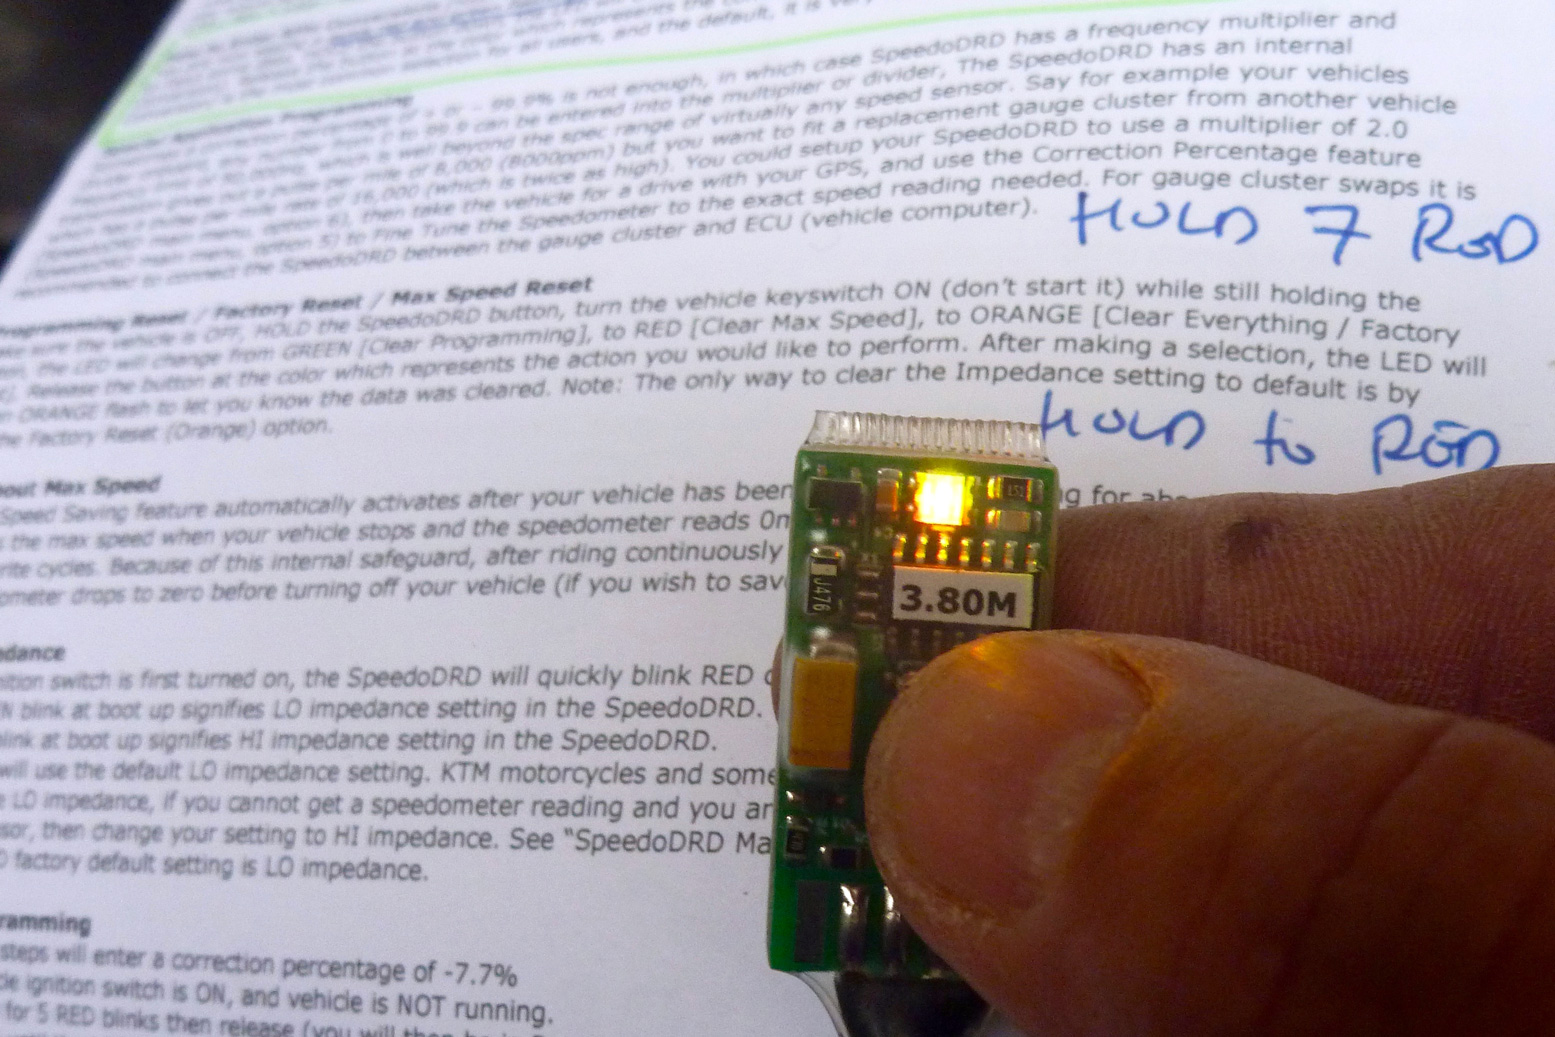
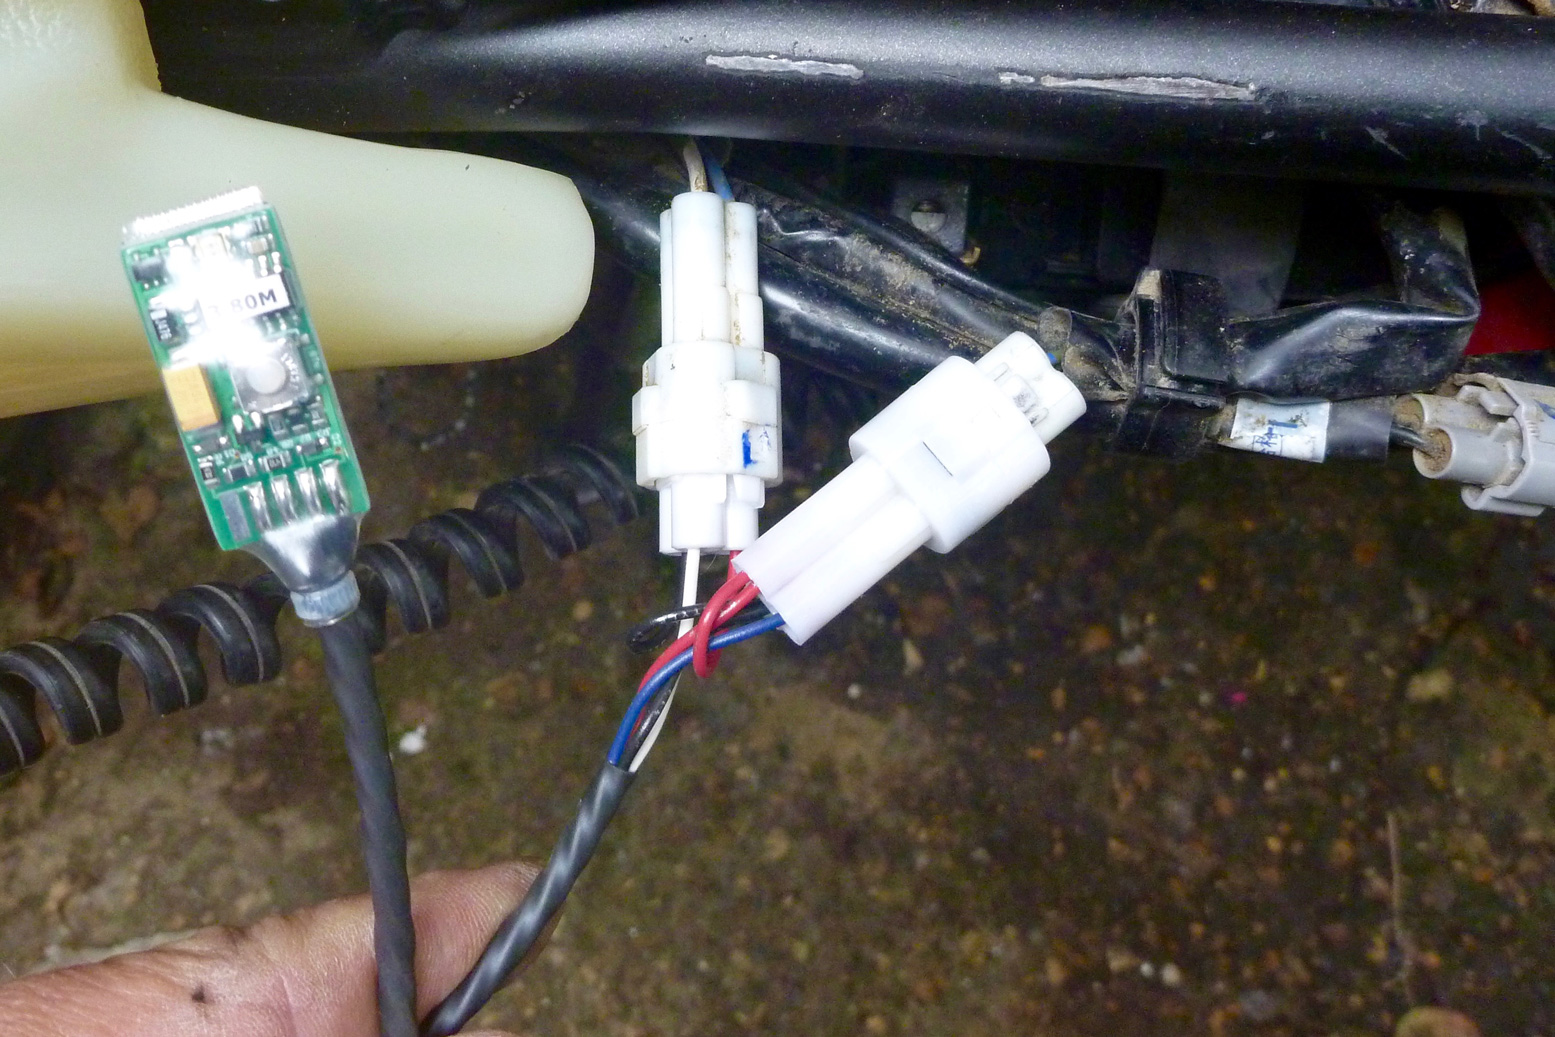
Other jobs include re-fitting my Trail Tech Vapor to give accurate speeds because, according to my GPS the WR speedo reads 12% fast and odo some 4% over. But I’ve also just fitted a Speedo DRD chip (left) from Totally TTRs. I was hoping the WR’s OE kph digital speedo could be reset to show mph, like my XT660ZE from the same era. But annoyingly, it seems WRs sold in kmh markets can’t flip their speedos to mph, while Brit and American mph WRs can changed to kph. WTF WR?
Like those nifty fuel controllers, the DRD is very easy to programme and can also flip to mph to make the bike UK legit, as well as correct the large speedo error, even though the Vapor technically does that job too. As a reminder the Trail Tech Vapor can also display ambient and engine temps – the latter a vital reading on any bike, IMO – as well as a GPS compass and altitude, rpm and, yes even the time of day.
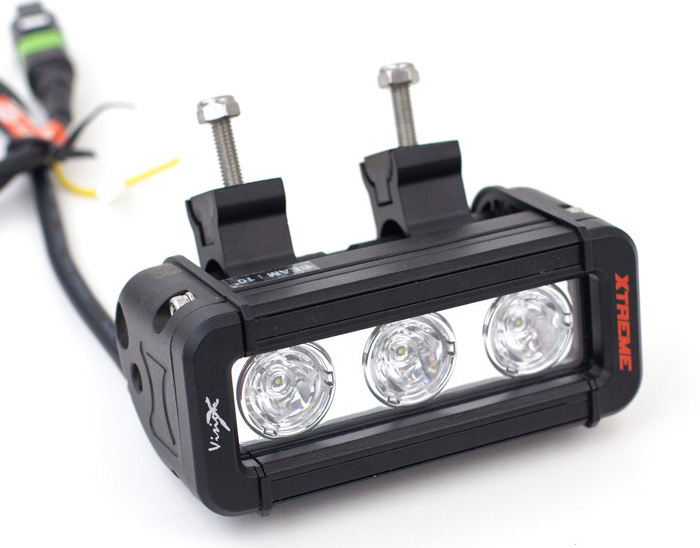
As for lighting, I’m assuming the standard little headlight will not wake the badgers. Some say you can fit a super-bright $60 HiD bulb and fry burgers with it; other find the cut off is unsuited for road riding. I must say on a travel bike I prefer the idea of a secondary light; a back up should the main one fail. I’ve had a Vision X 5″ Xmitter narrow beam (left) sitting around for ages. They say this is the best model to get for travel bikes, so now will be a good opportunity it fit it to the WR.
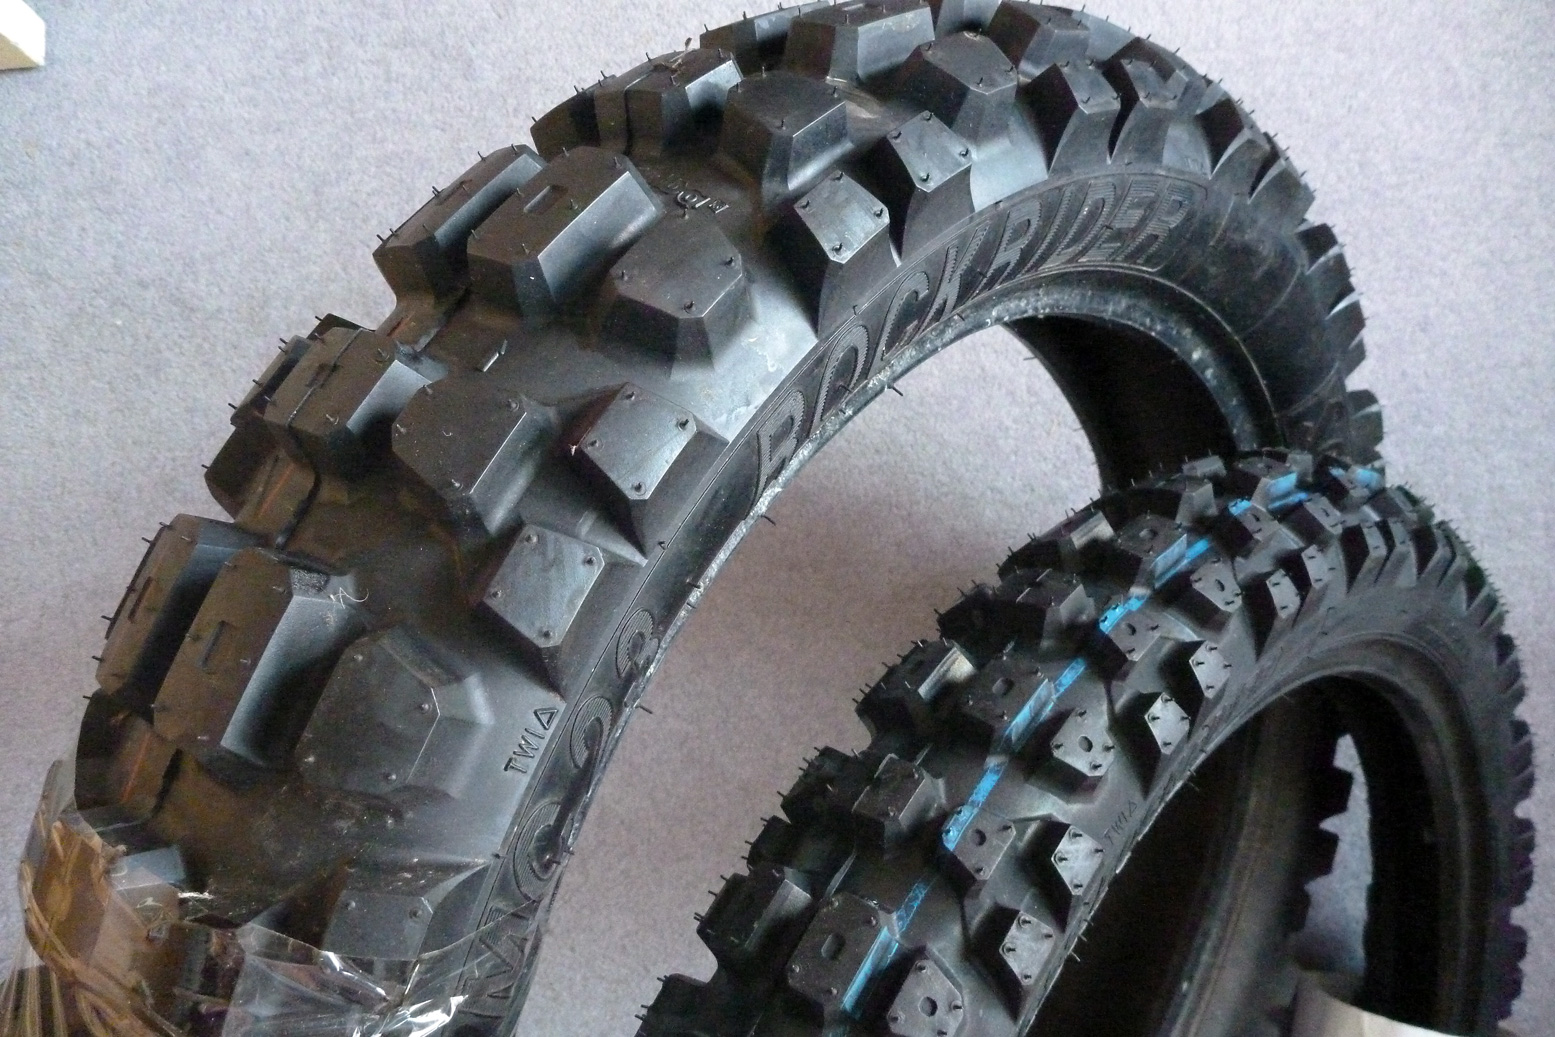
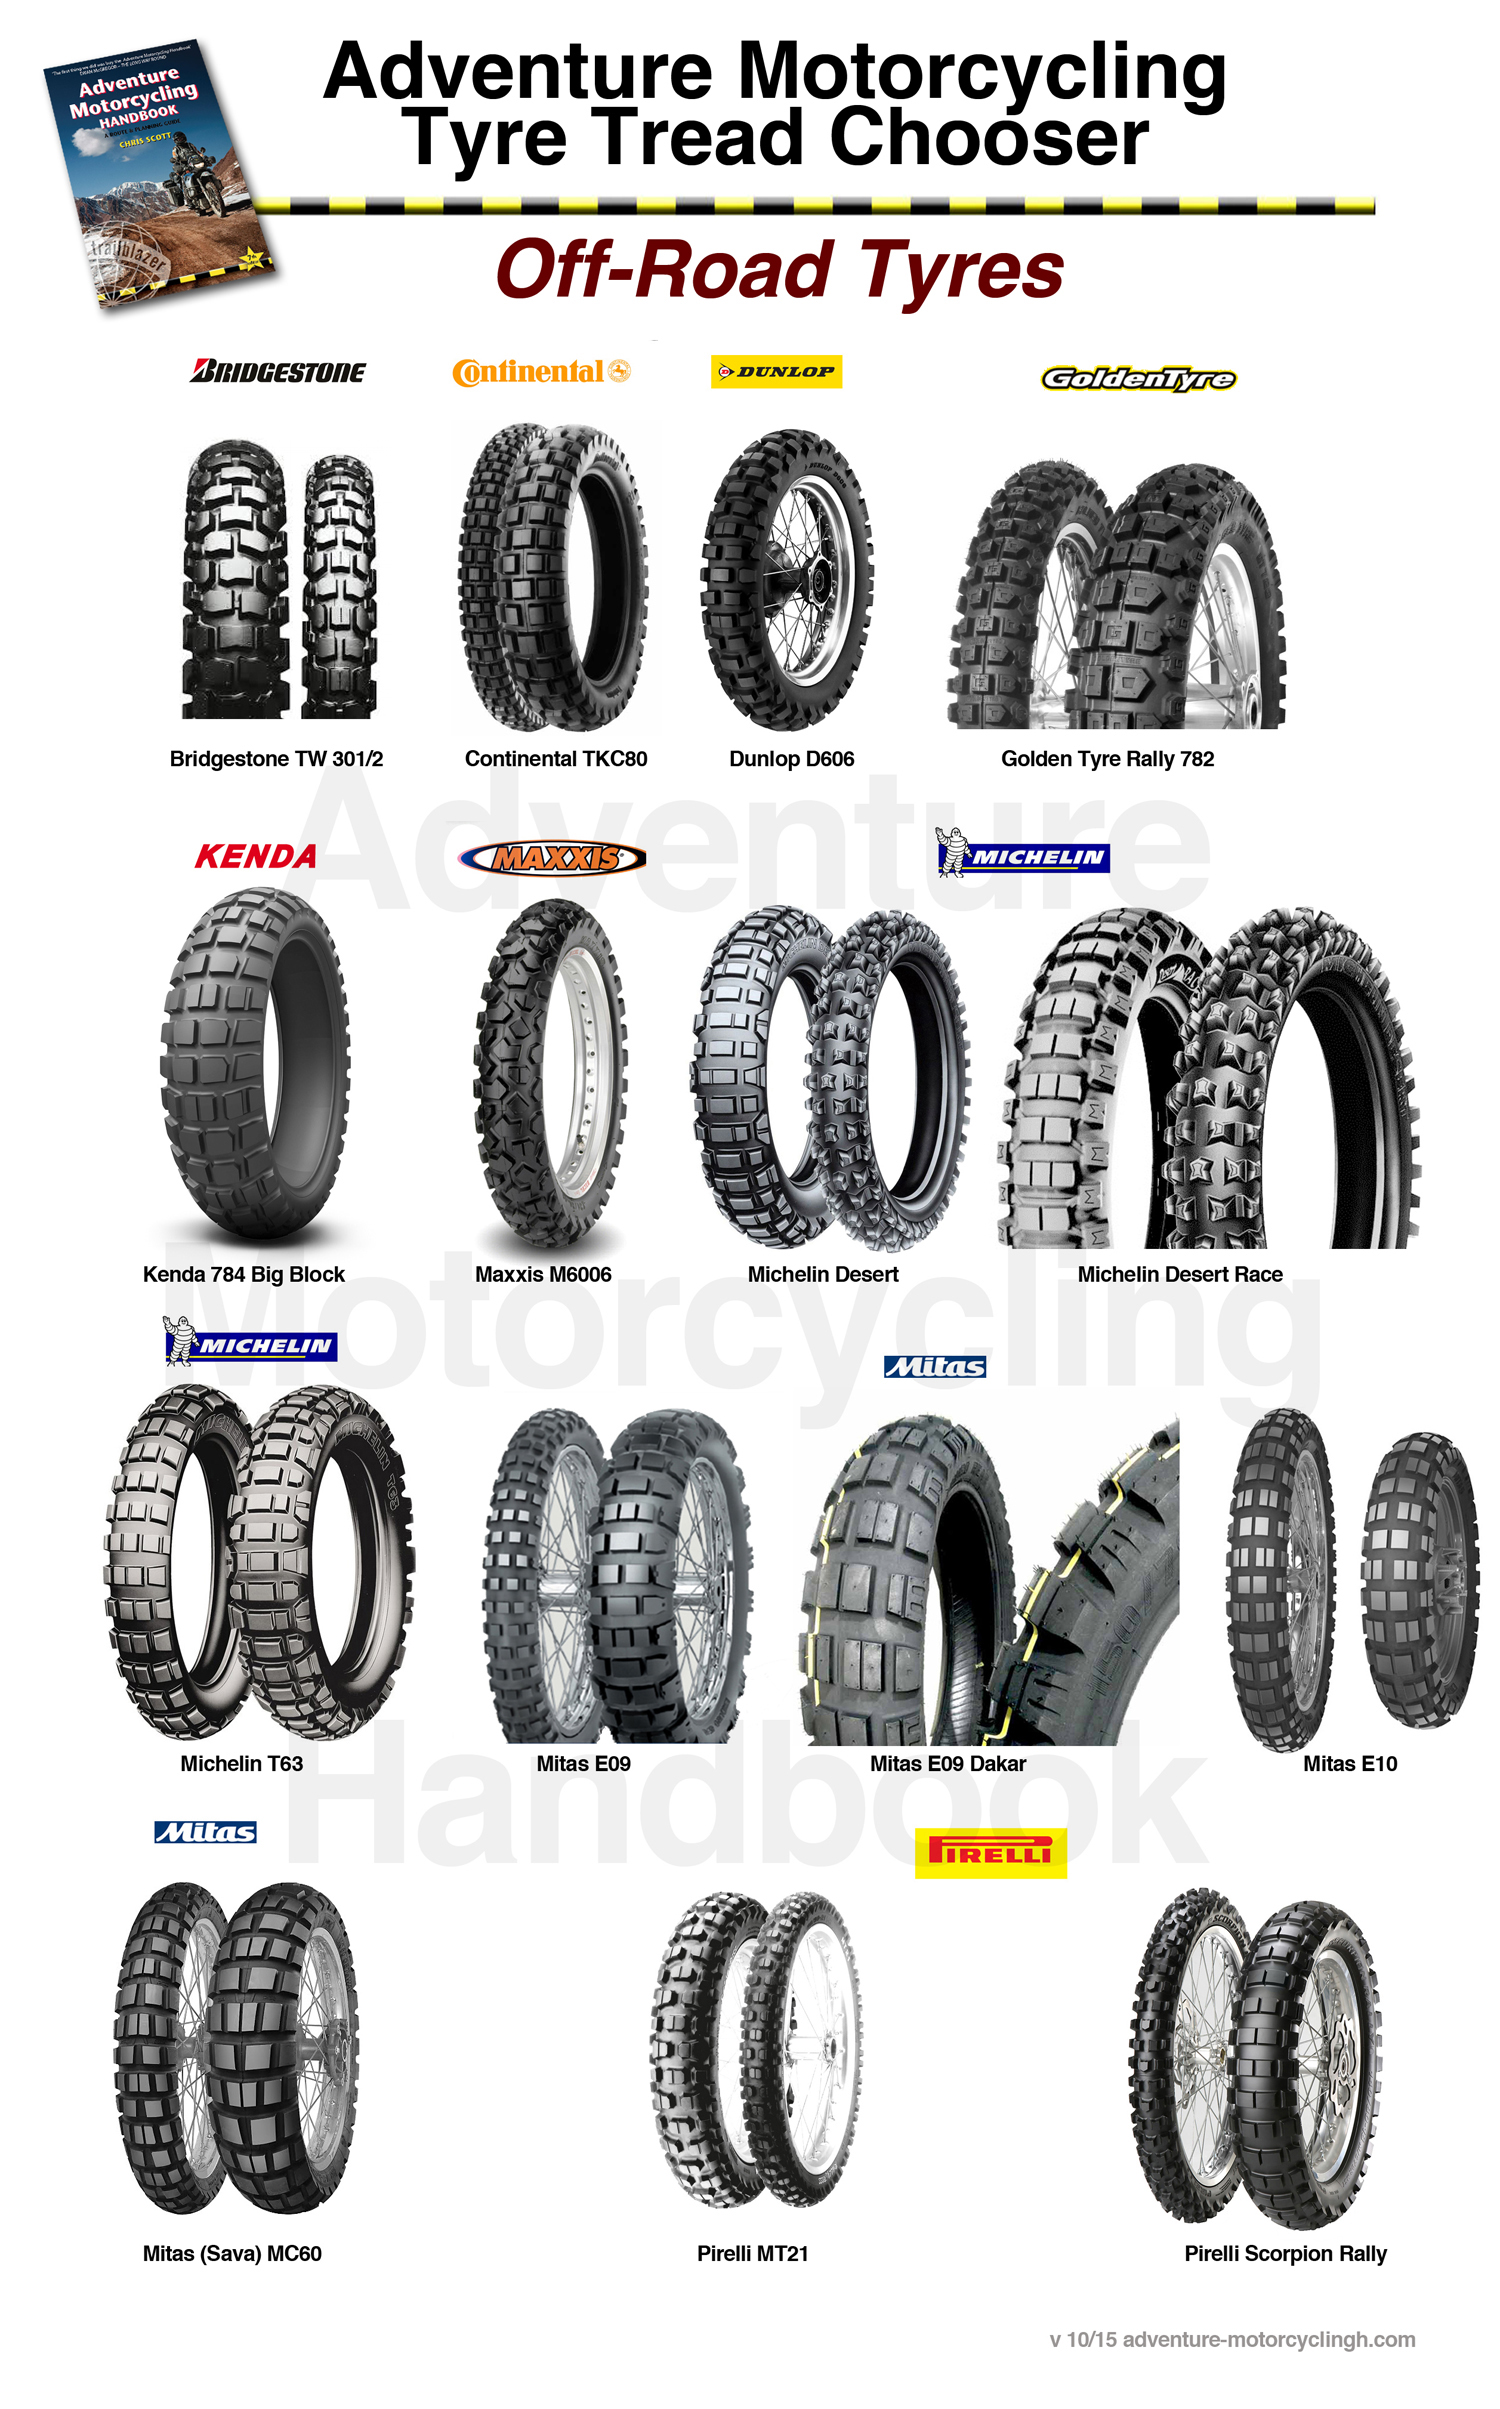
Wakey wakey! A mate gave me a rear Sava MC23 Rockrider which he reckons are the new black (and round). At 140-80 it didn’t fit his TTR250 and I don’t think oversized tyres work on a WR (120/80-18) any more than noisy pipes make more power. More weight; more drag and over-stiff tyres on light bikes can be counterproductive in deep, soft sand. They’re just too stiff to sag usefully, even at very low pressures, to give better traction, as I found decades ago running a Mich Desert on a Tenere right down to 5psi. The MC23 is 4 plies tread and 3 in the sides – sounds stiff. I won’t be that loaded up nor riding hard, and the WR will lack a Tenere’s grunt to hook up, for sure.
In the US they all rate the Dunlop 606 on WRs, but they don’t sell it in the UK. Either way, something from the list on the left will do the job. The Mitas E09/10s I’ve been wanting to try don’t come in WR rear sizes. With Sava/Mitas it’s the MC23 or nothing and in the end I succumbed to online tyre fatigue and clicked on a 120/90 Rockrider for £56. It may not hook up in the sands of the Erg Amatlich, but it won’t puncture up on the plateau, either. To keep it company I also bought a front MC23 Rockrider – £42 from Oponeo, so that’s £98 all shod. This came branded as a Czech Mitas as Mitas have lately bought out Slovenian Sava. Just as well because as tyre names go, ‘Sava’ is even worse than Golden Tyre. I hope to at least mount the rear tubelessly, doing a better job than I did last time on the Tenere. Enough tyre talk.
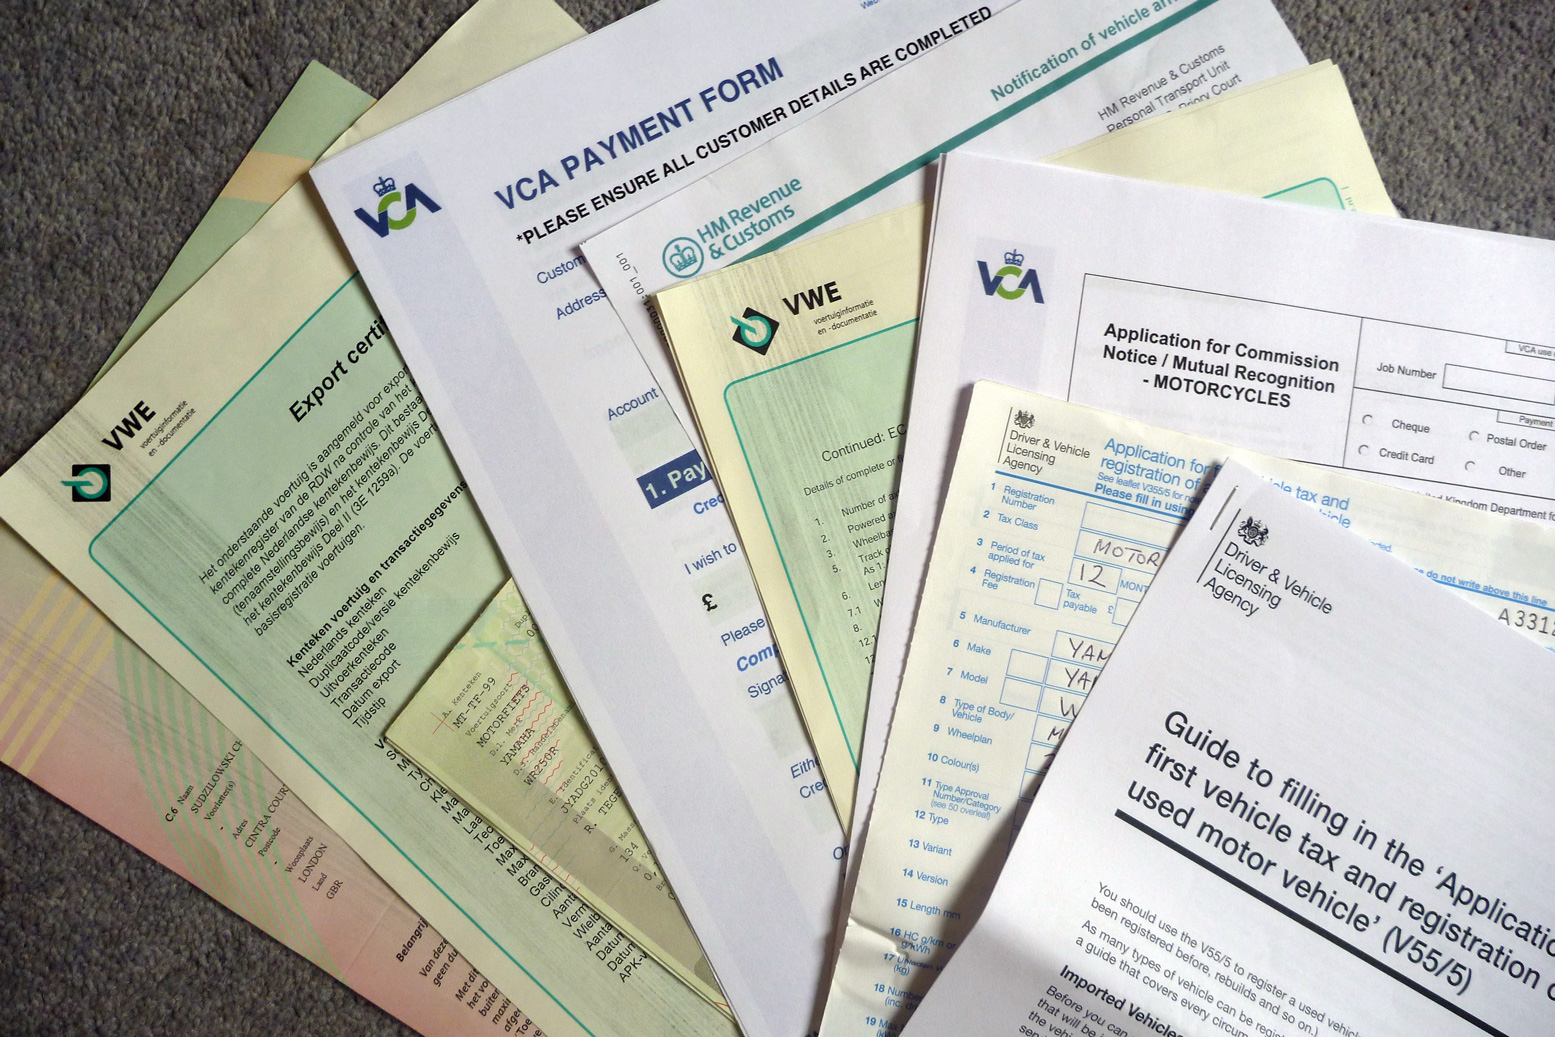
Unfortunately, delays in receiving paperwork to complete UK registration (added by my own confusion in how to set about the task efficiently) mean it’s unlikely I’ll have a UK plate and logbook in time for my Morocco tours in a few weeks. I’ll have to rent something down there. Can’t say I’m bitterly disappointed at missing the chance to cross Spain and back in early winter on an untried 250. Last couple of years I’ve been lucky with the rain in Spain. It can’t last and it all gives me a chance to get the WR in good shape for the proper desert trip we have lined up in the new year. It also means those rally tyres won’t get wasted running mostly roads.
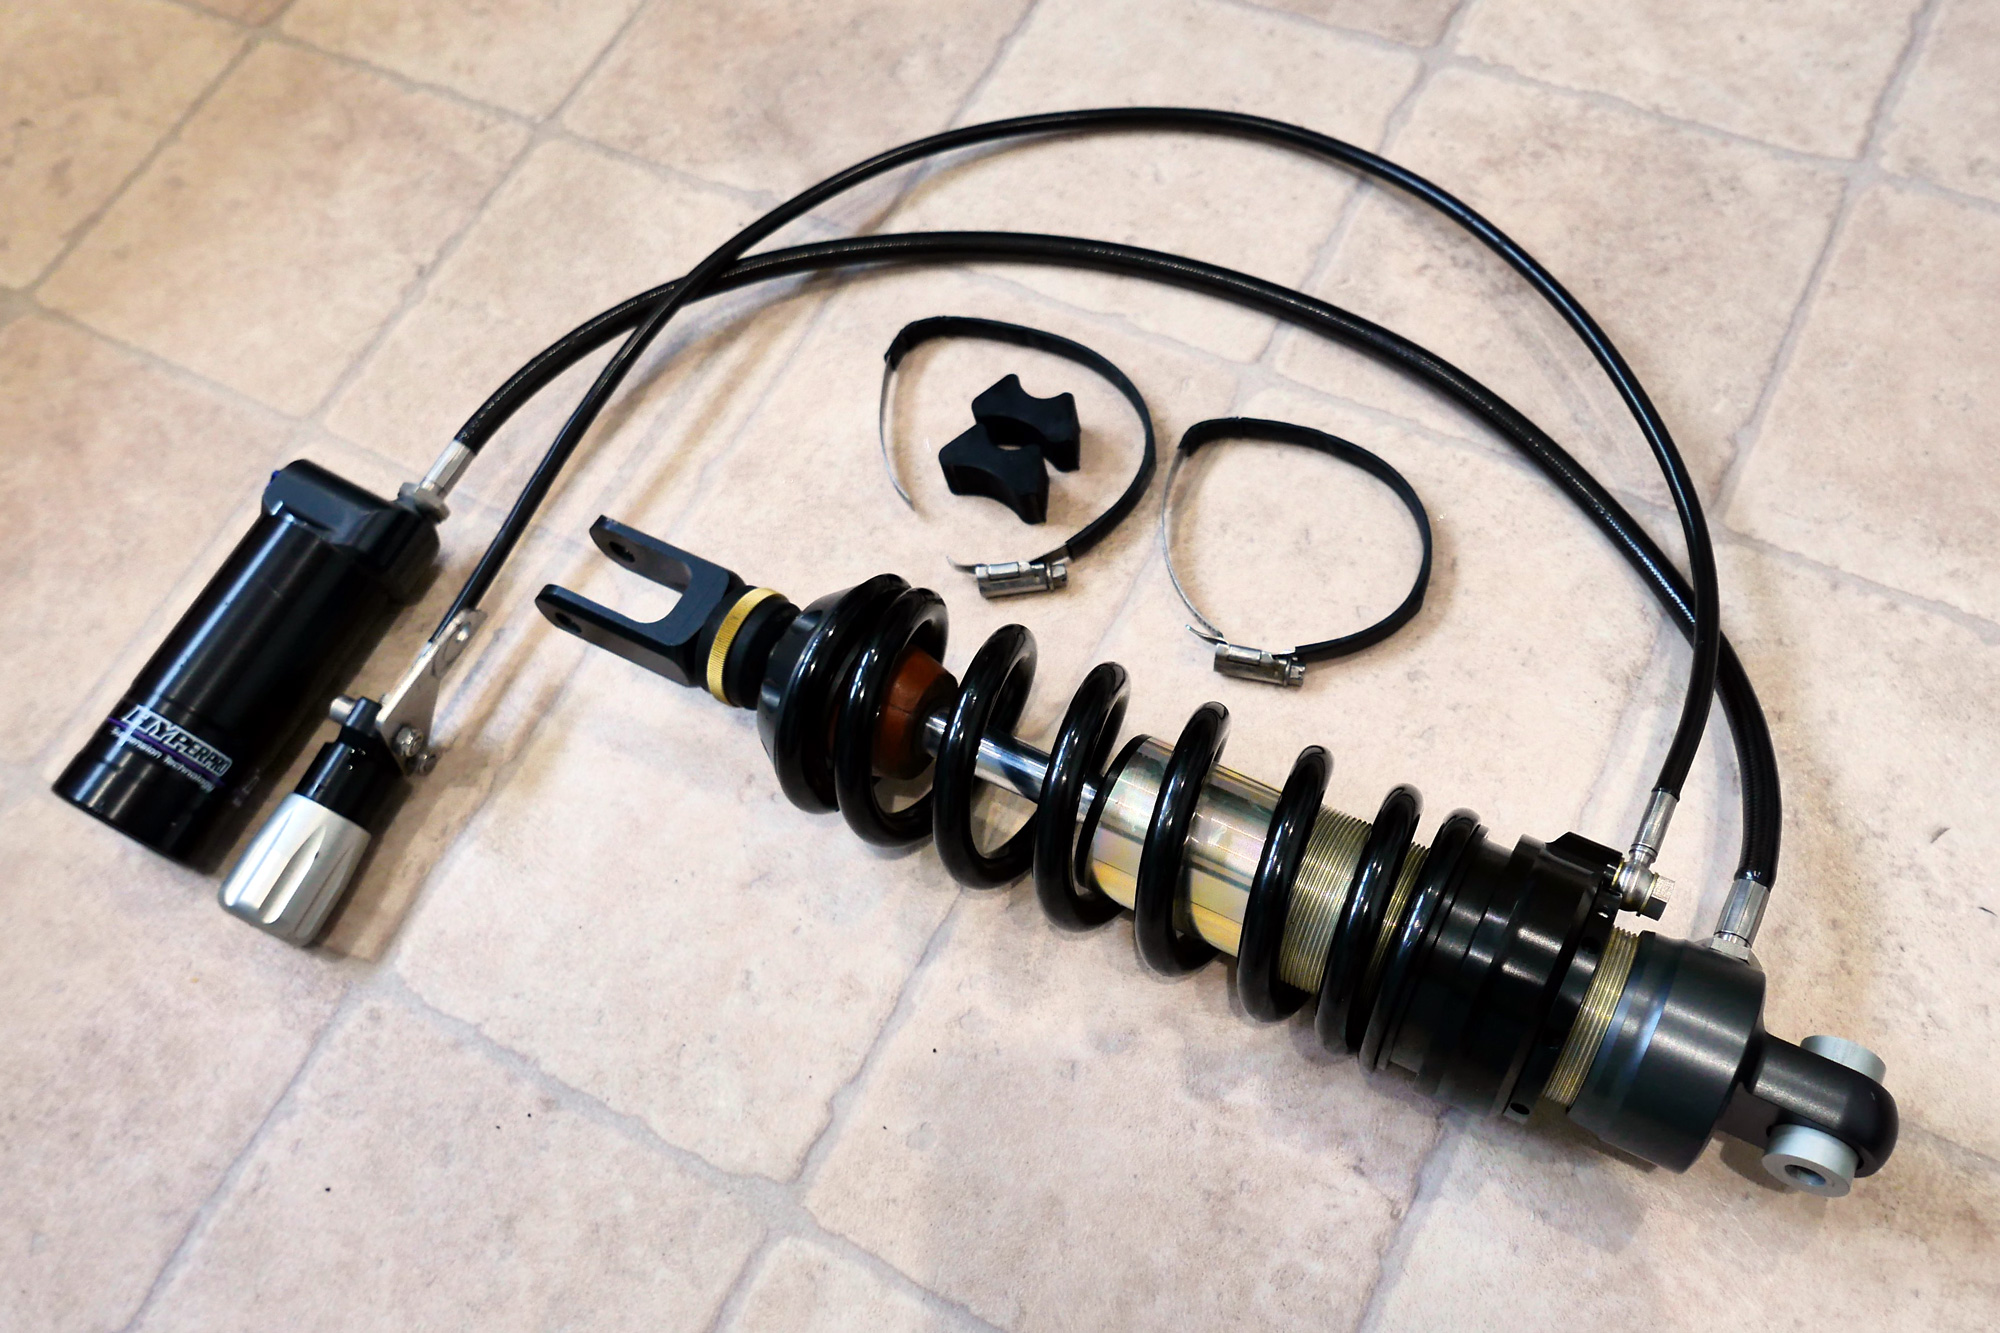
I do wonder if it has been worth the faff and expense of buying a bike from Holland just to get some top-grade Hyperpro suspension (this is the first WR250R to have HP). All I know is if it works as well as my HP X-Country, then the answer will eventually be yes. You just wonder how many trees have given up promising futures to certify the re-registering process of this motorcycle.
Have to say, after having a close look, so far I’m impressed by the WR. The easy disassembly and access to things, nifty hinged air filter door, minimal-sized components where possible and solid parts elsewhere, like triple clamp and subframe. It’s like a Jap KTM, and grails don’t come much holier than that.
One thing I’m pretty sure I won’t be doing is meddling with the airbox flap, EXUP valve, silencer or other stuff to squeeze 3% more power out of it and save a few ounces. Like most things, the WR-R already is what it is: lighter and more powerful than any other Jap trail bike, with a travel workable oil-change interval and excellent mpg. That should do nicely for the next desert ride or two I have in mind.
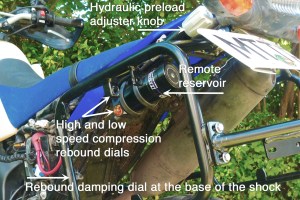
On the way to the Overland Event I had a pile of heavy books I was hoping not to bring back. Once loaded up it was great to just crank up the Hyperpro Hydraulic Preload Adjuster (HPA) knob which still fits nicely alongside the new rack. At a pinch you can almost do it on the move, though probably not while texting. I haven’t yet had the heart to run the WR at the revs it’s supposed to handle. What’s probably a true 55-60mph seems fine for now, but unlike a CRF-L or KLX, you do have a bit of spare oomph when you need it. For the first time in years I’m very much looking forward to getting my latest project bike on the dirt.
Turn on, Plug in but don’t Chill Out on winter’s long road.
See also: Mosko Moto Ectotherm (soon)
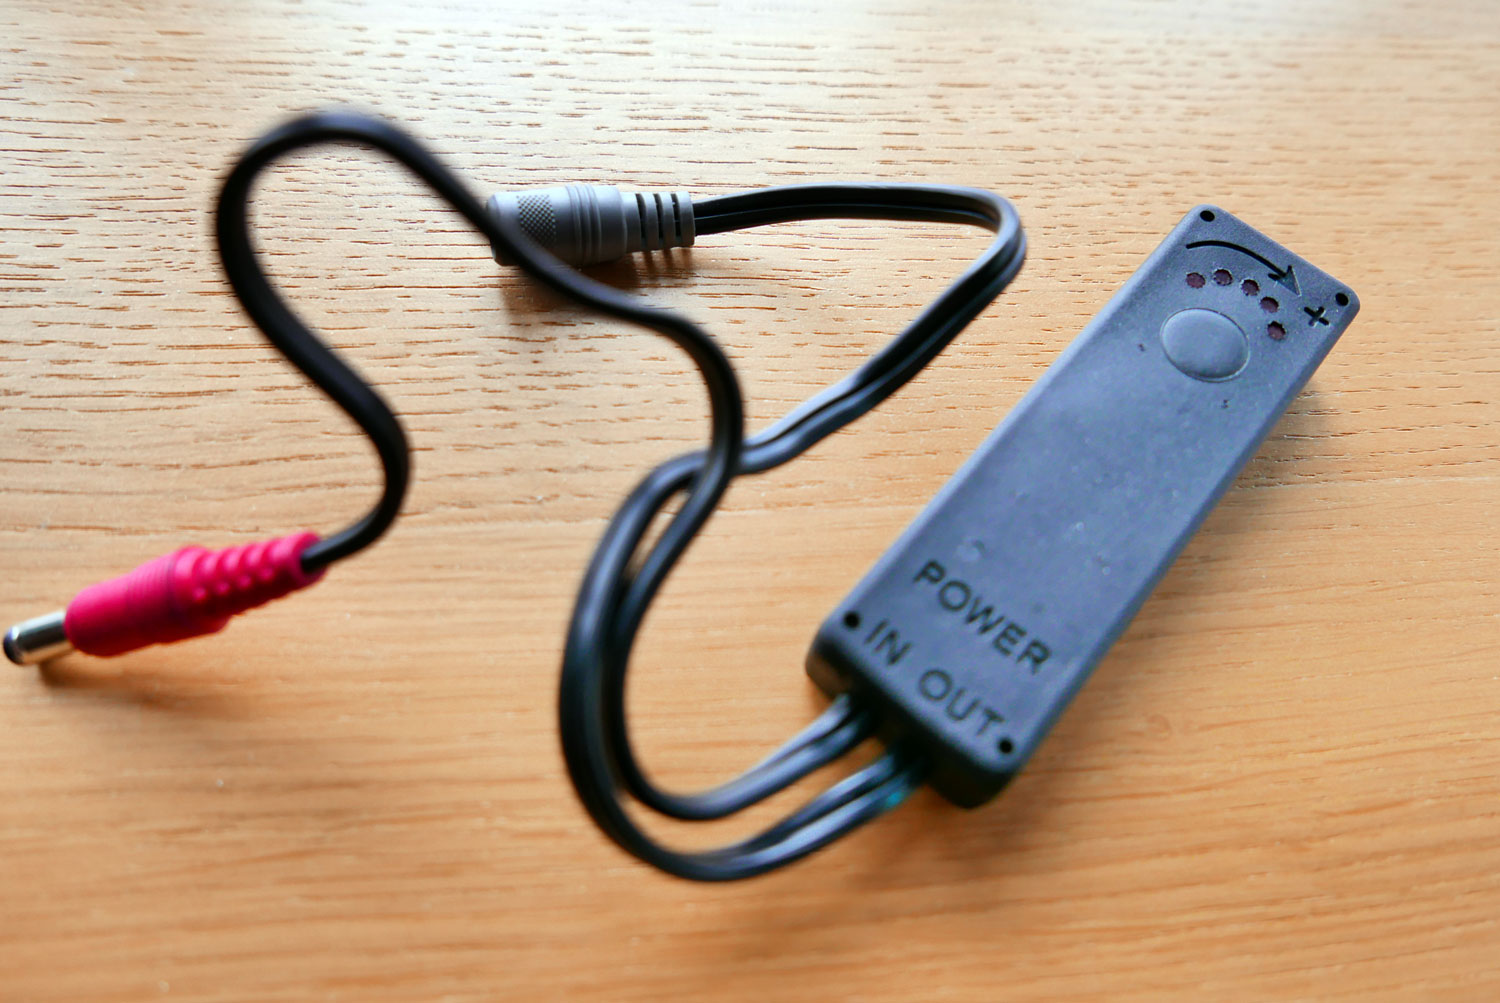
If you live outside the tropics and like to ride on anything other than sunny summer days, heated clothing makes sense on a bike. Your engine churns out excess electrical power which, with the benefit of modern technology and materials, can make a near-freezing ride tolerable in a way you couldn’t imagine. The two jackets looked at here are Aerostich’s 75-watt Kanetsu AirVantage and the 60/105 watt Powerlet RapidFIRe which you can still find for as little as $160.
My tips for heated jackets
Get a full heated jacket with heated arms, neck and full torso, not a waistcoat or a jacket with partial panels
Get an easy-to-operate heat controller dial
If the body’s elasticated, aim for a close fit
Wire direct to the battery via a fuse (leads often supplied)
Don’t bother with remote, battery-powered options. Your bike has a battery and charging system: use them.
I remember back the late 70s there was a batty guy at work called Maurice Seddon who rode a BSA made before I was born and who sold hand-made heated clothing on the side (left). For London-based despatching that wouldn’t have been such a great idea, as with all the stop-start and on-off you never got that cold. But out on the road between cities you sure could in winter. Even then, heated clothing had a reputation for inefficiency and unreliability and so didn’t seem worth the investment compared to piling on the layers and gritting your teeth.
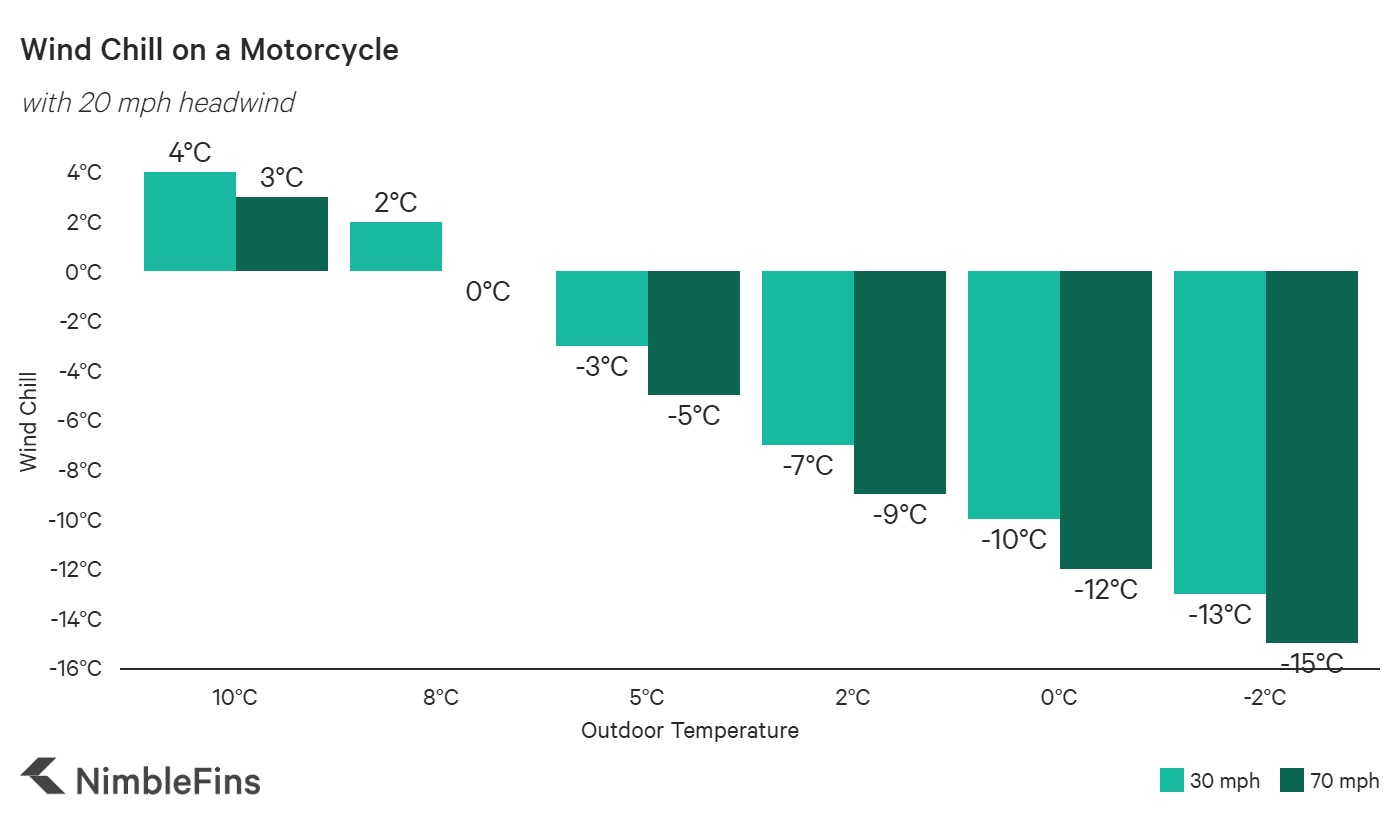
Compared to the northern US states and eastern or northern Europe, the southern UK rarely gets that cold in winter (anymore), but sat on a bike in the wind it’s always colder than you think. Apparently, in bikers’ lore over in the US there’s something called the ’60 60 30 rule’: 60mph at 60°F (ambient) feels like 30°F on a bike (100kph / 15°C / -1°C). That may be easy to remember but is clearly exaggerated. There’s no way doing 60mph at 15°C feels like just below freezing. It’s an embellishment of what they now call the ‘old wind chill index’. According to this page, the new wind chill index (NWCI) gives a more plausible figure of 10°F / 3°C when riding at 70mph /112kph in 50°F / 10°C ambient. Bright sunshine can also reduce the wind chill by several degrees. Headwinds can increase it.
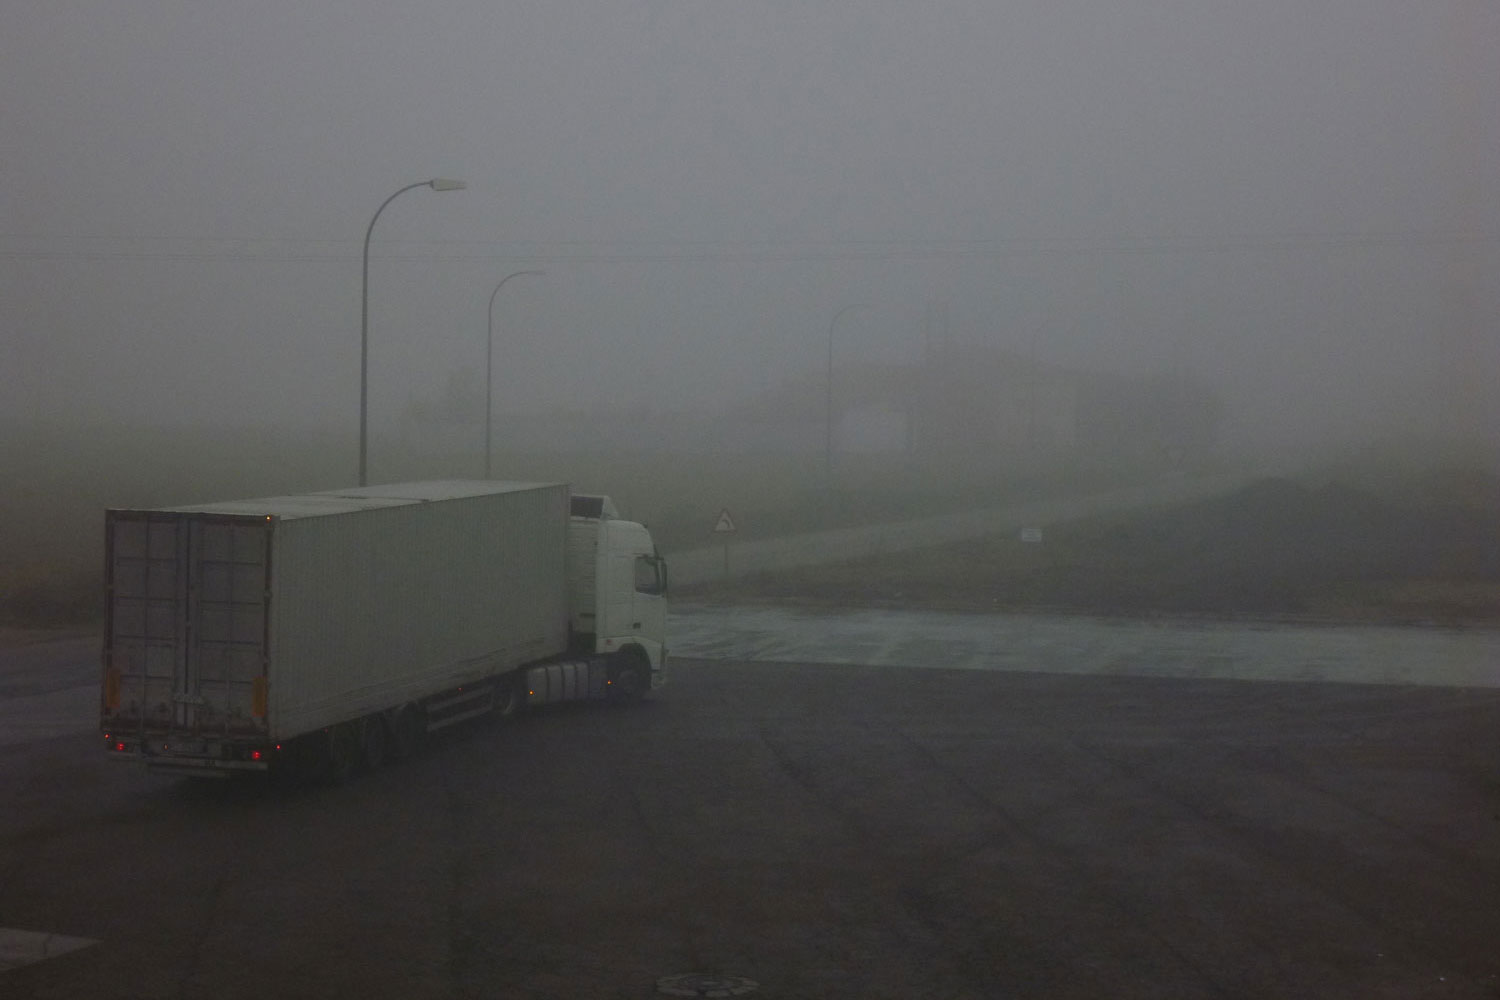
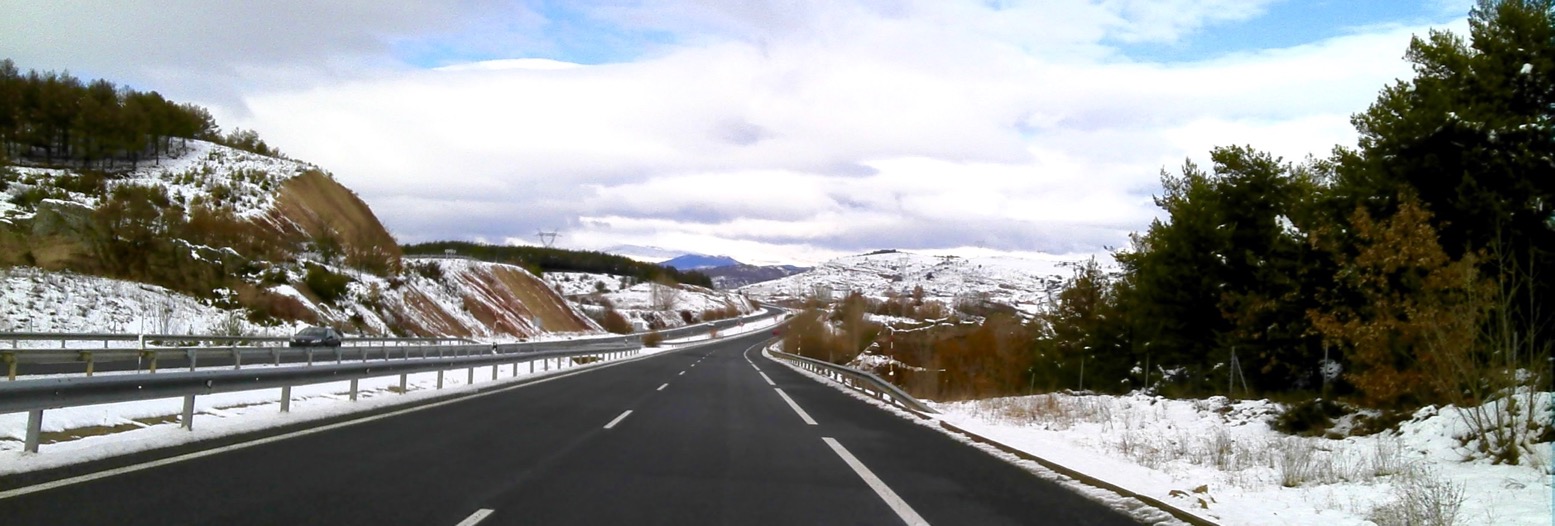
But when the ambient temperature drops to a more typical, mid-winter’s ride of 41°F (5°C), the new wind chill index corresponds to 26°F or -3°C. That’show it felt for me crossing northern Spain one when, for the last few hundred clicks to Santander, the road rose to more or less 700m (2300′). Though it was foggy and clearly above 0°C, I felt freezing with my Powerlet RapidFIRe heated jacket turned up to the max. I rode on through the murk for as long as I could bear it, then dived into a roadside hotel to thaw out. Next day it was the same until I dropped out of the fog to the coast.
It gave me time to work out how to get the best from a heated liner. Apart from sealing against all possible draughts, using heated grips, hand guards and a windshield, having the liner pressing on your body is much more effective. Like this, the liner’s heated matrix is warming a thin base layer clinging to your skin, not the air gap between. And ironically, I feel it’s better if that base layer is not thermal – just thin polyester or whatever that’s easier to wash than a jacket full of wires. At times I was riding with my left arm hugging my chest just to force the front of the jacket against me and benefit from the heat. But doing that for a while my hand got cold away from the heated grip. Next day I wore a thin fleece over the heated jacket to press the wires down achieve the same, all-round effect.
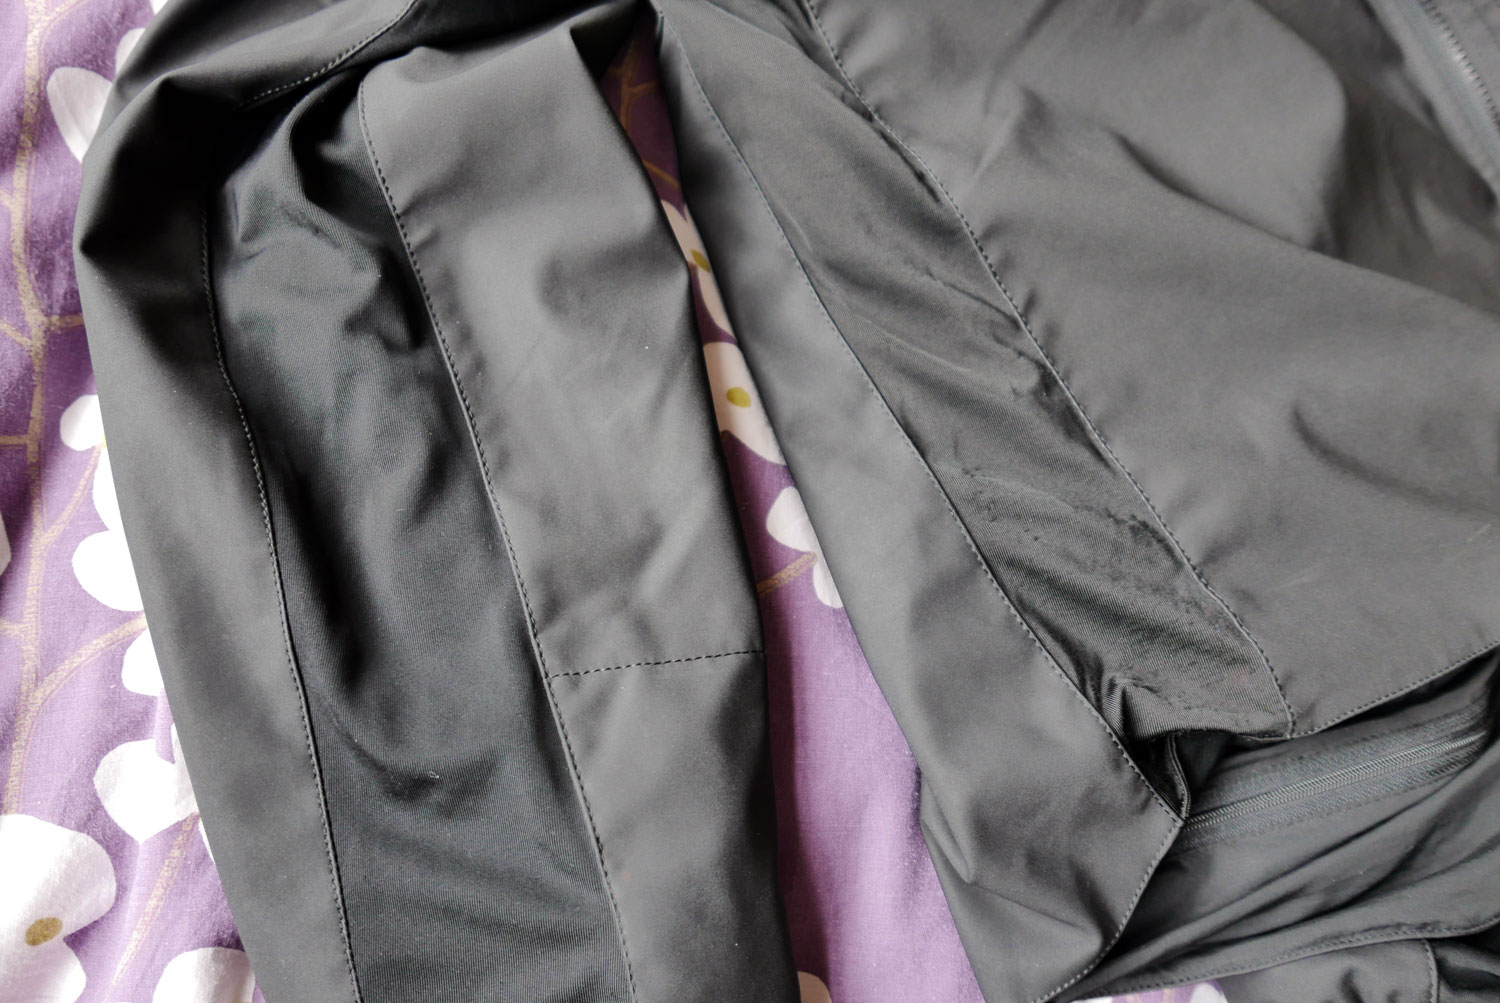
Liner or jacket? The Kanetsu is designed to zip in as a liner on your Aerostich Darien or Roadcrafter, but over the years I’ve mostly used it with various other jackets. The Powerlet zips up to itself, but does feature a textured outer shell that’s slightly tacky or rubbery so it’s more prone to staying with your main jacket as you slip both off (assuming that’s what you want). Because the Kanetsu is a zip-in liner, I found when using it with other jackets the open-ended zip would open up from the bottom. Aero could get round this by adding a stud to stop it separating when not zipped in as a liner. Both jackets stuff into their own zippered pouches (left), with the Kanetsu benefitting from belt loops. On a long trip both still add up to a sizeable bulk when not worn, unless you choose to use it off the bike. As you can see below, they both look pretty good as regular jackets. The Aerostich has more pockets, the Powerlet has a lined and heated collar. Both weigh about 1100g.
As said, a close fit makes all the difference and these jackets achieve that differently. The RapidFIRe has Spandex side panels in the body and arms (left) to make the liner cling to you. Mine was an end-of-the-line cheapie which by that time was only available in XL – a bit too big on me. But it occurred to me I could easily close up those elastic panels with thread to achieve a snugger and so more effective fit.
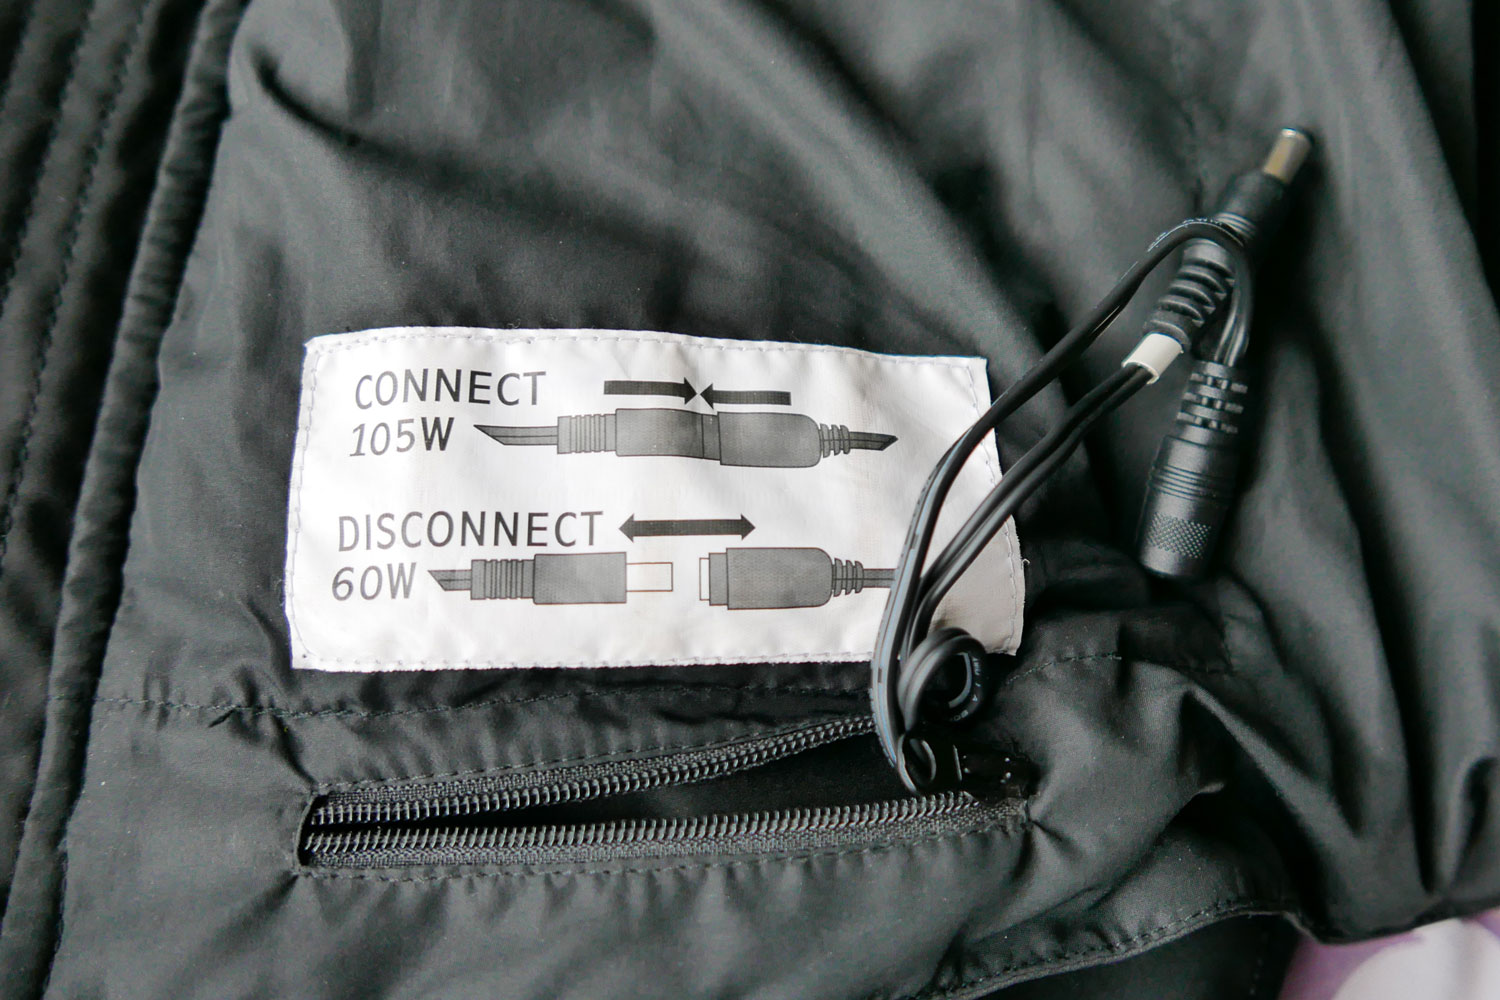
The RapidFIRe has two heat settings: 60 or 105 watt which, afaict, the newer $430 Atomic Skin model has dropped. Probably because no one ever needed 105 watts. To activate this arctic setting you join up two loose plugs zipped into a dinky hem compartment (left). Knowing my Honda had the capacity to run it (see below), I tried the 105-watt setting on a 200-mile round trip down to around 8°C (which adds up 0.5°C windchill @ 65 mph). I found that setting 2/5 was more than enough to keep me warm in my Darien Light and a thin base layer. If I regularly rode in sub-freezing conditions I might leave it on 105 watts. More probably though, I’d get a car.
My 5-year-old 75-watt Kanetsu AirVantage is a version of Aerostich’s regular (and $70 cheaper) WindStopper. It differs by having an air bladder within the body linings which you inflate with a stem valve (left), like an airplane life jacket until you have a comfortable fit under your riding jacket. As long as you’re not wearing it inside out (an easy mistake to make) the bulging bladders press the heating elements against your torso, a clever idea that maximises efficiency and means you don’t have to whack up the dial for it to have the desired effect. Until you get used to it, it’s another thing to remember to do when togging up, and it can result in that ‘stuffed’ feeling you’re trying to avoid with heated gear. But it adds insulation and does work. The AirVantage is definitely worth the extra $70 ($387) over the regular, non-inflating WindStopper.
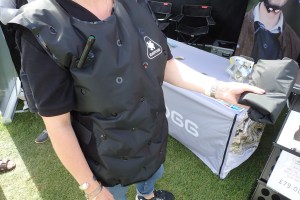
Fast forward to 2019 and at a show I spotted these Exotog inflatable pull-over bodywarmer. A bit like the lifejacket mentioned above, the idea is the still air creates a thick insulated layer without excessive bulk when not in use. The truth is, down works better to keep trapped air still, but that’s impractical with humid, breath-inflated items and these must be better than nothing. It also occurred to me they’d be an effective way of pressing a heated jacket down on to your torso to derive maximum efficiency. It weighs from 270g and costs 100 quid.
What both jackets highlight is that once warmed up and doing their thing, you won’t necessarily feel like The God of Hellfire (left) reposing in front of a roaring log fire with a warm cup of cocoa. But you’ll sure notice the difference should you switch them off. [This is actually a slightly misleading test as switching off is a bit like stepping out of a shower all wet: in the short term you’ll feel chilly until things evaporate]. And, depending on the wind protection on your bike, you’ll also notice your heated but exposed arms will feel notably less warm than your balmy torso, as well noticing the slightest cold spot. In fact this whole temperature differential can be a bit of a distraction.
The Powerlet uses something called Carbon Nanocore technology (thin wires) producing far infrared heat (hence ‘Rapid FIR e’); the AirVantage simply uses ‘hotter’ wires in the arms. Whichever one you’re wearing, this is where those velcro arm cinches on your riding jacket come in useful to press the heating elements against you. The Darien I recently reviewed has them both above and below the elbow (right), but they still couldn’t spread the heat evenly. If I was heading for a really long, cold ride, I’d find a way of binding the heated jacket’s sleeves close to my arms. All these measures will enable you to run as low a setting as possible, so giving you an extra margin when things really chill down.
Electrical consumption One good thing about modern bikes is they should have plenty of alternator capacity to power electrical accessories – and heated jacket liners probably make the biggest demands. My CB500X produced 500 watts at 5000 rpm – my late-1980s era GS500R dished out just 200 watts at the same rpm. Even a modern 250 single like my WR250R can produce over 300 watts. Modern lights draw less power too, but add fuel pumps, some LED or HiD spots, heated grips as well as the possibly lower engine speeds when riding at night in freezing temperatures, and on the old GS the alternator may have struggled to keep up with the demand.
Heat Controller These thermostats usually come as accessories to the heated liners but are a good idea unless you’re happy with all-or-nothing heating. After all, what other heating application – domestic, industrial or otherwise – has no adjustment settings? Often, as you slow down to ride through a built-up area you’ll feel too warm – you don’t want that but you may not want to switch right off either.
Get an easy-to-feel dial, not buttonsHeat Troller: dial easier to use than buttons
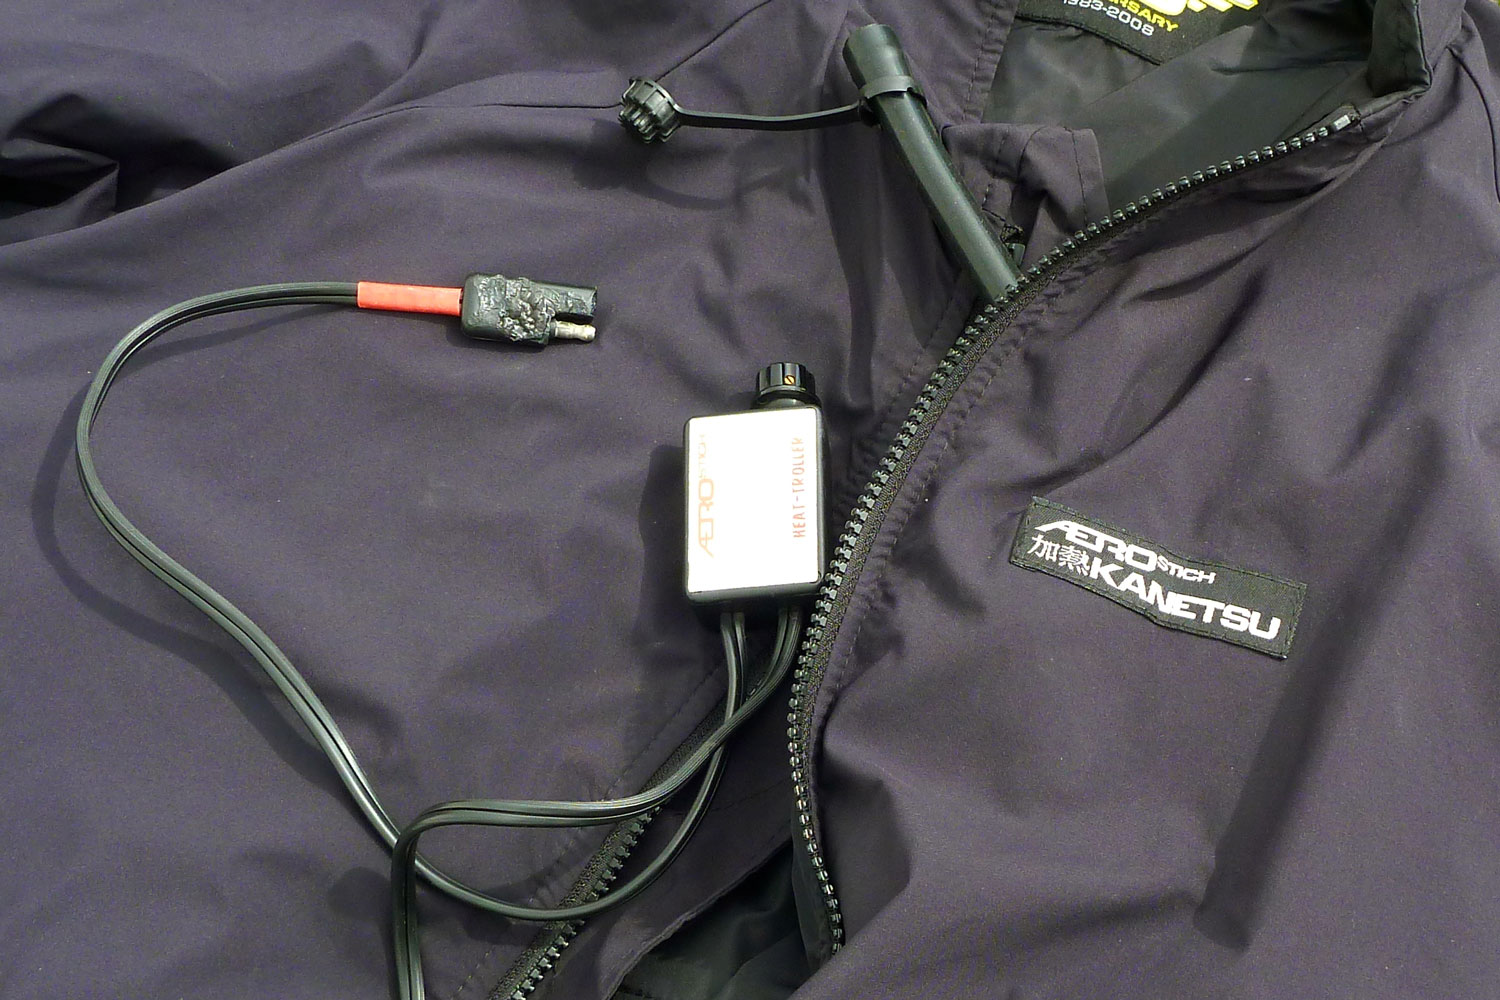
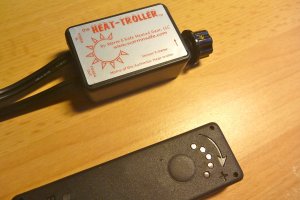
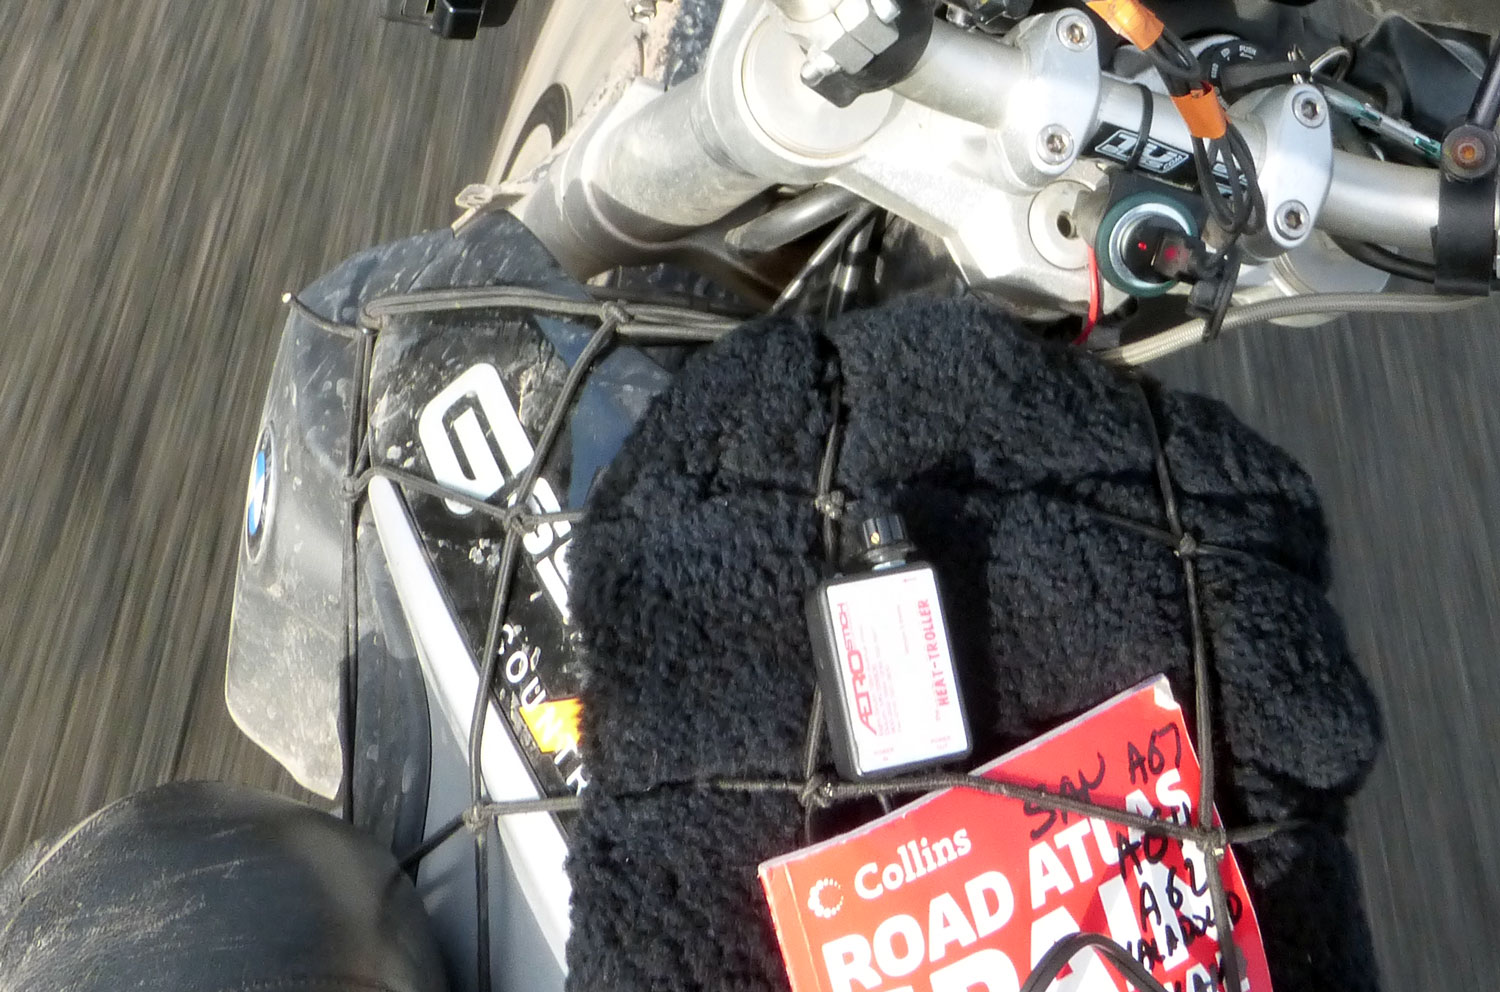
The Aerostich Heat Troller ($70; above left and right) is a little box with a dial knob and molded SAE leads. You can feel the knob’s soft click as you turn it on and in less than one clockwise turn it’s at max. Tucked down by a tank net as above right, it’s easy to operate on the move using feel alone when wearing thick gloves. No need to take your eyes off the road. I just dial it up to max then back off as needed. There’s a red LED that flashes proportionally – handy for a quick glance to see if it’s actually working or if it’s just you and you need to dial in more heat. Direct from Aerostich it seems the Heat Troller only comes with SAE connectors but I just bought one with QuiConnects coax here). Their Kanetsu jackets now comes with BMW, SAE or QuiConnect fittings.
The Powerlet uses a similar black box and the co-axial QuiConnects all round (left), but with a flat pad to turn it on and keep pressing up to five levels. The problem is that pad is very hard to locate and feel through a thick glove, so you’re not always sure if you’ve done anything or gone too far and turned it off. You need to glance down to check the position of the red LEDs – not handy on an icy hairpin at six in the morning. It’s nowhere near as user-friendly as a dial knob. The current Atomic Skin Powerlet liner uses a remote wrist-mounted wireless controller. Me, I’d sooner fit an Aerostich-style Heat-Troller unless you mount the controller on the handlebars.
Overall, the discontinued? Powerlet RapidFIRe gets the nod as it’s a tad less bulky, has two core heat settings, has accessory wires to run glove liners, has a regular zip for use in any riding jacket, not as a zip-in liner, has wire in the collar and slicker QuiConnect fittings. But chances are you can’t buy it anymore unless you’re tiny or huge, and neither the Kanetsu not the Atomic Skin are currently sold in the UK.
Click this for a review of Aerostich and Klim shells which were used with these heated liners
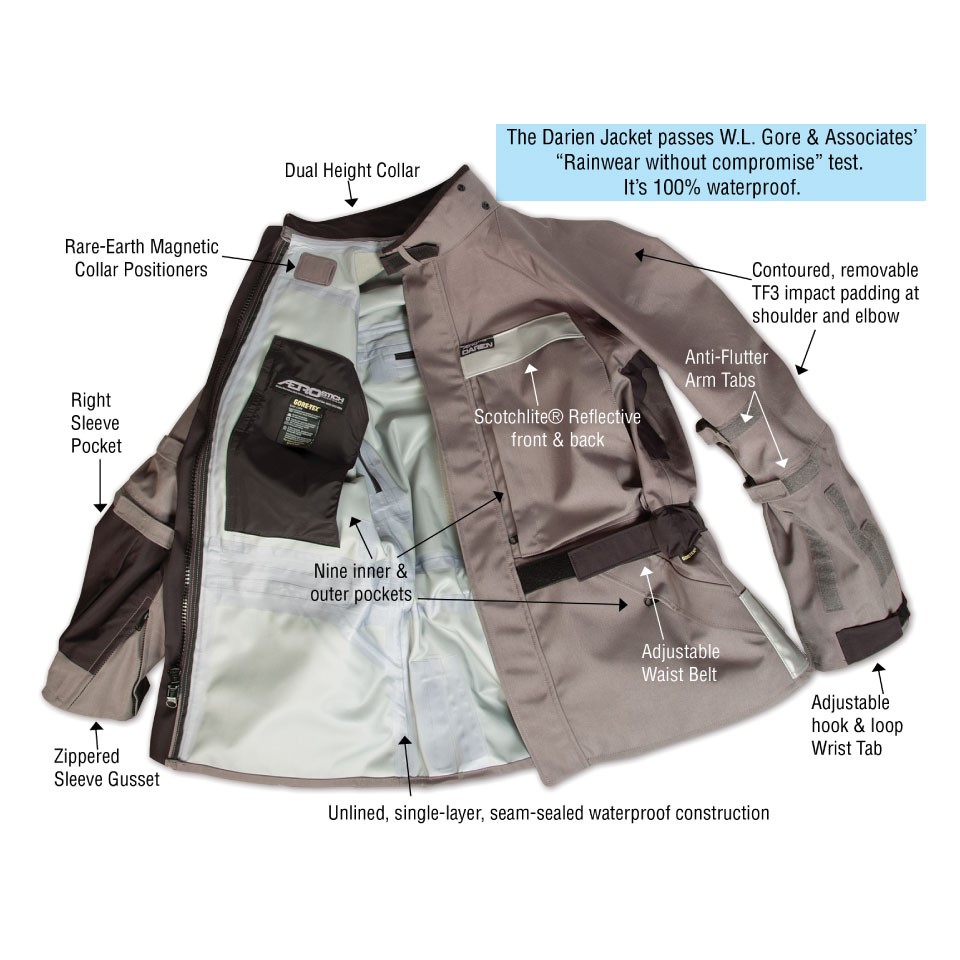
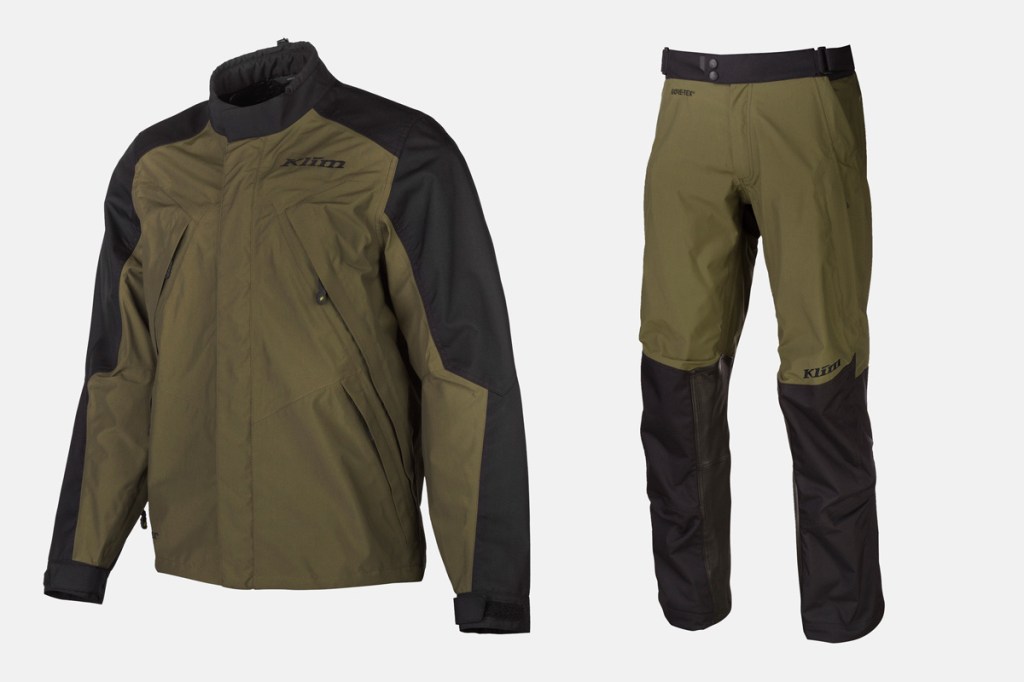
If you’re serious about a travel jacket, one with a waterproof/breathable membrane laminated directly to a tough outer shell, with taped seams and with some good venting is the way to go. It’s not the cheapest way of making a jacket, but it’s the most effective.I’ve now done a couple of thousand miles on two US-branded shells: Aerostich’s Darien Light (rrp $577; sold US only; 2.27kg) which has been around little changed for over a quarter of a century. And Klim’s Overland (rrp $430 / £379; 1.97kg) which hasn’t. Some might say Klim’s Latitude might be a fairer comparison with a Darien Light (DL). I looked at a 2015 Latitude but couldn’t see myself owning it, for the reasons explained in the link.
Fyi: these jackets were supplied by Aerostich and Adventure Spec in exchange for adverts in AMH7
What they say:
If you’re taking your first steps into Adventure and Adventure Touring, the all-new Overland series is a tremendous value.
The Darien Light really comes into its own for commuting and general riding, especially in atrocious weather where it will flat-out work better than whatever you now wear.
Aerostich Darien Light A 25-year old, made-in-the-USA design that’s been refined over the years and comes in four or maybe six colours. A longer version of their equally popular Roadcrafter.
• Roomy fit • Irresistibly practical • Collar flap magnets • Ten+ pockets, including massive ones • Intuitive waist belt cinching • Customisable plus a range of accessories including heated and thermal liners
• Bulky, base-spec TF3 armour • Only sold at Aerostich, USA • Plain range of colours
Review This is my third Darien (fourth it you count the same-styled waxed cotton Falstaff). Didn’t get on with the stiff, full-weight Darien and even less with the mucky and ineffective Falstaff, but a Darien Light – made of 200D rather than 500D Darien fabric (losing 30% abrasion ability in the process) has got to be one of the most under-rated round-the-world travelling shells. Light enough to be bearable in the tropics, roomy and adjustable to take extra layers, vented to keep you cool, plus your obligatory Gore-tex membrane to reduce clamminess while resisting the rain. The fabric may get bonded by the roll in Vietnam, but one good thing about being cut and assembled in Duluth, MN (afaik) is they can do you any number of custom fittings and enhancements if you have special prefs or a non-conventional physique. Very few motorcycle clothing manufacturers offer this level of customisation; you just get what you get in whatever colours they have between XS and XXL.
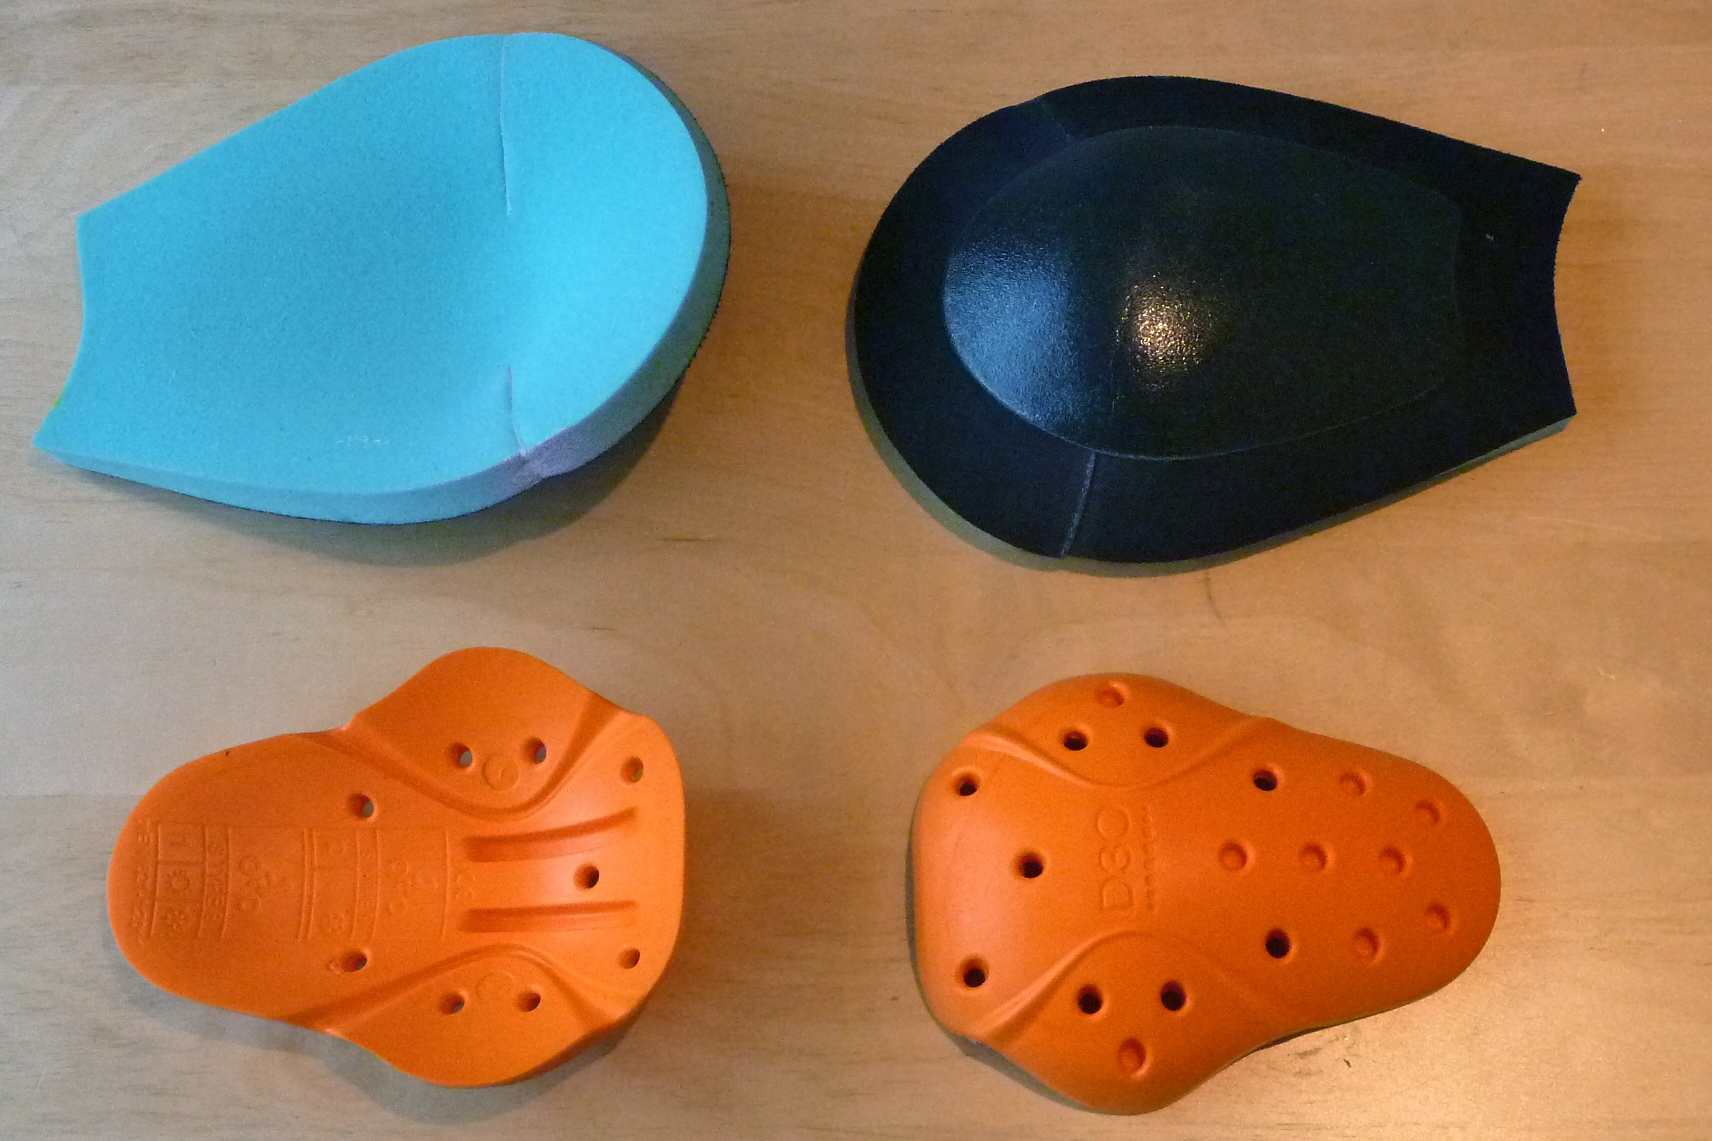
Armour One all my previous Dariens I ditched the bulky, hard-capped TF3 elbow, shoulder and back armour without thinking. This time I stuck with all except the back pad, but can see why I used to remove it. After experiencing the Klim Overland’s supple slices of orange D3O, the bulky TF3s snag and don’t make slipping on the DL the sartorial delight it should be, especially if you’ve left the arm cinches done up. You feel like a stuntman togging up prior to being catapulted from the battlements.
The TF3 elbow – top – is light at 90g and composed of a soft, open-cell sponge, cut and glued to shape, then partially topped with a hardshell cap which must be key to distributing impacts. The orange D3O T5 equivalent is heavier, slimmer and smaller, a denser rubbery foam moulding that looks more effective. Aero do sell similar, low-profile TF5 armour, which can be adapted with new velcro sleeves for fabric Darien jackets.
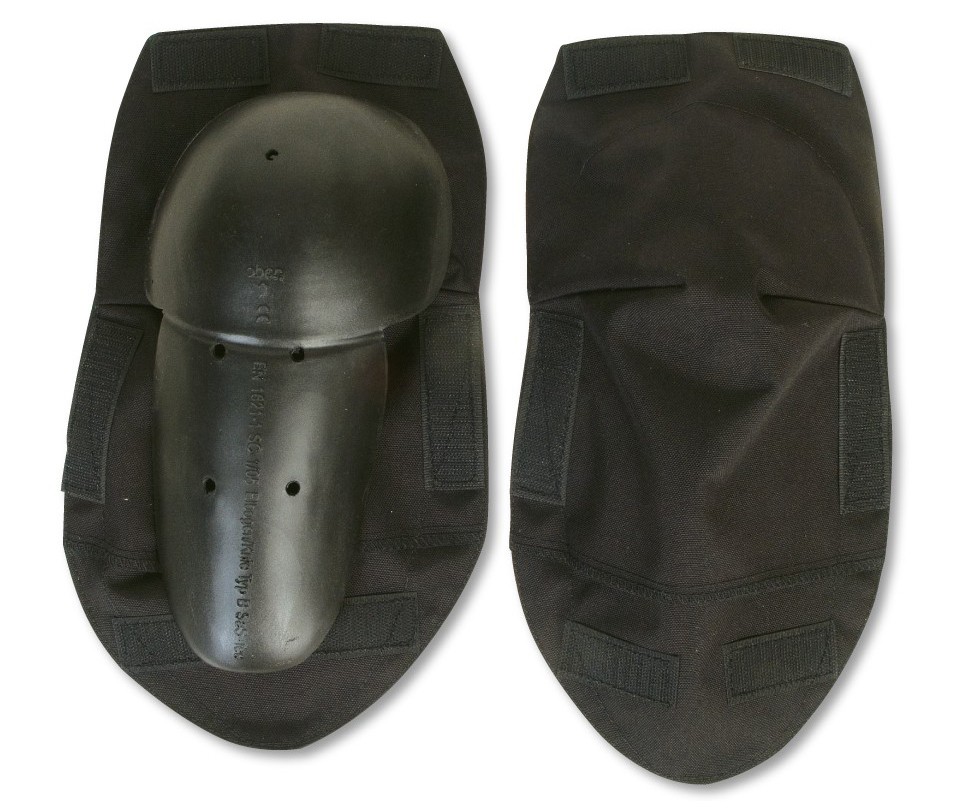
My advice: if buying an Aerostich fabric suit, upgrade to TF5 armour and velcro sleeves(left). For elbows and shouldersthe cost should be negligible. Aero should make this upgrade option more obvious on the DL page, though as it is, the TF3s warm up quickly and once on the move you’re barely aware of the bulk. Aero tell us that velcro-ing armour pads to the shell (rather than hanging them in a mesh) is a superior but more time-consuming way of doing it. And the velcro (Americans are constitutionally prohibited from using the v-word) does enable useful fine-tuning with the position. If you want to get picky then the outline of the velcro patches glued into the shell’s inside shows on the exterior and spoils the smooth lines. I suppose the crux is the stuff staying in position as you tumble down the road and the two velcro cinches either side of the elbow will see to that. Perhaps in the baggier DL cut, arm-joint armour is more prone to getting dislodged than on the closer-fitting Overland with D3O. According to this detailed explanation from 2011, while not CE certified or approved (a European compliance standard), at that time TF3 was as good at impact absorption as anything out there. That’s great to know, but things have moved on and while not being a card-carrying ATGATT type, I feel the DL should come standard with TF5 – see the comments below the above linked explanation. I’ve since inserted in some half-price D3Os into my DL’s arms. The orange stuff is nearly 50% heavier (TF3 90g vs D3O 132g) but slips on better and feels less bulky, while almost certainly impacting as well.
Old Men in Black While I’m whining, it’s shame the DL comes in such a drab selection of colours. It would be great to get away from boring old black – usually the least bad option. It’s a safe, conservative and inexpensive option, but I believe there’s a way to make a jacket interesting with shades of dark grey; my ARMR Moto cheapie wasn’t bad-looking. Singularity fans, check out the alluringly noire City Stealth Roadcrafter (right) from Aerostich. Expect to see it in the next Bond movie.
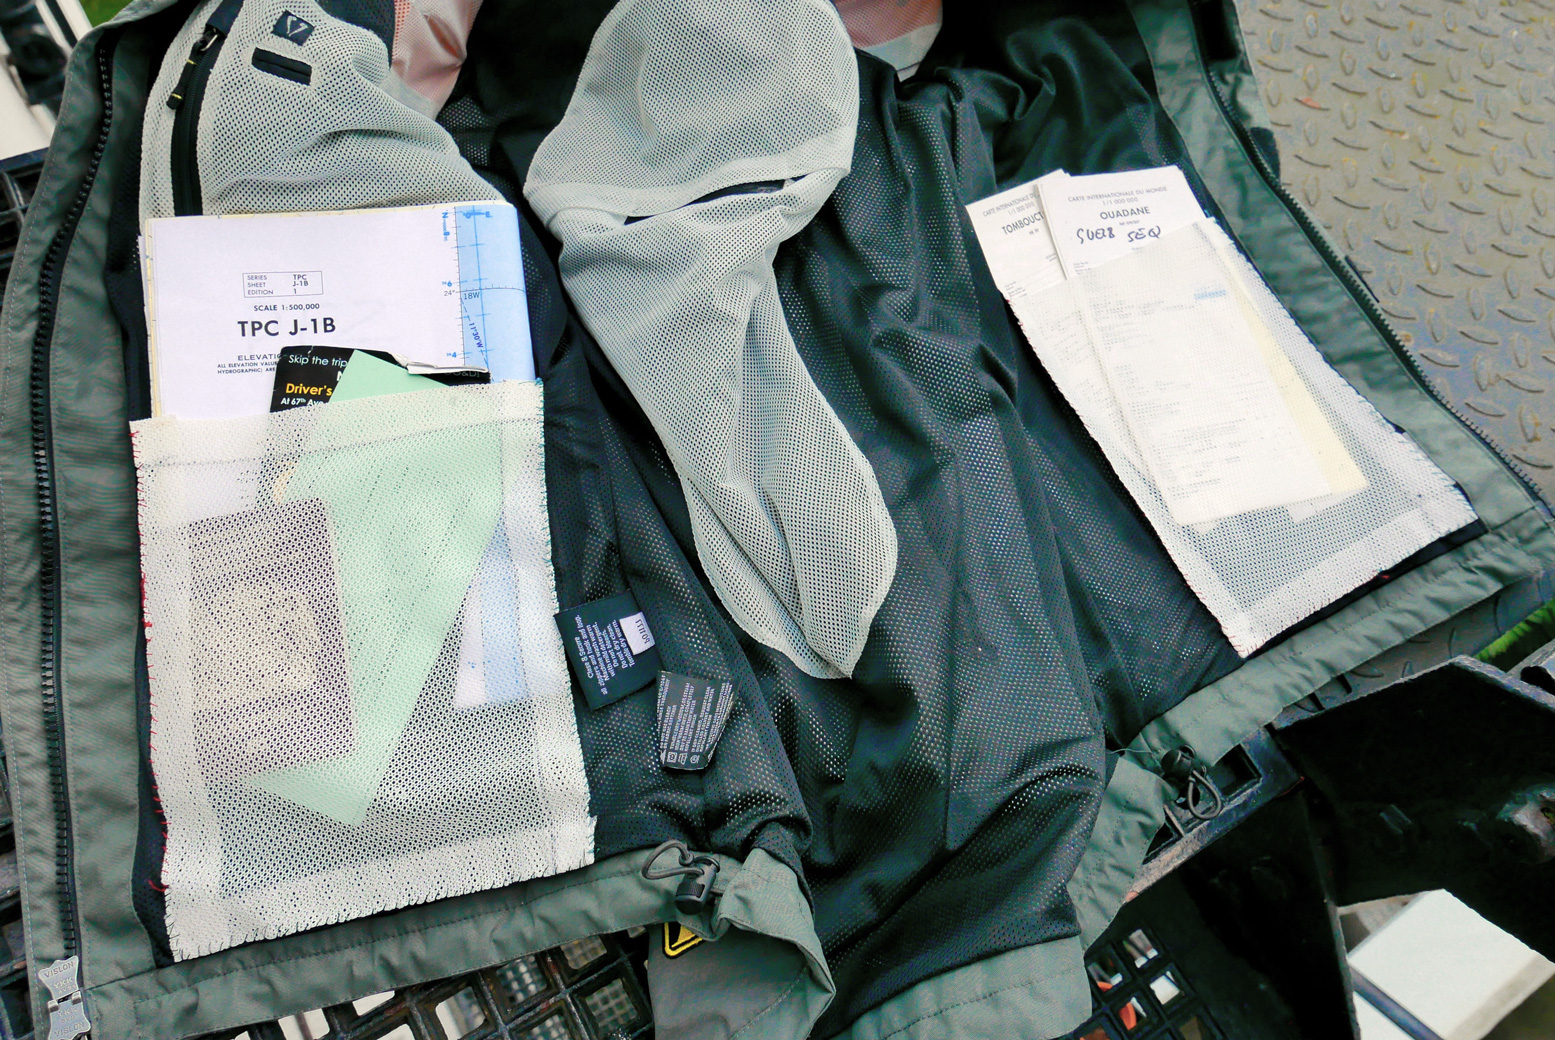
Storage One of the best features on all Dariens is the varied array and size of pockets. For me this ability to compartmentalise your valuables and frequently useables (‘V&FUs’, as the adventure clothing industry calls them) is at the heart of the motorcycle overlander’s key garment. My 2015 DL has ten plus one: a zip-up on the right cuff, two angled and flapped zip-ups at the hem, two vertical zipped chest pockets which’ll swallow a map, gloves or a bundle of border-generated paperwork. Behind them are a couple of spacious hand-warmers which are a tad too high for comfort. All have water-resistant TiZip-like zips which will need lubing once in a while. There’s also a small, velcro-flap-only chest pocket top left which I found handy for a waterproof point-and-shoot and a Sharpie. There’s a mini snap link inside though I’d actually prefer an exterior D-ring (like on the Overlander’s hem) – somewhere to quickly hang the keys while paying for fuel, for example. Inside the main shell are two smaller, lighter-load-bearing but deluge-secure wallet-and-phone chest pockets: one vertical entry, the other from the side, both velcro’d; take your pick. You can also velcro on a clear, zip-up pocket onto the left forearm; handy for a compass away from metal influences, I find. I use all of them plus a light, bladder-holding daypack so when I get off the bike I know I have all my compact V&FUs with me.
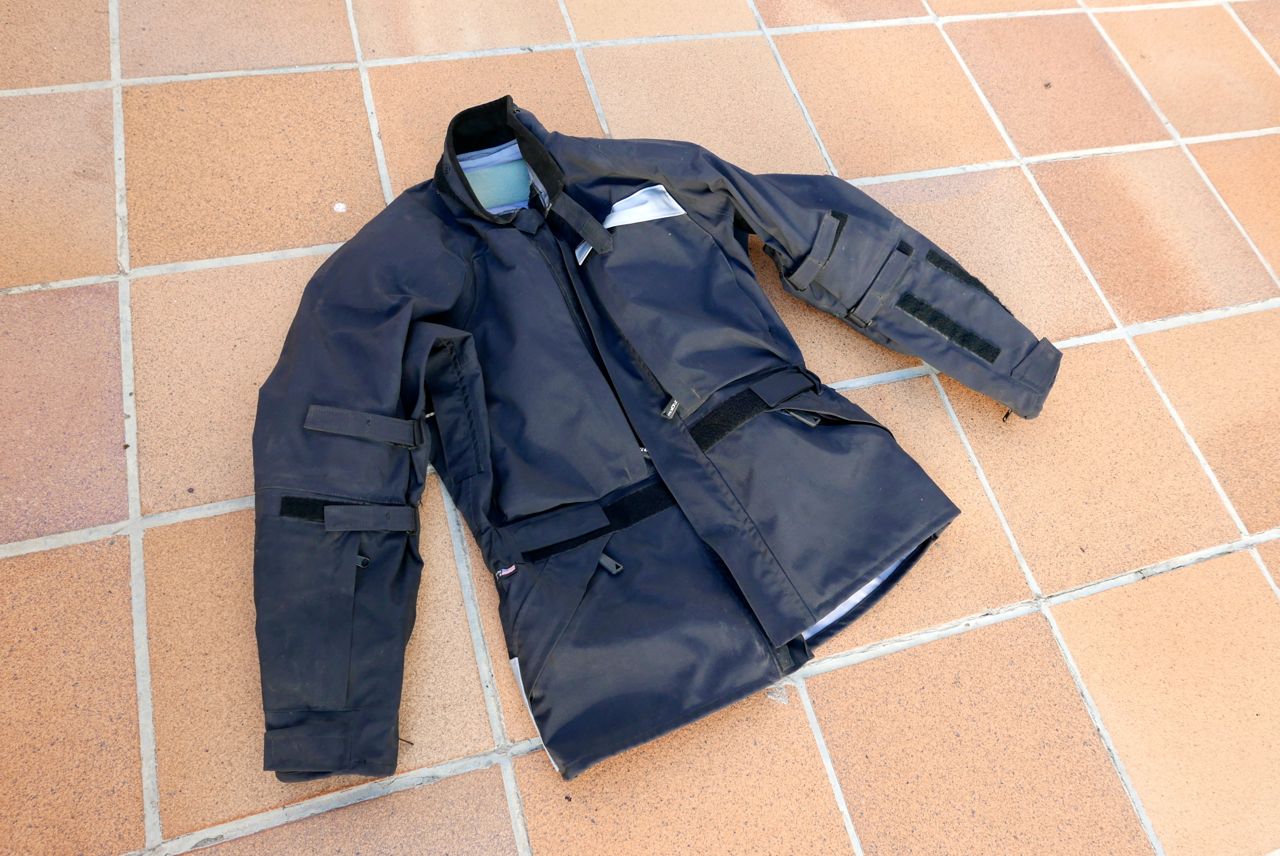
Vents The DL’s venting comprises of more water-resistant zips which arc up and round the armpit. With that bend and the stiffer zip action, you can barely work them at a standstill, let along on the move. The exhaust vent is a two-way lateral zip below the big back reflector. Riding with them open while on the piste at say 25°C and 25mph saw a nice cooling sensation on the chest, rather than an all-round coolness, but that will do me. It means you’re not gagging to take the thing off even time you stop. Problem with the horizontal back vent is it will get blocked if you wear a daypack or hydrator – vertical side exhaust vents are better in that respect. I’d have rather had a dark grey shade, but found in wintertime Morocco the passive heat absorption of the black fabric was just right when combined with the vents. Wearing the Overland in similar conditions was noticeably cooler. Get into the tropics or the Sahara in the warmer seasons and I don’t suppose I’d be quite so comfortable in black.
Adjustability I thought using magnets to secure a folded-down collar might be this year’s gimmick; they’re actually quite inspired. The collar simply flaps down and stays there at any speed requiring no unsightly studs, clips or velcro (though it may set your pacemaker into a nosedive). Another plus is the easy-to-use velcro waist belt: grab either forward-facing band and cinch as desired – very handy for keeping the core warm. The Klim Latitude I tried did the same thing but with backward facing tabs – for me a far less intuitive action. Other adjustments on the DL include side tabs for hip girth, a cinch cord down there, velcro tabs above and below the elbow to cinch down armour or heated clothing, plus a zip and velcro cuffs to help air-off or run gloves tucked in or out. There’s a velcro strap on the lined collar which you can just about use one-handed on the move, fighting the magnets.
Rainproof As for waterproofness, I’ve not yet had the chance to ride in hard rain – just a few hours of dense fog. I’d expect the exterior pockets to eventually leak, but the shell to hang in there unless it’s really hammering down. Watch for an update.
Conclusion The Darien is a flexible and versatile do-it-all jacket that, base-level armour apart, doesn’t feel like war-zone-ready clobber. It’s a jacket that, much like the CB500X I’ve been riding, is good for the getting there and the being there.
I’m sure I’m not the first to suggest that Aerostich should capitalise on this adventure biking fad with a snazzier, adventure-style jacket based on the Darien. Something that would appeal to less conservative younger riders whose fathers, I suspect, make up the core of the Darien and Roadcrafter users. The thing is, apart from a bit of flashy detailing here and there, a pouch on the back and bluetooth interconnectivity, it would differ little from what I already have here, the Leatherman of overland-ready jackets.
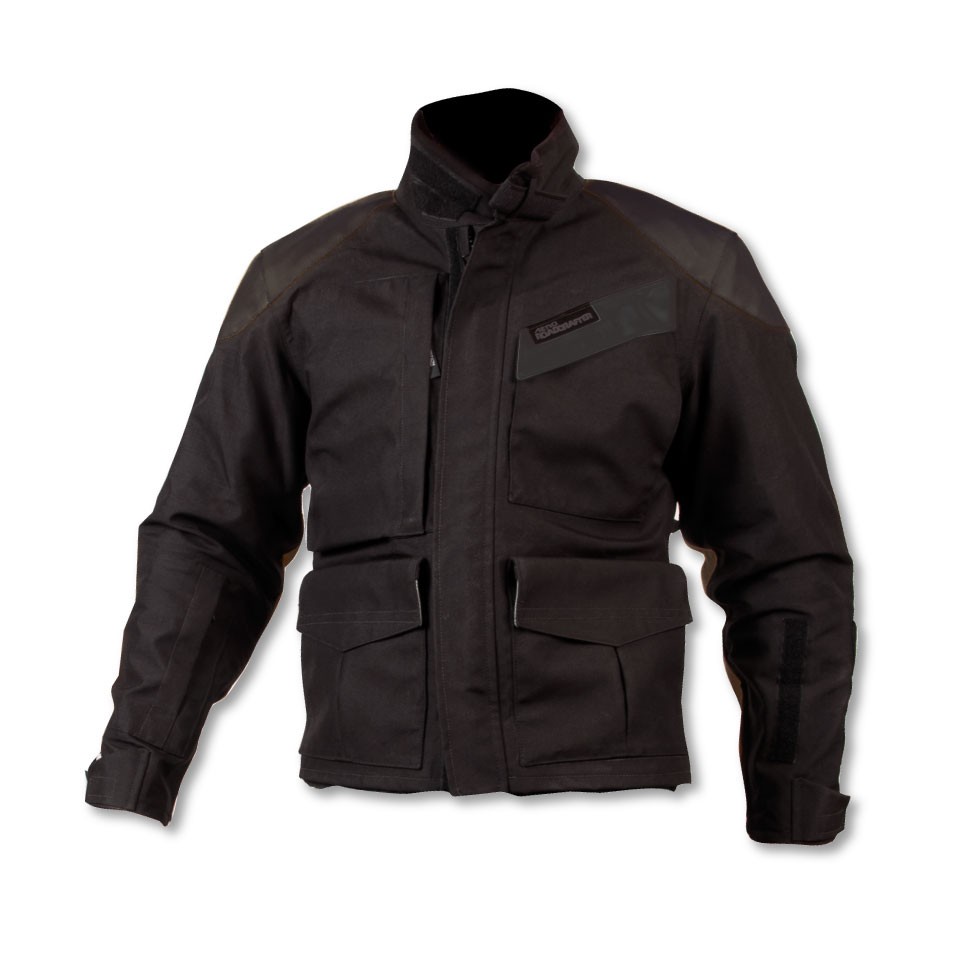
Klim Overland(discontinued) The Overland was an upgrade on Klim’s entry-level Traverse, with armour, better venting and reflectivity, a new look as well other improvements.
• Was a great price and widely distributed • Exudes quality • Discrete D3O armour • Easy to use vents • Fits well if wearing minimal layers
• Sizing comes up way small according to the chart • Small pockets • Boring black or light grey; you get what you get in your size
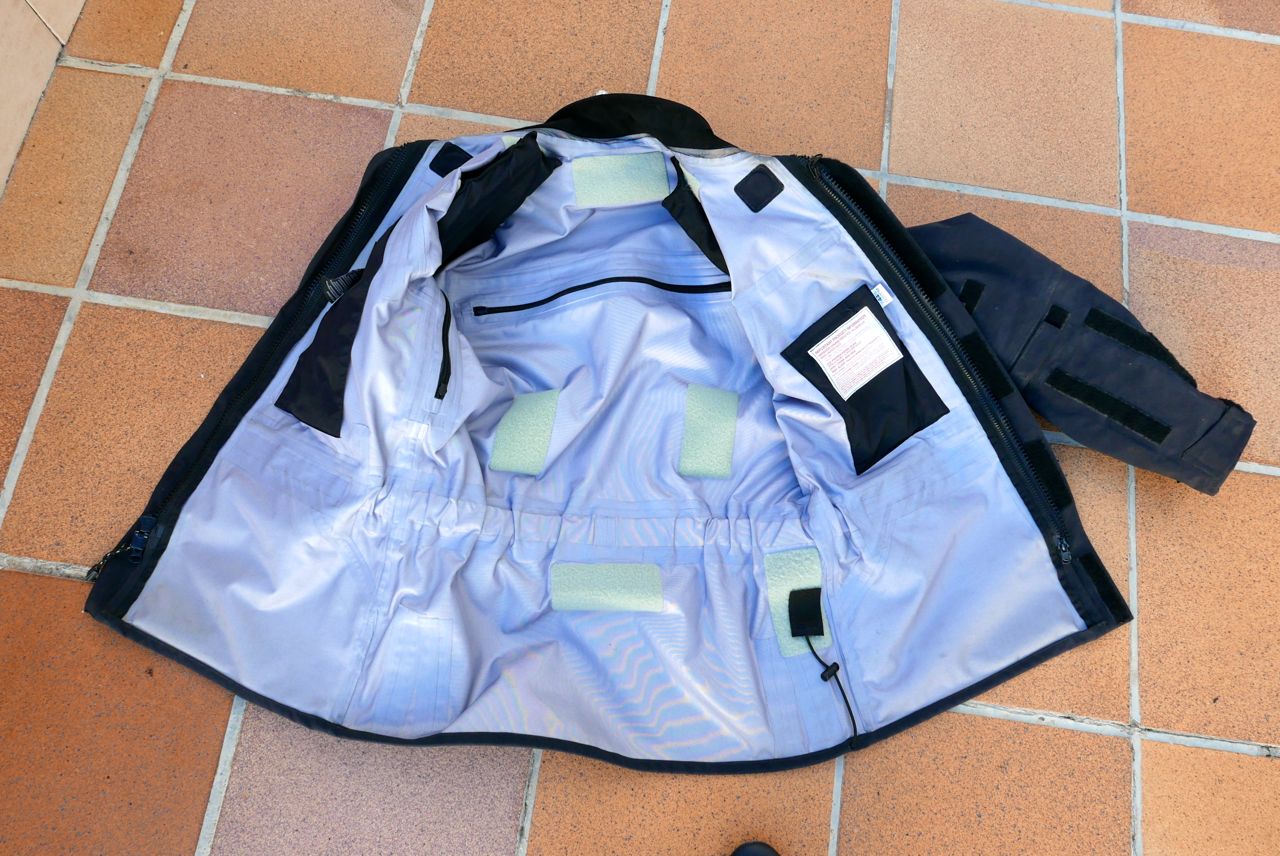
Review The Overland has a lightweight body with a boxy cut (not waist belt) and textured overlays in high-wear areas. This makes it as light as it can be – the five sections of D3O armour adds maybe a kilo to the weight. I chose the Large knowing it would be on the tight side, but also knew the XL was a big jump. Read my first impressions of the Overland here. According to Klim’s sizing chart (right) I should have been bang on with an L as usually an American L = XL in Europe. Not with Klim, so with an L there’s just enough room underneath of a Powerlet heated jacket which adds up to three fleeces and a pint of hot soup. It does make a nice change to have a close-fitting jacket for a change, instead of the usual and more practical sack.
Armour The soft, pliable (even when cold), CE certified (not ‘approved’) D3O T5 EVO XT armour (made in Croydon, no less!) slips unobtrusively into the mesh liner’s pockets and you forget it’s ever there. Unlike the Aero TF3, it doesn’t bulk out the jacket like an American footballer, all of which helps give the impression of a slim, close fit.
Look It’s all subjective of course but it sure is nice not to have to wear another black jacket and it seems that Klim have toned down the branding on this one. The Overland’s fabric textures don’t come up so well in photos, but in grey it looks less dull than you might think. It’s a boxy fit they say, but then I have a boxy torso, which would yield little under a waist belt. The reflective patches are minimal but, we’re told, mimic the form of an oncoming rider not a startled deer. It’s the other extreme from Aero’s broad bands of Scotchlite, and you do hear that France now requires a minimal area of reflectivity on motorcycle clothing which I doubt the Overland’s discrete 3M sipes would cover.
Storage Here is where a jacket daring to call itself ‘Overland’ comes up a bit short. If they’d called it ‘Dayrider’ or ‘Happy Shopper’ or even Traverse II, it would have been fine, but then they probably wouldn’t have been so successful. I enjoy wearing the Overland for short rides but in Morocco, when it came to sending one back before riding home in December, I knew I’d be keeping the Darien. Having pockets full of stuff may not give you a profile like a David Beckham underwear advert, but it sure is handy.
Having said that, one good thing about the mesh lining is that it’ll be easy to buy a square foot of the stuff and sew on a usefully large ‘drop pocket’ on the inside (see below), because only inside can you be sure that stuff won’t get wet. And yes I’ve looked closely at the Latitude and Badlands which IMO, both come up short on large-capacity pocketure.
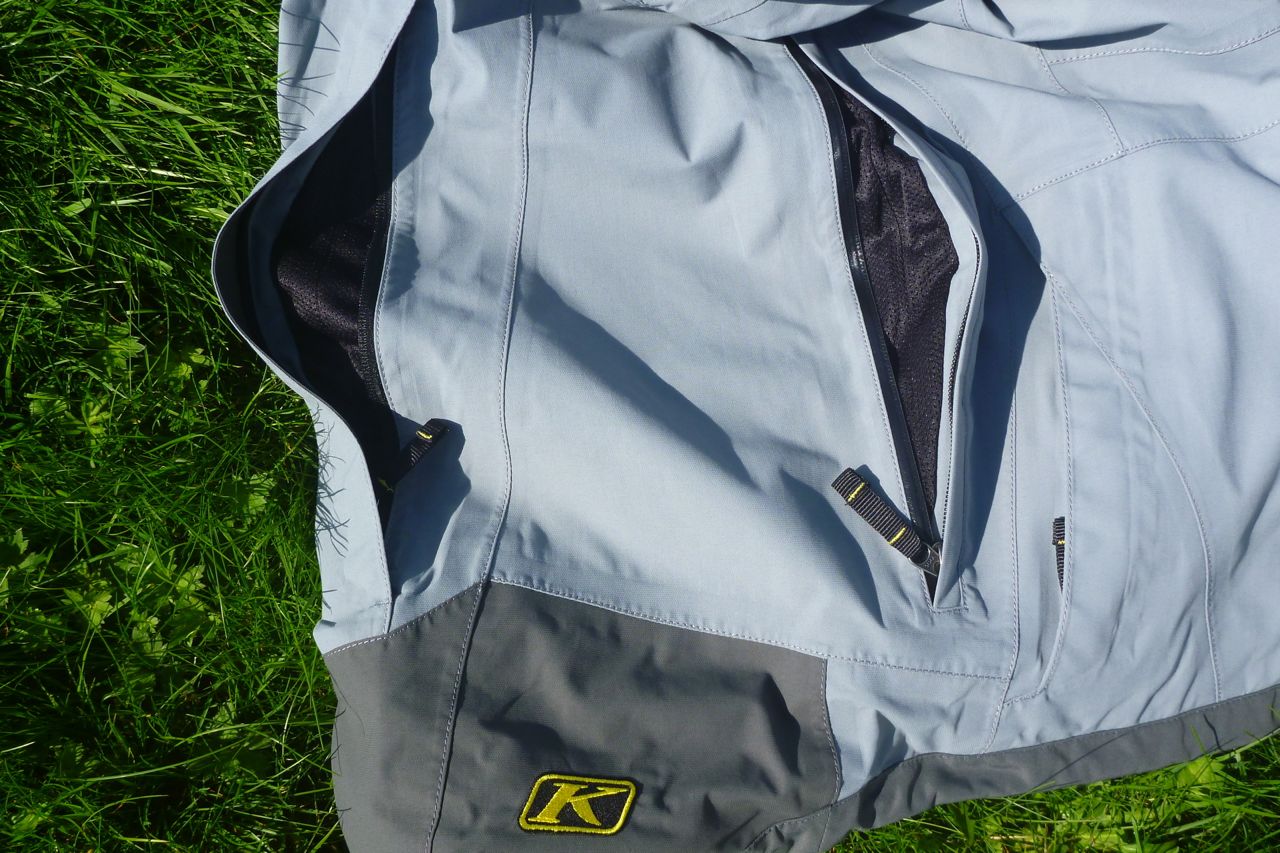
Vents The Overland’s vents have a superior arrangement to the DL and even other Klims: simple zip downs along the side but below the armpit; and matching vertical exhaust vents at the back which cunningly won’t get blocked by a daypack as the DL’s transverse back vent does. On any jacket, how all this venting deals with torrential rain remains to be seen, but on a rainy ride back from Amsterdam in 2016 I got home dry.
Adjustability Even with the back of neck cinch cord loosened right off, I found the collar a tight fit against the front of the throat when done right up. Down at the hem you’ve another cinch cord, but that won’t snug up well against the chill as well as a waist belt. That’s not the Overland’s style and anyway, you can use your own belt against the cold or use a daypack’s hip belt. I liked the single arm cinch below the elbow; with a snug fit there’s no need for two as on the DL – less is always better. Cuffs are velcro only, no room to tuck in gloves in, if that’s your thing.
Rainproof? Again, climate change has got to such a state that I’ve been riding near daily across three counties in winter for over a month and have dodged all rain clouds. A jacket, with four apertures and multiple zips isn’t like a submarine, no matter what they all claim. I got hours or rain riding a WR from Holland. There was a certain clamminess; but I was dry inside.
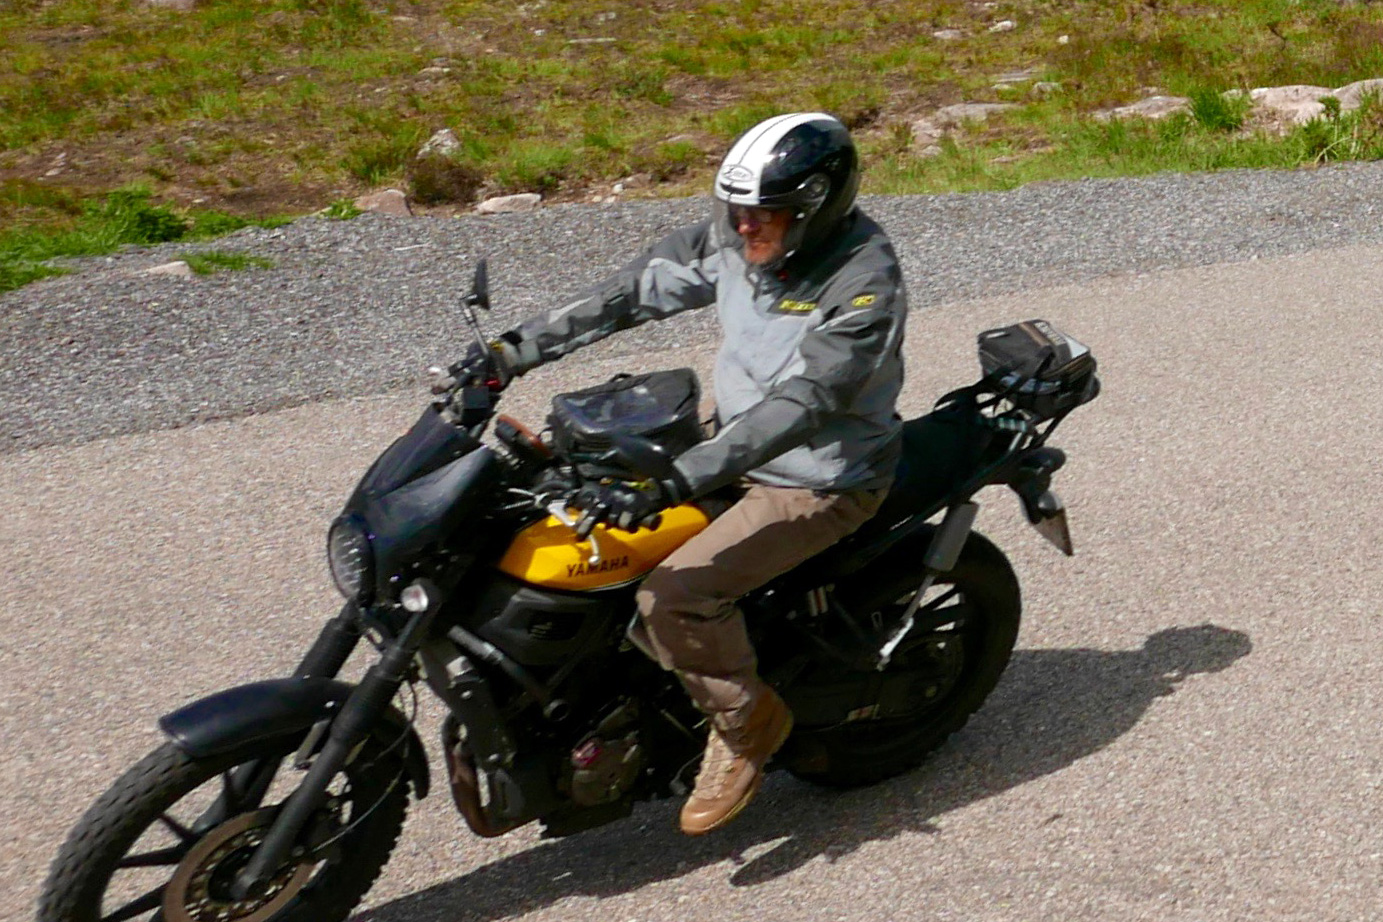
The Overland in a slick-looking and well-featured jacket that I enjoyed putting on more than the Darien Light, and would be my choice for nipping out on the bike or doing short, fly-in trips. It’s less overkill than the Badlands style as many here think. Overland may be a misleading name but it’s still Klim quality at a great price.
Update: A year in I’m liking the lightness and simplicity of my Overland. Just enough jacket to do the job with good vertical vents when it warms up. And with 50p of mesh, I’ve added some drop pockets to the insides (left) to make my Overland even more useful for overland travel where you end up with piles of documents you want to keep handy.
In 2017 the Klim dropped the Overland. Shame. The new-style Traverse (right) is similar but lacks armour and those arm cinch bands for a snug fit. Read my 2019 Travese review here (soon).