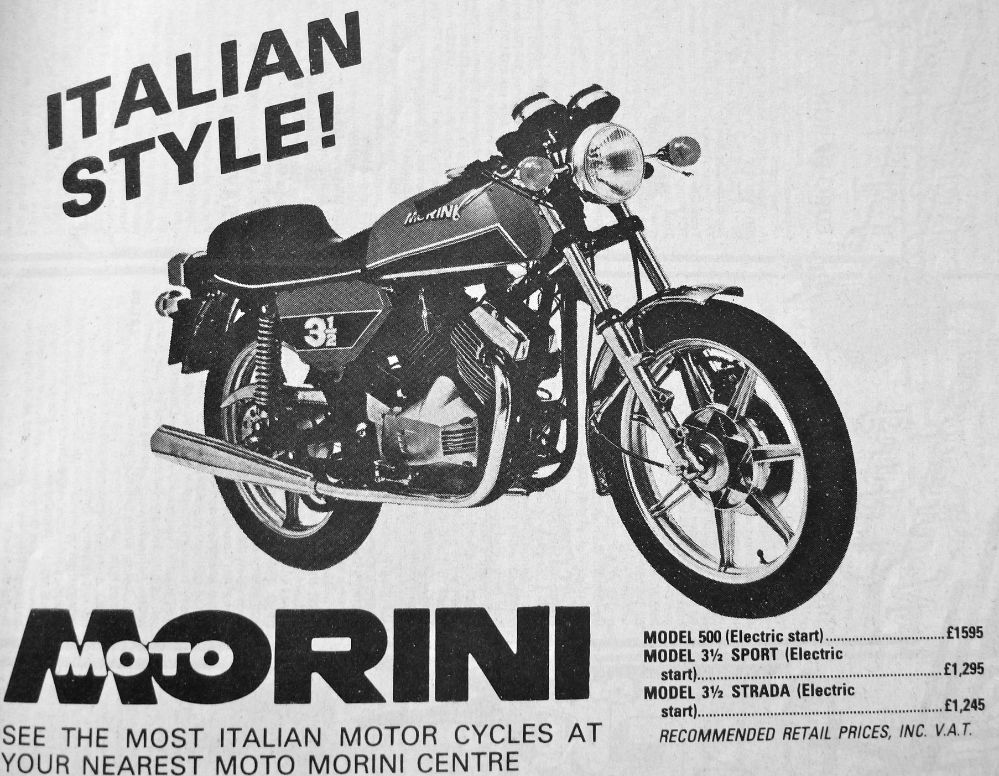
When I ‘started out on my motorcycle journey’ in the 1970s, Morini’s red and black, mag-wheeled, 3½ v-twin (right) was one of the coolest bikes no one rode. A mini Ducati 900SS for the price of a 750 Bonneville which many more of us actually bought. I haven’t seen a Morini since those days, but like so many classics, the ‘Fre’n’arf’ is supposed to be back one of these days, looks even better and probably runs a lot better too.
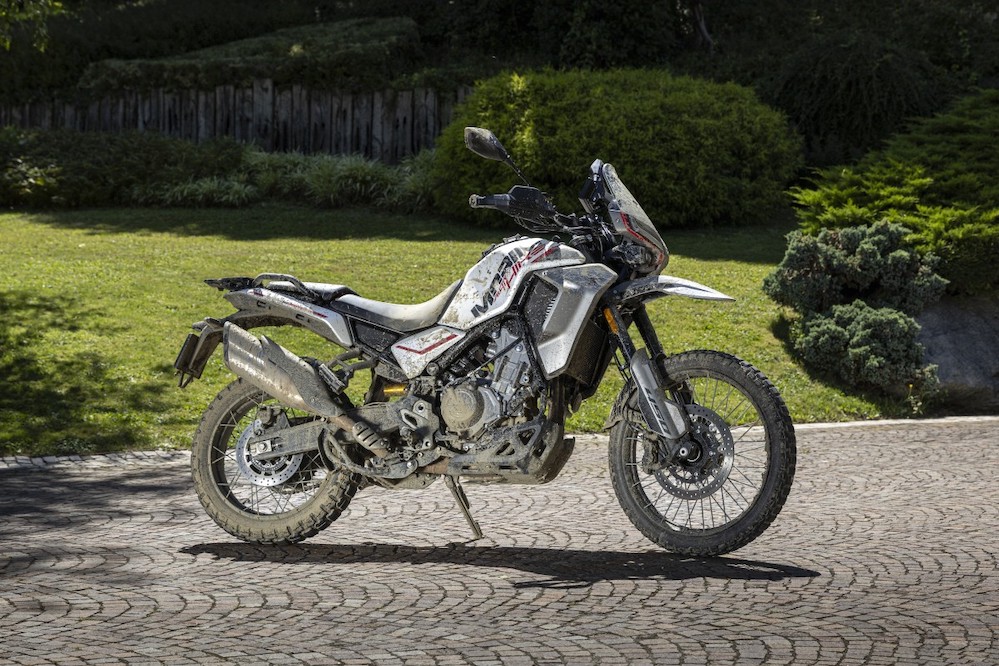
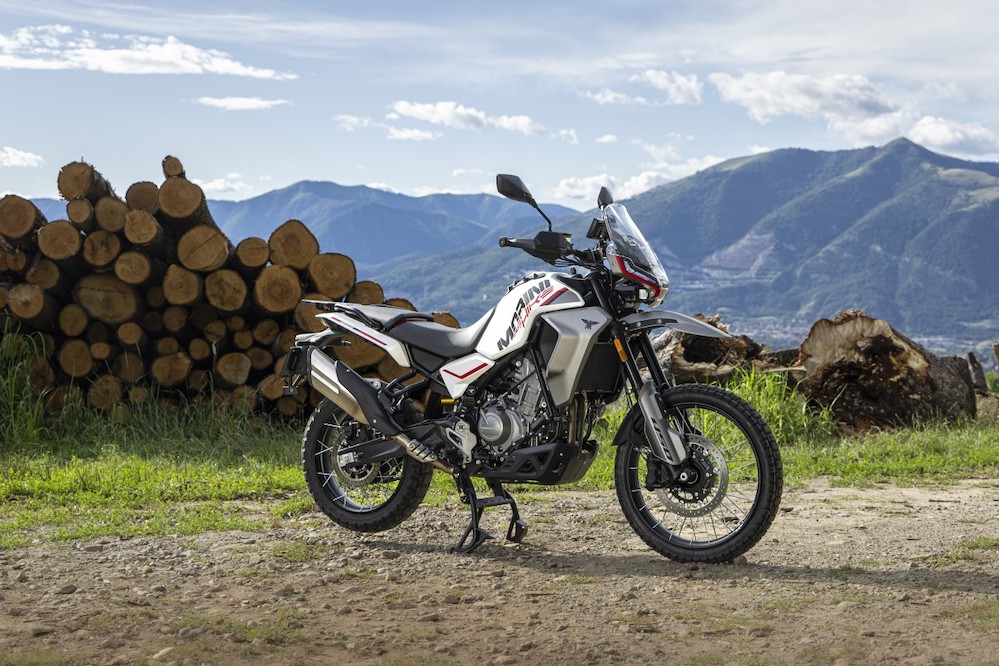
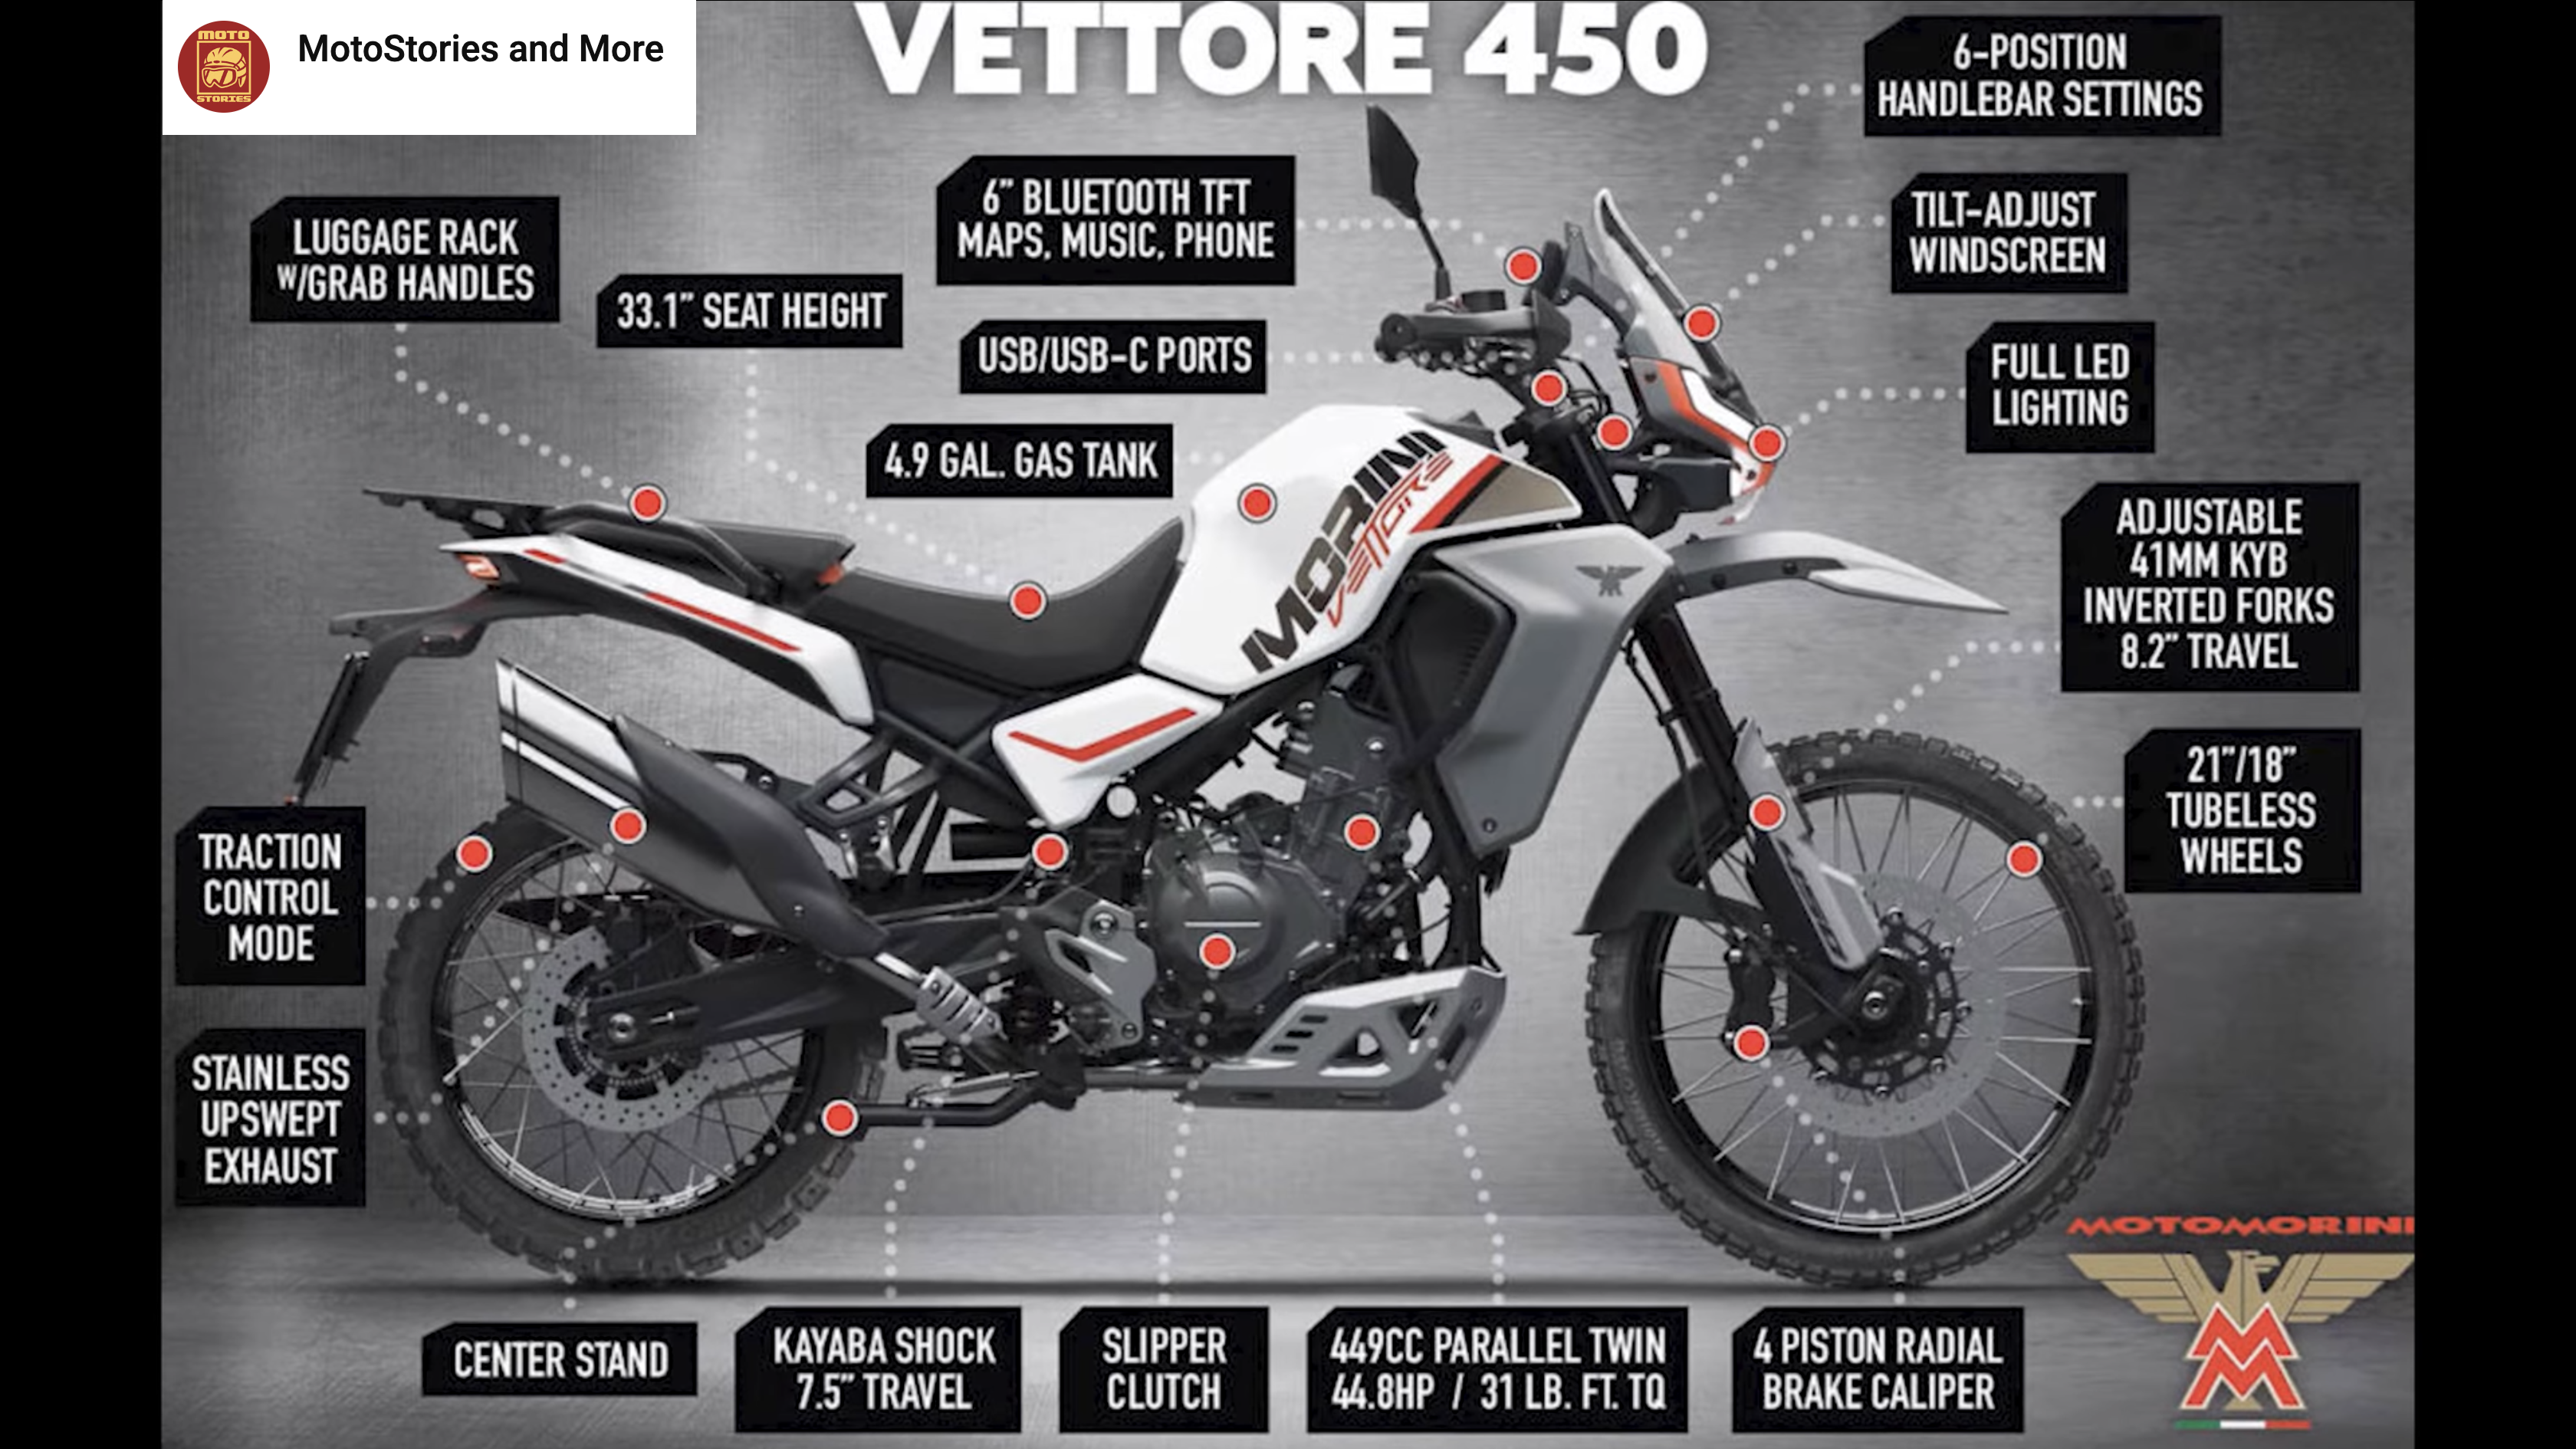
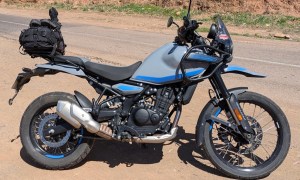
Chinese owned and manufactured since 2018, but designed and developed in Milan, out already and soon in the UK is Morini’s entry into the optimal 450cc travel bike segment, the Alltrhike 450. What a crippling neologism that looks like a typo or is more suited to a pair of trail shoes. In the US they’re calling it Vettore. Better. Why not just call it X-Cape 450, or even X-Cape 4½ to go with the X-Cape 700 and 1200 twins? In the UK the ‘All-Trike’ will cost just just £5300 for the up-spec, all-heated version.
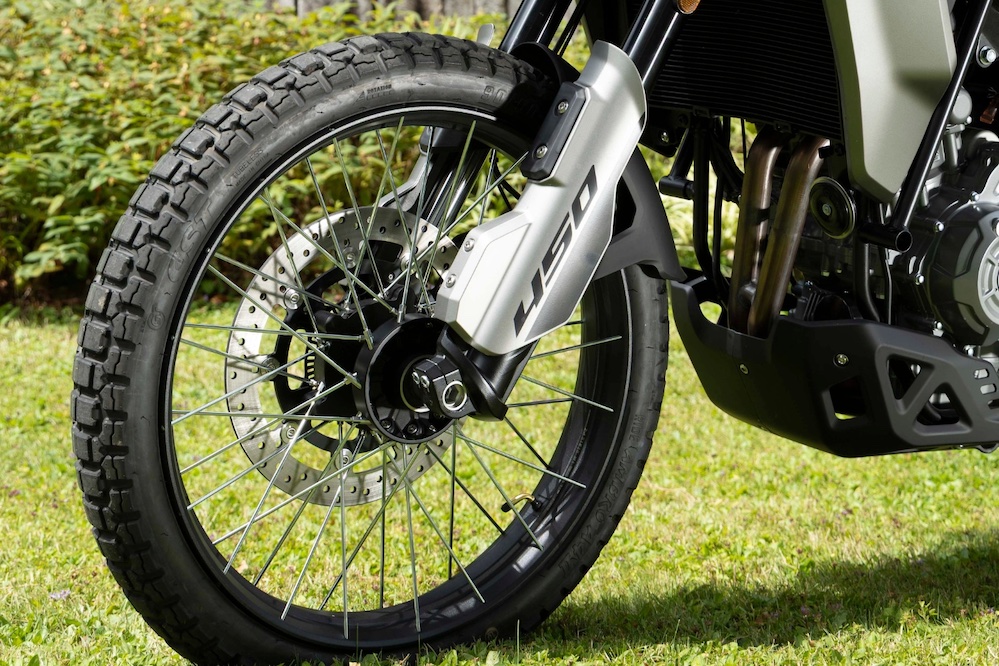
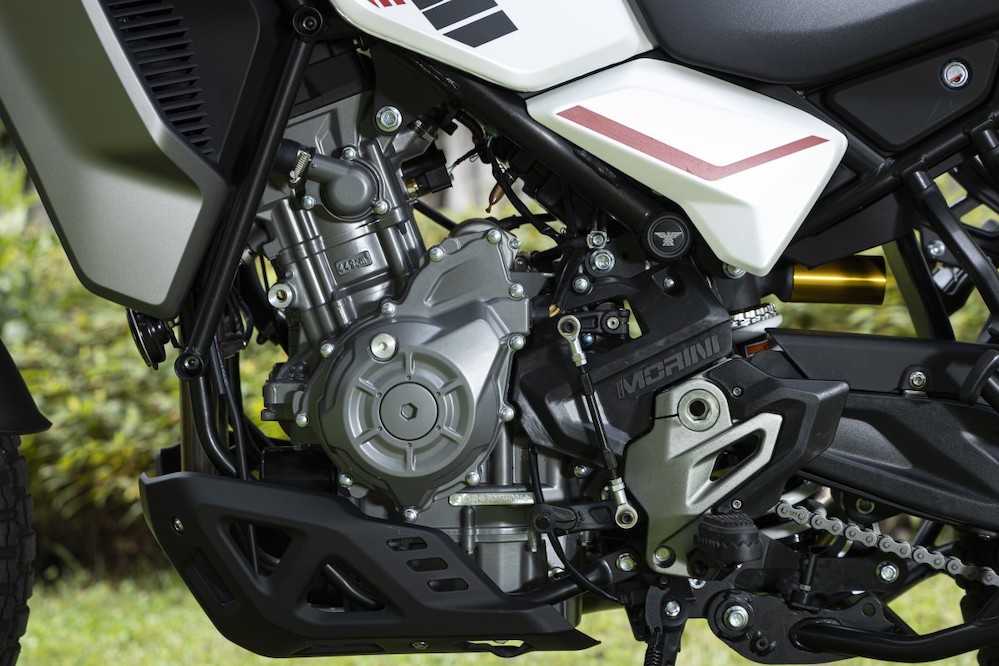
Underneath, it’s a CF Moto 450MT Look closely and you’ll see it’s actually based on the CF Moto 450 MT (left) which I ran from new a couple of years ago and liked very much. The wheels are the same spoked tubeless (overlooked in official specs). The 6-speed, 270° CF Moto motor is the same – another big plus, especially if they’ve ironed out the CF’s slightly annoying low-speed fuelling glitch. I’d also guess the frame, pipe, JJ brakes and KYB suspension are the same too. With such proven tech and engineering, that’s all a good thing which will help the Morini hit the ground in third. I got a little excited when I saw the weight of 170kg listed and then parroted around. Digging deeper reveals a more realistic 190kg dry. By the time you brim the 18.5-litre tank, that’ll be 204kg wet, 7kg more than my old CB500X, and not far off an XT700. I wish CF or Morini or anyone had been bold to design a pannier tank, like the KTM 790/890. Nearly 20 litres is a lot of weight up high.
Morini Alltrhike / Vettore 450 vs CF Moto 450MTIbex
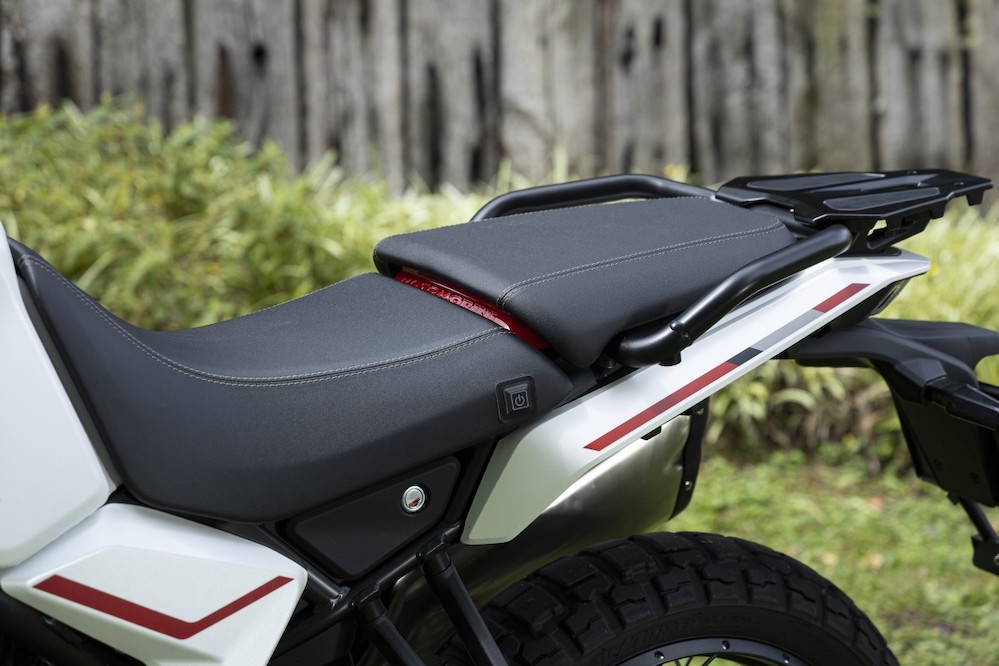
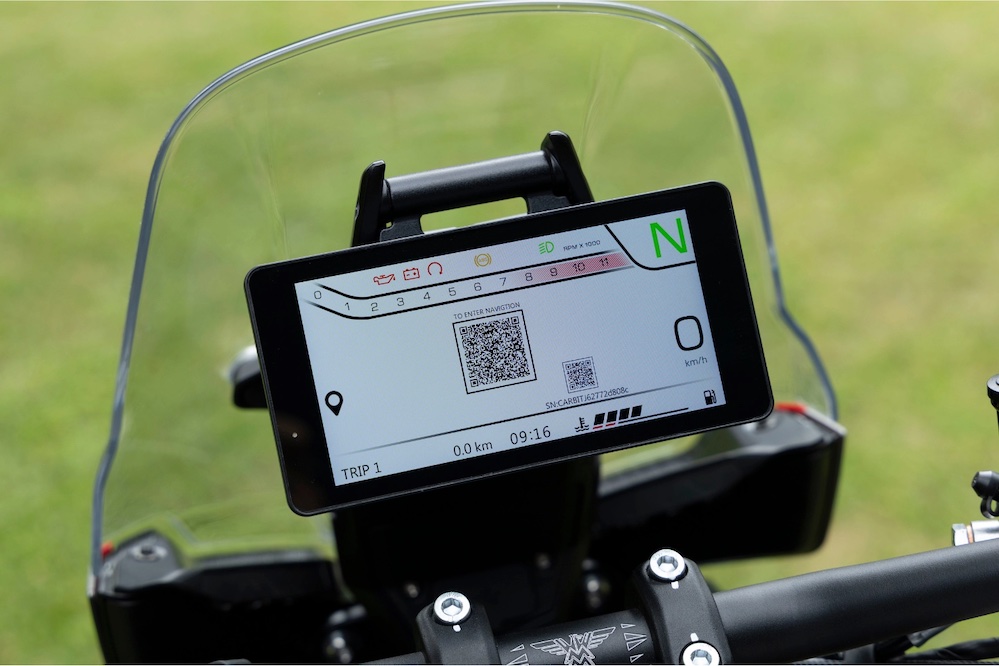
Slimmer tank area, despite being larger volume Snatchy low-speed fuelling sorted? Rear seat drops down to make a smoothish bench seat Centre stand Longer service intervals Lots of heating Phone-mirrored Carbit Ride nav on display Cheaper than CF Moto in UK Same proven engine and TL wheels Three-way adjustable handlebar and even foot pegs
Alltrhike is not a catchy name Heavier than the already top-heavy CF Screen pivots forward and back, not up and down Not bad looking but CF Moto looks better
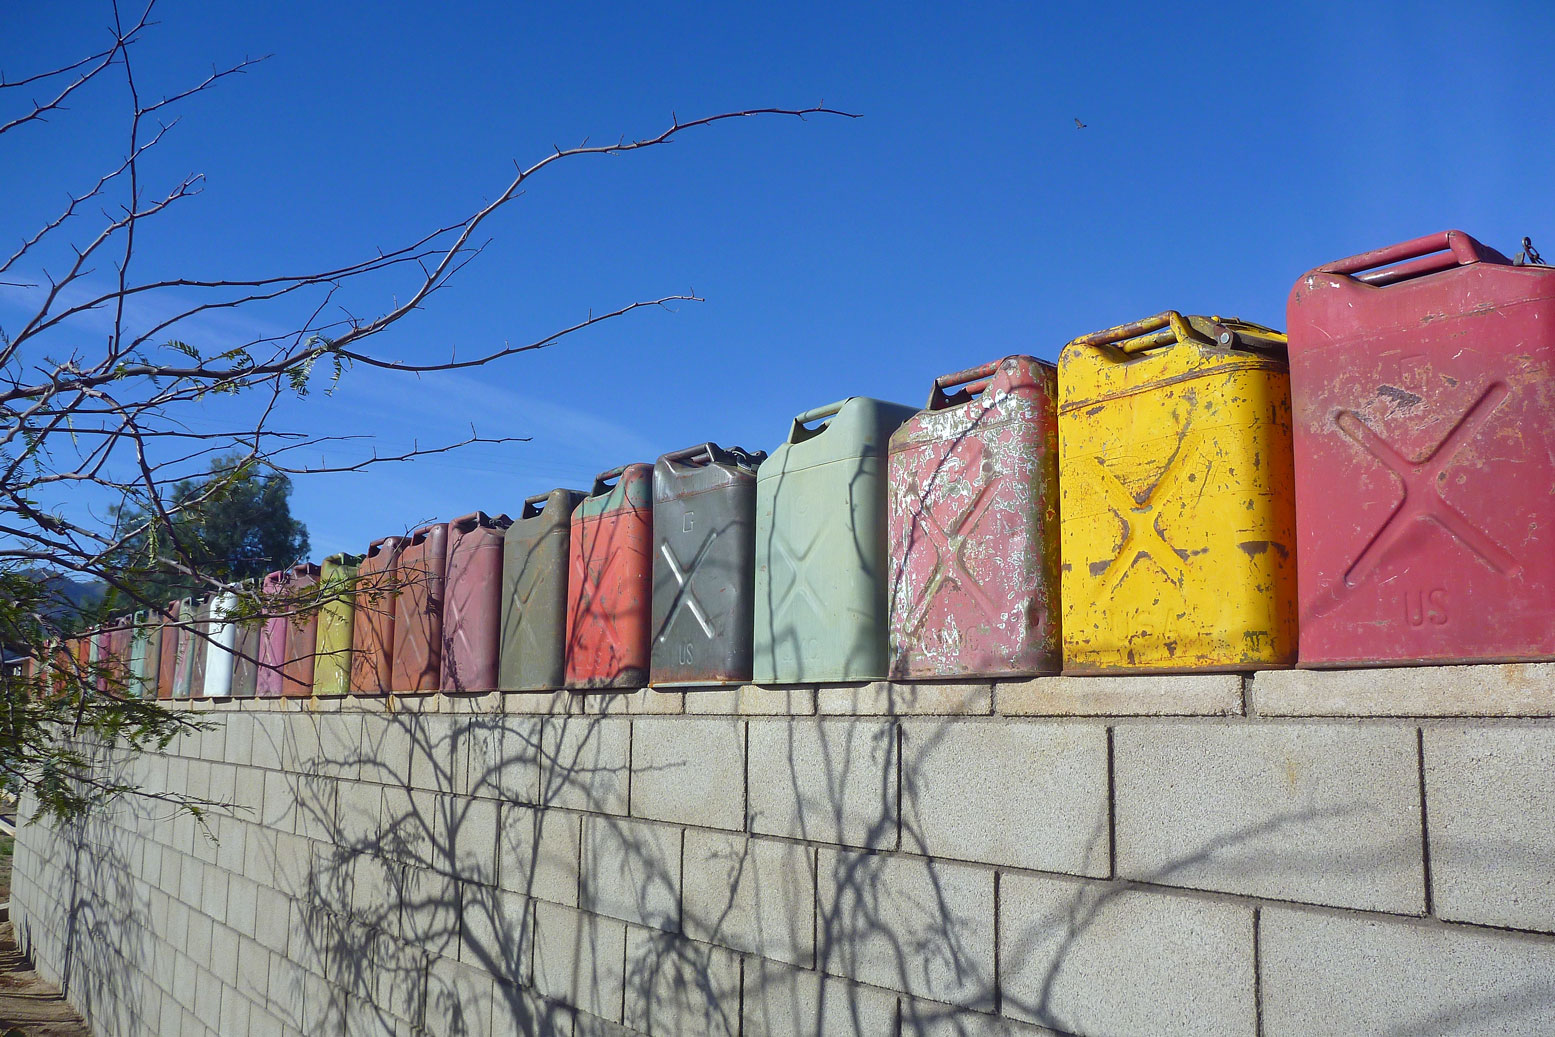
Based on nothing more than online data, below is a comparison table for the Morini Alltrhike / Vettore, CF Moto 450 and the nearly here BMW F450GS. The BMW may end up a lot more than even the base £7000, but if the wet weight of 178kgincluding 14 litres is to be believed, that’s a ~full jerrican less than the Chinese 450s. And you can be sure in a year there’ll be a F450GS Adventure with a 21-inch front, bigger tank and more suspension travel.
When I think back to my early travels, the idea of doing anything more than just jacking up the shock to carry the load never occurred to me. With suspension, it has to be pretty terrible for you to notice, and for that to happen – or for good suspension to show it’s worth – you need to be either riding pretty fast, or hammering over rough terrain. If you don’t do much of either or don’t have up to a grand to spare (or have good, fully adjustable forks) it’s not worth it. But for under £100 it is possible to improve a non-adjustable fork’s damping action. And my Serow could do with some of that.
Can’t be bothered to read another word, but still curious? Watch the 12-min vid at the bottom
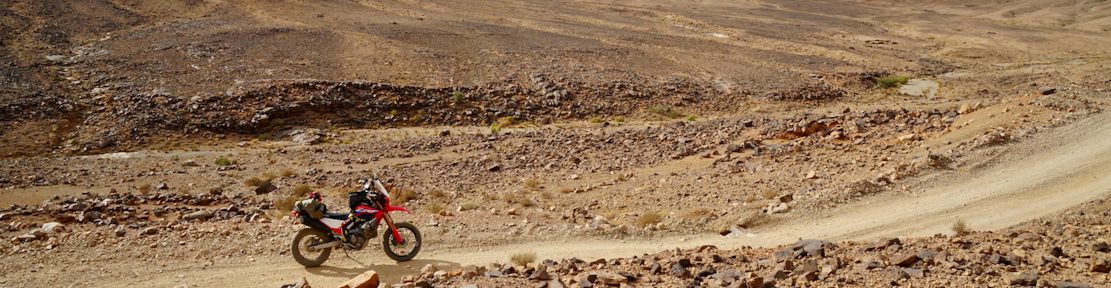
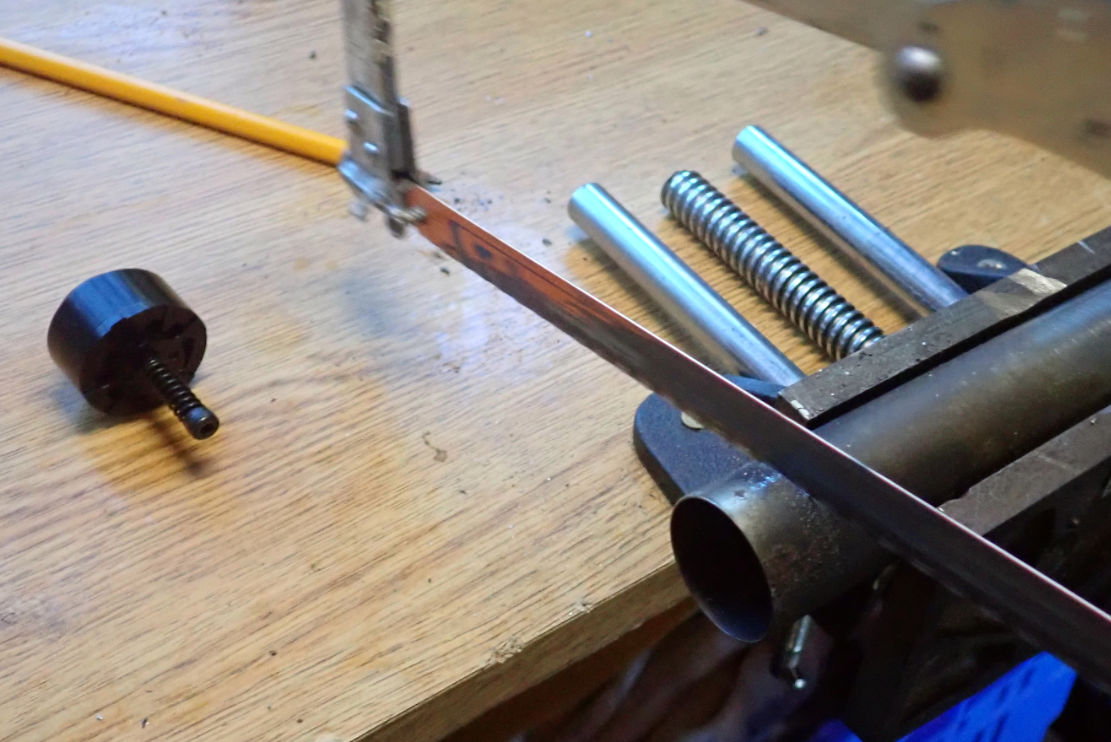
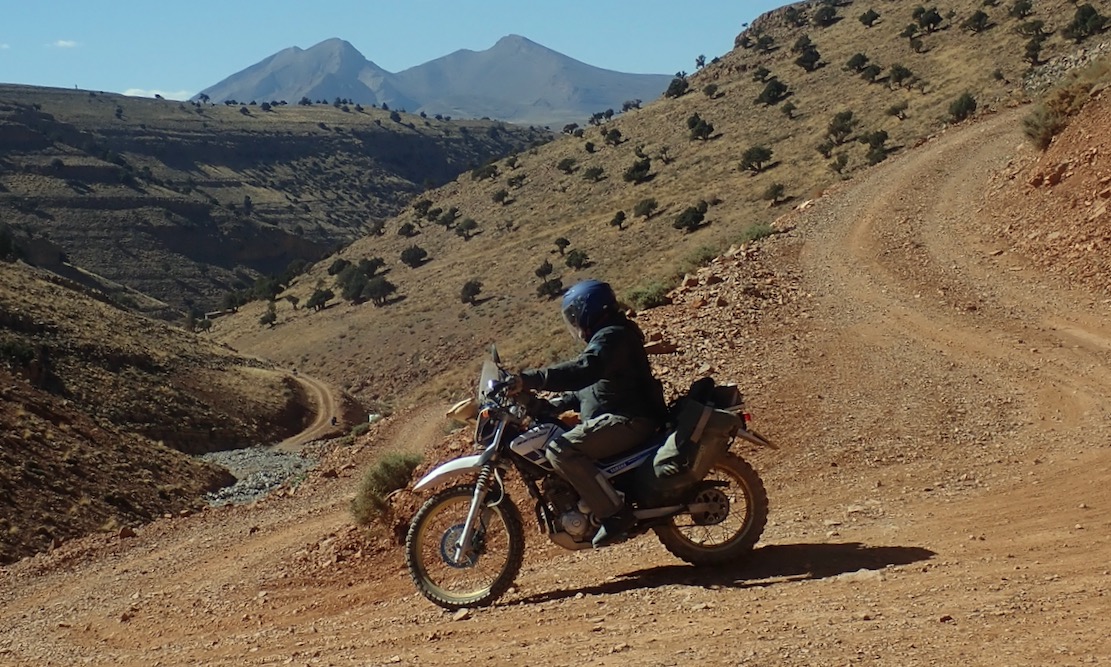
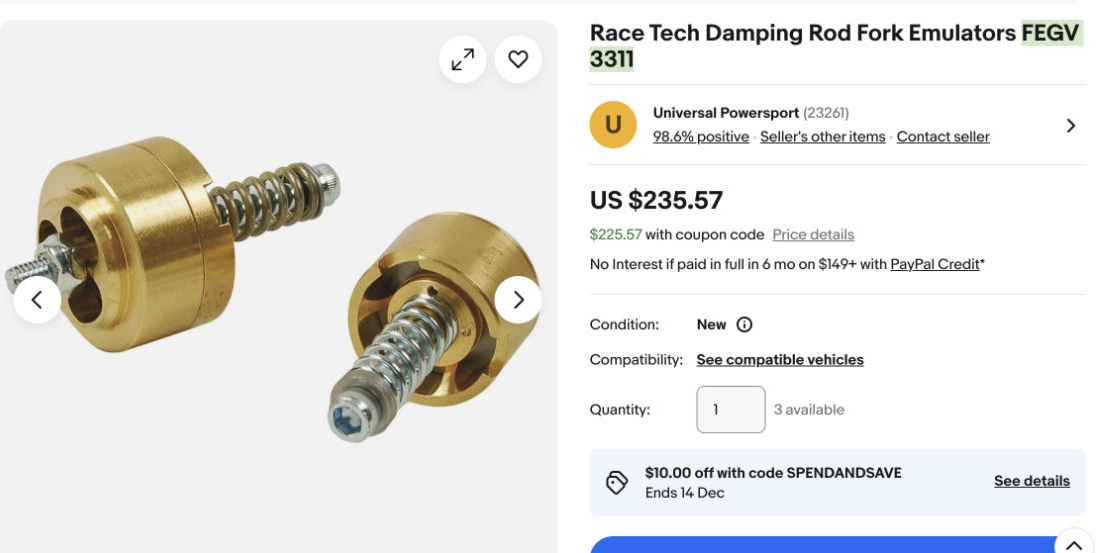
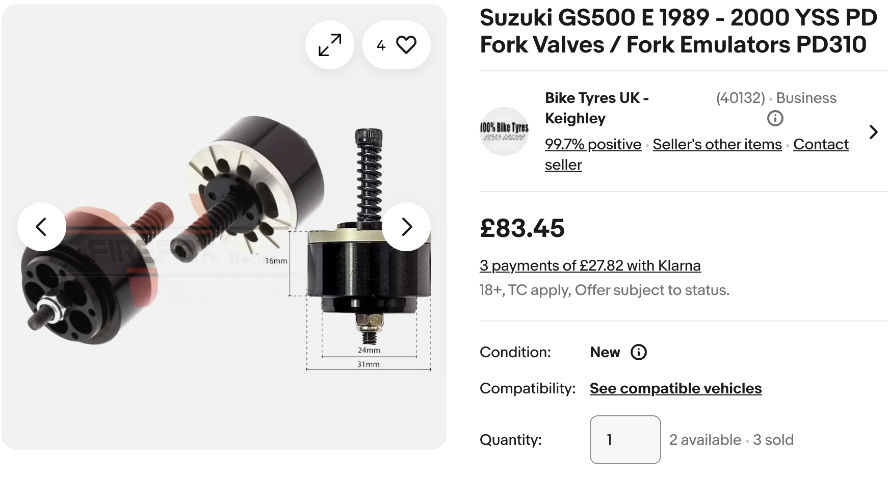
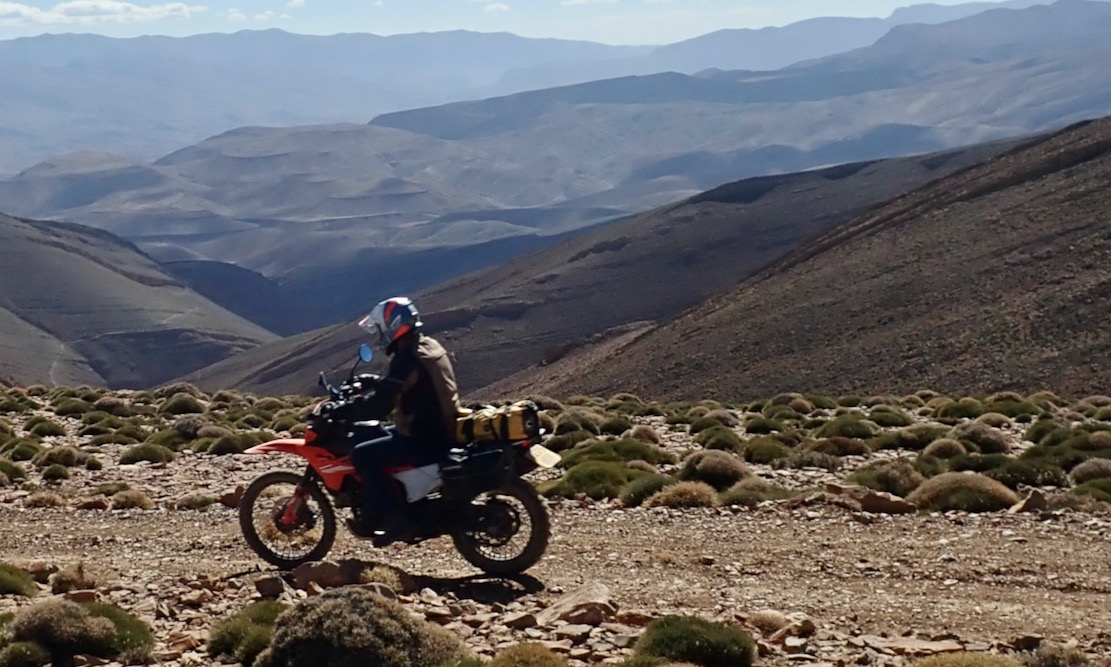
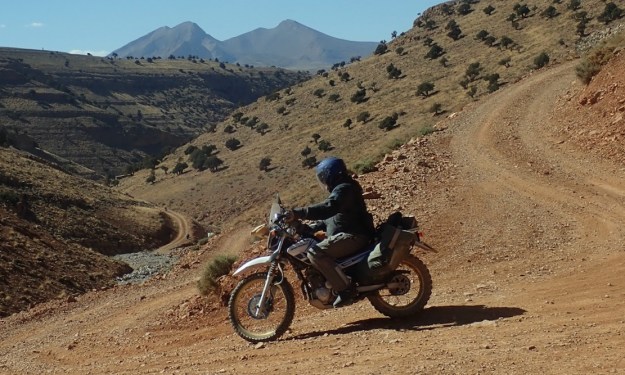
On our H.A.T recce in Morocco last November (left), right off the bat the Serow’s front end was all over the place on stony climbs. Notably worse than other bikes I’d ridden lately. It never bottomed out and the back end wasn’t sagging, so I presumed it was a combination of too stiff front tyre and negligible damping, that inscrutable function which controls spring rebound. ‘Spend a grand plus taxes on a full, US-imported Cogent front and rear Serow set up‘ they said. ‘Night and day or your money back!’ Cogent also do a fork kit with drop in emulator valves, replacement springs plus oil for around $400. I didn’t need a new spring or oil, only valves, just to end up with better, but still unadjustable forks. Next stop were Race Tech Gold Valves for $230 (FEGV 3311). Still quite a lot with import tax and all, and unlike Cogent, you need to drill extra holes in your damper rods (a lot of added work). You’ll find much online chat about the pros and cons of Cogent vs Race Tech emulators. Like here. Long story short, widely sold in the UK YSS also do a range of emulator valves for just 90 quid (below). They’re not gold, and I’d need to drill the rods but as I needed a new fork seal anyway, it seemed worth a shot to DIY, even though I’d never taken forks apart before.
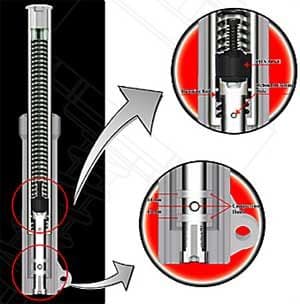
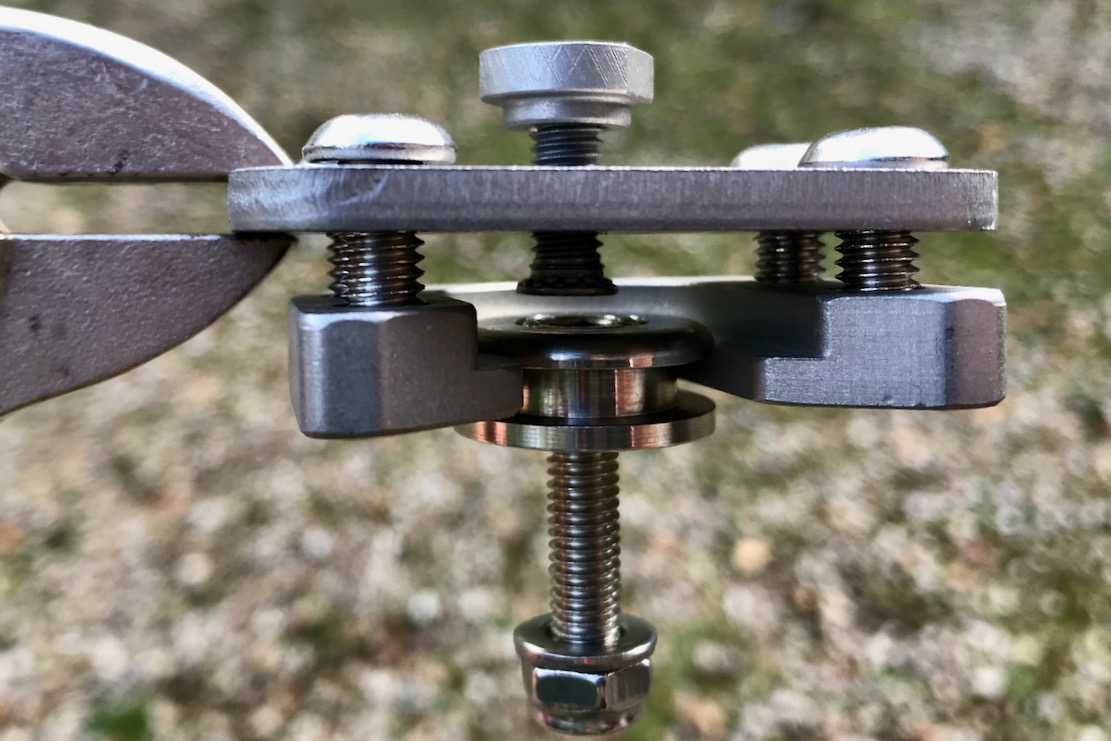
I’d heard of emulators but wasn’t really sure what they were. Turns out they’re easily fitted valves which enable conventional, archaic damper rod forks to ’emulate’ supposedly superior cartridge forks (Cart-what? For another time). The valve (above left) is a preload adjustable spring loaded plunger which sits between the fork’s fixed damper rod and the spring (right). As forks compress, oil is pushed through the valve, opening the sprung valve which is otherwise closed. Oil flows through progressively relative to force, compared to static conventional damping rods with just a couple of drilled holes. The vid below made similar Race Tech installation on an XT500 look relatively easy. If only. You need a set matching the internal diameter of your fork tube. For a Serow it wasn’t possible to find that info online, and guessing from the fork tube outer ø is sketchy (I now know…). The best way to verify your fork tube’s internal ø is to undo a fork cap, lift out the spacer/spring, and measure ID with some verniers. On the Serow forkID was ~30mm – not my 31mm estimate. The 31s got sent back for exchange but never made it. But by chance I found some next-size-down YSS 29s used on ebay for half price. Weeks passed by for all these fascinating events to work themselves out.
If it was only as easy as the slick vid below with a well lit and superbly equipped workshop and dinky music tinkling in the background. Whip out the springs, tip out the effortlessly unscrewed rod, pop in the new valves and reverse the rest before damping progressively into the sunset. My damper rods didn’t slip out nicely (and wouldn’t have easily dropped back in, either) so the entire fork leg needed to be disassembled. Unless using drop-in Cogent valves, you need to get your hands on the damper rod because additional holes must be drilled for oil to pass unfettered up to the new emulator valve. A hex bolt at the base of the fork secures the damper rod inside the lower fork. They’re notoriously tricky to remove because it’s like trying to undo a bolt from an unseen uncaptive nut without any means of restraining the nut.
More tools to buy. Sigh…
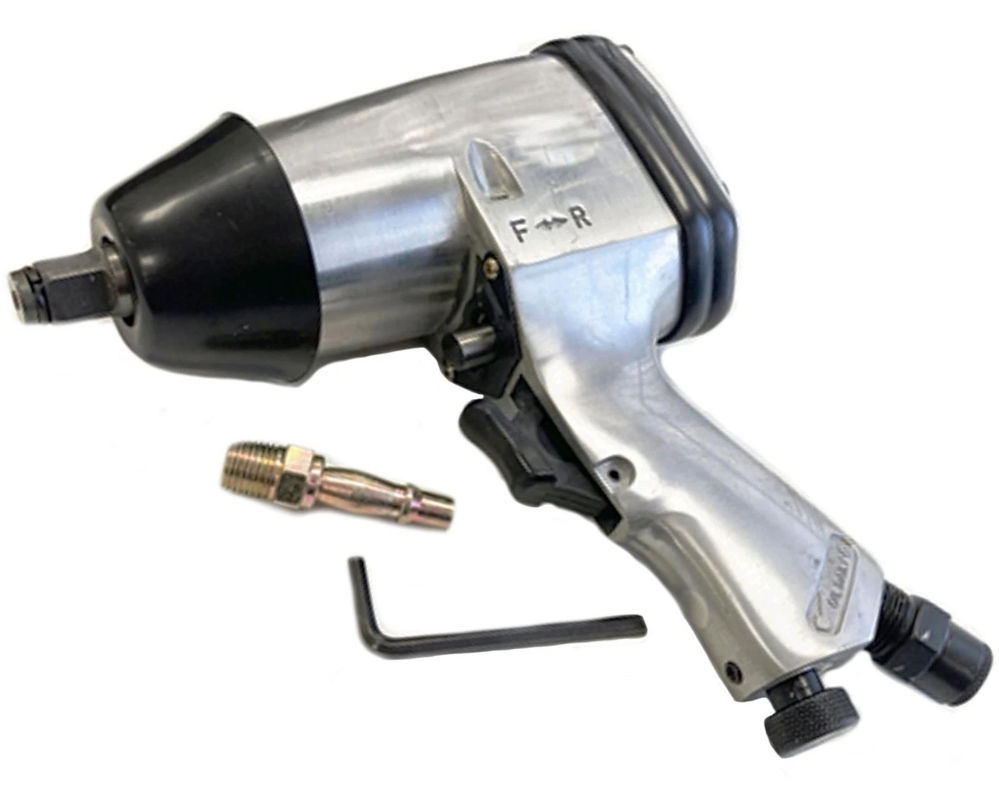
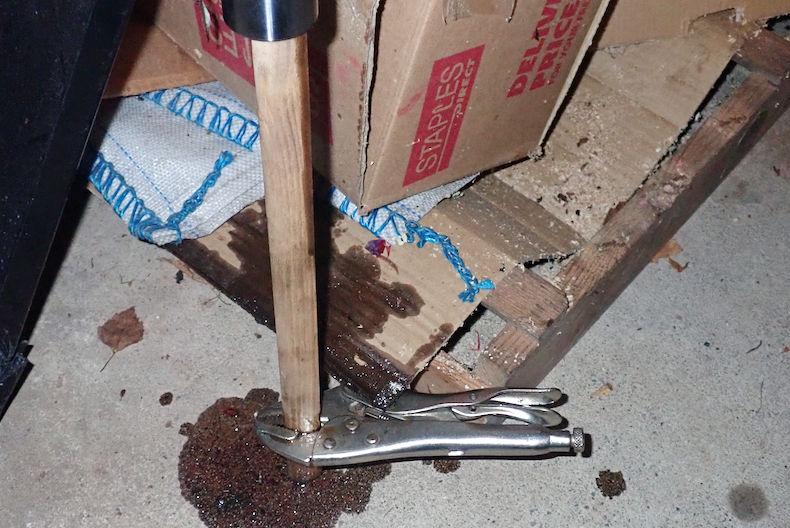
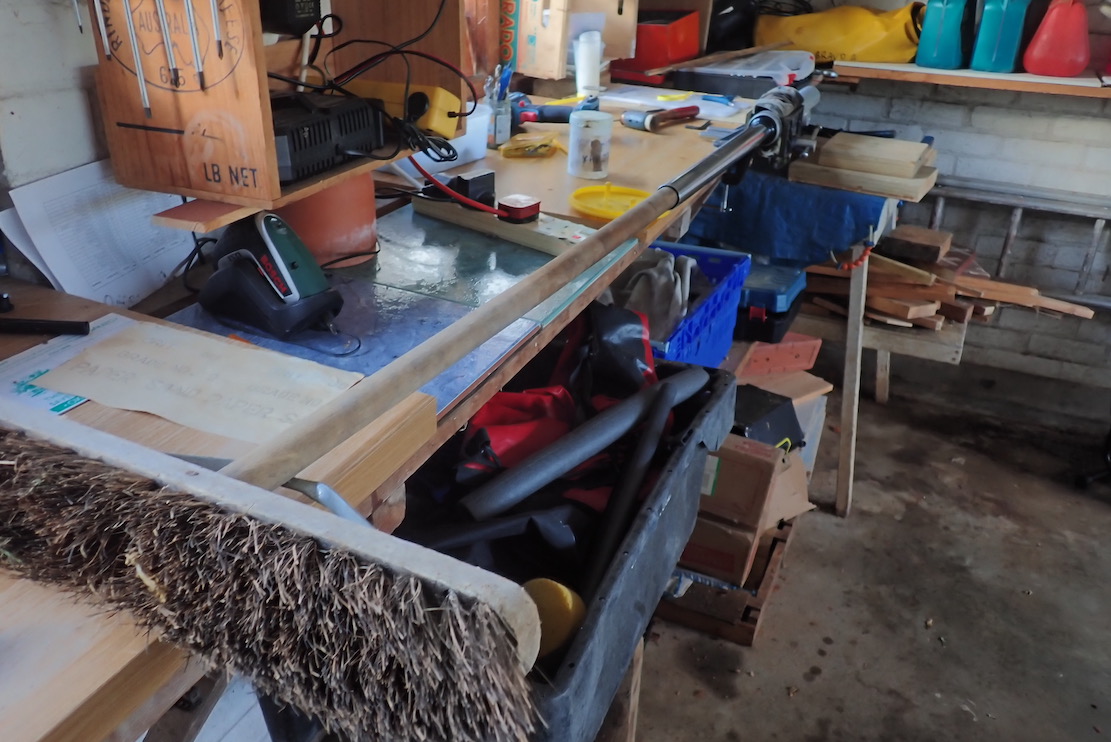
‘Get a rattle gun’ I was advised (left; pneumatic impact driver), to ‘shock’ the allen bolt from the damper rod to which it’s been seized for the last 15 years. I have an 80-bar compressor tank and found a 25 quid rattler on ebay – ker-ching. But air gun shock therapy wasn’t working. The rod was spinning inside – as you’d expect. A ha, I thought, I will ram a whittled stick in the other end to stop the rod spinning, lock it off with some Moles (below left), then apply rattle. That worked – eventually, but on reassembly it didn’t, so I deployed the ‘broom trick’ I’d seen mentioned online. Same idea: slide it down the fork tube to press against the damper rod top, then pull the trigger. Long arms or step ladder needed. All this seemed a bit less faff than entirely reassembling the fork (as suggested in the vid) to add tension to the rod for removal/refitting.
Jammed whittle stick – can workBroom handle pressure – better
Much faffing later (have I mentioned faffing yet?) I had the forks in bits by which time I realised I could have fitted the new fork seal myself, not at the LBS.
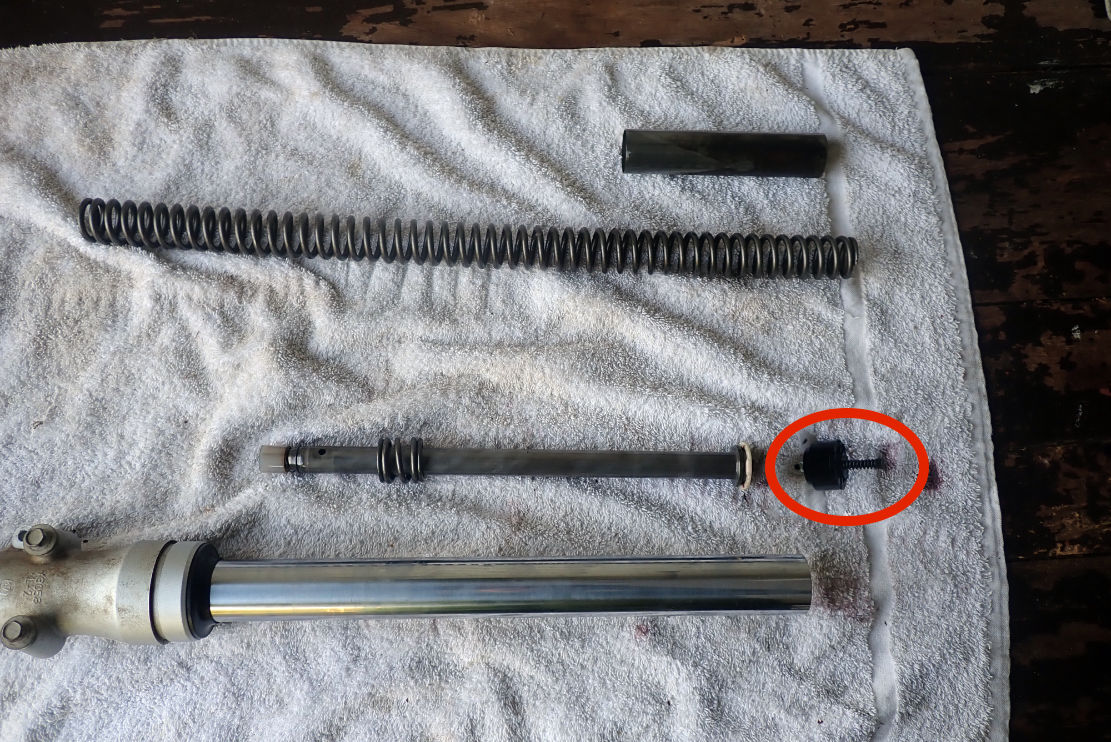
Emulator ringed alongside damper rod prior to drilling. Fork spring spacer up top
To maintain your fork spring effective length & vpreload (FSEL&P) and not void your insurance, you need to saw off the effective height of the valve’s body – about an inch – from the spacer tubes so it all fits back together again (below). A fairly easy job even I’d find hard to mess up.
Next job was drilling several extra flow holes in the damper rods which normally have just a couple near the bottom. Like much of the Serow, this is 1970s technology, maybe older, but I suppose it worked well enough. Additional holes allow the oil to move up to the sprung emulator valve which controls the variable flow. Another thing I learned: on Serow forks the drilled rods pass through a close-fitting nylon collar at some stage of reassembly, so any protruding burrs left over from the drilling will lock the fork action. Grind the rods smooth to slide through the collar smoothly, then clean off any remaining swarf with solvent. By now Christmas had come and gone, so had New Year and there were already chocolate eggs in the shops and daffs blooming. But I was getting close and the forks now slid smoothy in and out, like they should. I did the ‘broom trick’ as mentioned above to tighten the rods back onto the fork leg with the air gun, and was so amazed it worked first time, I stopped right there and took the rest of the day off before another cock up kicked me in the nuts.
“Refitting is the reverse sequence to removal.” to quote M Haynes, and amazingly, only one bolt had escaped in the weeks it took to complete a one-day task. But let’s snatch a positive from this elongated fiasco (above ;-): I’d leaned all about damper rod fork internals. Having avoided fork disassembly all these decades, I can now see they’re not so complicated, at least old-style RWU forks. USDs, who knows, but it’s said that, apart from fork seal weepage, they’re more complicated inside but are often higher spec and have adjustment, so emulation maybe not needed. Amazingly, a simple circlip appears to hold the two parts of a leg together. Undo that and whack the two sections apart like a Christmas cracker to get to the seal or damper rod. Along with rod loosening, refitting a seal without damage and without the correct slide tool is probably the hardest job. Deciding on fork oil weight and volume/height is another opportunity to tie yourself in knots of self doubt. I found several values online for the ‘XT250’ until I realised just measure the volume of watery, brown swill which poured out of the non-leaky leg – 350cc. On reassembly I poured in just 300cc of fresh 10W, thinking it’d be easier to add more if something felt very off, rather than try and suck some out. The damper and emulator valve is surely be submerged in the oil full time. I think oil volume is more to do with how much air remains in the forks and it’s effect on compression. Less air = more compression.
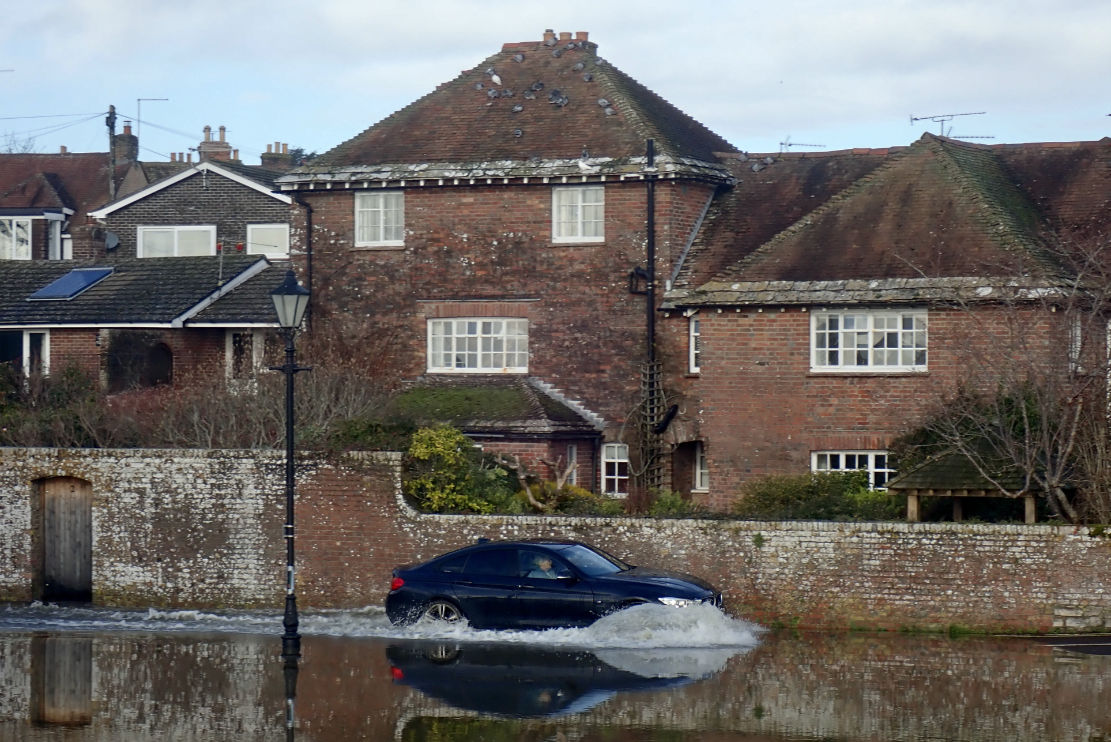
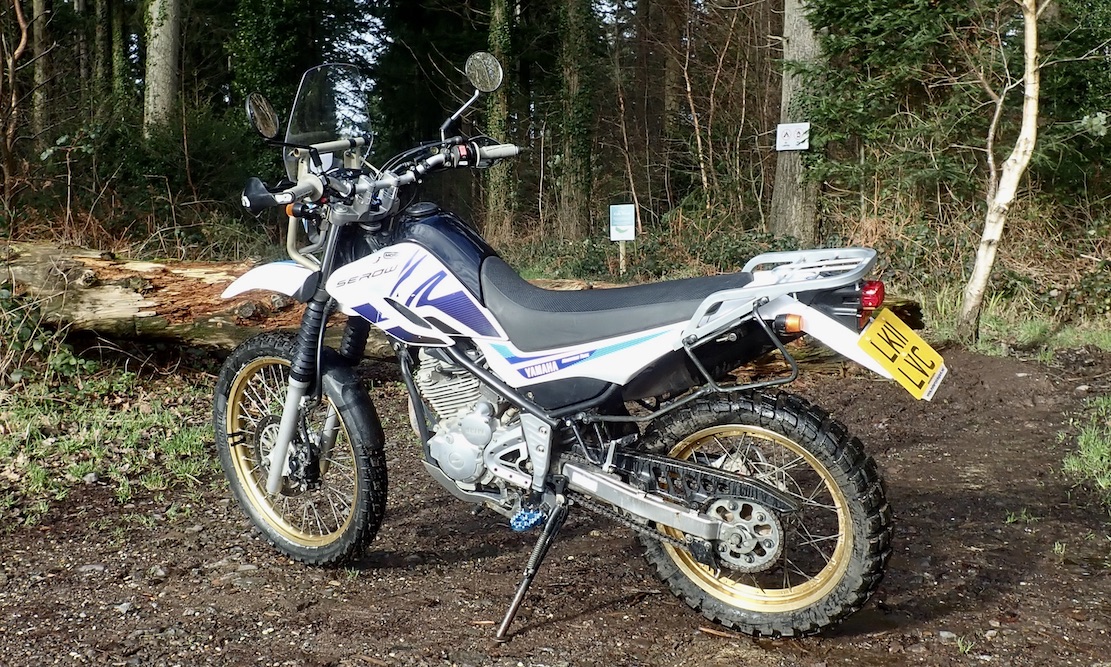
By the time I reached this climactic peak of enlightenment, the Serow’s previous owner got in touch, enquiring whether I knew anyone with a Serow Touring for sale. Someone must have told her I was a serial bike quickshifter! With Morocco snowed out and me elsewhere this winter, a deal was made and a date was set. I topped up the leaky rear tubeless tyre and took the Serow out for one last ride along Purbeck’s flooded lanes. The forks felt the same – fine on normal roads, as before. No great surprise. I’d need to find a rocky climb to see if the front responded any better, but right now what few local lanes I knew around here where probably knee-deep in mud or carpets of rotting leaf sludge. On these tyres? I don’t think so.
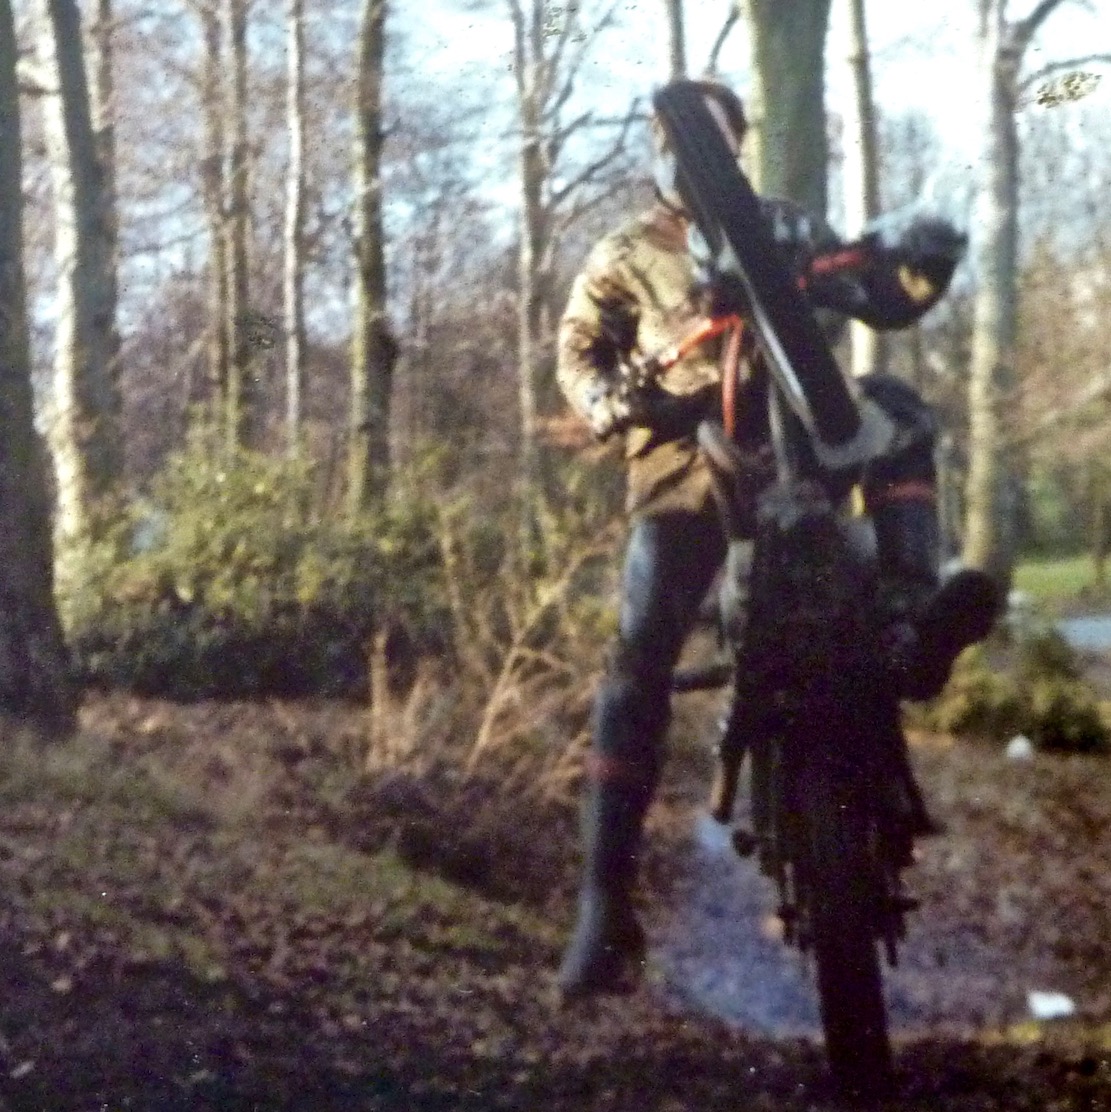
So I puttered merrily around the Purbeck Hills I usually cycle in the summer and tried to think what could replace the agreeable Serow. As I did so, the sweet aroma of mud thrown up onto the hot pipe took me right back to my earliest days dicking about on Surrey wastelands with ratty trail bikes (left). What trail bike was as light, low saddled, semi-tubeless, economical, started on the button and came with racks and a screen? Probably my CRF300L a couple of bikes back, but look at the huge amount of spending and work it required to reach that stage. I guess that’s why these old Serows hold their value.
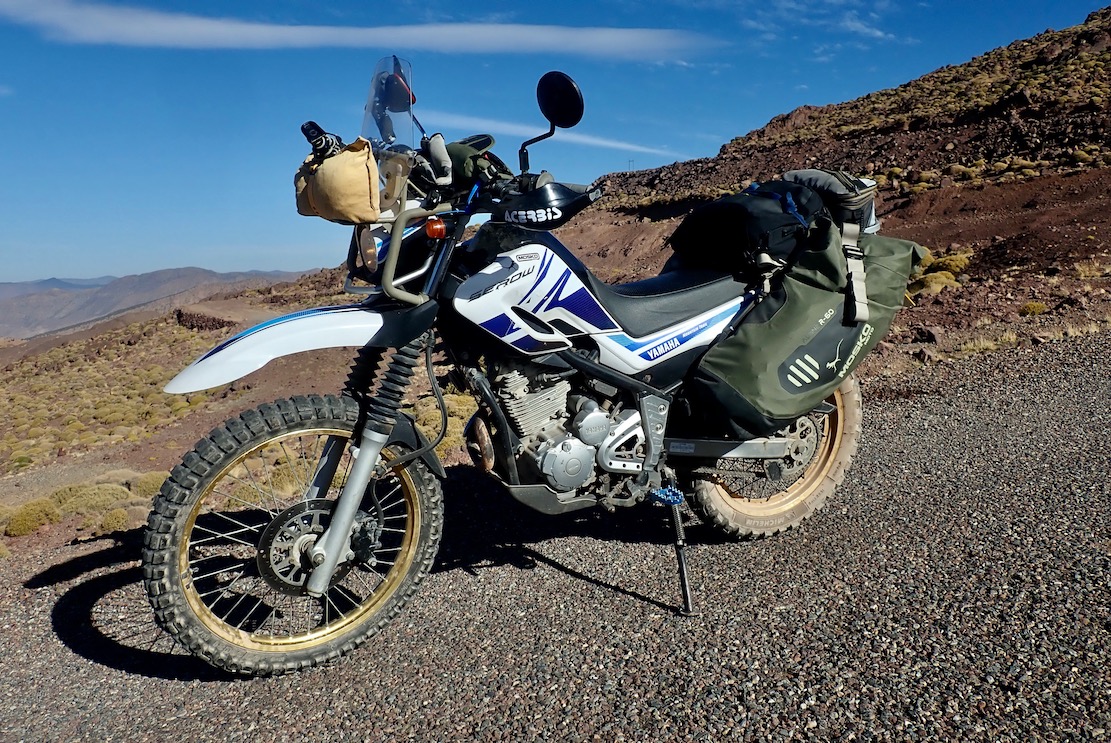
• Economy: often over 100mpg so 300km range from the 9.3-litre tank • 19hp was never really an issue, even at 11,000′ (when it became 12hp) • Looks good • As light as you’ll get for a regular trail bike • Windscreen frame enabled near eye-level Garmin mounting which made a difference • Came well equipped with racking and TL rear wheel • Seat is low • Starts and fuels with no fuss whatsoever • No vibration through bars or pegs • Mosko bags did the job unobtrusively
• Something was wrong with the front end • I’m too big for this bike and couldn’t stand comfortably (common issue) • Seat (or pants) need added padding • Some days the TL rear tyre lost air, some it didn’t • Ultra basic and barely legible LCD display • Bigger footpegs needed a longer shifter with big boots/feet • Front TL Kenda Big Block too stiff for this light bike
Review On reflection, I was a bit slack preparing my Serow. It ticked so many boxes and was a ‘XT’ after all, I assumed it would do the job, like most XTs do. But after 10 days on the High Atlas Traverse (H.A.T) I can see how it could be improved for off roading. Ascending the first dirt track – one I’ve done many times on many bikes – I could feel something was wrong. The front end flapped around rather than tracked straight like the Him 450 I last rode. It took a while to work out it was probably a combination of too stiff Kenda TL tyre at too high psi, plus probably what’s left of decade-old fork oil.
They say 250 Serow forks in particular are not so hot, but I was fooled by them being firm (they never bottomed out). They also say a $400 Cogent spring, oil and valve kit fixes that and – as a Serow owner I know will affirm – add their $800 shock and you’re sorted.
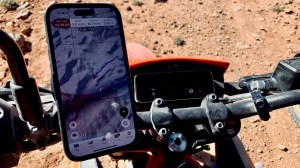
ScreenshotScreenshot
I now see RaceTech (also in the US) sell just the cartridge emulating valves (left) for around $230 + all the usuals, while in the UK Brooks sell similar Thai YSS valves for £84. I’ve read of these emulators without actually understanding exactly how they work but after watching this RT installation vid, I get it. Seeing as the forks are apart for a new seal and gaiter, I gave the YSS valves a shot. Back in Morocco, even once the front tyre was dropped to 19psi, a lot of energy was spent keeping this thing on line on the steep, loose climbs of the H.A.T. Luckily, minimal weight and the easy-going motor producing its own ‘traction control’ made this possible. And elsewhere the Serow was fine. I have to say the rationalising above still sounds a bit thin. I’m sure I’ve ridden ill-damped and poorly tyred bikes before, but something – maybe rearward weight distribution or my weight overall? – was off, though I was nowhere near the 160kg max payload stated in the manual. I see one bloke fitted an ebay steering damper to his Serow. They do say pricey off-road dampers like the Scott are enhancements rather than there to disguise unstable steering. I dismissed the notion that the weight of the hefty front rack and screen were an issue (that wrapped cloth bundle below is only a 500g bike cover, fyi). Really, it’s got to be a grand of Cogent springing that transforms the Serow – just like a grand’s worth on the CRF 300L did the same.
Sorted, carb’d TTR350 was dynamically loads better but ‘only’ did 75mpg, and you can see how much taller it is
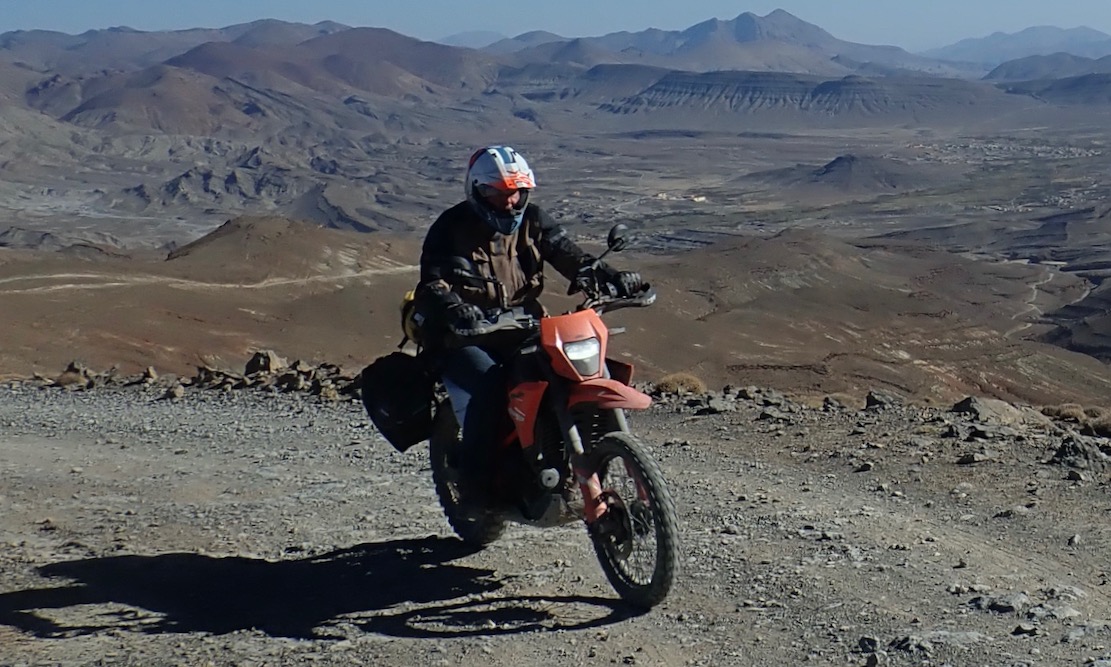
Still, it’s amazing how adequate 19hp turned out to be – especially when vanned all the way down to KM Zero! Even up in the H.A.T Death Zone where only hardy microbes survive, the XT was never left wanting, even if it couldn’t pull beyond first at 10,000′. All motors lose power at altitude, but I like to think it’s the reliably even fuel injection which makes the scant power effective. This lowly output must have contributed to economy of up to 108mpg or over 38kpl. An all-time record for me. The worst was about 88/31 and the average was 98/34.7, though exact figures probably got muddied by village fuel top-ups.
A low-slung chariot. Dropping outriggers and getting on – no problemo
The soft, low-down power meant the gearing didn’t feel under any strain, though 1st to 2nd had a bit of a gap and a 6th would have been nice. The narrow rear Anakee Wild was well matched for the pace and load, and probably helped keep the mpg in three figures.
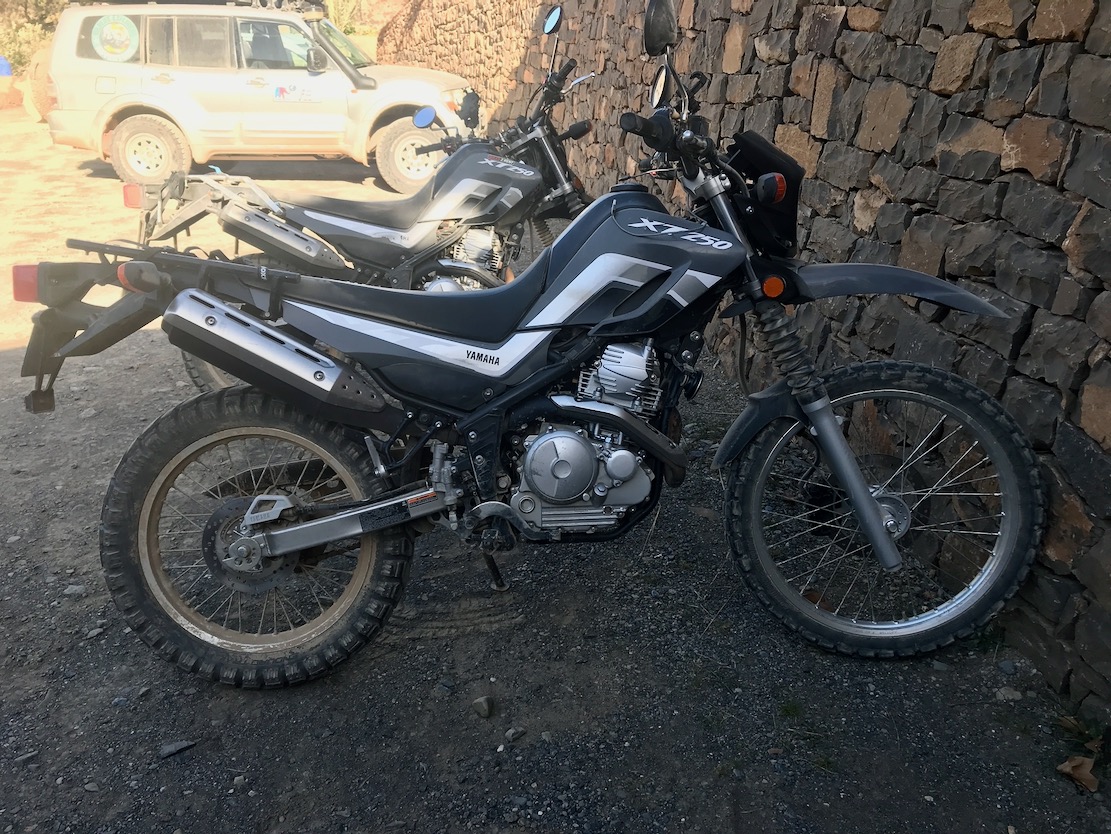
Near identical and new non-Euro XT250s are easily rented in Morocco, but have tubes all round.
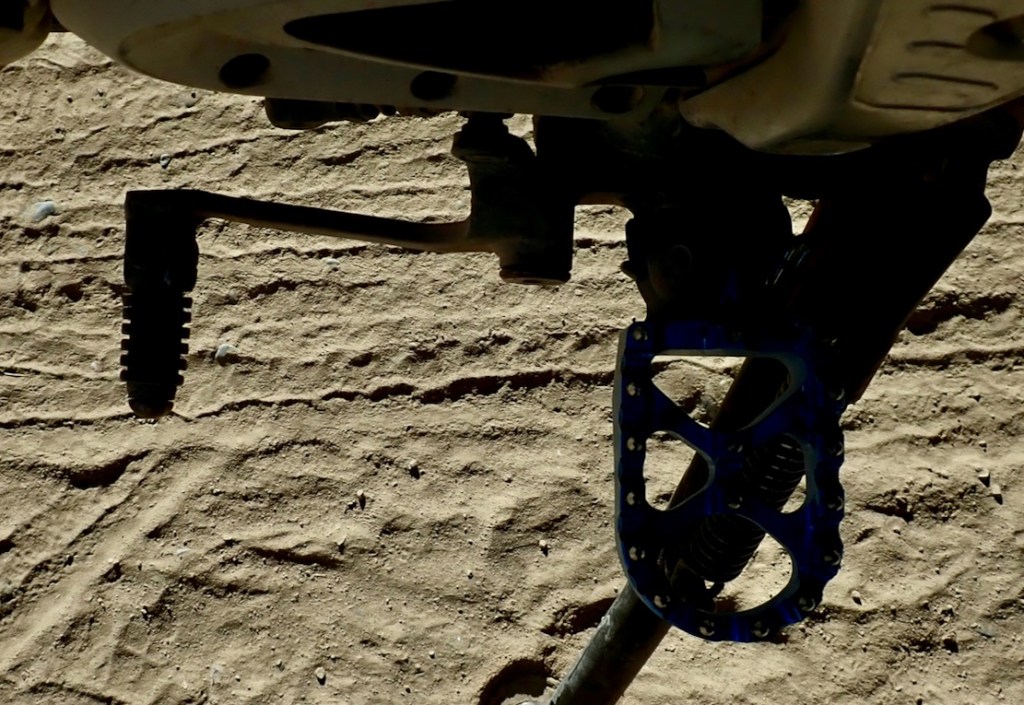
Having ridden ABS for years, I think my once finely honed braking finesse has suffered. Part of the problem was I was so squashed up that, unless sitting right back and upsetting the ride balance even more, my feet point down so that accurately modulating the rear brake was more than my Sidi clad ankles could do. Well, that’s my excuse. Were the seat a lot taller the knee angle would open up, the bum would go back and the feet would level off. And though I rarely stand, when you need to you must, but even with the risers fitted the stoop was not sustainable. Higher bars would need longer cables – a faff. And along with the stoop, the suspension probably didn’t inspire confidence to stand up and attack (that and a very sore leg from a needless lowside).
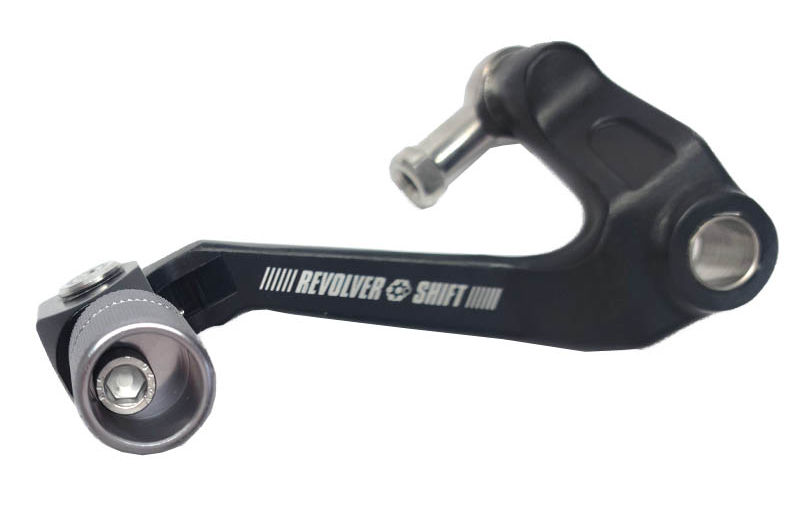
Another ergo problem I’ve never had before was caused by fitting bigger pegs for better standing support on the boor soles. It reduces the peg to shifter space (below) which, with brick-like Sidi Adventures, makes up-shifting awkward. But it seems I’m not the first to notice this, and adjustable shifters are available (below right). My oh my it’s amazing what you learn after a few full days on the trail!
As noted on previous AMH project bikes, stock suspension is commonly only adequate and technically dead simple to improve, compared to a motor. But I think I prefer the feel of a low-comp but injected air-cooled engine over a CRF, just like I preferred the CRF over the highly strung WR250R. The Serow has a mellow donkey feel which suits my slow/remote exploring prefs these days.
Serow 19hp and 140kg; TTR350 29hp and the same; KTM 390 170kg and 44hp.
Shaky front end apart, the Serow fulfilled its intended purpose: an easy bike to manage the unknown trails of the H.A.T. It started on the button, fuelled cleanly and never missed a beat. In places on the H.A.T, last year’s 450MT would have too much to handle. But while it could be easily improved, the Serow’s still a bit small for me.
Quo Vadis Quo what? A KTM 490 X or R perhaps? or I wonder if I should take another spin on a Himalayan 450, a bike I expected to like but didn’t. It’s certainly my size and has great range, but manages to clock in with nearly 50% more weight. Not much you can do about that and heavy bikes do take it out of you over a day on the piste (improved suspension might ease the beating). I may try and rent one again.
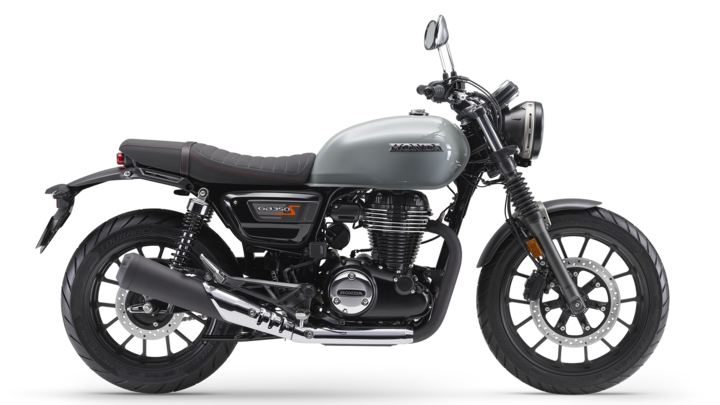
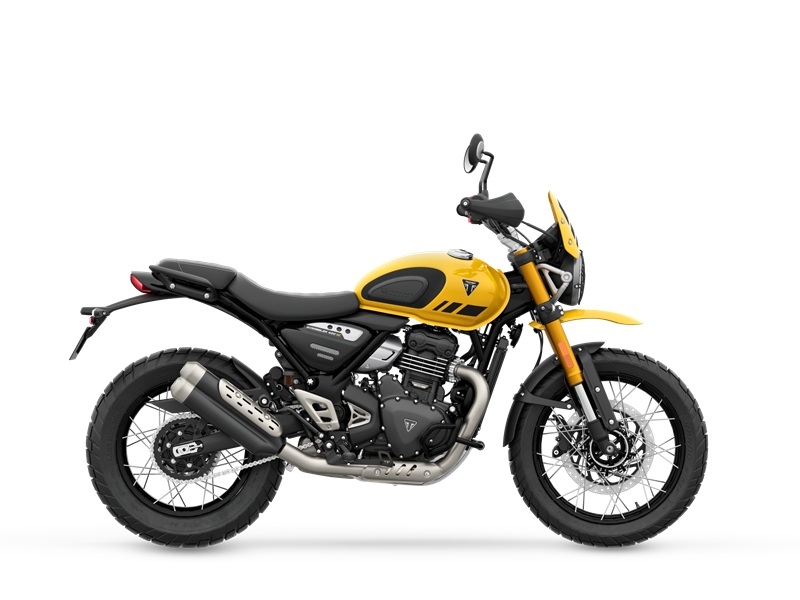
A more stupid idea is adapting Honda’s air-cooled and injected GB350S (above left) into a travel bike. Everyone seems to love this 21-hp, Indian-built Honda ‘Bullet’. But I can guaran-damn-tee, I won’t be able to stand up on that without apehangers. And while supposedly as economical as the Serow, it weighs 178kg. I’ve never actually seen one; maybe it’s also too small for me. That motor’s been around for years but when hiding behind retro styling you can get away with a low output. So not much chance of them spinning off a soft Adv, like Triumph have done with the more highly strung Scrambler 400XC (above right). The XC is also tubeless but is only 10kg lighter than a Him 450, won’t have anywhere near the economy or range and costs nearly double the GB. Both are tubeless. How lucky we are to have all these choices.
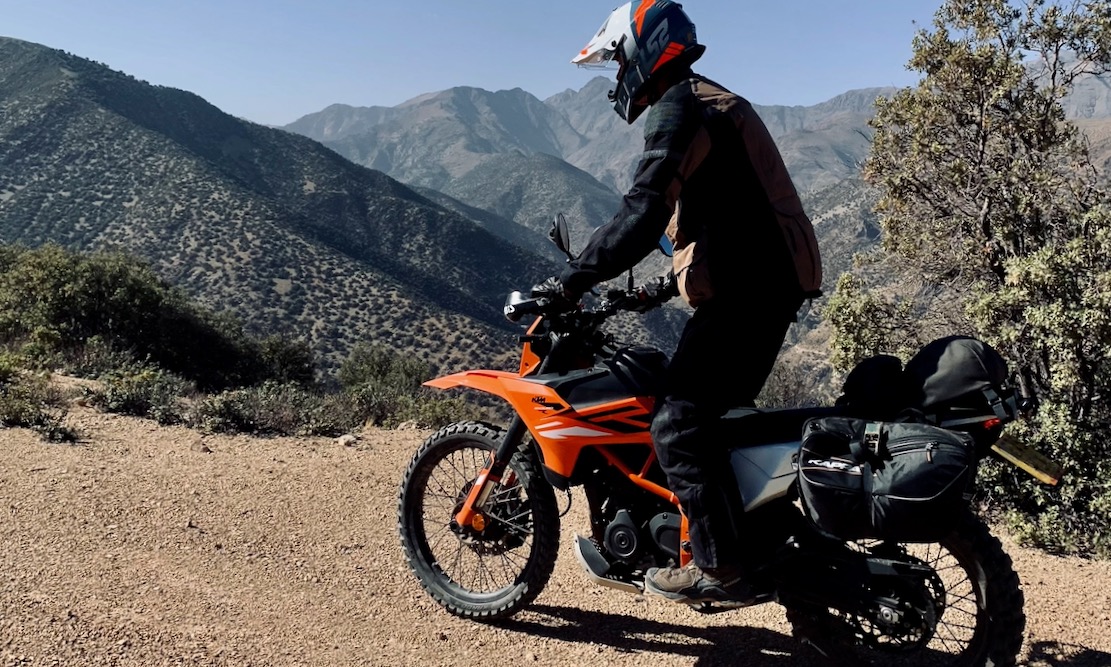
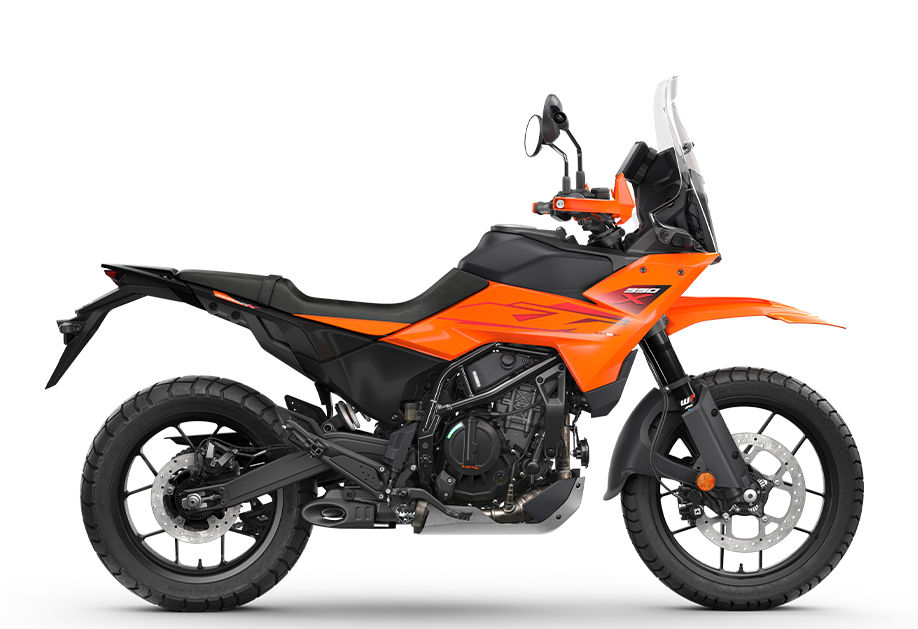
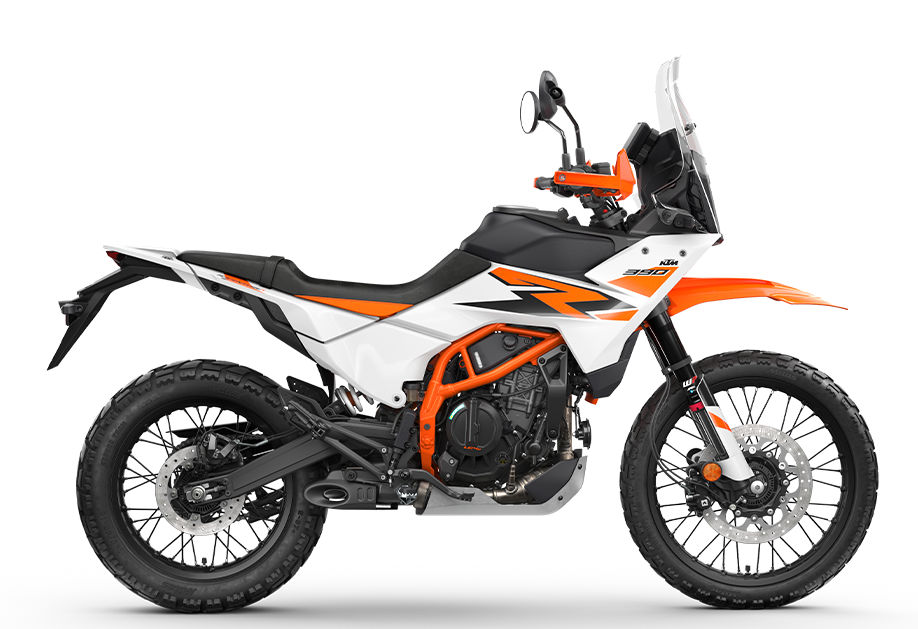
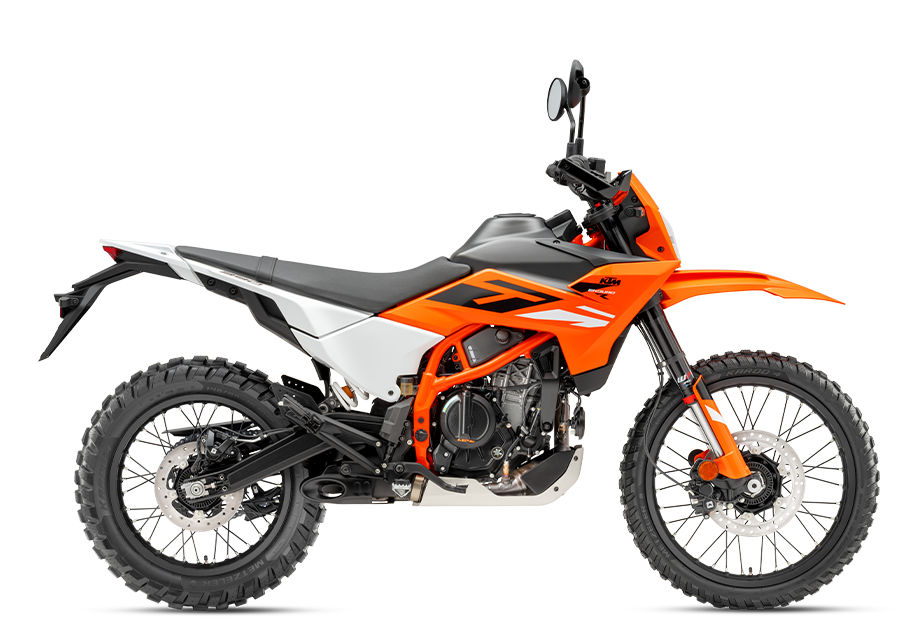
For a bike with the world-weary A-word in its name, I wasn’t that impressed with the 390SW rental we tried in Morocco in early 2025 (left): a naked, low-barred road bike with tubed tyres. For unsupported trail touring it was the worst of all worlds. Emerging from their their annus horribilis, for 2025 KTM have brought out a 390 Adventure X (below left) for just £5400, a higher and better sprung Adventure R for £6100, and an Enduro R trail bike for £5700 with the same R-level springs. Meanwhile the 2024 Adventures are currently being very heavily discounted from their formerly high prices and presumably, once they’re gone they’re gone.
390- Adventure X390- Adventure R390 Enduro R
MODEL
Adventure SW (2024)
Adventure (2024)
Adventure X (2025)
Adventure R (2025)
Enduro R (2025)
Weight
170kg
173
176
176
165
Tank
14.5 litres
14.5
14
14
9
Seat
855mm
855
825
870
890
Wheels
17/19
17/19 cast TL
17/19 cast TL
18/21
18/21
Suspension
170/177mm
170/177
200/200
230/230
230/230
Price UK
£5600
£5200
£5400
£6100
£5700
All data above copied from KTM UK and unverified. Both 2024 models are heavily discounted
Here we have Bob’s brand new 390Enduro R with a 9-litre tank and a 890mm (35″) seat height. It’s supposedly only 5kg lighter than an Adv SW, but has more and better suspension travel, a basic display, all costs nearly the same.
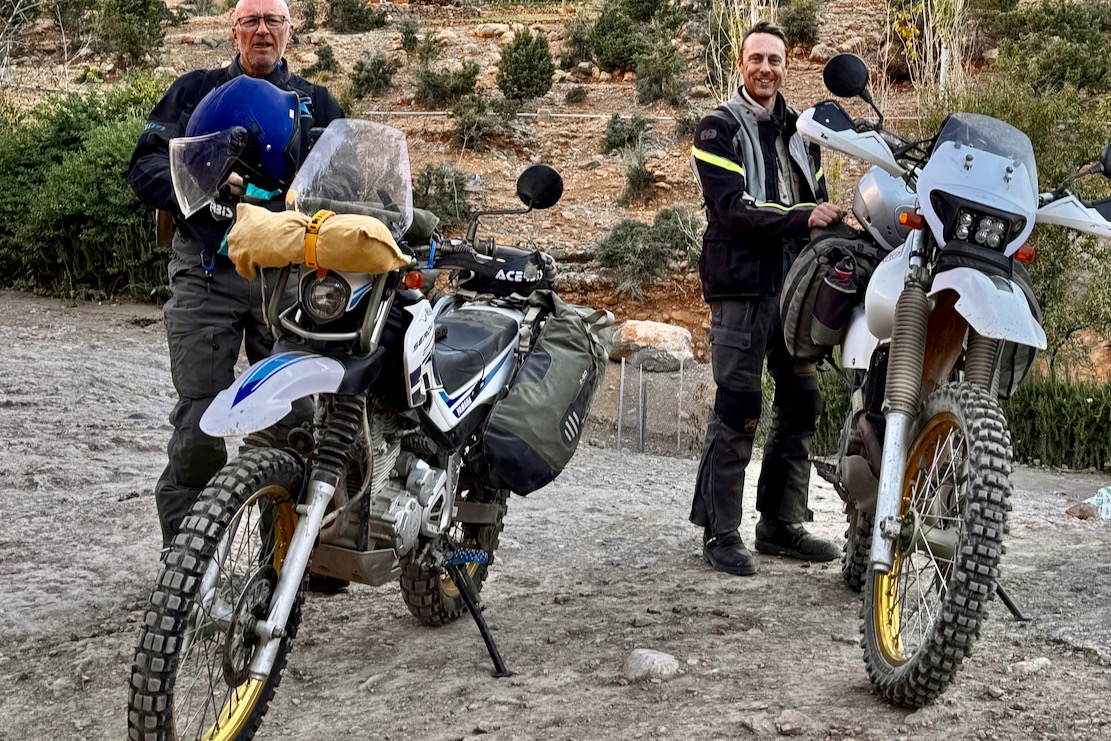
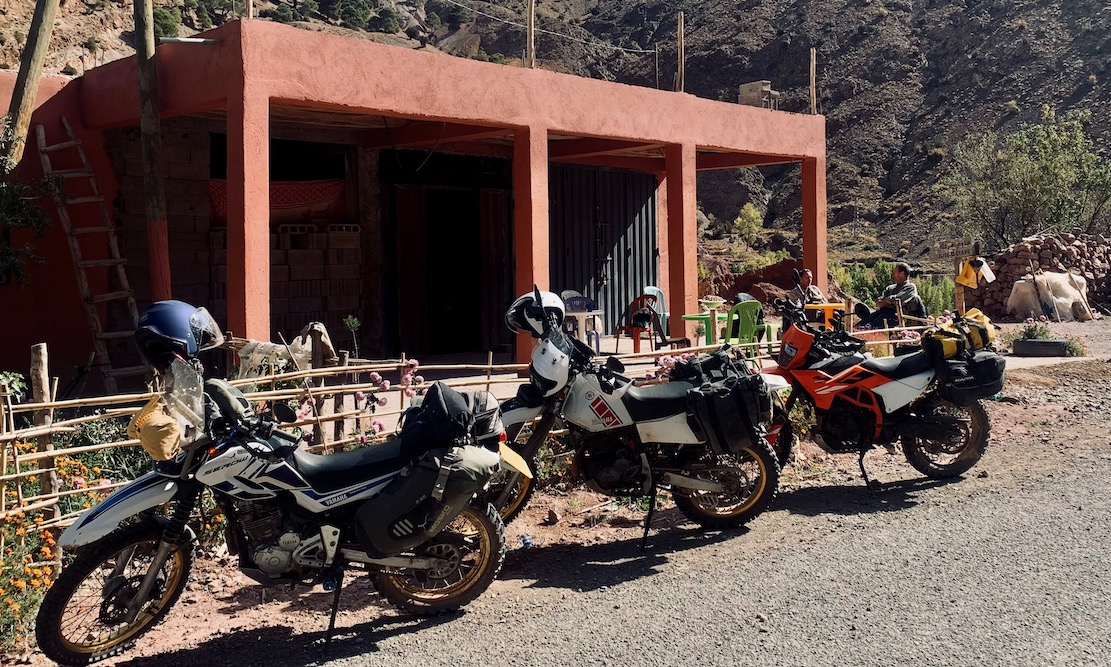
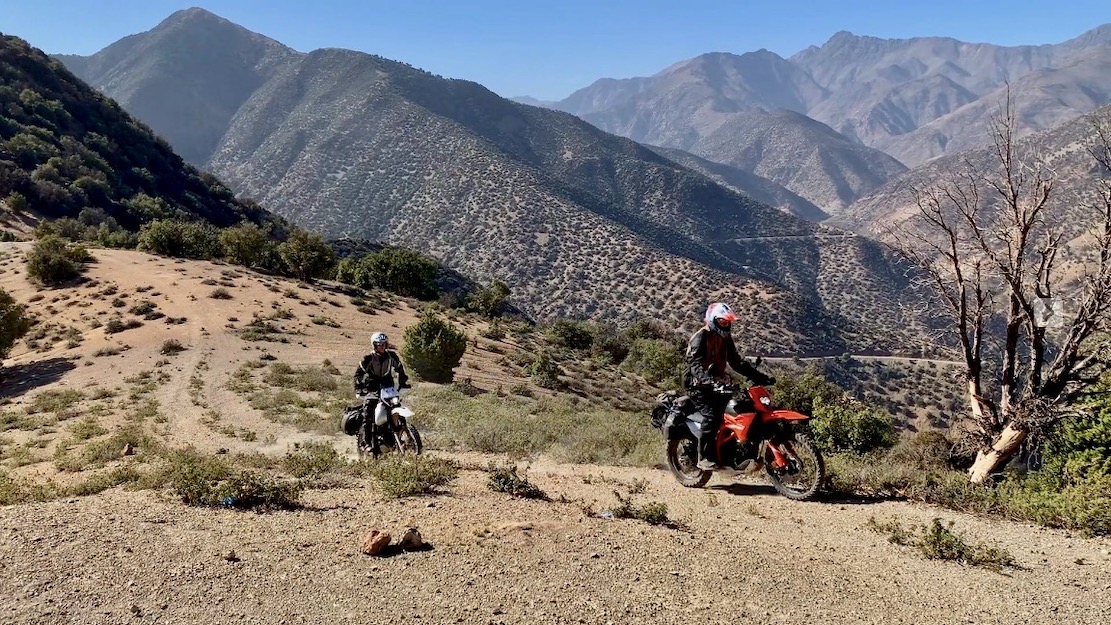
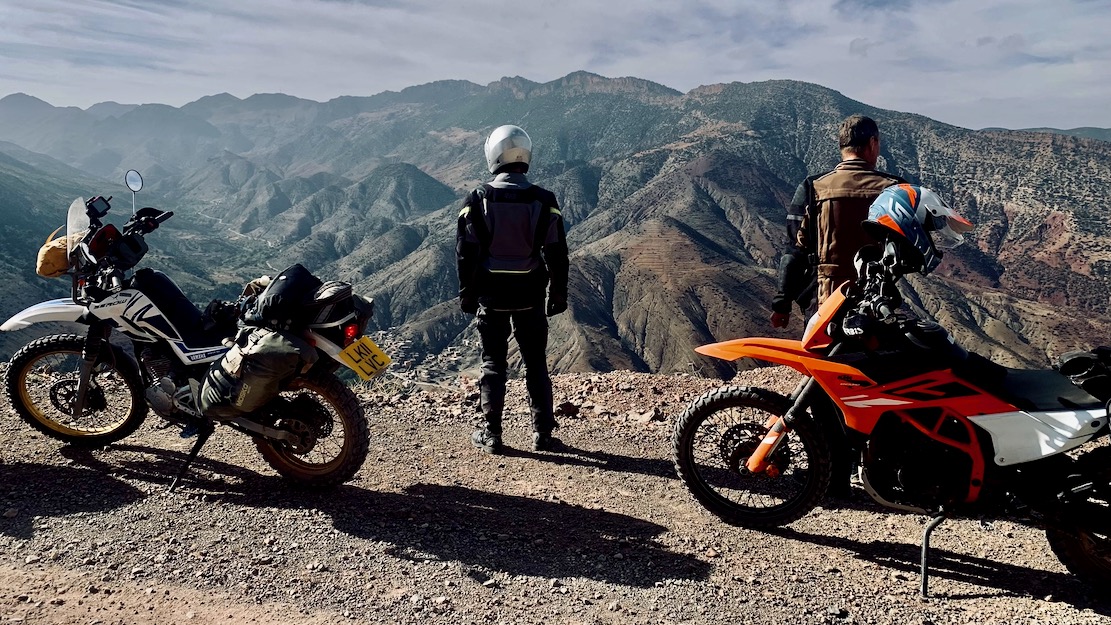
Bob’s spanking Indian-made Enduro R arrived just in time for him to run it in, sling some throwovers onto an Indian-made rack and roll it into Simon’s van. A few days later it got rolled out near the start of my new High Atlas Traverse at the Tizi n Test pass. I was on my 250 Serow (830mm seat, 9.6L tank, 139kg wet) and Simon had his over-bored 350 TTR (890 seat, 14L tank, 145kg wet).
Bob is 6′ 4″ (1.93m) so the yard-high Enduro R didn’t really bother him. I realise it’s actually the same seat height as my old 300L from two bikes ago. A only 6′ 1″ no wonder it bugged me. He brought an 11-litre fuel bag which we needed a couple of times. I seem to recall he got up to mid-70s mpg (27kpl) which gavce a pretty good 250-km range a tad better than Simon’s carb’d TTR, but way behind my Serow which got well over 100mpg a couple of times. The KTM makes twice the power of the Serow.
I had a quick spin on revised Stage N of the TMT for as long as it took Bob to needlessly fall off my Serow on a switchback. Sadly, my bike had that tendency (more here soon) so with better suspension it’s no surprise I liked the KTM more than my Serow, but not as much as Simon’s custom-barrelled 350 TTR. The masses of extra power didn’t really come into it on the trail.
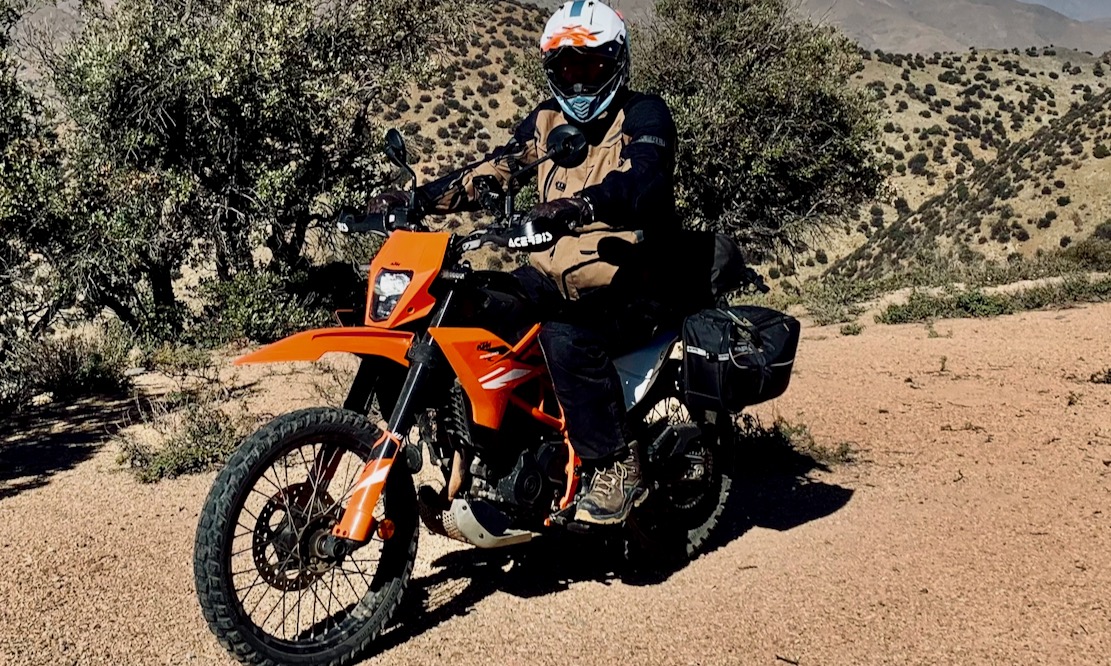
Good suspension rolled over rough stuff with no deflection or correction needed by the rider, the cable clutch was much nicer, and the bike quickshifts up and down from new (no unlocking required). I found this worked better on the dirt than on the road a few days later, but by then my ankle wasn’t pivoting like it should. For once I could stand up properly, and for a KTM the seat looked hard but felt pretty good and Bob never complained (I wore – and needed – Moto Skiveez most days on the Serow). A bit of air could have been lost from the tyres for a softer ride all round. I didn’t get into the KTM on the road so much. Everything felt typically KTM-hard and Bob was often shaking out his vibration-numbed hands, though I didn’t notice this on my brief spin at <100kph. A few more miles may have changed my opinion.
If it was me, I’d probably get the bargain-priced Adventure X at £5400; it’s lower, has a bigger tank plus a screen and tubeless cast wheels. Would I soon regret the unadjustable fork, basic emulsion shock and 19-inch front over the nimble Enduro R or full spec Adventure R? We may never know, but for £6100 the full-spec Adventure R is more bike for your money if doing more challenging dirt riding and weighs 20 kilos less than my 450MT, but lacks the charismatic engine. Apart from the inner tubes, for easy trails and roads, I’d say the X marks the spot.
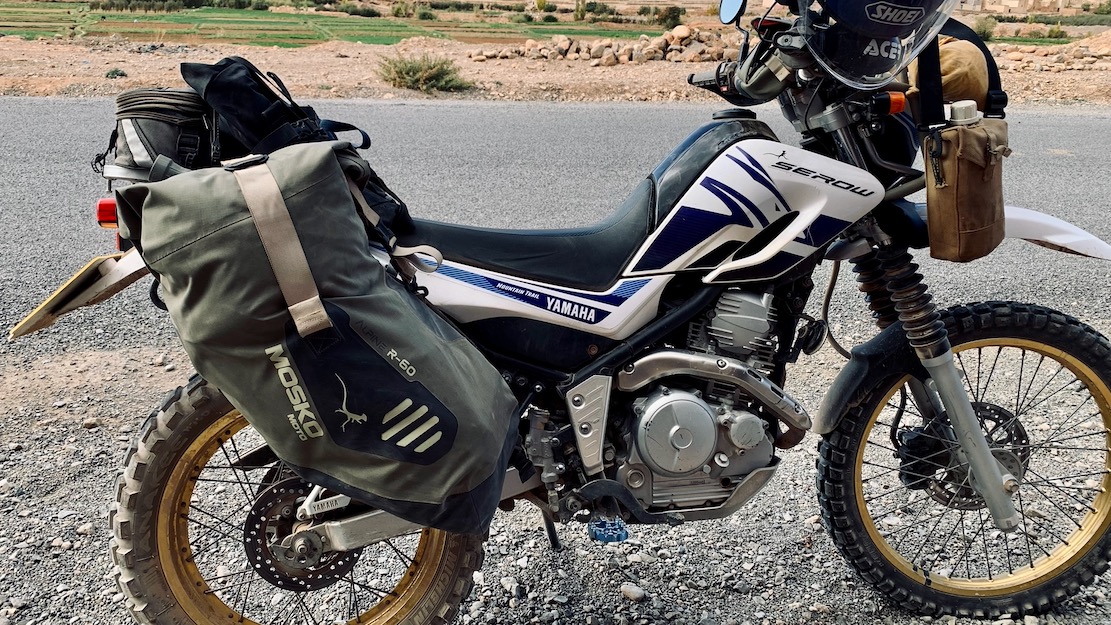
In a line Mounted separately and semi-permanently to a light rack and without rear duffle – not as Mosko intended – but was exactly what I wanted.
Price and verified weights Bags £476. Right side 1350g; left 1530g; hardware 130g, Duffle 650g. Total: 3.7kg/8.1lbs Gnoblin q/d mount (optional; £39) 182g. As mounted (no duffle or Gnoblin): 2.5kg
Mounts low and forward, ideal shape for optimal load distribution
Well put together and clever design elements
Light: my adapted set-up just 2.5kg
Looks more than 22 litres per side
The outward flex of the CURV board (not used) limits pressure on sidepanels
With CURV board sits high on some bikes
If you want the q/d element make sure the CURV board suits your bike
OTT strap hard to cinch down with changing bag volumes
Alpine R60s supplied free by Mosko for testing and review
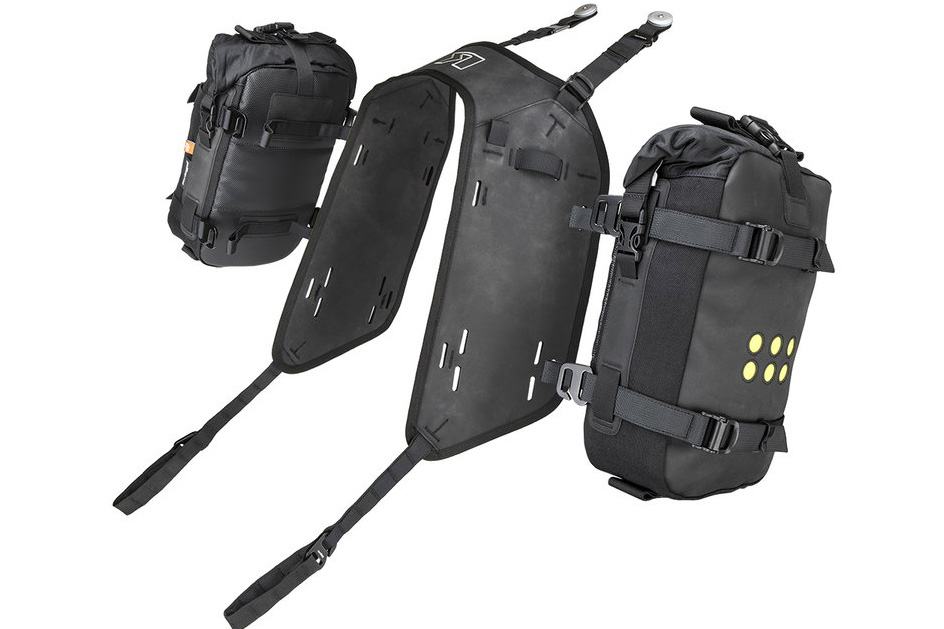
What they say The Alpine 60L Rackless is Mosko Moto’s lightest weight dual sport and ADV luggage setup with the capacity for multi-day trips. Designed for riders who seek minimalist, lightweight luggage, it provides the three-bag organization and packing system of a traditional pannier setup (two side panniers and a rear duffle) in a lightweight, waterproof, abrasion-resistant ripstop nylon rackless bag. Featuring our super durable CURV® chassis, the universally-mounting A60 can be easily swapped between multiple bikes, and can be packed and checked for fly-to-ride adventures.
Alpine Style For this autumn’s recce of the High Atlas Traverse I wanted to try something different. Though never a fan of the one-piece Giant Loop Coyotes and the like, I’ve been interested in separate throwover side-bags which can manage without a full racktangle™ (right). I also like the idea of tough drybags sleeved in a holster, as on Mosko’s Rackless 40 and 80, although these look a bit heavy and over-designed for my little Yam 250 on this trip. ‘You should make something in between the 40 and 80, and simpler‘, I suggested to Roel as Mosko EU. ‘Give it a month or two and I’ll have our new Alpine 60L to show you‘, he replied.
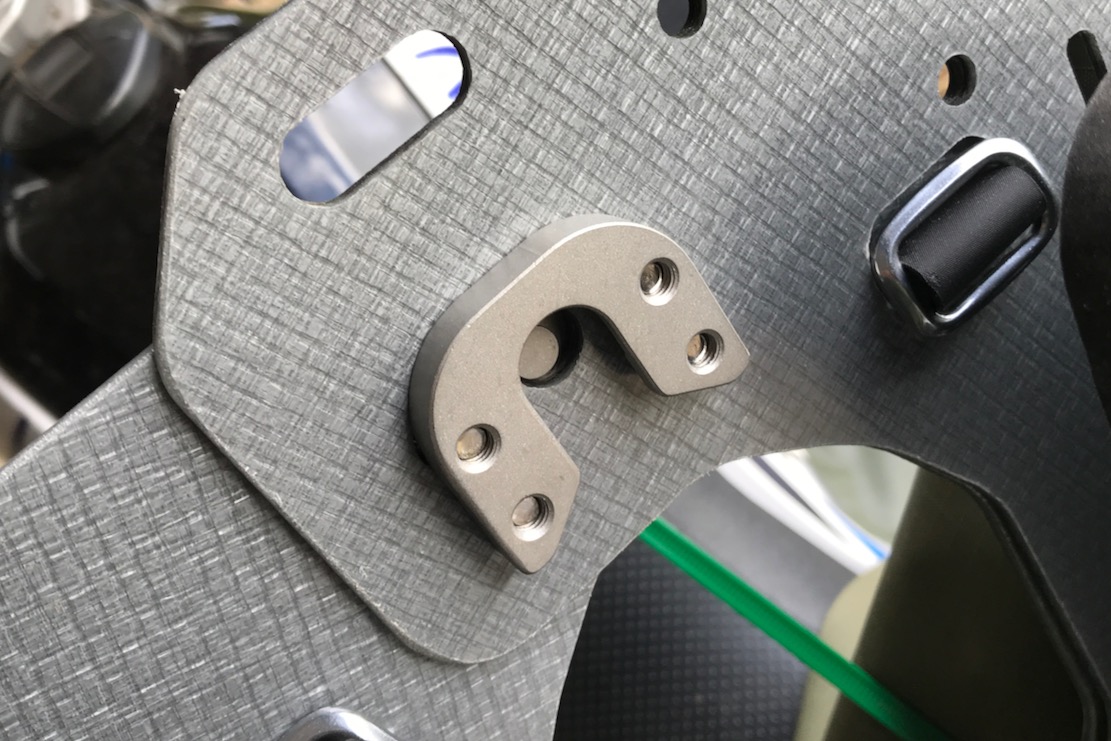
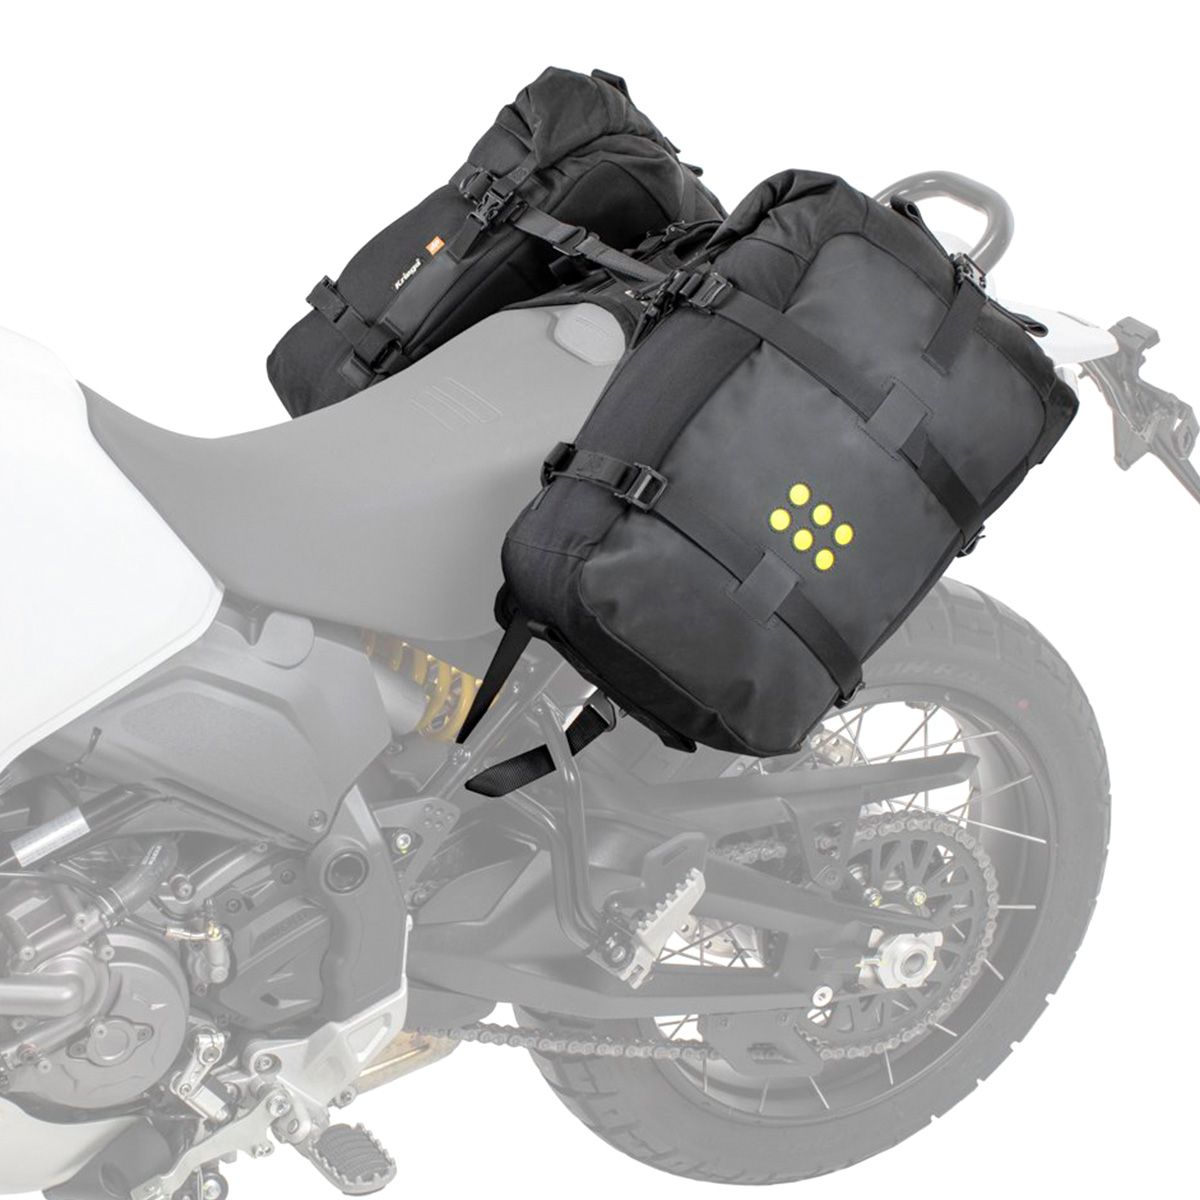
A week before wheels-up and Mosko’s Alpine R60 arrive in Woodland Green and Black. Two sidebags of 22 litres (but look bigger), plus a 15-litre top duffle which I didn’t plan to use. Each bag comes mounted on a bendy, two-piece U-shaped composite CURV® backplate which you bolt together with supplied hardware. That straps to the bike at the pillion pegs or rear downtube, to be tensioned from the tail rack, either with an optional and neat peg called a Gnoblin (below), or just a strap or two. Result: a quickly detachable 3-point fitting using the backplate to part-stabilise the load. Mosko are pitching the Alpine 60s at the harder-riding, ‘light-is-right’, crowd, but anyone who appreciates a minimalist, light throwover that’s easily removable will like the R60.
Gnoblin: peg on rack, U-clamp on panelU-clamp on the panel. Hook to peg and tension
The clever thing about the composite CURV® plate to which each bag is semi-permanently buckled, is that the flexible board naturally bows outwards to resist pressing on the sides of the bike causing rubbing; a quasi-rack. A replaceable, full-length, 8-mil EVA foam pad is velcro’d to the plate. The bags come securely anchor-buckled to the plate which is velcro’d to the EVA pad. To avoid pipeburn use the Mosko heatshield, at only £22 it’s cheaper and neater than a C-channel off-cut and clips. Set up this way, removing the whole rig is a 10-second job (discounting the duffle), while secure mounting in the morning might take as long as 30 seconds, so make sure to set the alarm. I’ll take q/d soft bags if they have a bombproof and foolproof attachment system which can be used daily without thinking too much. Otherwise, most nights in Morocco I leave partly loaded bags on the securely parked bike and bring what I need into the room.
Too far back as usual… sigh
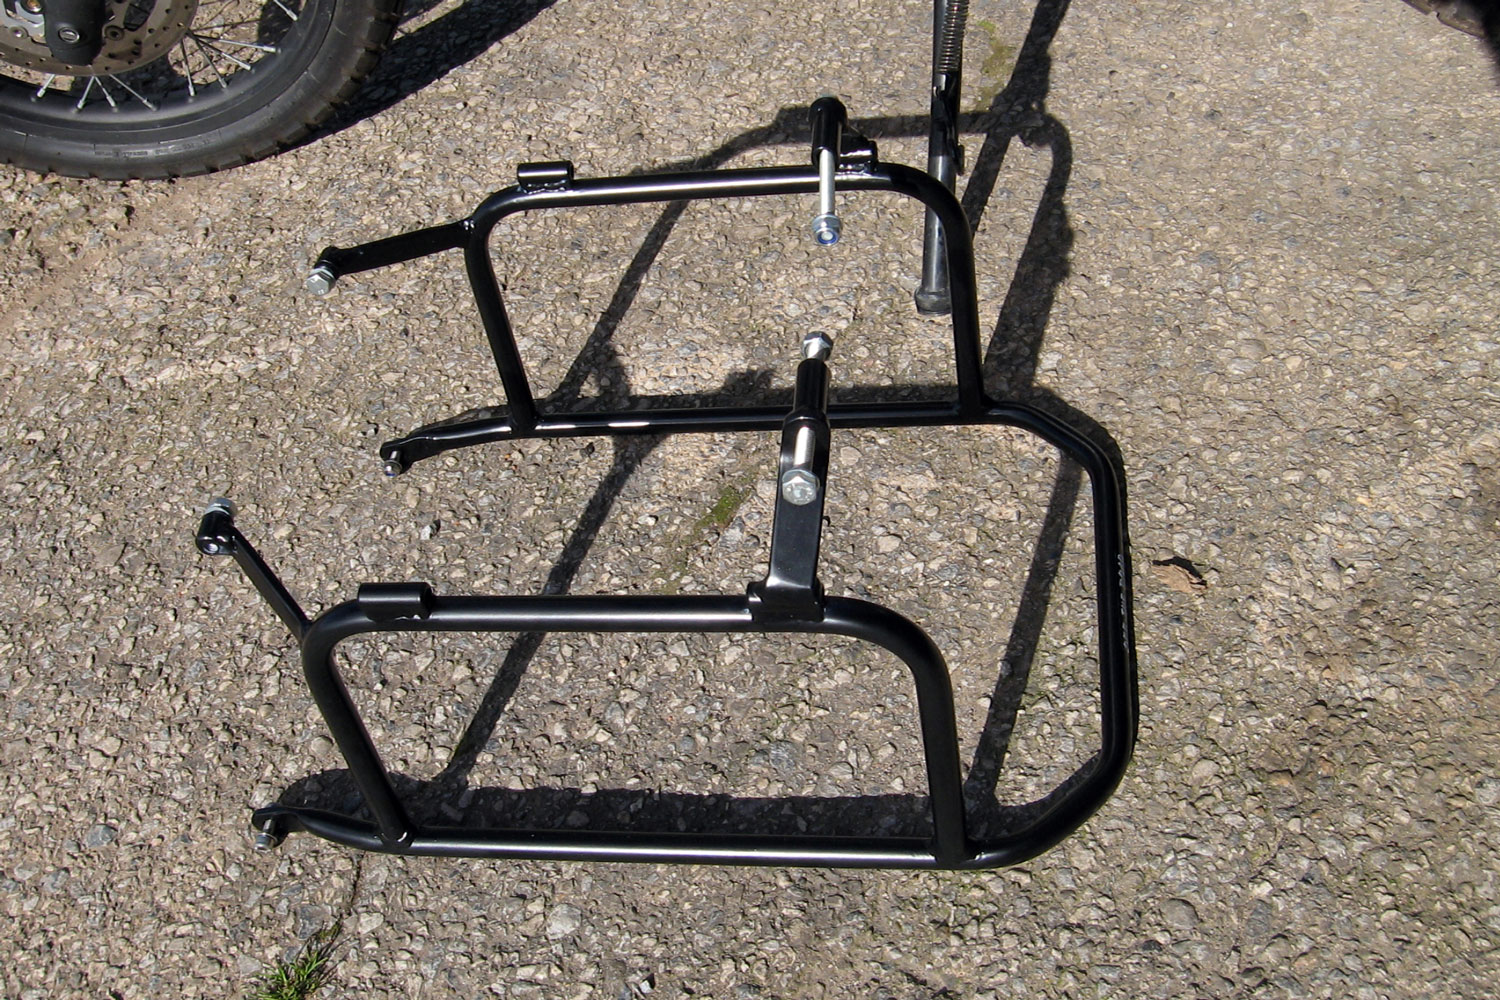
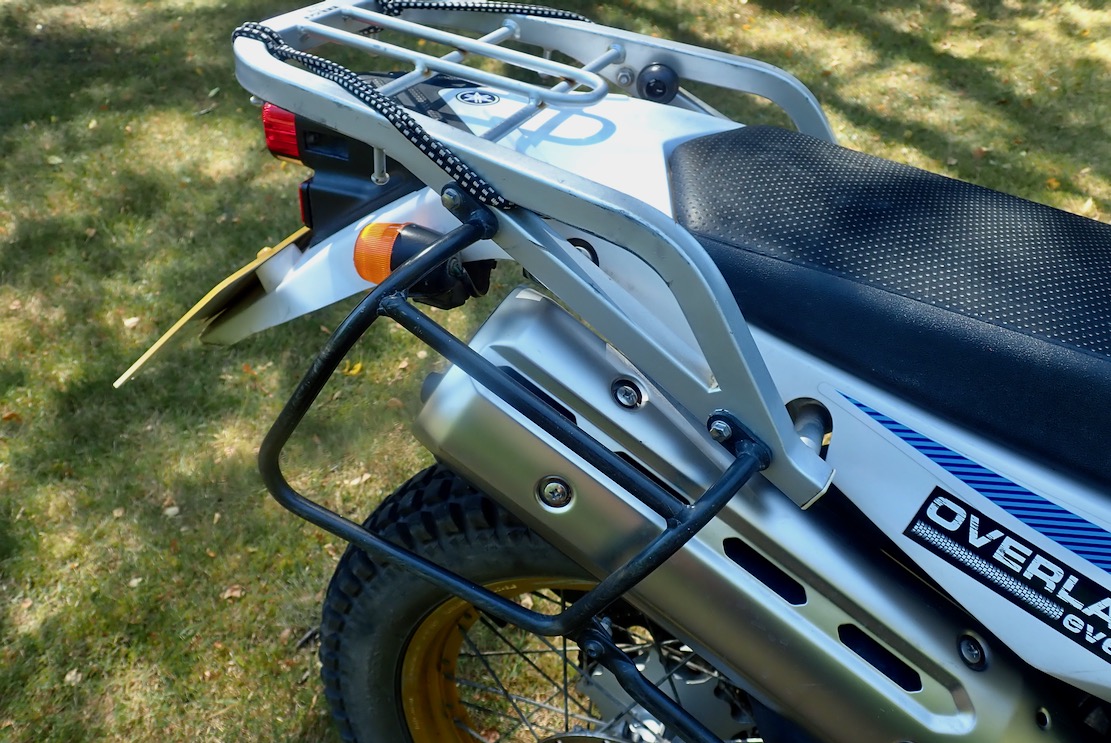
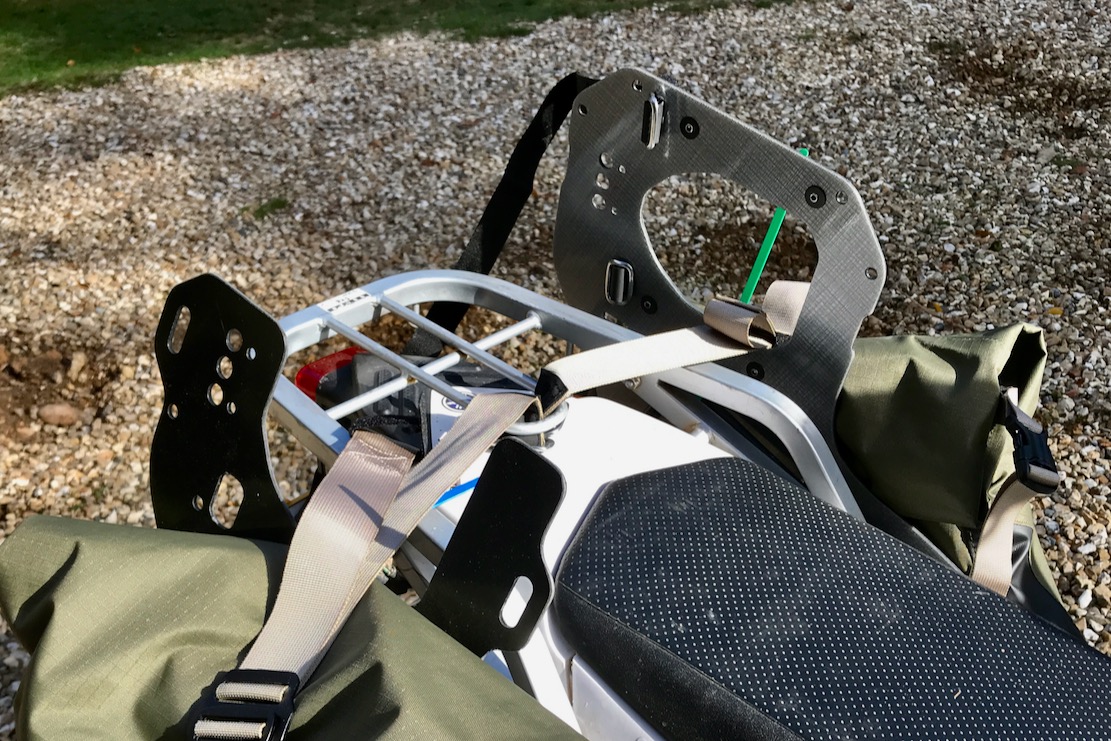
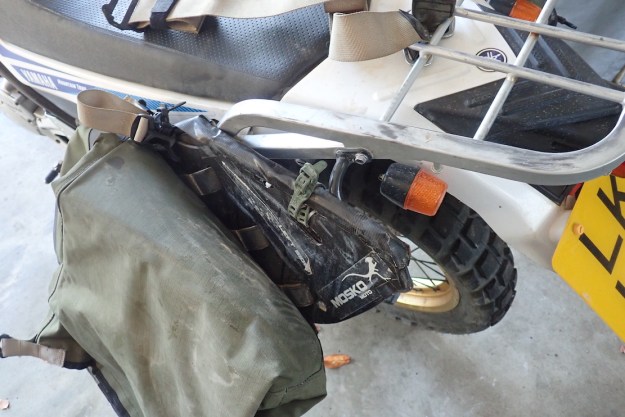
My Serow Touring came stock with an old-school alloy tube tailrack and light-gauge steel side frames (left) which are way too far back as usual, but otherwise ideal for stabilising the low weights I typically carry in Morocco, lodging each night, as I do. Out of the box I could see issues fitting the Alpine 60s onto my racking, but could also see a solution.
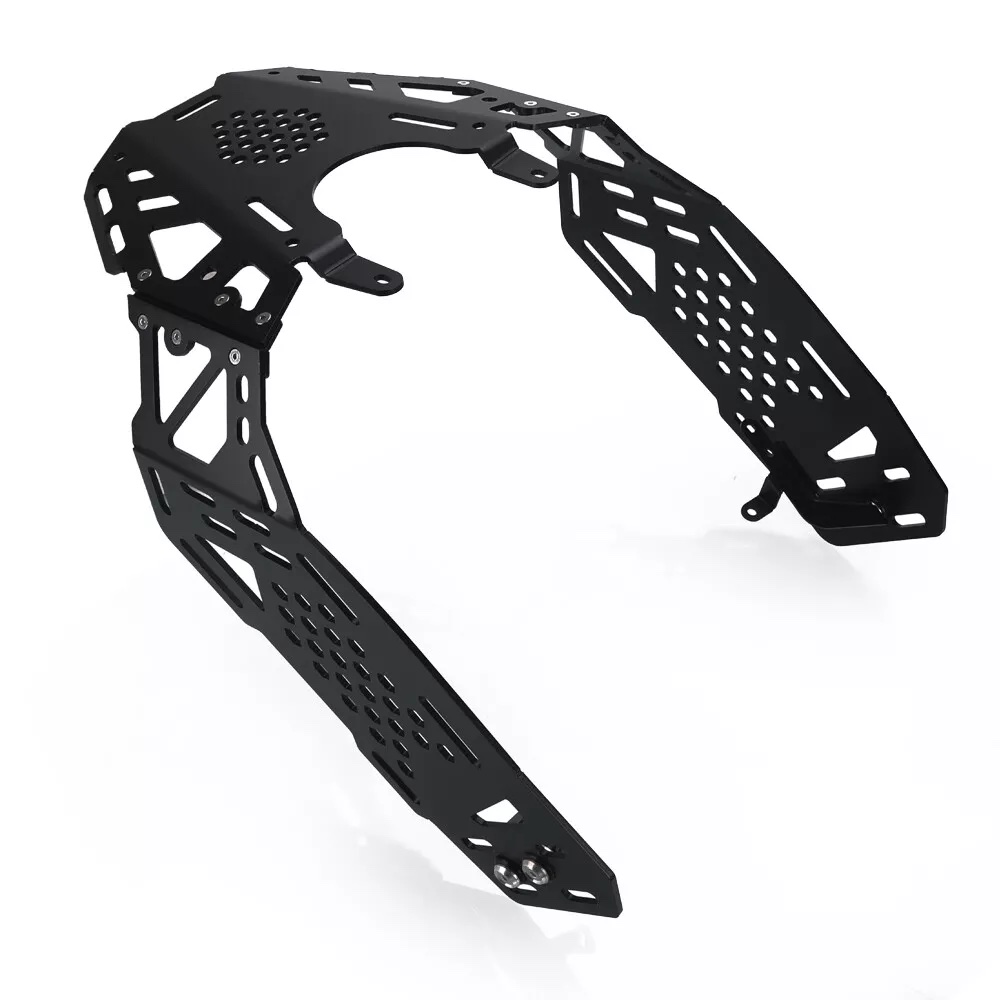
Looking at the vid above. Either those bags are full to overflowing, or the stiffness of the flexible backplate means they sit high on that Kove, even without the duffle which might be hidden from view. “The A60 is a rackless system” says our man Coleman at 0:52, but at that point you can see the Kove has been fitted with a CNC FishRacing integrated full rack system (right), or the 25-quid Ali-X knock-off. It’s much wider than my Serow set up which may explain why the bags sit so high. I’m not a fan of this current, easily cut (aka: cheap) CNC trend, when hand-formed and braised tubing uses less metal for half the weight (rant ends ;-). As said the R60 baggage appears to sit high on the racked Kove, but it also does in the Mosko video (below), fitted to a Moroccan T7 rental with only a tail rack. I think it’s a seat-width thing. As we know modern pipes are huge.
There are some long-winded R60 video reviewers out there. MoskoPete is not one of them. Job done in 3:29.
Last year I tried to fit the Kriega OS-Base Universal harness (below left) for my 450MT but the one-piece grab handles/tail rack got in the way. I could have swapped in an aftermarket CNC tail rack (and lost the handy handles), or cut a hole in the harness for the alloy handle to pass through, before rebolting. I liked the idea of being able to lash anything to the harness, not just Kriega’s OS bags, but again, their fitted bags seem to sit high, effectively resting on the side of the seat (below right) to limit swinging about in the rack-free void below. This is the weak spot of the rackless idea on monoshockers: the side panels become a necessary but over-high support point. For me the ethos has long been as low and forward as possible – or ‘AL&FAP if you’re in a hurry. These set ups may save rack weight, but are higher and further back than ideal. With minimal loads it’s not critical, but it’s not great for CoG and bike control, especially weaving around off road, picking up or when getting out of shape.
Kriega Universal fabric harness450MT grab handle/rack gets in the wayToo high
This is where panniers should sit when not two-up.
I returned the Kriega harness and went with the usual tailpack-sat-on-a-tailpack, plus my novel and as yet unrecognised 3P idea, as well as small tankside bags on radiator crash bars (left). Baggage ends up all over the bike which is handy for daytime access and organisation, but a bit of a faff to bring it all in overnight (if necessary), plus a messy look.
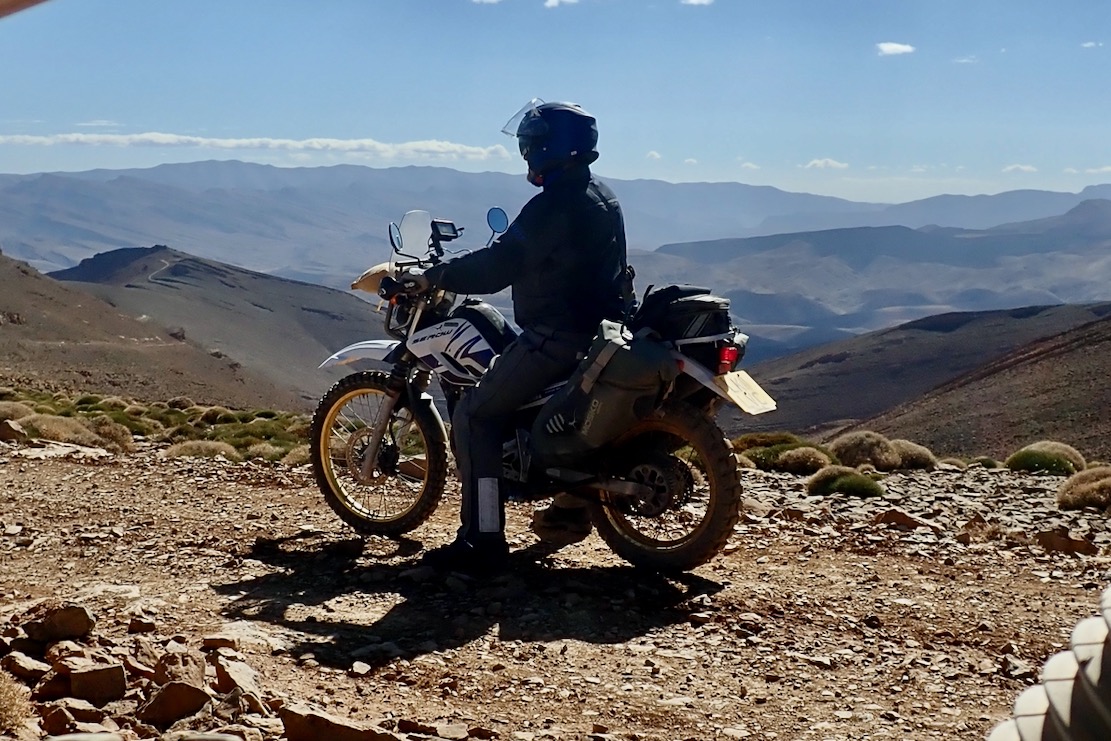
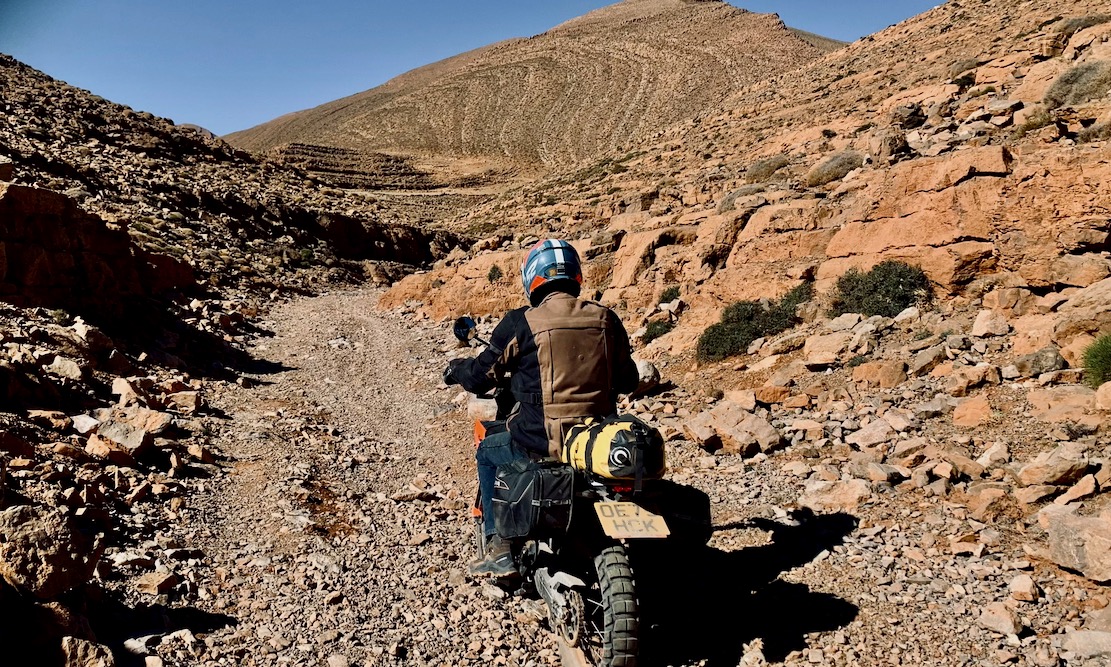
Up at 3200 metres on the High Atlas Traverse
This time I wanted to try everything in one place. I could see the R60s might not sit well on my bike but I liked the bag shape more than the q/d feature. The R60’s ‘short sock’ shape potentially puts loads in the right place. Heavy or rarely used Items like tools and tubes can go it the bag’s ‘toe’; light stuff up top with all the rest in between.
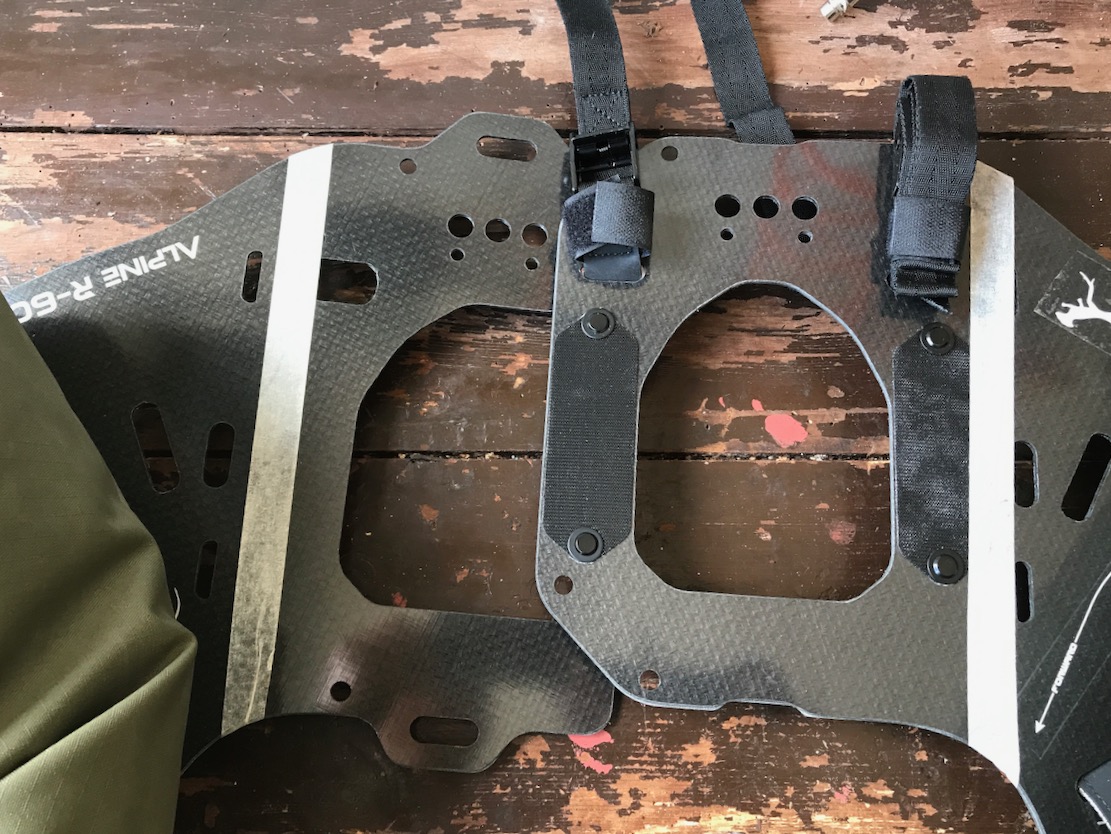
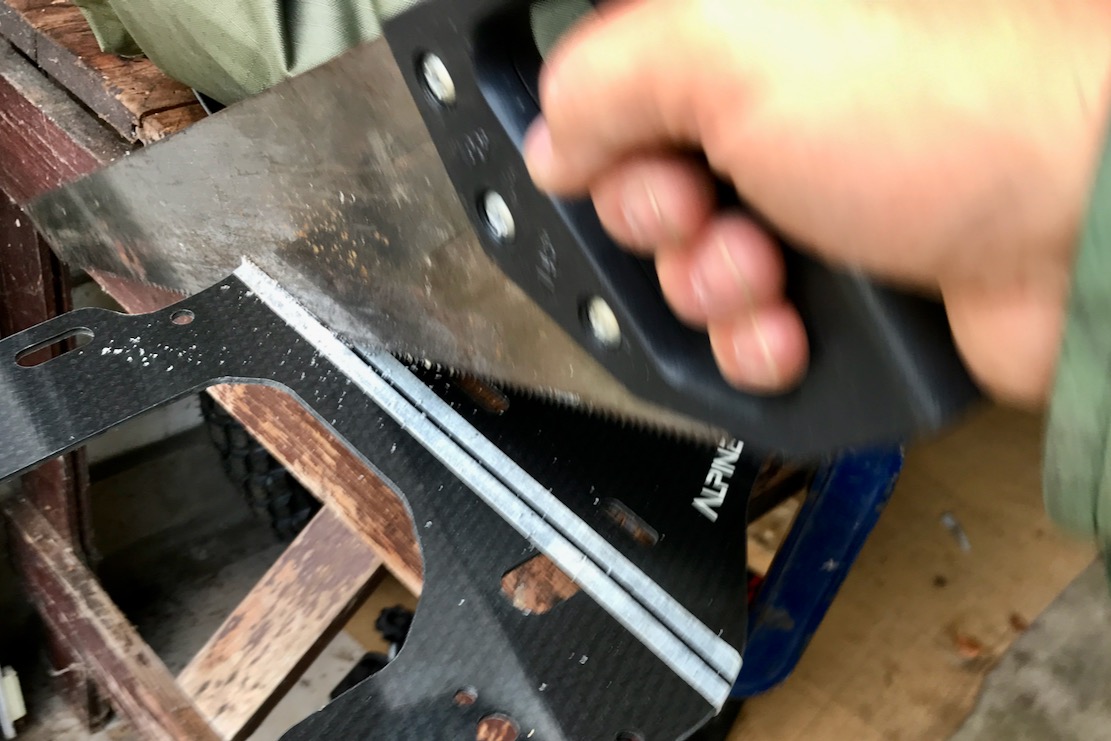
Unjoined CURVplatesCut along taped line
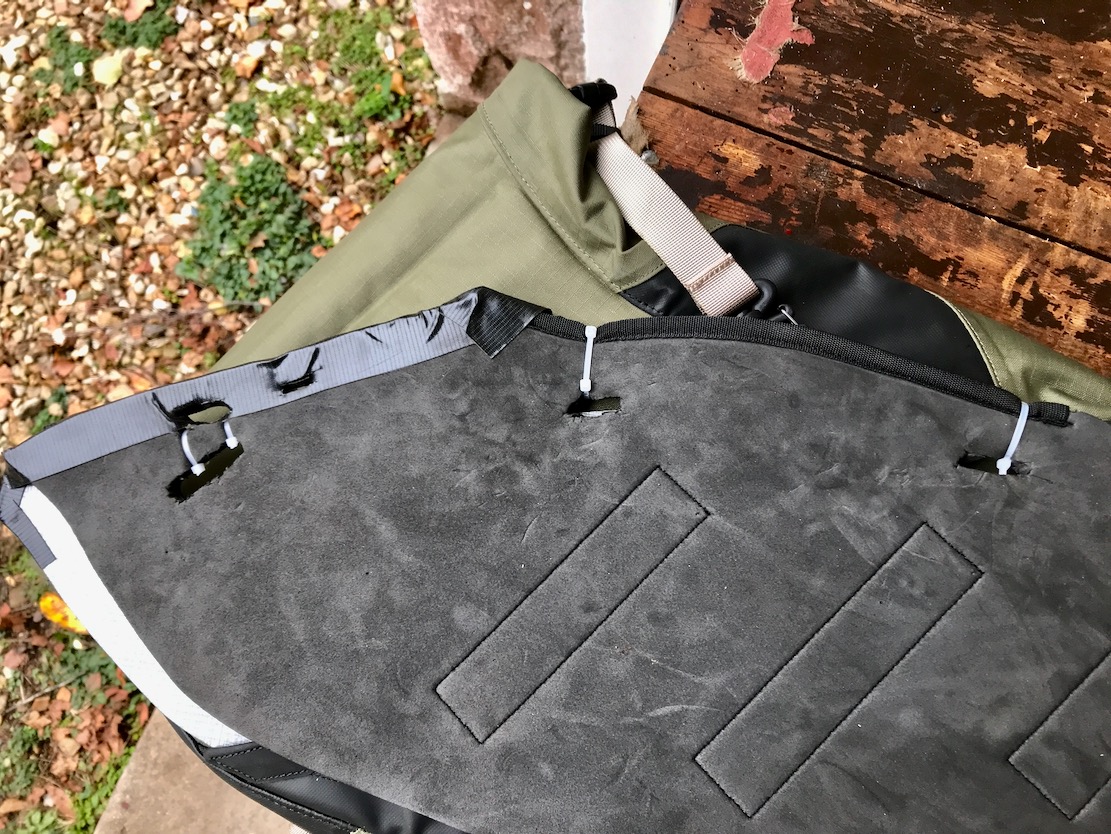
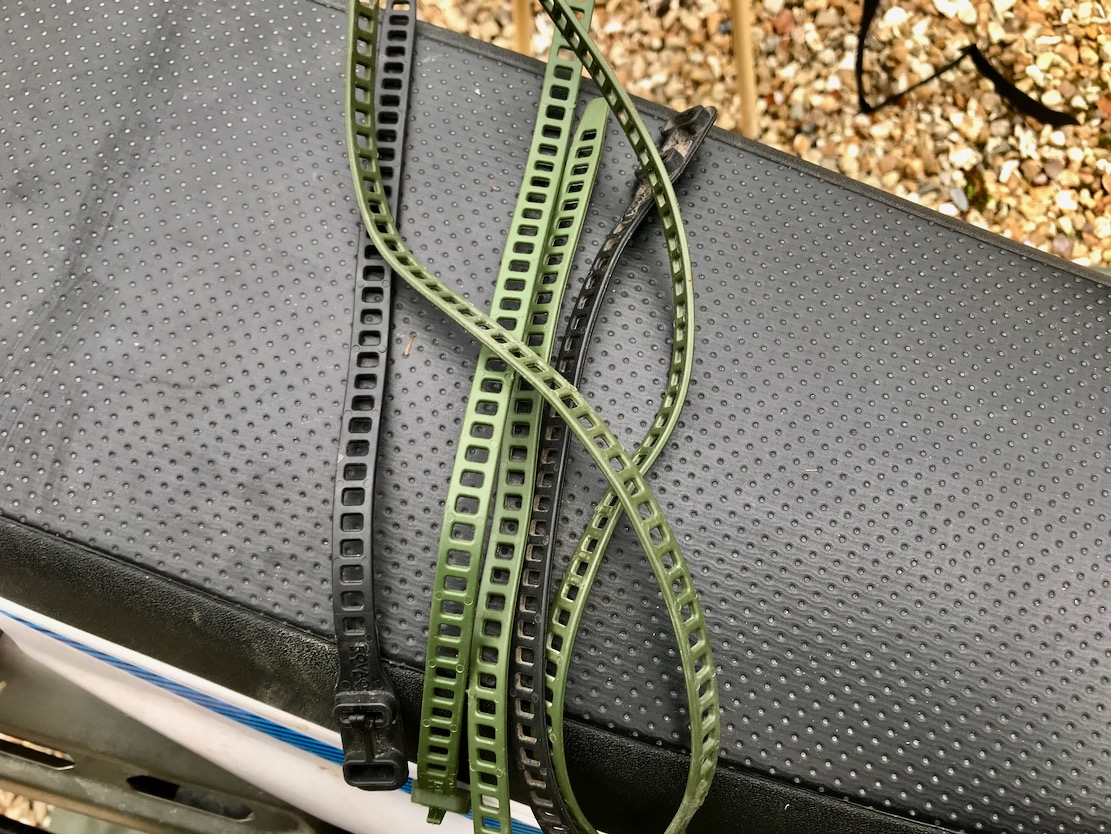
I test mounted the unjoined Alpines with zip ties; holes pre-cut into the CURV-plate make this easy. After seeing that it could all fit very well, I removed the bags and sawed off the rear parts of the plate and EVA pad, making two separate panniers. I then taped and zip-tied the trimmed board and foam (below left) and re-attached each 1.25-kilo bag using the much shortened strap to the front of the pillion peg hanger and at three more points along the upper edge of the board with reusable TPU RovaFlex SoftTies (below right) which adorn just about all of my outdoor gear.
Trimmed backplateI’m never far from RovaFlex SoftTies
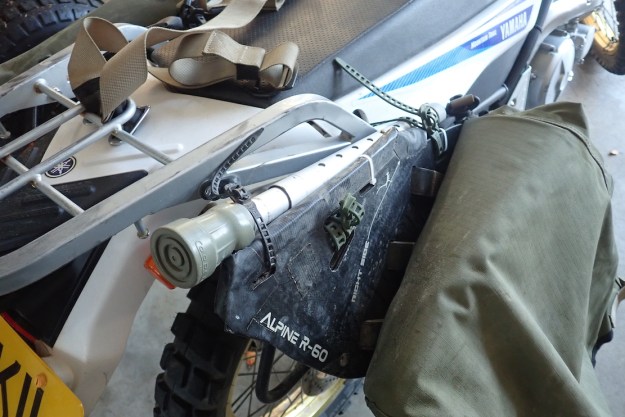
By chance, the bag’s lowest point also rested on the Serow’s unfolded pillion peg, additionally supporting heavy weights positioned in that area, reviving my unsung 3P idea mentioned above and effectively giving up to five contact points per side.
The 50-mil OTT-straps anchored themselves through a gap in my tail rack (left) to pull the bags close in against the rack. There was no need to run an additional strap around the whole bag and rack to hold it in, as Adv Spec suggest with their Magadans. As it’s set up now, the seat can be removed as normal, the side panel can be accessed by undoing the pillion strap and lifting each bag. For insecure overnight parkings, I just fill a light 70-litre sack with what I need for the night.
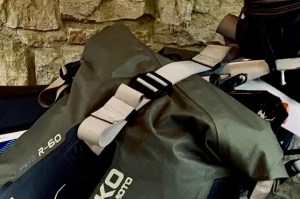
All in all, the trimmed R60s could not have fitted better: secure, low, forward and as light as you’ll get for the volume and durability. In Morocco a couple of tumbles didn’t affect the bags, though we didn’t have any pelting rain to test the waterproofing. On the road load volumes vary from day to day depending on what you’re wearing an so on. So the only complaint I have was that it was hard to cinch down the 50-mm male metal anchor buckle to pull the top down tightly. The strap was jammed too tight. It was more easily done on the upper part of the strap which is less intuitive for a good yank. Other than that, the OTT strap and two clips per side made things easily to access during the day. You soon learn to pack a day-access bag on one side so the other can be left till the evening. Everything in several pouches or bags shoved down inside easily, using all the space. Once I get the Serow sorted, I’m looking forward to taking out the R60 for another run.